In my experience, any SHTF situation begins like: “shit I forgot to pack <insert cheap and common item here>! What am I supposed to do now?” Rings any bells? We’ve all been there – buying all sort of cool, survival gadgets, but at the same time, losing sight of what’s really important during SHTF. For those of you who’re in love in hiking, you probably know what it’s like to hear that growling in your stomach only to realize that you forgot to bring along a roll of TP.
The bottom line is that during an emergency situation, priorities and values tend to change. I wouldn’t be surprised if people would pay lots of money for a TP roll or a box of matches if either of those things should become hard to find.
About that, the other day I heard a cute little story about Canadians using trading cards for barter during the late 19th century, because, guess what, nobody gave a flying BS about paper money. No surprise there considering that even the Ancient Romans had no love for currency and would often use salt as bargaining chips. As you can see, some items are even more valuable during trying times. That’s why it’s essential to know what to stockpile and, of course, when to do that (reading the signs).
In writing this article, I’ve discovered, much to my own sadistic amusement, that nearly all of the items that become almost invaluable during an SHTF situation are ridiculously cheap. If you’re lucky like I was, you can probably find most of them in thrift stores or even yard sales; got me a nice BB gun from one of my neighbors. He only wanted five bucks for the thing, and he even threw in jumbo pellet boxes.
Now, about today’s topic. In thinking about my little incident with the missing TP roll, I’ve done my homework and figured that most people, even seasoned preppers, tend to stockpile the wrong items. So, if you’re still wondering about what’s missing from your household emergency kit or B.O.B, here’s my killer low-priced SHTF items that will become invaluable during a crisis.
My Top-Notch SHTF Shopping List
- Skivvies
Yup, you read that right! Underwear is at the top of any list. Why? Because if soiling your pants after seeing a tsunami won’t convince that buying extra skivvies isn’t the right thing, I don’t know what. Apart from that, underwear’s great for keeping you nice and clean and smelling like a daisy.
More than that, it prevents sweat-loss during long hikes, meaning that your body will have less trouble keeping itself cool. Always aim for 100% cotton, if you don’t have a cotton allergy that is. It would be a great idea to get boxers instead of briefs, thongs or whatever because those don’t limit your movement.
2. Zippo lighter
Song and poems should be written about this little gizmo, which saved my life more times than I care to remember. It’s the kind of thing that sticks around for a lifetime and even more (I got mine from gramps, who was a Ranger in WWII).
If lighters were cars, then Zippo would be a Volkswagen Beetle – as old as time itself, cheap, reliant, and can be tuned at will. A Zippo lighter does require a bit of maintenance compared to other lighters, but other than that, you can light up that MOFO even after dropping it in a river. As always, go for thrift stores, discount shops, yard sales or online auctions to get a Zippo.
3. Zip-lock bags
Bag and tag ‘em, boys! These transparent wonders are useful for almost every SHTF situation – storing food, keeping your electronics dry, organizing your toolbox, cooking, making ice, and the list goes merrily on. Go stockpile as much as you can ‘cause these things have of the habit of disappearing faster than TP after eating Chipotle.
4. Char cloth
Char cloth is a great firestarter and comes in handy when you’re too beat to whip up a fire using traditional means. It’s often recommended to use char cloth when the wind picks up in speed. Funny enough, char cloth’s very easy to make at home. Still, many preppers prefer to buy their online or from military shops.
A buddy of mine sells them by the truck and, sometimes, he can’t deal with the number of incoming orders. The choice is up to you – buy your char cloth online or learn how to do it yourself. FIY: it involves linen, a tin box with holes, and a fire. I’m sure you’ll figure out the rest on your own.
5. Emergency blanket
Whether it’s for pitching up a makeshift tent or snuggling with your SO by the fire, an emergency blanket should not be missing from any of your emergency kits or B.O.Bs. For taking shelter, a mylar blankie aka the one lined with aluminum is very efficient at deflecting heat. It also comes in handy when you don’t have anything to collect rainwater in. Stock up on them while you can.
6. Water purification tablets
Water may be the source of life but can also make your insides turn to mush if the source’s contaminated. One of my buds bought it that way – we were our hiking in Montana when he had this genius idea of emptying his bottle to refill it from one of the springs we encountered. “Bad idea, dude,” I told him since natural water sources are teeming with bacteria and all sorts of nasties.
Fast-forward, he ended up in the hospital with a bad case of dysentery (guess they took him there to outfit his bum with a tap or something). Anyhow, water purification tablets are must-have in any SHTF scenarios – even the water coming from your tap can sometimes become contaminated. Why take any chances when you can use these bad boys to get instant mostly-purified water?
7. Fishing tackle
Smeagol caught juicy fish! Yup, there’s nothing grilling a freshly-caught trout, that’s for sure. But for that, you need a couple of tools. No, not a fishing rod because those are too heavy to carry – I was thinking more about some line, a couple of hooks, and a good reel.
Those things can even fit in the pockets of your cargo pants if you try hard enough. Why buy it? Because in any SHTF situation, ponds and rivers become treasure troves for all those hungry, hungry preppers. So, be sure to have one in your bug out bag in case things really begin to smell rotten in Denmark.
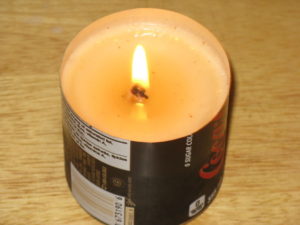
8. Candles
Got around to saying “goodbye” to Norma Jean? Well, in any case, emergency candles, although little gauche for today’s world, come in very handy during a blackout or finding your way in the dark when your flashlight dies out on you.
Yes, you can even set up a romantic ambient if your SO is a prepper like yourself. I personally used those 24-hour candles on many occasions to keep my meals warm or just to scare the crap out of my friends. Your call. Anyway, their great for just about anything that involves warming up or shedding light.
9. Batteries
Hey, tin man! Ran out of juice yet? Now, an extra pack or two of long-life, triple-A batteries is a must especially if you have more than one gadget running on bats. They’re quite cheap, and you can probably get a very good bargain if you hit a thrift store or something. Just be sure to store them in a dry and dark environment – you wouldn’t want those to spring leaks before you have a chance to use them, do you now?
10. Hand-cranked radio
I have to admit that I’m more partial to hearing stuff over the radio than watching TV or streaming movies online. Call me old-fashioned if you like, but a hand-cranked radio will be of much more useful to you during a blackout or even an EMP attack.
Another reason why you should buy a hand-cranked radio has very much to do with all the cool attachments each model has (mine has a built-in flashlight, a USB slot, and a card reader). And no, you don’t really need to step in the swanky electronic shop to buy one. I bought mine from $2 store, and it works just fine.
11. Duct tape
The tales I could tell you about duct tape! Unfortunately, most of them are not really PG, so I’m just gonna say that duct tape and WD 40 solves most of your problems, mechanical or otherwise. Duct tape can be used to seal outlets, put together shelters, insulate Faraday cages, seal food, and more. If you want good quality duct tape, I would advise going to the hardware store and buying at least a dozen.
12. Baby wipes
As stupid as it would seem, baby wipes are quite useful when there’s no water around for washing your unmentionables. Back in college, I had this friend called Sean, who would use baby wipes instead of taking a shower. You don’t want to know what happened during those hot summer days when all of us were in the same room with.
We even coined the habit – a Sean Shower, which literally stood for I’m too lazy to take a bath, so I’ll just use these baby wipes because they do the same thing. Anyway, Sean Showers are okay if you have to ration the water. They’re also great for cleaning out wounds and even getting some of that dirt off the car’s hood.
13. Books
Let me just say this: books f-ing rule! There’s no denial in that, and even though much of today’s lit is online, I still prefer that new book smell instead of Kindle or a computer screen. More than that, in case you run out of battery, or there’s an EMP strike, there’s no more reading stuff. So that’s one to nothing for books.
You should definitely consider throwing in a book or two in your B.O.B and your household emergency kit. They’re very comforting when you’re all alone out there, with darkness all around. You can also use them as fuel in case you run out of tinder. Anyway, my book philosophy is simple – always buy used. Search for them in flea markets, thrift shops or antique shops. Your call.
14. Floss
Mouth health’s very important and flossing is still considered the most effective way of dealing with food remains. However, in an SHTF situation, dental floss can also be used for other stuff as well. I recall ripping my shoelaces while camping and used some floss to repair tie my boots until I could find replacements at a nearby store. You can also use floss to pitch a shelter, make weapons, seal food bags or creating snares. Search for offers online. You’re bound to find a dozen under $10.
15. Heavy-duty garbage bags
Whether it’s for disposing of hazardous material or burying dead bodies, heavy-duty garbage bags should not miss from your B.O.B. They’re quite cheap, and the things you can do with them are only limited by your own imagination. I like to use heavy-duty bags to protect my wife’s flower beds from insects, snow blizzards, heavy rain, and stuff like that.
If you’re in an SHTF situation, you can always use a garbage bag, a knife, and some floss to make a temporary shelter. It’s even more crucial to have these around if you need to collect rainwater or to hunt (yup, you can create a simple net for bunnies and birds using a stick, some duct tape, and a little bit of floss).
I managed to get quite a bargain on garbage bags – 5 for $4 at Costco. Try them out before buying them. They’re supposed to withstand quite a lot of punishment. If they tend to tear in your hands, then you should seek another brand.
We’ve all been there – buying all sort of cool, survival gadgets, but at the same time, losing sight of what’s really important during SHTF. Some items are even more