HomePosts Tagged "Preppers" (Page 11)


We all start off our lives living in bliss and thinking the world we live in is perfect. Then as you leave your younger years behind and start into your early teens you learn that’s not so much how it is. You learn of human history and wars that have ravaged the world through the ages. You start growing up more and more then you see the world is not as you saw it as a child. You go to college and start a family as you progress. You watch as your generation is overtaken by the next and hope that the wars never reach your homeland.

One day they will and it may not be something like Red Dawn or a repeat of past world wars. Maybe it’s just a stupid mistake of a perceived threat and next thing you know nukes are falling. It could just a simple repeat of past natural disasters like a sun spot wiping out all electronics in the world, or maybe we are drilling for oil, then come across extinction level virus or bacteria. That has been shown recently with finding never before seen bacteria in fracking waste by scientists. All in all, my point to prove is from time to time civilization has been in dire straits that almost ended life or just topples a country or government.

What do I pack in my bug out bag?

With all that thought on history, a lot of people prepare for disaster to strike and build themselves BOBs and stock up at least 72 hours worth of resources like food and water. What would you do if it was longer than that or you faced a serious crisis that took the world to its knees? When I think of bugging out or bugging in respectfully, I think of a crisis that would be something more like a WROL scenario. What would you need in a situation like that. Would the food you stored back get you through or the water you stocked up last the entire duration?

Etekcity Ultralight Portable Outdoor Backpacking Camping Stoves with Piezo Ignition – 11$

What do you need to think about carrying in your bug out bag to help you survive? You need to think about what is needed to keep you and anyone with you alive. To start off you’ll need a way to make any water you come across safe to drink. It’s a good idea to carry a water filter or multiples. Acquire a sharp knife or two. Remember 2 is 1 and 1 is 0. Knives can help with crafting weapons and utensils. You could buy some camping gear to cook on and you can make a penny stove to cook with as long as you have fuel for it. I find 91% alcohol works well.

Another way to cook is make a gasifer stove (see below). It works with anything organic that is flammable but wood is the preferred fuel. If all else fails build a fire and take a clothes hanger, make a loop with it, wrap it in wet newspaper and cook on that. I heard it works well if the ink is not poisonous. That covers hydration and cooking.

How are we going to eat?

Well in the earlier stages of this scenario you’ll come across canned foods and foods preserved so they last a while but as time goes on these things will go out of date and/or be used up. So in this time it’s a smart idea to grow food. Learn now how to do that. For a while animals will also be a source of food, but in time will be scarcer until humanity declines enough for animals to reclaim the cities and forests. Next comes how to defend yourself, and family if they haven’t opted out of life.

You need to know a few self-defense techniques.

It would also be a great idea to learn how to use a bow, spear, slingshot, and such since bullets and smokeless powder will disappear in time. In the same sense firearms will not last forever even if you had a million bullets. Your gun will need to be cleaned and oiled. Metal will wear down and parts will break with you have a small chance of finding replacements. This is why learning a little self-defense is better than nothing.

What about medicine?

When there is only you and whoever is left of your family how would you treat infections? What about animal bites, broken bones from falls, or a fast killer dehydration from diarrhea. You should at the least get some first aid training and have some medical supplies in your survival pack. I mean if your near a city maybe you can find antibiotics or pain medications in a pharmacy. Probably not when its been looted by others trying to survive too. Willow bark is what aspirin was derived from and many plants are natural antibiotics…

So what all I was trying to do with this article is convey my perceived SHTF scenario to you guys. I feel a lot can be accomplished in small SHTF scenario like hurricanes, floods, and natural disasters with a 72-hour bob but when I think of bugging out or in I’m thinking of TEOTWAWKI.

  We all start off our lives living in bliss and thinking the world we live in is perfect. Then as you leave your younger years behind and start into your


There has been a lot written about using an air gun for a SHTF situation. Which caliber to use, the type of air gun, cost of ammo and so on and so on.

Well, after reading all those articles and doing some deep thinking, I came up with what I think is the best type of air gun for SHTF that will serve you the best. Now this is not a must have. You must weigh you own needs want’s and physical ability to find the air gun that suits you best. Those are the factors that will help you make the right choice.

Factors to consider before purchasing an air gun for SHTF

A factor that most people don’t understand is that when your using an air gun to hunt is the difference between an air gun and a powder burner. Both an air gun and powder burner depend on energy to take down game. The difference is how this energy is delivered.

A powder burner does this by a combination of mass (bullet weight + velocity) to transfer a large amount of energy to game to take it down. Heavier bullets and greater velocity allow you to take down large game at distances over 100 yards and depending on the size of the game, out to 1000 yards. This creates a large wound cavity with hyodrostatic shock causing damage to the tissue and taking down the game animal.

An air gun depends more on penetration than shock to the game to take it down. The energy used to do this is measured in foot pounds. The higher the foot pounds the greater your ability to take game down will be. There are two main types of air guns that should be considered for a survival situation; break barrel or PCP.

PCP stands for Pre-Charged Pneumatic. This is an air gun where the air that is used to propel the pellet is compressed externally. This air is compressed using either a special mechanical or hand compressor to reach up to about 3000 psi . The pro side of this is that you can send a heavier pellet down range and take down larger game. PCP’s have taken game the size of American bison, buffalo quickly and humanely. Also a lot of PCP’s have a magazine that allows you work a bolt for fast repeat shots. On the con side you will have to buy at a minimum a means of compressing the air and a portable air tank if you want to extend hunting time.

Break Barrel: On the other hand, if you are using a break barrel you charge it by “breaking” the barrel , thereby cocking it. This compresses the air or the gas in a gas piston type, then you load a pellet and then you’re ready to shoot. Your effective range is shorter due to lower foot pounds delivered to the game animal.
With a break barrel, you can take small game such as rabbits, squirrels and dove out to about 30-40 yards. Your effective hunting success will depend on the environment you’re in, range to the animal pellet choice and your skill level.

The pros of using a break barrel are it’s cheaper to buy and use. Once purchased all you need are pellets and you’re shooting. No additional equipment needed. A con is the size of the game you can take and the range you can be effective in taking this game. Another con is that a break barrel is a single shot, you miss and you might spook the game as you re-cock the gun. Your physical strength is a factor when choosing between a break barrel or a PCP. The break barrel requires more physical dexterity than a PCP. Using a PCP that is charged requires average strength and dexterity to pull the trigger and load the magazine. The break barrel requires you to cock the gun which can be difficult if you have physical limitations.

In my research, I have come across a new break barrel that claims to be the most powerful production break barrel available. This is the Hatsan 135 QE Carnivore Big Bore in .30 caliber.

Hatsan BT Big Bore Carnivore QE Air Rifle air rifle

Some of the specs are:

  • Caliber 0.30″
  • Max Velocity 550 fps
  • Muzzle Energy 30 ft/lbs
  • Barrel Length 10.6″
  • Overall Length 47.2″
  • Shot Capacity 1
  • Cocking Effort 50 lbs
  • Barrel Rifled Yes
  • Front Sight Fiber Optic
  • Rear Sight Fiber Optic
  • Scopeable Weaver & 11mm dovetails
  • Trigger Two-stage adjustable
  • Buttplate Rubber
  • Suggested for Small game hunting/target practice
  • Action Break barrel
  • Safety Automatic
  • Power plant Gas-piston
  • Function Single-shot
  • Body Type Rifle
  • Weight 9.9 lbs
  • Shrouded Yes

This is a robust air gun that will meet your needs in most situations, either hunting or a SHTF situation.

When used as a hunting gun the first thing I think you should do is decide if you want to use a scope or not. The gun comes with open sights. This means you can use it straight out the box. Open sights mean you can acquire the target a bit quicker and they are less likely to be knocked out of alignment.

Do you need a scope for your air gun?

A scope on the other hand lets you place your shots a bit more precisely. It also helps if your eyesight is less than perfect. A scope does add cost to the purchase and while modern scopes are well made, you will get what you pay for. If you put a cheap scope on the gun, it will cost you twice as much as you will end up buying a better scope. Make sure you get a scope that is rated for use on air guns. This is due to non PCP air guns having a double shock when firing. While a gas piston may not cause much damage, it’s best to check with the scope manufacturer before purchasing.

Once you choose between open sights or a scope, your next step is to find the best pellet for the air gun. While it will shoot any .30 pellet, it will be more accurate with certain pellets. The only way to find the best one is to buy several brands, go to a range and sight it in. You need to do this no matter which type of sight your using. This rifle also has an Integrated Sound Moderator (Shrouded). What this does is to reduce the sound of firing down-range. Depending on how close your neighbors are you might be able to practice in your backyard. Make sure you check before shooting and make sure your not violating any local or home owners association rules

Ok, your air gun is sighted in, you’re got the pellet your accurate with, so what can you hunt with the rifle?

Depending on your state you may be able to hunt game up to deer size. Now you will not be taking deer at 200 yards. That is way beyond the capability of the rifle. For most deer size game I would not go much farther than 50 yards. If your state has a feral hog problem this rifle will work on hogs also. Treat it as if your bow hunting. For smaller game like squirrels and rabbits, I would add about another 20 to 25 yards.

Shot placement is very important when hunting, it’s even more so when using an air rifle.. Head shots are the most humane way to take most game. You should be able to place most shots in a dime sized shot group before you go hunting.

So there you have it, my idea of the best air gun for a SHTF situation. Is it the most powerful? No. Nor is it the most accurate air rifle you can buy. Are there other calibers that can be used? Of course. They are just not as versatile. This is one that will do most of the jobs you need it to do at a cost, ease of use and maintenance most people can afford. As with any tool, the more you practice, the better you will become in its use.

  There has been a lot written about using an air gun for a SHTF situation. Which caliber to use, the type of air gun, cost of ammo and so on


I have grown up and lived in the suburbs of Phoenix, AZ almost my entire life. For anyone who is not familiar with Northwest Phoenix, this means I grew up in the desert. We lived in track homes all the while being within a stone’s throw (literally) of undeveloped, uninhabited, and unending desert. Every time the surrounding wilderness would become developed, we would move further out-of-town (and so the cycle continues today). It was against the back drop of the unrelenting heat and the unforgiving desert that I would learn my first courses in survival.

One lesson I have learned from my parents and now encourage my children to participate in is being an Outdoorsy Kid. It didn’t matter if it was after school or during the summer time my brothers and I would often hear my mother say “Go play outside.” Whether this was for her sanity or ours (or both) we didn’t know but we also didn’t care because we had a blast running around doing whatever we wanted in the Wild West. We spent the majority of our free time outdoors…even when it was 120 degrees outside (don’t call CPS, we had a hose in both the back and front yards and sometimes popsicles!!).

Water is essential

I learned in my youth that water is essential. In Phoenix the summer temperatures can rise quickly. Sometimes when you get into your car that has been parked outside for hours the heat will take your breath away.

CamelBak Classic Hydration Pack

As we explored deeper into the surrounding desert we spent greater amounts of time away from readily available water sources such as water fountains, the kitchen sink, or my personal favorite, the hose in the front yard. We began freezing half full water bottles at night and filling them the rest of the way in the morning before our next adventure. The water would stay cold for hours. We would find larger bottles and experiment with those trying to find the perfect balance between size and how easily we could carry it on our bikes.

When we joined scouts our parents purchased us a Camelbak (which we thought was the greatest thing since sliced bread). It wasn’t very often one of us didn’t have that bright blue mouth piece clinched between our teeth while outside playing football or baseball or riding bikes. We learned from a young age that we needed to have water with us if the fun was going to continue.

While it seems like a “no-brainer” that water is requisite for roughing it in the outdoors, you’d be surprised by how many individuals neglect this important part of survival. I can’t tell you how many times inexperienced adults try to jump into prepping/camping/“outdoorsy stuff” as if it’s a fad and end up with heat exhaustion or heat stroke all because they thought a 2 mile hike in the Arizona summer would be easy and fun. This is a lesson my brothers and I already learned long before the age of 12 and one we have never forgotten. Today we all have clean water storage sources for “on-the-go” situations. I never leave the house without a water bottle.

Become acquainted with wildlife

Playing outdoors introduces you to wildlife that would otherwise go unnoticed. I remember trying to chase down lizards, snakes, coyotes, roadrunners and once a pack of wild donkey (yes, the desert wilderness in northwest Peoria has wild donkeys). We learned quickly what snakes and lizards could be caught and which of our reptilian friends we should avoid. Through trial and error we learned to pick up large stones so that the rock is in between you and whatever animal/insect you thought might be hiding underneath. We learned that if you heard the heart stopping “rattle” from a Diamond Back Rattlesnake that you ought to run in the opposite direction. We learned that although the outdoors is fun the wildlife that survives in such harsh and tough conditions do so by being harsh and tough themselves. You might consider me a “nervous nelly” but when I see inexperienced campers/hikers stopping with their children to admire a rattle snake I can’t help but think “Are you stupid or just not from around here?”

It would be impossible for me to tell you the emotions I felt as a 12-year-old getting my first Shotgun and going out with my dad to hunt dove and quail. I learned to hunt for food, to respect the wildlife around me, and to never shoot at or kill animals just for fun. I learned that edible was a relative term and that finding edible animals could be the difference between starvation and a feast.

Learn how to build and breakdown

We loved building Forts out in the desert. Sometimes we would lug our shovels and picks out to the desert and dig a pit for our fort. Afterward we would have dirt clod wars, throwing clumps of Arizona dirt at each other or neighbors. We learned that at about 6 inches to a foot deep we would have to work together to get past the hard desert clay. Many times our forts need to be built upward. We learned simple “granny” knots would “knot” do (see what I did there…with the word Knot?).

We built “lean to’s and A-frames and box frames using lashing techniques. We saw that if you wanted a fort or a shelter to last more than an hour or two, you needed to apply the proper knots (clove hitch) to your lashings.

Aside from building we learned to breakdown those things we built. I remember one evening we wanted to show our father some of the forts we had built. As we traveled to our latest edifice, we all passed prior forts that we had dug or built that were still erected or half torn down. My father was extremely angry to find out that his sons had been out littering the desert with his tools, lumber, and camping supplies. Needless to say, we spent the rest of our night filling in pits and untying blankets and lumber from trees. We learned that being in the outdoors is great but it is our responsibility to clean up after ourselves…even in the outdoors. My father taught us to “Leave no trace” and that when you run out of rope it is absolutely not acceptable to use your father’s extension cords.

Learn to maintain equipment

It got to the point that in order to have more time playing and less time traveling to our destinations we needed to start riding our bikes. At first when playing in undeveloped land there are no paved or forged trails. Unfortunately while riding our bikes in the wilderness we popped A LOT of bike tires. My mother got fed up with buying new bike tubes every week so she purchased us a tube patching kit. This saved both time and money and it was small enough to fit in our backpacks along with a hand help bike pump.

Outside of fixing flats we learned to maintain our bikes; repair damaged chains, correct crooked handle bars, and tighten brakes. We learned that no matter what your equipment is, you should know how it functions, what tools you need to fix it, and how to maintain it. In any survival situation your equipment comes second only to your knowledge and experience. All the knowledge in the world won’t start a fire or fix a flat tire without tools. While I don’t ride bikes any longer I apply the same principle to my survival equipment, my home, and my vehicles.

Many lessons learned

We were not the most avid campers, we didn’t go hunting every year, we were definitely not professional bushcrafters, but we did learn what we needed to. My parents believed in letting us develop in the outdoors. I would be hard pressed to list every lesson I learned being an “Outdoorsy kid.”

You might be thinking that what I have just listed are “common sense” ideas and that everyone knows these things out of the womb, but I would beg to differ. When I see today’s youth (I am involved with the youth at church, and am a Scout Master for the local troop) I am shocked at the lack of outdoor/survival knowledge they possess. I have observed first hand that children are like sponges and can adapt very quickly to survive and even thrive in difficult situations.

As human beings “survival” is burned into our DNA, however we need to be careful not to snuff out that fire of survival in our children. Yes, the outdoors can be a dangerous place, yes, your child will get scrapes, bumps, and bruises…maybe even a broken bone or two. But when the SHTF I’ll bet you wish someone knew how to build a fort out of seemingly nothing, or that you knew to pack extra water and keep a clean supply at the ready, or that some wildlife and their specific environments ought to be avoided. Let your children learn these lessons in their youth, let them fail when playing and building forts rather than failing as an adult when they don’t know how to change a tire, or when they get laid off at work, or during the next economic downturn, or city riots, or fire, or flood, or plague, or famine, or war, or invasion, or… the list goes on.

This knowledge I have shared is, of course, specific to me and my environment. You might live in the boonies or even deep in the urban parts of your city. Whatever your situation whatever your environment, you and your children need to know it. You and your children need to understand the potential dangers and potential saviors of your environment. Whoever you are or wherever you are, let your kids be “outdoorsy kids,” you’d be surprised how much intelligence they gather.

  I have grown up and lived in the suburbs of Phoenix, AZ almost my entire life. For anyone who is not familiar with Northwest Phoenix, this means I grew up

The mantra of Guns, Bullets, and Beans is a reasonably common one but bullets go both ways. Almost everyone who has served in active duty involving gunshot injuries or has been involved in treating them will tell you never to engage in a fire fight unless you have no other choice. Rather than focusing on building a fortress to defend your supplies it is safer to build a home you can walk away from without compromising your supplies or getting on the wrong end of a gunshot wound.

Rule One: Do not get shot.

Rule Two: Get shot in a leg or arm without any bone involvement.

Rule Three: If you have to be in a fire fight make sure you kill them all before they can return fire.

I have never been shot and I have only had two guns pointed at me but I have nursed a fair number of shot ICU patients over the years. In SHTF things will be different and trauma care for shooting patients (I dislike the term ‘victims’ as it implies powerlessness) needs a hard look at especially if you live in an area of the world that has a lot of armed people around you. This article will have some biology (science is fun!) and I am not talking about body armor or types of ammunition (not my specialty but here are penetration estimates. If Pat uses them there will be graphic photos and I hope these will not trigger anyone but knowledge is power.

The article is long and I am not going into lung, abdominal, brain care as basically you are likely dead. Please look up lung injuries as knowing what tension pneumothorax, septic shock, and paralytic ileus are good ideas.

Basic Field Care if you are Shot

Avoid being shot again. Disengage and get to the safe area. All home and bug out locations should have a stocked and safe area away from the main buildings that is believed to be safe in the event of an attack.

A wounded man is helped to get away from gun shots Picture: AFP

Do not scream “medic!” or “I’m hit!” There is a fire fight going on so do not give tactical information to the enemy or distract your side. Everyone on your team is a field medic and has practiced for this so no one helping you needs to be screaming for help either. You and/or they deal with it until after the fire fight. Stay off the radio until the fire fight is over and give no tactical details if summoning help. “Jimmy I’m at X and I’d like to see you” is better than “Jimmy! They shot me in my leg. It hurts. I need help now”

Look for the entrance area and check if there is an exit area. Survey yourself quickly for other injuries. Entry wounds can look insignificant and exit wounds can look dramatic. The actual issue is what was in the way and what is happening beneath these entry and exit points.

Exit wounds can look dramatic

Cover the wound’s entry and exit points with thick cloth or blood stopper bandage as soon as you can. Limit the blood flow by partial or a full tourniquet if you have knowledge to safely use one. Blood looks dramatic and it is hard to assess the amount. Pulse rising, blood pressure dropping, consciousness failing are signs of massive blood loss. Without intravenous infusions and/or blood transfusions you will likely die. I know some are prepping to give blood transfusions but this is a really dangerous and specialized intervention. Giving a basic intravenous of normal saline (0.9% sodium chloride) is simple and easily learned. Both are illegal to use but not to learn unless you are a medical doctor.

Leave this initial thick pad on no matter how wet it gets. Add more and do not remove any. I do not feel a blood clotter like the Israeli Bandage should be applied at this stage unless you have several in reserve. If you have one only consider using it after the next phase of care or buy more than one. Technology keeps evolving but if you use it can you remove it without an Operating Room?

If possible elevate the wound above your heart. This lowers the blood pressure locally and should decrease bleeding. Realistically it probably will be easier to raise your heart above the wound site.

If bone is injured splint it as it is for transport and apply the initial pad over the splint.

If it is not an abdominal injury drink as much water as you can and keep drinking one pint an hour. Sports mixes are a good idea as well. If abdominal you will likely die but stay nil by mouth (NPO) as you might get lucky and abdominal trauma is always worse if you take anything by mouth.

It is going to get painful quickly so use the brief pain-free period to move away from the bullets and get to safety.

Basic Field Care if you are the Medic

Yeah! We won and all the bad guys and girls are dead. As in all First Aid situations assess the area for possible threats prior to giving care. Any snipers waiting as your team-mate was screaming for help giving away his location? Has the shooter who did the hit been dealt with or are you next? Consider dragging the injured away from the scene before doing anything else.

When safe have a look and verify if they are alive or just barely alive? If dead or barely alive then do not waste time, energy, and supplies.

If you can see bits of their bowels, chances are slim for survival.

Reasonable signs of potential viability are that they are conscious and can talk to you in sentences. If they are able to do this has the wound caused abdominal contents to become free?

Sorry but without a surgeon and a good hospital/surgical set up your friend’s dead if you can see bits of their bowels. Brains oozing out of the wound, eyes, nose, or mouth are equally untreatable in SHTF so do not waste supplies on a futile attempt.

Then follow the steps you would take if you had been shot. Starting to go beyond these in the field is just not a good idea. Get them to the safe zone.

Safe Zone Preliminary Care

Everyone in your group should know how to do this as you might have to do it for yourself.

Emergency War Surgery: The Survivalist’s Medical Desk Reference

Unlike every film you have ever seen getting shot is extremely painful and shock is likely for the pain alone even if blood loss is minimal. Get calm and practice deep breathing techniques to slow and steady your breathing and your heart rate. If you have alcohol available do not drink it if you are shot. If you are the medic have a small amount. Seriously, I have a small bottle of brandy in my kit for me to swig if I am facing a major injury and it can also be used to sterilize instruments and your hands.

Okay. Now what are we facing here? If they are unconscious check for other wounds as there are many cases where the obvious and none fatal wound gets all the care while the insignificant and overlooked wound slowly kills the patient.

Strip them naked. Use scissors or a knife but get them fully naked unless they are conscious and are sure they have only one wound. Even so I am stripping them and doing a quick body search. Note where all the wounds are and where you see swelling and bruising. Is this survivable? If there is flank and/or side deep bruising from an abdominal wound likely means the spleen is damaged if on their left side or the liver if on their right side. Frankly they are going to die unless you can do surgical repair which is highly unlikely and is highly skilled. Wounds that go through the body are more survivable than those where the bullet remains inside but a through shot going through the deep abdominal area or chest is likely not one you can treat. No worries they will die quickly from blood loss or lack of oxygen.

If the decision to treat is made then clean the area around the wound and your exposed arms and forearms with something. Clean water if that is all you have or use the remaining brandy to clean your hands carefully. Soap and water is awesome hence having a stocked safe area previously set up for major injuries away from the areas likely to be in a fire fight is a good move. You can use multiple different liquids but the aim is to pour the external stuff AWAY from the wound and never towards it.

Having done that move them onto a fresh laundered sheet or have one placed under them. If possible have the room warm to avoid cold shock but you need the area naked to do this care. Avoid using beds as they are too low and the mattress will be ruined. A massage table or a folding plastic table is a good idea.

Using a powerful flash light (have a head lamp if you cannot get an assistant) pick out and remove everything you can see in the wound that is unattached to the patient. Clothing and bullet and bone fragments have to be removed or infection will occur for sure.

Now reassess blood loss. Is it arterial (bright red maybe but you can see it pulsing) or venous (dark for sure and steady stream)? If arterial use a tourniquet between the wound and the heart if possible, get sterile gloves on, and go in. Find the sight of bleeding and suture it. This can result in limb loss but most arteries can be sealed and blood flow can take alternative routes. At a pinch you can seal it with a hot piece of metal from a fire but frankly you likely will have the patient die of shock. This is not the movies. Still I’d consider it for a wound in a limb that cannot stop bleeding no mater my digging around in there.

Yes you can use back powder but only if it is a limb and the bleeding cannot be stopped. This will hurt and inflict a severe burn on top of the other injuries.

Set bones if you can and have to at this stage. The wound is as clean as you can get it and you have flushed it out with loads of cooled boiled water after adding a bit of salt. 0.9% sodium chloride is normal for the human body but flush it out a lot until most of the bleeding has stopped. You have removed every bit of dirt, clothing, and bullet you can see in there. You have stopped all major bleeding. Doing this on yourself is unrealistic despite the movies so everyone in your group needs to know how to do this not just the doctor or the nurse. They might be the one shot.

Start broad spectrum antibiotics and ensure 3-4 liters so fluid intake a day. Use the intravenous if you have to but keep them hydrated.

Broad Spectrum Antibiotics:

  • Amoxillin
  • Levofloxacin
  • Gatifloxacillin
  • Streptomycin
  • Tetracycline
  • Chloramphenicol

If bone involvement it is very important to use a broad spectrum antibiotic to avoid issues later on with chronic bone infection. If you have antibiotics then use them if the wound penetrated deep into the body. Hopefully their tetanus is up to date especially if soil has entered the wound which in SHTF is likely from clothing in a fire fight. Antibiotics will not help tetanus and it basically kills people horribly.

Ongoing Care

Evacuate them to a hospital with a trained doctor as soon as possible. If you can do this within 60 minutes you dramatically increase their chance of living. Okay if you cannot then try this!

Wound Care

If the outside of the dressing is clean and dry and there is no obvious smell, swelling, or severe pain then leave it on for 7 days. Do not peek!
Change the dressing using clean materials if sterile ones are unavailable. Laundered sheets work fairly well for this so have a supply kept aside for health care use. Unopened packs of baby wipes can also be considered very clean. Wash your hands and arms well with soap and water before and after giving all care and especially wound care. You do not need a face mask but do not breathe into the wound even if you are wearing one. The outsides of face masks are extremely contaminated and the human mouth is as well even if you floss frequently. Use cooled boiled salt water to soak and dressing that are stuck and take them off gently.

If the wound is bulging or leaking pus (yellow smelly stuff) then remove one or two sutures and let it be open to drain. Be aware that 7-14 days afterwards this can occur and the entire wound site might burst open. Flush everything with loads of cooled boiled salt water and attempt to push gently back into the body and then suture really well. Probably will die but worth a try if you have got this far. Open it carefully being sterile if possible and remove obviously dead tissue and wash everything out. Have a good look for any debris you missed the first time you treated this. This is a wound infection and needs 12-24 hour dressings until it heals (once or twice a day). Change the antibiotic given if you can at this point.
Do not use triple antibiotic cream, honey, or anything inside the body. Just don’t ever no matter the temptation. Flush with cooled boiled water and if open and you need to pack it use cooled boiled water-soaked sterile gauze.

General Care

Use limited bed rest. However sick they are turn them every 1-2 hours in bed and get them up in a chair as soon as possible and totally ignore their complaints about this. Immobility kills. Keep them hydrated well and use higher protein foods if available. Add a stool softener into the mix early on if they are immobile. Metamucil works fine if used early on. Let them rest a lot and avoid strain on the wound area but also make them feel useful. They can cut up clothing for toilet paper and other chores so make them earn their keep.

They will out of commission for a long time so have stored food available and firewood and drinks they can reach even in a weakened state. You might not be able to do this for them.

The mantra of Guns, Bullets, and Beans is a reasonably common one but bullets go both ways. Almost everyone who has served in active duty involving gunshot injuries or has


The right to bear arms in America remains strong. But it behooves individual gun owners and employers to keep up with the ongoing legal and political caveats in their respective areas. Company policies and state and federal laws are all bound to clash when enacting concealed carry rules for employees. There is also the matter of providing peace of mind to workers who do not carry firearms. The following guidelines will help shape concealed carry rules for your individual company.

Law vs. Policy

Maria Ivette Ros was fired from her job as a Wells Fargo branch manager in Oldster, Florida, in 2014 for carrying a concealed weapon into the bank. The company has a strict policy against employees carrying firearms onto the premises, with the exception of security personnel. Ros filed a lawsuit in state court claiming her Constitutional rights were violated. Wells Fargo argued it is not a government entity, but a private company that can make its own rules pertaining to firearms. It’s unclear how the case was adjudicated, as court records indicate it was dismissed with prejudice in August of 2014.

The Ros case would have provided a blueprint for employers in right-to-work states like Florida that also strongly adhere to Second Amendment precedent. Know the laws of your state before writing concealed carry policies. Several states have adopted “parking lot laws” that allow employees to carry concealed weapons in their vehicles while parked on company property. States like Arizona, Pennsylvania, and Texas either have no laws addressing the issue or specifically prohibit employers from enforcing anti-concealed carry policies.

Most state laws pertaining to workplace concealed carry are fairly straightforward. But in states like Kansas, Kentucky, and Wisconsin where the laws aren’t as clear, it’s best to consult a Constitutional attorney before writing your policies.

Safety First

The General Duty Clause contained in Sec. 5 of the Occupational Safety and Health Act (OSHA) requires all employers to provide “a place of employment which are free from recognized hazards that are causing or are likely to cause death or serious physical harm to his employees.” Education and accountability are key for compliance to OSHA’s broad safety rules.

Inform all employees of your intent to enact concealed carry policies. Clearly, state in a memo why you’re enacting the policy and how concerned employees can address said issues. One oft-repeated concern among pro-gun control advocates is the “assault rifle” fallacy. A great way to educate and bridge those gaps is showing them how false that label is.

Visit an online gun library and point out, for example, a Ruger Mini 14 versus an AR-15. Emphasize that both are semi-automatic, use .223 ammo and have 30-round magazines. The only difference between the two is that the previous looks like a BB gun, while the latter looks much more menacing. Conveying this type of knowledge about firearms will also put skeptical minds more at ease.

Follow Examples

An aviation insurance firm in Georgia enacted a company policy earlier this year that requires all employees to obtain a concealed carry permit. Once they obtain the permit, the company owners give them Smith and Wesson handguns just as other employers provide computers, office supplies, and coffee in the break room, local news station WSB-TV reported. The company owner said the policy was enacted as a result of a crime surge in the metro Atlanta area. Georgia law grants civil and criminal immunity to employers who comply with guns-at-work laws, which of course is more reason to consult an attorney beforehand.

Belly bands make a good concealed holster for some people.

Speak with those who already have policies in place. There’s no substitute for real-life experience when it comes to drafting and enforcing workplace gun policies. No database or easily accessible list of employers with current concealed carry policies exists, but rifle clubs and shooting ranges are the best places to get word-of-mouth information like this.

More General Guidelines

Laws and safety supersede everything else. When drafting your policies, there are some basic elements that should be included:

  • Proper channels for employees to report threats, intimidation or harassment should be clear, confidential and easily accessible.
  • Potential disciplinary action for employees who violate any part of the policy should also be included.
  • Security personnel or other measures that limit access to your parking lot should be considered for companies that allow concealed carry in cars only.
  • Human resources personnel are encouraged to involve law enforcement when terminating employees with known tendencies of violence.

An armed workforce deters criminals from interfering with your day-to-day business, but doing it the right way ensures you stay out of the courtroom and keep your employees happy at the same time.

  The right to bear arms in America remains strong. But it behooves individual gun owners and employers to keep up with the ongoing legal and political caveats in their respective

Many people have become invested in the survivalist lifestyle as of late, and who could blame them? Every day you hear about another terrifying development in the world at large, whether it’s a threat of natural disaster, war, or simply some sort equipment malfunction that causes large scale destruction. The truth is that it’s very hard for families to feel any sense of peace or security in this day and age. These intangibles are hard to come by in a time when most people can’t even trust their next door neighbors.

For this reason, doomsday prepping has become quite attractive to those who want to be ready for anything. This includes occurrences such as natural disasters, economic collapses, and just about everything in between. One thing we can learn from the state of things today is that anything can happen at any moment, and those who are prepared for disaster will have a real advantage over those who are not.

Ordinary People Performing Extraordinary Feats

For the most part, doomsday preppers are just ordinary people. Often they have families, and they genuinely fearful for their children’s future given the ever increasing instability present in the world. Preppers are comprised of various age groups, social statuses, political beliefs, and all ethnicities and philosophical outlooks.

The common thread amongst preppers is that they actively take precautions in the event of a disaster. This can include things like floods and tornadoes, enemy attacks with biological weapons and similar tactics. The disaster needn’t be on a large scale to be threatening. Smaller scale disasters, which are more common due to the shifting economy, as well as odd weather patterns causing adverse conditions, can also be devastating.

Doomsday prepping is a lifestyle that is available to anyone who isn’t afraid of a little hard work and sacrifice. While we frequently hear of exorbitantly priced shelters and bunkers, this isn’t always the case. For a relatively reasonable sum of money, you can create your very own safe haven in the event of an attack, and this shelter can include all the items necessary to your survival until the initial threat subsides.

Shelter the Things You Love

Underground bunkers are quite popular with the survivalist set, and creating your own underground shelter is much more attainable than it seems. A bunker can be constructed for a relatively reasonable price. All you need to undertake the task are basic construction materials and some elbow grease. You can also enlist the help of a professional if you are unsure of how to go about constructing a safe and secure bunker on your own. There are many cost effective ways of building a bunker, it may just require a little research on your part.

The next step is to purchase supplies. Fortunately, most of the food you will need to buy is rather inexpensive. Canned items, like fruits and vegetables, are able to be purchased in large amounts for very little money. For this reason, when stocking your underground bunker you should definitely consider buying food in bulk. Foods such as rice, beans, and other staples are also available at extremely affordable prices. You may even want to consider stocking seeds to be used for planting when the time is right.

Water is equally important. Fresh water should be plentiful, but so should the means to purify unclean water should your source become depleted. This can be accomplished through chemical means, such as iodine tablets, or by purchasing a water purification system. Boiling water is also an option, but this can be difficult if you are left without the means to do so.

Clean Air is Crucial to Survival

While much is said about keeping adequate food and clean water supplies, little is ever mentioned regarding the quality of one’s air in a survival scenario. All over the world, terrorist groups and the like use biological and chemical weapons as a means of waging war. The effects of these weapons are long lasting. Chemical weapons typically have a faster onset, while biological weapons can cause untold suffering for years to come.

If you choose to go the underground bunker route, air purification should be a top concern, along with food and water. Bunkers tend to have insufficient ventilation, which can actually be beneficial depending on the air quality outside the bunker. However, insufficient air flow can be a detriment to those subsisting in a bunker, and can negatively impact health, as well as general quality of life.

For this reason, it’s crucial that air purification is part of your survival plans. An air purifier can be extremely beneficial to those in such situations. These devices can filter the air of harmful chemicals and agents, allowing you and your family to breathe easier, no matter where you may be. This is especially important if the disaster scenario is ongoing. You’ll want fresh, clean air at your disposal, and this can be afforded by an air purifier.

Don’t Forget an External Power Source

In order to be a fully functioning survival unit, a power generator is a must. Batteries are important for smaller items, such as flashlights and radios. But to power large items, such as the aforementioned air purifier, as well as things like cooking implements, heating systems, and other vital needs, you’ll need a larger, more reliable power source. Generators are great in this respect. A portable generator is the ideal, as you will be able to take it with your should your bunker become compromised.

Expect the Unexpected

Real safety is hard to come by these days for many reasons. Unrest is a fixture all over the world, due to economic collapses, brutal governments taking advantage of their citizens, as well as fringe groups threatening the very fabric of society. You can’t take risks like these lightly, given the state of the world today. Doomsday preppers face these risks head on through their various prepping methods. By being prepared for unforeseen circumstances, preppers can rest assured that they have a sound plan to follow in the event of unmitigated disaster.

Many people have become invested in the survivalist lifestyle as of late, and who could blame them? Every day you hear about another terrifying development in the world at large,


As anyone can tell you that has ever discussed the bible or religion there is no one Christian view on any topic and the purpose of this article is not to push one view or another but to provide a perspective that you may not have considered. There will be those that may say these scriptures are out of context but I challenge you to look them up for yourself. Obviously, our founding fathers quickly amended the constitution to provide the citizens a clear assurance that they could “keep and bear arms” but where did they get this view? Was it simply from their experience in dealing with the British or was there a scriptural basis for it.

Different Views of Scripture

There are two predominate views based on scripture that address preparedness. The first is that scripture warns us therefore, we should take practical steps to take care of ourselves and others. The other view is that God will take care of us so no need to prepare. Some simply believe the Lord will take care of them others believe that He will but that they must do their part. It is always important to look at scripture in context and with other relevant scriptures. A good example of why this is critical is this text in the book of Luke.

Luke 10:4 (NIV)
4 Do not take a purse or bag or sandals; and do not greet anyone on the road.

If we stop here it would appear that Jesus is telling them not to prepare, that He is going to take care of them and to rely on the mercy of strangers when they travel. As we read on in Luke 22 we find a much different view as again Jesus is speaking directly to his disciples.

Luke 22:35-38 (NIV)
35 Then Jesus asked them, “When I sent you without purse, bag or sandals, did you lack anything?”
“Nothing,” they answered.
36 He said to them, “But now if you have a purse, take it, and also a bag; and if you don’t have a sword, sell your cloak and buy one.

Here we have a much more complete and up to date picture, Jesus giving instructions for the future. Now he does not only address the purse (money), bag (provisions) and sandals (clothing) but also the sword (protection). He puts such an emphasis on the sword, such a level of importance that He separates it from the other items saying if you don’t have one go sell clothing to buy one! He does not say to sell the sword to buy clothes. This may not be for you today but Jesus is speaking of what the future will require. The future Jesus described for the disciples may just be your reality today. Jesus specifically indicates that the disciples are to take supplies with them when they go out to minister as well as a means of protection.
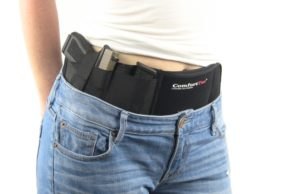
Personal Protection

Your first reaction to this topic might be to think “Guns” but for this discussion we are really discussing whatever means of personal protection you are comfortable with. Often we hear Jesus described as a pacifist and at times Jesus plainly chose that approach.

Matthew 5:39 (NIV)
But I tell you, do not resist an evil person. If anyone slaps you on the right cheek, turn to them the other cheek also.

Are there times to walk away from a fight? Absolutely yes, are there times when using a lethal weapon for a minor offense is simply not the appropriate response? Of course, yet just before His crucifixion, Jesus’ instructions are different from the often quoted “turn the other cheek” phrase used by some.

Luke 22:38 and 49 (NIV)
38 The disciples said, “See, Lord, here are two swords.”
“That’s enough!” he replied.
49 When Jesus’ followers saw what was going to happen, they said, “Lord, should we strike with our swords?”

Later that night in the garden where Jesus was praying he was betrayed by Judas and as he was being arrested Peter drew a sword.

John 18: 10 (NIV)
10 Then Simon Peter, who had a sword, drew it and struck the high priest’s servant, cutting off his right ear. (The servant’s name was Malchus.)

Jesus quickly had Peter put the sword away (Luke 22:51) but this brings up the issue of timing. Jesus never had a problem calling out his disciples if they were doing something wrong. He had done this on many occasions, chastising them or correcting their methodology and theology. So just moments earlier he had condoned them bringing swords but had Peter put his away when he used it. The speaks volumes as to the proper timing of when to use force to protect yourself or those you love.

The sword in its day was the equivalent of the semi-automatic pistol of today. It was the pinnacle of technological defensive/offensive close range weaponry and Jesus’ followers were carrying them with his blessing. This does not describe a group of pacifists!

Much like the timing of when to use the sword and when to put it away is when to turn the other cheek and when not to. King Solomon who was known for his wisdom and was known as a man of peace wrote Ecclesiastes. He addressed timing in Chapter 3 in a list of opposites.

Ecclesiastes 3:1,3,8 (NIV)
1 There is a time for everything, and a season for every activity under the heavens:
3 a time to kill and a time to heal, a time to tear down and a time to build,
8 a time to love and a time to hate, a time for war and a time for peace.

Deciding when to apply each of these apparently contrasting statements may be the essence of wisdom. In the book of Nehemiah, we are presented with an Old Testament view as Nehemiah prepares defenses for the city of Jerusalem. He is in a predicament where he must come up with a defensive system to not only protect Jerusalem but also the workers themselves. Many consider this a biblical model for mutual protection in small groups.

Nehemiah 4:13-18 (NIV)
13 Therefore I stationed some of the people behind the lowest points of the wall at the exposed places, posting them by families, with their swords, spears and bows. 14 After I looked things over, I stood up and said to the nobles, the officials and the rest of the people, “Don’t be afraid of them. Remember the Lord, who is great and awesome, and fight for your families, your sons and your daughters, your wives and your homes.”

15 When our enemies heard that we were aware of their plot and that God had frustrated it, we all returned to the wall, each to our own work.
16 From that day on, half of my men did the work, while the other half were equipped with spears, shields, bows and armor. The officers posted themselves behind all the people of Judah 17 who were building the wall. Those who carried materials did their work with one hand and held a weapon in the other, 18 and each of the builders wore his sword at his side as he worked. But the man who sounded the trumpet stayed with me.

It is important to note that Nehemiah set up the defenses by family. There are several practical points to this. He sets up the motivation for this in verse 14 encouraging them to fight for their sons, daughters, wives and homes. People tend to fight harder when they have a personal stake in the fight; Also they would be stationed in the area closest to their home to help rotate out the people staffing the defenses.

Note the verbiage in verse 18 “and each of the builders wore his sword at his side as he worked.” Each worker was carrying his own protection, not relying on someone else or using borrowed weapons but his own sword. Have you given your means of protection over to someone else? Are you relying on someone else to be there for you? It is important to see that these were “workers,” able-bodied people, not the sick, elderly or those unable.

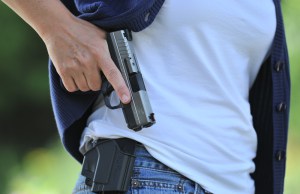
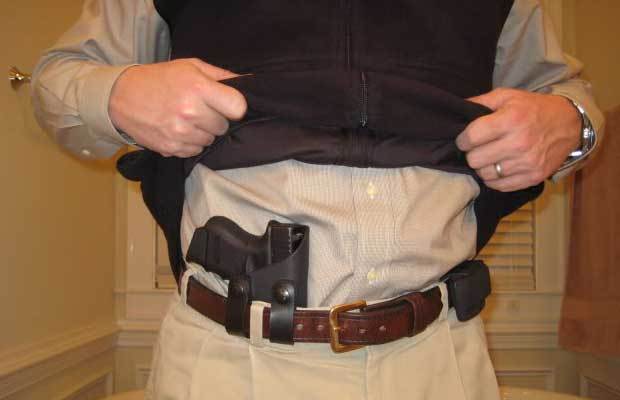
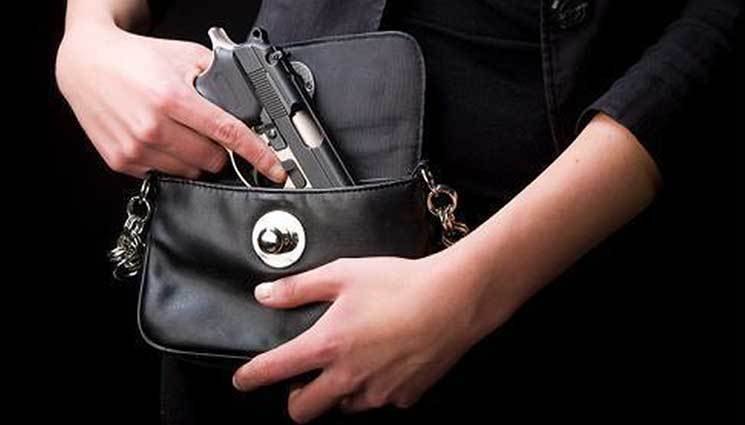
Verse 17 and 18 are sometimes sighted by advocates of concealed carry of handguns but it can apply to any means of protection you may feel comfortable with. You may be opposed to or feel uncomfortable with others around you carrying firearms, if so hopefully this will give you some understanding as to why Christian gun owners may be so passionate about it. Many feel it is not just a Constitutional right but a right God has given. You can see if someone approaches a topic with that point of view there is little chance of changing their position.

Verses 13 and 16 could provide specific instructions on which types of firearms to obtain. A sword being close range offensive/defensive (handgun), a spear to be close/mid-range weapon (shotgun) a bow being long range (rifle) and armor being (defensive use of your surroundings or protective gear).

Luke 17:31 (NIV)
On that day no one who is on the housetop, with possessions inside, should go down to get them. Likewise, no one in the field should go back for anything.

Many concealed carry advocates quote this scripture as guidance regarding always carrying a firearm. If you cannot get back to your house and you must leave it would be prudent to have your choice of protection with you. When it comes to personal defense I have found Solomon’s words helpful in choosing who I associate with or receive instruction from.

Proverbs 14:16 (NIV)
The wise fear the Lord and shun evil, but a fool is hotheaded and yet feels secure.

Solomon is clear here as to who you should work with when it comes to preparedness, if you are a Christian or not, hotheaded people do not make good decisions. Training for whatever means of personal protection you may choose is critical. It can be basic or advanced depending on your comfort level but it is scriptural.

Genesis 14:14 (NIV)
When Abram heard that his relative had been taken captive, he called out the 318 trained men born in his household and went in pursuit as far as Dan.

Abram’s men were trained, or at least 318 were and he did not send out the untrained ones. If we follow this example to be prepared or the most useful in a difficult situation, training is a requirement for service. Protecting yourself and others can be an intimidating task. Going it alone can be done but incredibly difficult so find another like-minded person, help one another.

Ecclesiastes 4:9-12 (NIV)
9 Two are better than one because they have a good return for their labor: 10 If either of them falls down, one can help the other up. But pity anyone who falls and has no one to help them up. 11 Also, if two lie down together, they will keep warm. But how can one keep warm alone? 12 Though one may be overpowered, two can defend themselves. A cord of three strands is not quickly broken.

The reality is you must sleep so at some point having someone to stand watch if you are in need of rescue or must quickly defend yourself simply makes working in a team more effective.

The government has guns so do you need them?

Song of Songs 3:7-9 (NIV)
7 Look! It is Solomon’s carriage, escorted by sixty warriors, the noblest of Israel, 8 all of them wearing the sword, all experienced in battle, each with his sword at his side, prepared for the terrors of the night.

Solomon clearly demonstrates that rulers are prepared for “the terrors of the night” if your leaders are possibly you should be as well. Our leaders will be protected they have insured that but who will protect you? The resources available will be directed to protect those in authority, your protection in a time of crisis will be secondary.

Prepare but for the right reason

You may prepare because of guidance in the scripture but scripture also addresses motivations so it is imperative that we prepare for the right reasons.

2 Timothy 1:7 (NET)
7 For God did not give us a Spirit of fear but of power and love and self-control.

We do not prepare out of fear. There can be a fine line between concern and fear when we make decisions based on fear alone we often find ourselves out of God’s will. The Bible can be described as a book of balance. Have you ever spent time with a Christian who is out of balance in any area of their beliefs? If so you know you don’t want to be that person! Therefore living a joyous life while still preparing for the future and knowing you can protect yourself and loved ones is a prudent life balance. Firearms may not be your tool of choice but please consider these scriptures when limiting someone else’s ability to use a firearm as their tool of choice.

  As anyone can tell you that has ever discussed the bible or religion there is no one Christian view on any topic and the purpose of this article is not


The Boy Scouts and Girl Scouts are two universally known organizations that many kids participate in growing up. As prepper parents, enrolling your kids in the Scouts is one of the first steps toward a preparedness lifestyle that we can do for our children. But not every experience in the Scouts is the same. Here are some excellent ways to get the most out of Scouts for your child.

Be The Troop Leader

Our lives are busy. We need to work, upkeep the yard and house, get groceries, run errands, and more. So naturally, parents often see activities for their kids as short-term daycare. It’s a great way to get a break from entertaining them and get needed stuff done. But doing so is a missed opportunity for many reasons.

As a prepper, there is no one better suited to lead a Scout troop than you. You’re already attuned to wilderness and preparedness ideas. So when you lead the kids in different activities, you’ll have a great depth of experience to draw from.

The Scouts are wonderful at providing their leaders with a vast array of ideas, activities, and badges to earn. So many that any one troop can only cover a small fraction of them. This leads to a huge degree of different experiences between troops. By being the troop leader, you can choose the best badges to work on for younger troops that will teach them the values you want. In an older troop, you can help guide them and encourage them to pick the badges that most reflex preparedness.

Leading a troop is also a great way to spend quality time with your children. Your kid will become more emotionally invested in the Scouts and the lessons learned there when you show them how much you like it by doing it with them. They’ll respect you more as they get to see you become a leader in the community, not just at home.

You also have the amazing opportunity to guide and shape the next generation as they learn from you. If everyone went to Scouts and grew up to be preppers, the world would be a much better place.

As a prepper, there is no one better suited to lead a Scout troop than you. You’re already attuned to wilderness and preparedness ideas.

Volunteer Frequently

If your schedule doesn’t allow for being a leader or co-leader of a troop, then do your best to volunteer frequently. Running a troop is hard work. You need to plan ahead and have everything prepared for each meeting. Almost every troop has two leaders, but the burden is still felt. So, I guarantee that your child’s Scout troop is always excited to accept volunteers at every meeting. They’re probably already begging for it.

Boy Scouts Handbook: The First Edition, 1911

By volunteering, you gain all of the benefits for your child as being the leader, except to a lesser extent. Some leaders will gladly let you pick the badge or topic for a meeting or two. This lets you guide which areas your child is learning.

If that’s still too much commitment, then just being at the meeting to help corral the children when necessary will lift a huge weight off the leader’s shoulders. It will allow them to focus on being prepared for each activity while you handle the dirty work.

It also reinforces the importance of Scouts and the lessons learned even if you’re just sitting on the sidelines and helping to pass out snack. When your kids are older, they will remember and thank you.

Attend Every Meeting

One of the good things and bad things about Scouts is that it meets much less frequently than other activities, such as sports. This makes it easier to make each meeting as they’re often once every two weeks or even once a month. But it also makes it easier to miss as you’re not in the weekly routine of it.

Make Scouts a commitment. Make it a priority to never miss a meeting for any reason. Because they meet so infrequently, each meeting is ever more precious and valuable.

In addition to making sure your child attends every meeting, make sure to attend them yourself. This way, you’ll always be around to volunteer when needed. You’ll also have a great influence with the leader in picking badges if they see your face every meeting.

Attending every meeting yourself is also a great way to make new friends. What better friends for you than parents of children that are the same age as your child in the same activities? You can start with play dates for the kids and then do picnics with your families together. Some of my best friends I met through Scouts when I was my children’s leader.

By being the troop leader, you can choose the best badges to work on for younger troops that will teach them the values you want.

Ask To Be In A More Active Troop

Every troop is different. They do different activities and meet at wildly different days and times. When you first sign up for Scouts, most people just give them your contact information and let the organization arrange which troop your child lands in. Often times they do this by geography and your kid will be in a troop with the children living closest to them.

This may be great. Or, you could end up in a troop that meets less and does less interesting badges. But just like picking which teacher your child get each year, you have a strong say in it. Don’t let the random whims of a stranger decide the fate you’re your child’s Scouting future. Take the wheel and find the best one for you.

Contact the Boy Scouts local council or Girl Scouts service unit manager and let them know you want your child added to a troop that meets more frequently and does more activities. If you ask nicely, they’ll be happy to assist you.

This is a little more challenging if you’re joining a newly formed troop as they don’t have the history to know. But this is especially important to know when joining an existing troop. The unit managers will know which leaders are more active in the Scouting community and will give great recommendations.

This will also serve your child’s future in Scouting. More active and exciting troops will often last longer before the kids start dropping out. Staying in the same troop with the same kids and leader always provides for the best experience.

Send Your Kids to Scout Camp

Most Scouting troops only meet during the school year. Thankfully there are a number of Boy Scouts and Girl Scouts summer camps throughout the country. Day and overnight summer camp are amazing experiences for children. There’s new activities like archery, boating, and obstacle courses that are rarely done during the year. Your child will spend more time outside enjoying the wilderness. It’s also a great chance for your kid to make new friends from different cities that they’d never meet otherwise.

Also, since these camps are tied to the larger Scouting organization, you’ll be confident that they’ll teach your kids the same values of preparedness. You’ll also find they are often cheaper than the YMCA camps as you’ll be able to use your fundraising dollars towards it, like Girl Scout cookie sales.

  The Boy Scouts and Girl Scouts are two universally known organizations that many kids participate in growing up. As prepper parents, enrolling your kids in the Scouts is one of


In an ideal world when a SHTF scenario takes place you’d be wearing your bullet proof vest and have immediate access to your hand gun and assault rifle. Unfortunately this may not be the case because of several factors. The laws in your country might prohibit you from carrying any weapons or the place you are attending might not allow you to carry weapons, such as universities and hospitals. So how do you defend yourself using unarmed combat skills if you get stuck in such an unpleasant situation? This article will go through the steps involved in defending yourself from the initial assessment of the threat, how to avoid or eliminate the threat with your bare hands or with any improvised weapon that you’re likely to come across in everyday life.

Assess the threat

As with everything else, the first step is to assess the situation. The extent of your assessment will obviously depend on the prevailing circumstances. You can’t take out pen and paper and start drafting an action plan if there’s a hyped up guy slashing with a machete right in front of your face. Each situation warrants a different level of assessment. An imminent threat requires split second decisions that are mostly based on muscle memory acquired through hours of training whilst a hostage situation requires careful planning. Whatever the situation, the aim of your assessment is to identify any weaknesses of your opponent, availability of improvised weapons and escape routes. We’ll cover all these aspects in the sections below.

Basics of Self Defense

When faced with a threat you have two opposing options; fight or flight. Backing off from a confrontation might make you feel like a pussy but it’s better to feel that way for a few days rather than being killed or injured because of your pride. If you decide to run away from a confrontation/threat you have to be sure that you can run faster than your opponent, avoid any weapons he may attack you with whilst you are running (mostly applicable to firearms), and find adequate shelter before he catches up with you. If this is not possible then you’d better stand your ground and fight because once you turn your back on your opponent you’ll become much more vulnerable.

The human body has multiple weak spots that you can target to your advantage.

Once you’ve decided to fight, or are forced to fight your way out, there are some basics you have to keep in mind. The fundamental principle of self-defense is to reduce to the least extent possible the damage your body receives in the attack. Key areas to protect are your entire head and face and vital organs in your torso. However do not underestimate the importance of your limbs. You won’t be able to attack with enough force if your arm/s gets injured and you’ll have problems standing and moving about if your leg/s gets injured. How you protect yourself will depend on how you’re being attacked. We’ll go through these in the coming sections.

The next principle is to stop your assailant from what he is doing. This is achieved by hitting a delicate part of your opponent’s body with a tough part of your own body (or any hard object that comes to hand). Your attack should be vicious and aggressive. This is not the time to have sympathy. You want to cause intense pain and damage in as little time as possible in order to neutralize the assailant.

Tough Parts of the Body

  • Knuckles
  • Elbows
  • Knees
  • Sole of the foot
  • Forehead

Delicate Parts of the Body

  • Temple
  • Eyes
  • Nose
  • Jaw
  • Neck/throat
  • Solar plexus
  • Ribs
  • Kidneys
  • Groin
  • Knees (when hit from the sides)

Unarmed Assailant

When your assailant is unarmed it’s a fight on equal par and the outcome will depend on strength, stamina, technique, aggressiveness and as always a bit of luck. Although it’s important to be aggressive don’t forget about defending yourself and protecting your vitals. If you get injured, you drastically reduce your chance of winning that fight. Once into the fight do your utmost to knockout (make unconscious) your opponent or cause an injury that makes him harmless. Do not start throwing useless punches and kicks in the air like a drunkard. Instead aim all your shots and focus on making contact with most if not all your attacks. Hit with all your strength but make sure not to lose your balance. Do not opt for fancy spinning kicks and that stuff unless you’re a professional kick boxer. Aim your kicks to his knees to knock him off-balance and aim your punches to his face and ribs if you get the opportunity. Do not unnecessarily expose yourself whilst attacking and always be ready to block his attacks. Follow these basics and you’re likely to be the one standing next to an unconscious body.

Armed with a Knife

When faced with an opponent with a bladed weapon you must concentrate on that weapon and move in such a way that it never contacts your body. Keep at a distance and let your opponent slash and trust in vain. You have to wait for your opportunity to move in swiftly and grab hold of the hand holding the weapon. Do not grab the weapon from the blade. Your best chance of moving in is when he has swung the blade and is about to slash back. Once you gain hold of his weapon bearing hand hit him with all you’ve got but never let go off the hand. When you feel that he’s become weak enough, grab the weapon bearing hand with both your arms and twist it ferociously to break as many bones as possible. At this point he should drop the weapon or loosen enough his grip such that you can safely take it away from him. Once the weapon is in your hand, it’s up to you how to proceed but keep in mind there might be repercussions, both legal and psychological, if you decide to end his life.

Armed with a Firearm

An assailant with a firearm is much more difficult to disarm due to the extended range and deadliness of the weapon. Here your initial approach will be drastically different in that you want to come in physical contact with your assailant. You’ll have to do this gradually whilst distracting your assailant with conversation or a decoy. Once close enough your objective will be to grab the gun by the barrel and hold the gun pointing away from you and ideally away from other people. Movies and some martial arts experts demonstrate techniques to disarm an assailant with a gun pointing towards your head/torso. I am not judging the capabilities of these individuals but I strongly suggest you do not try this technique. All the assailant has to do is squeeze the trigger. This only takes a split second and your attempt to twist the gun might actually be what causes the trigger pull. The approach I suggest is much safer. Wait for a moment when your assailant points the gun in another direction. This is likely to happen whilst he is shouting instructions and uses the armed hand to point towards what he’s talking about. As soon as the gun is pointing in a safe direction, grab the gun by the barrel (obviously without any part of your hand obstructing the barrel’s end) and hit the assailant with all you’ve got. It’s interesting to note that if the firearm is a pistol it will shoot the loaded round when the trigger is pulled but it will not cycle another round since you will be hindering the slide’s motion. Be careful in the case of a revolver due to the hot gases escaping from around the cylinder. If it is a long firearm, grab the barrel with both hands so that you can exert more leverage. Obviously in the latter case you’ll have to attack with your lower limbs.

Arm Yourself – Improvised Weapons

Even a fire extinguisher makes an effective weapon. Spray the compound to blind your attacker and then bash them over the head with the empty cylinder.

This article is about unarmed combat in view of situations where you’re not carrying any weapons. This however doesn’t mean that you shouldn’t try to arm yourself with whatever might come handy. The following are a few ideas of easily obtainable weapons in everyday life.

Sticks such as a broom, billiard or long umbrella-You can swing such sticks to keep your assailant at bay but usually such sticks are fragile and immediately break upon impact dealing very little damage to the target. Instead use ‘weak’ sticks like you would use a lance. They will be less likely to break and will deal a lot of damage due to the low surface area which results in a lot of pressure.

Metal pen-This has a very short reach but you could easily incapacitate someone by stabbing him in the eyes or neck. You can also use a metal pen for pressure points techniques to subdue an assailant. This however requires training.

Stones or any other hard object such as a soda can (full)-These can be used as projectiles especially when you have an ample supply of them. If you’ve got only one it might be better to hold on to it and use it for battering your opponent.

Chair or stool-These can be used as a shield and to keep your assailant at bay as well as for striking. Obviously they can be thrown in the typical western movie style.

Fire extinguisher-You can direct the escaping gas (CO2 will be extremely cold), water, foam or powder in your assailants face. You can also use the cylinder as a battering device or throw it at him. You could even approach the assailant from above and simply drop the fire extinguisher on him.

Stiletto Shoes-If you or anyone accompanying you is wearing stiletto shoes, take them off. You’ll be able to move with more agility (be careful if there is glass or other sharp or hot objects on the ground) and you can use it for stabbing just like you would with a metal pen.

Conclusion

You never know when things are going to turn sour. We do our best to always be prepared to defend ourselves but we might end up in a threatening situation whilst we’re officially unarmed. That doesn’t mean we’re all gonna die. It means that we have to prepare for that scenario like we would for any other. Always be alert of your surroundings and book yourself for a few self-defense classes and keep practicing those techniques. You’ll be glad you have if the need ever arises.

  In an ideal world when a SHTF scenario takes place you’d be wearing your bullet proof vest and have immediate access to your hand gun and assault rifle. Unfortunately this


Foraging for Wild Carrot (Queen Anne’s lace), Sumac and Cattails

My study, fascination and field knowledge started early with plants and herbs. I was intrigued by the “Old and Unique” Shaker women’s ways and the vast knowledge of a plant or herb’s medicinal properties and applications.

My Father, was a quiet but powerful inspiration to me as he would busy himself in the “Seasons of Growing” and harvesting beautiful plants and flowers. I remember the very first organic garden he helped me plant with great patience. I can still see and feel the memory every time my bare feet touch the newly upturned coolness of the sandy loam in the hot and hazy weather.

This article will feature two of my favorite wild edible plants, Wild Carrot, species- Daucus carota and Sumacs- Rhus spp. I believe it is of great value and importance to know about the wild edible plants in your vicinity and how foraging for edible plants can benefit you. You may need this information if one were to be lost or stranded in the woodlands for some time.

Wild Carrot (Queen Anne’s Lace)

Wild Carrot (Queen Anne’s Lace) in an Illinois field before a storm

I will start with Wild Carrot, species- Daucus carota. This lovely white flowered plant is also affectionately called Queen Anne’s Lace, Bird’s Nest (for the dried brackets) and Bishop’s Lace. This plant is a somewhat biennial herbaceous plant that will grow to 1 or 2 feet high. The little flowers in the bracket are white and flat in a lacy clustered umbel. The leaves are tripinnate and very fine with stiff bracts that have three forks.

It is of extreme importance to remember that Wild Carrot has a firm stem that have small hairs all around it. The edible root smells of carrot.

One of the most crucial things I learned about this plant may also be a lifesaver in a field study especially if you are in need of food! The plant has a tiny red to purple flower in the direct center of the lacy cluster. This little flower derives its color from anthocyanin to attract insects, is worth noting in the field. You must be able to identify this when searching for Wild Carrot because it resembles Poison Hemlock. Poison Hemlock’s root smells vile and leaf stalks are hairless! A small amount of Hemlock can cause paralysis and death! Please always remember this in your field study of wild plants.

I also want to remind everyone because of misidentification, beginners should make no attempt to use Wild Carrot until you can distinguish it from Poison Hemlock and Fool’s Parsley! Once you feel comfortable in your knowledge of this plant you will find it to be useful. It grows abundantly throughout fields and waste places in Midwest, southern and northern regions of America. It will flower from May to October.

Sumacs- Rhus spp.


Sumacs are lovely summer to autumn shrub like or small trees with large feather compound leaves, pithy twigs and milky sap. The densely packed red fruit clusters are small, hairy and dry.  The silhouette of this plant in winter is distinctive for it holds onto its clusters.

Sumac can be used as a refreshing drink with vitamin c. Its acidic nature makes it taste like a pink lemonade. I would always find this abundant plant on upland open fields and forest borders in IL, IN, KY, TN and northern GA.

In the summer when the berries are ripe and before the heavy rains wash away the acid, collect the entire fruit cluster and rub it gently to bruise the red berries. You then can soak for 10 to 15 minutes in cool water. Then gently remove the cluster and pour the pink juice mix through cheesecloth to strain out any tiny hairs and berries. You can drink as is or sweeten to taste this refreshing drink.

Smooth Sumac in a Kentucky Autumn Field

Cattails


Cattails- Typha spp. is one of the most interesting plants found profusely in brackish and shallow water. It flowers May through hot July forming extensive tall stands in wet areas.

I love that Cattails have so many uses as an edible plant! You can use the stalks and shoots, spikes, pollen, sprouts, rootstock and the immature flower. How incredible is that and great to know if you are in the wild stranded without food for a period of time.

A Field Guide to Edible Wild Plants: Eastern and central North America

The leaves of this stately plant are sword like and erect. The stiff stems are unbranched and topped with cylindrical heads of tiny flowers. The male flower head is golden yellow when full of pollen and the female flower head is sausage shaped green at first and then turning to a warm brown.

It is one of the most versatile of the wild edible plant family. In springtime the young shoots can be pulled from the rootstock, peeled and then boiled for 10 to 15 minutes like an asparagus. It can also be eaten raw. The very young flower spikes can be prepared and eaten like corn on the cob with butter. Gather these before they erupt out of their paper like sheathing of leaves and boil. This makes a unique wild vegetable to enjoy. The young 2-4 foot stalks can be prepared and peeled to the white core and boiled just like the shoots. The pollen makes an excellent and rich in protein flour that can be used with wheat flour or on its own. Gather the golden flower spikes in early summer and put into a plastic bag to shake off the pollen. Before autumn the flower heads produce a horn like sprout that forms on the tip of the rootstock. These can be boiled for 10 minutes or added to salads. Cattails have a starchy core at their base that can be prepared like a potato. Last but not least during fall, winter and early spring the cattails rootstocks that are buried shallow have collected much starch. This starch can produce lovely white flour. Collect, wash well and peel the outer covering to reveal its core. Crush the core in a pail of cool water to separate fibers from the starchy substance. Remove fiber to allow starch to settle and then pour the water off. Repeat this process one more time and then you will have a nice flour to use or dry it to use at a later date. Always dry the flour and plants very well before storing to ensure freshness and keep rancidity at bay.

It is very enjoyable to do field studies and school yourself of the properties and uses of the wild edible plants that grow profusely in your vicinity. It may be of great importance to you and your loved ones. Enjoy the great outdoors and all it has to offer. Always enjoy the journey….

Stay tuned for more of my wild edible plant writings!

The photographs that accompany this article were taken by me in Indiana, Illinois and Kentucky.

  Foraging for Wild Carrot (Queen Anne’s lace), Sumac and Cattails My study, fascination and field knowledge started early with plants and herbs. I was intrigued by the “Old and Unique” Shaker


I have a tight budget. I’m talking, poverty level budget, and with survival products being over the top expensive, prepping can be really hard. There are hundreds of articles about prepping on a budget. They present us with products that are “budget friendly,” and ideas on what is the best way to prep and save money, but those products don’t fit the budget, those ideas don’t fit the forced lifestyle of the poor. The “Impoverished.”

I’m a college student and currently I gross $8000 annually, and have had to work extremely hard to get up my preps. The following are a few tips to help others with getting ready in a similar situation.

Be Patient

Every step of this process is going to take some time. It’s tempting to blow a whole paycheck on survival gear, I know, but it’s better to show yourself that you can work and wait for what you need. Think about growing vegetables, you can’t pick all of your tomatoes just because one of them is ripe. Everything has to be ready, at it’s own time. Don’t rush anything, even if it feels urgent. We’re turtles, and we will win the race.

Cut it Off

Get rid of what you don’t need. You can use a towel and wash it, instead of using paper towels. Doing dishes is not going to kill you. You don’t need Air Jordan’s if you aren’t on the college basketball team. Why do you have Wifi, if it comes free with your apartment? It’s slow, but it works.

Save money wherever you can, just to save it. Take shorter showers, turn off the water when you brush your teeth, and open the blinds, instead of turning on the lights.

P.S. You’ll be lucky to have running water, let alone internet, when SHTF.

Budget Everything

Budget gas, groceries, rent, savings, insurance, bus fare, fun. Whatever you need to pay for each paycheck, budget. Write how much you can spend, on each item and only spend that much. Seriously. For people like me the most important things are going to be rent, and gas/transportation to make my next check. Write what that costs, and then prioritize and move down the list. Fun is the last thing you budget after you read the next two items.

Budget a savings amount, I save 8% of each paycheck, when possible. After two years of doing this, I have a month of cushion, if I were to lose my job.  After your “Normal” expenses are accounted for, you need to budget in prepping. Just $10 per month. Less if you have less, more if you have more, this is a priority, above going to the movies or the bar; be responsible.

Make sure your math adds up, don’t have a $1,000 spending budget with a $500 paycheck. A good tip for those who are really struggling, is to make payments each paycheck; save a little from each paycheck to put towards your bills.

Learn and Practice

No book you buy can teach you more than you can learn for free, you’re on the internet, use it. Learn to make a fire, learn to make a shelter, learn how to fish and make traps. Learn to do this with just I knife and what nature has given you, because buying a tarp, might not fit your budget.
Learn what is edible and poisonous in your geographical area, how to identify it and how to cook it. I love clover, in salads and as an add in, in curry.

Practice all of this. It’s fun and free. Those two words are beautiful to see in the same sentence. Practice with kids in your family. Practice on a date; firelight and natural shelter in the woods, with some soup boiled over the fire… I say romantic. Run drills, for everything from fire and power outages, to riots and looters.

Don’t be a Gear Snob

I understand the importance of quality, the $1.00 knife you have is better than the $100 knife you would have someday. If you’re struggling to even eat, you don’t need to be turning up your nose. There is a time and place for quality, and yes, one $50 shovel may outlast five $10 Shovels, but we need to make sure that we have a shovel. Search before purchasing, find the best deals, that you can.

Hoard, Reduce, Reuse, Recycle

If it is safe and reasonable to keep using something, do. It saves money. Your backpack for school is your edc, last year’s backpack is your bug out bag. Make do. Use what you have. You can even learn to make a gas mask from a coke bottle and a beer can.

Shop the bulk aisle for groceries and for preps, I watched the store employee pour brand name flour in the bulk bin, once… that’s quality and quality at the cheapest price.

Public Resources

Use the library for information. Use the food shelf to find canned and bagged food to stock pile. Get help, if you’re below the poverty line, these resources are for you. USE THEM. My food stash is all canned goods from the food shelter, I just keep track of the date.

Save up

Now, I mean this as in after you have your basics. Once you have a decent emergency box BOB, car kit, and edc, you can buy more high quality products to replace what you have, especially when something breaks.

Live, Now

I told you how to save money, throughout this article, you should have preps and maybe even some money left over. Save up for something fun, with your leftovers. Life spent only planning for the future, isn’t really a life at all.

I could write books on this, but I have class, a job and a daughter to deal with. I hope I can help even one person in my situation to be ready for whatever the future may bring. Do what you need to do, only you know what you can do.

  I have a tight budget. I’m talking, poverty level budget, and with survival products being over the top expensive, prepping can be really hard. There are hundreds of articles about

I work in a retail store’s warehouse. As anyone familiar with logistics work knows it’s basically just a big windowless box, and the lights are a long way off the ground, with lots of areas of shadow. One of my jobs is to drive order pickers down the rows and raise the platforms up around 40 feet in the air to gather orders off the shelves. Over the summer, I was all the way up at the top rack with my order picker, when I heard an explosion outside the building and the lights went black. The normally gloomy area was now completely dark; I couldn’t see my hand in front of my face. A lot of people told me afterward that if they’d been in my position they would have panicked. I didn’t, however, because I had something on me that I always carry, no matter what: a flashlight.

What had ended up happening was that lightning had struck a transformer across the field, flash-vaporizing the oil inside and cutting power to our whole building. The sad thing was, we only had a couple of flashlights and over forty people were on duty in the store at the time. Luckily I had two on my person and another three in my van, all of them with extra batteries. My coworkers laughed, but I was able to help locate confused customers and start restoring order.

The point of that anecdote was to provide a case study of a very mundane event—a power loss due to electrical storm—that my prepared mindset enabled me to react to in an efficient and helpful way. I got laughed at, sure, for having so many flashlights, but I had more people come up and thank me for being able to lend a hand.

Flashlights are often overlooked as a part of a prepper’s Every Day Carry, especially for beginners. They’re not sexy, like guns and knives and monkey fists. They’re often considered bulky, awkward to use, and unnecessary. But as my story goes to show—and I have numerous others from various jobs and situations—they are far from unnecessary. In fact, flashlights are one of the most useful pieces of prepper gear you can carry on you at all times. You’re far more likely to whip out your flashlight than your gun or even your knife (and I say this as someone who always carries at least two knives and owns numerous firearms) in day-to-day interactions.

So, with all that by way of introduction, what are some good characteristics of an EDC flashlight that will serve well both pre- and post-event? Let’s look at a quick overview.

Characteristics of a Good Every Day Carry Flashlight:

EDC flashlights have to do a few basic things: They have to be easy to carry, take readily available batteries, be lightweight, streamlined, easy to operate, and provide adequate illumination. Let’s break these categories down a bit.

The best flashlight is one you have on you at all times.

An EDC light that’s easy to carry is one that you are going to have no second thoughts about throwing in your pocket or purse. It’s kind of like the “Always Gun” concept for flashlights. For those of you unfamiliar with the Always Gun concept, it means that even if you have a bigger, more powerful gun for specific situations you still need a gun that you will always carry, meaning it’s small, light, and easy enough to use that you won’t leave it home. With a gun this could mean you carry your Ruger Redhawk when walking in bear country, but a Ruger LCR when you’re at work in the city. Applying this to flashlights, this is the difference between a big MagLite 4 D-Cell flashlight that you keep by your bed and don’t take anywhere, and the little MiniMag penlight you keep on your keychain.

Readily available batteries should be self-explanatory but for a surprising number of people it’s not. The current rage in prepper products is for all things Tacti-Cool. These items have the appearance of being for high-speed operators, but are in reality bulky hindrances designed for mall ninjas. Case in point: more and more modern flashlights come with rechargeable batteries. I’m not against rechargeable batteries per se, but I do think they make for a bad EDC choice. Many of these batteries require USB charging cables, meaning they need to charge off of a computer or mobile power pack. This may be fine for a flashlight you keep in a truck or charging on the nightstand, but it’s not convenient to carry when prepping for life’s little (or not so little) emergencies. If you don’t carry any spare batteries on you (which you should, since a single change of batteries for a good EDC light adds negligible pocket mass and weight) or if your batteries have expired or gone bad, having very common batteries allows you to either swap supplied with someone else who is similarly prepared (this is why my sister and I carry flashlights that take the same batteries, since we work together), or allows you to buy them quickly from almost any retail or convenience outlet. It also allows you to help others if their light has gone out. Recently I tried to help a man whose flashlight was on the blink, but couldn’t because his light was highly specialized and only took one specific kind of battery I not only didn’t have but had never heard of.

Goldenguy 5 Pack Mini Cree Q5 LED Flashlight Torch 7w 350lm Adjustable Focus Zoomable Light – Great stocking stuffer.

A side point to keep in mind, where practicable, is to keep as much commonality between the power sources for your EDC flashlight and any lights on your EDC handgun or go-to home defense long gun. This is not a hard and fast rule, and often not applicable, but it will streamline supplies if it is possible. My EDC flashlights and the lights I’ve attached to my Ruger 10/22 and Mossberg 500 20 gauge shotgun (I live in town so need lower-powered firearms for home defense) all take the same batteries, meaning I can supply them all from the same stockpile.

Weight is a major consideration for an EDC flashlight. Most of us can’t go around in military web gear or with assault packs on our backs. We need something that we can easily fit into a pants pocket or a purse, and that isn’t going to slow us up, pull our pants down, or give us a sore shoulder. I have never weighed any of my EDC lights to get an exact measurement, but I know that they all come in at only a few ounces, even with batteries.

Another consideration is a streamlined design. Lots of lights look cool and techno, or tactical, or retro, or whatever floats your boat. But when selecting an EDC light, you have to keep in mind what kind of clothing you’re most likely going to be wearing and what kinds of activities you will most likely be doing while carrying the light. Believe it or not, what kinds of work you’ll be doing actually has a lot to do with what kind of light you select. That’s why I have a modest array of lights I can choose from depending on what I’m going to be doing. If I’m going to be mostly sitting at a desk or riding in a car, then I don’t need to worry much about a light that’s easy to turn on in my pocket because I won’t be moving my leg much. On the other hand, if I’m going to be out in the woods, at work, or on the range, where I’m going to be doing a lot of moving, squatting, or bending, I’ll carry a different type of light that isn’t so easy to turn on by mistake. There’s nothing worse in the world of flashlights than to pull your light out of your pocket and not have it shine because you’ve accidentally worn down the battery. So pick something that will fit within your lifestyle and the kinds of clothing you wear. If you wear cargo pants you’ll be able to get away with one design, skinny jeans or dress pants will require a different approach.

One important feature when thinking about design is the activation method. There are two main activation types on flashlights: Twist and push. Twist-type flashlights require you to twist either the head or the end cap to get it to turn on. I don’t personally like them because they’re almost impossible to use one-handed, but their advantage is that they seldom if ever turn on in your pocket.

Push flashlights can be further subdivided into standard push lights—where the button is up near the head of the light—and tactical, where the button is on the end cap or somewhere near it. Obviously this is a generalization, there are tactical lights with the push button near the head, and non-tactical lights with end cap activator. But for the sake of discussion this broad classification will work. By and large I recommend a tactical-style light with a somewhat recessed end cap button, as this is the hardest to accidentally activate. Standard types are the easiest to burn out through careless pocket activation, but there are some with good stiff buttons that are more resistant to this.

Easy to operate is fairly straightforward: get a light that fits your needs and that you can easily grab and turn on without thinking or looking. Odds are that you’ll be in the dark when you need it, and fumbling for your light’s on/off switch is the last thing you want to be doing, as you’re more likely to drop it than anything else.

One other thing to keep in mind when considering ease of operation is the bulb type. I am a fan of LEDs because they never get hot, do not need to be changed, and will not break so easily if dropped. However, if you have very sensitive eyes and will need to be using the light in close proximity to your face, such as in very tight quarters or inside an engine or mechanical assemblies, you may want to consider a standard incandescent flashlight. While they do not last as long and do not put out nearly as much light, they are gentler on the eyes.

Personally, I like a high-lumen light that provides a very bright beam over a short, wide space.

Lastly, I want to touch on adequate illumination. This is a tricky subject because it’s going to be different for everyone. The illumination a flashlight offers is measured in lumens. Without going into the physics definition of what exactly a lumen is, this unit is used to measure and compare the brightness of a flashlight’s beam. A higher number of lumens will be a brighter beam, and most likely reach farther. However the latter is not assured, as other factors including the lens material of the flashlight, mirrors inside the light head, the condition of the lens, and a few others dictate exactly how far a beam will reach.

Personally, I like a high-lumen light that provides a very bright beam over a short, wide space. This is because I’m usually using the light in cramped quarters or indoors, so I don’t need it to illuminate very far. If I were going to be spending a lot of time in the dark outdoors I’d consider something with a longer beam. Take into consideration how much light your eyes need to function. My sister carries a relatively weak flashlight because she has very strong eyes and can practically see in the dark anyway. I, on the other hand, have very weak eyes and need a lot of light to do anything, so I carry a much brighter light most of the time. Another criteria is the type of beam you want. Depending on what you think you’re going to need the light for, you may want a very tight, long-range beam, a broad, well-defined inspection beam, a diffuse beam from the many smaller lamps of a pocket work light, an adjustable-focus beam, or yet another variety. Choose your light based on your normal environment and the kinds of things you expect could go wrong there. I personally work indoors and tend to be in tighter quarters, so I want a wider, short-range beam to illuminate more of my immediate surroundings and not cast so many shadows.

Earlier I mentioned flashlights getting the cold shoulder in favor of guns and knives and other defensive gadgets. While these tools are more effective in a truly deadly confrontation, I would be negligent if I didn’t address the defensive use of the flashlight before I close. A bright, easy-to-use flashlight ready on your person can be used to shine in a nighttime attacker’s eyes, blinding him and either giving you time to escape or draw a more effective weapon. Just one more reason to carry some form of pocket torch.

A flashlight may seem unnecessary in our modern world of 24/7 ceiling lights and power at the flick of a switch. But even without a major disaster it’s still possible to be left in the dark for minutes, hours, or even days. For the purpose of brevity I didn’t go into all the further points to consider when choosing a flashlight for your home or vehicle, but hopefully this short piece helped provide some items for consideration next time you’re looking over your EDC load.

I work in a retail store’s warehouse. As anyone familiar with logistics work knows it’s basically just a big windowless box, and the lights are a long way off the