Urban Survival Kit
The remembering of the events on 9/11/2001 that killed thousands is just barely in our rear-view mirror. This day fortunately passed without any incident. That day in our past saw so much death, chaos and confusion many of us haven’t experienced in our lifetimes and hopefully never will again. It was a historical day for all manner of reasons beyond the tragedy of lives lost through terrorism or sacrifice. It gave us a glimpse into the very definition of pandemonium live on TV – played out in real-time before our unbelieving eyes. As a nation, we watched in horror as first explosions rocked the towers, then the catastrophic collapse of two giant skyscrapers enveloped a city in toxic dust and sent untold thousands running for their lives.
A terrorist attack on a large city is still statistically one of the least likely events you would ever be affected by, but since that day people have come to understand some of the risks of being caught in an urban disaster differently. There are different realities in an urban environment that might require an alternate set of plans for your life. If you started to plan for an urban survival kit, what items should you consider?
Urban survival kit list
An urban survival kit is one you could carry with you and possibly stash at your work location assuming you have a safe place to go to outside the city. If you live full-time in the city, your needs for a kit might be similar but if you plan on walking out and not coming back, a Bug Out Bag might be more appropriate.
I work in a small city in a building in our downtown area and if an event like 9/11 happened in my city, I would want to have some items on hand that might allow me to escape with my health intact or possibly to render aid to someone. The items in the urban survival kit below are just ideas. Your reality might require additional survival items altogether.
I am going to discuss items that could assist you if an event like 9/11 happened in a city you were in. A disaster has impacted the city and you work in an office building downtown. Communications are down, services are down and your goal is to make it out of your building, out of the city and back home as quickly as possible.
The basics
Water – Naturally you will need water so a liter or so, maybe a couple of plastic bottles of water would meet your needs until you either get home or to a location with a source of water you could filter and resupply. Even in 9/11 the world didn’t stop. Stores were still open and you could still make purchases but this initial supply will allow you to get as far away from the crisis as possible before you have to stop and think about additional supplies.
Plastic water bottles can be reused and are lighter than other options, but a stainless steel Nalgene bottle can also be used over a fire to boil water if you really are in dire straits.

Pack down to storage pocket-size. Ultra lite-weight Waterproof and breathable. Beats carrying an umbrella.
Food – This should be something that requires zero preparation. Something like high calorie energy bars would be best. You don’t want to have to worry about boiling water (or carrying cookware) to re-hydrate your Mountain House Chili Mac, you want to get home. Energy bars take up relatively little space, you can eat them while you are walking and they will tie you over until you get to a safer location. A good option would be Bear Valley Pemmican Bars. They have 390 calories each and no chocolate to melt all over the place. Have enough for the amount of time you think it would take you to walk home and double that. You could face detours or be slowed by injury.
Shelter – You could be forced to spend the night outdoors, or trapped in a subway station or airport. For urban survival you wouldn’t need to worry about packing a tent. There should be millions of places to find a shelter you can get under. You do need to worry about warmth though. In the cooler months plan for a set of base layers, a fleece and a water proof shell. These don’t have to be expensive and the high-dollar hiking shells aren’t worth their price in my opinion. You can get a waterproof jacket from Frogg Toggs for less than $20 that is incredibly light so it takes up no space in your urban survival kit and it can keep you dry. It also doubles as a windbreaker so in combination with your base layers and fleece you should be warm for a walk out of the city.
 A urban survival kit can give you the survival items you need to make it out of the city fast.
Summer conditions require a different shelter and that is usually from the heat. A good lightweight hat that keeps the sun off your head will work. I would also pack a lightweight long sleeve shirt. This may be the last thing you want to wear if it is hot, but if you are a woman who is in a sleeveless dress in the middle of summer a shirt will keep the sun off you and offer a little more protection.

Simply touching an attacker will deliver a high voltage shock causing loss of balance and muscle control, confusion, and disorientation bringing him to his knees and making him incapable of further aggressive activity
Shoes are a big deal for me probably because for some reason I have been blessed with the tenderest feet in the world. If I had to walk very far barefoot I would be hurting. I know some people who can walk barefoot over gravel. Not me so good footwear is a priority for me for that reason. In addition, you may be at work with dress shoes and they aren’t suited for long walks. Have a good pair of shoes that will first allow you to walk for days possibly and protect your feet. You could have to walk cross-country. The weather may be inclement so have shoes that will get you home no matter what. I wear either leather boots with good soles or hiking shoes every day. I know some people who wear flip-flops and I would hate to see them try to climb their way out of a collapsed building or pile of rubble with nothing more than those on.
Security – I carry a concealed firearm with me just about all of the time. If something happens I will at least have a 9MM for protection. In a true disaster, desperate people might be out to harm you for any one of a million reasons. Having a means to defend yourself is an important, but often overlooked necessity. If not a firearm, because for some people that isn’t possible, a high power Taser that can shoot out 53,000,000 watts could incapacitate someone quickly. Barring that, Police Strength pepper spray is an alternative. Sabre has a compact size that gives an advertised 35 shots. That could get you through a lot of bad guys. Going down the list a good survival knife is a fall back item which has other uses, but the last thing I want to do is get into a knife fight with anyone.
Health – Running from disaster can lead to injury or you could have been injured in the attack. Simple first aid items can help you stop bleeding or wrap up wounds long enough to receive care when you are in a safe location. Obviously, if you are seriously injured, I don’t expect any of us will be packing a full service medical kit in our urban survival bag.
You can pack a few of the following items that could help in the health department.
- N-95 masks – Remember the giant dust clouds when the buildings fell? These could be very useful in a similar situation or offer some protection against other threats.
- Nitrile Gloves – This one might not make sense because our goal is to get home as quickly as possible but a few sets of nitrile gloves weigh almost nothing and could be a disposable option for messy situations.
- Pain Reliever – A good pain reliever could help with aches from injuries or sore muscles from carrying loads.
- Blood Stopper –This is a compound that actually stops bleeding. Used for serious wounds to create a seal. Adventure medical kits created a Trauma Pack bandage with Quick Clot in it so you can wrap the wound, the Celox will stop the bleeding and you can keep on keeping on.
- Sunscreen – If you are forced out in the middle of summer and you aren’t prepared to deal with the effects of too much sun, you could end up with severe burns.
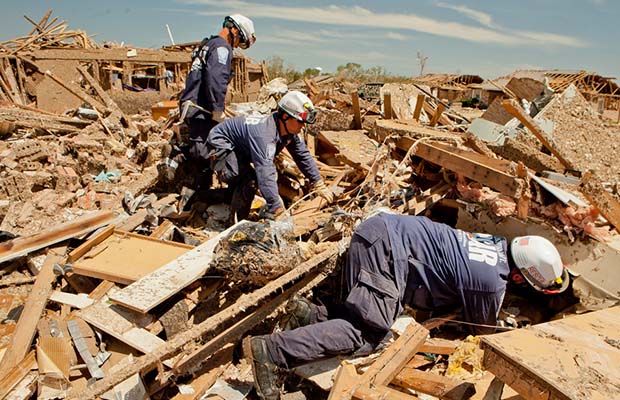
 In a disaster or crisis you could find yourself running for your life. Will you have the gear you need?
Hygiene – I wouldn’t worry too much about the hygiene department assuming you aren’t dealing with disease or dead bodies here and assuming you can make it to safety. Spare toilet paper might be a good item to pack just remove the cardboard insert out of a half used roll and squish it down. Put this in a freezer bag to keep it dry. Hand sanitizer isn’t something I use, but in a disaster situation where I was worried about disease and I couldn’t wash my hands I would use this before eating.
I wouldn’t bring deodorant or a toothbrush although I know comfort items are really important to some people.
The X Factor
Many of those items above could have a home in either your Get Home Bag or your Bug Out Bag, but what other items could you need in an urban survival situation where your goal is to get home as quickly as possible?
 The Stanley FUBAR can get you out of a jam or be used as a weapon in a pinch.
Pry Bar – A simple pry bar can be a lifesaver. You can use it to pry open vending machines to get that lifesaving candy bar fix or do open elevator doors, stuck filing cabinets… A million uses and if you want to go all Braveheart on someone, a prybar like the Stanley FUBAR can be used as a weapon in a pinch.
Bolt Cutters – This may not be a realistic tool for some of you, but a pair of mini-bolt cutters can open doors that were previously closed. Pun intended. If you goal is to get home, maybe these aren’t needed but I can imagine a lot of potential uses depending on how bad the disaster is.
Eye Pro – You want to protect your eyes and a good pair of swimming goggles can keep you safe from the effects of Tear Gas or dust. You can even get them in pretty colors too. If that is too silly for you, there is always the high-speed ESS Military issue protective glasses. These will protect you from debris, but they aren’t sealed around your eyes. You will probably look much cooler though.
Gloves – Gloves should be available to you pretty much in every bag you have. These can be good leather gloves or something like Mechanix Gloves. They will protect your hands from cuts, heat and abuse.
Small Roll of Duct Tape – Do I really have to say why? Don’t pack a whole roll because you don’t need that weight. Just wrap your water bottle or a lighter a few times for back up repair capability.
Headlamp – A good bright headlamp, beats a flashlight every time for hands free sight when it’s dark.
Bandanna/Shemgah – These can be used for bandages, face-masks or protection from the elements.
Loud Whistle – A simple whistle is great for getting the attention of anyone you want to find you, like a rescue team if you are trapped.
Sticky Notes and Permanent Marker – Useful for leaving notes for people letting them know where you are or where you are going.
USB Battery Charger – This adds some weight but if your phones are still working, this will allow you to recharge your phone without the benefit of an electric socket. Even a small 3300mAh USB Battery charger can fully recharge your smart phone.
Maps of your city – Yes maps. What if you can’t take your normal route home? What if you are forced to go around due to a giant fire? Having even a simple map will allow you to chart out an alternate route if you are forced to. Another option mentioned on another post was to take screenshots of your city or route in Google Earth and store them on your phone as a reference.
What bag are you going to carry your Urban Survival Kit in?
So you have all of this gear stocked and ready. It could go in the bottom of your locker at work or in a desk draw, but you need something to carry it all in. There are a million bags out there and you should select a bag for your urban survival kit that not only gives you room for your gear but is comfortable, able to withstand a little abuse and blends in to the rest of the crowd so you aren’t targeted for your belongings.
Here are a few sample bags that should do the job nicely. Make sure the bag you choose fits and is comfortable to you.
5.11 Rush 24
The 5.11 bag is my get home bag that remains in my vehicle. If I can access my truck but am unable to drive to safety, I will use this bag and transfer any gear if needed. These are incredibly tough bags but do look tactical which is certainly by design. I have seen many guys rocking these bags though so I don’t think you would get too many looks if you brought this to work.
 Rush 24 by 5.11 Tactical
Black Diamond Bullet 16 Backpack
Versatility in a sleek, trim pack, the Black Diamond Bullet 16 panel-loader is an excellent rig for off-trail or high-mileage scrambles which would serve you equally well in an urban environment.

CamelBak Cloud Walker 18
The Cloud Walker 18 hiking pack sports a clean, technical aesthetic with features designed to keep all your gear organized. The main compartment is accessed via an asymmetrical zipper that enables easy access and prevents cargo from spilling out when fully open. In addition to the 2 liter Antidote Reservoir you get two mesh side pockets for keeping essentials close at hand.

Osprey Axis Daypack
Osprey makes excellent bags and I have this pack’s older brother, the Atmos AG as my bug out bag/hiking bag. Excellent quality.

Tactical Taylor Urban Operator Pack
The Urban Operator has a large main compartment, medium-sized front pocket with an admin organizer. Fits most laptop computers up to 17″, water bottle pocket and contoured padded shoulder straps. 1,836 Ci volume. It’s a little tactical looking but nothing too out of the ordinary nowadays.

So there are my thoughts on some good urban survival kit items. What do you have in your bag? Do you commute to work in a large city? What are your plans if disaster strikes?
The remembering of the events on 9/11/2001 that killed thousands is just barely in our rear-view mirror. This day fortunately passed without any incident. That day in our past saw