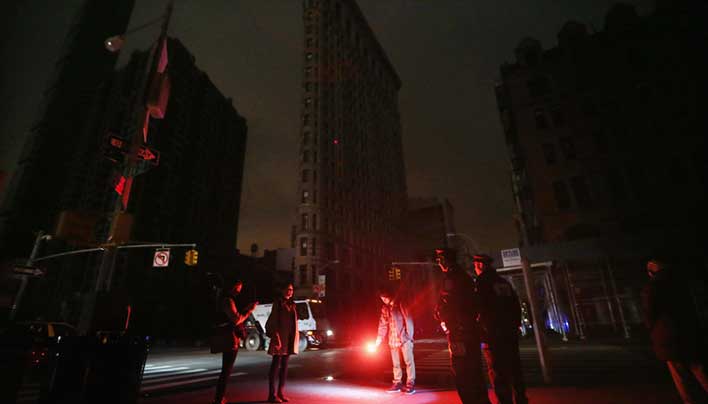
Home2020November

When non-preppers think about how to survive the end of the world, they usually think about hoarding supplies, finding a secure place to store them and hunkering down to wait it out. It’s a nice fairy-tale, but in the real world, when SHTF, true survivors have to know how to hit back.

While it is important to stock up on supplies that you might need to survive TEOTWAWKI, having all the supplies in the world won’t help you if you can’t get to them when an apocalypse event strikes. What about defending all your supplies from desperate people trying to get them? What about protecting yourself and the people you care about? What if a flood or fire break out and you end up stranded with nothing? Even if you do manage to make it back to your supplies and feel safe, what happens when the inevitable occurs and your supplies run out?

Fitness is the First Step to Survival

The truth is, prepping is about skill and knowledge, first and foremost. Knowing what matters most is the true key to apocalypse survival, and having the skills to do whatever it takes to keep going isn’t about buying stuff; it’s about building your skill-set. That’s why the first step in learning how to prepare for the end of the world is always getting your body ready to handle whatever might come your way. In reality, every moment is an opportunity to train for the end of the world.

The Elements of Physical Fitness

Diversify your training to see the greatest results.

Endurance. Strength. Flexibility. Creativity. These are the essential elements of apocalypse survival and training. The good news is that there are plenty of opportunities in your everyday life to increase your overall capacity to execute these skills – if you make the time for it. Here’s a quick guide on how to physically prepare for SHTF:

  • Endurance. There’s just no way to build your stamina without getting after it, every day. Endurance is quite literally a marathon sport. Even if it starts with a simple walk, find a way to get moving and keep moving every day. Aim to continually increase the amount of physical activity you do, the kinds of activities you try and their level of difficulty.
  • Strength. Bodyweight exercises are a great way to strengthen and tone without a ton of equipment, while there are a range of targeted activities like CrossFit and Krav Maga that can help you home in on and improve your weakest skills.
  • Flexibility. It may not seem very tough, but staying limber is essential to staying alive. Stretch while you strengthen, and you’ll be able to do more and recover faster after intense physical activity.
  • Creativity. Diversify your training to see the greatest results. Try different combat methods and improvise with the environment around you to identify your strengths and weaknesses while making it easier to respond effectively, whatever your situation or surroundings.

Apocalypse Training Techniques

Learn how to defend yourself in a lethal situation without a weapon.

Ultimately, fitness training for SHTF situations is about applied knowledge, not book learning or simulations. The people you’re fighting against when SHTF won’t follow the rules of sparing or good sportsmanship. At TEOTWAWKI, you’ll be fighting for your life with whatever you have available. That means you need to be prepared to fight on all fronts.

Train in three ways for maximum effect:

  • Functional Training. Use what’s around you to build practical strength, like tires, ropes and more. This idea is the cornerstone of CrossFit and parkour training.
  • Combat Training. Learn how to defend yourself in a lethal situation without a weapon. Mastering a martial art that’s specifically designed for tactical fighting like Krav Maga can be your greatest protection in an apocalypse situation.
  • Tactical Training. Firearm training is a no-brainer. Having a gun won’t help you if you don’t know how to properly use it or don’t consistently practice and improve your shooting skills.

When deciding how to build your skills in each of these three areas, think about the ultimate goal of any technique you learn. Your primary objective is to survive, not simply one-up your assailant. Find tactics that will help you stay one step ahead of an opponent both mentally and physically. Approaching your training this way is how to survive the end of the world. Survival isn’t about winning a trophy or a championship belt. It’s about making it out alive.

Tactical Survival Training for TEOTWAWKI

Focus on developing the kind of skills that will serve you under pressure when preparing for the end of the world. PHOTOGRAPHER: Lauren Harnett

If you really think about it, it makes sense to focus on developing the kind of skills that will serve you under pressure when preparing for the end of the world. You won’t be facing rainbows and words of encouragement in the end of days. When training with firearms, spend the majority of your time building and practicing fundamental skills so they become natural reflexes when you’re fighting for your life, rather than focusing on tricks and complicated techniques that will take time to recall.

The tactics you have to think about are the ones that will do the most damage when it’s time to make a split-second decision in a fight or flight situation. It’s better to stick with tactical techniques that complement what naturally happens in your body and brain when adrenaline spikes. This means sticking with methods that retain your accuracy and control, even when you’re under serious stress.

Practice the Basics. Then Practice Differently.

The tactics you have to think about are the ones that will do the most damage when it’s time to make a split-second decision in a fight or flight situation.

The first key to effective firearm use is mastering the basics, including your stance, grip, target acquisition, sights, trigger control, follow-through and ability to disarm an opponent. Here’s a quick breakdown of each and what you should focus on to improve your fundamentals.

  • Power Stance. Improving your overall fitness level will help you find a stable, mobile and balanced stance when shooting your gun, but it takes practice to find the power stance that will protect you from recoil, while letting you stay agile, aggressive and in control.
  • Grip. Make your grip firm, tight and with your thumbs curled down. Firearm expert and master trainer Massad Ayoob calls this the “crush grip,” and it’s one of the five elements he considers most crucial to have in your arsenal before firing a gun (Ayoob, 2012).
  • Target Acquisition. This skill covers the rapid vision transition that must occur after you’ve spotted a target and before you shoot. Practice adjusting the focus of your eyesight from a natural target to your sights quickly so you program the movement into your eyes’ muscle memory.
  • Sight Alignment and Picture. Two essential yet separate elements of proper shooting, sight alignment requires that your front sight be centered between the rear sights with your rear sights horizontally aligned, while sight picture is the relationship of your sight alignment to your target for accurate execution. Understanding the relationship between sight alignment and picture takes practice and depends on your individual gun.
  • Trigger Control. Your grip will go a long way toward improving trigger control, which is the act of pulling the trigger without pushing the nose of the gun up or down, jerking the trigger or otherwise disturbing your aim. Smooth and consistent squeezing is key.
  • Follow-Through and Reset. Follow-through is about squeezing the trigger until it stops moving, while reset is about getting the trigger ready to fire again. After your follow-through, practice releasing the trigger to the point of reset and firing again. Sometimes, the trigger break and follow-through positions are the same, sometimes not. Your trigger reset is rarely the same position where the trigger rests when untouched. Practice to determine both the follow-through and reset positions of your specific guns.
  • Disarmament. Whether you’re facing a knife, gun or concealed weapon that you can’t identify, you have to know how to disarm an assailant coming at you with a weapon – not only to protect yourself from other people, but also to anticipate how someone else might try to disarm you and prevent it.

There are a few simple drills that can help you get the basics ingrained in your brain, round out your shooting skills, and give you the confidence and versatility you need to shoot well when SHTF. Remember to practice shooting both moving and still targets, work with both two-handed and one-handed grips, and incorporate movement into your tactical training. If you aren’t shooting, move.

You should test out different kinds of firearms, including rifles, shotguns and handguns, and practice drawing and shooting them all until you find the weapons that work best for you. Your gun will do you no good if you can’t draw it fast enough and shoot it accurately. Practice in low light environments, try shooting multiple targets to improve your agility, and practice safely shooting from behind cover and concealment. All of these techniques can give you a huge tactical advantage in a lethal confrontation.

Mental Readiness: The Real Key to Apocalypse Survival

Having a strong mind and body and the right functional, combat and tactical training will go a long way to getting your ready for TEOTWAWKI – much more than stockpiling supplies can ever do.

Mental preparation is about conditioning yourself to handle the inevitable emotions during an apocalypse. Fear, concern, hopelessness, helplessness, defeat. Being better prepared than most can itself be a liability, since you can’t save everyone and trying to could ultimately end your own life. How will you determine when to stand firm, when to offer help and when to move on?

Mental preparedness doesn’t mean being weak. In fact, working on assessing, identifying and controlling your emotions will improve your ability to stay assertive, aggressive and in control instead of breaking down in the face of disaster. Often, appearing aggressive is enough to keep weaker would-be threats at bay, without the risks of direct engagement.


Having a strong mind and body and the right functional, combat and tactical training will go a long way to getting your ready for TEOTWAWKI – much more than stockpiling supplies can ever do. I hope this article gave you a good understanding of where to put your focus to really prepare for SHTF. If you get after it and train to improve a little each day, you’ll be better prepared than most when the end of the world arrives. Good luck.

When non-preppers think about how to survive the end of the world, they usually think about hoarding supplies, finding a secure place to store them and hunkering down to wait

Are you afraid of the dark? Me either, but darkness brings about a whole new set of challenges you don’t need. When the power goes out and it happens at night-time, I can still get around my house just like most of you could as well, but not as quickly as I do with light. I can still make it out of my bedroom and down the hall to the kitchen, but navigating familiar paths isn’t really crucial. Light is needed for a lot of things more important than walking down the hall and having a plan for light if you lose power is another important step in becoming prepared for any emergency.

Since the dawn of time, man has been looking for new ways to shed light into the darkness. Light dispels our fears, helps us search for things and gives us better visibility for certain tasks. If you don’t already, you need to have back-up lighting for your home, bug out vehicle and person so that you won’t be hampered in a low or no light situation. There are several low-cost options that we will be discussing that can allow you to see through the darkness when you need it most.

Candles

Romantic isn’t it?

Candles are probably one of the oldest forms of light. They are simple to use, require no electricity, and I know there is something special about eating by candlelight, but they do have drawbacks as well. Candles do not put off much light, so you will normally need more candles in a room to have any decent light output. A single candle can light things up enough for walking around and simple tasks, but even reading a book with a single candle could strain most people’s eyes.

Candles also have a nasty habit of catching things on fire. Obviously, we are talking about an open flame here and candles can catch anything that falls into their path on fire. If you have curtains for example that blow and touch the flame, you could be in for a rude awakening. For this reason, candles should be carefully considered for your primary lighting needs and great care should be taken in their use and position in relation to everything else. In our house, we have candles, but they are not something we allow the girls to walk around with. Candles also put off smoke and soot so they aren’t the cleanest form of light

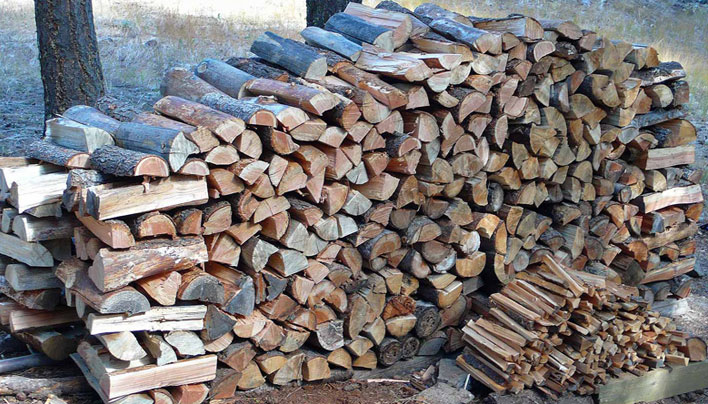
You can also cook or warm up food with candles and they do put off a good bit of heat so in a colder situation this can have a double benefit. Candles can also be made from beeswax so if you keep bees you can be set for life in your own candle making materials. I wouldn’t plan on this unless you are already making candles, so have a supply of your own before you need them, unless you are planning on taking up beekeeping soon.

In our house we have a few different options for candles. When I started prepping, I was out at the grocery store and saw the big candles with the saints printed on the outside of glass containers. I am sure someone will illuminate me as to what these are for; I think it is a Catholic religion practice, but to me, these were survival candles! I quickly bought a few of these for back-up light. Then I went to Wal-Mart and bought about a half-dozen decorative candles about the size of a coke can. Lastly, I found a site online that sells candles in bulk. I believe it may have been Candles 4 less and I got a whole box of 15 hour candles. These fit nicely in a box along with the rest of my supplies.

Lanterns

Hurricane Lanterns

For me lanterns make the most sense for a heavy-duty light, but they are not without issues either. There are a few different types of lanterns that I have or have considered for light if the power goes out. The first type is the old style oil lamps and you can get these from a lot of places like Lehmans. Actually, now that I look at the prices again, they have come down and there are a lot of good options for oil lamps  . Oil lamps can put off much more light than a candle and have a sturdier base. If you have a reflector, the light is magnified slightly and makes a better choice for a whole room light. Also, with oil lamps, you can walk around a little easier with them since most have a guard over the flame to prevent wind from blowing directly on the light.

Oil lamps too are dangerous potentially if they are dropped or the flame touches something else. I would recommend these maybe in situations where children aren’t involved or ensure great care is taken using them. I know they have been used for years, but they have also started fires for years, so just a simple word of caution.

Kerosene lanterns are another good option, but they like propane need to be vented. One good thing about propane is that you can use the same fuel you have stored already for your Kerosene heater.

Propane lanterns are incredible and I have one that I use for camping and as a backup for power outages. The light these things put out is incredible and you can even cook on them they get so hot. Propane needs to be vented though so you don’t want to use one of these in your house without proper ventilation. I have purchased a good amount of additional propane cylinders and mantle wicks so that I can use these for a good long time if needed. This lamp is my ideal dual-purpose light that is safe enough (with those exceptions I mentioned) if your power goes out or if you are out in the woods.

With any time of flame based lighting it is important to have proper fire extinguishing equipment close by in case of any accidents and I would never recommend leaving these lit when you are sleeping.

Flashlights

If you haven’t yet read our post on tactical flashlights, we cover a lot of ground in there, but the safest light you can have is a good old trusty flashlight. Flashlights come in all flavors and sizes and we have a couple of different options for the different uses each one needs to fill.

Hands free lighting with headlamps.

For hands free operation, if you are going to be moving around I have to recommend a headlight. Headlights have been around for years in various configurations. You might have the image of a coal-coated miner walking around with the big light strapped to his head with the big square battery strapped to a black hard hat. They have come a very long way.

Headlights now are extremely light and much more powerful thanks to LED light bulbs. I have Petzyl headlamps for everyone in my family and they were perfect for camping or hunting. Most use 3 triple AAA batteries so you aren’t stuck with hard to find battery needs. The ones I have adjust the tilt so you can easily shine the light on your lap if you want to see what you are eating or out ahead to light up the trail as you walk. They also have three modes (low, high and strobe) for different lighting situations. They are held on your head by a comfortable elastic type of band that isn’t too tight and is easily adjustable. I take mine with me whenever I am camping like I said and also on long car trips, because if I have to change a tire in the middle of the night, I need both hands free. You can wear these around the house to do anything and when you aren’t using them, just pull them down around your neck. You can also take them off and shine them at the ceiling if needed for a really nice ambient light.

Regular hand-held flashlights certainly have their place as well and we have several different types and styles of these. I recently ordered some incredibly cheap led lights that are less than $7 and have an output of 300 lumens! I am testing them now and will write-up my review after I put them through some more paces, but you can’t beat a light like this at that price. Is it waterproof and shock-proof and able to be driven over by a truck? I don’t know but at $4 I can buy a whole bunch of these lights and still have money left over for a box of MRE’s.

Batteries are an important consideration I’ll admit with flashlights, but you can purchase rechargeable batteries and a handy solar recharger to keep you supplied with plenty of light for a long time.

Solar Powered

Solar powered lights are great alternatives, but you need the sun obviously. These lights are going to need charging and put out much less light than you would expect. I have heard of people who plan on using their sidewalk lights if needed and I think that is a creative use, but I wouldn’t count on that for the best alternative lighting you can have for your family. Great in a pinch, but not the best option in my opinion.

Hand crank

I am sure most of you have seen the hand cranked flashlights for sale. These have a small motor that is activated when you either crank a handle like a fishing rod or squeeze a lever like a stress ball for a long time. This sounded great to me when I first heard about it, but after trying to use these a couple of times, I decided that they aren’t going to work for me. I am all for exercise, but not when I need light. When it counts, I want bright light that can help me see what I am looking for, or illuminate what I am trying to do. The hand-crank lights are novelties for me that just aren’t the best solution.

Hopefully, this gives you some ideas on lighting options for emergency situations and how you can be prepared to keep the lights on even when the power is out.

Are you afraid of the dark? Me either, but darkness brings about a whole new set of challenges you don’t need. When the power goes out and it happens at

From buying it to burning it, knowing a few things about firewood can greatly help the productivity of your wood stove or fireplace this winter. Here are tips culled from the nonprofit Wood Heat Organization to help you prepare by knowing what type of firewood is best.

What makes for good firewood?

When determining which types of firewood burn better, it’s important to remember some high school chemistry and the fact that all trees, no matter their species, are made of pretty much the same chemicals. What makes for good firewood, though, is density and moisture content.

Woods that are harder or denser, like oak, hickory and ash, typically burn longer and produce hotter coals. And, a low moisture count (using wood that’s dried properly, or “seasoned”) means you’ll burn your fuel with better efficiency and avoid overly smoky fires or excessive creosote buildup in your chimney.

Of course, many hardwoods are rare, protected or difficult to come by in certain regions. When comparing available types of firewood to purchase, just keep in mind that hickory, oak and maple burn longer and hotter, making them great choices for winter’s coldest months. In contrast, poplar, pine and spruce burn more quickly and make for better fall and spring woods because, according to the Wood Heat Organization, they make heat control easier and don’t overheat the house.

Talk to neighbors with similar stoves and homes to find out how much wood they burn over a season. And ask for recommendations on reliable suppliers of wood.

What is a cord?

Officially, the measurement for wood is called a “cord.” A “full” cord is an 8-foot-long stack that’s 4 feet tall and 4 feet wide, but since 4-foot pieces aren’t typically what people use in the fireplace or wood stove, firewood is rarely sold in that size, which can make purchasing firewood confusing.

Adding to the confusion are the various terms like “face” cord and “furnace” cord that are sometimes used to describe a variation of a full cord (where the piece lengths are shorter than four feet).

Of course, stocking up on firewood is an investment, so you want to understand exactly how much wood you’re getting and how to compare various pricing. The Wood Heat Organization offers a formula to help you do that, and suggests avoiding wood that’s not a variation of a full cord (that means, no buying a load from the back of a pickup truck).

Stacking firewood the Holz Hausen way.

How to stack and dry wood

When your wood is delivered, have pallets, railroad ties or other stable material ready to stack the wood on and get it off the ground. Wood left on the ground in a disorganized pile won’t get enough air-flow to dry sufficiently. To properly dry your wood out — what’s called “seasoning” — the Wood Heat Organization says to select a place where the sun can warm the wood and wind can blow through it.

Cross the wood in alternating patterns per level as you stack it. Take your time to pick good, level pieces as you approach a corner or endpoint. This crisscrossing technique allows for both more stable woodpiles and free movement of air.

By leaving the wood to dry for at least one summer season, for a total of at least six months, you can likely achieve the 15 to 20 percent desired moisture level that the Wood Heat Organization says is ideal for firewood. (That may vary depending on your specific conditions and the species of wood you’ve chosen.) A good sight check is to look for crack marks at the ends of seasoned logs. Of course, all this might mean buying wood now for use next fall.

Take wood from shed to stove

Typically, most people don’t like tramping through the snow late at night for firewood. Nor do they like bugs or mold spores in their homes from wood left piled up indoors. That’s why the woodshed was invented.

Today, it’s any covered space that’s close enough to a basement or kitchen door where a wood-stove is typically located. While it’s fine to have some wood in the house ready to burn, it’s more advisable to keep your seasoned firewood in a woodshed. There are even building plans available for woodsheds that are as creative and stylish as they are solid and dry.

We wish you a winter’s worth of warmth, and hope you follow best burn practices. Just remember to keep a well-maintained stove and chimney to maximize savings, safety and efficiency.

Woods that are harder or denser, like oak, hickory and ash, typically burn longer and produce hotter coals. And, a low moisture count (using wood that’s dried properly, or “seasoned”)

Let me start by saying this: I am not a fan of hanging fifty-million things and a coffee maker from my AR or upgrading a $200 10/22 with $1K worth of furniture. It’s just not my style and I’m of the mentality that the more things any item has, the more things there are to snag and break. Especially when I’m looking at firearms for home- or self-defense or hunting, I want to eliminate potential disasters.

That said, there are a few things on the market that I and some of my partners and buddies now have, but we don’t really see often on the ranges, blogs, or forums. I consider some of them game changers. So today, I’m going to point out offset sights, optics with integrated sights, and a specific type of single-point sling adaptor that could change some minds about the best gadgets for your guns.

*The links are only examples. There are others available. Please shop around and find additional reviews and pricing options.

Offset Sights

Offset sights like these are intended to be used in conjunction with an optic or scope.

Quickie refresher: Scope – dedicated crosshair aiming aid, adjustable or fixed magnification using lens refraction (no battery for many/most); Optics – either all lens-based aiming assistants; or battery-powered light-up aiming aids, regularly with multiple types and-or colors of dots and open- or closed-ring reticules to choose from and additional choices like red dot versus holographic. I’ll use the more disparate definitions this go-round.

In some cases, offset sights allow a shooter to switch between a longer-range target appropriate for a medium- to high-magnification optic or scope, and a close-quarters target by simply tilting the firearm a bit. In other cases, they allow a shooter to have a backup sighting option in case their optic has a really bad day at a really bad time (dead batteries, solid smack, cracked lens, blowing snow, sprayed mud).

They’re also useful as a way to avoid switching between optic types or colors that perform better in varying light and background conditions, although that crops up more  regularly with competition and smaller game shooting.

Co-witnessing standard iron sights and optics or scopes is certainly an option. There’s a little fiddling at times to get height right, but an MBUS rear sight is hardy and fast to pop up even in freezing weather and gloves or sweltering summers with slippery hands, and you learn to let the front sight blur in front of your crosshairs or optics just like you learn to switch between a front sight focus and target focus when you hunt with a pistol and a bead-sight shotgun. Still, I really like the ease of just tilting a firearm.

Up to a .223/5.56, anyway.

AR-10’s, SOCOM .308’s, and the other 7.– platforms are a little more than I can comfortably handle for more than a couple of shots tilted, even being 6’ in heels and 200# in winter gear. It’s also harder for me to keep the firearm under control when it’s angled with larger calibers. That’s where the second nugget comes in.

Optics with Integrated Iron Sights

Manufacturers of optics with integrated iron sights like the Bushnell AR Optics 1x MP Illuminated Red/Green T-Dot Reticle Riflescope or the Aim Sports 4X32 Tri III. Scope with Fiber Optic Sight seem like they have missed a really, really big advertising and searchable description point to me. I had never heard of having more than a blade front sight centered on an optic or scope until fairly recently. The ability to actually adjust an iron sight as a backup to a scope is huge for me, and having it all be in one single piece without the need for extended or additional rails or attachments totally blew me away. You’d think they’d be singing from the hilltops about what they did. Instead, our groups see them very rarely and they tend to be unknown when people notice us using them at ranges.

I have the Bushnell for several guns, but its irons aren’t adjustable. Aim Sport apparently started manufacturing some of its models in the U.S. and fixing some of the import and manufactured-for-domestic-assembly products recently, so we jumped on a couple because they do allow us to adjust both the optic and the irons.

Bushnell AR Optics 1x MP Illuminated Red/Green T-Dot Reticle Riflescope, 1x32mm

We’re pretty happy with the Aim Sports in the households that went there, but nobody’s had them much more than a year and I tend to want a little more history or a standing reputation for quality before I’m willing to give an unqualified recommendation. Mine holds both optic and iron-sights settings well in hard-times practice, banging around in a pickup bed in transit, and at 3-Gun and 100-yard Modern Sporter competitions. It’s not so hot as a shoulder-holstered or chest-carrier handgun optic. The Bushnell is a reasonable hunting handgun optic, although finding a holster for it is funtastic and I still have point-of-aim adjustments for certain rounds.

The joy with these is that while you do loose cheekweld, it’s not a tremendous adjustment, and you can still keep a firearm shouldered squarely. Too, with little to no movement of the gun, it gains a bit of speed. There are times when fractions of heartbeats matter, a lot.

As with the offset irons, the AimSport with adjustable iron sights can also be set up with one for <10-25 yards and one for 100-200+ yards. Another bonus is allowing me to shoot ammunition that performs very differently due to powder loads or specific projectile weight or shape easier. Instead of painter’s tape marked with point of aim differences on the firearm, I can set up a single optic for the two most common sets.

Buying fancy optics & irons

It’s not a totally inexpensive investment, but considering what we seem willing to pay for optics as a general shooting crowd, they’re not unreasonable. There is at least one other dual-sight optic manufacturer out there – possibly more, since they seem to be totally dropping the ball on marketing these puppies as a be-all solution for backups, lighting, evil match designer, or variable distances. Again, research is our friend.

Aim Sports 4X32 Tri III. Scope with Fiber Optic Sight

Single-Point Sling Adaptor

I found a single-point sling adaptor with the intention of using it just for 10/22’s and airguns for practice. Then I decided it was fan-tab as a lanyard adaptor for a couple of my hunting or creak in the night handguns. And then we started testing some buckle varieties (which we mostly like better than the Velcro).


We’re pretty pleased.

I now have these or similar on a fair number of firearms. Don’t run them through a trigger guard or anything crazy like that, but most guns have somewhere they can get snugged. *We have yet to find one that works with M16A1 or A2 stocks; they block the charging handles. Skeleton or adjustable stocks only.

The straps do loosen up here and there as you go along, but a loaded Benelli Nova has been hanging from an unused belt (ahem, “sling”) with extra rounds in an attached purse (ahem, “ready bag”) behind a closet door for a couple of years. It’s been tightened maybe 4-8 times in its life now, and we’re talking about the gun that gets to go to the range and practice being a master key and LTL to lethal crowd and varmint control, then get dropped for a handgun for clearing and precision work. I use the same adapter on my 3-Gun shotgun and rifle.

It rolls around some, but I don’t consider the rolling to really be a bad thing, either. I live with and practice with a couple of lefties. It’s not a big deal in gloves, but for the ones who don’t practice “adaptably” as much as some of us, the buckle can be distracting and having to clip a sling to their shooting hand side is sometimes problematic. In a situation where they need to transition, a stock hanging up in the sling because it’s on a dedicated ring to one side can cost some precious heartbeats. The universal bands slip enough to eliminate that problem for us.

The other joy is that these things are $5-10, and require no tools or skill to install. Zero – an otter could do it. That means that while some do live with a sling attached, I can afford to put them on absolutely anything that might ever be grabbed in a hurry or needed in a defensive situation.

Now, instead of having dedicated rigs to account for various chest and height measurements from 24” and 5’6” up to 52” and 6’4”, everybody has a sling with their grab gear. They can then exchange firearms or grab whichever firearm is most appropriate for a situation, clip it, and roll. With person-specific slings instead of slings dedicated to firearms, a big, tall shooter doesn’t end up with a necklace or snagged as they “swim” into a sling, and a shorty doesn’t end up dragging even an 18.5” barrel’s front sight over the gravel and through the grass (both make it harder to shoot accurately; the latter may cause shouting from the gun owner during practice).

Slings (and sling clips) are one of those things I don’t see on firearms as often as I really should at the range. Being able to sling a firearm can be pretty invaluable. My household and partners like single-point slings best for defense (single-point slings are not really ideal for hunting – just saying). There are worlds’ worth of slings and adaptors out there, and they merit some research and a decent investment. There’s absolutely nothing wrong with picking up a sturdy 48” or 52” belt at Goodwill for $2 and a $2 clip at ACE to go with a $7 adaptor until you’re ready for that investment.

As mentioned, the really nice thing about those buckle-on single-point sling adaptors is that they’re so inexpensive, and adaptable to so many different types of firearms. Saving money on a sling and clip may let us get in some practice that makes us more effective or – over a household – might save enough money to invest in some solar-powered motion-activated lights that let us immediately locate an intruder of either the coyote or human type. That’s pretty invaluable, too.

How much should you spend on gadgets?

There are lots of tools and gadgets that make our lives easier or drastically increase our effectiveness and efficiency, but as with anything else, prioritize purchases. Make a list of goals, needs, the things that are most likely to strike personally and locally or regionally, and what’s already in the toolbox and junk drawer. Be creative as you look around, and visualize things that are already in-house as blank slates that can be adapted to other uses. A $15 lunch bag or laptop bag works just as well as a $25-75 range bag.

If something else works for now, until you’re better set, use that.

Do buy quality products when it’s something like a defensive firearm or its furniture (or smoke detector). That doesn’t mean you have to pay more for a manufacturer’s label and advertising costs. When it’s a $1K-$2800 HK versus a $500-700 S&W AR, get a S&W. It does mean that if something’s built for airsoft or paintball or costumes, you might want to consider the weights and abuse limitations. It’s usually worth it to spend more on something sturdier.


With the reminder that I’m just not big on hanging fifty million things from my firearm, there are a few choice gadgets that make a big difference and are worth some investment. A universal sling adaptor and the ability to engage targets accurately at multiple distances or if an optic craps out are two of the things that make my list. Hopefully even if they don’t make yours, something in this article gave you something to think about.

Let me start by saying this: I am not a fan of hanging fifty-million things and a coffee maker from my AR or upgrading a $200 10/22 with $1K worth

I was taught all the values of saving money but it wasn’t exactly modeled for me. Consequently, I had to overcome some hurdles as I grew up learning to budget, and more importantly, to stick to it (I still trip from time to time). My wife and I are now teaching our children about the value of their dollars and I am proud to say they are more miserly than I at their age. When they ask for a toy or a special treat and we feel it is appropriate we tell them they can have it if they pay with their own money. Our daughter is better at this than our son, but they look at their piggy banks, count the money, and more often than not are reluctant to part with their treasure for something fleeting. Financial expert Dave Ramsey says,

“There’s something psychological about spending cash that hurts more than swiping a piece of plastic. If spending cash whenever possible can become a habit, you’ll be less likely to over-spend or buy on impulse.”

So when was the last time you counted a wad of cash and had to make some decisions as to how much went where? You might do this regularly if you own a small business, but if you’re like the majority of debit card-swiping, electronic bits and bytes-spending, you probably haven’t in a very long time.

The benefits of liquidity

As it applies to you and me, liquidity is the amount of spendable cash on-hand such as in a piggy bank or hidden stash or cash that is readily accessible through ATM/bank withdrawal, or the quick sale of belongings. To most preppers cash on-hand is obviously the better choice for your money because you physically have it. Does the adage “a bird in the hand is worth two in the bush” sound familiar? The preppers who are involved in collecting precious metals (I am not one of them) will tell you quite correctly “if you don’t hold it, you don’t own it” (link includes good warning on dangers of holding valuables). Liquidity doesn’t have to be money as we know it. In a SHTF grid down scenario money will be whatever gets you something you want or need à la bartering. But for now, greenbacks and coins are the money we use and they’re still legal tender everywhere so having some on-hand mitigates your risk of being unable to buy what you need. It’s the same idea behind why we store any supply – we know we will need it later.

So why don’t we keep money accessible?

Despite the common sense and relative ease of having accessible supplies of needed items millions of Americans do not prepare in even the slightest way. We have discussed the concept of normalcy bias as a large reason behind failing to prep. When it comes to money, our society revolves around instant gratification and “efficiency” so we use credit and debit cards, electronic fund transfers, and online shopping – all made possible by a digital fiat currency system not backed by anything, which further removes us from cash as the marketplace ceases to resemble anything from even 15 years ago. In 2015, for many Americans, liquidity is limited to what sits in the bank account between bi-weekly direct deposits that isn’t automatically withdrawn due to electronic bill payments.

Three examples of why cash (use and acceptance) is still a necessity

The following examples are from my own life. They only involve human error by one or two people yet significantly impacted my family negatively. Imagine a scenario where the grid goes down or the government seizes digital wealth and you have a problem hundreds of millions of times worse.

  • Example 1: My wife ordered new checks and paid a bunch of bills. We shortly thereafter discovered the account number was incorrectly printed and were hit with late fees due to the delay in us having to run out and get cash from the bank which was closed. After going in to our water utility and advising them of this problem the clerk assured me there was no problem on our account. I offered to pay cash anyway as a safeguard but she refused due to a policy about the dangers (robbery and money laundering) of cash payments. Several days later I came home from work at 3pm to hop in the shower for my next job at 4pm only to discover our water had been shut off for “non-payment”. I showered with a gallon jug of water I had left over from a road trip, rushed to the utility office, and had to pay extra fees – in cash, mind you – because I was a deadbeat and didn’t pay my bills on time. The next day I started prepping (water storage) thanks to Final Prepper I discovered a few weeks prior.

Moral: Cash payment would have eliminated use of checks and this problem. Acceptance of cash would have resolved this problem before it escalated.

Do you have a back-up supply of cash if electronic methods aren’t working?

  • Example 2: Our mortgage bank mailed a check from our escrow account to our home insurance provider. This check was never received and our home insurance was dropped for non-payment. I went to the insurance office to rectify this and was told because the policy had been cancelled we needed to buy a new one. Much wailing and gnashing of teeth later mixed with a couple phone calls to the bank, I purchased a new policy. Next stop on this crazy train was our insurance company billing our mortgage bank for this new policy as well as collecting money from us. The bank paid this one as well and debited our escrow account a second time, putting us in the negative. A lot more anger, many more phone calls, and a few steps closer to a heart attack, the bank and insurance company “fixed” the problem by giving us our original policy back and not refunding any money. Just to make things interesting the bank made a third payment to the insurance company for the renewed original policy, putting us further into the negative. We found this out because they kindly sent a statement increasing our mortgage payment by about a hundred dollars a month. More phone calls and many bad words later the bank credited us with the first faulty payment but refused to eliminate the rest of the debt that was not our fault because they “can’t just type numbers in the computer and make money appear.” Funny, I thought that’s what happens whenever we mail a check or have an automatic payment? I was unaware that money teleported or got zapped through the cable modem. This situation was resolved yesterday, just before the next example happened.

Moral: People are morons and corporations don’t give a damn about you. Cash payments by us instead of electronic payments or checks in the snail mail by third parties would have eliminated this problem from happening. Emergency fund money in the bank is a good safety net.

  • Example 3: When I woke up this (Friday) morning and checked my work email before taking my children to school I was greeted with this message:

We are aware that the automatic deposits for payday have not transferred to individual banks. The Finance Department is working on it and as soon as it is resolved we will let you know. We apologize for any inconvenience.

In 2013 Cyprus banks were closed to their depositors and money was confiscated to pay off National Debt.

I got in touch with my wife at her job and we exchanged some choice words. An hour or two later I checked my email again and saw this gem:

Dear co-workers,

Due to my error, the direct deposit file was not sent to the bank in time to transfer funds into your accounts today. I apologize greatly for this error and hope you understand.

The file has been submitted for transfer by Monday. If you have any questions or concerns about this delay in payment, please feel free to contact me and I will work with our bank to try and get your funds to you sooner.

Thank you.

Fortunately, my wife works and works for a different company. We were spared the troubles so many of my co-workers faced, especially those who are single or whose spouses also worked for the city.

Moral: Having a system where one employee is capable of affecting over a thousand families to the tune of over $750,000.00 is insane. Payment in cash would have eliminated this problem. Emergency fund money in the bank is a good safety net.

Preppers should not only have padding in their bank accounts but should keep emergency cash in a safe location. As long as it’s the legal tender being accepted it is valuable. How will you pay when the ATMs shut down, or your card is stolen/compromised, or the banks are closed? Cash is king, make it part of your prepping plan.

I was taught all the values of saving money but it wasn’t exactly modeled for me. Consequently, I had to overcome some hurdles as I grew up learning to budget,

I personally shop online for almost anything I can for a couple of reasons. First is the incredible ability to research and check prices. I can read or watch video reviews for any products I am considering before making a final decision. Secondly, I hate going to the mall or just about any other shopping center type of place with a passion – I would just about rather take a kick to the head than go to the mall during Christmas, but even the rest of the year shopping online is just my preferred option. I was looking around for more prepper and survival gear the other day and often readers ask for gear recommendations so I wanted to give you this list of the best-selling prepper items but with a twist. I want to also give you my opinions on why this list is wrong when taken from the standpoint of what people should be focusing on. I will show the best sellers and give alternate items you should have if you don’t already.

LifeStraw Personal Water Filter

The LifeStraw is a great idea and Water is the highest priority, all things being equal, you should focus on when preparing for any kind of unforeseen emergency. But I think the LifeStraw itself has some limitations and drawbacks that would make me choose another option for water filtration.

For starters, the LifeStraw is really meant for only one person. If you have a couple of people to provide clean water for, this isn’t ideal. Next, you must stick your face down in the water for this to work. Not only does this require you to get up close and personal with your water source but it also prevents you from being able to fully stay aware of your surroundings. Yes, you can fill a container up with water and stick the LifeStraw in that, but why? Additionally, can’t take any water with you for later because the LifeStraw only works when you have a water source to stick the straw into. Lastly, the LifeStraw only filters up to 1000 liters before it is no longer safe.

For me, there are a couple of other options. For just about the same price, size/weight footprint, the Sawyer Mini Water Filtration System is far superior. It filters 100, 000 gallons, comes with it’s own bag that you can fill to quench your thirst, then refill for the road and still has all the microorganism filtering benefits. To me, these are the most minimal and basic water filters you can get, but it’s probably better to expand to a slightly larger capacity system.

The best solution in my opinion is a gravity fed water filtration system. Why? Unlike manual pump filters like the Katadyn Hiker or the MSR Miniworks (which I own and like), gravity fed filtration systems have no moving parts to break. Also, you can just let the water filter do its job while you move on to other issues like setting up camp or observing your surroundings. I am a HUGE fan of the GravityWorks by Platypus, but they are much more expensive. They taste far better than any type of Iodine water filter system like the Polar Pure, last far longer too, can easily support multiple people and I don’t have to worry about those little glass bottles breaking on me.

Mountain House Freeze Dried Food

The next 3 items on the list of best-selling prepper gear are food so I will combine them. Mountain House is listed as the best seller and I certainly have recommended their products as a great camping or backpacking option that also work great as a preparedness option. They only require hot water and you have a meal. Now, is this the best prepper food you should get if you are trying to stock up food for emergencies?

Maybe.

Mountain House or any one of the many other manufacturers of quality freeze-dried food out there fill a need and as part of a larger food self-sufficiency strategy I think they fill a great role. If you have nothing else but Mountain House, you will still be able to feed your family with decent tasting food that requires nothing more than a fire or stove to heat the water. You can even eat out of the bag. However, I recommend a little more diversity.

Your pantry should be filled with a larger portion of foods you already eat and let the Freeze-Dried food supplement that should you need to. You probably wouldn’t want to break out some Mountain House Lasagna with Meat Sauce if your friends were coming over for dinner, but after a snow storm knocks your power out for a week, this stuff is awesome. Your own family’s needs and preferences will dictate what you store but for tips on how to get started, check out my article on 30 days of food storage for ideas on how to get a jump-start.

Emergency Disposable Rain Ponchos

No offense to the good-looking group pictured here, but preppers shouldn’t be buying these cheap bags expecting protection.

Number three on the list of the best-selling prepper gear is Emergency Rain Ponchos? Seriously? Granted, this is from Amazon.com but these are glorified trash bags meant to give you some protection if you are out at a theme park let’s say and an unexpected downpour threatens to ruin the fun. No self-respecting prepper should have to resort to this because if you can’t find out what the weather is going to be and plan accordingly, you have bigger things to worry about most likely.

Instead of a disposable trash bag, if you are looking for some prepper gear that isn’t a rain jacket, consider a legitimate poncho instead. These are more expensive, but the construction is vastly better and you can use these to provide shelter if you combine them with a little paracord. Usually they come in camouflage colors but you do have options if you are trying not to look tactical. You can even combine them with a poncho liner to have a great cold weather system that can keep you dry and warm.

Gerber Bear Grylls Fire Starter

Number 4 is a means to start a fire and magnesium fire starters are a great grid-down item to have. There are many other brands out there and while I haven’t personally tested the Gerber line, I have been very happy with the craftsmanship and quality of other items like their multi-tools that I own. The Bear Grylls Fire Starter is just branded merchandise but it should do the job admirably.

Now I own several fire starters like this but you know what I own more of? Disposable lighters. They are cheap (you can get a pack of 10 for the price of one fire starter) and easier to use. Yes, they won’t last anywhere near as long as a fire starter, but if I needed to get a fire going quickly, I would much rather start my tinder off with a quick flick of my Bic and then move on.

Survival Shack Emergency Survival Shelter Tent

Keep the rain off you? Maybe? Sun? Yep. Will it keep you warm in cold climates?

Number 5 on Amazon’s list of best-selling prepper gear is essentially a big piece of Mylar with some rope. It is cheap, lightweight and compact, but when it comes to staying warm, I don’t see how this big open tent is going to help you.

In the right environment, creating a survival shelter is a free option but that assumes a lot of things. First that you have materials you can make a shelter with. Debris shelters are all the rage on YouTube for preppers and survivalists, but what if you don’t have any trees, limbs lying around or millions of leaves to cover it with?

A better option may be a survival bivvy. Advanced Medical Kits sells an Emergency Bivvy that will keep two people warm. First, it’s enclosed so you don’t have air blowing through it and wiping away any heat convection your body was making – think survival sleeping bag. It doesn’t require trees to string a rope and you get the added benefit of body heat from your buddy – assuming you are with someone. It is a little more expensive and does take up a little more room, but seems like it would be more effective at keeping you protected from the elements.

Is Best Selling Gear really the Best for You?

There are many other items on the list of best sellers and I just scratched the surface. I think in some cases; the things people buy are often out of convenience and cost savings but those two factors alone could leave you just as unprepared as if you didn’t purchase any prepper gear. Before making any prepper gear purchases, use the internet and conduct research. Take a look at what your survival priorities for the place you are or where you are going. Read articles – there are thousands out there on just about any subject related to prepping you can think of. Watch videos on YouTube and make your own mind up on what makes sense. But don’t stop there.

Actually try out the gear you just purchased. Use it to collect water and drink from it. Take that freeze-dried food out with you and make a meal. Try spending a night in that shelter or working in the rain in that poncho – start a fire. You will learn more from your own experience than anything you can read on a prepper blog and it will give you the knowledge you need to make your own, better, decisions on survival gear that works best for you.

I personally shop online for almost anything I can for a couple of reasons. First is the incredible ability to research and check prices. I can read or watch video

Would your family know what to do in the event of a disaster or SHTF event? Would the prepping supplies you have carefully purchased and stored away help your family survive or would they be unused because nobody knew about them?

Not that your family is inept without you, but do they know all of the plans and preparations you have made? Would they know immediately what you had planned to do in specific disasters? Would they know your rationale for making decisions you did or would they make the same mistakes you had already learned through? Would they know the dangers you had anticipated and prepare correctly for them or would they have to figure things out along the way?

The article has a cryptic title but the thought of writing down instructions for what to do in the case that you weren’t home during the apocalypse occurred to me the other day. I envisioned how best to leave information for my wife or any family members if TEOTWAWKI happened and I wasn’t there to help. The image of a grainy video tape playing of me sitting in my favorite chair, possibly holding my AR15 for effect came to mind from far too many cheesy movies. My family would be watching me as I said the words uttered by many a B-Movie actor: “If you are watching this, I must be dead” or something like that. I wouldn’t leave video behind but I could see printing a manual out and in a nod to those cheesy movies, my opening line might be: “If you are reading this, I may be dead”.

You may be in fact dead or you could just be seriously delayed in getting back to your home. We talk about people who travel for business on Final Prepper and making a journey of hundreds of miles on foot possibly with the right circumstances. If you are on a business trip and something like an EMP wiped the grid out while you were hundreds of miles away your family might not even hear from you for weeks. They might not know you are alive and trying to get back to them. The unknown in that situation would be pretty daunting to most people. The last thing they knew you were hundreds of miles away and now the bottom just dropped out. Without knowing if you would ever even make it back home, instructions you leave behind could be your plan laid out into words that they could look to for guidance and direction. While it may not make the thought of you being lost forever any easier to take, it could help them survive.

Before you begin your prepper plan

I think it’s only fair to say that your family shouldn’t be clueless about your prepping plans for survival even if you are traveling. I personally share most of my plans with my family but I don’t go into great specifics on many issues. I do understand that on some issues they hear me, but don’t care very much. Would they recall what I said two years ago during a disaster now when they could possibly very scared and near panic? Maybe, but I am sure they would need some additional details to make things go smoother if my plan is meant as the ideal for our survival.

Some people though don’t have family members that care about their preparations. Some preppers have spouses that are actually opposed to taking any steps to survive if something happens. That’s what the government is for, right? If you have a situation where you are prepping on the sly or are in some ways doing this all by yourself because of an unwilling spouse, you probably want to leave them with information they can use if you aren’t there.

As much as possible, I think you should try to get your spouse on board with your prepping plans. If you do, things will be so much better in the long run. If your spouse is with you, the rest of the family comes next. Make sure to talk about bad things happening in life and what you would do if faced with those situations. You can make these conversation topics age appropriate obviously, but share your prepping plans with your family as much as possible and then they will already know where your mind was at even if you aren’t there.

Make sure the location of this document is known. The last thing you need to do is hide the instructions from them, but don’t put this out in the open for anyone to read.

What should you document?

I have seen detailed plans for very specific things like how to thaw the well pump with schematics. If this is something that you need to pass along and have the time to do that, I say more power to you. Most of us wouldn’t need that level of detail, but each of us must take our own situation into account when you are writing down the important information that the people you leave behind might need to know.

I have broken a hypothetical set of instructions down into what I think are logical sections. Your plans might be completely different from this sample, but you can use this to create your own prepping instructions list.

  1. Introduction – If you’re reading this I may be dead. You can use whatever words you want to in this section obviously but the introduction should be an explanation of what the instructions are for and what to do in your absence.
  2. Evaluate The Crisis – This part is important because some people freak out unnecessarily. Is this a regional event? Are communications affected? Is the TV still working? Are people dead outside? The urgency of their actions could vary greatly with the crisis. Using guidelines based upon your own prepping priorities there should be logical decisions you can make based upon what you are seeing.
    1. Short or Long Duration – Assuming there isn’t wide-spread catastrophe is this disaster short-term as in a natural event like hurricane, tornado, flood excreta or is this something more protracted and longer with no end in sight?
    2. What is affected? – What infrastructure is impacted? There are triggers that you can analyze to see if you need to act immediately or can try to wait out the crisis in your current location.
    3. Last Minute Preps – In some situations, there is a chance to run out and obtain last minute supplies. What are the risks of this? Do you have cash stored if credit cards and ATMs are down? What stores and supplies should be at the top of the priority list?
  3. Do you need to Bug Out? – This is a complicated subject but going back to the list of triggers, what decisions does the person reading this need to consider? How long can they expect to last with the supplies you have on hand? Do they have a place to go? Could they get there? Is it worth the risk traveling at this time?
  4. Security – Hopefully the person reading this knows about any firearms you have, where your ammo is stored and combinations to the safe. Do you have weapons hidden? Do you have platform considerations they need to know about? For example all of your pistols are .45 Glocks and our tactical carbines are all AK47. This information could be a detail they need to consider when looking for additional ammo or bartering with others for bullets. What provisions do you have for home security and defense? Do they have an appreciation for how desperate people could become and standard safety procedures to prevent unwanted contact with hostile people?
  5. Shelter – Heat and Cold – assuming there is no power, what can be done to heat the home? Do you have heaters stored somewhere? Where is the fuel? How do you light that Kerosene heater and keep the house vented? Where are the tents? Do they know how to set them up?
  6. Food and WaterHow much food and water is stored? How many people will this feed? For how long? Do you have any food hidden in caches somewhere? How will they cook the food without power? Do you have stoves or gear to cook over a fire? Water filtration is a big one. Do they know how and why they should filter the water, optional sources for collection like rain barrels and how to disinfect with calcium hypochlorite if necessary?
  7. Sanitation – What do you have planned for sanitation if the toilets stop running? Do they know where your portable toilet and stash of toilet paper, hand sanitizer and lime is?
  8. Power – What are your backup power options? Do you have a generator and do they know how to start it? Do they know how many electric devices this machine will power so they don’t expect every appliance in the house to run off a 3000KW generator? What about solar chargers, inverters to be run off a car battery or other options you have?
  9. Communications – It’s great that you have all of the Ham radio gear you need, but do they know how to use it? What repeaters are programmed into your handsets? How should they monitor their communications? Is there anyone they can trust and what frequency and call sign do they use? Additionally, you might not be able to communicate with them to tell them you are OK and headed back on Route 80. They should know how to communicate their intentions if they have to leave before you get back for a hopeful reunion.
  10. Homesteading Skills – Gardens, livestock and anything that needs to be considered for long-term disasters. Do they know how often the chickens need to be fed? Do you have survival seeds stored somewhere? Do you have plans for harvesting game locally?
  11. Money/Finances – Where is the money stored that you kept hidden? What guidelines should they follow for using each after a crisis?

This list could be 10 times as long, but these are just some ideas I came up with off the top of my head. Your instructions should fit your plans and resources.

Where should you keep this prepper master plan?

As corny as it sounds I would stick this information in a binder with a big label on the outside that says something like “In Case of Emergency”. Make sure your wife, kids and any relatives who you trust know where this is. The information you put in here could save their life.

Now, I don’t expect everyone will write down as much detail as is needed on every single subject. Each could be its own book and there are great preparedness books out there. I recommend everyone have several resource books on-hand to fill in the holes and answer questions you might have forgotten.

The job of making sure your family is taken care of doesn’t end when you leave the house. It’s your responsibility to ensure they know as much as possible in order to survive. Sharing information with them if you are delayed in coming home could save them.

Would your family know what to do in the event of a disaster or SHTF event? Would the prepping supplies you have carefully purchased and stored away help your family

For many people, the idea of prepping for disaster conjures up visions of families in hazmat suits and gas masks readying themselves for the global virus outbreak. For others, it is the camouflaged survival group with their loaded 4 wheel drive bug out vehicles shooting their way through some random checkpoint on their route to a hidden survival retreat in the mountains. It really depends on your view of what the prepping lifestyle is as to whether or not these images are extremely distasteful or something you actively aspire to emulate.

I think by this time, the idea of prepping has come a long way and almost everyone can see the benefit on the surface at least, of taking small steps to prepare for disasters small or large that might impact your life. Like the example above, some delve more deeply into the lifestyle part than others, but I think there is a portion of the world out there who wants to take even smaller steps. They want to do something, but they aren’t ready to jump in completely and buy a years’ worth of freeze dried food, or trade in their Prius for a Toyota Tundra. They want to prepare in a way that is sensible to them, but not overboard. They are looking for Prepping Lite.

In my efforts to get everyone prepping, I wanted to illustrate a few of the key principles of prepping and compare them with how your stereotypical Prepper might view what is necessary and contrast them with what a prepping lite person can do that will still give them some benefit should a disaster visit their lives. The understanding of course is that the Prepping Lite solutions presented here will not be as robust or thorough, but should be better than nothing. If that is what it takes to get you to start prepping, then so be it.

Food

Prepper Recommendations – Food is critical to survival and I shouldn’t have to defend this one at all. Stock up as much food as possible that your family will eat. Other factors like cooking come into play, but long-term food storage is an important aspect of food preps. Plan on raising livestock such as chickens or rabbits and hunting for wild game as possible supplements to your pantry.

Prepper Lite Recommendations – Start with 3 days’ worth of food that doesn’t need refrigeration. Simple ideas are canned soups, tuna, canned chicken, rice or beans. Have some good vitamins to help with immune strength and don’t forget the manual can opener. If you do, or you just get bored, you can use this simple trick.

4 Liters of Water Filtration capacity doesn’t get much simpler than this.

Water

Prepper Recommendations – One gallon per day per person. For a family of 4 plus pets, assume 150 gallons of water per month of survival. Living on a lake or having a well is a plus, but having backup disinfection methods and a way to gather water from other sources (rain barrels) is a priority. You can almost always find water if needed, but you have to make it safe to drink to avoid illness.

Prepper Lite Recommendations – Store 15 gallons of water in your house or apartment and purchase simple water filters like the Sawyer mini or better yet, the 4 liter Sawyer filtration system for more capacity and plan on raiding the local park, home water heater if needed or your neighbor’s Coy pond. A Water BOB is another good backup if you have the warning. Simply fill up the tub and have 100 gallons for the disaster. Prices have come back down now, but during the height of the Ebola scare, these were selling for $98. No, I am not kidding.

Heat

Prepper Recommendations – Wood burning stove is usually recommended, but Kerosene heaters work very well in a pinch too. Make sure you have plenty of stored fuel.

Prepper Lite Recommendations – Sealing off rooms will trap body heat and a good oil lantern will give you light as well as warmth. Sleeping bags and plenty of warm layers combined with keeping the cold out will keep you alive.

Health

Prepper Recommendations – Pretty decent physical condition is what we strive for because survival will be a lot more work than sitting on your butt behind a computer (yes I am looking at myself here). A good baseline is to be able to move your own body weight. Push-ups, Sit-ups and 2 mile run/jog 3 times a week will make you healthy enough to shoulder that bug out bag into the wilderness or work in your survival garden all day.

Prepper Lite Recommendations – Get out and walk daily. If nothing else, the fresh air will be good for you and walking is a great form of exercise. If you need to lose weight, start by just trying to lose a few pounds.

Shelter

If the heat goes out, set up your own survival shelter. A tent indoors will trap your body heat and keep you warmer.

Prepper Recommendations – An underground bunker or a remote cabin in the woods is the prepper dream, but out of reach for many of us. A well-stocked home location with provisions for security and a mind toward self-reliance should the grid go down, is a respectable second.

Prepper Lite Recommendations – If you live in a large city, identify structures that could be safer. These could include friends who live within a short drive (less than 2 hours) away and who would be willing to take you in should a disaster force you from your home.

Firearms

Prepper Recommendations – Firearms are a personal choice, but I would say most preppers recommend some form of legal firearm protection. We recommend our top 5 firearms if you are so inclined, but at a minimum you should have a means of protecting your family. Firearms make the most sense for a lot of people.

Prepper Lite Recommendations – If you can only get one firearm, or begrudgingly accept that you need to have some protection, but refuse to buy into the whole prepper battery of arms idea, I would suggest a shotgun. Shotguns have their limitations, but if you can only have one weapon for survival and don’t want to spend a ton of money, my vote is a simple 12 gauge shotgun. Buy a few boxes of buck shot and get practice. If that isn’t your cup of tea, try the closest Krav Maga classes near you.

Do you have any prepper lite recommendations?

For many people, the idea of prepping for disaster conjures up visions of families in hazmat suits and gas masks readying themselves for the global virus outbreak. For others, it

With so many people growing vegetable gardens for the first time, I thought it apropos to write a post concerning the one culprit that has caused my husband and I to want to throw up our hands in surrender.  I am not speaking of rodents, varmints, or hungry neighbors.  This enemy is fierce.  This foe is the common weed.  An opponent like no other, one that will take over and suffocate your tomatoes while you go on vacation, one that grows faster than you can pull it from the ground.  If you dig up uncultivated ground in hopes of being self-sufficient, be prepared or this rival will defeat you before you can say “cucumber sandwich”.  Our family has fought the good fight for many years and learned from our mistakes and I want share what we have learned the hard way in hopes of saving fellow Preppers of an empty wallet and an aching back.

Before you begin…

First of all, if you do not mind spraying your food with weed killer like the guy down the road from us, you will have a weed free garden with very little effort outside of filling your sprayer up and possibly receiving a pulled wrist muscle.  He sprays religiously and his garden is beautiful.  However, he also has a putrid complexion, thin hair, and all of his pets have extra legs.  Our family chooses to go the chemical-free route and I am sure he laughs at us when he sees us bent over in our garden getting dirt under our fingernails.

Secondly, if you are willing to invest the money required to create a square-foot gardening and a weed-free wonderland, go for it.  The downsides are not only cost, but lack of air circulation, need for more watering, and if wood is used to make the raised beds it will eventually rot and have to be replaced.

Also, do not assume that you can simply go outside, lay down something to kill your grass in a lovely rectangular pattern, and commence growing delicious fruits and veggies.  We had a friend come over with a back hoe and dig up a large square where our veggies would sprout and grow and feed our family.  We were optimistic and naive and discovered that when you dig up a plot of grass that has a variety of weeds thriving in it, you will have many years of weeding ahead of you.

Here is a brief list and description of the top ten weeds you will encounter in your veggie patch and ideas on eradication.  If you are looking for a quick and easy solution other than chemical annihilation, STOP reading at this point because it will take a determination and a will to succeed that cause most people to either cover their gardens with grass seed or put in that in-ground pool they thought they always needed.

Most Unwanted Weed List

Crab Grass

1. Crab Grass

This weed is fast growing and sprouts seed heads quickly in warm weather.  So quickly in fact, that if you happen to miss it you will be fighting all of its numerous offspring the following year.  Even worse is that when you think you have caught it and are in full annihilation mode and pull it from the ground, you have probably left its rooted nodes behind that are thriving a couple of feet away.  Your best defense is to pull it the second you see and not let it sprout a seed head,  mulching helps as well.

Dandelion

2. Dandelion

Yes, some people eat this in salads or brew tea with it, but truth be told, if you don’t control its population, you will be fighting a vigorous invader.  The best measure is to pull it out completely, being sure to remove the root as well.  Mulch is not very effective, however, but some gardeners swear by the dandelion puller.

Bermuda grass


3. Bermuda Grass

This weed is especially irritating because of its extensive root system.  We have pulled this out thinking we got the root and all, set in a pile beside the garden, let it winter over and lo and behold it was still alive and thriving the following season.  This grass sprouts from rhizomes that break off when you try to dig it out.  I had a gardener tell me that the roots can be as deep as 15 feet underground.  The only way you can keep it from slithering into your home and stealing your children is to mulch HEAVILY.  And forget putting down black landscape fabric because it will grow through it.  Solarizing helps as well, if you are dealing with a large patch that is winning.  This involves spreading clear plastic down in your hottest months and let the sun bake it.  Digging a moat around the garden is also recommended to keep it from creeping so quickly into garden beds.

Bindweed

4. Bindweed

Similar and a cousin to sweet potatoes this is called the “zombie plant” because it just keeps coming at you no matter what you do.  Do not let this hateful weed go to seed because its roots can go as deep as 30 feet underground.  Also, the seeds can stay viable for 50 years.  Unfortunately the best way to eradicate it is to pull it.  Do not till it or you will till the seeds into your soil, but use a fork after it rains to avoid leaving any fragments behind.

Chickweed

5. Chickweed

Some people eat chickweed in a tasty salad and use it for its medicinal properties.  I personally want to kill it.  It is a winter weed and it grows quickly.  If it is pulled at the wrong time the seeds will sprout new little chick-weeds everywhere.  You must pull it in the early spring. One positive aspect of chickweed is that you can feed it to your ducks and chickens, they will love it.

Ground Ivy

6. Ground Ivy

Pull it, it comes back.  Pull it, it comes back.  Pull it, it comes back.  Get the point?  This is best pulled out if you water the ground first before pulling by hand.  You must remove all the underground runners as well.  If you till it, it will sprout from root fragments and you might as well put in an in-ground pool over your garden.

Canada Thistle

Eek, this is a prickly perennial that requires wearing heavy-duty leather gloves to remove.  Some gardeners recommend cutting this down to the ground and pouring a mixture of vinegar and salt on the stem area.  You can also remove with a fork being sure to get the whole root system.  If all else fails and the weed takes over, you can use the fibers from the stems to make rope.  You will be very skinny due to lack of food, but you will have some good strong rope.

Burdock

8. Burdock

Vinegar works well on hot days with this nasty biennial invader.  You can also take the time to dig this out of the ground, but it is much like the dandelion and it is imperative to remove the whole root system.  Mulch is useless.

Quack Grass

9. Quack Grass

This perennial weed grows mainly by creeping underground rhizomes that release chemicals that poison other plants and keeps them from growing.  The runner roots must be removed, but be aware that the roots are very thin and it doesn’t take much for them to break off causing you to miss fragments that will become new “quackers”.  Again, do not till this weed, because you will spawn many more of its devil children.  Cover crops can help, such as field peas, buckwheat or crimson clover which will overcome the quack grass.  Many gardeners have reported that it is very common for it to crop up when buying composted manure or mulch so be sure you are not getting product full of quack grass.

Johnson Grass


10. Johnson Grass

This noxious weed needs to be dug out in its entirety.  It is suggested that Johnson grass needs to be allowed to sit out of your garden for several months before tossing into the compost pile.  Cover crops can be helpful in suppression.


The following is from Mother Earth News:


Organic Weed Control: What Works, What Doesn’t

In our comprehensive Worst Garden Weeds Survey, gardeners rated several mulch types and organic herbicides based on their effectiveness in controlling weeds. Out of those who’d tried each type, here’s how the methods ranked, including the percentage of respondents who found each effective.

Top-Rated Mulch Types

1. Paper or newspaper (80 percent)
2. Black plastic (76 percent)
3. Straw or hay (69 percent)
4. Shredded wood or bark (65 percent)
5. Grass clippings (63 percent)
6. Living mulch (45 percent)
7. Clear plastic (21 percent)

Top-Rated Organic Herbicides

1. Vinegar (72 percent)
2. Herbicidal soap (68 percent)
3. Neem oil (57 percent)
4. BurnOut Weed & Grass Killer (42 percent)
5. Weed Prevention Plus (29 percent)
6. Weed Pharm Organic Weed Killer (23 percent)
7. Cinnamon bark crab grass killer (17 percent)

Seize the Sun. More gardeners reported success with mulches than with herbicides. As you evaluate your mulch options, keep in mind that clear plastic — the lowest-ranking mulch type — will only work to kill weeds if it’s used in summer and pulled tightly over soil, creating a hot environment weeds can’t tolerate. This method of capturing radiant heat from the sun under clear plastic is often called solarization. To solarize a bed, water areas of bare soil, and then cover the areas with clear plastic. Dig a trench and bury the edges of the tightly pulled plastic in the trench so the heat will build up, and keep the plastic cover on the garden bed for three to six weeks.

Mulches Are Strong Medicine. Several gardeners said the most successful mulch strategy was to use newspapers and/or cardboard under a thick layer of organic mulch, such as grass clippings, shredded leaves, straw, hay or a combination of these (wet your newspapers so they don’t fly around as you try to lay them down).

The tips most often cited were to do a couple of good hand weeding sessions early in the growing season before laying down mulch, and to keep reapplying organic mulches as they decompose throughout the season. Grass clippings will block weed growth better than the same thickness of hay or straw, but will usually not last as long. Grass also releases more beneficial nitrogen than hay, straw or leaves. Start your mulching regimen early, before weeds get a foothold, and don’t be shy about applying a lot — if you can, mulch 6 to 8 inches deep with hay, straw or leaves, or 2 to 3 inches deep with grass clippings. Organic mulches are a quadruple win because they suppress weeds, build fertility, retain moisture and are often free. Simply gather grass clippings and leaves from your property, or get them from friends or neighbors who don’t use lawn herbicides.

Many respondents commented that black plastic mulch is effective because it blocks light from weeds, but it can leave a mess of fragments in your garden when it eventually deteriorates. Others noted the usefulness of landscape fabric laid beneath a layer of straw for keeping weeds out of paths.

Organic Herbicides. Almost all of the gardeners who commented on organic herbicides said the ones that work only offer a temporary fix. Many said store-bought options aren’t worth the money. Many gardeners considered vinegar an effective herbicide option if applied directly to weeds on a sunny day. If you’re cautious about protecting the soil food web in your garden, note that vinegar can do minor harm to soil microorganisms.

In conclusion, weeds are not our friends.  They will invade every inch of your garden if you allow it.  New gardeners should plan on spending the summer months at home working in the garden upon digging their new garden.  Make it a family affair.  We have given our children sections of the garden that they have to keep weed free.  Neglecting your renewable source of food is not wise.  The reward for all your hard work is that your family will be growing food for the table and pantry and eventually, after years of waging war on weeds, you will win.  If you can practice eradicating diligently and removing weeds upon sight, you will eventually have fewer weeds invading your garden and more food in your belly.

With so many people growing vegetable gardens for the first time, I thought it apropos to write a post concerning the one culprit that has caused my husband and I

You have probably heard of seed saving, where you save a plant’s seeds or tubers at the end of a growing season to serve as the seed source for the following year. This is great because choosing the proper plants and practicing proper seed-saving methods gives you to a free, self-perpetuating garden year after year. Saving seed also means you can share seeds with friends and neighbors, so everyone can start growing their own.

Heirloom, open-pollinated plant varieties are your only bet for a successful personal seed bank.

Many people, however, are not as familiar with the concept of a personal seed bank. A personal seed bank is like seed saving on steroids. You save seed for the coming season’s planting, but you also bank seed for longer storage, just in case.

What that “just in case” might be varies. Some people have created a personal seed bank as insurance against crop failures. Others believe a personal seed bank is necessary in the event of a partial (or total) societal collapse. Many people just like the idea of being sustainable and self sufficient. And, of course, seed saving can be a fun hobby.

PLANNING YOUR SEEDBANK

The most important thing to remember when planning your personal seed bank is that you can only save and store open-pollinated, non-hybridized, non-GMO seeds. Why? Because genetically modified and hybridized seeds have been dinked with by large corporations such as Monsanto, which doesn’t want you to be able to save your own seeds. Why? Because they want you to have to buy seeds from them year after year. Hybridized or GMO seeds frequently have sterile first generation offspring (F1 is a designation you might have seen). This means that while you’ll get viable plants from the seeds you buy, the seeds you save from those plants will likely be sterile. If they’re not sterile, they’ll produce offspring that are so unlike the parents with such a wide variety of characteristics that they will be a disappointment and not useful. Only buy heirloom, open-pollinated seeds from trusted sources.

The second thing to decide when planning a seed bank is what kinds of seed you want to save. The best seeds to save are from fruits and vegetables you enjoy eating the most, but experience comes into play, too. If you’re a beginning seed saver, to start it’s best to bank seeds that require the lowest skill set. This way you can focus your first growing season on learning seed saving techniques and still have viable, usable seed banked in preparation for the following growing season, at which time you’ll expand your skill. The easiest seeds to save and bank are self-pollinated seeds (see below for more info on this).

The third thing to decide when planning a seed bank is what seeds would be best to save. This can vary greatly depending upon the reason why you are choosing to create a personal seed bank. If you’re banking seed as insurance against a crop failure in your garden or to be more self-sufficient, then banking what you like is the best option. If you’re banking seed as insurance against a societal collapse, then you’ll need to bank a wider variety of seeds and include many types that you may not have ever grown before, including grains like wheat or barley. Be advised, though, that in these cases it is a good idea to get some experience growing these seeds before a collapse occurs; your seed bank will be useless if you don’t know how to grow the seeds you have.

Ready-to-order seedbanks are great options until you have a chance to store your own varieties

SEED SOURCES

If you’ve never saved seed before, you’ll have to buy your first seeds from a commercial grower or be lucky enough to have seed-saving friends who are willing to help you with your first crop. Excellent commercial sources for heirloom, open-pollinated seeds include Seed Savers Exchange, Native Seed Search, Southern Exposure Seed Exchange, Sustainable Seed Company, Baker Creek Heirloom Seeds, and Abundant Life Seeds, among others.

Another alternative is to buy a pre-made seed bank that is already packaged and set for storage. This is a great idea for those who want a head start on their seed bank and have some insurance on-hand until a self-made seed bank has been created (which can take several years). A good source for a seed bank such as this is sold by Camping Survival. They sell a 6-can set that is organized by use type. For instance, the “Culinary Herb” can includes a variety of common herbs from basil to thyme, and the “Ancient Grains” can includes barley, flax, amaranth, and others. The ‘Medicinal Herbs” can is especially beneficial to have and is often overlooked in seed banks.

SELF-POLLINATED SEEDS

The best and easiest seeds to save (and therefore bank) are self-pollinated seeds, which include tomatoes, beans, lettuce, peas, chicory, and endive. These plants have reliable seed set the same year they are planted, and they are self-pollinating. Self-pollinated seeds fertilize themselves, meaning the pollen from a plant’s flower fertilizes the stigma on that same flower. No muss, no fuss. There are few worries about cross-pollination or accidental hybridization. You get the same variety of tomato or bean year after year, though it is recommended to separate varieties by a row, just in case.

Self pollination is one way seeds of concern to home growers reproduce; the other two modes of reproduction are insects and wind pollination. This is where things can get tricky, because in these cases pollen from a plant up to a mile away can fertilize a plant in your garden. This increases the chance of hybridized plants, whose seeds will not breed true when planted. Because of this, insect and wind-pollinated plants such as corn or onions have to be manipulated by the grower to ensure that pollination is limited to same varieties.

WIND AND INSECT-POLLINATED SEEDS

More experienced seed savers can take on plants that require more intervention to insure that saved seed breeds true.  Crops such as corn, cucumber, radish, spinach, and squashes (among others) produce seed the same year they are planted, but require the grower to intervene to prevent unwanted hybridization. This intervention can come in the form of hand-pollinating the plants to prevent cross-pollination, or making sure there is considerable distance between the variety you are growing and other varieties (this distance can vary between 100 feet and a mile, depending upon the plant).

Biennial vegetable seeds set seed the year after they are planted, and as a result expert seed savers can take on the two-year commitment needed to save these seeds. Biennial vegetables include onions, carrots, cabbages, beets, swiss chard, turnips, celery, leeks, and others. Instead of harvesting at the end of the first growing season, the plants need to be successfully overwintered the same year they are planted (this can vary depending upon if you live in the north or south). The second growing season is when the plants will flower and set seed. These plants also need to be separated from other varieties to avoid cross-pollination.

ORTHODOX SEEDS


Seeds like beans, peas, and cucumber can be dried and frozen and remain viable for storage.

No, this has nothing to do with religion. What it does have to do with is how well a seed withstands the freezing and drying conditions that are necessary to maintain a seed bank. Orthodox seeds can be dried and frozen for storage and remain viable for a period of time, but some seeds take to this better than others. Some seeds can be stored up to 10 years or more, others begin to lose viability after one year. For most common vegetable plants, three to five years is about as long as they can be stored, though some plants (like parsnips) really need to be used within a year or two.

Ideally, seeds need to be dried to less than 7% moisture and, for maximum storage length, frozen to no warmer than zero degrees Farenheit (a home freezer may reach this temperature). The lower the temperature, however, the longer seeds will remain viable. Most vegetables known to the home gardener are orthodox seeds, such as peas, corn, and tomatoes. In fact, about 80% of plant species are orthodox seeds.

Recalcitrant seeds can’t be dried for storage and must be planted immediately. Tropical plants such as mangoes, coconuts, and tea are recalcitrant. Intermediate seeds can take some drying for short-term storage, but they are not viable options for a personal seed bank. Examples of intermediate seeds include coffee, papaya, and others.

SEED SAVING SPECIFICS

The best free online resource for learning how to save specific vegetable seeds can be found at the International Seed Saving Institute. They have a complete seed-saving guide that you can find here, which includes how to address the pollination needs of individual plants and harvest the seeds to best advantage. I’ll be writing plant-specific seed-saving Spins this growing season, but for now ISSI is a great resource.

You have probably heard of seed saving, where you save a plant’s seeds or tubers at the end of a growing season to serve as the seed source for the

One of the most diverse prepper considerations from the standpoint of a long-term disaster is health. By health I am not specifically referring to the risks to your health from the disaster itself. If you are living through a hurricane or earthquake, there are natural risks to your health that you need to mitigate in the moment. Prior planning helps you with identifying the risks in this type of scenario and developing a course of action to take. If there are violent mobs approaching your city, that is another risk and those subjects are just one piece of the health equation that preppers need to plan for. Prepping is all about staying alive and alive usually assumes healthy. If your health deteriorates too far, you won’t be alive for very long.

Physical safety from harm has one dimension. Then you have nutritional health and that brings in the considerations of adequate food, sanitation and hygiene and treatment of illness, and the subject of clean water. These things could have a far greater impact on your life after some disaster than the actual disaster itself, assuming you did have a plan and were able to take steps to get yourself out of harm’s way. Yes you could be affected by that natural disaster, but with minor preparations and some action, that is largely avoidable.

During the clean up in the days, months and possibly years after the event, your daily nutritional health will likely play a bigger factor into your survival. Assuming you have the food storage covered and you are stocked with water filtration methods and all the toilet paper you can handle, there are many other considerations our body needs to run as efficiently as possible. And like a lot of other prepping supplies, some are harder to find if the grocery stores aren’t open. After the beans, bullets and Band-Aids, do you have plenty of salt stored away?

Why is salt important to nutrition?

Your body needs salt in order to function. In fact, Salt is essential to life and you simply can’t live without it. Salt isn’t something the food companies made up either and its importance was very evident far back in history. The world Salary comes from the Latin root word for salt, “sal” because Romans were paid in salt. Salt is so important that we need to include that in our daily diet and even more so if we are depleting salt as in the case of heavy perspiration.

What is salt used for in the body? According to Mercola:

  • Salt is a major component of your blood plasma, lymphatic fluid, extracellular fluid and even amniotic fluid.
  • Salt helps your body properly carry nutrients into and out of your cells.
  • Salt helps you maintain and regulate blood pressure
  • Salt increases the glial cells in your brain, which are responsible for creative thinking and long-term planning. Something you are sure to need if the grid goes down for very long.
  • It helps your brain communicate with your muscles via sodium-potassium ion exchange.

When our bodies don’t have enough salt to provide for optimal health you can develop a condition known as hyponatremia. In hyponatremia, your body’s water levels rise, and your cells begin to swell. This swelling can cause many health problems, from mild to life-threatening.

Hyponatremia signs and symptoms may include:

  • Nausea and vomiting
  • Headache
  • Confusion
  • Loss of energy and fatigue
  • Restlessness and irritability
  • Muscle weakness, spasms or cramps
  • Seizures
  • Coma

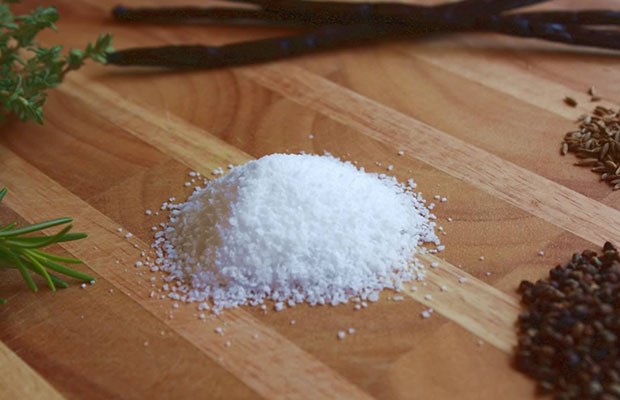
Living near the oceans provides a limitless source of salt but are you close enough to take advantage of this?

How much salt should you stock up on?

So it’s clear we need to plan for salt as part of our overall health if we want to maintain optimal levels, but how much should we stock up on and is any salt better than another? Most of our diet now provides the salt we need in abundance. Over 80 percent of the salt most of us consume comes from processed foods. The freeze-dried camping meals I love as a bug out bag option give you plenty of salt so you might think you already have everything you need.

When I first started prepping and began my food storage, I went to Sam’s and bought a whole case of Morton Iodized Salt. Each box is 4 pounds and they cost a little over $1 each. I figured I was set for quite a while, but I didn’t learn about the differences in “salt” until much later. Regular table salt has added ingredients (Calcium silicate, dextrose and of course Potassium Iodide) so strictly speaking this isn’t the best all-natural salt you can get. However, I believe that in a disaster or crisis, this will be perfectly fine and it is a cheap way to store a lot of salt. So now, I have at least 48 pounds of salt which I calculate lasting my family three years minimum.

A more pure source of daily salt is Himalayan Salt.

There are healthier sources of salt. Himalayan Salt for instance seems to be the most pure retail source now but it is more expensive as you would expect. Himalayan salt is only 85 percent sodium chloride; the remaining 15 percent contains 84 trace minerals from prehistoric seas. Table salt by example is not pure sodium chloride but is 97.5 percent sodium chloride and anti-caking and flow agents are added to compromise about 2.5 percent. These can be dangerous chemicals like ferrocyanide and aluminosilicate. You should research the health benefits of each and make your own decisions. For my family, we have the Morton salt stored in bulk for what-if and use Himalayan on the dinner table.

How to find sources of salt in the wild

Stocking up on dozens of pounds of salt from your closest big box store is simple enough. Maybe you have a convenient salt mine in your town like the residents of Jericho, but what if you don’t have a home and all of your supplies anymore? What can you do to provide the needed salt for optimal health? Is there a source of salt naturally near you?

Well, you can find active salt mines near you by going to the internet. This site has a simple listing of salt mines by location that you might use to scope out opportunities ahead of time.

Sea Water – Yes, this is a no-brainer I understand, but some people might not have considered that all the salt we could ever need is in the oceans. Just collect seawater and let it evaporate in a container. You might have to wait a while for that to occur, heating over a fire is another option but the evaporated water will leave behind sea salt.

Meats and Seafood – The blood from animals can be harvested for recipes and the meat naturally contains sodium. Salt water Fish are naturally going to have sodium but again, if you are living close to the oceans, you already have a source. Kelp and seaweed are also excellent sources.

Eggs and Dairy – Eggs, large eggs contain 62 milligrams of sodium and while this isn’t all you need, it is a source and provides another reason for raising your own chickens.

Vegetables and roots – Right out in your garden, One cup of cooked spinach contains 184 milligrams of sodium per serving. One cup of raw Swiss chard contains even more, with 313 milligrams of sodium. Other vegetables like artichokes, sweet potatoes, radishes, celery, carrots, broccoli and bell peppers have lower amounts but they are still a source. One cup of raw celery contains 96 milligrams of sodium.

Hickory Tree Roots – Apparently, the roots of a hickory tree can be chopped into small pieces, boiled in water for a long time, but not so long there is not any water left. Remove the hickory root pieces and then boil the rest of the water down and you will be left with a black substance that is supposed to be salt. This one is not one of the better known sources and I can’t find a lot of literature on the subject. That coupled with the higher chance of error seems to rule this out.

What about salt blocks? –This seems like a great idea. Just buy a few blocks of salt, intended for livestock or luring animals like deer into the stand and you are all set. Unfortunately, there are a lot of other chemicals added to those salt blocks to keep them in that nice pretty block so this approach isn’t recommended for salt you can consume later. The salt blocks would be good for their intended purpose though and that is providing a lure for animals. Bring them in close and you can harvest a big deer hopefully. Sure beats licking that block…

What other overlooked prepping supplies have you thought of?

One of the most diverse prepper considerations from the standpoint of a long-term disaster is health. By health I am not specifically referring to the risks to your health from

Have you read the latest article or seen the latest video about why this tool or that item should be included in your bug out bag or have in your home if you decide you are going to stay put and dig in? For many of us, hesitating to make adjustments to our basic items we pack for shelter, fire, food, water, hunting, fishing, tools, first aid and firearms once we are comfortable with our selection-is normal, yet, we still might have doubts.

One adjustment we may consider would be the benefit of using drones as a necessary piece of equipment for preppers in a true TEOTWAWKI scenario.

Drone technology has been changing rapidly. They have become an important tool for our military, the government, law enforcement, and commercial businesses and perhaps even for your neighbor down the street. The uses for these UAV vehicles and the government’s dependency on them should –if they haven’t already –raised a red warning sign in front of all of us who are concerned about government interference or being able to bug out or keep a low profile in a SHTF situation. Stop and consider your bug out plan! Is it drone proof? Have you considered ways of detecting, hiding, or if necessary destroying drones that might cross your path as you move towards your bug out location?

Perhaps one thing to consider is using drones for offensive and defensive security.

Using Drones for Offensive Security

Reconnaissance and Surveillance:

The primary reason for adding drones to your list of bug out items is Reconnaissance and Surveillance. In a bug out situation, you will need to reconnoiter your planed escape route or routes. Being able to get a ‘bird’s eye view” via a live feed on your smart phone-even after an EMP attack (if your phone and drone was protected) could provide you with instant intelligence to determine if it is safe for proceed. Currently, to have that same level of information you would had to commit you and perhaps your group into an area that may no longer be safe.

Drones could also be placed in strategic areas along your bug out route as a static observation positions. Its camera could record video

SYMA X5C Explorers 2.4G 4CH 6-Axis Gyro RC Quadcopter With HD Camera

footage to alert you to increased activity or threats which you could access well before you reach the area. These monitoring drones could also use Drone tracker applications to defend or detect drones approaching you or your group early enough to provide you time to hide and remain undetected.

Aerial attack

It is not outside the realm of possibility that drones could be equipped with explosives and then flown into an attacking force to inflict physical harm or even loss of life. They could also be used to deliver tear gas or pepper spray to spearhead an attack on a position or to cover a retreat. As drones become more advanced, the capabilities to carry a heavier payload will provide even a larger threat of attack.

Delivery of supplies:

If your bug out plans or the current tactical situation requires your group to travel in small numbers at various intervals and radios cannot be used, drones can be used to send or deliver messages (encrypted) or supplies.

Electronic Surveillance:

Using Drones as electronic bugs to listen in or collect signal intelligence or even to hack into WIFI and steal data from networks is not limited to movie fiction. Having the training to use or detect this surveillance might make the difference between survival and capture.

Physical/ Defensive security:

The addition of drones as part of your physical and defensive security plan should be pretty clear by now. As stated earlier in a SHTF situation and you are physically unable to bug out, then placing drones in strategic areas in your neighborhood could be used for observation purposes, collecting intelligence of activity near and perhaps far away from your location while being able to keep a low profile.

The camera systems on drones have video and audio capabilities. Some even have the ability of using night vision cameras with infrared detecting systems which could detect threats in low light or night conditions much better than the human eye.

Consideration of drones as part of your security plan can help in protection against gangs, thieves and even other drones that are being used against you I’m sure you can think of the various benefits especially if you’re getting up in years and are not as agile as you may need to be if such a SHTF event happen

Second thoughts – are they worth the risks

Yet, the use of drones during a bug out could be a risk that you might cause you not to consider these tools. Many of them make a lot of noise and could attract the very threats that you are trying to discover and evade. There size and the possibility of being damage during a bug out must be taken into consideration along with costs prior to being purchased. This industry is growing rapidly as the demand for smaller, faster, more rugged systems are flying off the design boards and hitting the market.

One should also consider that the government and law enforcement agencies are also busy designing counter measures to combat the likelihood of them being used for criminal or terrorist activities. So one needs to consider what ECM (electronic counter measures) might be used against them.

Still with proper training and experience, drones could be great surveillance tools. What do you think? Do drones make sense for preppers?

Have you read the latest article or seen the latest video about why this tool or that item should be included in your bug out bag or have in your