HomePosts Tagged "stockpiling"

Sure, shoveling a couple of tin cans and ready-to-eat packs inside a pantry or emergency household kit may be a no-brainer, but what happens when a real emergency blows your way and you’ll need to eat those stuff to stay alive? More than that, are you really sure that everything stays fresh until the time for unboxing comes? There are a lot of things to consider when creating a long-term food stockpile: shelf life, type of food, the very environment where you choose to store the food, and, the containers themselves.

As you know, emergency food should be stored in a cool and dark environment to keep them from getting rotten. Still, that leaves you to deal with other unforeseen dangers such as rodents clawing your way into your food stash, insects, and, of course, indirect environmental factors that can make long-term storage food stored in metal cans go bad. Last but not least, moisture can severely affect your food, even if it’s neatly wrapped in packages.

What I like to do in this case is to take the original pack and place it inside individual zip-lock bags before placing them inside airtight plastic containers.

You can even throw in a couple of desiccant silica gel packs to remove any moisture remaining inside. For a while, I thought long and hard about finding a more permanent solution to the excess moisture issue inside the pantry I use to store my food and I eventually ended up buying a dehumidifier. It works very well, and mine takes triple-A batteries (you can switch them with rechargeable power cells).

Now, regarding today’s topic, some foods are more endearing than others. For instance, lentils can be stored for at least 5 years. On the other hand, rice, if deposited in a proper environment, can last for 30 years if not more. This is why I’ve always pushed for smart stockpiling, aka buying only those stuff with a very long shelf life that could, theoretically, last forever.

This is not something new under the sun. In fact, if you remember your history lessons when Carter and Lord Carnarvon popped open Tut’s tomb, they found perfectly edible food stored inside wax-sealed angoras. And it’s not the only example – the Chinese and even the Mayans. So, what are these wonder foods that can be kept for decades at an end in the pantry before going rotten? Stick around to find out.

  1. Carrots

Packs with flavonoids and tons of other nutrients, carrots are excellent for stews, broths, and even by themselves. What most people don’t know is that those bright-orange wonders can be stored for decades. Dehydrated carrots have a shelf life of 25 years or even more. The trick is to place them in air-tight containers right after removing all the water to minimize contact with the air. I recently found out that it’s way easier to remove the water if you chop them into small pieces.

To whip up a quick batch of dried carrots:

  • Peel them off.
  • Wash and rinse.
  • Blanch them in a pot.
  • Put them on a tray.
  • Preheat the over to 125.
  • Place the carrots inside and allow them to dry. It takes about 4 to 5 hours depending on your oven.

Don’t forget to still every hour. Take them out of the oven and allow them to dry before tossing them inside a zip-lock bag.

2. Pasta

Mamma mia! Who doesn’t adore a plateful of pasta with meatballs? I, for one, am very much in love with pasta. It’s the type of food that can be cooked in every way imaginable. Even better, pasta, especially the deep-frozen variety, has a very long shelf life (at least 20 years).

Still, if you store them in a moist-free environment, you can take them out and whip up a quick pasta dinner even after 40 or 50 years. I read somewhere that pasta products can even last for a century and even more if placed in special storage containers like aluminum-lined mylar bags.

3. Salt

No meal’s complete with a sprinkle and tinkle of salt. This awesome condiment, which has been around since the dawn of time, does not ever go rotten if stored in the proper conditions. You need not worry about bacteria getting inside, because salt has a way of dealing with them.

Still, the only thing you should concern yourself with is moisture. If the container isn’t properly sealed (been there, done that), then it’s bye-bye salt and hello mush. I usually keep my salt in a heavy-duty plastic container in which I throw a pack or two of desiccant silica gel wrapped in plastic just to be sure.

4. Baking soda

There’s nothing baking soda can’t do or fix – you can use it to bake delicious cookies, cakes, and clean stuff around the house. Before I went to the doctor to get my molar fixed, I used to gargle baking soda in the morning before brushing my teeth (great for morning breath as well).

If you’re a computer buff, just like myself, you can use a light baking soda mixture to remove persistent stains from plastic computer cases (also works wonders on those yellow spots!). As you’ve guessed it, baking soda has no expiration date, provided that you store it in proper conditions – no moisture and sunlight.

5. Soy Sauce

Care for some Chinese? Well, if you’re a fan of Asian cuisine then you must know that no dish must be without soy sauce. The salty, smokey, flavor gives that sea-foody taste to each meal. Are you ready for the good news? Soy sauce never goes bad. Ever!

Since it’s packed with sodium, that stuff will never spoil due to bacteria. Watch out for moisture and exposure to sunlight though. To protect that black gold, pour the contents of a bottle into a sealable and air-tight glass jar. You can line up the jar’s mouth with aluminum foil and plastic wrap for extra protection.

6. Powdered milk

I know that nothing beats the taste of real cow’s milk, but the bacteria inside it make it impossible to store it over long periods. On the other hand, powdered milk is not pretentious and very handy to have around the house for dishes and drinks. If stored in a moisture-free environment, powdered milk can last forever. I usually store powdered milk in a large plastic container with a couple of moisture-absorbent packs inside.

7. Instant drinks (coffee, cocoa powder, and tea)

No emergency stockpile should go without easy and quick-to-prepare drinks. I cannot and will not imagine a world without coffee or tea. Since they’re dehydrated, all instant drinks can last up to 10 years if you remember to store them in a moisture-free room.


8. Honey

Yes, dear? No, I was talking about bee honey, the one you use to make cookies or sweeten your drinks. The high sugar contents inhibit bacteria from developing. And, if stored properly (lid screwed on tight, no sunlight and moisture), a jar of honey can last for 100 years or even more!


9. Stock and bouillon

These are great during those cold winter days when you want to whip up a bowl of soup or your favorite comfort food. Everything boiled and set to cool down before being placed in bottles or something can last for ten years or more. A funny thing happened to me the first time my wife and I prepare bouillon for our stockpile.

So, the pantry which I used to store my food had a slight design issue – heat seeped through one of the holes in the wall. After the bottles cooled down, we placed them inside and forgot about them for a couple of weeks. One night, I heard this long bang coming from the pantry. Half-asleep and almost naked, I ran up to see what the Hell was happening.

When I opened the door to peek inside it was like stumbling upon a crime scene – two of the bottles exploded and there was tomato sauce everywhere. After a while, I realized that the heat made the bouillon bottles blow up. So, make sure your pantry is insulated. Otherwise, someone might think you’ve killed someone and hid his body inside the room.

10. Sugar

Spice and everything nice – these are the ingredients to create the perfect prepper. Very much like baking soda and honey, sugar can be stored indefinitely. The only problem is that it tends to harden over time. No problem. Just place it inside a large container and use a spatula or a spoon to break down those big chunks.


11. Beans

Delicious, nutritious, and easy to prepare, beans are at the very top of the food pyramid. Although you’ll probably end up passing more gas than usual after a bean-based dish, it’s nevertheless a versatile food. More than that, if you’re careful enough to store them in proper condition, a single bag of beans can last up to 30 years. There’s one catch about beans – you will need to reseal the bag from time to time. This is why I switched to aluminum-lined mylar bags instead of plastic, airtight containers.


12. White vinegar

What happens when the wine goes bad? You get up from the table and argue with the waiter, of course. Kidding – wine has this outstanding quality of transforming into vinegar, which is one of the most useful items found in your pantry, apart from salt and baking soda.

Vinegar can be used in salad dressings and other dishes, but it’s also a great helper around the house (my wife uses it to remove cat hair from the carpet and I use it in very small amounts to remove pigeon droppings from the car’s hood). White vinegar never goes rotten, so you can store as much as you want without a problem.


13. Maple Syrup

Fancy some pancakes with maple syrup for breakfast? My kids go absolutely bonkers over this dish. Can’t say that it’s really good for their teeth but, hey, try arguing with a hungry and screaming toddler. Just like honey, maple syrup has high sugar contents, which means that it can be stored for long periods of time (50 to 80 years, by some accounts).

However, you should know that there’s a huge difference between maple syrup stored in plastic and the one stored in glass bottles. The first, even unopened, has a shelf life of 5 to 18 months, while the later can last as much as half a century.


14. Ghee

I don’t know if most of you are familiar with this ingredient. Ghee is a type of base which is prepared from boiled butter. Basically, you get ghee by removing all the water from the butter. Great for Indian dishes and preparing low-calorie foods. If you store it in an airtight container, ghee will never go bad on you.


15. Corn starch

Momma always used to say that if the food looks too watery, add some cornstarch to make the spoon stand up on its own. Corn starch is very useful around the house – you can cook with it, clean up stuff, and even use it in combination with water to soothe sunburns. Stock up on cornstarch now because this stuff will never go bad.

Okay! To wrap this up in a neat and elegant manner, check out this small list of all the foods and their shelf-lives. Hope you’ve learned by now that smart stockpiling is all about knowing your food and not shoveling them in a pantry and throwing away the key.

Food Shelf Life (years)
Carrots (dehydrated) 25+
Pasta 20+
Salt Forever
Baking Soda Forever
Soy Sauce Forever
Powdered milk Forever
Instant drinks 10+
Honey 100+
Stock & Bouillon 10+
Sugar Forever
Beans 30+
White Vinegar Forever
Maple Syrup 50~80
Ghee Forever
Corn Starch Forever

Other self-sufficiency and preparedness solutions recommended for you:

The vital self-sufficiency lessons our great grand-fathers left us
Knowledge to survive any medical crisis situation
Liberal’s hidden agenda: more than just your guns
Build yourself the only unlimited water source you’ll ever need
4 Important Forgotten Skills used by our Ancestors that can help you in any crisis
Secure your privacy in just 10 simple steps

Sure, shoveling a couple of tin cans and ready-to-eat packs inside a pantry or emergency household kit may be a no-brainer, but what happens when a real emergency blows your

Remember when we were kids, and our moms used to tell us to wash the carpets with water and vinegar? Yeah, the aroma alone was enough to send an elephant to the ICU but, surprisingly enough, everything smelled like brand-new afterward. And because I hated doing the carpets and upholstery as a kid, I did my best to stay as far away from that stuff as possible. Big mistake!

Anyway, vinegar does not only go well in salad dressing or to clean various household objects but has many other purposes. And since we simply cannot ignore the fact that vinegar’s just as useful around the house like baking soda and rock salt, I’ve decided to write this not-so-short and an awesome piece on how you can take full advantage of the ghost of wine past in an SHTF situation.

So, without further ado, here are 14 reasons why every prepper should stockpile as much vinegar as possible.

  1. No more bumper stickers and decals

The worst thing about buying a car from a second-hand dealer is that no matter how hard you look at it, you’ll still end up with a surprise or two. Mine was bumper stickers and decals. I don’t know who was the former owner of my car, but that person really had a thing for sticky logos and drawing.

I’m not kidding you when I say that those damned things were everywhere – windshield, side windows. There’s was even one on the left tail light. Anyway, the dealer offered a pretty good bargain, and apart from the stickers, the car was otherwise in great shape.

Now, if you somehow wound up in the same situation as me, forget about WD 40 or sprays for bumper sticker removal. Put two tablespoons of vinegar in a bucket of water and pour over the area covered in stickers.

Wait a couple of minutes and then use an ice scraper to remove the sticker. It works like a charm, and the sticker will come off without leaving any glue marks on the window. You can also try it on decals – same recipe, but repeat the process three times for good results.

Related – Knowledge to survive any medical crisis situation

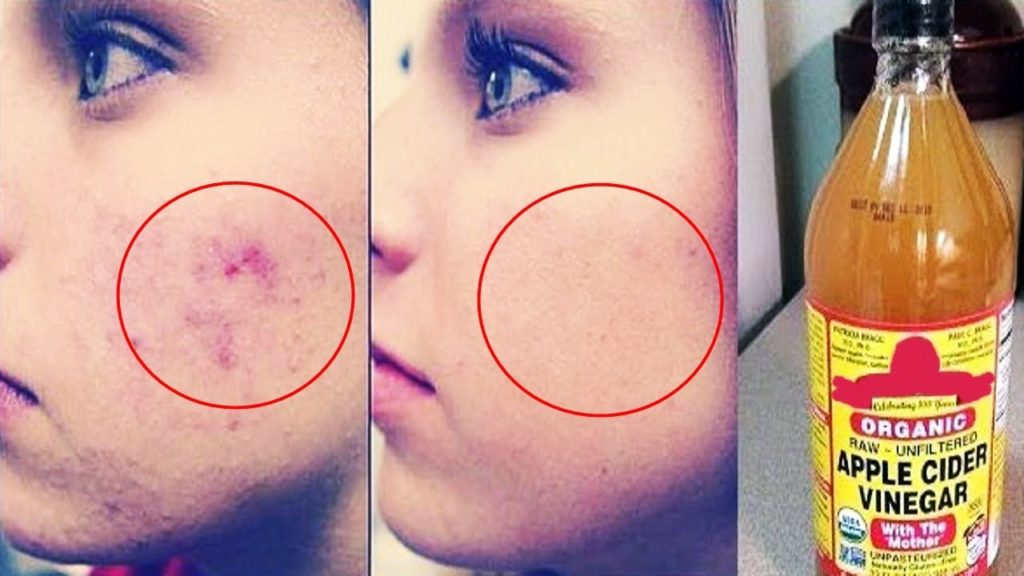
  1. Getting rid of acne

Acne’s now a welcoming sight, regardless if you’re 14 or 44 (yeah, it can happen during late adulthood too). The bad news is that apart from taking your prescription meds and ensuring that your face is al clean and oil-free as possible, there’s not much you can do about it; and, of course, there’s the scratching.

Now, in order to get rid of the itchiness, mix water and four teaspoons of apple cider vinegar in a glass. Use this mixture to wash your face and rinse with clean water. This also helps the tissue heal faster and prevents the icky stuff from spreading.

  1. Making your candle or propane lantern wicks last longer

Emergency candles and propane lanterns are great for those not-so-romantic moments when the power grid fails. However, neither is a long-term solution. If you have reasons to believe that you’ll need to brave the dark a while longer, try soaking the wicks of your emergency candles and propane lanterns in an all-vinegar solution. This will give you at least 3 to 4 hours of flame per candle\lantern.

Related 4 Important Forgotten Skills used by our Ancestors that can help you in any crisis

  1. Removing Warts

Even the thought of having to endure another wart makes my skin crawl (had one right on my sole). You can go to your local drug store and spend tens of dollar on wart removal solutions which won’t help you with anything other than making a dent in your wallet or you can try this neat prepper remedy.

In a tall water glass, put four teaspoons of apple cider vinegar, and one teaspoon of vegetable glycerin. Shake and leave it be for a couple of minutes.

In the meantime, wash the wart and the surrounding area with soap and clean water and dry off with a towel. Dap both the wart and the area around it with betadine or another disinfectant.

Now, soak a gauze in the vinegar+water+glycerin mixture and clean the warty area. Do these two or three times a day. By the end of the second day, you’ll see that the wart begins to shrink. Continue the treatment until the bulge disappears. You’re welcome!

  1. Stop the tummy-rumbling.’

In case you forgot to buy antacid or any other kind of tummy pill, you can soothe your rumbling stomach by drinking a glass of water mixed with two teaspoons of vinegar. Also does wonders for heartburns, heartaches, and, possibly, broken hearts.

  1. No more dandruff

This may no quality as an SHTF situation, but then again, dandruff is neither healthy nor aesthetic. I found that regular anti-dandruff shampoos don’t do shit about that white stuff. However, if you add a splash of apple cider vinegar to your hair before using regular shampoo, dandruff will bother you no longer.

Here’s what you’ll need to do – get some moisture into your hair and add two squirts of vinegar. Massage your scalp and wait at least five minutes. Rinse with plenty of water. Finish up with regular shampoo or conditioner.

Bear in mind that depending on your type of hair and skin you may need to repeat this process. I myself had to wash my hair three times a week with vinegar and shampoo for two weeks before I got rid of dandruff.

  1. Best pest-repellant ever

I admit that I sometimes forget to drive my pets to the vet clinic for their regular checkups and, of course, delousing. But that doesn’t mean that I allow those awful fleas to do as they will.

Now, if you really haven’t the time nor the money for the vet, because shit happens, put one teaspoon of vinegar in a glass of water and use this mixt to wash your dog’s fur (haven’t tested it on my cats ‘cause, you know cats and waters really don’t mix). Wait for at least a couple of hours before rinsing with plenty of water.

Related –How to make the ultimate painkilling tincture

  1. Making veggies green again

You really don’t need to throw every wilted veggie in the fridge. All they need is a little love, tenderness, and a splash of apple cider vinegar. In a spraying bottle, mix one tablespoon of vinegar with cold water. Give your veggies good spraying, and they’ll regain that hunter-green color in no time.

  1. Keeping diabetes in check

You know that you really don’t need to use that insulin pen each time there’s a small variation in your blood sugar levels, right? In most diabetes cases, glucose levels can be kept at a normal value by eating the right stuff.

Now, in case you have issues controlling that blood sugar level, drink a glass of water mixed with two teaspoons of apple cider vinegar. Please keep in mind that this is only a short-term solution, which means that you will still need to take your prescription meds and use insulin if there are bigger variations.

  1. Removing rust from moving parts

In the past, vinegar has been successfully employed to remove rust from moving parts like cogwheels, springs, and levers. You can also use it to get rid of rust from just about any kind of metallic.

In order to free up a mechanism that simply refuses to budge on account of the rust, take out all the moving parts and soak them overnight in water and vinegar. Take out, allow them to dry, and reassemble the mechanism. If there’s still friction, take it apart again and repeat the procedure.

  1. Removing candle wax from wooden surfaces

Nothing beat a romantic candlelit dinner, especially after the light goes out. Dinner – good, removing candle wax from furniture and tablecloth – very, very bad. Well, it’s not that hard to get the excess wax out, but it tends to leave a nasty behind.

Here’s how to get rid of candle wax fast and easy – use a hair drier to heat up the wax. Mix water and vinegar in a small bowl. Use this concoction to scrub the area.

  1. Eating pesticide-free veggies

I love going to the farmer’s market to purchase my favorite veggies. Still, whatever I do doesn’t seem to make a difference when it comes to the pesticide part – sure, there, more or less, safe to eat, but they sure have a funky taste. Sometimes I even contemplate skipping dinner and grab some take-out because I lack the emergency to wash every lettuce or cabbage leaf.

In searching for ways to get rid of dirt and pesticides from veggies fast, I stumbled upon this little prepper’s trick which involves the use of apple cider vinegar and baking soda. I can state for the fact that it works – even the taste’s different.

Here’s how to do it – fill your sink with clean and cold water (don’t forget about the plug). Add one tablespoon of apple cider vinegar and one tablespoon of baking soda. Now place your veggies inside and let them soak for at least 15 minutes. Drain the water, rinse with cold water, and enjoy a pesticide-free veggies dinner.

Related –The vital self-sufficiency lessons our great grand-fathers left us

  1. Crafting a fly trap

Word of caution before I tell you how to piece together the trap – this only works for gnats or fruit flies. I wouldn’t try out on other flying critters.

Anyway, grab the biggest mason jar you find around the house and use a nail or your survival knife to poke a couple of holes in the lid. Bear in mind that these holes must be big enough for the flies to pass through. Fill the jar halfway with apple cider vinegar and place on the kitchen counter. Attracted by the sweet smell, the flies will go inside and drown.

  1. Getting rid of callouses on your feet

Staying on your feet from dusk till dawn is probably one of the best health shots. Still, your feet might have a thing or two to say at the end of the day. Callouses are nasty, and there but the first step to other ‘wonderful’ things such as blisters and even warts.

There’s a way to get rid of those callouses and, of course, the not-so-great smell that goes along with them. Before hitting the sack, fill the bathtub with warm water. Add two tablespoons of apple cider vinegar and soak your feet for at least 20 minutes. I personally prefer to add a little bit of Epsom salts – they’re very soothing for the skin and prevents crackling.


Did I manage to convince you to stockpile more apple cider vinegar? Hit the comments section and let me know your thoughts.

I thought you needed a break from our Weed Week. 

However, starting a pot stock-pile is also a very good idea.

I’m just saying.

God Bless.


Other Self-sufficiency and Preparedness solutions recommended for you:

The Lost Ways (The vital self-sufficiency lessons our great grand-fathers left us)
Survival MD (Knowledge to survive any medical crisis situation)
Backyard Liberty (Liberal’s hidden agenda: more than just your guns…)
Alive After the Fall (Build yourself the only unlimited water source you’ll ever need)
The Lost ways II (4 Important Forgotten Skills used by our Ancestors that can help you in any crisis)
The Patriot Privacy Kit (Secure your privacy in just 10 simple steps)

Ok, let's talk vinegar. Or what happens when wine goes bad. Or, as we preppers like to call it, the stuff that dreams are made of.

Ever stopped to think just how useful a bar of soap can be? No, you can’t shave it and turn it into plastic explosive as Frank Burns from M*A*S*H said, but there are lots of other stuff you can do with it beyond washy-washy. No matter if you’re using the old rectangular bar, the liquid variety or dishwasher detergent, each and every one of them could save your skin one day.

Most seasoned survivalists and bushcraft experts carry at least one bar of soap with them and, as you might expect, it’s not only for washing soiled jammies or getting the dirt off your hands.

Since soap is another one of those household items that should get its own statue in the survival hall of fame, I’ve decided to do write this short and sweet piece on how soap may serve your bushcraft purposes.

So, because talk’s cheap, here are 5 ways you can use soap to get out of a potentially life-threatening situation.

  1. Shampoo

I know that most of you don’t really see the purpose of washing your hair during an SHTF situation, especially because, I don’t know, priorities tend to shift. Still, hygiene’s very important, and you really wouldn’t want to end up with lice in your hair and worse.

Don’t know for sure if the rest of you people have even considered the thought of adding one bottle of shampoo to your B.O.B or at least an all-purpose shower gel (great for hair, body, carpets, upholstery and anything in between), but I really don’t see the point of getting one if I have one or more soap bars.

Sure, you won’t get curls or fluffy hair, but at least your head’s clean and lice-free. By the way, if you find yourself without shampoo\shower gel, you can also use liquid soap or dishwashing detergent to wash your hair. Just be careful not to use that dishwasher stuff on more sensible body areas because you’ll end up with sores (true story).

  1. Removing ice from the driveway nice and fast

No rock salt or kitty litter? No problem. You can create your own ice-busting concoction using regular liquid dish soap, water, and a bit of alcohol (don’t get your hopes up because you’ll want to rub alcohol for this concoction). Here’s what you’ll need to do: take a bucket and fill it halfway with hot water. Add one tablespoon of rubbing alcohol and one tablespoon of undiluted dishwashing liquid soap. Mix and use this concoction to remove ice from your driveway.

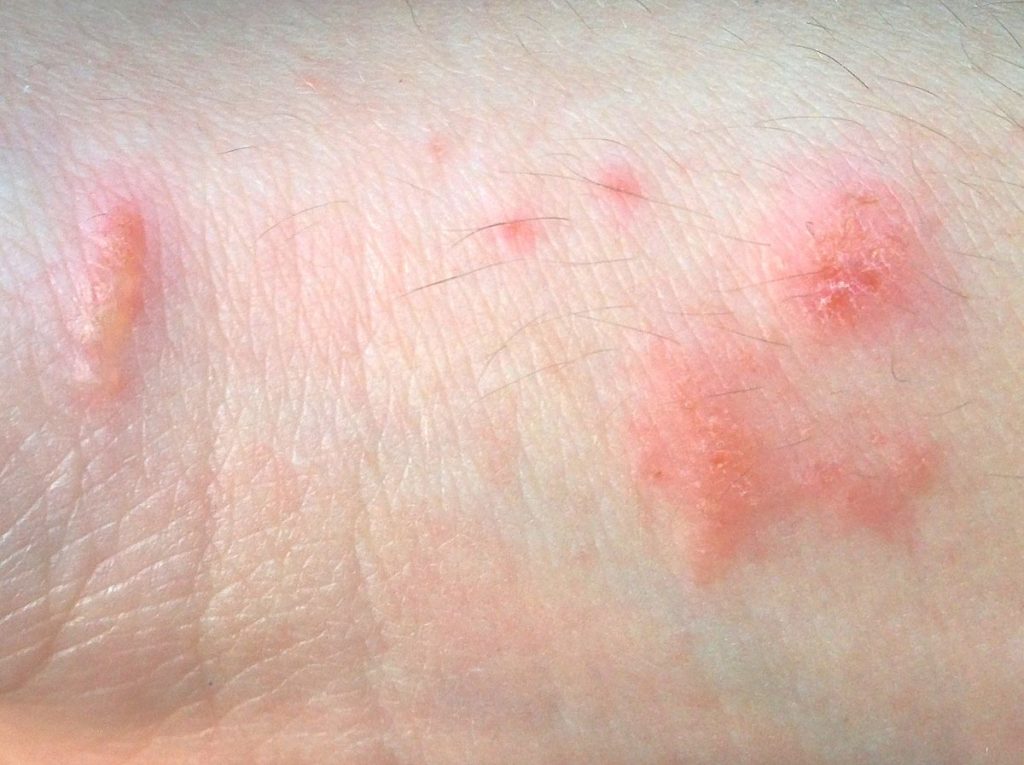
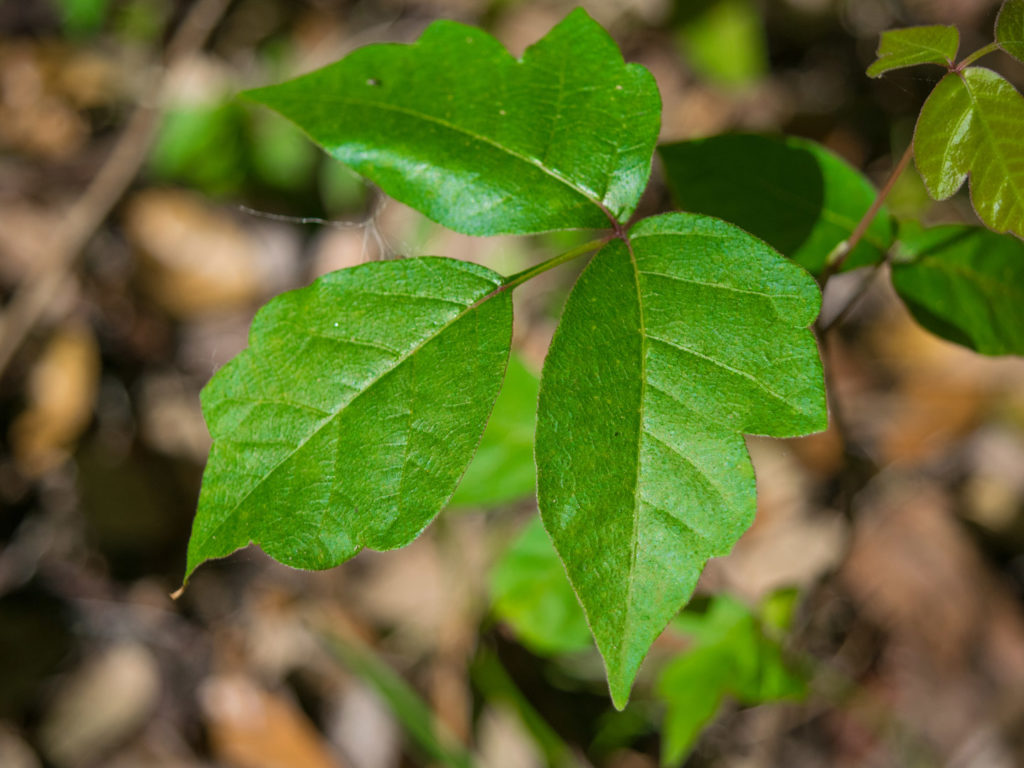
  1. A sure-fire remedy for poison ivy poisoning

Do you know what’s worse than having a bear on your ass? Having to resist the urge to scratch after getting into contact with poison ivy. What’s even worse about this type of poisoning is that the blisters can spread if you pop those oil-filled pustules.

How to solve this? Using dishwashing liquid soap, of course. Since the stuff’s designed to deal with oil stains, it will eliminate the excess oils from the area, thus stopping the blisters from spreading. Moreover, using liquid soap on poison ivy blisters increases the healing rate of your skin.

  1. Keeping them nasty bugs away from your food

Now that spring’s finally arrived, we turn our attention to things more romantic like picnics, BBQs, and campfire sing-alongs with your intoxicated buddies. The only thing that annoys me the most, apart from having to clean that bathroom (sorry, hun) is insects crawling over my food.

Yes, I should know by know that a picnic’s not exactly, well, a picnic, but I do hate to share meals with overly insistent ants, and God knows what.

After doing a bit of snooping on the Internet, I found out that you can actually protect your food from pests using diluted dishwashing soap. It sounds crazy, but believe me, it works. And no, the food will not have a soapy taste to it. To prepare your own pest repellant from soap, get yourself one of those spray bottles and fill it with others. Add two teaspoons of dish soap, shake, and spray the table area.

Yes, you can even spray the food – in its watered-down form the stuff’s safe to eat. Only don’t use too much of it because your food will certainly end up tasting funny.

  1. Getting rid of sticky things in your hair

Well, what can I say? Shit can happen even at home. Doesn’t matter how hard you try to maintain hygiene, because there’s always that moment when you forget that you just dunked your hands in Vaseline, but that itchy spot on the top of your hand just refuses to go away. For moments like this, be thankful for the fact that dish soap exists.

This stuff’s powerful enough to remove anything from the flue, Vaseline, nail polish, gum, and, yes, even peanut butter.

However, do keep in mind that dish soap was made for washing dishes and not to be used as a shower gel. Here’s what you will need to do in order to get rid of that nasty stuff from your hair. First of all, stop scratching because you’ll only spread around the stuff, and rip some hair locks in the process.

Now, pour a tablespoon of your favorite dish soap into your palm and apply it over the sticky area. Rub the area for 5 to 10 minutes. After that, wait a while for the soap to sit and do its job. After that, get into the bathroom, rinse your hair with plenty of water.

You can also use a little bit of shower gel or shampoo to ensure that there’s no more dish soap in your hair. I know it sounds nasty, but then again you really had to scratch that itch.

That’s it for my short and sweet list of how survivalists use soap, regardless if its liquid, solid or the kind used for washing dishes. Do you believe my list lacks certain applications? Hit the comments section and let me know.


Other self-sufficiency and preparedness solutions recommended for you:

The Lost Ways (The vital self-sufficiency lessons our great grand-fathers left us)

Survival MD (Knowledge to survive any medical crisis situation)

Backyard Liberty (Liberal’s hidden agenda: more than just your guns…)

Alive After the Fall (Build yourself the only unlimited water source you’ll ever need)

The Lost ways II (4 Important Forgotten Skills used by our Ancestors that can help you in any crisis)

The Patriot Privacy Kit (Secure your privacy in just 10 simple steps)

Ever stopped to think just how useful a bar of soap can be? No, you can’t shave it and turn it into plastic explosive as Frank Burns from M*A*S*H said,

Soot. Cinders. Slag. The ghost of wood past. Yes, I was indeed referring to wooden ash – we know it, we get it, but we do sure hate cleaning it after the magic of sitting by the firepit’s gone. If you’re the proud owner of a fireplace or anything that runs on split logs and fire, then you know just how frustrating it is to remove the ash from the grate.

Let me role-play for a while (gonna be Morpheus from The Matrix). *ahem* What if told you that there’s a way to turn ash into your ally? More than that, what if I told you that wood ash is the very best thing that could happen to a household after baking powder and diatomaceous earth? I know it sounds rather far-fetched. Perhaps even a bit crazy, but, as a matter of fact, the survival potential of wood ash is known since the dawn of time.

For instance, ancient Egyptians would use a mix of water and ash to deal with pests. The same mixture would also act as a deodorizer, wishing away foul smells (and they kind of needed it, especially those who insisted on wearing those ridiculous-looking wigs).

Anyway, because I’m what my wife calls a slug bug, I sort of did some research of ways to deal with wooden ashes (I simply cannot stand the thought of wasting a couple of hours cleaning every stove and pit and then digging holes around the yard to bury the ash).

And so, after snooping around for a while, I discovered that wood ashes are not only great for getting rid of pests or making deodorants but also for many other jobs, much of them having to do with everyone’s favorite topic – SHTF.

So, without further ado, here’s how wooden ash can help you in any shit hits the fan situation.

1. Water filtration

If you’re out of water filtration pills or have no other source nearby, it may be possible to whip up a water filtration system using an old plastic bottle, fresh ashes, pebbles, sand, and two pieces of cloth. The trick is to arrange them in layers: pebbles, sand, cloth, ash, pebbles, sand, ash, cloth, sand, and pebbles again. Use this to sort of strain your dirty water a couple of times. Proust!

2. Getting rid of ice quick and fast

Many don’t know this, but wooden ash is packed with potassium chloride, aka salt. So, using a handful of wood ash on your driveway or front porch has the same effect as using salt. Knock yourself out!

3. Making the fridge stink go away

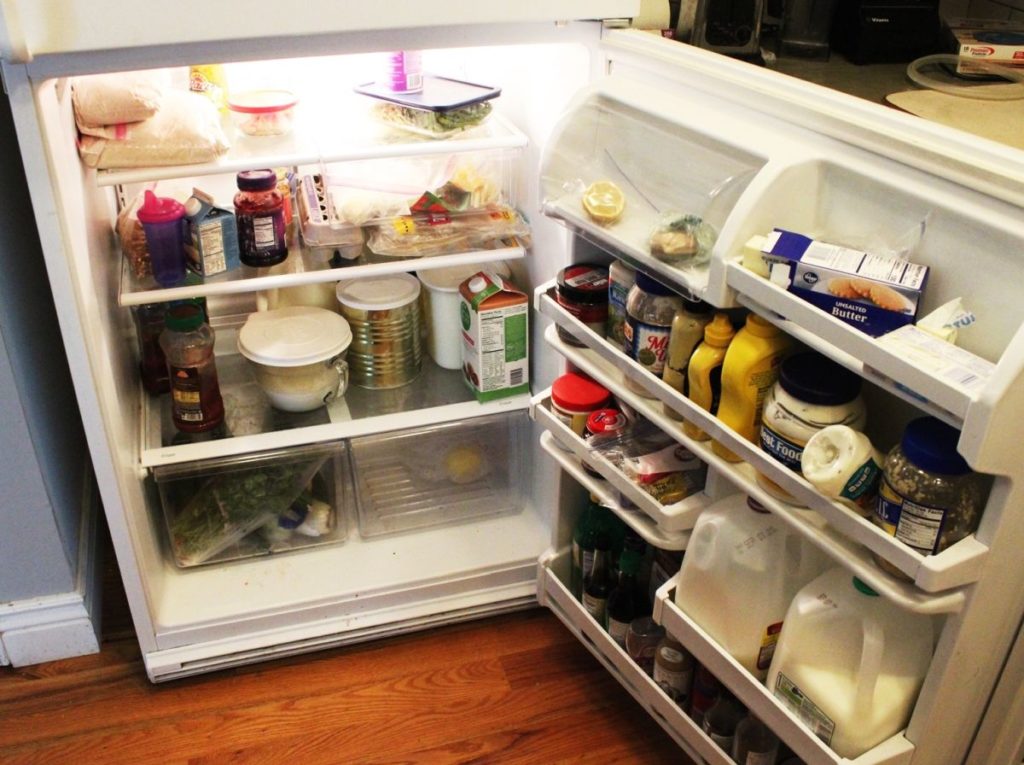
There’s nothing more repulsive than having to open the fridge only to nail it shut afterward on account of the rancid smell. You don’t need to get everything out and wash the inside with water and dish detergent. Grab a small plate from the pantry and fill it with ash. Stick it inside the fridge, and the smell will disappear in a couple of hours.

4. Keeping your food fresh

No power? No problem. Dig a hole in the ground, fill the bottom with rocks and straw, and put your veggies and fruits inside. Cover with as much ash as you can find and you’ve got yourself a tiny root cellar. Long before the fridge was invented, homesteaders would place veggies, fruits, and even meat in big clay pots, fill them with ashes and sealed with wax.

5. Making a strong decontamination agent

Although it’s highly unlikely for you to get anywhere near radiations, you should know that it’s possible to create a strong decontamination agent using boiled ash. In a big pot, put some water, wait for it to boil, and had a handful of soot. Stir until the ash is dissolved.

Use a coffee filter to strain the stuff. The resulting liquid, also called lye water, can be used to scrub clean your body if get into contact with harmful radiation. By the way, lye water can also be used to clean and sanitize marble, plates, silverware, clothes, floors, and even wooden floors.

6. Remove humidity from emergency food pantries and root cellars

If you discover that your root cellar or pantry where you’ve stashed the emergency supplies are far too humid, you need not spend hundreds of bucks on a dehumidifier. Grab yourself a metal bucket and put some ash inside. The soot will instantly remove all extra humidity from the air.

7. Field toothpaste

Oral hygiene should always be on the top of your list no matter if you’re at home or lost in some neck of the woods without water and food. Anyway, if you ever feel like your teeth are about to go on a strike because you forgot to wash or floss, dip your finger in fresh ashes and rub it against your teeth. It has the same scrubbing effect as baking soda or salt. Sure, it’s a bit messier compared to toothpaste, but at least your gums are clean.

8. Gardener’s best friend

If you ever get around to growing your veggie garden, don’t let those pest or animals ruin your dream. You can get rid of most of them by putting a small ash pile at the base of each plant.

10. No more trips to the vet for ticks, lice, and fleas

I sometimes find it difficult to run to the vet each time one of my cats or dogs come home with fleas or ticks (and yes, it happens very often since we keep them inside only during the winter and early spring.

If you want to save some money of those vet bills, it may be possible to create a strong flea\tick\lice repellent using water, fresh white ash, and a little bit of vinegar. Combine all three inside a bowl or something and stir. The result is thick, off-white paste. My cats and dogs hate it and spreading it on their furs is a nightmare. However, this stuff is as effective as anything you get from the pet shop.

Hope you’ve enjoyed my article on survival uses of wooden ash. Think I’ve missed something? Hit the comments section and let me know.

Before you go, you may also like:

How to survive any medical crisis situation with ease
Secret Military Solution For Power Independence

Lost Skills of our Ancestors that still work today

What if I told you that wood ash is the very best thing that could happen to a household after baking powder and diatomaceous earth?

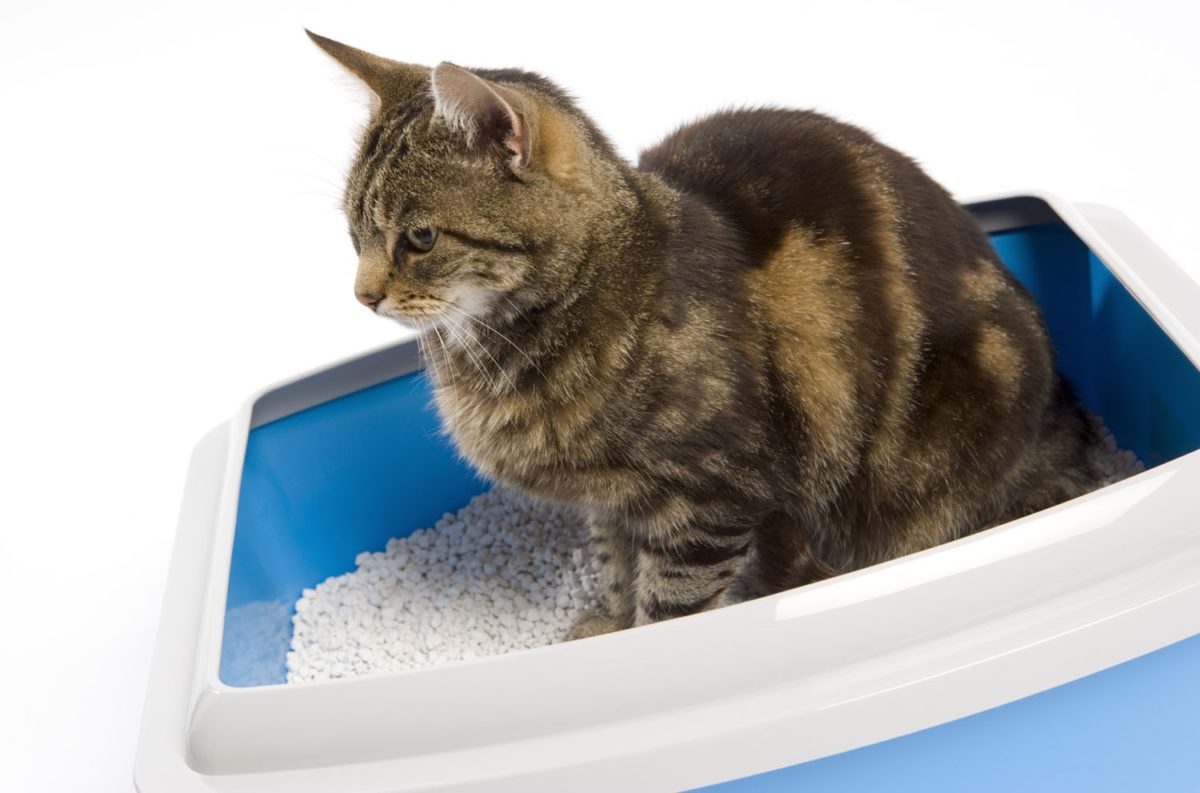
As the proud owner of two small cats, I can admit that sometimes I just can’t keep up with their potty habits. Sometimes they’re worse than kids; spreading those silica pebbles all over the bathroom or bringing them to bed when it’s nap time. Anyway, in buying so many sacks of cat litter, a thought occurred to me – what if I can use this stuff for other purposes than, well, kitty litter?

Of course, this sort of thing called for some extra time spent online searching for non-cat uses of kitty litter. Well, after a very though peer review (cats were pleased with the results of my searches), I pieced together this small list of ways to repurpose kitty litter.

Yes, I know that most of you have heard that cat litter can be used to defog car windows or to gain extra traction during the winter, but there are other ways to use this stuff.

Now, without further ado, here are some ingenious ways to use kitty potty pebbles during an SHTF situation.

  1. Dump some of that stuff in a portable emergency potty

Since kitty litter is made to draw out moisture, it makes for an excellent smell and liquid buster for your portable toilet. The idea of having to go number two in a bucket or whatever may be unnerving, but you won’t have much choice during an emergency.

Want to hear one more reason why you should add kitty litter to your portable toilet? Because you won’t have the time or disposition to empty it after each use. So, do yourself a favor and put some of this stuff inside your mobile potty before nature takes its course.

  1. Making your driveway slip-free

You know how people end up in the ER when the frost sets in? Slipping on the driveways after getting out of the car. You can either use regular rock salt to deal with the ice, but that stuff eats through concrete like acid, or you can opt for an environmental- and driveway-friendly solution which is kitty litter.

Sure, it won’t do much about the ice, but at least you’ll have enough traction to stay upright until you get inside the house. You should also sprinkle some kitty litter under your doormat – yup, that thing can also become very slippery during the winter.

  1. Putting the kibosh on them moles

Prepper loves veggies, mole loves veggies, but prepper does not like a mole – that’s how it is; a true Shakespearian forbidden love affair which ends in the above-mentioned person finding all kinds of non-soil-friendly ways to get rid of the blind Romeo.


Anyway, if you don’t want to end up poisoning the ground, sprinkle a little bit of cat litter around your plants. For some reason, moles abhor cat litter and will stay away from your garden. From where I stand, it’s a win-win situation: no one gets hurt, the soil remains healthy, and plants will grow unhindered.

  1. Nips grease fires in the bud

Whether you’re cooking outside or inside, grease fires are a very real and very scary possibility. Even worse is that you can’t do shit with water. Now, if you forget to check your fire extinguisher, leave it where it is. Grab a handful of kitty litter and toss it over the fire.

Since the silica pebbles are designed to draw out moisture from, well, anything, they’ll blanch that grease spot faster than you can say “preparedness.”  You should also consider keeping a small bag of kitty litter in your BBQ’s firebox if you’re planning on cooking grease-laden foods.

  1. No more rancid smells around the house

Kitty litter is great at reducing foul smells around the house. If there’s a stink in the fridge, put some of this stuff on a small plate and place it inside the fridge.

Now, if the kitty litter doesn’t help with the bad smell, try this trick – in a small bowl, combine one tablespoon of diatomaceous earth, one tablespoon of fine rock salt, and one tablespoon of baking soda. You can also add a splash of apple cider vinegar if you like. Stick the bowl in the fridge, and I guarantee you that by morning, the inside will smell as if the fridge just came out the production line.

  1. No more rodents lurking around your food pantry

Before I got around to redoing the pantry where I keep my emergency food and water stockpile, rats and mice were a big issue. Sometimes I had to throw entire packs of trail mix or whatever because they were literally covered in rat bites and feces. Plugging every hole that you can find is indeed a good fix, but a costly one.

After doing a little bit of research, I’ve discovered that moles aren’t the only pests that detest the sight and smell of cat litter. Apparently, even rats and mice flee in terror at the sight of these pebbles (probably because they know that a cat may be hanging around).

Anyway, doesn’t matter if you own a cat or not, should you find yourself up to the neck in rodents, scatter some kitty litter around the area where you saw bites or feces. They won’t trouble you any longer after this.

  1. Plant care

Since I’ve always like fooling around the garden, knowing how much moisture plants need was kind of an issue for me. There was this one time I ended drowning my wife’s cabbage patch because I used the power hose to water them. If you’re just like me when it comes to gardening, you can use kitty litter to balance the water levels.

Since this stuff absorbs extra moisture, you need not worry about giving too much water to plant – it will draw out the exact amount it needs. The rest will be absorbed by the kitty litter (would be best to use silica pebbles, because they have a higher absorption rate).

That’s it for my 7 funky and fun ways to use kitty litter in an SHTF situation. What are your thoughts? Hit the comment section and let me know.

As the proud owner of two small cats, I can admit that sometimes I just can’t keep up with their potty habits. Sometimes they’re worse than kids; spreading those silica

American colonists were once encouraged to grow and cultivate cannabis for hemp, but it all changed when the plant’s more “medicinal” uses were discovered. And here we are now.

These days it seems like Wall Street has high hopes for the blossoming cannabis industry — with marijuana stocks rapidly gaining traction. Tilray (TLRY) , the first marijuana IPO in the United States, has been having a heyday in the market, with one of the most astonishing sessions earlier this week that saw the stock shoot up over 90% before closing lower. And with an estimated valuation of around $24 billion, cannabis is no longer a joke on The Street.

As other companies like Coca-Cola (KO – Get Report)  work on getting a piece of the pot pie, it seems the wave of approval for cannabis-based companies and IPOs won’t be stopped.


Question is – why aren’t you investing in marijuana stocks right now?

You’re missing out on what could be the quickest and easiest way to get rich in your lifetime. Right now, literally hundreds of these marijuana stocks are exploding to rare highs of 8,500%11,430%17,054%25,099% and even 127,900%

Minting hundreds of new millionaires — and even billionaires, like Christian Blue and Michael Kennedy — along the way. And because many of these marijuana stocks are still trading for just pennies, you could literally start investing in marijuana stocks with just a $100 bill.

So what’s keeping you from turning that tiny stake into a massive fortune, and retire incredibly wealthy in less than a year. I’ve seen it happen to literally dozens of folks already.  And even more, are still becoming millionaires seemingly every single day.

One fellow I know of, for example — Terry Braid — was a local electrician in his hometown, when he decided to invest in this once-in-a-lifetime boom with a friend. The result? His combined stake is now worth over $200 million! Imagine that… A 53-year-old now has more millions than he could ever spend. All because he invested in what historians could look back on as the biggest boom ever.

You will NEVER see an easier way to get rich than explosive marijuana stocks… not in your lifetime. And if you miss out, you’ll spend the rest of your life regretting it.

news headline

Right now, hedge funds, venture capitalists, institutional investors and even massive corporations like Constellation Brands have marijuana investments in the pipeline. And once they get set up, billions — possibly even trillions — of dollars will flow into the marijuana industry, helping push these marijuana stocks even higher.

This really is the new gold rush.

That’s why we’re already seeing some of the world’s biggest investors, like hedge fund billionaire Leon Cooperman, and billionaire venture capitalist Peter Thiel, go all in. It’s the biggest no-brainer of our generation.

But while the “smart money” is going all-in right now,  everyday folks are being left out of this once-in-a-lifetime “get-rich-quick opportunity.” Regular Americans like you are not participating, simply because they don’t know how to get started, or what marijuana stocks they should buy.

And that’s not fair.

Many of These Tiny Marijuana Stocks Are Still Trading for Just Pennies!


Because there are literally countless dozens of other small marijuana stocks still trading for pennies, you could get started with a single $100 bill. You could cash out with a retirement fortune just a few short months from today.

After all, just look at what happened with shares of Abattis Bioceuticals Corp., a tiny Canadian-based marijuana company. You’ve probably never heard of it. But had you invested a single $100 bill when shares were trading for just 3 cents, you could have cashed out with $9,208 in profits. In just a little over three months!

chart

Look, take it from someone who has been involved with the markets for well over a decade. There’s never been ANYTHING like this before. This is the true “get rich quick” opportunity you’ve spent your whole life waiting for, one that could turn a single $100 bill into a retirement fortune.

That’s because Abattis Bioceuticals Corp. is just one of literally hundreds of marijuana stocks that are exploding right now…

For example, look at what happened with shares of Acacia Diversified Holdings, a tiny marijuana company from Clearwater, Florida. Had you put $100 in when shares were trading for just pocket change, you could have turned your $100 stake into a quick $13,700 windfall. Invest $1,000 and you’d be looking at $137,000 in profits!

Imagine that… six figures in gains in just a few short weeks.

chart


You’re probably starting to see why so many people are becoming marijuana millionaires seemingly every day. That’s because the bottom line is this: almost every single day, dozens of marijuana stocks are exploding, making it the fastest and easiest way to grow rich… starting with just a few dollars in your pocket. 

But this WON’T last forever…

The marijuana stocks that are trading for pennies will soon begin trading for $25… $50… $75… or maybe even $100 or more. And once they get expensive like that, it will be too late for you to get rich quick. We’re already starting to see it happen with some marijuana stocks like Canopy Growth Corp., which recently reached a high of $51.53.

That’s why I can’t emphasize size this enough, there’s no time to waste.  We will NEVER see an opportunity even remotely like this again in our lifetime. That means you have a very small window of opportunity to act. One that’s closing with each passing day.

Just remember, every day you sit out, someone else is growing rich from Marijuana Stocks!

Funny or not, it’s just the simple truth.

Just remember, every day you sit out, someone else is growing rich from Marijuana Stocks!

Where would we be today without mouthwash? Probably brushing our teeth several times per day in order to get rid of all those food pieces. Wouldn’t call it a marvel a technology, but mouthwash does have its uses and, some of them, go way beyond oral hygiene.

And because I was thinking the other day about reasons to stockpile even more mouthwash than usual, I ended up burning the midnight oil to see what that stuff’s good for apart from, well, using it to wash your mouth. Of course, I won’t bother you with tall tales about guys using mouthwash and mumbo-jumbo to summon otherworldly beings, but I did discover some very interesting facts about this stuff.

Did you know that there was a time when FDA was seriously considering blackballing mouthwash on account of a freak study that linked this substance to oral cancer? Of course, it was later proven that the study was a bogus and that the only severe reaction mouthwash can cause is the so-called black tongue – basically, the tongue grows tired of shedding dead skin cells which end up sitting there, is not pretty.

The black color is the result of a chemical reaction between an oxidizer commonly found in mouthwash and the dead skin cells. No reason for alarm, as it is not life-threating (just use a brush with soft bristles to scrape your tongue or chew some gum).

Anyway, back to the topic du jour – mouthwash in survival. As many common household items, mouthwash can also be used during an SHTF situation. Here are my choices in alternative uses of mouthwash.

Antiseptic

Let’s start by stating the obvious – since mouthwash was designed to kill bacteria responsible for tooth decay and bad breath, it’s safe to assume that it has strong antibacterial properties. If you don’t have anything else on hand, you can always pour a bit of mouthwash on small scrapes and nicks. Word of caution though – this stuff’s going to sting like hell.

Have you ever tried to disinfect a minor wound with medicinal alcohol? It stings even worse than that. Don’t forget to wash with clean water and flush the area with a saline solution – mouthwash contains other substances that really don’t belong inside the wound.

Get this book now and learn such facts as: The Antioxidant 550 times stronger than vitamin E and 6,000 x More Powerful Than vitamin C. Get your copy here.

Washy-washy the toothbrush

As I’ve said countless of times, oral hygiene’s very important, no matter how shitty the situation is. If you ever find yourself stranded in the field, it may be possible to sterilize your toothbrush with a little bit of mouthwash. In fact, it’s quite advisable to do so before putting that thing in your mouth, especially if you’ve been on the road all day.

If you want to make sure that toothbrush’s germ-free, I would advise soaking it in mouthwash – grab a zip-lock bag or small airtight container, put the toothbrush inside, pour a little mouthwash, seal, and stir.

No more stinky feet

Yeah, I know that this not qualify as an SHTF situation, but try sleeping in a closed tent after a day of walking, hiking, running or whatever. In case you don’t have any soap nearby, just drizzle some mouthwash on those mutton chops, rinse with water, and dry yourself with a towel. Yes, you’ll have less mouthwash, but at least you’ll get a good night’s sleep.

Itchiness and Accidental Poisoning

There’s nothing more thrilling than the feeling of tiptoeing through poison ivy or nettles. Don’t fret, don’t whine, and, most importantly, stop scratching. Put a bit of mouthwash on the sting, and you’ll be up on your feet in no time. Just be sure you use an alcohol-based solution – the other kind won’t be of any use to you in this situation.

Ensuring that your cooking stuff is germ-free

One thing hikers and backpackers fail to observe are keeping their food utensils clean. Yes, I know no one will be in the mood for washing plates and cutlery after a hearty meal, but this would mean extending an invitation to all kind of nasty germs.

Now, if you don’t have anything on hand to sterilize your plates, and that includes clean water, you can always use a bit of mouthwash. Shake the bottle for some foam – it will be easier to remove grease and anything sticking to the plate.

Makes body stink go away

Because no good deed should go unpunished, the result of pushing your body beyond its limits is a nasty smell. From where I stand, there are two options – either you wait until you find a source of water to take a bath or do something before the smell curls your toes.

If you have nothing else in your B.O.B, use a tiny amount of mouthwash to wash those stinky body parts. Works great for the armpits, chest, and legs, but I wouldn’t try it elsewhere.

No hand sanitizer? Not a problem.

Hygiene’s important but it becomes vital in a shit hits the fan situation. Apart from the fact that most of the environments you’ll be traversing are riddled with all manner of germs that would like nothing more than to take a bit out of you, your hands will be in permanent contact with icky stuff. I don’t know if your B.O.B contains soap or not, but it should at least have a small bottle of hand sanitizer.
In the event you run out of the stuff, use some mouthwash to sterilize your hands. Might not be as powerful as a regular hand sanitizer, but at least your hands are clean enough to handle food or tend a wound. I don’t judge.
And so, we come to the end of yet another entertaining piece of how everyday items can save our lives in a potentially life-threatening situation. Mouthwash is indeed a good thing to have around the home, regardless if you’re a hygiene freak or not. Just to be safe, you should throw in a couple of small mouthwash bottles in your B.O.B. Missed anything? Drop a line or two in the comment section and let me know.


Other self-sufficiency and preparedness solutions recommended for you:

The Lost Ways (The vital self-sufficiency lessons our great grand-fathers left us)

Survival MD (Knowledge to survive any medical crisis situation)

Backyard Liberty (Liberal’s hidden agenda: more than just your guns…)

Alive After the Fall (Build yourself the only unlimited water source you’ll ever need)

The Lost ways II (4 Important Forgotten Skills used by our Ancestors that can help you in any crisis)

The Patriot Privacy Kit (Secure your privacy in just 10 simple steps)

Where would we be today without mouthwash? Probably brushing our teeth several times per day in order to get rid of all those food pieces. Wouldn’t call it a marvel

Oh, how I love food! Let me count the ways.

Actually, I don’t like food-food, but the homemade variety. And nothing beats a meal cooked during an SHTF situation.

Yes, I know how that sounds, but admit it that the best meal you’ve ever eaten was back when your can was on the line. Even spam taste better when it’s eating from tin plate set beside a romantic 24-hours emergency candle.

Which brings us to the topic du jour – how to make spam at home.

I know most of you people have enough cans in your emergency supplies pantry to make it through WWIII, but wouldn’t it be neat to learn how to make some yourself instead of buying? Sure it would, and I am going to show you how easy it is to make this stuff. What can I say about spam? The dish is so popular that it inspired songs and even phrases like the one we use each day: “for when the spam hits the fan.”

Now, as for the recipe, I have to warn you that it takes a little bit of muscle to pull this through because everything will have to chop, diced, and ground. So, without further ado, here’s how to prepare emergency spam. Ingredients:

  • Pork shoulder (about two-and-a-half pounds). You can use other pork cuts as well. Just be sure that your cut of choice has enough fat on it.
  • Good-quality ham (about three ounces).
  • Tender Quick Meat Cure (bought mine from Amazon. Aim from one tablespoon at first and then half a tablespoon later.
  • Garlic (two cloves are more than enough for this recipe).

Already gathered your ingredients? Great! Then it’s time for phase two of our spam cookery.

How to prepare homemade spam

Step 1.

Get your oven ready. Pre-heat to 300 degrees Fahrenheit.

Step 2.

Tend to the meat. Take your pork shoulder or cut of choice and cut it into small cubes.

Step 3.

Set up your grinder. After you finish installing the thingy, grind the pork shoulder cubes. If you prefer your mixture to be less chunky, grind the meat one more time.

Step 4.

Ham and garlic. Take your ham and mince it. Place it afterward in a food processor. Now mince your garlic and add it to the ham.

Step 5.

Finely mince the ham and garlic. Don’t make it into a paste, though.

Step 6.

Grab a large bowl and wash your hands. Place the ground pork meat, ham, and garlic in a large bowl. Add one tablespoon of Tender Quick Meat Cure and use your hands to mix the ingredients. If the mix seems too loose, add half of spoon of Tender Quick Meat Cure.

Step 7.

It’s time to shape your ham. Grab a baking tray from the pantry. For this recipe, I used a small ceramic terrine tray my wife got from her mother. Put the mixture inside the tray and use your hands to spread the mixture over the entire surface.


Step 8.

It’s oven time! By now, your oven should have reached the desired temp. Cover you spam tray with an aluminum foil. Make sure it’s wrapped around nice and tight, especially around the handles. Now, take a large baking tray from the pantry and place the spam tray smack in the middle. Fill the larger with water (should be ¾ full). Place in the oven for three to four hours. Check the larger tray every half an hour and make sure that there’s still water there.

Step 9.

Time’s up! Let’s pop the lid. This is the most important part of making ham. Remove the tray from the oven and allow it to cool for a bit. After that, use some gloves or something to get the spam tray out of the bigger tray. Have to warn you that this part’s a little bit disgusting. Take the aluminum foil off the spam tray. That yellowish goo on top of your meat is pure fat. Take a ladle or a large spoon and remove the excess fat. Temporarily place it in a plate or bowl. After it cools down, throw it in the garbage because it cannot be reused. Don’t forget to leave a thin layer on fat on top of your spam.

Step 10.

Bag and tag. Grab yourself a lid from the pantry and place it on top of the spam tray. All you need to do know is to find some sort of weight to put on top of the lid. This prevents the blob inside from expanding and from drawing too much moisture from the air. I used two small bricks to weigh down the lid, but you can use anything you have on hand as long as it’s heavy and keep the lid shut.

Step 11.

The ice-man cometh! Place the tray with the weight on top inside the fridge. You can also turn this into full-blackout recipe by swapping the fridge with a cool and dry place. Don’t worry about the meat turning bad because it’s packed with enough salt.


That’s it!

If you’ve gone through every step, you should have fresh, homemade spam in 24 hours or less. Now, bear in mind that this is not the canned spam variety which means that it doesn’t have a very long shelf life. However, if you know a little bit about canning, you can go for the kill.

I haven’t gotten around to canning my span mostly because I don’t know a thing about how to seal those blasted things. My mother told me that there’s a special tool for that job, but I’ve yet to discover it. Anyway, it’s not like there’s enough spam to can – my family made quick work of it.

Like my recipe? Let me know your thoughts in the comment section. Also, if you know of any canning method, I’ll be grateful if you would care to share it.


Other Self-sufficiency and Preparedness solutions recommended for you:

The Lost Ways (The vital self-sufficiency lessons our great grand-fathers left us)
Survival MD (Knowledge to survive any medical crisis situation)
Backyard Liberty (Liberal’s hidden agenda: more than just your guns…)
Alive After the Fall (Build yourself the only unlimited water source you’ll ever need)
The Lost ways II (4 Important Forgotten Skills used by our Ancestors that can help you in any crisis)
The Patriot Privacy Kit (Secure your privacy in just 10 simple steps)

Nothing beats a cooked meal during a SHTF situation. You have no idea how easy it is to make this stuff.

There’s no better nor frustrating way of knowing that it’s six in the A.M and you need to go to work then having to waddle all the way to the bathroom in order to massage those gums.

Have you seen The Green Mile? No matter how hard I try, I still end up crying like a toddler at that scene where Paul and the others escort Coffey to the electric chair. Well, that’s how all of my mornings fell, more or less – dead man walking the walk just to have his brain zapped by yet another glorious 9-to-5 bull session.

Anyway, rant aside, during one of the tedious morns, while shining my chicklets, a thought crossed my mind – is there any other way of using toothpaste besides, well, brushing your teeth?

As always, yours faithfully hoped on the computer and did a little bit of snooping. Of course, as you’re probably painfully aware by now, not everything you find on the Internet should be taken for granted (there was this guy who wrote this ginormous article on how common toothpaste brands such as Colgate or Lacalut can magically heal anything from brain cancer to athlete’s food).

So, after weighing in the facts and laughing my can off in the process, I’ve discovered a couple of nifty and very real ways of using toothpaste outside the bathroom.

Because talk’s cheap and so is the author, let’s get down to business. Here are 10 ingenious ways you can use toothpaste in any SHTF situation.

Acne buster

Do you think that only pre-pubescent guys and girls have to deal with acne? Dead wrong! Acne is a long-term skin condition. Very long-termed, I might add, and this is not coming from a guy who wrestled with acne until his late 30s. Anyway, besides taking your prescription meds (which is a must), you can try rubbing a bit of toothpaste on some of the more problematic areas.

You don’t need much; just a squirt the size of a pea. Gently massage the area, rinse with cold water, and you’re all set to go. It won’t make acne vanish overnight but, in a couple of weeks, you’ll see fewer whiteheads and pimples on your face. This trick is also great for people with oily skin – rub a bit of toothpaste, and your skin will become smoother than a baby’s bottom.

Getting rid of mosquito bites

If it’s one thing I hate more than doing taxes, it’s mosquitos. Summer comes, those dreaded seem to pop out of the ground to spread their reign of terror. Sure, a can of bug repellant will do the trick, but I usually find myself covered in tens of mosquito bites, long before I get around to using the bug spray. A mosquito bite shouldn’t be a reason for concern (unless you live near the Nile area), but there’s nothing you can do about the itching.

Probably most of you end up with bites ten times their original sizes because you can’t simply stop scratching yourself. Well, after trying everything from soothing sprays to medicinal alcohol, I’ve discovered that you can get rid of the itching if put a pea-sized amount of toothpaste on the bite area. I would go with the peppermint variety because it has that cool feeling to it. Works just fine on other types of insect bites.

Treat burns

A great way to relieve pain and to prevent blistering is by putting a little bit of toothpaste on the scorch mark. Before applying sterile gauze, submerge the burn area in cold water and apply a tiny amount of toothpaste. Since the stuff has powerful antibacterial properties, it will keep the nasty germs at bay and, in addition, create a waterproof barrier.

What can I say? It’s a win-win situation. Word of caution, though – this works for minor burns (a drop of hot oil or wax on hand, applying too much pressure on cigarette butt). For more severe burns, ditch the toothpaste, and get your can to the hospital.

Plugging empty nail holes

For me and my family, spring is more about redecorating than actually doing any cleaning. So, old pictures end up in the attic, and new ones take their place. However, there are instances when the pic we choose for a room really doesn’t match the décor. The result – we end up with one more empty spot and a nail sticking out of the wall.

Most times, I let them nails alone because pulling them would not solve anything except ending up another hole in the wall. If you have the same problem, try this simple hack – get a little bit of toothpaste and plug the hole. Use a hair dryer or something to harden up the paste. You can leave it like this if your rooms painted in hospital-white or take a brush an apply a coat of paint. Easy-peasy!

Poison Ivy treatment

Because mosquito bites are the least of your worries when you’re out camping or hiking. Two words: poison ivy. Apart from the fact that you feel that your entire skin’s on fire or something, not even the best cream will make the itching go away. Now, if you want to skip the step whereupon you’re forced to wear gloves or something as not to upset those pustules, try applying a little bit of toothpaste on the sting area. Of course, the skin sores won’t go away overnight, but you would feel less itchy.

Defog your goggles and windshield

Having to wear prescription glasses since adolescence sort of made me come up with cookie solutions to the cleaning and defogging issues. Back in my days, lenses were made from regular glass. Sure, they were heavy as shit, but at least there was no fogging. Fast-forwarding a bit, nowadays prescriptions are lighter, cheaper, more resilient to scratches, but they do tend to fog out more frequently compared to their glassy counterparts.

Anyway, if you want to prevent fogging, which becomes particularly dangerous when you’re behind the wheel, rub a little toothpaste on the lenses and rinse before leaving the house. I wouldn’t recommend doing this more than a couple of times per month since excessive use of water, and other stuff can wipe away the anti-glare and blue light coatings.

No more bruising

Bruising’s the inevitable denouement of any kind of sudden pressure exerted on the tissues. Remember when we were kids, and we used to come home covered in scrapes and bruises after a whole day of biking?

Well, times might have changed, but habits have not. I for one can’t let the week go by without a brownish patch on my arms and legs. A quick fix for bruises – making a thick paste out of water and toothpaste and applying it to the future bruise area.

The ingredients inside the toothpaste will restore circulation, preventing major discolorations and cutting down on recovery time.

Word of caution though – if you see more of those bruises on your body and know for a fact that you haven’t hit yourself within the last couple of hours, you should ditch the toothpaste remedy and go see a doctor. It may be the beginning of a simple iron deficiency or something life-threatening.

Makes for stronger nails

Brittle nails can be solved by dunking your hands in a bowl of water mixed with toothpaste. Yes, I know it sounds a little bit far-fetched, but do keep in mind that nail brittleness has all sorts of causes, one of them being germs. Since toothpaste contains quite a bit of that stuff, it will eliminate most bacteria, leaving your nails stronger, longer and shinier (was kidding about the longer part).

If you’re that kind of person whose nails tend to exfoliate no matter what you do, I would advise taking some calcium supplements or eating calcium-rich foods. Of course, you should also use this at least twice a week.

Revive your CD and DVD collection

Growing up in the era of computers and laptops, I managed to amass a collection of CDs, DVDs, Blue-Rays, and, yes, even floppy disks. Although most youngers don’t even know what a floppy was or how hard it was to store docs and games on them, from my experience I found them to be more resilient compared to optical storage devices such as CDs or DVDs.

Not even keeping them inside their original cases doesn’t seem to safeguard them from scratches. Sure, losing a CD or two is no big deal, considering that most of them are probably filled with all kind of crap we don’t need.

Still, it becomes truly tragic when we lose stuff like those CDs\DVDs where we stored family vacation photos or the holy wedding DVD (guilty!). It’s a gamble, but there may be a way to access that CD or DVD long enough to copy the data to your laptop or computer.

Take a closer look on the back side of the recording device and notice where the scratches are. Put a little bit of toothpaste on that area and wipe thoroughly with a clean cloth. As I’ve said, it may or may not work, but what have you got to lose?

Remove ink and tobacco stains from hands

Since everybody’s now bonkers about working on the computer, the ink has become less and less popular. Still, for those of you for who the fountain pen still means anything, ink spots from the fingers can be very difficult to remove.

A quick workaround would be to run some toothpaste on the stain and rinse with clean water. Works for clothes too. As for tobacco stains, you will need to prepare a mixture consisting of water, toothpaste, and baking soda. Stir and use a toothbrush to put the stuff on your fingers. Give it a good scrub and, voila – no more stains.

That about wraps it up on my cookie 10 alternative uses of toothpaste. If you were still in doubts about toothpaste should be stockpiled or not, here’s the answer to your question. As always, if you feel that I’ve missed anything, don’t be shy and hit the comment section. Would also love to hear about more how you people use toothpaste in the field.

Before you go, you may also like:

This is more than just about your guns…
How to survive any medical crisis situation with ease
10 Easy Steps to Secure your privacy
Secret Military Solution For Power Independence

DIY Unlimited water source
Why a food reserve is way better than the Federal Reserve
Lost Skills of our Ancestors that still work today

A thought crossed my mind – is there any other way of using toothpaste besides, well, brushing your teeth? I found not one, but ten.

I don’t need to remind just how darn important it is to know what to cook when the power goes out. There are so many recipes on the grand world-wide-web that you need only type in “gimme food” in Google to figure out your next step.

The trouble with these “whip-up” dishes, as I like to call them, is that they have a very limited shelf life, despite being bagged and refrigerated. In my searches for the next cannable superstar (be sure to check out my article on canning and pickling pork meat), I’ve stumbled upon a most interesting recipe – the so-called Poor Man’s Hamburger. According to its description, it should be an Amish dish, although I find it very hard to make a connection.

Anyway, the recipe’s pretty straightforward and if you have a good pressure canner, you can keep this stuff in your pantry for at least three months if not more. The weird part about preparing this recipe is who or rather what gets the spotlight – though it’s a meat-based dish, the gravy’s actually the one who steps into the limelight.

Crazy, right? Not in the very least! As you’re about to see, the gravy you get is what you might consider a great SHTF asset – it can very easily be combined with the meat of all sorts (chicken, beef jerky, spam) but it can also be eaten, well, plain, as a sort of early-morning broth.

Before we get to the cooking part, I should warn you that this recipe takes time. If you have something big planned that day, I will leave it for another day, preferably a lazy Sunday. So, without further ado, here’s what you’ll need to do in order to prepare Cannish, aka the canned version of the Amish Poor Man’s burger.

Gathering your utensils and ingredients

For this recipe, you’ll need the following tools:

  • Canning jar (the bigger, the better).
  • Plastic container (I would go for a 35 quart because you’ll have a lot of stuff to mix)
  • Food processor.
  • Oven grill (if you don’t have one, you can always use the top part of an old BBQ which you can place it over a tray).
  • Mouth rim (you’ll need this to shape your burger patties).
  • Skillet (for cooking the gravy).
  • Aluminum foil.
  • Lots and lots of patients.

As for the ingredients, go raid the pantry or the local farmer’s market of the following supplies:

  • Celery (around five cups).
  • Onions (five cups will do).
  • Saltines (I used one and a half pounds of saltine or six packs).
  • Eggs (two dozen).
  • Milk (five cups).
  • Lots of salt and pepper.
  • Ground beef (this recipe calls for at least 30 pounds. That’s around two or three big-ass rolls).
  • Canned mushrooms (five cans).
  • All-purpose flour.

Yes, I know it’s a very long list, but as I’ve told you, this is the kind of recipe that kind of makes you spend the entire day in the kitchen. Still, do bear in mind that will also be some waiting time, which would be right after you stick those burger patties into the over. All done with the tools and ingredients? Great! Let’s get right down to business.

How to prepare Cannish

Step 1. Grab a cutting board, a sharp knife, and get to chopping. Have your food processor ready, because everything you’ll chop or crush from this point forward will require a little bit of mixing.

Step 2. Leave the chopped onions and celery aside for the moment. As for the saltines, you can either use a mortar and pestle to crush them or place everything inside a zip-lock bag and use a rolling pin to beat the living daylights out of it. When you’re done, add them to the food processor, and give them a good mix (I scrambled them for 10 or 15 seconds to make sure that there are no chunks left).

Step 3. Grab yourself a large bowl and crack open two dozen eggs. Whisk the shit out of them.

Step 4. Measure five cups of milk.

Step 5. It’s now time to put everything together. Place the plastic container on your work table and add your chopped celery & onions, saltines, whisked eggs, and milk.

Step 6. Get dirty! You have two choices for the mixing part – wooden spoon or hands. I personally prefer the latter (make sure you’ve washed your hands before dipping them in the mix).

Step 7. Add some salt and pepper to the container (I used two tablespoons of rock salt and one and a half tablespoon of grounded black pepper) and continue mixing.

Step 8. Stick the container in the mix in the fridge for 30 minutes. It will be easier to handle once you get to the patty-making part.

Step 9. Get your ground beef out of the freezer and use a knife to remove the membranes. Add the meat to your plastic container and use your hands or a wooden spoon to bind the mixture. FYI, it’s easier to do this if you dip your hands in ice-cold water. Fill a small bowl with cold tap water and keep it next to your container.

Step 10. Start making patties. Take a handful of meat and stick in the metal rim. If you’re skilled patty—maker, you can ditch the ring, and form them by hand. Don’t make them too big or thick. Remember that your goal will be to place each cooked patty inside the canning jars. You shouldn’t also take into account that this type of meat is packed with fat, which will kind of end up in the oven tray.

Step 11. Stick the formed patties in the fridge for 15 or 20 minutes. To prevent them from sticking to each other, create patty layers separated by baking parchment.

Step 12. Get the patties out of the fridge and arrange them on your grill. If you use the exact amount of ingredients, you’ll end up with 28 or 29 burger patties.

Step 13. Preheat your over to 375 degrees Fahrenheit.

Step 14. Place the BBQ grill with a tray in the oven and bake for 35 minutes. Don’t forget to flip the patties after 15 minutes. Depending on your rig, this step can take anything from 2 to 6 hours. In my case, it took about three and a half hours to bake all the burger patties. When they’re done, place them in a large roasting pan. Cover it with two layers of aluminum foil. Allow the burgers to cool down.

Step 15. In the meantime, get a skillet and prepare the gravy. Here’s how to do it. Get one and a half cup of fat from the patties and add it to the skillet. Set your heat to medium-low. After the fat begins to warm up, and half a cup of all-purpose flour.

Use a spoon to stir. Don’t rush it! Gravy’s something that takes a lot of patience. If you see that the mix is about to go up in flames, lift the pan off the stove, and put it back again. You’ll know that the gravy base is done when it turns light brown.

Step 16. It’s time to prepare the mushroom soup. In a big pot, pour the contents of five mushroom soups cans. Using an empty can as a measuring cup, add five cups to the shroom soup and bring it to a boil.

Step 17. While the shroom soup’s still hot, grab a ladle and carefully add it to the browned flour mixture. The secret to not ending up with burned gravy is to stir while pouring shroom soup with the ladle. It may take a while longer, but it’s worth it. If you feel that the mix is too thick for the spoon, use a whisk instead.

Step 18. When you’re done adding every last drop of shroom soup, give the mix a good whisk, and let it bubble for five more minutes before killing the flame.

Step 19. Take a breather. Smoke if you have them. After the gravy cools down a bit, it’s time to put everything together.

Step 20. Give those canning jars a good wash. You can either submerge them in a tub filled with water and dish detergent or boil the Hell out of them before using. Your call.

Step 21. Place five burger patties in each canning jar and cover with gravy. Put the lid on, tighten it, and allow the jars to cool down overnight before placing them in the fridge or pantry.

Congratulations! You’ve just made your first batch of canned Amish Poor Man’s burgers. Your kitchen probably looks like a scene from WW2 or something, but who cares when you have delish marinated burgers. If stored probably, you won’t have to worry about running of food, at least for a couple of months. Although the canning part allows you to store this stuff in any place outside of the fridge, I would strongly advise you to keep your jars refrigerated and to consume it in two months’ time.

Another thing about this recipe is that it will take a while to figure out how to make the gravy base. For my part, I had to discard the contents of two skillets and ended up using more than three cups of fat before I was able to make a ‘stable’ base. As I’ve mentioned, the trick is to gently stir the mix and to lift the skillet every now and then. If the weather’s nice, you can always skip the oven part and cook your patties over a charcoal barbeque.

As for the mix, if you can’t find any saltines, you can always replace them with other types of crackers. Just make sure that they’re salty. The dish can be eaten hot off the oven but, if you want to get more kicks out of it, stick in the fridge and leave it overnight. By morning, the patties would have sucked in all that delicious gravy. You can heat them up in your microwave or in a pan with boiling water.

That’s it for my Cannish recipe! What do you guys think about this SHTF dish? Hit the comments section and let me know your thoughts.

Before you go, you may also like:

This is more than just about your guns…
How to survive any medical crisis situation with ease
10 Easy Steps to Secure your privacy
Secret Military Solution For Power Independence

DIY Unlimited water source
Why a food reserve is way better than the Federal Reserve
Lost Skills of our Ancestors that still work today

Anyway, the recipe’s pretty straightforward and if you have a good pressure canner, you can keep this stuff in your pantry for at least three months if not more.

Probably most of you have included some kind of wound cleaning substance in your first-aid kits. Sure, hydrogen peroxide’s the way to go for getting dirt and other stuff out of the wound, but it’s hardly the only antiseptic out there.

Anticipating that some of you can get a little freaky like me when it comes to having a complete medical kit, I’ve decided to use this opportunity to write about potassium permanganate – prince and pauper, at the same time, among antiseptics. What’s even more interesting is the fact that knowing what this stuff is will allow you to use for stuff other than cleaning wounds.

Before I start talking about the many uses of potassium permanganate, here’s a historical tidbit. During the latter years of the Korean War, the North was so desperate to gain a foothold that it began deploying unconventional weaponry. White phosphorus rounds were one of the weapons used against the South Korean soldiers and friendly American GIs. I won’t go into many details as to what kinds of wounds these devilish contraptions inflicted; suffice to say that it wasn’t a welcoming sight.

Anyway, the trouble with phosphorus rounds was they continued to burn inside the would long after leaving the gun’s barrel. Almost invisible to the naked eye, the Army surgeons had to improvise. And here’s where potassium permanganate comes into play – phosphorus reacts to potassium permanganate; quite violently I might add.

However, if used in small amounts the compound makes phosphorus light up like a Christmas tree. So, in order to operate, surgeons would dunk wounded patients in tubs filled with water, pour in some potassium permanganate, switch off the lights, and operate.

Outside of surgery, this compound can be used for tons of other stuff, most of them having to do with our favorite topic – getting out of SHTF situation. So, after probably boring you half to death with my little historical detour, here’s how potassium permanganate can serve you in a survival-type situation.

  1. Wound managed and various life-threatening scenarios

Let’s start by stating the obvious – potassium permanganate is a very effective antibacterial agent and just the thing you’ll need to keep infection at bay. However, the thing with this compound is knowing what forms works best depending on the nature of your emergency. For instance, in the case of wound management, the liquid solution would be the best approach. However, the powdered form can be successfully employed when having to deal with stuff like snake bites or poisoning.

By the way, if you or someone close to you has ingested poison, you can induce vomiting by using a 0.2 percent permanganate solution. Doctors would often order stomach washes using this compound. Conditions of the skins like irritations, sores or eczema may also be treated using potassium permanganate. Still, if you consider including this compound into your B.O.B or household emergency kit, I wouldn’t use it for more than wound washing.

  1. Getting rid of the dreaded morning breath

Although it’s far trickier to use than baking soda\salt with others, it may be possible to use potassium permanganate to 86 the dreaded morning breath. To prepare a mouthwash, dissolve one gram of powdery potassium permanganate in two gallons of water. This stuff will burn your esophagus and stomach, so be sure you spit it out. By the way, since potassium permanganate is known for its astringent effect (making the skin cells contract), you can use the mouthwash mix to get rid of stinky feet. Use this in conjunction with purified water and soap, and you won’t need another foot spray ever.

  1. Water filtration

If you’re all out of water filtration tablets or can’t lay your hands on charcoal, it may be possible to use powdered potassium permanganate to remove bacteria from the water. According to the FDA’s safety guidelines, the concentration should be around one unit of potassium permanganate to 10,000 units of water.

To figure out what this means, imagine you have a well with very dirty water. By applying the dilution ratio, it means that you will need to use around 7 grams of powdered potassium permanganate to purify one gallon of water. Do the math if you plan to sterilize smaller amounts of liquid.

  1. Fire-starter and probably self-defense weapon

Here’s my favorite way of using this stuff outside medical emergencies – to start a quick fire. For this, you will need around 10 grams of potassium permanganate and one-quarter of a teaspoon of glycerin (if you can’t find glycerin, use a water and sugar mixture). Place the permanganate on a small plate. For extra safety, you should do this experiment outside, as far away from flammable sources as possible. It would also be wise to put the plate on a hard surface like concrete slab or brick.

Now grab a pipette, draw a bit of glycerin and put a few drops in the middle of your permanganate mound. Stand back because the fumes are highly toxic. In a matter of seconds, you’ll see smoke rising from the mound, followed closely by purplish flame. When it’s safe to approach, grab yourself a handful of kindling and longs, move the place to your firepit (don’t forget those safety gloves) and, voila! You now have a cozy fire.

As for the weapon part, I guess you can create makeshift pipe bombs using potassium permanganate and phosphorus. I don’t know for sure if phosphorus is an over-the-counter compound or not, but in SHTF situation, you may be able to combine these two in order to make defensive weapons.

Be extremely careful when mixing potassium permanganate with other compounds. As you’ve seen from the above-mentioned experiment, permanganate doesn’t behave like an English gentleman when combined with stuff like glycerin. Always wear protective gear when working with volatile compounds.

Well, that above covers my take on using potassium permanganate outside the medical field. I hope you’ve enjoyed my article. As always, if you feel that I’ve missed anything, don’t be a stranger and leave a comment.

Outside of surgery, this compound can be used for tons of other stuff, most of them having to do with our favorite topic – getting out of SHTF situation.

I would lie if I said that I don’t envy all those wonderful homesteaders who managed to put a couple of bucks outside for the root cellar. Yeah, those things are really great (if you have them, of course) and not to mention very useful during any kind of shit hits the fan situation – a hole in the ground, some stones, a couple of shelves, and you’ve got yourself a gigantic fridge capable of storing veggies, legumes, pickles, and whatnots.

Ingenious, that’s what it is! However, if your home doesn’t come with a root cellar, building one from scratch takes a lot of time, energy, and, yes, a shit-load of money.

Fortunately, there is a way to tap into Mom Nature’s icy powers without the need to fork over too much cash. Being a very determined guy, I have searched high and low for ways to recreate a root cellar without actually having to build one. Sounds crazy, right? Not in the least, as you’re about to see.

The idea to write this short and sweet piece came to me after watching a documentary on National Geographic about ancient food storage methods. Can’t remember the name of the show, but there were these two guys traveling around the world and interviewing homesteaders about how they make food last longer.

In the last part of the show, there was this man from China who was quite a bit of a local celebrity, thanks to his top-notch Kimchi. For those of you who don’t know, Kimchi is Asia’s version of pickled cabbage. However, instead of using canning jars, homesteaders would place the thinly-sliced cabbage inside a ceramic jar, which would later seal with wax before burying it in the Earth.

So, with this in mind, I snooped around the Internet and found a simple and cheap way of making a mini version of the root cellar using only an old metal barrel. Here’s how to whip up a backyard cellar in order to store your veggies.

Gathering the necessary materials

For this project, you’ll need the following:

  • A shovel.
  • A barrel (I would go with a galvanized metal barrel because they’re easier to clean and fare much better underground compared to the plastic ones).
  • Rocks (shape and size don’t matter).
  • Straw.
  • Several pieces of plywood to cover the lid.

Ready with the gear? Neat! Let’s get to work, then.

How to build a mini root cellar in the backyard

Step 1. Find a suitable place to dig a hole. I would advise you to place your barrel\future root cellar in a sunny spot. You should also make sure that there are no water pipes or electrical lines running nearby.

Step 2. Once you found a suitable location, grab your shovel and start digging. The hole will need to take the shape of the barrel. As for depth, it all depends on the size of the barrel. Just be sure that the rim stays on top, with the remaining underground.

Step 3. After you’ve finished digging the hole, remove any deep roots or pebbles from the bottom. Moreover, ensure that the end of your pit is dry.

Test the ground – if it feels moist to the touch, it means that there’s water underneath which is a big no-no. I know it’s annoying, but if this happens, you will need to find another location for your root cellar. Mark the spot in case you’re thinking about adding a well to your property.

Step 4. Fill the bottom with the rocks you’ve brought.

Step 5. Place the barrel on top of the rocks. Ensure that the body of your barrel remains below the freezing line while keeping the rim up top.

Step 6. Place some earth around the barrel to seal it in. Don’t put on the lid yet.

Step 7. Prepare the veggies or fruits for storage. If you’re not sure about the thingamajig’s cooling action, you can try it out on a couple of potatoes.

Step 8. Place a handful of straw on the bottom of the barrel.

Step 9. Place your veggies on the straw. You can add more vegetables if you like. Just remember to put some straw between your veggie layers.

Step 10. Put the lid on the barrel, put the plywood boards on top, and cover with dirt. Congrats! You’ve just made your first backyard root cellar.

Additional Consideration on Mini Root Cellars

Building’s the easy part, but knowing what and how to store – that’s a bit challenging. The first rule of the game is never to mix your veggies with fruits. If you plan on storing fruits, you should consider placing a second root cellar.

The reason why fruits and veggies should never be placed in the same barrel is because of ethylene, a plant hormone which induces ripening in fruits. The same substance that makes fruits yummy-yum-yum will cause your veggies to ripen and rot a lot faster.

A root cellar built in this fashion will allow you to store food at a decent temp (somewhere between 32- and 40-degrees Fahrenheit), with humidity at around 95 percent.

For this reason, you’ll be able to store even short-lived veggies such as cauliflower, brussels sprouts, celery, kale, endive or leaks. If the seal holds, you can look forward to a scrumptious carrot-based dish even after six months. As far as fruits are concerned, you should ensure that your root cellar has a bit of moister compared to the one used to store veggies.

After consuming every veggie or fruit from the barrel, I would recommend giving it a good wash with the power hose and use plenty of detergent. I can’s put my finger on it, but I believe that this kind of contraption can also be used the summer to keep your fruits and veggies cool.

In most cases, the mini root cellar can extend the shelf life of fruits and veggies by at least a couple of months, with one exception – kale. If you’re planning on storing some kale, keep in mind that you can’t keep it in for more than two weeks.

Think I’ve missed something? Have another way of building a root cellar in your backyard? Hit the comments section and let me know.

If you didn’t start digging, you may also want to check out this offer coming from our partners at Easy Cellar. As well as the many benefits of having one in your backyard.

A hole in the ground, some stones, a couple of shelves, and you’ve got yourself a gigantic fridge capable of storing veggies, legumes, pickles, and whatnots.