Our family finally took the plunge and invested in baby chicks. My wife and I have talked about raising chickens for years and, honestly, I don’t know what took us so long. We did our research, bought some books, looked on the web, went to the library, and decided this year was the year to extend our renewable food sources.
Eggs hold so many nutrients and the “chicken ecosystem” as a whole is an incredible source of food, the eggshells can be ground up and taken for added calcium, the shells can be added to compost, and the chicken manure can be used as fertilizer for the garden. Best of all, by raising your own chickens you are in control of the health and quality of the eggs you consume.
Eggs, Eggs, Glorious Eggs!
I love eggs. You can scramble them, fry them, bake a cake with them, hard boil them, make a quiche, or wait until they spoil and throw them at bratty kids in your neighborhood. Just kidding. In the event that one day you wake up and find out that there is no more food at your local supermarket and you are on your own, having chickens will be a relief. Eggs themselves are a wonderful source of needed protein and fat. On average, for every hen you have, she will lay one egg per day.
I have included this simple recipe that you can make in any situation you may find yourself in, provided you have some Ziploc freezer bags. If you have a garden or have canned foods you can use, you will be set with an easy protein packed nutritious meal.
Omelet in a Bag
- Ingredients:
- 2 eggs
- 2 slices ham, chopped (optional)
- 1/2 cup shredded cheese (optional)
- 1 tablespoon chopped onion (optional)
- 1 tablespoon chopped green bell pepper
- 2 tablespoons chopped fresh tomato
Directions:
1. Crack the eggs into a large resealable freezer bag. Press out most of the air, and seal. Shake or squeeze to beat the eggs. Open the bag, and add the ham, cheese, onion, green pepper, tomato, salsa, and mushrooms. Squeeze out as much of the air as you can, and seal the bag.
2. Bring a large pot of water to a boil. Place up to 8 bags at a time into the boiling water. Cook for exactly 13 minutes. Open the bag, and let the omelet roll out onto a plate. The omelet should roll out easily.
Mmmm, Pass Me More of That Eggshell, Please
So let me break down the benefits that I have researched by starting with grinding up eggshells for extra calcium. My mother does this for the calcium benefits. Even if you are happy with your Centrum with Calcium right now, this is handy to know about in the event things go bad and driving to your local CVS to pick up your supplements is no longer an option. Calcium is important for bodily function as well as promoting strong teeth and bones.
How to Make Powdered Eggshells:
- Wash empty eggshells in warm water until all of the egg white is removed, but do not remove the membrane because it contains important nutrients for the joints which helps arthritis.
- Lay broken pieces out on paper towels and allow them to air dry thoroughly.
- Break the eggshells up into small pieces, and grind them to into a fine powder in a food processor, blender, coffee grinder, or a nut mill, or put them in a plastic bag and use a rolling pin to grind them. Please note that some blenders will not grind the eggshell into a fine enough powder. A coffee grinder works the best.
- Store powdered eggshells in a covered glass jar or container. Keep it in a dry place, like the kitchen cupboard.
How to take eggshell calcium (this forms calcium citrate) takes 3 hours:
- Put 1/2 teaspoon of powdered eggshell into a small dish (approximately 4 1/2 to 5 1/2 inches across) 1/2 teaspoon equals approximately 400 mgs of elemental calcium.
- Add the juice of 1/2 a lemon (freshly squeezed), and mix well it will start to bubble and foam, which is what is supposed to happen.
- Leave it at room temperature for 6 hours the longer you leave it the less gritty it will be, but do not leave it longer than 12 hours.
- It can be taken by the spoonfuls, followed by mouthfuls of water to wash it down. It is not sour tasting. In fact the taste is quite pleasant.
- Also take 400 mgs of magnesium citrate at the same time.
Compost It
If you are not using your eggshells for calcium, then by all means add it to your compost for added calcium to your crops. Tomatoes love it. Place some crushed eggshells at the base of your growing peppers, tomatoes, broccoli, cabbage to deter slugs and cutworms. If you are trying to attract birds, for their benefits, put crushed eggshells near or in a feeder. Woodpeckers in particular love it, and it will keep them from pecking a hole in the side of your house at 5 a.m.
Bring on the Chicken Poop
Chicken manure makes wonderful fertilizer for your garden. However, you never want to add it directly to your soil because it is too strong. Here are some tips for handling and dealing with your chicken’s manure.
- Collect manure and bedding. We use pine shaving for bedding. It is approximately $5 per cubic yard. You can also use sawdust, dry leaves, or straw to provide a dry cushion for chickens and to control odor and pests. The coop bedding can be collected with the manure and dumped into a composting bin.
- Use a “hot compost” recipe. By adding water, it will cause the pile to heat up. It is recommend that the compost pile heat to 130-150 degrees F and maintain that temperature for 3 days. Heating is necessary to destroy pathogens but temperatures above 160 degrees F can kill beneficial microorganisms and slow the process. To help you achieve appropriate temperature you can purchase a compost temperature gauge from a local nursery.
- Repeat the heating process. Once the center of your compost pile has reached the required temperature for three days it will start to cool. After it cools, pull the center apart and move the core material to the edges and bring the edge material into the center to heat. For 1 cubic yard of material repeat the process of bringing edges into the core at least 3 times.
- Let it cure. Monitor the pile and once you are satisfied that the entire contents of your bin has been heated, loosely cover and let cure for 45-60 days before using. It’s ready when most material is dark, crumbly and sweet-smelling like soil.
- Add to garden. You can add the resulting compost to your vegetable garden or flower bed by spreading it on the surface or by gently working it into existing soil.
Manure Safety Tips. Fresh chicken manure may contain disease organisms that could contaminate root crops (carrots, radishes, beets) and leaves (lettuce, spinach), so DO NOT spread uncomposted manure on the soil in your vegetable garden. The following “Safety Tips” are summarized from the Stewardship Gardening Program provided by Washington State University:
- Apply only aged or composted manure to your soil.
- Always wash hand after handling livestock manure.
- Thoroughly wash raw vegetables before eating.
Good Things Can Come in Small Spaces
If you live on a small plot of land and are concerned you don’t have the space, no worries. Chickens require very little space and take about as much time to care for as you would spend on a dog or cat. In fact, I would venture to say that our chickens take much less time to take care of than our cat. Our family feline likes fresh ice water twice a day, is constantly hungry, and likes to vomit all over the carpet because she eats too fast. And before anyone contacts me to diagnose any illnesses that might be inducing this annoying habit of hers, don’t. She is perfectly healthy. I remind her every day as she stares me down with contempt, that if she were a real pet she would lay eggs. I digress.
We opted not to purchase a rooster because we weren’t interested in making baby chickens just yet and we figured our neighbors wouldn’t be crazy about the racket early in the morning. If you have a large plot of land, though, a rooster may be right for you. They are protective over the hens and can fight off predators.
When You Are Ready To Buy
Okay, so now I have convinced you that if you don’t buy chickens this minute, you will surely perish. Can you order them on Amazon? No. Not yet. We bought ours from the local Tractor Supply. We were able to walk in and pick the exact breed and point to the particular chicks, which to our novice eyes, looked as though they would grow to be mighty hens that would spit out giant yummy eggs in abundance. There is a plethora of information about breeds and their various qualities. We wanted hens for egg production and not for chicken salad so we chose Leghorns. An excellent guide to chickens and their many breeds is at http://www.mypetchicken.com/chicken-breeds/breed-list.aspx
Another Benefit of Our Feathered Friends
I hate bugs that eat my garden veggies and bite my tender flesh. Well, chickens actually eat bugs. They also eat many varieties of weeds. A chicken can make your gardening work easier by doing some post-harvest gardening for you. Let them loose and they will scratch and dig your garden beds. We have a fenced in garden, so I am hoping to move them into our garden occasionally to help improve the soil and destroy unwanted pests and weeds.
What Does a Chicken Eat?
You can purchase commercial feed, but it does contain soy and GMO corn which many experts believe will compromise the quality of your eggs. I have included a homemade chicken feed recipe. I must be honest, I have not made this recipe yet, so I cannot elaborate on the shelf life, storage of, or tell our readers where to purchase all of the ingredients. I can say, however, that all of these ingredients are good for human consumption, so in the event of a disaster situation, you and the chickens can share the same food items. This means you can alleviate the hassle of buying food for yourself and stocking up on a separate food to keep your chickens alive and healthy. I would suggest making small batches and storing in an airtight container as you would your own grain. The following will provide your chickens with the nutrients they need to produce delicious and nutritious eggs:
Homemade Poultry Feed Mix
- 2 parts whole corn
- 3 parts soft white wheat
- 3 parts hard red winter wheat
- ½ part Diatomaceous Earth (not the kind you put in your pool)
- 1 part hulled barley
- 1 part oat groats
- 2 part sunflower seeds
- ½ part peanuts
- 1 part wheat bran
- 1 part split peas
- 1 part lentils
- 1 part quinoa
- 1 part sesame seeds
- 1/2 part kelp
In A Survival Situation, Can I Feed My Chicken MREs?
Okay, so what happens in the event you have depleted all your supplies of lentils or commercial chicken feed? Commercial chicken feed is only good for a couple of months. Stockpiling food for chickens is a good Plan A, but what about Plan B? Here is a list of some food items for your chickens that are storable or may be on hand:
- Oats – oats stored in Mylar bags with oxygen absorbers can stay viable for close to 20 years, if stored properly.
- Corn – dried corn stored in Mylar bags can be ground and fed to chickens.
- Worms – worms from compost bins.
- Table scraps only in desperate situations. Chickens will eat pretty much anything.
- Foraging – given enough land, and variety of greenery, chickens can do well.
Preserving Eggs
Every Prepper wants to know how to preserve food for storage. Eggs have a long life once they are layed. They can be stored for two to three months in your refrigerator or at temperatures no higher than 55°. There is a process whereby you can oil the eggs and keep them in warmer temperatures. It will compromise the flavor, but in an emergency most of us would not complain.
The eggs you’re going to store this way should be oiled 24 hours after being laid. (This will immediately put store-bought eggs out of the running.) In a clean, closed carton that is located in a cool, dry place, eggs dipped in oil will keep for several months. They will, however, eventually develop an off-flavor, and this off-flavor is especially pronounced in eggs stored at 34°F for more than four months. By the time you hit the six-month mark, the flavor is usually unacceptable to most people.
If you’re able to have fresh eggs at your house day in and day out from some pretty prolific layers, or because you have a neighbor who gives you fresh eggs each day, or if you’re able to obtain fresh eggs from a farmer’s market, then this method may be for you. Regardless, the knowledge alone will be a great help if and when the worst were to happen.
To properly oil your eggs, they must be at room temperature (50 to 70 degrees F) and they must be dry. Make sure your oil is free of bacteria and mold by heating it 180°F for about 20 minutes. Then, with tongs or a slotted spoon, dip the eggs one at the time into the oil. Set them aside on a rack such as is used in candy making and let them drain for about 30 minutes. Pack them away in clean, dry cartons.
What You Need to Start
It is not necessary to have a chicken coop to get your baby chicks. Your chicks will need to mature before you can set them outside. You will need a large box or bin to keep them in, a heat lamp to keep them at the required 95° the first week, bedding, a water dispenser, a feeder, food, and chicken wire for the top to keep them from escaping once they become juveniles. As I write this, I can hear their soft peeps and stirrings behind me. They possess a delicate, sweet, downy smell that fills our sun-room. Caring for them has been unbelievably easy and rewarding when I think about how our family has secured another renewable food source for our future. Now if we could just figure out a purpose for our demanding cat.
Our family finally took the plunge and invested in baby chicks. My wife and I have talked about raising chickens for years and, honestly, I don’t know what took us so


 How to install a sand point well
 How to install a sand point well


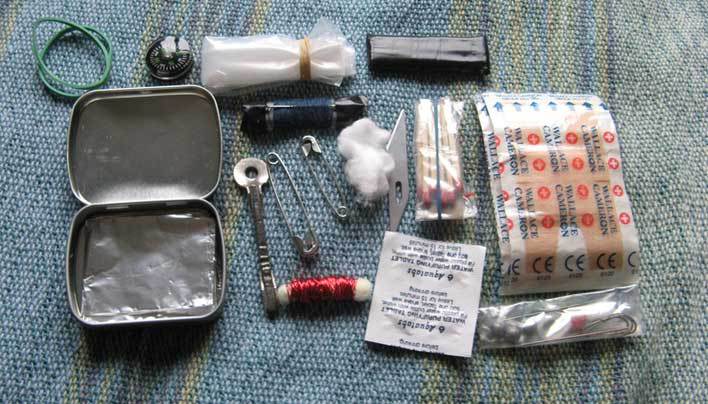 A survival tin has an assortment of items that you think can help you out if you are ever faced with some life or death survival scenarios.
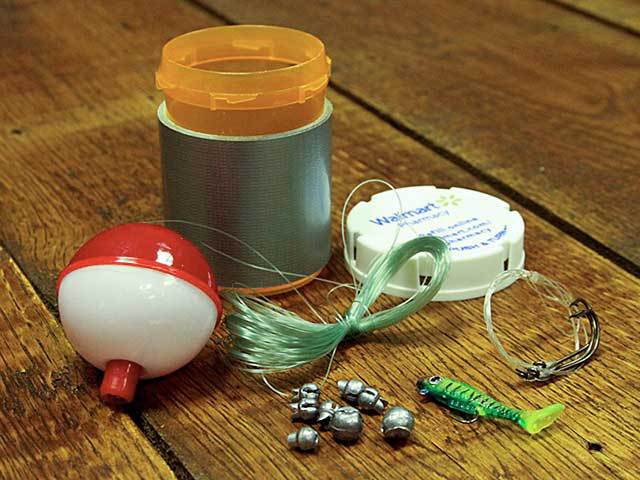 A survival fishing kit doesn’t have to be complicated or take up too much space.
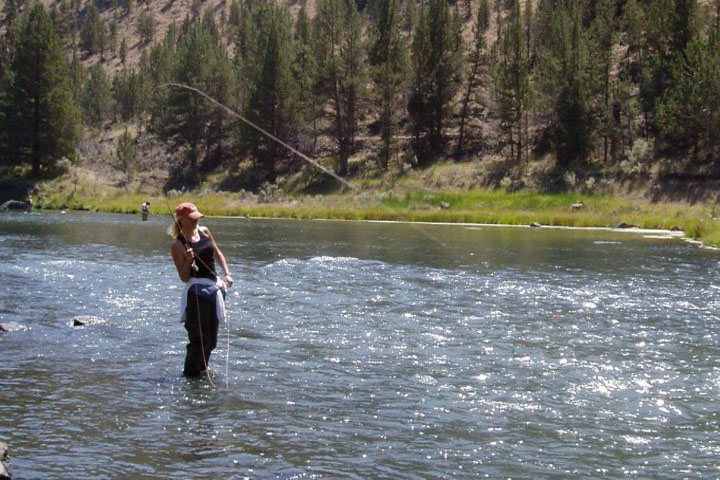

 If you’re planning to shoot your first buck from a tree stand, you cannot do so successfully without learning how to shoot from a higher position.
 You can also master shooting with it during near sunset or near dawn conditions.


 S.O. Tech RSB-L-BLK Riggers SERE Belt – Stash pocket allows you to hide escape tools