HomePosts Tagged "Survival"

“It’s never lupus,” as the iconic Dr. House put it. Don’t know too much about that, but I have a saying of my own – “it’s never just a pill bottle.” Yup, you’ve guessed it. Today I’m going to show you a couple of nifty ways to reuse your old med bottles.

Some are them are no-brainers, while others are quite ingenious. Heck, when it comes to human ingenuity, even something as insignificant as a match can be turned into a unique item. So, because talk’s cheap, here are 11 ways to use your old pill bottles around the house.

Big life lesson – when you reach the point where two paychecks aren’t enough; you have to make some sort of change. I won’t deny the fact that with all my prepping training I still end up spending a couple of thousand dollars each year buying all sorts of crap.

Well, ever since my lovely wife realized that money kept flying out of my wallet, she used a clever trick to put something aside for rainy days – stuffing dollar bills in old pill bottles. Yup, took me a while to figure it out.

Long story short, the cash pill bottle trick worked, and we managed to put aside enough to buy our son a new smartphone. So, if you’re just like me when it comes to burning dough, use an old pill bottle as a piggybank.

Make a small emergency candle

You can make a 4-hour emergency candle by filling an old pill bottle with wax, lamp oil, tallow, or fat obtained from melted bacon. Stick a wick inside, allow it to soak the fuel, and set it ablaze.

Fishing kit

If you don’t have the resolve to make a paracord grenade, you can at least try to make e small fishing kit using a pill bottle, some cordage, hooks, and a couple of feet of fishing line.

Here’s how to do it. Wrap the paracord tightly around the pill bottle, place your fishing implements inside, and put the cap back on. You can attach a small carabiner to the cordage if you want to hang the fishing kit to your bug-out bag or belt.

Travel-size shampoo and conditioner

You really don’t need to throw a whole bottle of shampoo, conditioner, or shower gel in your luggage or bug-out bag. Pour as much as you need inside pill bottles, put some plastic wrap on top, and screw the cap in place.

Store key to ammo locker or safe

You know how the saying goes: if you want to hide something, put it in plain sight. If you’re worried about your children finding the key to dangerous storage lockers like the ammo cabinet, propane tank locker, or fire-proof safe, use old pill bottles to hide the key. You should also fill them with small pebbles or kitty litter to give off the impression that they’re really pill bottles.

Create a waterproof money container

Since I’ve mentioned something about saving money, you can create your own waterproof cash container by repurposing a bottle. Remember that cash will always be king, and that’s why it would be wise to have a small amount on you. To make a money container, you’ll need a small drill, epoxy glue, paracord, and, of course, some money.

Start by drilling a hole in the pill bottle’s cap. Draw the paracord through it and apply some glue. Put your cash inside, screw the cap back on, and that’s it. You can also make a square knot at the base of the pill bottle to ensure that the thing doesn’t fall off your bug-out bag or belt.

Make a small med kit

Although nothing can replace your B.O.B’s first-aid kit, it is possible to make a smaller and more portable version using a pill bottle. You can also use the steps for crafting a waterproof money container for your mini-med kit.

As for the contents, I added a couple of aspirins, some Ibuprofen, Alka-Seltzer, one Iodine prep pad, and one alcohol-soaked prep pad. Of course, you’re free to add or remove items.

Make a perimeter alarm

I don’t know about you, but I always like to install some sort of perimeter alarm when I want to camp for the night (I usually end up using the beer cans I brought along for the ride).

If you’re not much of a beer lover, you can make your own perimeter alarm using a couple of pill bottles filled with kitty litter or pebbles. Put a couple of stakes in the ground, connect them with some dental floss or string, and tie the filled pill bottles.

Store seeds for later use

If you want to protect seeds from the sun or extra moisture, store them inside clean and dry pill bottles. Don’t forget to label them.

Make a field sewing kit

There’s no way of telling what could happen in the field. And, during a shit hits the fan situation, your clothes will get torn to shreds. Sure, you can always patch them with some zip ties or dental floss, but you can also take the high road by using your sewing kit.

You can quickly make one from an old pill bottle. Place a needle, some thread, and a couple of patches. Put the cap back on and store it inside your B.O.B.

Make a deodorizer

If you want to ward off those nasty smells from your clothes, place some dried-up lavender flowers inside a pill bottle. Use a needle or a small knife to poke a couple of holes in the lid.

Finally, place it inside the wardrobe and, voila, no more rancid smells. You can also make one for the fridge. However, for that one, I would advise replacing the lavender leaves with apple cider vinegar, baking soda, or diatomaceous earth.

That’s about it for my take on repurposing an empty pill bottle. Would you like to add anything to the list? Hit the comments section and scribble away.

“It’s never lupus,” as the iconic Dr. House put it. Don’t know too much about that, but I have a saying of my own – “it’s never just a pill

You’ve probably heard this one before – brush and floss before hitting the sack. I can wholeheartedly say that dental floss is the best thing to happen for yapper health right after ceramic implants. Have you ever stopped to wonder if the same stuff we use to floss our teeth can be used for other purposes?

Of course you did, and I have to admit that most of you can become very inventive when it comes to, let’s say, repurposing floss (you really should that news piece about that guy who ended up in his hospital after his SO tied him to the bed with dental floss for a wild sex game).

Anywho, floss is very handy to have around, especially when the shit hits the fan. It doesn’t take too much imagination that dental floss can be successfully employed as cordage when the need arises.

From crafting weapons to drying your clothes above the firepit, dental floss is a powerful ally, one that can help you get stuff done without too much effort. So, what are the survival uses of dental floss? Well, keep reading, and you will find out. Maybe I’ll even manage to surprise you.

Weapon-making

Though I can’t say that I’m very comfortable around weapons, bladed or otherwise, in case of an SHTF situation, you can craft yourself a sturdy weapon which can be used for hunting, self-defense, and both. Easy enough to do it – take a long pole and tie your survival knife to one of the ends using as much dental floss as necessary. You can also use floss as a bowstring if you can find a piece of wood with the right curvature.

Fishing

No fishing lines? No problem. Just cut a long piece of dental floss and tie the hook to the other end. If you don’t have anything on hand to act as a floater, you can always inflate a condom and attach it to the dental floss line. You can create your custom fishing box – just like a tinder box, but with fishing implements – using a small oval container (I fashioned mine from an old coconut shell coated with resin), a few hooks, dental floss, a floater, and some piece to act as a weight.

Tying your shoes

There’s nothing worse than a ripped hiking boot shoelace. But wait! It gets even better – no reason to cry over ripped shoes when you’ve got a spare, but that usually never happens. So, if you’re out and find yourself with nothing to tie your shoes, just grab a long piece of dental floss, cut it to size (use the other shoelace as a reference point) and carry on.

Drying your clothes

Anything can happen when you’re in a survival-type situation. I personally abhor anything that ends in me having to sit for any number of hours with soaking-wet clothes. Of course, you can always use the extras in your B.O.B, but that still leaves you with wet apparel.

The best and quickest way to dry them would be over a fire. Take two long sticks and insert them into the ground just about the firepit. Use your survival knife or another sharp implement to create grooves at each end of the stick. Cut a long piece of dental floss and connect the two sticks. Now that you have a clothesline, the only thing left would be to start your fire and hang your clothes out to dry.

Making a simple alarm

Whether you’re alone in the woods or have a small mountain refuge, you’ll need some sort of alarm system. Of course, when you’re still in contact with the rest of the world, you can always hit the local hardware store to purchase an alarm. However, when you’re out there, things take to change a little, in the sense that you will need to improvise.

To make a simple alarm for your overnight camp, plant a couple of sturdy sticks around your location and connect them using dental floss. Attach a couple of cans or empty container, and that’s about it. You may not be able to see what comes your way, but you’ll certainly be able to hear it long before it can set foot inside your tent.

Mend ripped clothing

I know that sewing is not on your top 10 favorite activities list, but any prepper should know how to repair his clothes, especially when there’s no one around to do it for him.

Sewing kits should be a part of your B.O.B. However, in case you’ve forgotten to throw in some needle and thread, you can always use a fishing hook and some dental floss to patch up your clothes. If your first-aid includes a suturing kit, you can also break open a pack and use the sterile thread to seal holes in your clothes.

Stitching up wounds

And because I already broached the subject of suturing, if you’re unfortunate enough to wind up with a big bleeder, you can always use dental floss to make stitches. As for the needle, grab a fishing hook from the kit, and throw it in the fire. You will also need something to hold the hook during the procedure – if your first-aid kit doesn’t come with a pair of straight scissors, you can always use your multitool’s plier.

After cleaning the wound with whatever you have on hand (I would recommend clean water and mouthwash), grab the needle by its midsection, run it through the first incision line, cross the gap, and piece the other edge of skin from beneath.

Pull the thread, grab the longer end, loop the thread four times around the pliers, open it a bit, grab the smaller end, and pull. Repeat the procedure until you close the wound. Congrats! You now know how to make simple interrupted sutures.

That’s it for my 7 cookie ways of using dental floss in an SHTF situation. Have something more to add to the list? Hit the comments section and let me know.

Before you go, you may also like:
Put This Spice In Your Shoes To Fix Toenail Fungus
The vital self-sufficiency lessons our great grand-fathers left us
Knowledge to survive any medical crisis situation
Liberal’s hidden agenda: more than just your guns
Build yourself the only unlimited water source you’ll ever need
Secure your privacy in just 10 simple steps

You’ve probably heard this one before – brush and floss before hitting the sack. I can wholeheartedly say that dental floss is the best thing to happen for yapper health

Everybody loves it, and everybody hates it – that’s what I like to call the Coca-Cola paradox. Even though the doctors scream at the top of their lungs that Coke’s as poisonous as arsenic, we cannot conceive a cozy family meal or a game night without at least one uncorked bottle of coke.

As far as I’m concerned, I can’t say I have any love for fizzy drinks, no matter their backgrounds. Of course, I would prefer a glass of freshly-squeezed lemon juice any time, but that doesn’t mean that I want to see the Coke factory burnt to the ground.

There’s no denial of the fact that people who drink too much Coca-Cola expose themselves to all manner of nasty diseases such as leukemia, thyroid cancer, morbid obesity, tooth decay, COPD, asthma, heart disease, and the list goes on and on. Still, it doesn’t mean that this type of beverage doesn’t have its uses. No, you’re not going to die if you drink a bottle of Coke every now and then, but don’t make it into a habit.

Anyway, since my dad’s been a big fan of Coke since the early ‘50s, I spend a lot of time doing research on this drink’s side effects in an attempt to convince him to tone it down a notch. Can’t say that I had too much success, but I did uncover something really interesting. Coke can be used in SHTF situations. Yup, you read that right. How? Stick around to find out.

Boost the efficiency of your compost

If your compost’s not good enough for the plants with munchies, add a bottle of Coca-Cola. It will increase the acidity of the compost and, at the same time, it will give those tiny organisms all the sugar they’ll need.

Get rid of dirt and stains from the toilet

If you don’t have anything else on hand to clean the toilet bowl, try using Coca-Cola. Pour half a liter in the toilet, wait 15 minutes, then flush the toilet a couple of times. There you have it! No more stains or smudges and, best of all, you didn’t even have to scrub it.

Related –  A terrifying disaster is upon us (What you can do to keep your loved ones safe during the coming chaos)

Remove gum stuck to your hair.

You really don’t have to cut away those precious locks if get gum stuck in them. Instead, soak them in a bowl with Coca-Cola for a couple of minutes. You can now remove the gum by hand.

Set a trap for pesky bugs

There’s nothing worse than having to dodge stinging insects like wasps or bees when you’re at the picnic. Want to take your revenge on them? Try this trick. Fill a small bowl with Coke and place it as far away as possible from your picnic area. Attracted by the sweet smell, the suckers will go for the Coke and leave you alone.

Get rid of congestion fast

Yes, I know that drinking too much Coke can lead to all kinds of intestinal mishaps, but, apparently, this stuff can be used to relieve congestion. Take a pan and add one can of coke and some water. Bring to a boil, wait a couple of minutes for that stuff to cool down a notch, and serve.

RelatedA Gold Storm Is Coming  (Even the most prepared Americans will be blindsided by what’s about to happen.)

Hack away windshield ice

Tired of having to wait around for the engine’s heat to melt away the ice on a windshield? Pour a bottle of Coke over it and wait to see what happens.

Make a diversionary device

If you need to get out of Dodge fast, it’s possible to create a diversionary device using a big bottle of Coke and a couple of Mento’s pills. Unscrew the cap, get a couple of Mento’s pills inside, put the cap back on, shake for 10 seconds, and throw.

No more nausea

If you feel like your stomach makes a loopty loop, open a can of Coke and let it go flat. Take on a teaspoon of that stuff every hour or so, and you’ll be up and kicking in no time.

Hack away the powdery corrosion on car battery’s terminals

Tired of seeing that white and blue stuff on your battery’s terminals every time you pop open the hood? Use Coca-Cola – pour a small amount over each terminal and wait. Finally, use a clean cloth to remove the smudges.

Make a grown bolt budge

If a rusty bolt’s preventing you from opening something, pour some Coca-Cola over it to unloosen it. By the way, this beverage works wonders on rusty screws and bolts. Don’t replace the rusty ones. Instead, dunk them in a bowl filled with Coke and let them soak overnight.

No more scorch marks on pots and pans

Did I tell you how much I hate scrubbing them pans after cooking? Well, I’m going to say it a thousand times if it’s necessary. Luckily, I have discovered a secret weapon – Coke. If there are too many burn marks on your pots and pans, pour some Coke inside, and let them soak overnight. Drain, wash, rinse, and you’re done.

No more ouchie from jellyfish stings

Remember the last time you went for a swim and ended up getting stung by those jellyfish? Well, if you feel like your skin’s about to melt, pour some coke over the sting site. Coke’s ingredients will neutralize the poison.

Kill slugs and snails

I really don’t have anything against slugs, snail,s or lummoxes. However, every time I see them munching on my veggies, I go berserk. If you’re having the same problem, use some coke on them. The acid inside America’s favorite fizzy drink will make them curl and die in agony.

Remove blood from clothes

Well, this might sound a little odd, but Coke’s very useful in removing blood stains from just about any type of clothing or fabric. Just so you know.

Coca-Cola for hiccups

Again with the hiccups? If holding your breath doesn’t solve the issue gargle some ice-cold Coca-Cola for a couple of seconds. Works like a charm.

That’s it for my ways of repurposing Coca-Cola. Think anything’s missing from the list? Head to the comments section and let me know.


Other Self-sufficiency and Preparedness solutions recommended for you:

The Lost Ways (The vital self-sufficiency lessons our great grand-fathers left us)
Survival MD (Knowledge to survive any medical crisis situation)
Backyard Liberty (Liberal’s hidden agenda: more than just your guns…)
Alive After the Fall (Build yourself the only unlimited water source you’ll ever need)
The Lost ways II (4 Important Forgotten Skills used by our Ancestors that can help you in any crisis)
The Patriot Privacy Kit (Secure your privacy in just 10 simple steps)

Everybody loves it, and everybody hates it – that’s what I like to call the Coca-Cola paradox. Even though the doctors scream at the top of their lungs that Coke’s

INTRODUCTION

While we all want to do our best to prepare for a coming crisis, and many of us realize the city is perhaps the worst place to live, very few people are really prepared to pack up the old Winnebago and head for the hills. Most Americans, whether they’re aware or not, are going to stay in the cities.

This is not a hasty decision for most people. Most of us depend on the city for our livelihood, and we can be better prepared by continuing to live in the city, earning a good income, and making preparations for exiting the city at the appropriate time or by staying in the city and living off existing supplies.

This special report explains some of the most critical dangers of living in a city and presents some solutions to surviving them. If you are one of the people who has decided to stay in the city, you’ll benefit greatly from this information.

CITIES ARE ARTIFICIAL

Every city is an artificial construct. Cities formed as people came together to conduct business, participate in social interaction, and benefit from efficiencies in public services (such as schools, sewers, water, etc.) and a common defense. Yet cities cannot survive alone. They need resources from the country; most notably, food, water, and electricity. While electricity and water can sometimes be created or found within city limits, the acreage requirements of food dictate that no city could possibly feed its own people.

Read that last phrase carefully: No city can feed its own people. Not one. Cities are, by their very nature, dependent on the importation of food. The advent of just-in-time delivery systems to our grocery stores means that most cities would run out of food within a week if supplies were for some reason disrupted.

Remember, cities are not self-sufficient. Although they may seem to be in 2013, they have for a long time been entirely dependent on the American farmer for their support, something almost all Americans take for granted (except the farmer, of course.)


RISKS IN THE CITY

The city presents some serious risks during a crisis. The four most serious ones are:

  1. The collapse of social order (riots).
  2. The failure of the water treatment and delivery systems.
  3. The depletion of food supplies.
  4. The failure of the power grid.

While not every situation will appear in every city, every situation will most certainly appear in some cities. Will that include yours? We’ll tackle these one at a time:

1. THE COLLAPSE OF SOCIAL ORDER

“Social order” is a delicate thing, and it exists as a psychological barrier that could easily collapse under the right conditions. We all saw this during the L. A. Riots following the Rodney King trial verdict as citizens of L. A. set fire to their own town, yanked people from vehicles and beat them literally to death, and even fired guns at firemen attempting to save their buildings! More recently we were all witness to the looting, violence, and total breakdown of society following Hurricane Katrina in New Orleans.

Societal_Collapse

Riots can spring up quickly.

What allowed this to happen? Simple: the simultaneous melting away of the psychological barrier of “order.” Once people realized 911 couldn’t handle the load or was offline, that the local police were helpless or had simply abandoned their posts, “Law and Order” ceased to exist in their minds. They then conducted their lives in the way they always wanted to, but couldn’t because of the police. That is, they ran out to the local stores and just took whatever they wanted (looting). They took out their racial frustration on innocent victims who happened to be driving through the area, and they let loose on a path of destruction that only stopped when men with rifles (the National Guard) were called in to settle things down. In other words, only the threat of immediate death stopped the looting and violence. Rifles work wonders.

Imagine store owners lying prone on the roofs of their stores with AK-47’s, firing at anyone who approached. This is exactly what happened in Los Angeles. But worse, imagine the lawless horde firing at the rescue copters trying to bring in supplies to the desperate masses.

The National Guard eventually got things under control. This event was isolated, however, to one city. Imagine a hundred cities experiencing the same thing. Will the National Guard be able to handle the load? Not likely. What about local police? They aren’t fools; if things look bad enough, they’ll grab their families and head for the hills, just like they did in New Orleans. No pension is worth getting killed for. A few U. S. cities could be transformed into literal war zones overnight. It would require all-out martial law and military force to have any chance whatsoever of bringing order to these streets. And the reality is that there is not enough military in the USA to secure all of the cities if this happens.

This collapse of social order is perhaps the greatest risk of staying in the city during a crisis. What, exactly, would cause this collapse of social order? Lack of three things: food, water, and money. When people run out of food, some will begin ransacking their neighborhood, searching for something to eat. (Remember that in a city, a “neighbor” does not mean the same thing as a “neighbor” in the country. They are not necessarily your friends.) It won’t take long, then, for violence to take over in some cities. While certain regions will certainly manage to keep things under control and people will form lines at the local (depleted) Red Cross shelter, other cities will see an explosion of violence. Imagine the gang-infested regions of L. A., Chicago, New York, St. Louis & New Orleans. Do you think those people are going to stand in line and wait? They already have guns; now they finally get to use them. Pent-up racial tensions & hostilities will simply serve as justification for shooting people of the same or other color in order to get their food.

Even if the food somehow gets into the cities, lack of money (due to the government not sending out checks) could cause the same thing. Eventually, lack of money results in looting and mass theft. As the stealing balloons, it also results in a collapse of social order. Water; the same thing (but faster). The collapse of social order is also very dangerous because it doesn’t require any “actual” collapse of the power grid, telecommunications, transportation, or banking. Social order is a psychological artifact. It is a frame of mind, and any global panic can quickly remove the mental barrier that right now keeps people basically “lawful.”

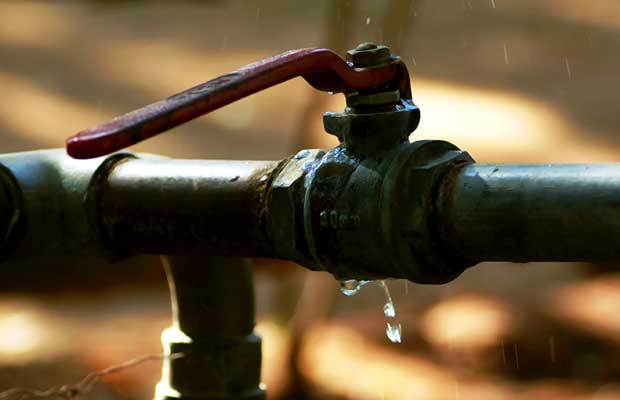
2. THE FAILURE OF WATER TREATMENT AND DELIVERY SYSTEMS

Will the water treatment facilities fail during a crisis? Many will. Some won’t. The problem lies in figuring out whether yours will. Certainly, they depend on electricity, and testing conducted on some plants has already revealed weaknesses in the system.

In one such test, the water treatment plant released a fatal dose of fluoride into the water system when tested. The computers thought they were 99 years behind in releasing minute doses of fluoride, so they made up the difference. If you happened to be downstream, drinking that water, you were dead. Fluoride, no matter what misinformed dentists tell you, is actually a fatal poison. A major crisis likely to demonstrate this fact in more than one city.

The most important question here, though, is about what will happen when the water stops flowing (or if it is flowing, but it’s not drinkable). As you are probably aware, while people can live without food for long periods of time (2-3 weeks), water is needed on a daily basis. You can go 2-3 days without it, at most, but beyond that, you’ll quickly turn to dust.

That means people will do anything to get water because not having it means death. And guess where it’s going to be the most difficult to actually get water? You guessed it: in the cities. On the first day of the water crisis, many people still won’t figure out what was going on. They’ll figure it’s a temporary breakage of a water main and the government will get it fixed within hours. As those hours stretch into the next day, these people will get very worried.

By the second day, more and more people will realize the water isn’t coming. At that point, you could easily see a breakdown of social order, as described in the previous section (as you can see, these things all tend to cause each other.). People will begin their “search for water,” and the first place they’re likely to go is where they always go for liquids: the grocery store, the local Wal-Mart, the 7-11. The shelves will be cleaned out rather quickly.

Beyond that (because those liquids aren’t going to last long), you’re going to see people engaged in a mass exodus from the cities. They’ll take the gas they have left in their tanks and they’ll leave the city in search of water. Some will go to “Grandma’s house” out in the country where they might at least find a pond or stream to drink from. Others will simply go on an expanded looting mission, stopping at any house they see and asking the residents (with a gun in their face, likely) if they have any water to “donate.”

As a result of all this, if water stops flowing, here are the events you can expect to see in some of the worse-off cities:

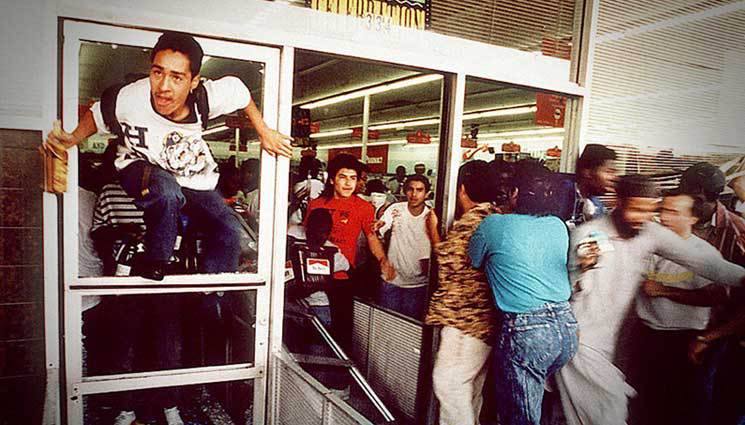
  • Looting of all the grocery stores by the second or third day (remember New Orleans?).
  • Minor outbreaks of violence during the looting. Shop owners, for example, may attempt to defend their shops with firearms (ala L. A. Riots).
  • Mass exodus of residents from the city in search of water.
  • Ransacking of any houses or farms within a gas-tank radius of the city.
  • Mass traffic jams on the outbound highways as people run out of gas and abandon their vehicles (if bad enough, this could actually block the highways and trap people in the cities) (Remember Hurricane Rita?).
  • Mass outbreak of water-borne diseases as people use streams and rivers as both a water fountains and a bathroom. People crapping upstream are going to infect the people drinking downstream. Very few have any kind of water filtration device. That last point is really critical. Once the water flow stops, the disease is going to strike.

3. THE DEPLETION OF FOOD SUPPLIES

The food supplies will likely dwindle quickly as we approach a possible crisis due to people stocking up just in case. Once the crisis actually hits, expect to see breakdowns in the transportation sector that will result in major delays in food delivery. This means food may arrive in a sporadic fashion in some cities (if at all).

Once this happens, food suddenly becomes really valuable to people (even though they take it for granted today). And that means any small shipment of food that arrives will be quickly grabbed and eaten or stored. It only takes one week without food to remind people how much they actually need it, so expect the atmosphere to be that of a “near panic” if food is delayed by as little as three days. The level of panic will vary from city to city. Some cities or towns may experience very little difficulty receiving food. Others may face near-starvation circumstances.

empty-shelves

The shelves will be emptied quicker than you can say EBT.

Remember, the cities depend entirely on food shipped in from the farms and food processing companies. Also, note that if there’s a water problem as mentioned in the previous section, and the mass exodus begins, the highways may be jammed up at critical locations, causing gridlock for the trucking industry. If we’re lucky, some trucks will continue to roll. If we’re not, assume that nothing gets through.

A shortage of food ultimately results in the same behavior as a shortage of water. First, people eat what’s in the pantry, then they loot the grocery stores. After that, with all local supplies depleted and no hope on the horizon, they leave the city and start ransacking nearby homes. Some will hunt in nearby forests, but most city-dwellers don’t know how to hunt. In any case, anyone with the means to leave the city will likely do so soon after their food shortage begins.

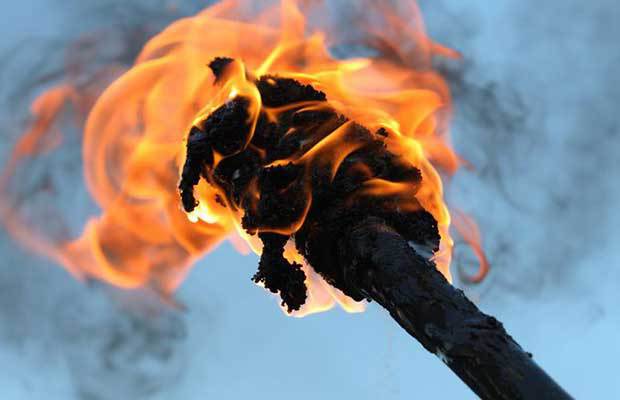
4. THE FAILURE OF THE POWER GRID

Nothing is as suddenly obvious nor has such a gigantic psychological impact as the failure of the power grid. When the electricity stops, almost everybody knows it at the same instant (unless it happens at night).

Naturally, during the first few hours of the power failure, if it occurs, people will assume it’s a temporary situation. Maybe a tree fell on some power lines, or perhaps a transformer blew up somewhere nearby. They’ll sit tight and wait for the power to come back on.

What if it doesn’t? Then the city faces a severe problem. Without power, obviously, everything shuts down. Within hours, the looting begins in the more crime-ridden cities (we saw this in New York a few decades ago.). The longer the power stays off, the worse the social disorder.

The loss of power will bring the entire city to a halt. While vehicles may get around for a few more days (using whatever fuel they have left), businesses obviously won’t be operating. Houses that depend on electricity for heat will quickly reach Winter temperatures, freezing many occupants to death. While those that depend on electricity for Air Conditioning will just as quickly reach Summer temperatures, resulting in death from heatstroke. Hospitals and police stations may have generators on hand, with a few days worth of fuel, but in short order, that will be depleted, too.


But the water treatment plant will almost certainly be off-line without power, causing all the events mentioned in the water section, above. Let’s face it, power is the worst thing to be without in the city. If you have power, you can survive a food shortage, perhaps even a short water shortage. But without power, all bets are off. If you have a “bug-out” vehicle stocked and ready to go (see below), this might be the time to bail.

SOLUTIONS IN THE CITY

Okay, so you’re stuck in the city. You’ve made the decision to stay. You’ve read the problems above, you believe they make sense, and you’re intelligently frightened. What now? You really have two strategies. You can:

  • Stay and defend your house
  • Bug out (leave the city and head for the hills)

Important! This is not an either/or situation. You can begin by staying in your house and assessing the situation. You’ll want to have a “bug-out” vehicle stocked and ready, just in case, if you can afford one, but you may never actually choose to bug out. You’ll have to be the ultimate judge of this. Just remember that when you bug out, you face major risks and disadvantages. Among these:

  1. You’re severely limited in how much you can carry
  2. You have limited range due to fuel
  3. You expose yourself to social chaos, roadblocks, random violence, etc.
  4. Your house will certainly be looted while you’re gone
  5. You run the risk of mechanical breakdowns of your vehicle
  6. You must have a place to go that you know is in better shape than where you currently are.

DSC_0028

Being prepared to defend yourself is necessary.

In general, unless you have a specific, known safe place as your final destination, I don’t advise people to bug out. Just “heading for the hills” is a very poor plan. You might not make it. But heading for Grandma’s house or some known, safe place could be a very good plan indeed, depending on whether Grandma is ready, willing, and able to accept you!

For these reasons (and more), staying and defending your house is sometimes the only reasonable course of action, even if it seems dangerous. For the most part, looters and people looking for food are going to have plenty of easy victims, so if you show a little willingness to use force to defend your property, you’ll likely send people on to the next house.

That is until the next house is already empty and you appear to be the last house on the block with any food and water left. If you’re in a bad enough area, your neighbors may “gang up” on you and demand your supplies or your life. This is truly a worst-case scenario, and unless you literally have a house full of battle rifles and people trained to use them (and the willingness to shoot your neighbors), you’re sunk. This is why the best situation by far is to keep your neighbors informed and help them get prepared. Then you (both your member and non-member neighbors) can act as a group, defending your neighborhood and sharing the supplies you have with anyone willing to help defend you.

When you have this kind of situation going, your neighbors realize you are their lifeline. You supply them with food and water, and they will help support you because they are, in effect, supporting their own lives. The best situation is when your neighbors and other ward members have their own food and water supplies. That way, they aren’t depleting yours, and they have a strong motivation for getting together with you to defend your neighborhood. (More on this below.)

STORING (AND HIDING) YOUR FOOD

Storing food is just as important in the city as in the country, but hiding it is far more important. That’s because, in the worst areas, marauders will be going from house to house, demanding your food or your life. If you’re dumb enough to put everything you own in the obvious places, you might as well not buy it in the first place. They will find it. To count on having any amount of food leftover after the marauders break-in, you’ll need to hide your food.

One alternative is to plan on defending your home with force. If you have enough gun-wise people in the house, and enough firearms and ammo, you can probably pull this off. But most of us aren’t nearly as experienced with firearms as the gang members. A better alternative might be to plan on bringing your supplies to your ward/stake building where all of the Saints can both pool and defend their resources. This of course will depend greatly on your local Bishop and Stake President.

Back to hiding: the best way to hide your food is to bury it. You’ll need airtight containers, long-term food that won’t rot and you’ll need to plan ahead. Bury your food at night so nobody will notice, and make sure you don’t leave the map on the refrigerator door! (Better to memorize it!) Try to get the ground to look normal after you’re all finished. You’ll want to bury your food as early as possible because it gives the grass time to regroup over the spot. If you’re in an area that snows, you’ll have a great concealment blanket! Most food marauders won’t go to the trouble to dig up food, especially if you insist you don’t have any.

Best plan: Have some smaller amount of food stashed around the house, letting them find something. Better to give them something and send them on their way. The art of hiding your food is an ancient one. You’ve got to get creative. Use the walls, the floors, and the structure of the house.

If hiding your food is simply not an available alternative, then try not to advertise it. Keep it put away in your house or garage in as discreet a manner as possible. Don’t make a point of telling people that you have a year’s supply (or more). Word gets around fast that Bro. Jones has a ton of food in his garage. Boxes of food fit nicely under beds, behind furniture, in the attic, etc… Be Creative!!

To sum up the food storage, you really have three strategies here:

  • Store it all in your house and plan on defending it by force.
  • Bury it in your yard in case you get overrun by looters.
  • Store part of it in your house, and hide the bulk of it.
  • Relocate all of it as soon as you recognize a major disaster is in progress.

One of the best ways to store food for burying, although it will only last 2-3 years in high-humidity areas, is to purchase 55-gallon good-grade steel drums. Once you obtain the drums, dump in your grains or other food items. If you purchase bags of food from Walton Feed, this is the perfect way to store it. Don’t leave it in the bags unless you’re actively eating it. [Note: Plastic barrels do not rust.]

Then sprinkle some diatomaceous earth into the drum. You’ll need about two cups to treat a 55-gallon drum, and it must be mixed in well. Diatomaceous earth is made from ground-up seashells, and it kills bugs by getting into their joints.

You want diatomaceous earth that is food grade, and on the bag, it says, “Fossil Shell Flour.”

Once you get these drums filled and sealed, you can then bury them in your yard. This is actually a HUGE UNDERTAKING and is a LOT more difficult than it sounds since you’ll need to dig to a depth of around 5 or 6 feet in order to sufficiently bury these drums. You’re likely to attract a lot of attention unless you do it at night, and you’ll definitely be removing a lot of dirt that you’ll need to find some use for. Because the drums are steel, they will also deteriorate unless you line the outside with plastic (a good idea) and treat the drums with some kind of protectant or oil. (Don’t use WD-40.) Even Vaseline would work well, although you would definitely need a lot to coat a 55-gallon drum.

When you’re all done, you should have your protected grains in 55-gallon drums, buried in your yard, and protected against the humidity of the surrounding earth. It’s a big effort, but then again, the food inside may save your life. You’ll find it much more efficient to bury several barrels at once; side by side.

In reality, it would be faster and easier to simply build a false wall in your garage and seal up your food behind the false wall. Sure, you might lose 2-3 feet of useable space in your garage, but the tradeoff is knowing everything is safe and sound.

STORING EXTRA WATER

Water can be stored in exactly the same way, although you might want to bury the barrel before you actually fill it with water. Make sure you treat your storage water, rotate it, or have filters on hand when you get ready to use it.
WaterIf you don’t have a yard, or it’s not practical to bury your water, you’ll have to store water inside your house. This can get very tricky because water takes up a lot of space and it’s very difficult to conceal. It’s best to get containers made for long-term storage, but in a pinch, you can use almost any container: soda bottles, milk jugs (although it’s very difficult to rinse the milk out), and even rinsed bleach bottles (in that case, you won’t need to add bleach). But a lot of these containers will deteriorate quickly, and they may break easily. Also, consider what happens if your water may be subjected to freezing. Will your containers survive? Be sure to leave enough air space to handle the expansion.

In order to prepare yourself for the water shortage, assuming you’re going to stay in the city, stock at least six months of water at a minimum of two gallons a day per person. That’s nearly 400 gallons of water if you have two people.

Of course, even with the best in-house preparations, you may find yourself depleted of water supplies. In this situation, one of your best defenses is to have a really good water filter that can remove parasites and bacteria from the water. You can also treat your water in other ways (iodine, distillation, silver solution, bleach, etc.). Armed with these items, you can safely use stream or river water (or even pond water) for drinking.

WATER WELLS

By far, the best solution for obtaining long-term water supplies is to drill a well. Buy the best-quality hand-pump available (cast-iron pumps available from Lehman’s) and a good cylinder. They will last a lifetime if installed properly. With this setup, you’ll have a near-unlimited supply of water.

The total cost of doing this, depending on where you live, ranges from about $4000 – $6000. Is it worth it? If you’ve got the money, I think so. However, many cities simply don’t allow the drilling of wells, so you may not be able to get one drilled even if you want to.

The deeper your well, the more expensive it gets. Most well drilling companies charge by the foot. When water is deeper, you also need a bigger pump and a more powerful cylinder, so the costs tend to really grow the deeper you go. If you can find water at 20′, you’re very lucky and it might not cost you even $2000. If you have to go down to 200′, it might cost you $7500, and you’re at the depth limit of hand-powered pumps anyway.

DEFENDING YOUR LIFE AND PROPERTY

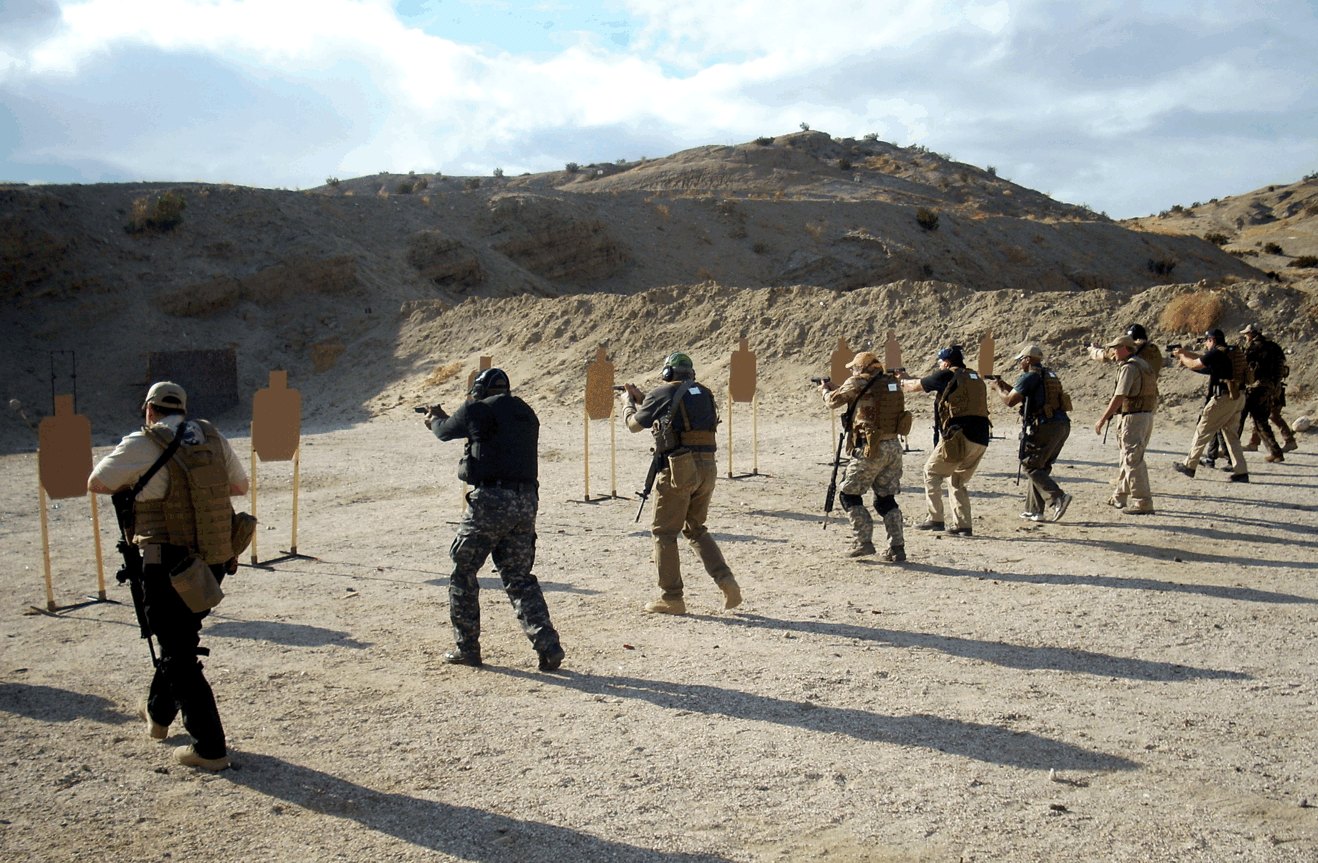
Let’s talk about force. No doubt, there are plenty of nice people in this country, and I think that in small towns and rural areas, people are going to find ways to cooperate and get along. I also think, however, that some cities will suffer complete social breakdown and violence will rule. If you happen to be stuck in one of these cities, you’re going to need to use force to defend your house. The section that follows discusses what I consider to be extreme responses to violence in the direst situations. Hopefully, you won’t find yourself in these circumstances, but if you do, the information below may be valuable.

Important: Do not use your lights at night. If you are stocking propane-powered lanterns, solar-powered flashlights, or other unusual supplies, using them at night will announce to everyone within line of sight that you have more than the “usual” supplies. Expect them to come knocking on your door. At most, let a fire burn in the fireplace, but in general, avoid drawing attention to your house.

Defending your house is a crucial element of your stay-in-the-city plan. Make your house your fortress, and hold drills to help other family members practice some of the more common activities such as hiding, defending, evacuating, etc.

Some useful items for home defense include:

  • A guard dog.
  • Pepper spray.
  • Firearms.
  • Smoke bombs (military-grade).
  • Tripwires

Let’s go over these: The guard dog is certainly a welcome addition to any family trying to defend their house. Although he probably eats a lot of food, the investment is worth it. Dogs also tend to sleep light, so let them sleep right next to the food storage areas, and make sure you sleep within earshot. If the dog barks, don’t consider it an annoyance, consider it an INTRUSION.

Pepper spray is a great alternative to the firearm. It will incapacitate people and certainly give them a painful experience to remember. On the downside (potentially), it might just remind them that next time they come back for food, they better kill you first. So understand the limitations of pepper spray.

Firearms are useful for obvious reasons. In the worst-case scenario, when looting is rampant, you may have to actually shoot someone to protect yourself or your family. If you’re squeamish about pulling the trigger under these circumstances, don’t plan to stay in the city. Use the “bug out” plan instead.

Smoke bombs can be useful for covering a planned escape from your house. You can purchase high-volume smoke bombs that will quickly fill up any house with an unbreathable cloud of military-grade white smoke.

Tripwires are great perimeter defenses. You can buy them from Cheaper Than Dirt (they run a few hundred dollars). They will give you an early warning if someone is approaching. You can connect the tripwires to flares, shotgun shells, light sticks, or other warning devices. This way, you can have an audible or visible alert, your choice.

In addition to these devices, you can make significant fortification-style improvements to your home. While none of these are very affordable, they certainly help defend your home:

  • Replace glass windows with non-breakable Plexiglas.
  • Add steel bars to the windows.
  • Replace all outside door locks with heavy-duty deadbolts.
  • Replace all outside doors with steel doors, preferably without windows.
  • Remove bushes and other shrubs where people might hide.
  • Blackout the windows entirely to avoid light escaping at night (similar to what residents of London did during the WWII bombing raids).
  • Build secret hiding places for food, coins, or even people.
  • Create escape hatches or passageways.
  • Rig pepper-spray booby traps.

These aren’t as absurd as they might at first sound. Many people living in rough cities already have steel bars covering their windows, and removing extra bushes and shrubs is a well-known tactic for making your home a safer place.

LIGHT

To light your home when there’s no electricity, try the following:

  • Use LED flashlights and rechargeable solar-charged batteries. You can buy all these items from the Real Goods catalog.
  • Use propane-powered lanterns. You can find these in the camping section of your local Wal-Mart. Be sure to purchase extra mantles and store lots of propane.
  • Purchase quality oil lamps from Lehman’s and stock up on oil. You can also purchase cheap kerosene lamps from the Sportsman’s Guide or Wal-Mart, then simply purchase and store extra kerosene.
  • Buy extra candles.
  • Purchase lots of olive oil. Not only can you cook with it (and besides, it’s a lot healthier than corn or vegetable oil), but olive oil also burns as a clean candle fuel. You can float a wick in a jar half-full of olive oil and light the wick. Viola, a homemade candle. Olive oil is a fantastic item for your storage anyway because even if you purchase all the grains in the world, you’ll still need cooking oil, and you obviously can’t buy powdered cooking oil. Well-stored olive oil can last for thousands of years.

STAYING WARM

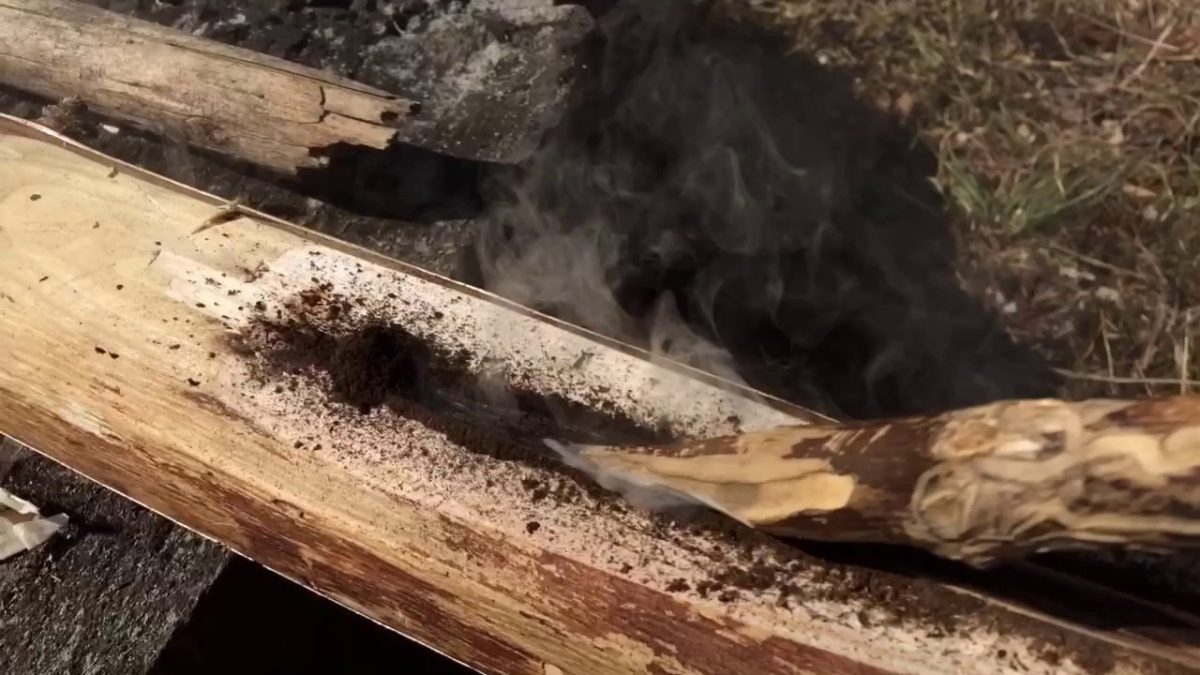
Did you know that people won’t steal giant logs? Although they may easily steal wood you’ve already chopped, most people won’t have any way of stealing logs. They’re too heavy, and the vehicles won’t have any gas left. For this reason, your best bet in regards to stocking fuel for your house is to stock up on UNCUT wood logs.

It takes a lot of extra research to find out how to get them (took me a few weeks of asking around), but you can find a source if you look hard enough. Or you can usually get a permit to go out and cut your own. The effort is worth it because this will give you a ready-to-go source of heat and fuel that cannot be easily stolen.

The catch, of course, is that you’ll need equipment to cut and chop the wood. A chainsaw is REALLY nice in this way, but it requires fuel. Fortunately, chain saws don’t use much fuel, so if you have a way to store as little as 50 gallons or so, you’ve got enough to power your chainsaw for a few years (at least!). You’ll need fuel stabilizers, too, which you can buy at your local Wal-Mart. (Be sure to buy extra chains for your chainsaw, too.)

You’ll also need splitting hardware. You can buy log splitters or just buy an ax, a wedge, and a sledgehammer. Better yet, buy all four so you have a choice of what to use. And remember, wood splits much better when it’s frozen, too, so you might just wait until the cold hits in Winter to start splitting your wood. Only split a little at a time, because you don’t want to end up with a big pile of nicely-split wood sitting out in your yard. It will invite theft from people who don’t have any. If you already have trees on your property, you’re all set. Cut down about 4-5 cords right now, so they can start drying out, then chop them as you need them.

A “cord” of wood, by the way, is a volume measurement. It’s 8′ x 4′ x 4′, or 128 cubic feet of wood (stacked). Some people that sell wood will try to rip you off, so make sure you know what you’re buying. If you purchase logs, it’s better to get a price per linear foot, based on the diameter of the log. For example, you might ask for logs that are an average of 10″ in diameter, and you’ll ask how much the charge per linear foot would be. Something in the range of $1 – $2 would be great.

RELATIONS WITH NEIGHBORS

I’ve already mentioned the importance of getting along with your neighbors. It really is crucial to your city-based survival plan. The best situation to be in, as mentioned before, is to have neighbors who are aware of the issue and who are getting ready for it by stocking their own food, water, and other supplies. Every neighbor that becomes self-reliant is one less neighbor or member you’ll have to support.

The range of neighbor situations, from best to worst, is as follows:

  • Best case: your neighbor is aware of and both temporally & Spiritually prepared for an emergency with their own supplies and training.
  • Good case: your neighbor is aware of a potential crisis, and even though they don’t have their own supplies, they’re willing to help defend yours as long as you share.
  • Bad case: your neighbor didn’t prepare for it, figuring they would just steal from you if things got bad. They are aware of YOUR supplies but don’t have their own.
  • Worst case: your neighbor isn’t aware of anything, and he’s a violent, angry neighbor just released from prison. He is going to be caught off guard by the ensuing events and will likely attempt to use violence to get what he needs or wants.

Your decision on whether to stay in the city may depend greatly on the quality and quantity of your neighbors. If you do live in a bad neighborhood, do what you can to relocate. If you live in a good neighborhood, do the best you can to educate and inform your neighbors.

GUN CONTROL IN THE CITIES

No matter how you felt or thought about gun control in the past, it’s time to face disaster-induced reality. The gun-control politicians (and the people who supported them) have placed Americans in a situation where not only can the police not protect us in a timely manner, but we cannot lawfully defend ourselves. Criminals unlawfully have firearms; citizens lawfully don’t. Intentionally or otherwise, gun-control supporters have created a situation where an unfortunate number of innocent men, women, and children are going to be in danger during a crisis simply because they could not obtain the tools of self-defense.

It also happens that the cities where the rioting will likely be the worst are precisely the cities where firearms are most likely to be banned from lawful ownership (and where criminals may wield near-absolute power for a while.). Perhaps when society recovers from it, we can review the fallacy in the cause/effect logic that keeps people voting for gun-control laws, but in the meantime, millions of people are going to have to resort to breaking the law in order to protect their families. And yes, you too will have to resort to breaking the law if you are to acquire a firearm in an area where guns are entirely banned from private citizens (like New York, Los Angeles, etc.).

After the disaster hits, if the rioting gets really bad, we’re going to see local police begging law-abiding citizens for help. Your firearm will be a welcome addition to the force of law and order, believe me. No local cop is going to mind you having a handgun if you’re manning a roadblock protecting a neighborhood of families with children. Act responsibly, tell them what you’re doing, and they’ll probably give you a big thanks. But if you’re carrying a gun while you smash a window of the Wal-Mart and walk off with a stereo; well that’s a different story. Be prepared to get shot.

See, cops don’t mind private ownership nearly as much as we’ve all been led to believe. I know, I work with law enforcement officers in a small town, and I ask them about topics like this. When the crisis hits, they’ll be more than happy to have your cooperation. We’re all going to need as many law-abiding gun-toting citizens as possible in order to fend off the criminals and establish some degree of order.

ONE MORE REASON TO MOVE OUT

If you really feel you need a firearm to protect yourself and your family, your best bet may be to move to a city or state where people are a lot more accepting of firearms. You’d be surprised what a difference the locale makes. Check the gun laws in any state you’re considering moving to. Obviously, “cowboy” states like Arizona, Texas, and Wyoming will have fewer restrictions on firearms (and, interestingly, they have less of a problem with gun violence). States, where the population is denser (like California & New York), tend to have much greater restrictions on private ownership of firearms.

BUGGING OUT

Suppose it’s July 19, 2017, and you’ve changed your mind about this city thing. You happened to be right smack in the middle of one of the worst-hit cities in the country. The looting is getting worse, the power has been out for two weeks, and your water supplies are running low. You still have enough gas in your truck to make it out of town if you can get past the gangs, that is. You’ve decided to BUG OUT!

SOME BASIC POINTERS:

  • Don’t try to bug out in a Chevy Geo. You will likely need a big heavy 4×4 truck in order to go off-road and around stalled vehicles.
  • Get something that can carry at least 1000 pounds of supplies. A big 4×4 pickup will do nicely! Yes, it requires more fuel, but you can carry the fuel as cargo.
  • Don’t bug out unless you can have someone ride shotgun, literally. You will need an armed passenger in case you run into not-so-nice people.

WHAT TO TAKE

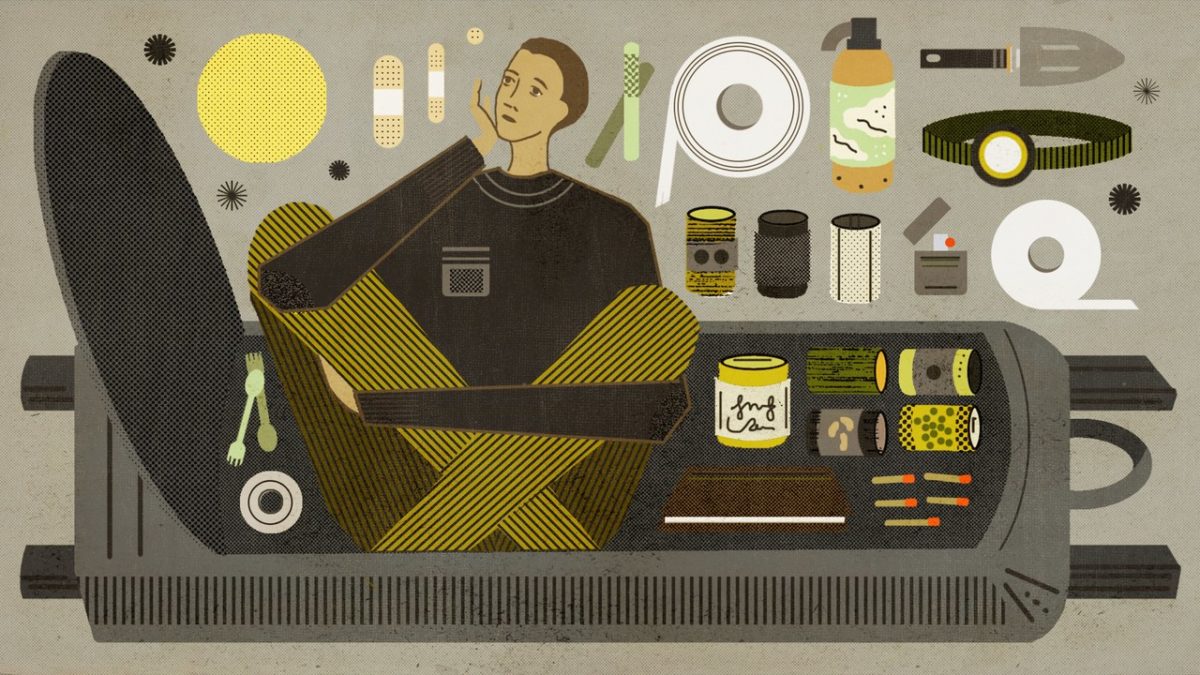
Ahh, the bug-out supply list. All this will fit in your truck. Here’s what you should take if you’re preparing to bug out with two people:

  • Your 96 hour kits for each person in the vehicle
  • 20 gallons of water
  • 40 gallons of extra fuel or more (and a full gas tank)

WHERE TO GO

As mentioned earlier, if you have a designated place of refuge (Grandma’s house, a cabin in the woods, etc.), head straight for it. If not, you’re basically driving anywhere you can go, so try to head for an area that forested and near a creek or river where you can get some water.

CONCLUSION

Choosing to remain in the city is a rational choice for many people in many situations. However, as you have seen from the dangers described here, the further away you can get from the population centers in general, the better your chances of surviving.

Most people, perhaps yourself included, have a difficult time actually accepting that a major disaster is going to be as bad as described in this report. And after all, if you leave the city, sell out, quit your job, move to the country, and then nothing bad happens? You will have disrupted your life, and you may find yourself broke, jobless, and homeless. You COULD assume it will be a mild event, which I suppose is also a credible possibility. In that case, surviving in the city will be quite feasible, especially if you have neighbors that can support your efforts and you don’t live in a dangerous city with high racial tensions. However, the very nature of a major disaster means that if only one or two major infrastructure components go down, the ripple effect will quickly create a much worse scenario. It seems there is very little room for “mild” effects unless they are minuscule. The most likely scenario at this point clearly points to massive disruptions, severe shortages in food and water, loss of power in some areas, and a breakdown of social order in certain areas where the population density is high.

But you can survive anything with good planning, an open mind, and plenty of practice. Why not start now?

INTRODUCTION While we all want to do our best to prepare for a coming crisis, and many of us realize the city is perhaps the worst place to live, very few

Beef jerky…the stories I could tell you about this stuff. I’m just going to say that I would marry beef jerky if that were possible (thinking about moving to state or country). Anyway, beef jerky’s awesome and, from where I stand, has but one caveat – not enough of it to go around. I mean, c’mon, I know it’s supposed to be emergency food or trail food, but who in God’s name eats just one 20g bag? It’s like saying “hey, it’s game night, and I’m gonna drink just one beer or eat one bag of chips.”

As far as a survival food is concerned, jerky’s the right call since it’s packed with just enough protein and fats to keep that engine of yours running. Sure, they’re salty AF and feels like you’re chewing on a rubber band, but it’s amazingly delicious. Since most of you are busy with your jobs and have neither the time nor the mood to replenish your beef jerky stocks, I thought about sharing with you my mouthwatering homemade beef jerky recipe.

It’s super easy to make and, most importantly, it mostly requires ingredients you probably have in your pantry. Why make beef jerky at home when you can always order some online? Because, let’s face it – as cheap as store jerky is, it’s pretty hard to find one that’s exactly the way you like it. Some are chewy, others salty as Hell and some, well, taste like crap.

First of all, preparing your own beef jerky puts you in full control of the dish, from choosing the beef cuts, all the way to the cooking part. Second, by choosing to cook rather than buy, you can make it as salty or sweet as you like. Last, but not least, beef jerky’s one of those recipes that don’t require an advanced degree in rocket science in order to prepare.

So, without further ado, here’s how to make some delish beef jerky at home.

Ingredients and Utensils

For this recipe, you will need the following:

  • Angus beef sirloin. I use around two pounds of beef for this recipe. Once you get it dried, you end up with one large zip-lock bag of beef jerky.
  • Worcestershire sauce (three-quarters of a cup).
  • Soy sauce (three-quarters of a cup).
  • Smoked paprika (one tablespoon).
  • Honey (one or two tablespoons).
  • Ground black pepper (two teaspoons).
  • Hot chili flakes (one or two tablespoons, depending on preference).
  • Garlic powder (one teaspoon).
  • Onion powder (one teaspoon).

That’s it for the ingredients. As for kitchen utensils, you will need a large bowl to mix your ingredients, an oven tray, baking paper, a pair of scissors, and, of course, a zip-lock bag for the jerky. All done gathering your utensils and all of the ingredients? Take your time. I ain’t going anywhere. When you’re ready, here’s how to put everything together.

Preparing mouthwatering beef jerky

Step 1. Take your beef cut out of the bag and wash it thoroughly. Dry with a couple of paper towels or place in a strainer.

Step 2. In a large bowl add your Worcestershire sauce, soy sauce, smoked paprika, honey, ground pepper, hot chili flakes, powdered garlic, and powdered onions. Whisk the ingredients using a fork or, well, a whisk.

Step 3. Cover the bowl with some plastic wrap and place it inside the fridge for half an hour.

Step 4. It’s now time to tend to the meat. Using a very sharp butcher’s knife, cut the meat into thin strips – if it’s easier, make stake-sized bits.

Step 5. Take a big zip-lock bag from the pantry and put the beef inside.

Step 6. Get the bowl out of the fridge and pour over the beef. Seal the bag and place in the refrigerator. Leave the meat to soak up all those juices for at least a couple of hours. Ideally, you should leave it overnight. Remember – the longer you marinate your meat, the tastier it will be. I usually keep it in the fridge for one or two days.

Step 7. When you’re ready to cook the meat, preheat the oven to 176 degrees – yup, you’ll need ultra-low heat. The idea is to dry the beef cuts, not to bake it.

Step 8. Take the marinated beef out of the bag.

Step 9. Place the meat on an oven tray covered with baking paper. Use a paper towel to soak the excess marinade.

Step 10. When the oven reached the desired temperature, stick the tray in the oven and cook for 4 to 5 hours. Every hour or so, flip the beef cuts.

Step 11. When they’re done, take them out of the oven, allow the cuts to cool down, and cut them into thin strips using a pair of scissors or a knife. Bag and tag!

Another Way to Prepare Beef Jerky

Don’t go anywhere, because this was just the warm-up. Okay, so you now know how to prepare beef jerky at home. But can you do the same, say during a shit hits the fan situation? Beef jerky is, more or less, the beauty of the best – thought it looks totally unpalatable, it’s actually delicious, nutritious, and, on top of that, it can be made anywhere and with any type of meat.

Now let’s imagine for a moment that you’re lost in the woods and you run out of food. Obviously, you’ve got to do something about it. Now, if you still have your bug out bag with you, whip out a snare and wait. Keep in mind that beef jerky can be made with any kind of meat.

However, if you want your trail snack to contain all the proteins and fats your body needs to keep on going, you would want to stick with red meat or fish. When you’re done with the gutting and butchering parts, here’s what you will need to do in order to prepare jerky.

Step 1. Find a clean spot to set up your working area.

Step 2. Use your survival knife or a very sharp rock to cut the flesh into very thin strips (half a centimeter). Don’t forget to cut across the grain, not with the grain (those muscle fibers will make meat harder to chew).

Step 3. While the meat’s still wet and tender, season it with your condiments of choice. I like to keep stuff like ginger, cumin, sugar, salt, pepper, and chili in small pill bottles. You can also make your own mix which you can use to season the meat. Put a little bit of sugar if you have some in your bug out bag.

Step 4. It’s now time to create some sort of drying rack. Look around for twigs, long stick or branches. If there’s nothing available, you can always hang the meat cuts by a low-lying branch using heavy duty zip ties. Just be careful to place that meat within eyeshot because it’s bound to attract some unwanted attention (flies, mosquitoes, and, yes, even bears).

(Optional) If you want to a little smokey flavor to your meat, place it over a small campfire. Don’t leave there too long, though. You’ll want to dry your meat, not cook it. Of course, there’s nothing wrong with some BBQed game, but it tends to spoil faster.

Step 5. If you manage to improvise a drying rack, flip the meat every couple of hours. Depending on weather conditions, like wind, humidity, and temperature, it can take up to four days for the meat to lose all moisture.

Yes, I know it’s a painstaking process. More so because you’ll need to be on the lookout for critters. On that note, when it’s time to hit the sack, don’t forget to bring the meat inside your tent or improvised shelter. Obviously, you won’t be able to keep an eye out while you’re asleep.

Step 6. After a couple of days have passed, take a look at the meat. You’ll know it’s ready to eat when the meat has a brittle aspect. If you prepare jerky from red meat, the color you’re looking for is a purple-brown. On the other hand, if you’re using white meat, the jerky will turn pink-grey when it’s done.

Step 7. All that remains to be done is to cut the meat into thinner strips and to store it in a zip-lock bag or an airtight container.

Wrap-up

Taking all these facts into account, I would have to say that jerky is indeed the ultimate survival food. Given the right storage conditions, a batch of jerky can last for at least a couple of months, if not for a whole year.

Now, as far as the oven-drying version is concerned, I would advise ditching the salt. Yes, I know that salt and jerky is a marriage made in Heaven, but the soy sauce adds and smoky taste to the meat, which means that it doesn’t need extra. Of course, if you’re not a big fan of soy, you can always replace with two tablespoons of rock salt.

I don’t know about you, but I like to add some kick to my jerky. If you want your snack to be spicier, you can add half a teaspoon of Tabasco in addition to the chili flakes. Yes, I know it sounds pretty hardcore, but hey, at least your jerky won’t be bland.

One of my friends told me that it’s also possible to prepare beef jerky using a dehydrator. Remember my powdered eggs recipe? Well, the method’s more or less the same. The only advantage of using a dehydrator instead of a regular oven set on ultra-low heat is that it reduces the cooking time by at least one, maybe two hours. If you have one of those gadgets in the kitchen, you should definitely try it out.

One more thing – the meat itself. Though I highly recommend using sirloin for this recipe since the cut will be, well, chewier, you can use whatever meat you prefer. Just be sure it has the same amount of fat as sirloin. Haven’t tried it yet, but from what I heard, jerky prepared from fish like rainbow trout, tuna or salmon is absolutely divine. Trouble is that it’s very hard to get ahold of a good recipe and most of the stuff on the market looks way too nasty.

So, here’s where I take my love. Hope my little winding has managed to convince you that making your own beef jerky is better than having to go through hundreds of Google pages in order to find the right one. As always, don’t think of cooking as something you need to do – have fun around the kitchen. Play some tunes. Work on your air guitar skills; whatever floats your boat. What do you think about my beef jerky recipe? Hit the comments section and let me know.

Beef jerky…the stories I could tell you about this stuff. I’m just going to say that I would marry beef jerky if that were possible (thinking about moving to state

As preppers we stock up on supplies that we think we will need in an emergency. The order of priority for these items is usually tied to what our bodies need to survive. We can only live for 3 days (on average) without water so we make plans to purchase storage containers and water filtration systems to cover that base. We next need food, so we stock our pantries full of store-bought and freeze-dried food for a situation where the grocery store is either unreachable or out of food. Security and shelter round out the list of initial survival concepts you want to take care of but what else is there?

There are so many aspects to preparedness, but one of the more important ones to consider is medicine. If the grid goes down, the pharmacy will be in the same boat as that grocery store. If you are still able to purchase items (grid up), they may be sold out with no reasonable hope of resupply. You don’t want to find yourself in a situation where you need simply medical supplies to treat illness or injury and aren’t able to procure them for your family. Thinking about your families’ health from an injury standpoint isn’t as sexy as buying a good SHTF weapon, but knowing which medicine to stock up on for an emergency will allow you to plan for disruptions and possibly keep your family more healthy when they need it the most.


What are important types of medicine to stock up on?

This list certainly won’t take the place of a hospital pharmacy and it surely won’t give you the skills you need to treat every injury, but even the most basic of medical supplies and a little knowledge could help you out. When shopping for medicines or thinking about first aid, I consider what types of injuries you could encounter in a disaster.

Disasters both natural and man-made bring death, disease and injuries. The medicines you need to stock up on should take some of these into consideration while not addressing every conceivable ailment under the sun. To achieve a basic level of preparedness I would recommend having the following items on hand.

Pain Medication / Fever Reducer

By pain medication I am referring to over the counter pain relievers. This can help with anything from headaches, sore muscles from too much exercise after SHTF or injuries. Acetaminophen (Tylenol) is good for relieving pain and fever. It is generally less irritating to the stomach and is safer for children but can be toxic to the liver if you take too much of it.

Aspirin, Ibuprofen (Advil, Motrin) are examples of non-steroidal anti-inflammatory drugs (NSAIDs). These reduce inflammation caused by injury, arthritis or fever. They can also assist with pain associated with menstruation.

Children shouldn’t be given aspirin as it has been shown to cause Reye’s syndrome and can cause other bad effects. For pain medication I would have at least a bottle or two of your favorite pain reliever. For smaller children who might take liquid or chewable tablets I would stock up on that also. You don’t want your child to experience a fever without having medicine to bring that fever down if needed. The medicines above can be useful for both reducing inflammation, relieving pain and reducing fevers. I personally like aspirin for headaches but we do have large bottles of the other two on hand as well.

Anti-diarrheal

One of our readers put this as his top 4 or 5 items to have in his bug out bag and I can understand the rationale. The last thing you need to worry about in a bug out scenario is pulling over every twenty minutes or trying to find a safe place to let it all out. Diarrhea besides being messy as all get out can dehydrate a person quickly. Dehydration leads to weakness, irritability and confusion. Not the state you want to find yourself in an emergency.

There are two main types of medicines that help stop diarrhea, thickening mixtures (psyllium) absorb water and gives number 2 a little more volume. Antispasmodic products slow the spasms of your lower intestine. Loperamide is the active ingredient in products like Imodium and Pepto Diarrheal control. I have also seen loperamide hydrochloride in pill form in dozens of first aid kits. Fortunately, I have never had to use them but have them just in case. Better safe than sorry.

Antibiotics

Sooner or later someone you know will need something a little stronger than a clean bandage. Antibiotics are used in the treatment of bacterial infections. A cut from a rusty piece of metal when the grid is up isn’t life threatening. Without something to fight the infection in a grid down world, a bacterial infection could spell death. Antibiotics do not work on viruses though, so they won’t help you out with every illness.

How do you know when to use antibiotics?

The answer depends on what is causing your infection. The following are some basic guidelines from Familydoctor.org:

  • Colds and flu. Viruses cause these illnesses. They can’t be cured with antibiotics.
  • Cough or bronchitis. Viruses almost always cause these. However, if you have a problem with your lungs or an illness that lasts a long time, bacteria may actually be the cause. Your doctor may decide to try using an antibiotic.
  • Sore throat. Most sore throats are caused by viruses and don’t need antibiotics. However, strep throat is caused by bacteria. Your doctor can determine if you have strep throat and can prescribe an antibiotic.
  • Ear infections. There are several types of ear infections. Antibiotics are used for some (but not all) ear infections.
  • Sinus infections. Antibiotics are often used to treat sinus infections. However, a runny nose and yellow or green mucus do not necessarily mean you need an antibiotic.  Read more about treating sinusitis.


Obtaining extra antibiotics could be difficult without a willing doctor or an active prescription. A common alternative to pharmacy antibiotics is fish antibiotics. Largely made with the same compounds, fish antibiotics are available without a prescription.

Colloidal Silver

Colloidal silver isn’t loved by the medical or scientific establishment, but that doesn’t mean it does not work. Colloidal Silver or CS as it is referred to by some is said to be an excellent antibiotic with the side benefit of being able to be made with simple materials by anyone. You should research for yourself whether or not this is a prepper supply you want to store and there are well documented cases of people who have abused this. I have some in my medicine cabinet.

Additional medical supplies

  • Oral re-hydration solution – To offset the effects of dehydration caused by illness or diarrhea, make your own by adding 6-8 teaspoons of sugar and 1 teaspoon of salt to 1 liter of water. Best to boil the water, add the sugar and salt while it is still warm to dissolve completely and let cool.
  • Multi-vitamins – I know the experts say that vitamins don’t do anything for you, but I believe if your body is deprived of vitamins supplementing with a good multi vitamin is a good idea.
  • Bandages – Probably more than you would ever expect to need. Bandages on wounds need to be routinely changed and the wound cleaned (based upon injury of course, consult a medical resource book for frequency) and you can easily go through dozens with one injury.
  • Rubbing Alcohol and Hydrogen Peroxide – Both alcohol and hydrogen peroxide are useful for cleaning wounds but each have many other benefits in the prepper’s first aid kit.
  • Cough Drops – Sure there are natural alternatives to cough drops, but you can buy a few hundred for less than $10
  • Anti-itch creme – Itching sucks.
  • Honey – Natural honey can be used to treat wounds and never goes bad if you have it stored properly. Plus it tastes great on that oatmeal you have stored in your pantry too.
  • Knee Braces and Ace Bandages – A lot of injuries will simply take time to heal. A good knee brace can make getting around possible for someone with mild injuries. Ace bandages can help with sprains.
  • Any prescriptions you take regularly – An entire post could be written about obtaining supplies of life-saving medical prescriptions. The sad fact is that in a grid down world, many people who can no longer access prescriptive medicine may die. There are alternative treatments, homeopathic remedies and natural substitutes for some specific medicines, but these should all be researched thoroughly on your own. At a minimum you should have at least a one month supply of any medicine you must take. If the disaster allows you to make it to another medical provider you have some time.
  • Thermometer – Get the old-fashioned kind if you are worried about EMP, although the newer digital thermometers are really nice too.
  • Blood Pressure Cuff – Helpful in situations although requires some training on how to use one properly. Don’t forget the Stethoscope to hear the heartbeat. – Hat tip to Ty for these last three great recommendations.

When does medicine go bad?

Yes, medicine does go bad, but it may not be bad in the way you think or as quickly as you might believe. For one thing the expiration date on medicine does not mean that the medicine is bad after that date. Medicine does start to lose its effectiveness over time though so keeping your medicine up to date is the best approach to having a good supply of medicine in your home.

How quickly a particular medicine loses its potency will vary by the medicine and the conditions where it is kept. Moisture and heat are not friends to medicine so a cool dry place out of sunlight is the best location. Medicine that has changed color, texture or smell even if it has not expired shouldn’t be taken. If pills stick together or are harder or softer, show cracks or chips they likely need to be replaced.

This is really just a start at some of the most obvious medicine to stock up on but each person has their own needs. What is your plan if you can’t get to the doctor?

These are some of the most obvious medicine to stock up on but each person has their own needs.

Water is obviously a critical supply you need to have in order to live. Water more than food is required if you are going to survive and we talk a lot on survival blogs about how to handle the water once you get it. If your water isn’t clean, we discuss how to filter or treat the water to make it drinkable.

We have talked about transporting water to your location or carrying water in something like your Bug Out Bag. We have additionally talked about filtering water that you collect in rain barrels, but what if you are in a survival situation and you have no source of water. Knowing how to find water is perhaps just as important as knowing how to treat water before you drink it.

Water is the most abundant resource on this planet in terms of sheer volume, but fresh drinking water is not as easy to come by. Although the earth is covered in oceans, freshwater sources are a little harder to find and as a society, we have come to rely on water treatment stations to pump the majority of what we drink. Many rural locations rely on well water, but that is also pumped from deep underground.


If you are in a survival situation it will be very unlikely that you would be able to drill a well and find a source of water. Obviously, if you are in a fixed location this is always a possibility, but for the rest of us water can be found and this post will go into both Urban and natural settings where you can find sources of water.

Water Basics

The human body needs approximately one gallon per day in average conditions for hydration and hygiene. You could of course skip a bath, but you still need a steady supply of water or you will become dehydrated. Go without water too long and you die so we want to make sure that doesn’t happen. We will mostly cover how to find water in the wild in this section, not how to treat water.

Snow and Ice – Depending on your location, you may have water all around you at certain times of the year. If you are where there is snow and ice, you can melt as much water as you need. Two things to remember with this is that heating snow for drinking water is very fuel intense so if this is your main plan for survival, expect to use a lot of wood or energy to heat that snow. Many of you have eaten snow as kids; I know I did but you can’t do this for long or else your body temperature drops as the cold water chills your inside. I saw a documentary one time where a family was hiking and became lost in a snow blizzard. The mother who was breastfeeding an infant at the time was eating snow to stay hydrated and provide milk for the baby. She died because the snow reduced her body temperature so much. Melt the snow if you are going to drink it.


Ground – How many of you have heard the hiking adage that if you are lost you want to make your way downhill, then down river as all rivers flow to a town. Bear Grylls used to say that on just about every show he was in the mountains. Well, I don’t know if all rivers do lead to a town, which would hopefully get you in contact with people who could help you, but I do know that water flows to the lowest spot. If you are in the mountains, make your way down and unless you are in a desert, you will start running into places where water runoff accumulates, forms trickles, then streams, then rivers. I think that in the wild you should have plenty of sources to find water and you can even find drinking water in a tree. Make sure that any water you drink is treated first obviously.

Desert – Deserts are a little trickier as they don’t normally have water on a good day. It is possible to find water though without squeezing it out of elephant dung. Deserts get rain from time to time; it’s just so infrequent that the water sinks down, runs off or evaporates before long. In deserts you can dig along creek beds for water that could be a couple of feet underground. You could also build a solar still. The video below shows how to do this.

If that isn’t an option, you could wrap a clear plastic bag over the leaves of a bush or tree to collect condensation, but I don’t believe you would get enough water to live like this and it’s much better if you are lost, to make your way out of the desert as quickly as possible.  Regardless, here is another video that shows that method as well.

Rainwater – If you can collect rainwater, I think this is probably the easiest and safest way to find water but it isn’t without its own drawbacks. First of all, it has to rain and as you know even the weather men can’t predict when that will happen with complete accuracy. Waiting on rain could take weeks and if you are thirsty, that will be too long. You also need a method to capture the rain also. You can’t just stick a gallon jug outside and expect that bad boy to be filled up. Collecting rainwater for survival requires rain, a large collection surface and a big bucket.

Providing you have these things, a relatively small amount of rainfall can allow you to collect an amazing amount of water. Our home is set up with two rain barrels and I have filled each barrel up with a single rainfall before. For situations where you have a base location you are staying in, collecting rainwater for survival makes the most sense to me.

Dew – You can also collect water from the dew in the morning, but like the solar still and the clear bag methods above, I don’t think these are realistically going to give you enough water to last a day. They may be worst case scenario options, but if you are going to survive, you need a reliable source of abundant water.

Finding Water in Urban Environments

adi709_1fc_lg

Drain the water from your water heater in emergency situations.

One advantage of trying to find water in an urban environment as opposed to the wild is that we pipe a bazillion gallons of water into our cities every day and unless it is used, we store it in pipes and reservoirs in almost every house, shack, building and complex.

You can start in your own home. Even if the water has been shut off, you will have a lot of water still inside the walls of your house. The back of the toilets have at least a gallon and a half each. Your water heater will have 30-60 gallons. The actual pipes in your house will still have many gallons stored in them and you can access it simply by opening the tap in the highest part of your home, like the second floor and gravity will allow the water trapped in the pipes to flow out the bottom taps.

Most of us already have the home sources identified, but what about water in other locations? I wrote a post a few days back trying to point out what in my mind where the differences between looting and scavenging. At least one of our readers had strong feelings on that subject, but in this case where you need water for survival, there would be many more places that could be abandoned that could offer potential for water also.

Large manufacturing plants have water reservoirs on the roofs in some cases for their fire systems. Even if they don’t like the pipes in your home, sprinkler systems are loaded with water that could be used in an emergency. Before I get any nasty grams about this, the usual caveats apply. I am talking about a grid-down, SHTF scenario where your life depends on having a source of water and there is nobody presently using or occupying this structure. Even that isn’t clear enough… I don’t mean to break into anyone’s home and steal their water if they are home.


Sprinkler systems are much trickier than other sources and the kind you can see above your head are easier than the ones buried underground. We have other sources like water towers, fire hydrants, break room water coolers, swimming pools, hot tubs, fountains, aquarium tanks, air conditioning evaporator traps, water fire extinguishers and on and on. Essentially, there should be a lot of places to find water, but we may have to try a little harder if the world has gone to hell in a hand basket and of course all the sources should be treated first before drinking.

What not to drink

The following items shouldn’t ever be consumed as a water replacement and as much as I respect Bear Grylls, I have to agree with the second item on this list.

  • Alcoholic beverages
  • Urine
  • Blood
  • Seawater

I hope that gives you some ideas for water sources if you are ever faced with survival scenario that you need to find water. I hope even more so that you never are. Maybe in your list of prepper supplies, it would be good to have a hacksaw and a pipe wrench too. You never know…

If you need more there’s always wikihow. Here’s what they have to say.

Locating water is an important skill to have if you enjoy wilderness activities such as hiking, camping, or cross-country events. Water is vital to the performance of your body. Even a single day without water can become a challenge. Dehydration can result in clouded judgement, physical weakness, vomiting, and fainting. In as few as three days the body can begin to shut down, leading to death. Knowing how to find water if you become lost or separated from regular water supplies can save your life.

1. Look for areas that have green foliage. Green areas in a desert or plains area can indicate the presence of water.[2] A line of trees or some foliage low on the ground may also hint at a creek bed or some other body of water.

2. Scout the terrain for low-lying areas. Some examples of these include valleys, depressions, or crevices. Water moves toward the lowest point possible, so these places are prime locations for finding a lake or stream.

  • Rainwater may collect in these areas.
  • If you are in a mountainous area, check for water at the foot of cliffs.
3. Detect signs of wildlife. Circling birds can sometimes indicate a water source nearby, but you might also follow animal tracks. Water is a basic need for all animals, and the tracks you follow will likely lead you, eventually, to a watering hole.[4]

4. Notice the presence of insects. Mosquitoes in particular are an indication that water is nearby, as is the presence of flies, which tend to remain about 325 feet (100 meters) from water. Generally, most insects do not stray too far from water sources.

  • Keep your eyes peeled for bees as well. Bees build hives three to five miles away from a water source.

Part2

Accessing Trapped Water

1. Collect suitable snow or ice to make water. If you are in an arctic area, or an area that receives snowfall, you should collect snow that has a bluish look to it. This will prevent you from consuming frozen water that his high in salt content, which could contribute to your dehydration.

  • Frozen water that has a higher concentration of salt will appear gray or opaque.

2. Melt the ice with a heat source and purify. There are many ways you might melt your ice into water that will quench your thirst. In extreme situations, you may have to find a container and then cuddle it, using your body heat to melt the snow. In other cases you may be able to use a match, lighter, or other heat source. Once the snow has melted, you may purify the water using several different methods, such as:

  • A water purifying tablet to cleanse the snow, now turned to water, for consumption.
  • A filtration device, like a water purifying straw, to drink your thawed snow.
  • Using your heat source to bring the melted snow to a boil. Allow it to boil for a least a minute to guarantee the water has been purified.
3. Search out water in damp sand or dirt. In an arid setting, if you spot a depression or moist patch of sand behind a sand dune, in a dried out lake, a gully, or some similar feature, you should dig down in that area to search for water. If you notice water begging to puddle at the bottom of your hole, you’re in luck.
4. Locate any water-containing plants, such as barrel or saguaro cacti. It can be helpful to brush up on your knowledge of edible and poisonous plants, but this may be an unrealistic option for your situation. Instead, you seek water in vines, cacti, and roots. Cut a notch in the plant and wait for liquid to seep out. In the case of cacti, break it open and suck moisture from its pulp, being careful not to eat any of the cactus, as it could make you sick. Generally, you should avoid drinking plant sap that is:
  • Thick
  • Colored
  • Sour or bitter
  • Sharp or unpleasant in odor

Part3

Determining the Drinkability of Water

1. Know the hazards of drinking unpurified water. Drinking water that is poisonous, contaminated with parasites or bacteria, or is tainted by human waste can cause serious health complications. This can be a threat to your survival in an emergency a wilderness experience. Illnesses associated with contaminated water include:

  • Dysentery
  • Cholera
  • Typhoid

2. Increase your chance of survival while looking for water. Sweat will make you dehydrate faster, so you should avoid activities that may make you sweat while looking for water. You should also:

  • Stay in the shade, if possible.
  • Avoid eating anything while thirsty.
  • Damp your clothes in hot conditions to cool yourself in hot climates.
  • Carry materials, like a plastic sheet, to make water collection devices.

3. Be prepared to purify the water you find. You can do this simply by bringing water to a boil over a fire, though this might not always be an option. To ensure you don’t end up drinking water potentially tainted with parasites or bacteria, you should consider:

  • Carrying water purifying tablets.
  • Purchasing a simple water filtration device, like a water purifying straw.

4. Choose water that is clear and flowing. Flowing water will not be stagnant, and stagnant water is an ideal breeding ground for many disease-carrying insects and parasites. When deciding on whether or not a source of flowing water is safe to drink, keep in mind:

  • The location of the nearest human settlement. The downstream area of rivers can easily be tainted by human activities.
  • The mouth or origin of a water source will likely be safest for drinking.

What do you think? Did we miss anything?

Thousands Have Lived Without Love, Not One Without Water. Here's how to find it.

Perhaps the single most useful tool for someone to have in a survival situation is a lighter. While some might argue that a lighter is a little bit of a cheat and that a real survivalist would start fires from scratch, this argument doesn’t really hold water when your life is actually on the line. Starting a fire the Neanderthal way might be more pure, but it actually requires considerable skill and even a bit of engineering savvy before you’ll see the first glimmer of smoke, and eventually some life-saving flame.

A survival lighter is very compact, is universally available, and provides a priceless function to someone suddenly thrust into a life-or-death situation. For someone intentionally seeking out the wild places of the world, a reliable lighter is solid gold. But for a lighter to be as useful as possible, it must be relatively immune from the effects of wind and the elements and offer a steady flame that will not be blown out by a mere breeze. Storm-proof lighters offer just that kind of service and are well-known to survivalists around the world, many of whom carry two or more in the wild.

Here are some of the ways that a good survival lighter can make the difference between life and death in a real survival situation.

Building fires for warmth

Ultimate Survival Technologies Delta Shock and Storm Proof Lighter – Blaze Orange

In a cold climate especially, warmth will be essential for a person caught in the wilderness. Some kind of shelter is essential as protection from weather conditions, but it will also be necessary to keep warm, and in places where the thermometer dips low at night, a fire can stave off frostbite or even worse harm.

Cooking food

Humans are capable of lasting up to three weeks without food, but that doesn’t mean you can count on surviving that long between meals. In actuality, the body begins to grow weaker far sooner than the three week period, and that means muscle coordination and even brain functions are degraded far sooner. Raw food might be palatable in a pinch, but cooking food also kills germs and bacteria that might be present and will allow for a healthier intake of foods that are not normal components of the human diet.

Protection against wild animals

In an area where there might be predators, fire can be essential protection for the survivalist. Wild animals have a natural aversion to fire, many of them having witnessed the damage that wildfires are capable of, and they will not enter a campsite where a strong fire is burning. Of course, this means that the fire has to be maintained whenever there is a suspected presence of such predators and that a steady supply of fuel must be gathered, but here too, fire can help. Carrying a burning piece of wood along as you seek wood supplies will cause most animals to keep their distance.


Boiling water works just fine to kill off anything nasty in your water supply.

Water purification

There are, of course, better purification methods than boiling water, for instance, handheld purifiers and water bottles with purification systems, but if you happen to be caught without any of these, then boiling water works just fine to kill off anything nasty in your water supply. And it almost goes without saying that you must locate a water source, because humans cannot live longer than three days without it. Like with food though, that three-day guideline is an extreme case, and body functions will begin to degrade much sooner than that without essential water being taken in.

Mini survival kit

A survival lighter can be made to have much greater value than its single, intended function of lighting fires for all those benefits described above. Someone who has time to plan for a stay in the wild can dress up a lighter to be much more useful than as a mere starter of fires.

Carry a lighter on your keychain. This small peanut lighter could save your day.

Wrapping your lighter with duct tape can pay handsome dividends in a survival situation because there are hundreds of ways that duct tape can come in handy. After taping the lighter, add several fish hooks to one side of the lighter, and some sewing needles on the other side, to give yourself a tiny toolkit of items that can help with other aspects of survival.

Finally, wrap a long strand of heavy fishing line, perhaps 20-lb. test line, around the whole lighter to provide a means for fishing or makeshift trapping, and also to repair gear. By including these extra aids to survival all on one simple tool, the survival lighter is made even more valuable as a means of keeping you alive in a hostile situation.

Perhaps the single most useful tool for someone to have in a survival situation is a lighter. While some might argue that a lighter is a little bit of a

A couple of days ago, I had some friends over for a backyard BBQ. Several beers and patty flips later, one of them hits me with the oddest prepping question ever: “say, do you have any of odd stuff in your dark chest of wonders (that’s what I call my household survival kit)?”.

I really didn’t know what to answer. I mean, most of the objects us preppers carry and hoard (and don’t you try to deny that!) can be peculiar to some. Take magnesium rods, for instance. Aside from preppers, ex-military, and maybe some people who really don’t know how to spend their money, no one even considers owning such an object. Why would they?

Anyhow, for the time being, I considered the matter settled. But the question popped into my head again. Naturally, with my wife and kids fast asleep, I tiptoed downstairs and took a quick inventory of my prepping (what else could a man do on a Saturday night?).

Wouldn’t you know it, there are some things in there which may pass as peculiar to some, but handy nonetheless. So, after some careful consideration, I’ve decided to do a short piece about the odd and useful stuff every prepper should have around the house or hunting cabin or whatever. So, without further ado, check out my list of 5 outlandish items worth their weight in gold.

  1. Foldable pruning saw

If you’ve ever got around to do a bit of gardening, then you know how hard it is to get rid of vines or saplings. Yeah, long before I ever knew such a tool existed, I had to use a hacksaw or my survival knife to deal with stubborn outgrowths. Fast-forwarding a bit, during a yard sale, I came across this rather brutish tool.

I kid you not that when I first saw it, my first thought was “torture implement.” However, the guy selling the saw said it’s for pruning and not for chopping off fingers or garrotting someone. I feel a bit silly for thinking that no tool’s going to help me get rid of the backyard vegetation.

Needless to say, I pretty much came to enjoy messing around the garden now that I had the right tool. So, if you need to get rid of branches, saplings, twigs, vines, go for a foldable pruning saw. While you’re at it, you may want to consider adding one to your B.O.B – they’re awfully useful for quite a lot of jobs, and yes, in case of an emergency, they can be used for self-defense.

2. Quadruple-O Steel Wool

Here’s another doozie for you – 0000 steel wool. It’s sort of a byproduct of metalworking and very useful if you want to start a fire very fast. Yup, as you’ve probably guessed it, it’s highly flammable, which means that I wouldn’t store it next to a heat source or something. What I like to do with quadruple-O steel wool is to use in conjunction with char cloth.

For that, I’ve crafted my own version of the tinder, an old-school and ingenious way of whipping up a quick fire when you lack matches or lighters. My tinder box contains a small piece of 0000 steel wool wrapped in char cloth. I’ve bought mine from Amazon, but you can probably find them in every military surplus or sports store (they usually come in a pack that resembles smoking filters for rolling tobacco).

3. Guitar strings

Never quite got around to learning how to play the blasted thing, but I do stock up on strings as often as I can. There’s great for all sorts of things – setting up snares, cutting dairy products like hard cheese, or even hanging heavier pictures or wall decorations.

A while ago, my wife got for her birthday this awesome stone replica of the Dendera Zodiac. The trouble was that the plaque’s heavy as shit, which means that a regular string or wire won’t do. I managed to find a workaround by using a bass string – those are thicker compared to solo guitar strings.

4. Pencil sharpener

Having one pencil sharpener around the house is no big deal. Even though the PC industry has skyrocketed, there are those, including yours truly, which prefer to stick to pen and paper. Hell, some of the articles you see here were laid on paper before getting them live. Now, I know this may sound a bit strange, but I got a whole box of pencil sharpener tucked away in the garage.

No, I don’t have that many pencils to sharpen, but they do have their uses. For instance, if you run out of tinder, you can always use a pencil sharpener to make more. Moreover, the blade can be salvaged and made into a trap.

Of course, if you know your way around weapon crafting, you can always take a bunch of pencil sharpener blades, and fashion yourself a club or something. Of course, the mount is melted down and turned into nail (I melted a box of bladeless sharpers and used the metal to forge me a bushcraft knife).

5. Machete

I really like knives. The bigger, the better. Anyway, a machete’s useful for pretty much any job that requires extra muscle. I personally like to use it for chopping small wood and some last-minute weed-whacking.

Like with any other knife, you should definitely aim for quality. It’s true that this type of blade might be too cumbersome for your B.O.B, but no one’s stopping you from getting one the next time you go for a hike. Just be sure to get one that’s made from carbon steel and not stainless.

Think the list needs some improvement? Let me know what you think in the comments section.

Most of the objects us preppers carry and hoard can be peculiar to some. Take magnesium rods, for instance. Aside from preppers no one even considers owning such an object.

The sh*# has hit the fan and the power is out. Despite all warnings, you didn’t stock up on matches, lighters, or a flint. It’s getting cold outside, and you could really use a warm meal. What now? There are many ways to build a fire without matches or lighters, but in my opinion, the best way is to make a fire plough. While it does take some stamina, it is very effective.

One of my favorite survival movies is Cast Away in which Tom Hanks plays an everyday guy named Chuck Noland. In a very powerful scene, Chuck struggles for hours to make a fire using a bow drill. While that is a good way to build a fire, it is very difficult (as it is for Chuck in the movie). Finally, he gives up on the drill and tries another method: the fire plough.
Follow these instructions and you’ll be warm and eating a bowl of hot soup in no time.

    1. Prepare some kindling. There are many things you can use such as tree bark, dead plants or grass, wood shavings, or just some shredded paper. The drier the better.
    2. Find a piece of softwood. You might get it off a piece of furniture or from an abandoned building. As long as you can make a mark on it with your fingernail, it is soft enough. Make sure it’s no more than two feet long, no more than six inches wide, and no more than an inch thick.
    3. Find a very hard stick, about a foot long and a half an inch thick. With this one you shouldn’t be able to leave a mark on it with your fingernail, otherwise it is too soft.
    4. Kneel down over the soft wood. Rest one end of the hard stick on your thigh and the other end on the wood. It should slant either right or left (depending on whether you are right or left-handed) at about a 45-degree angle.
    5. Get a good grip on the stick and start rubbing it up and down the soft wood, making sure the keep the path straight as it forms a groove. The “ploughing” should be hard and fast. This is where your stamina comes into play. Ignore your burning muscles and keep at it!
    6. Soon a pile of wood shavings will form at the end of the wood. Eventually the wood will be hot enough to ignite the wood shavings into embers.
    7. Immediately place your kindling on the embers and gently blow on it until the kindling ignites.
    8. Triumphantly shout, “Fire!”

For a video of the same process you can view this below.

The sh*# has hit the fan and the power is out. Despite all warnings, you didn’t stock up on matches, lighters, or a flint. It’s getting cold outside, and you

Prepping in its most basic form to me is about proactively taking steps to ensure you and those around you are ready with skills, supplies and a plan to react to emergencies or disasters in a way that promotes your survival. The core of short-term survival I would argue is something that many of us take for granted and that is water.

Why do you need to store water for emergencies?

The simple answer to that question is one that you probably already know. We all need water to survive and if you go without it for a while your health deteriorates. You can get headaches, become lethargic and weak. Go with water for more than a couple of days and you die. Water or lack of sufficient, clean drinking water, more than almost anything else (I will go into the other things later) will kill you.

That much is pretty simple. Usually everyone can accept that premise without even blinking an eye. What they frequently have problems with is this idea that you could ever find yourself without clean drinking water. We in virtually all of the developed world have water treatment facilities, plumbing and systems that bring clean water inside the house or our offices and you would be hard pressed to walk anywhere in even the smallest cities without quickly finding nice clear, plastic bottles of water for sale. But what if the water in the tap was tainted? What if the tap no longer put forth clean, shiny water? What if the stores with all of those bags and bags of bottled water were empty? This is where prepping begins.

To prepare, you have to do something proactively.

It isn’t wise to sit back and say things like “that would never happen” or my own personal favorite, “the government will take care of us if that happened”. In any large emergency, you will be reliant upon yourself as evidenced in almost every case in recent history. Yes, disaster relief organizations and government assistance will usually mobilize, but do you want to wait for that to happen? Even the government tells you to prepare on its website, ready.gov. If they are saying not to wait for them, what does that tell you?

fema-sandy-closed

I don’t know why anyone would count on the government. Maybe they will do something right, but I wouldn’t bet my life on them saving me.

How much water do you need to survive?

So we agree that everyone needs to stockpile water, but the next obvious question is how much? The amount of water you need vary greatly depending on a few different factors. A general rule of thumb is that you need one gallon of water per person per day. This assumes hydration needs and hygiene. You won’t necessarily drink a gallon of water, but you might need it for reconstituting freeze-dried food, cleaning cooking implements or washing your body. On some days you might not even need a gallon of water. Other days you could end up needing much more than one gallon if you are exerting yourself physically or the temperatures are elevated and you are losing fluids to perspiration.

In my opinion, water is one of the easiest preps to cross off your list and since it is so vital, it made the cut as the first in this series. To calculate how much water you need, just multiply the number of people you are prepping for by the number of days you want to be stocked up for. In my family, I have those who live with me (4) as well as extended family who I plan will come to our location (another 4 potentially) as well as some friends (add 4 to that) so I am looking at potentially needing to supply water for 12 people. 12 people for one month is 12 X 30 = 360 gallons of water.

Where is the best place to store water?

That is only for one month. What if the emergency lasts longer than one month? What if the town’s water supply is still not safe for drinking at that point? 360 gallons takes up a lot of room no matter how you look at it. If you have 55 gallon barrels in your basement that is still 6 barrels and again that assumes everyone is staying at or under their one gallon a day limit.

I have a few different ways to store water. The first is stored in heavy-duty plastic containers that hold 7 gallons each. These are great because they are more portable, they stack and I can get some storage in smaller spaces, like the shelves of a pantry. I can also easily transport a few of these to my Bug Out Vehicle if necessary. This storage only lasts a week.

If you have the space, larger water storage containers work best.

After that I have rain barrels that hold 50 gallons a piece. The great thing about rain barrels is that they can be refilled by Mother Nature without you having to do anything except make sure the water is disinfected. But, this requires an outside location and not everyone has a home on land where they can back up a barrel under the gutter. People who live in apartments have different space limitations.

For apartment dwellers, I would recommend using the stack-able storage, but diversify that around your apartment so you don’t have weight all in one space. Usually any apartments are built on concrete substrates so even several hundred pounds of water in a closet wouldn’t risk compromising the floor. You can also try storage facilities if necessary.

What do you do when the water runs out?

But no matter how much water you have stored up, it could still run out in the worse emergencies so it is important to have an alternate plan to acquire good water afterward. Actually, I think it is more important to plan to procure water than it is to stockpile it in the long run.

Platypus GravityWorks Filter System, 4-Liters of water in minutes.

Water borne bacteria and viruses are not something you want to encounter in a disaster situation. Stomach bugs, even minor can put you down and give you diarrhea. Who wants to worry about getting sick when the world ends much less crapping yourself all the time when the toilet paper is in short supply anyway? A simple and reliable method of making your water safe to drink is also very important.

Boiling water is a sure-fire way to kill all bacteria and viruses. The drawback to this approach for me is that you have to start a fire and use a container. The fire could alert people to your location and that might not be what you want. Also, you have to wait for the water to cool before you can drink it and boiling isn’t going to get out any sediment, it will just make your water safer to drink.

I prefer gravity filters for their ease of use, compactness and filtration ability. With a filter like the Platypus Gravityworks, you can quickly filter 4 liters of water just by filling up a bag and it’s ready to drink in minutes. Literally, I filtered 2 liters in less than 2 minutes.

There is also using bleach to disinfect ,water purification tablets and even iodine, but these aren’t without their drawbacks too and do require you to wait for the chemicals to work. Your choice, but there are options.

Make sure you have plans to supply the water needs of your own survival group at the initial point of any emergencies and long after by crafting your water preparedness plan now.

Prepping in its most basic form to me is about proactively taking steps to ensure you and those around you are ready with skills, supplies and a plan to react

Remember when we were kids, and our moms used to tell us to wash the carpets with water and vinegar? Yeah, the aroma alone was enough to send an elephant to the ICU but, surprisingly enough, everything smelled like brand-new afterward. And because I hated doing the carpets and upholstery as a kid, I did my best to stay as far away from that stuff as possible. Big mistake!

Anyway, vinegar does not only go well in salad dressing or to clean various household objects but has many other purposes. And since we simply cannot ignore the fact that vinegar’s just as useful around the house like baking soda and rock salt, I’ve decided to write this not-so-short and an awesome piece on how you can take full advantage of the ghost of wine past in an SHTF situation.

So, without further ado, here are 14 reasons why every prepper should stockpile as much vinegar as possible.

  1. No more bumper stickers and decals

The worst thing about buying a car from a second-hand dealer is that no matter how hard you look at it, you’ll still end up with a surprise or two. Mine was bumper stickers and decals. I don’t know who was the former owner of my car, but that person really had a thing for sticky logos and drawing.

I’m not kidding you when I say that those damned things were everywhere – windshield, side windows. There’s was even one on the left tail light. Anyway, the dealer offered a pretty good bargain, and apart from the stickers, the car was otherwise in great shape.

Now, if you somehow wound up in the same situation as me, forget about WD 40 or sprays for bumper sticker removal. Put two tablespoons of vinegar in a bucket of water and pour over the area covered in stickers.

Wait a couple of minutes and then use an ice scraper to remove the sticker. It works like a charm, and the sticker will come off without leaving any glue marks on the window. You can also try it on decals – same recipe, but repeat the process three times for good results.

Related – Knowledge to survive any medical crisis situation

  1. Getting rid of acne

Acne’s now a welcoming sight, regardless if you’re 14 or 44 (yeah, it can happen during late adulthood too). The bad news is that apart from taking your prescription meds and ensuring that your face is al clean and oil-free as possible, there’s not much you can do about it; and, of course, there’s the scratching.

Now, in order to get rid of the itchiness, mix water and four teaspoons of apple cider vinegar in a glass. Use this mixture to wash your face and rinse with clean water. This also helps the tissue heal faster and prevents the icky stuff from spreading.

  1. Making your candle or propane lantern wicks last longer

Emergency candles and propane lanterns are great for those not-so-romantic moments when the power grid fails. However, neither is a long-term solution. If you have reasons to believe that you’ll need to brave the dark a while longer, try soaking the wicks of your emergency candles and propane lanterns in an all-vinegar solution. This will give you at least 3 to 4 hours of flame per candle\lantern.

Related 4 Important Forgotten Skills used by our Ancestors that can help you in any crisis

  1. Removing Warts

Even the thought of having to endure another wart makes my skin crawl (had one right on my sole). You can go to your local drug store and spend tens of dollar on wart removal solutions which won’t help you with anything other than making a dent in your wallet or you can try this neat prepper remedy.

In a tall water glass, put four teaspoons of apple cider vinegar, and one teaspoon of vegetable glycerin. Shake and leave it be for a couple of minutes.

In the meantime, wash the wart and the surrounding area with soap and clean water and dry off with a towel. Dap both the wart and the area around it with betadine or another disinfectant.

Now, soak a gauze in the vinegar+water+glycerin mixture and clean the warty area. Do these two or three times a day. By the end of the second day, you’ll see that the wart begins to shrink. Continue the treatment until the bulge disappears. You’re welcome!

  1. Stop the tummy-rumbling.’

In case you forgot to buy antacid or any other kind of tummy pill, you can soothe your rumbling stomach by drinking a glass of water mixed with two teaspoons of vinegar. Also does wonders for heartburns, heartaches, and, possibly, broken hearts.

  1. No more dandruff

This may no quality as an SHTF situation, but then again, dandruff is neither healthy nor aesthetic. I found that regular anti-dandruff shampoos don’t do shit about that white stuff. However, if you add a splash of apple cider vinegar to your hair before using regular shampoo, dandruff will bother you no longer.

Here’s what you’ll need to do – get some moisture into your hair and add two squirts of vinegar. Massage your scalp and wait at least five minutes. Rinse with plenty of water. Finish up with regular shampoo or conditioner.

Bear in mind that depending on your type of hair and skin you may need to repeat this process. I myself had to wash my hair three times a week with vinegar and shampoo for two weeks before I got rid of dandruff.

  1. Best pest-repellant ever

I admit that I sometimes forget to drive my pets to the vet clinic for their regular checkups and, of course, delousing. But that doesn’t mean that I allow those awful fleas to do as they will.

Now, if you really haven’t the time nor the money for the vet, because shit happens, put one teaspoon of vinegar in a glass of water and use this mixt to wash your dog’s fur (haven’t tested it on my cats ‘cause, you know cats and waters really don’t mix). Wait for at least a couple of hours before rinsing with plenty of water.

Related –How to make the ultimate painkilling tincture

  1. Making veggies green again

You really don’t need to throw every wilted veggie in the fridge. All they need is a little love, tenderness, and a splash of apple cider vinegar. In a spraying bottle, mix one tablespoon of vinegar with cold water. Give your veggies good spraying, and they’ll regain that hunter-green color in no time.

  1. Keeping diabetes in check

You know that you really don’t need to use that insulin pen each time there’s a small variation in your blood sugar levels, right? In most diabetes cases, glucose levels can be kept at a normal value by eating the right stuff.

Now, in case you have issues controlling that blood sugar level, drink a glass of water mixed with two teaspoons of apple cider vinegar. Please keep in mind that this is only a short-term solution, which means that you will still need to take your prescription meds and use insulin if there are bigger variations.

  1. Removing rust from moving parts

In the past, vinegar has been successfully employed to remove rust from moving parts like cogwheels, springs, and levers. You can also use it to get rid of rust from just about any kind of metallic.

In order to free up a mechanism that simply refuses to budge on account of the rust, take out all the moving parts and soak them overnight in water and vinegar. Take out, allow them to dry, and reassemble the mechanism. If there’s still friction, take it apart again and repeat the procedure.

  1. Removing candle wax from wooden surfaces

Nothing beat a romantic candlelit dinner, especially after the light goes out. Dinner – good, removing candle wax from furniture and tablecloth – very, very bad. Well, it’s not that hard to get the excess wax out, but it tends to leave a nasty behind.

Here’s how to get rid of candle wax fast and easy – use a hair drier to heat up the wax. Mix water and vinegar in a small bowl. Use this concoction to scrub the area.

  1. Eating pesticide-free veggies

I love going to the farmer’s market to purchase my favorite veggies. Still, whatever I do doesn’t seem to make a difference when it comes to the pesticide part – sure, there, more or less, safe to eat, but they sure have a funky taste. Sometimes I even contemplate skipping dinner and grab some take-out because I lack the emergency to wash every lettuce or cabbage leaf.

In searching for ways to get rid of dirt and pesticides from veggies fast, I stumbled upon this little prepper’s trick which involves the use of apple cider vinegar and baking soda. I can state for the fact that it works – even the taste’s different.

Here’s how to do it – fill your sink with clean and cold water (don’t forget about the plug). Add one tablespoon of apple cider vinegar and one tablespoon of baking soda. Now place your veggies inside and let them soak for at least 15 minutes. Drain the water, rinse with cold water, and enjoy a pesticide-free veggies dinner.

Related –The vital self-sufficiency lessons our great grand-fathers left us

  1. Crafting a fly trap

Word of caution before I tell you how to piece together the trap – this only works for gnats or fruit flies. I wouldn’t try out on other flying critters.

Anyway, grab the biggest mason jar you find around the house and use a nail or your survival knife to poke a couple of holes in the lid. Bear in mind that these holes must be big enough for the flies to pass through. Fill the jar halfway with apple cider vinegar and place on the kitchen counter. Attracted by the sweet smell, the flies will go inside and drown.

  1. Getting rid of callouses on your feet

Staying on your feet from dusk till dawn is probably one of the best health shots. Still, your feet might have a thing or two to say at the end of the day. Callouses are nasty, and there but the first step to other ‘wonderful’ things such as blisters and even warts.

There’s a way to get rid of those callouses and, of course, the not-so-great smell that goes along with them. Before hitting the sack, fill the bathtub with warm water. Add two tablespoons of apple cider vinegar and soak your feet for at least 20 minutes. I personally prefer to add a little bit of Epsom salts – they’re very soothing for the skin and prevents crackling.


Did I manage to convince you to stockpile more apple cider vinegar? Hit the comments section and let me know your thoughts.

I thought you needed a break from our Weed Week. 

However, starting a pot stock-pile is also a very good idea.

I’m just saying.

God Bless.


Other Self-sufficiency and Preparedness solutions recommended for you:

The Lost Ways (The vital self-sufficiency lessons our great grand-fathers left us)
Survival MD (Knowledge to survive any medical crisis situation)
Backyard Liberty (Liberal’s hidden agenda: more than just your guns…)
Alive After the Fall (Build yourself the only unlimited water source you’ll ever need)
The Lost ways II (4 Important Forgotten Skills used by our Ancestors that can help you in any crisis)
The Patriot Privacy Kit (Secure your privacy in just 10 simple steps)

Ok, let's talk vinegar. Or what happens when wine goes bad. Or, as we preppers like to call it, the stuff that dreams are made of.