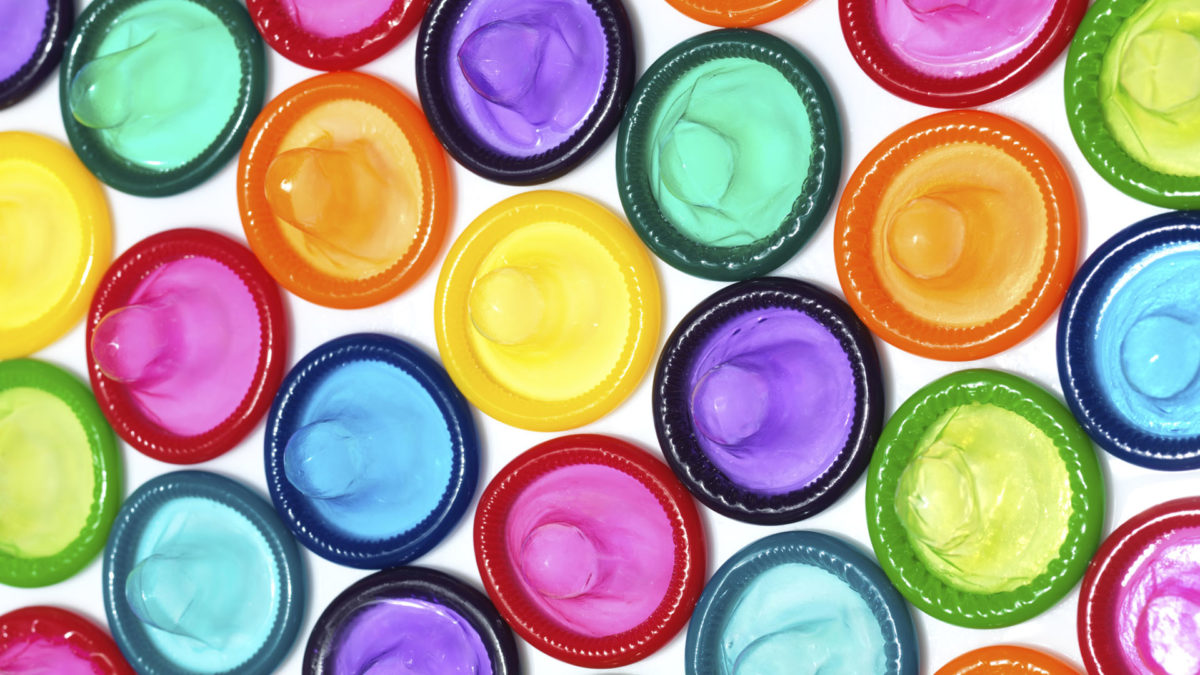
HomePosts Tagged "Survival" (Page 4)

Everyone likes to think they are unique and many people even go to great lengths to show the world just how special and creative they are. You have seen these types of people, maybe you are one yourself. Those who have tattoos all up one side and down the other (no judgement), who have multiple piercings and giant gauges in their ever expanding earlobes. They wear all manner of fashion that seems to be designed purely for shock value and their hair is carefully combed into their eyes.

Now before I get anyone upset, I am not advocating anyone dress any differently. I am a firm believer in the philosophy of if you want to let your freak flag fly, go right ahead. You aren’t bothering me at all. Except maybe the hair thing on guys today… I just want to cut that mop out of your eyes because it would drive me insane…And stop with the hair products maybe…

Seriously, I love variety and if you feel that you are expressing yourself, go right ahead. More power to you! However, in a survival situation there are times when being the only round peg in a room full of squares could be a disadvantage so today I want to talk about conforming.

The importance of the group standard to preppers

Now when I mention conforming, I am not talking about conforming to my version of society, your morals or style of dress or personal hygiene habits. I am talking about the decisions you will make regarding the survival gear and equipment that your larger mutual assistance group is going to use. It is important to formalize a group standard on several major pieces of gear if you want to function cohesively as a unit.

If each person is unique, their own purple flower with magenta ombre highlights, and does their own thing – you aren’t a group at all. You are just a bunch of individuals hanging around together and believe it or not, that could be a drawback. Let’s imagine a SHTF scenario for example. It’s bad, really bad and you are huddled together with your survival group, trying to get by and taking each challenge as it comes.

Choosing standard firearms

One of our posts that has had the most discussion back and forth has been The AK-47 vs AR-15: Which Rifle is Better? I wrote this back in March of 2014 but debates about the best firearm in a SHTF scenario have probably been raging since men were carrying around flintlock pistols. We are unlikely to find consensus as a whole prepper or survivalist movement, but your own survival group needs to come up with one choice and stick with it.

Why can’t I have my AR15 and Bob have his FN SCAR? Why can’t Julie carry her KRISS Vector while Mary rocks the tried and true AK-47?

I can give you a lot of reasons:

AR15

Standard firearms behave the same way. One you learn the mechanics of your AR15, every other AR15 behaves the same way

Magazines: Each of your battle rifles should use the same magazines so that if needed, you can grab a spare one from your buddy, lock and load and keep going. You never want to find out that you are under attack and nobody around you has the same magazine, or that two people do, but they aren’t with you at the moment. Try telling your buddy to just hold them off-while you reload a few more magazines.

Spare Parts and Accessories: Let’s say someone has a rifle that has a part malfunction that renders that rifle inoperative. You could either let that sit on the shelf or you can use the spare parts to fix other rifles that may need it. Yes, you should always have spares but it’s far less trouble to buy three of one thing as opposed to one different part three times. You won’t have to learn how to pull apart three different weapons either although knowing how would be a good skill.

You can also look at accessories the same way. I have at least 3 different sets of scope rings I got for 3 different scopes. If I were to have the same scope as my buddy and mine went bad, if needed, I could simply swap his out with mine. The alternative of strapping that nice Vortex Strike Eagle down with duct tape isn’t a good option.

Operation and features: Standard firearms behave the same way. One you learn the mechanics of your AR15, every other AR15 behaves the same way. Learn how to disassemble one, you know how to disassemble all of them. Have a misfire? You know how to quickly clear one AR…I think you get the point.

Reliability: I will also add this minor factor in there. Assuming you buy comparable quality firearms, the make of your rifle and the reliability will be comparable to the other rifles so your lifespans should work out close to the same period of time assuming proper care and maintenance. I know I had an M-16 from the 70’s when I was in the Army and it worked just fine. I did get some new hand-grips though.

Choosing standard calibers

This one should be in the same category but I wanted to break it out because we could be talking about Shotguns, Rifles and Pistols above with your standard firearms. Your ammo should be the same for all firearms as well. So if you have standardized on Glock for example for your pistol, everyone should have the same caliber. This can be .45 or .40 or .357 or .9mm but everyone should carry the same ammo. Same point as above for magazines. When you run out, someone else’s magazine and the ammo naturally will slide right back into your pistol. Which pistol caliber is the best? That is a different argument and a completely different post.

Choosing standard camouflage

REALTREE_CAMOUFLAGE_SUIT

Uh, yep! I think camouflage is very necessary in a survival situation.

Is camouflage necessary? It really depends on what you envision as being possible in your survival group. Do you see this as the end of the world as we know it? Do you imagine hostile refugees coming down your street to demand food or the use of your women? Do you expect to be fighting traitorous UN forces who are marching across town? Do you think you will need to hide? Do you think you will need to hunt?

Having the same outfit can prevent someone from easily sneaking into your perimeter unnoticed. Granted, they could be wearing the same old Woodland Camo fatigues I wore in service and if that is what I chose for my group I would be in trouble. There is a case to be made for selecting something a little more novel like German, Australian or British camo. I prefer the easy options available at any hunting store in the US made by RealTree. They match your local foliage and if you are caught in them, you can easily say you were hunting. No need to look like a paramilitary type and gain unwanted attention if you don’t have to.

Choosing standard communication equipment

Baofeng

Baofeng makes a great, affordable radio for preppers.

I am referring to shortwave radios here. Radio frequencies are the same no matter what equipment you have so why do we have to purchase the same radios? I will give you two reasons. The first is batteries and the second is operation. I have yet to see two HAM radios that were programmed the same way. I know there is software that can make this easier, but to my mind if everyone has the same radio, everyone will know how to use it the same way. Less problems, fewer mistakes. You can choose from a lot of manufacturers and spend a little or a lot of money, but radios should also be the same for your group. My personal choice is Baofeng’s BF F8HP model.

Conclusion

There you have a few of my reasons and rationale for setting a group standard and in these instances at least, not trying to be a purple unicorn with sparkles. I am sure there are those out there who have different opinions so let’s hear them!

Everyone likes to think they are unique and many people even go to great lengths to show the world just how special and creative they are. You have seen these

Prepping by definition means taking proactive steps to get ready. We prepare for situations to happen. We prepare to have food for our family if the grocery stores are closed or sold out due to shortages or looting. We prepare to provide water for our family if the tap water is undrinkable due to pollution. We prepare for economic collapse by having precious metals and cash stored in places we can access even if the banks close. We prepare so we have what we need when we need it.

But some disasters catch you off guard. There are some cases where we don’t have our Bug Out bags with us at the moment. There are times when we don’t have our EDC gear because as much as we hate to admit it, sometimes we walk out the door unprepared. This could be for all manner of reasons and I want to stress that we should limit this type of oversight as much as possible, but it still happens. Survival isn’t only guaranteed to those who have the latest prepper gear. Your mindset will take you further than the coolest survival knife in the world and today we are going to talk about how to survive with only the real everyday items you have with you. When you roll out the door and go out for a walk, the stuff you’re wearing can still assist you. It could be the difference between life or death in a survival situation. Here’s how to make the most of what you’ve got when SHTF.

Watch

It’s important to stay connected and maintain access to valuable information. A smart watch like the Samsung Gear 2 can do just that. It can also guide you in the right direction when disaster strikes because it can give you access to GPS navigation.

Watch

Even if you don’t have a smartwatch, your regular watch can help you in the wild just as well. You can use your wristwatch as an orienteering device to find your way. Hold your watch horizontally and point its hour hand at the sun. Bisect the angle between its hour hand and the 12 o’clock mark to get the north to south line. If you are doubtfully determining which end of the line is actually north, remember, the sun rises in the east, sets in the west and is south at noon.

Shoelaces

The laces on your shoes can be used when you need rope or string. They also can be used to create a fire, a lifesaving essential in the wild. Using nothing but your shoelaces, sticks and some wood, you can start a fire with the bow-and-drill method. Use your lace to create the part of the bow that’s used to be tied around the drill. It will help keep everything in place while you’re sawing to create a hot fire.

Flashlight

Having a good tactical flashlight on your person can save you if you get lost in the woods, and it sure makes for a great signaling device. When SHTF you probably won’t be using your flashlight to signal for help, but you can use it in other ways.

Animals are typically scared away with a flash in the eyes from a flashlight. And in a disaster situation like a fire or earthquake, you can find your way out of a dark building. Choose a LED flashlight to add to your everyday carry. They are much better than the cheap incandescent ones and the battery life is much longer.

Belt

Your belt can come in handy when you’re braving the wilderness in more ways than one. Use your belt to bundle firewood, making it easier to carry from point A to point B. If you get injured, use it as a tourniquet. The small metal prong or buckle can be put to good use if you need a weapon or hook because it can be sharpened and molded.

Shirt

You need water to survive, but safe, drinkable water may be in short supply when the apocalypse hits. It’s not likely that your water purification system is part of your everyday carry, but your shirt can make a good substitute. Filtering water through fabric is actually more common around the world than you might think. Use your shirt or other piece of clothing (woven fabrics work the best) to remove the color and particles out of water. However, this will not eliminate viruses or illness, so always boil your water after filtering it.

So while I think we all can agree that nobody should be going for a hike into the wilderness without the proper preparation, sometimes you have to use what you have. I try to have my EDC with me every single place I go, but sometimes, my outfit choice doesn’t allow it. If I am in athletic attire, I don’t have my concealed firearm on my hip, my multi-tool and large flashlight. I don’t have a bandanna either just to name a few. I do have a source of fire and a light on my key-chain and my car, which is always near has a full selection of gear including my Get Home Bag.

Stepping out the door without the tools you count on is taking a risk, but we weigh those with the situation. Even if you have nothing but the clothes on your back, you can survive. As long as you keep your head.

Prepping by definition means taking proactive steps to get ready. We prepare for situations to happen. We prepare to have food for our family if the grocery stores are closed

I will never understand how restaurants can get away with charging a hundred bucks for a piece of old beef steak. Sure, it’s delicious, melts in your mouth, but, c’mon, does a man have to sign an arm-and-leg lease to enjoy a good steak? Anyway, should’ve started by saying that I’m a big fan of aged food; cheese, fish, meats.

You name it! The bad news is that these are not the types of foods one can make at home. Or so I thought after stumbling upon this recipe. The funny part is that I was actually looking for a way to clean the freezer without using anything, well, toxic, when this little jewel sprung right into my eyes.

So, why should you try aged meat? Well, because it’s easy to make. On top of that, get this: the oldest beef cut in the world is 13 years old! Imagine having ready-to-eat meat at home without having to brine, refrigerate, go shopping, or hunt. Well, it’s possible, and I’m going to show you how to do it.

So, without further ado, here’s how to make your own aged beef.

Gathering the ingredients

As I’ve said, this recipe doesn’t require any special ingredients like salt, vinegar, or whatever else people use to preserve meat (not touching that topic with a ten-foot pole). Still, the cut of choice will ultimately determine the taste. The recipe I mentioned about involved large cuts of meat – the bigger, the better. Would be a good idea to go to a butcher’s instead of hitting the supermarket. Anywho, avoid small cuts, and choose meats that pack some fat – whole ribs, porterhouse cuts, rib steak, or New York strips.

That’s basically it as far as the ingredients are concerned. For aging, I would advise using a zip-lock bag instead of food wrap – does a better job at keeping the air out; meat should age on its own. The last thing you’ll need is more air.

Arguably, refrigeration’s the best way to go about aged beef, but considering that our grand used to prepare meat long before fridges were invented, I would venture to guess that the root cellar is also a good choice.

As for quantity, a two pounder’s more than enough in my opinion – if you’ve never eater aged meat in your life, better make a smaller batch. Otherwise, you’ll get stuck with something with an extra chunk of meat.

All done gathering your stuff? Great! Let’s get to the ‘cooking’ part.

How to Prepare Aged Beef

Step 1. Prepare the fridge or designate a shelf in the root cellar.

Make sure that fridge’s clean. Stinky food, molding, and, grime will affect the aging process. So, if something smells bad in there, better toss it in the trash. One more thing: remove cheese, garlic, onion, or fish from the shelf assigned to the aged meat. Garlic and onions are fine, but not during the aging process (gives the meat a funny taste).

Step 2.  Set temp and check humidity

The funny thing about meat: if it’s kept in above 40 degrees Fahrenheit temps, it will go rotten. On the other hand, if you stick it in a below 32 degrees Fahrenheit enclosure, it will freeze. So, in this case, the sweet spot would be 36 degrees Fahrenheit. Set the fridge’s thermostat accordingly and don’t forget to check the humidity inside (should be around 60%, give or take).

Most modern setups can display values such as temp and humidity. Still, if you have an older model, I would strongly recommend buying a hygrometer (a device that measures indoor humidity). It’s quite affordable and can be used around the house as well.

Step 3. Preparing the meat.

If you decide on paying a visit to your local butcher, ask him to leave the meat as it is; most tend to trim the excess, which is a definite no-no in this case. Wash the meat a couple of times, dry with paper towels or something, and place in a zip-lock bag.

Advice: if you want to hasten the aging process, try wrapping your meat in cheesecloth. Keep in mind that the cloth must be changed each day to prevent sudden dehydration.

Step 4. Store the meat in your fridge or root cellar.

Grab a small oven tray from the pantry, put the meat inside, and stick in the freezer. That’s it! All you need to do now is wait for the meat to age.

Additional considerations on aged meat

Color’s very important in figuring out how long should the meat age. For instance, if your cut has a darker color to it, the aging process takes anyway from a couple of days to one week (don’t forget to check up it each day). On the other hand, if the beef cut has a lighter color, it needs at least 7 days to age. Still, I wouldn’t advise you to keep it longer than 30 days. Always remember that there’s a fine line between edible aged meat and a spoiled chunk of something.

Another thing to keep in mind is that the fridge’s thermostat might not be able to keep up with the process. When you’re done checking the meat, recheck the temp and humidity.

The whole idea is to allow the meat to dehydrate on its own – that’s why it’s a good idea to turn on the fridge’s fan and to set it on low. In some cases, the in-build fan may not be enough. Not to worry – just grab a laptop or desk fan and place it inside the fridge on the same shelf as your aged meat.

When the aging’s complete, remove the cloth from the meat and set it on a plate. I should warn you though that the meat might give off an unpleasant smell even after removing everything from the fridge. Don’t worry about that – use a knife to cut the outer layer. Leave a little bit of fat.

Now, given the proper conditions, meat can be preserved longer than 30 days. However, if you plan on taking it out of the cloth and ziplock bag, you should eat it within one or two days.

That’s it for how to make aged beef steak. What’s your take on this? Hit the comments sections and let me know.

Sure, it’s delicious, melts in your mouth, but, c’mon, does a man have to sign an arm-and-leg lease to enjoy a good steak?

The various types of emergency foods that are available, coupled with the commercial hype surrounding them, can understandably lead the prepper to make less than optimal decisions with regard to the types and amounts of emergency foods to acquire. In this article I will briefly recap the most common types of emergency food and describe how each would fit in to a practical survival strategy.

The common types of emergency food stores include:

  • Canned Foods – Canned foods consist of fruits, vegetables and meats that have been prepared for long-term storage in jars and cans. Canned foods can be prepared at home and are available at virtually any grocery store. Depending on the type of food, they can either be ‘dry-pack canned’ or ‘wet-pack canned’. (Wet-pack canning involves immersing the food in hot water – sometimes in a pressure cooker – prior to vacuum-sealing.) Dried beans and dried white rice are the dry-pack canned foods most commonly stored by preppers and survivalists because they have an extremely long shelf life (up to 25 years!) and provide a good supply of proteins and carbohydrates.
  • mre

    MRE’s are a common choice for Emergency Food.

    Dehydrated Foods – Dehydrated foods have been processed in a food dehydrator to remove much of their moisture. This inhibits the growth of microorganisms that cause the food to spoil.

  • Freeze-dried Foods – Freeze-dried foods have been processed in a commercial freeze-drier in such a way that virtually all water has been removed (much more than is removed by a dehydrator). This process results in food that is lightweight and which has a very long shelf life.
  • Cured Meats – Cured meats have been treated with chemicals (usually nitrates) in such a way as to inhibit the growth of microbes and extend the unrefrigerated shelf life of meats.
  • Smoked Meats – Smoked meats have been exposed to the heat and smoke such that the increase in temperature dehydrates the meat (which inhibits microbial growth) while the smoke deposits an anti-microbial chemical layer over the meat.
  • Meals Ready-to-Eat – Originally developed for the military, MREs are portable, long-shelf-life food packets that contain complete meals. MREs can quickly be prepared and consumed. Often these packets include built-in food heaters and provide complete meals.

ISSUES RELATED TO NUTRITION

In general, all of the above forms of preserved foods provide good nutritional value. While the heating associated with some canning processes can degrade some water-soluble vitamins such as vitamins A, C, thiamine and riboflavin, they still serve as a good source of these and other nutrients. While nutritional value is preserved in the above types of foods, the nitrates used to cure meats have been shown to be carcinogenic in larger quantities. Salt and sugar may be added to canned foods to improve taste, which can also affect the nutrition offered by such foods (be sure to check the labels of any canned foods for references to sugar and salt!).

MREs provide good calories and some nutrition, but also contain a large quantity of sodium, which has been show to have adverse health effects when consumed excessively (MREs are designed to simply “get the soldier across the battlefield”).

SHELF LIFE OF DIFFERENT EMERGENCY FOOD TYPES

The shelf lives described here assume the foods are kept at room temperature of about 70 degrees Fahrenheit.

Canned fruits and vegetables typically have a shelf life of between 2 and 5 years. There is much anecdotal evidence of canned meats being eaten (and having good flavor and nutrition) after being stored for as long as 10 years. Some dry-canned foods such as dried beans and dried white rice can have a shelf life that exceeds 25 years.

Dehydrated fruits and vegetables typically have a shelf life of up to one year, while dehydrated meats have a shelf life of only about one month.

Freeze-dried foods have a shelf life that ranges between 5 and 25 years, depending on how well it is packaged (plastic food pouches have a shorter shelf life, while cans have a a much longer shelf life).

Smoked meats have an unrefrigerated shelf life of only a few weeks.

Cured meats have an unrefrigerated shelf life that ranges from a few weeks to as long as a year, depending on the type of meat and how it was cured.

Canned foods offer offer the most nutrition at the least cost. The other forms of food have the advantage of lighter weight and/or longer shelf life, but at significantly greater cost.

Smoked meats have an unrefrigerated shelf life of only a few weeks.

NOTE: While the storage of cured and smoked meats is of limited value in the time leading up to disaster; the ability, equipment and supplies required to smoke and cure meats will certainly be valuable skills to have in the aftermath if refrigeration systems are unavailable.

Modern MREs have a shelf life of between 3 to 4 years when stored at room temperature, however that shelf life can decrease rapidly when stored at higher temperatures (in a desert environment the shelf-life for a MRE may be as short as one month!). Also, when purchasing MREs you should be certain of their date of manufacture – otherwise you won’t get the benefit of the full shelf life.

DETERMINING YOUR OWN EMERGENCY FOOD NEEDS

A good way to begin to understand the types of emergency food supplies you will need is to consider how you will most probably be traveling during and after a major disaster. If you expect to be sheltering-in-place then the bulk of your emergency food supplies should consist of canned foods, as canned foods offer a very good shelf life and provide a lower cost per meal than other forms of emergency food. Even though canned foods are heavier than other types of emergency food, if you are sheltering-in-place then portability becomes a less important consideration than cost.

If you expect to be traveling on foot for an extended period, then the weight of your food will be a major consideration. In these circumstances you should plan on having freeze-dried food available, as freeze dried foods have an extremely long shelf life and are extremely light.

If you expect to be traveling by vehicle then weight is less of an issue and the ability to “eat while on the move” becomes important. MREs are an excellent choice for these circumstances because they can typically be unpackaged, heated and eaten without the need to interrupt travel. Also, because they utilize a chemical reaction to generate heat, the preparation of MREs does not produce smoke that might attract undesired attention.

When considering these factors you should not only be anticipating your travel needs when bugging out, but also potential future needs to travel overland for trade, barter and defense. Of course no one has a crystal ball to be able to predict these needs with certainty; however you should at least be able to develop a reasonable estimate. Additionally, you should build into your estimates the expected duration of the disaster, which should ideally be the amount of time required for you to become self-sufficient.

A quick way to estimate your emergency food needs is to answer the following questions:

  • How many people are in my group?
  • What duration disaster (in days) am I planning for or how long do I anticipate before achieving self-sufficiency?
  • If bugging out to another location, how many days of travel will be required?
  • In the aftermath of disaster, what percentage of total group members’ time will be spent on extended trips away?
  • What percentage of meals will utilize basic dry-canned foods such as beans and rice?

The answers to these questions can help you to estimate your own emergency food needs. If MREs are used exclusively for travel, for example, then the total number of MREs needed for travel is simply the product of number of group members, number of days of travel and number of meals per day. You may then increase this number so as to plan to use MREs for a percentage of post-disaster travel when concealment and speed are a top consideration.

Amounts of freeze-dried meals can be estimated as the product of average number of people traveling, the number of days of travel and the number of meals per day (while there will be some double coverage of travel by MREs and freeze-dried food, it’s never a bad idea to have some extra food on hand).

The balance between dry-packed “beans and rice” type meals and canned foods will be much more subjective, however by thinking in terms of the percentage of beans-and-rice meals vs. other meals, and of course considering the number of people you are planning to feed and the expected duration of the disaster, you will be able to identify the types and quantities of these bulk emergency foods that will meet your preparedness needs.

NOTE: Even before disaster strikes you should normally be consuming and replenishing your supply of canned disaster food so that you do not find yourself with a cupboard filled with expired canned food when disaster does strike!


The various types of emergency foods that are available, coupled with the commercial hype surrounding them, can understandably lead the prepper to make less than optimal decisions with regard to

I frequently highlight the need for water when you are preparing for emergencies. This simple, yet vital element of life can’t be ignored for long, so I recommend a multi-faceted approach when it comes to making sure you always have enough to drink. As long as the tap is running and the source is not dangerous to your health, you should be fine. That works great normally, but we all know that stuff happens. Water mains break, sources become contaminated or the disaster can render the pumping stations inoperable due to personnel or equipment problems. Your job is to keep any of those situations from impacting your ability to provide good clean water to your family.

If you are in the safety of your home you can store water in large containers so potential disruptions don’t affect you as much. You can collect and filter rain water from your roof normally or in emergencies, public sources like ponds, streams or rivers will work for a large percentage of us assuming you have fairly consistent access to them. This is usually enough if rainfall and those water sources are prevalent.

But what if you live in a drier climate and you are forced out of your house due to some emergency? Or what if you are lost in the wilderness and your source of water is depleted?

A reader of Final Prepper, James sent me an email asking for more guidance on water for the millions of preppers who actually live in Phoenix or other desert environs. I do appreciate the question and although I don’t live in the desert (so this subject is a little out of my imagined wheelhouse) I figured that this topic was very worthy of research for my own information as well. Below are some of the ways I knew about in addition to new ways I learned to find water in the desert. I know that we do have some readers (and authors) who live in Arizona who will be happy to fill in with their own ideas in the comments below also. So, without further ado, let’s get started.

canyon-hot-warning-dead

The desert doesn’t play around…

Where can you find water in the desert?

I have been to Phoenix, AZ before on a business trip to a nice resort type of location in the warm days of July. If I did not fully appreciate it before, that trip really reinforced my gratitude for Willis Carrier, the inventor of modern air conditioning. To be honest, the temperatures really weren’t that bad in the evenings and mornings. I was inside during the day so it isn’t like I was too inconvenienced by the heat but with temperatures over 105 degrees, I know that you really wouldn’t want to be more than arms reach away from a good water source for very long. For Preppers, this type of climate does impact the importance of water in your survival plans. The heat and low humidity (but it’s a dry heat!) seemingly evaporates your sweat instantly so I didn’t even see the traditional outward signs of moisture loss, but the ready access to water everywhere reminded you to keep hydrated.

This was reinforced doubly when my wife and I took a drive after that up to the South rim of the Grand Canyon. I had planned a short hike into the canyon and in my research; I was frequently admonished about my hiking plans and water supply. Because of its altitude, the rim where you begin your hike down into the depths of the Canyon can be as much 40 degrees cooler than your destination. You start out at the top of the Canon and it is a relatively pleasant 80 degrees, but by the time you reach the bottom near the Colorado River, the temperature can be as high as 120. To make things worse, the hike back can take you twice as long as the trip down so if you foolishly consume all of your water going down, you won’t have any for the much more strenuous hike back up. Our plans weren’t to even hike all of the way to the bottom, mainly because I didn’t want to have to carry 2 gallons on my back.

Had I been in another, flatter desert environment and found myself without water, there are some tips and tricks you can try.

A woman seeks water in a dry riverbed near Kataboi village in remote Turkana in northern Kenya. In 40 degree heat and no access to clean water, she resorts to collecting unfiltered water for her family in containers. The lack of rain this year across the Horn of Africa has resulted in failed crops, lack of water and death of livestock. The Government of Kenya declared the drought a national disaster as 3.5 million people in the country are in need of emergency assistance.

A woman seeks water in a dry riverbed near Kataboi village in remote Turkana in northern Kenya.
In 40 degree heat and no access to clean water, she resorts to collecting unfiltered water for her family in containers.
The lack of rain this year across the Horn of Africa has resulted in failed crops, lack of water and death of livestock. The Government of Kenya declared the drought a national disaster as 3.5 million people in the country are in need of emergency assistance.

Dry riverbeds can still contain plenty of water if you dig for it.

North facing shady areas at the base of cliffs – There is water in the dry climates like Arizona. Actually, the main source of water for Phoenix comes from three rivers and they bank surplus water underground, but if you were out in the wilderness it might be harder to find. One thing to remember is water goes to the lowest point which is almost always underground. Even when there is no water on the surface, you can often find it where it used to be. In lower areas, near the base of cliffs, you can dig down and find water occasionally. This water has run off the face of the rocks and settled below the surface. If you find a low spot that looks like the sand is moist, you can dig down and sometimes find plenty to drink. This water will need to be filtered for sediment if nothing else but could save your life.

Watch where birds and insects travel from/follow animal trails – Birds and insects like humans need water to live. You can watch the path that they fly from in the early mornings and evenings for a clue as to where a source of water may be. Animal tracks can be used to follow a path to a water source as well and you may find a watering hole used by the native wildlife. To get a clean source without any type of water filtration you can dig a hole 9 feet away (roughly) from the water source and allow cleaner water under the surface to re-hydrate you. This water, filtered through many feet of sand and silt should be free of any contaminants that the water on the surface of the watering hole would have. Again, I would always try to keep some form of water filtration device with me if I was going out into the wilderness. It’s just one less thing I have to worry about.

Tinajas

Water collects in Tinajas and you can use this to keep you alive.

Rock pockets and depressions – Rain is routinely collected in depressions in rock surfaces. Some of these can be large enough for you to swim in. If you are searching for water, it is a good idea to get up a little higher up to see if you can see a source like this. Just one good-sized hole could be enough to keep you in water for a very long time. There are some of these large depressions called Tinajas, that have petroglyph markings on them and it is thought that some of these may have been ancient directions to denote good places to get water. If not, at least they are really interesting to look at.

Where vegetation is living/broad-leafed trees – If you can find trees growing in the desert, it’s a good bet they have tapped into a source of water. Broad leafed trees like cottonwoods are an indicator that you can dig down to their roots and find water suitable for drinking. These trees could be growing in old riverbeds that still have water flowing way beneath the surface.

In dry river beds – Like the example above, just because there is no water on the top, you may find water by digging below the surface. The drier it has been, the less likely you are to find water but look for a lower place in the riverbed, one where the water would have likely stayed there the most time and dig down. This is another reason to have a handy bandanna with you to soak up water and squeeze it into your mouth.

What not to do if you are looking for water

Solar Still – Now I have heard about solar stills for a very long time. I think even in the Army we discussed these as a good source of water. In a desert however, you won’t get the same amount of return for your effort. Digging a solar still will expend a lot of calories and effort and you won’t get much moisture out of the ground. If you have plenty of green leaves to lie in there, you still have to wait a whole day. If you are thirsty it is better to stay in the shade than dig a still.

Forget the cactus – You have probably seen the cowboy chopping open the cactus and drinking from it. Trying this yourself can get you killed. There is only one type of cactus you can drink from and only one variety of that one cactus. The barrel cactus looks like its name and the Fishhook barrel cactus has water in there that isn’t toxic. It isn’t like a bottle of Evian though and you could still get sick. One alternative is to eat the fruit off the cactus. Prickly pear can be roasted to get rid of the little hairs and spines and can provide some moisture.

Don’t drink your own pee or anyone else’s for that matter – If your body is straining with lack of hydration, the last thing you want to do is force your kidneys to work overtime on a strange substance. Yes, your urine is supposed to be “sanitary” but this shouldn’t be a trick you use to re-hydrate yourself even in an emergency. What you can use it for is evaporative cooling. Soak that bandanna in your urine and wrap it around your neck to cool off somewhat. Then make a mental note to wash that bandanna.

So there are some ideas I have for how to find water in the desert. I think it goes without saying that as much as possible, you should plan for water well before you find yourself in a situation that would require you to use any of these methods above. If you are, hopefully this will help.

I frequently highlight the need for water when you are preparing for emergencies. This simple, yet vital element of life can’t be ignored for long, so I recommend a multi-faceted

Work Smarter Not Harder – In The Garden

Sometimes in the preparedness folds, we really get wrapped around axles. We have so much that we’re learning and trying to do, and we’re regularly doing it on a budget – which is just one more thing that circles around our heads and beats us up.

We can limit some of the pains of preparedness by changing how we look at things, but also how we do things. Gardening and larger-scale growing is routinely on our to-do list. It’s something that’s going to come as a shock for those who don’t practice ahead of time, no matter how many tricks get applied. However, we can save some time and stress on our bodies with a few low-cost and low-skill tricks and tools, and see increased yields. Bigger yields means lower dinner costs and potentially some increased food storage, letting us expand our preparedness in other ways.

Here are a handful of quickie, usually highly inexpensive – easy garden hacks to save time, money and labor. As you read them, don’t forget: Paper products are compostable.

Mulch

Mulch makes life easier.

Mulch can be straw or wood chips, lightly soiled animal litter, mown or whole leaves, the tips of branches we’re pruning, or shredded white paper. Shredded paper will settle into a mat that makes it tough for weeds, but “loose” mulch routinely does better with a weed suppression barrier down first. We can use newsprint, cardboard, or phone book pages as a weed suppressor and to keep small plants free of dirt kicked up by rain. We won’t get the same moisture-holding and soil aeration improvements, we will still have to weed some, especially if we already have beds that are weed prone, but it lessens our time spent sitting or crouched and bent over.

Mulch lessens the pains of gardening. We don’t weed as much, our plants do better, and we don’t have to water as much.

In some forms of mulch gardening, the mulch stays right there year-round. Some styles use a mulch that in hot, damp climates rots enough during the off-season and is tilled in that winter or early in spring. In others, we scoot aside just enough to drop seeds or transplants in during succession plantings, add amendments like cured manure or compost or pH-raising pine by raking it just into or over the surface, and add mulch more slowly.

Plastic bottles

olla-drip-irrigators-easiest-way-to-do-it-plantcaretoday_com

Sub-irrigated planters for buckets and storage tubs and conventional planters can be made using bottles for the tubes instead of aquarium or garden hoses or PVC.

We don’t store water or foods in milk jugs because they’re porous and can leach previous content out slowly, but they have their place among soda and juice bottles in the garden.

Various bottles can be used to make mini-greenhouses, cloches, scoops, and seed spreaders, as well as mouse and rat traps (2Ls can work for small squirrels and chipmunks, too, or slow them down enough for the garden terriers to get there). They’re great for vertical strawberry and herb and lettuce towers. We can use them to keep cord from tangling, and punch various holes to use for spreading amendments and treatments. Whack them in half, use sourdough starter and water or beer, and they catch horrific numbers of slugs.

For time savers and back savers, though, bottles really excel at helping us water.

Sub-irrigated planters for buckets and storage tubs and conventional planters can be made using bottles for the tubes instead of aquarium or garden hoses or PVC.

Whether we grow in raised beds or tilled rows, mulched beds or multi-layered hugel or lasagna beds, we can use bottles as a spin on olla irrigation, too. We can drill holes all over, as shown in the graphic from http://plantcaretoday.com/soda-bottle-drip-feeder-for-vegetables.html, bury it near our plants, and use a hose to fill it quickly. A similar version plants the bottle cap-down, with holes drilled in the cap and the sloping neck, and the inverted bottom cut entirely or with just enough remaining to make a flap. Those are even easier and faster to fill, with less aim needed.

The water from those will then sink out slowly, watering deep at the roots and watering our plants, not the weeds or walkways. Less water is lost to evaporation, and we don’t have to deal with timers or hose connections, or PVC to avoid standing out there forever to slowly sink in water. We pour it in, fill it up, and move to the next. If it’s really hot and dry, we might need to repeat, but it’s a low-tech, low-expense way to work faster than standing there with a hose or moving hoses back and forth so we can mow.

Maybe that means less time on our feet overall, or maybe that lets us progress to our weeding and suckering or the next round of planting.

Seeding time – The Dibble

A dibble is basically just something that makes a hole for us. Usually, it’s a somewhat shallow hole and it’s usually intended for seeds but we can work with that. There are two general types, rolling or boards, although with leek dibbles (which work with any transplant), you walk around with a rake or double-handle tool poking your holes. Boards are typically set up with dowels that will poke holes, or come as cutouts and we use something to poke holes to our desired depths. Rolling dibbles tend to be drum or wheel style.

drum-or-rolling-dibbler-and-dibble-board-www_ncat_org

There are two general types, rolling or boards.

Plans are out there for dibblers that can run from almost nothing if you salvage parts or make minis out of coffee cans and 12” PVC or make a single, double- or triple row dibble wheel out of bikes from Craigslist. Drum styles can cost as much as $100-200 to make at home if you’re inclined to go that route instead. Some of the really fancy board dibblers even get marked in colors so one board can be used for spacings from 1” to 6”.

In no-till schemes where you drag a pointed hoe to clear a spot for seeds, dibble wheels tend to be handy. In tall raised beds and window boxes or trays, a board dibbler may be more beneficial.

Using dibbles at whatever scale we choose to lets us quickly mark the space for seeds and transplants. Even if we have to go back with a post hole digger for some of those transplants, time spent upright instead of crouched tends to make for happier backs.


Seeding time – Furrowing rake

A furrowing rake is the simple DIY result of adding tight, relatively stiff hose or PVC to an ordinary hay or garden rake, and using it to drag lines along a prepared bed. It’s typically done so that the extensions are movable, letting us go as tight as the 1-1.5” gaps of the rake tines out to the full 1-2’ width of that rake.

We can get as complex as we like, adding marker lines to tell us how deep we’re aiming, or using multiple depths so we can plant cutting salad greens in the shallowest grooves and have deeper grooves for our peas. We can drag it both down and across a bed to create a grid, with seeds going at the cross points.

rake-with-hose-for-seed-spacing-1-themarthablog-dot-com

A furrowing rake is the simple DIY result of adding tight, relatively stiff hose or PVC to an ordinary hay or garden rake, and using it to drag lines along a prepared bed.

Taking a few minutes to prep some moveable rods or pipes and lay out our grid – while standing – limits how much measuring we do while we’re bent or crouched, saving time and pain with a very quick and low-cost trick.

Seeding tubes or pipes

Dibbles and furrowing aren’t the only way to limit how much time we spend crouched over during seeding time. Even a congestion-planting scheme that calls for under-seeding doesn’t have to be done from a stool or our knees.

There are a couple of tiers of standing seeders for small plot growers, from this really simple version http://knowledgeweighsnothing.com/how-to-build-a-back-saving-pvc-corn-bean-seed-planter/ to this more advanced DIY https://thinmac.wordpress.com/a-homemade-seed-planter/.

Those aren’t really necessary, though. All you really need is a pipe smooth enough for seeds to roll through cleanly and sturdy enough to stand up straight.

If you want to work with tiny seeds as well as larger ones, maybe you lay on skinnier aquarium tubing to attach to a tool handle or yardstick (with rubber bands, even), and make yourself a pasteboard, tin-can or paper funnel and tape it in place. Use the back-end of a teaspoon or the little measuring spoon from somebody’s aquarium chemicals to fish out 2-5 seeds at a time.knowledgeweighsnothing-com-pvc-seed-hack

Seed tapes and mats

If we’re not digging the various seeding tubes, we can also use our rainy days or blistering hot days to make seed tapes out of strips of paper, or larger seed mats out of unfolded paper napkins and paper towels like these http://annieskitchengarden.blogspot.com/2009/09/september-22-2009-home-made-seed-mat.html & http://simple-green-frugal-co-op.blogspot.com/2009/12/construct-your-own-seed-mats.html . We don’t have to mix up some kind of funky glue like with some of the DIY-ers show. The toothpick dab of white Elmer’s the first site shows is water-soluble and works just fine.

When we’re ready to plant, we just zoom along exposing our soil or following her mix, lay out our mats, and cover them again. We can work in fair-sized lengths that we roll up around an empty tube and then just nudge along using a broom or hoe, or use a square or two at a time that lets us stagger our planting for a staggered harvest or interspersed companion flowers.

Seed mats and strips can also be made out of a single thickness of newspaper pages for larger seeds like peas and beans as well, although we’ll want to make a small 1/8” slit or poke a pencil-tip hole through to give our seeds a head start on busting through the heavier paper.

Since we’re planting 3-6” or as much as 8-12” apart in those cases, whether we do rows or congestion beds, working with a larger paper size makes sense. The newspaper sheet will decay over the season, but being thicker, it does offer a nice head start for our seeds over the weed seeds that may be lurking below. Being thicker, it also does better if the seed gets that head start of a slit.

No more removing gloves. No more exposing seed packets to dirt and moisture, or unfolding and refolding and sticking them in a pocket as we try to keep track of where exactly the tiny black seeds landed in our bed. And since they’re evenly spaced instead of scattered in lines and areas, it’s minutely easier to tell which tiny baby dicot we should be plucking when the weeds start – at least we can work quickly in some of the gaps.

In the garden – Avoid the crouch-ouch

So why the focus on things that improve soils without hauling lots of bales, limiting all the bending, limiting the bending and time we spend watering (or pumping water), collecting trash to make all kinds of weird contraptions in the garden? It’s not just me being a greenie, I promise.

Especially for seniors and those with nagging pains and injuries, the ability to work standing upright or from a chair without leaning over or reaching far can not only increase the joy of gardening, but in some cases go as far as making gardening possible again.

Arthritic hands, shaking from an injury or age, and loss of full motor function from an accident can make it frustrating and painful even to fetch out and drop a lima or pea, let alone broccoli and spinach, and unless they’re willing to just punch some holes in a baggy and shake, just forget about iceberg and romaine and strawberry spinach.

The ability to work slowly over winter or summer to prepare for spring and autumn leaf and root crops, the ability to use a tube and funnel, then shake or scoop seeds using something they can actually grip is enormous.

Reexamine how you garden

Even for those in good health or who just like to be out there, some simple and inexpensive DIY projects and some trash collection and reuse can save a lot of time.

That might make a difference in garden size now, while we’re working and balancing families. It will definitely make a difference later, when we’re depending on those gardens to feed us or add a little forkability and crunch to our starvation-staving diet (I loved that article, BTW).

Saving backs and creating easy-to-use tools can also let us involve our parents and kids a little more in some cases, giving them independence and sharing the satisfaction that comes from a meal we procured for ourselves. There’s little better in life than seeing that pride returned to your parents and grandparents, or watching it bloom in your children.

It also sucks to fail, especially when we have a lot of time invested in something.

Water reservoirs, reduced weed competition, proper seeding coverage, and workload-friendly seeding methods can help increase our rate of success, which encourages us to do it again.

Work Smarter Not Harder – In The Garden

Nothing beats mom’s homemade food. Unless you live alone or don’t have any cooking skills or no emergency food left in the pantry. Well, you know how it goes – when life wants to throw crap at you, it uses a shovel. However dim the perspective may be, Mother Nature will always provide, if you know how to ask.

In today’s article, I’m going to talk about one of the most interesting birds out there – the pigeon. Some love them because they’re friendly and chatty and pettable, others not so much. I personally neither like nor hate them – they’re okay as long as they stay away from my car!

Anyway, even though the perspective of catching your own food is not something one would do out of pleasure, there are times when stop caring about those things and do what’s best for your growling stomach. If you find yourself without food, you can always enjoy a nice and tasty pigeon stew or steak.

The idea of eating pigeon meat may appear as revolting. However, history reveals that pigeon meat is not only palatable but a delicacy which once adorned royal feasts. During the 19th century, around Boxing Day, young couples and families would head out of the house to do a little bit of ice-skating.

As the weather was nippy, the skaters needed something hot and tasty to put some color back into those flushed cheeks. The snack of choice was the so-called Pigeon Pie Mystery. Fast-forward in time, pigeons have become associated with nasty things like car-wreaking, necrophagic behavior, and uncleanliness.

Despite these objections, pigeon meat is safe to eat, but you’ll need to catch them first. Sure, they may be friendly and a bit curious, but that doesn’t mean they’ll allow you to gut them.  In today’s article, I’m going to show you a quick and rather ingenious way of trapping pigeons, using common household items. Enjoy!


Gathering the materials for your first pigeon trap

For this project, you will need the following materials:

  • Plastic straw rope (you can replace it with dental floss or any kind of cordage).
  • An old plastic bottle.
  • Plastic bucket.
  • Wire cage (it doesn’t have to be new; if you can’t find one around the house, you can always go and buy one from your local flea markets or thrift shops).
  • Styrofoam board (should be about the size of the wire cage).
  • Crafts knife.
  • Pole.
  • Glue.
  • Small wooden board.
  • Hammer and nails.

Are you done gathering the necessary materials? Wonderful. Here’s how to piece together your first pigeon trap.

Crafting the backyard pigeon trap

Step 1. Remove the part of your wire cage. For this project, you may want to get one of those rectangular cages (mine is an old chicken coop I found in the attic).

Step 2. Glue the Styrofoam board to the top part of your cage. Allow the glue to work its magic before proceeding to the next step.

Step 3. Using your crafts knife, cut a hole in the Styrofoam board. The hole should be wide enough for your plastic bucket to pass through with any problems but, at the same time, prevent the pigeon from escaping.

Step 4. Once you’re done cutting the hole in the Styrofoam board, use the same knife to cut two small entrance on each side of the plastic bucket. If you really don’t want to sacrifice a bucket, you can go for one of those one-kilo yogurt containers. Just be sure you keep the lid.

Step 5. Apply some glue over the edges of the lid and place in on the bucket. Allow the glue to dry.

Step 6.  It’s now time to craft your wooden lever. Nail the small wooden board to the top part of the pole. Make sure that the board can move up and down freely.

Step 7. Plant the pole-and-board lever into the ground, just above the Styrofoam board opening.

Step 8. Make one small hole in the front part of the board and another one in the back.

Step 9. Draw some cordage through both holes. Ensure that the cord drawn through the hole made in the front back of the board is long enough as to allow the bucket to reach inside the cage.

Step 10. Tie the front string to the bucket’s handle.

Step 11. Fill your plastic bottle with water and tie it to the back string.

Step 12. Place a couple of seeds, kernels or breadcrumbs on the bottom of the bucket, and wait. Congrats! You’ve just built your first pigeon trap.

More on the makeshift backyard pigeon trap

The idea behind this simple trap is simple: attracted by the seeds or kernels placed on the bottom of the plastic bottle, the pigeon will land on the edge of the Styrofoam board. Bear in mind that pigeons are cautious by nature, meaning that they will take a good look at your thingamajig before stepping inside the trap.

If you cut only one small hole in the side of the bucket, the pigeon will not approach the seed, because it will realize that they’re no way out of there. That’s why you should have two openings.

Once the little sucker starts eating, it will probably figure out that everything’s okay and will step on the bottom to stuff its beak with them goodies. The second it steps inside, the bucket will be lowered inside the coop, trapping the bird.

You should pay extra attention to how the bucket’s lowered inside the cage. For this trap to work, the cord’s length should allow for the bucket’s body to reach the inner part of the cage, with the lid blocking the opening made in the Styrofoam board.

I can’t give you any precise measurements – it’s a trial-and-error process. One last thing: the plastic bottle’s contents. It would be wise to fill it with water instead of sand or earth; the trap’s sprung by the pigeon’s own weights. Putting anything heavier inside the bottle will make the trap useless.

That’s it on my makeshift pigeon trap. What do you think? Hit the comments section and let me know.


Other self-sufficiency and preparedness solutions recommended for you:

The Lost Ways (The vital self-sufficiency lessons our great grand-fathers left us)

Survival MD (Knowledge to survive any medical crisis situation)

Backyard Liberty (Liberal’s hidden agenda: more than just your guns…)

Alive After the Fall (Build yourself the only unlimited water source you’ll ever need)

The Lost ways II (4 Important Forgotten Skills used by our Ancestors that can help you in any crisis)

The Patriot Privacy Kit (Secure your privacy in just 10 simple steps)

Nothing beats mom’s homemade food. Unless you live alone or don’t have any cooking skills or no emergency food left in the pantry. Well, you know how it goes –

When it comes to self-sufficiency, replacing the grocery store seems to be the biggest hurdle for most preppers. Gardens are most commonly thought of because we as humans collectively seem to think, ‘how hard can it be’ to dig a hole and put a seed in it? Regardless of how prevalent gardening and farming are and have been in our culture, most people do not have a garden or expect maintaining one will be quick and easy.

The rude awakening comes the first year when the summer months cause weeds to grow like evil vines choking out everything that in the spring was nice and tidy. Bugs begin to eat all our tender vegetables and the idea of eating one more zucchini makes you sick. The first year of gardening can make you think that there is no way these tomatoes are worth all that effort. For us, if you consider the cost of time, materials and effort that went into our first garden I know the vegetables were about $10 a piece and many lessons were learned.

Having a garden that is growing and producing fresh food that your family eats is a tremendous benefit, but what about protein? Aquaponics is another growing hobby, but the initial setup can seem daunting and still requires an alternate power source. Sure, it would be nice if we all had a working farm with livestock but that simply isn’t going to happen. For one thing, most people don’t have the land or money but more importantly experience, to keep a farm going. There are ways that preppers can provide all the meat you would need to live on in a smaller and easier package. Enter the humble rabbit.

The interest in raising rabbits for meat is growing as preppers are constantly trying to find ways to feed their families in the event the local supermarket is out of commission. Once you have considered the prospect of having your own source of food, the question turns to how to raise rabbits and that is what I hope to discuss today. Raising rabbits gives you the benefit of fresh meat, but it is also healthier and devoid of the chemicals and hormones found in most grocery store meat. While you are feeding your family, they are also getting healthy food that has been raised by you so you know exactly what has been put into the food that makes it to your families table.

A lot of people know that rabbits are prolific breeders, but exactly how many rabbits would you need to feed your family? A single female has on average about 8 babies or kits per litter and rabbits have a gestational period of 28-31 days so it is feasible for your rabbit to have one litter per month but more likely a little less. If you start with three rabbits (2 females and one male) you could have well over a hundred rabbits in the first year.

Of course you would be eating these rabbits so the population would need to be controlled to support your family, but it is easy to produce enough meat so that your family could survive on a relatively small number of rabbits. You would just need to figure out how much meat you would want to produce and adjust your breeding accordingly. This gives you the ability to raise more meat though so it could be used to feed other people or barter.

rabbitcage

Building a rabbit cage is simple.

What type of rabbits are the best

There are three breeds most commonly used as meat stock: the Californian, New Zealand, and Florida White. The American Chinchilla, Satin, Silver Fox, and Champagne d’Argent are also great choices. It is best to speak to a local provider as each breed has their own advantages. For breeders in your local area, you can check out RabbitBreeders.us who has a searchable rabbit breeder’s directory.

What do Rabbits eat?

There is commercial rabbit food, but primarily they need hay. You should have a hay rack in your rabbit cage and make sure it is full of hay. Some recommend using Alfalfa, which you can easily grow yourself right in your home. Making sure your hay is cut into manageable lengths will help the rabbits out as well as keeping their cage clean. Rabbits can also eat vegetable scraps and lawn trimmings but make sure you are watching what they eat to remove anything they turn up their noses at. Carrots are always a favorite, but monitor their intake of too many green vegetables as it can cause them to get bloat or diarrhea.

How do you make a rabbit cage?

There are many ways to prepare a home for your rabbits from buying new manufactured rabbit cages online or used rabbit cages for sale at yard sales, in the local paper or on Craigslist. The more industrious can also find free plans to build your own rabbit hutch all over the web. The basics of any rabbit cage should give them shelter from the heat, protection from predators and enough room to move around. You also want something easy to clean because everything that goes in the front of the rabbit has to come out the back. A close wire mesh floor will allow the manure to drop on through and not be trampled under their feet.

How do you kill a rabbit?

For most people I assume the act of having to kill and butcher your own meat is the biggest psychological hurdle to raising your own food. Some even have a complete disconnect with the fact that all the animals we eat have to be butchered and killed before they can make it to those shiny packages in the store. It is one thing to pluck a tomato off the vine, but quite another to chase a chicken down that you have been raising for eggs and wring its neck, let alone plucking it and the butchering process.

Are rabbits a food source you would consider for your home?


Other self-sufficiency and preparedness solutions recommended for you:

The vital self-sufficiency lessons our great grand-fathers left us

Knowledge to survive any medical crisis situation

Liberal’s hidden agenda: more than just your guns

Build yourself the only unlimited water source you’ll ever need

4 Important Forgotten Skills used by our Ancestors that can help you in any crisis

Secure your privacy in just 10 simple steps

When it comes to self-sufficiency, replacing the grocery store seems to be the biggest hurdle for most preppers. Gardens are most commonly thought of because we as humans collectively seem

Yesterday I began a new series called, Back to Basics. People every day can simply look at events happening anywhere in the world and understand how taking some simple steps to ensure you can handle minor emergencies, isn’t crazy. Prepping to a certain level makes sense for everyone, regardless of where you live.

This series was designed to go back to the basics of prepping, obviously. Today I wanted to share tips for how to stockpile food for emergencies that anyone can use. I will focus on preppers who are just starting out, but I think some ideas in the topics below could be useful to anyone looking to ensure their family has food and does not go hungry. This article will also have dozens of links to other content on the subject for additional reading.


I believe there are 5 main components to survival that everyone needs to consider. They are simply Water, Food, Shelter, Security and Hygiene. Yesterday we talked about the need for water and how you can easily store water for emergencies that render your traditional methods of obtaining water impossible. Water is more important to life than food or at least you can live longer without food than you can water, but they are both important.

Why do you need to stockpile food for emergencies?

If you are new to prepping, you may have something that triggered your awareness of the subject. Preppers have many reasons for doing what they do and no two preppers are alike. Some are preparing for the end of the world, but most see situations in our daily lives that give a perfect reason to stock up supplies. You have only to look at the recent winter storm that affected large swaths of the Eastern Seaboard to have a perfect example of why you don’t want to be left without a means to feed your family.

emptystoreshelves

Greeks are finding food, medicine and fuel in short supply.

It seems almost cliché at this point, but invariably it always happens when a winter storm is forecast. Everyone rushes out to the store and certain food supplies are wiped out. Images of empty shelves are shown on practically every newscast and eventually prepper websites. Food shortages during simple storms are common if not expected. We don’t really even blink anymore because we are so used to this practice of waiting until the last-minute and then hitting the local grocery store on the way home from work to grab some basic necessities or comfort food.

Related – Build yourself the only unlimited water source you’ll ever need

If you can’t live for more than 3 days without going to the store, it’s time to reevaluate your family’s readiness. The statistic we hear most of the time is that the average home has only 3 days’ worth of food in it. If this is true, where would you be on day three if you had not been able to make it to the grocery store before the storm? What if instead of a snow storm, a virus outbreak had occurred and everyone was told to stay indoors to prevent infection? Each of us should have more food on hand that our families and friends will eat than is absolutely necessary to prevent surprises from leaving you hungry.

How much food do you need to store?

In the example above I used a virus outbreak as the condition that would prevent you from getting to the store. There are others though and weather could certainly be one of them. Some storms where I live have left roads impassable for upwards of a week. Could we walk to the store? Sure, but what if the stores having already been cleared of just about all of the food were closed? What if power outages prevented them from conducting any transactions? These are things you should consider.

Prepping is not something I ever consider you can accomplish. By that I mean, you are never going to be fully prepared. You may be much better prepared than some or all of the people around you, but you will never be 100% self-sufficient. Prepping should be done incrementally even if you have more money than you know what to do with because as you start to stock up food you learn lessons.

Related – The vital self-sufficiency lessons our great grand-fathers left us

A good rule of thumb for me is to start small when you are beginning to stockpile food for emergencies. You don’t need a year of freeze-dried foods to start with. Try just having a week or two of extra groceries that your family already eats. This is accomplished without any exotic storage needs usually or 5 gallon buckets of grains you have to figure out how to prepare.

Premium Fresh MREs Meal with Heaters

My wife purchases the groceries and I started out by giving her extra money to simply buy more food. I did this in the beginning because she is a much better shopper than I am and will always save more money than me. This worked great because she was easily able to fill our pantry and had plenty of meals planned to last us well over 30 days. Sure, at the end of that 30 days of food we would be getting into more exotic cans of mushrooms and soups that are better left as part of a recipe as opposed to your entire meal, but we wouldn’t starve.

What are the best types of food to stockpile?

Once we had a month worth of food and water stored up, I started looking at other options. I think each person should have a layered approach to food storage. This gives you flexibility and more importantly variety that as you go out to 6 months or 1 year or 2 will be important. My own personal goal is 2 years’ worth of food stockpiled for my family but that isn’t made up of only food from our grocery store. That can certainly be done though with a very good rotation plan.

Related – 4 Important Forgotten Skills used by our Ancestors that can help you in any crisis

Food storage should ideally cover the following:

Short Term Food Storage – The best and simplest foods are like I said above, what your family eats every day. One thing to consider is that the bulk of this food should be non-perishable in case you lose power. Canned foods are great as well as pastas, drink mixes and staples. These usually last at least a year.

Medium Term Food Storage – For the 5 – 10 year range MRE’s are a great option although they are heavier and their convenience comes at a higher price. I have several boxes of these and I like MRE’s because they are self-contained and don’t really need any water. Freeze dried camping foods like Mountain House are another great option to just add hot water to. Rice and beans make great additions to this category because you don’t really have to do anything crazy to store them as long as they are kept cool and dry.

Long Term Food Storage – When you start to look at foods that will keep for many years you get into stored grains like Hard Red Winter Wheat that you store in sealed 5 gallon buckets. Freeze dried food from any one of many suppliers out there keep for 20 years usually and are individually wrapped Mylar packets. They require water to re-hydrate but the taste can be surprisingly good. Make sure you have seasonings though….

Renewable Food Storage – This is when you have to get your inner farmer working. Renewable foods are an intensive garden, small livestock like chickens or rabbits and the occasional wild game caught either through hunting or snares. In the worst disasters, your food will run out so having a plan for that ahead of time will help you prepare.

vegetables

For a well-rounded plan, growing your own food will give you the most flexibility.

How do you plan for your food eventually running out?

I have a mix of the food storage options above. We eat on our grocery store items every day, but I also have MRE’s and a pretty large amount of freeze-dried foods stored. We also have the grains I mentioned and the all-important grain mill to grind them into flour. Several hundred pounds of rice and beans round out the equation.

Stockpiling food is only the start. We have a garden and small flock of chickens. The stored food is just to get us through the worst of the disaster. Hopefully before our food runs out whatever disaster has happened will be mitigated and life will have returned to some sense of normality. If not, we have a huge leg up that will allow us to further harvest our garden to put away food like the pioneers had to do. It is an approach that gives us some sense of security and prepares us to come out on the other side still alive.

What is your plan to stockpile food for emergencies?


On a different note, here’s some other self-sufficiency and preparedness solutions recommended for you:

The Lost Ways (The vital self-sufficiency lessons our great grand-fathers left us)
Survival MD (Knowledge to survive any medical crisis situation)
Backyard Liberty (Liberal’s hidden agenda: more than just your guns…)
Alive After the Fall (Build yourself the only unlimited water source you’ll ever need)
The Lost ways II (4 Important Forgotten Skills used by our Ancestors that can help you in any crisis)
The Patriot Privacy Kit (Secure your privacy in just 10 simple steps)

If you can’t live for more than 3 days without going to the store, it’s time to reevaluate your family’s readiness. The statistic we hear most of the time is

Homesteading’s the fine art of getting your land legs while learning how to do most of the stuff on your own. It’s great to have your own slice of heaven by the sea or in the middle of a dark and twisted forest – I for one can vouch that, most of the time, it’s rather amusing to figure out how our ancestors did things like tending to the garden, raising farm animals, settling in for the winter, picking up fresh herbs from the garden or building simple stuff out back.

Still, as pleasure-laden, as homesteading may be or become, it’s rather a turnoff when you need to do all of the things or more when you’re sick. Even a simple cold or the flu can turn a grown man into a noodle, but imagine what happens when you become bound to your sickbed with no one around to take care of you and your house.

Yes, that may strike as being a little depressive, but, unfortunately, it can happen even to the best of us. I being struck down a couple of months ago by the stomach flu somehow wound up all alone at my hunting cabin. Wife couldn’t come up on account of the kids being sick too and no driver’s license, so I was kind of force to get ingenious about my homesteading.

Anyway, after careful considerations and some chicken soup, I came with this wonderful piece which details my journey from sickly couch-potato to a regular Paul Bunyan wannabee. Without further ado, here’s are my golden rules to successful homesteading while you’re sick.

  1. Stay in bed

Of course, my first golden rule had to be a no-brainer because of reasons. Just kidding – most people tend to underestimate the severity of their medical condition and decide to just brush it off. Don’t do that. If you’re feeling that your legs are turning into the noodle, get to bed, medicate, and sleep on it. Remember that you’re all alone out there, and if you happen to collapse while working the field or chopping wood, there’s no one around to pick you up or drive you to the hospital.

  1. Get in touch with emergency services

No matter if you’re a big city dweller or the king of your own hill or mountain, you’ve still got to figure out how to get in touch with the emergency services in case shit hits the fan. A while after I bought my hunting cabin, figuring out that I kind of get down with the flu when spring comes, I went to my local drug store and bought me a one-push emergency bracelet.

Surprisingly, the device has great coverage, even in places where there’s no phone signal. Don’t kid around with your health, especially if you decide to drop off the grid. If you can’t find an emergency bracelet, use an emergency service smartphone application like Emergency+ if you have adequate coverage. A portable distress beacon is always a great alternative, but it will need some tinkering before you can use it to alert the local emergency services.

  1. Keep an ample supply of chopped wood or fire-starting material

Golden rule number three – when you’re game, chop as much wood as you can because you won’t be able to do so when you’re sick. It would also be a good idea to keep a small wood stack as close to the home as possible to minimize exposure to the elements.

Yes, I know that’s a big no-no in the big book of prepping, but some rules are meant to be bent if in doing so increases your survival likelihood. If your stove is running on another kind of fuel, be sure to keeps some close by, but not too close to the heating device.

  1. Soup broth all around!

I know it’s kind of a cliché but hot chicken soup really help you’re sick or feeling down. Making some in your home is no big deal. Still, I would skip the cooking part and go buy some canned soup. Sure, nothing beats a home-cooked meal, but do keep in mind that you can’t prepare the broth that much in advance.  So, make sure you have enough in your pantry for whatever the case may be.

  1. No one should be without a checklist

Checklists are a marvelous way of keeping everything nice and tidy, especially if you’re the kind of person that has no love for neatness. If you find yourself alone and sick on your property, get yourself together and try to jot down a small to-do list for the next couple of days. That way, you will have ensured that you haven’t missed anything.

  1. Let someone know you’re there

You may be king of the mountain, but every king sometimes requires the aid of a royal advisor. In this case, you should let someone know where you are and, most importantly, how long you’re planning on staying. If you plan on moving there, get to know your neighbors and, if possible, ask someone to check up on you every couple of days to make sure that you’re safe and sound.

  1. Keeping your meds close

You don’t need to be sick in order to figure out that it’s really important for the meds to be within reach. I personally emptied an old wooden wardrobe and sort of turned it into a big med cabinet. Of course, you can do as you like when it comes to med storage. Don’t forget about the golden rule of med hoarding: painkillers first, anti-histamines second, and vitamin supplements last.

These are my golden rules of homesteading while I’m sick. As I’ve mentioned, all of this stuff are the results of my me-time at the hunting cabin. Sure, it may be possible that some steps might be a bit off, but, as I’ve said, this was a personal experience. Think something’s missing from the list? Then go ahead and hit the comments section and let me know what you think.

Homesteading’s the fine art of getting your land legs while learning how to do most of the stuff on your own. It’s great to have your own slice of heaven

Emergencies can take place in a moment’s notice — at home, work or in public places — and knowing what to do next can very well safeguard you from injury or even death. There’s no point in waiting until an actual emergency happens. With that in mind, here are a few ways you can be prepared for whatever comes your way with these emergency survival tips.

Prepare for the Worst

If you live in California, you know the state has been expecting a massive earthquake for several years now. And if you live someplace where snow days are the norm, it’s important to be prepared for toughing it out if you find yourself snowed in for several days. Whatever situation comes your way, it’s important to be mentally and physically prepared for the possible events that can occur. Do your research on what can go wrong and you’ll be better prepared for anything that comes your way.

Pack a Generous ‘Bug-Out’ Bag

This may be the most crucial component of preparing for a disaster. Emergency preparedness bags, or “bug-out” bags, contain a number of items to sustain and protect you for long periods of time when you’ll likely have no other available resources. Some potential items include flashlights, a first-aid kit, water and food, emergency contact information, clean clothes, and an emergency fund. Plan accordingly for any situation and pack all necessary items ahead of time, while regularly updating your bag so any perishable items stay fresh.

training-828764_640

You can be prepared in every aspect, but if your health is poor, it’ll make every other task more difficult than it has to be

Optimize Your Physical Fitness

In order to successfully evade danger in an emergency, it’s important to be in the best physical condition possible. You can be prepared in every aspect, but if your health is poor, it’ll make every other task more difficult than it has to be. If you haven’t already done so, begin an exercise regimen that will build your muscles and endurance. Try going on long hikes and lifting weights to build muscle mass. In addition, eat healthy meals to keep your body in tip-top condition.

Develop Safe Driving Skills

In the case of a disaster, it’s not unlikely you’ll have to relocate to a safer location. Wherever that is, it’s important to drive safely to your destination in the midst of chaos. Begin refining your defensive, offensive and evasive driving skills by refreshing your knowledge on the rules of the road.

Plan for Recreation, Comfort Foods

It’s likely you’ll end up with a lot of “downtime” during a crisis. You may be stuck at one location for long periods, so it’s important not to let panic get the best of you. One way to avoid succumbing to fear or just a bad attitude is to prepare recreational activities and comfort foods. Pack a deck of cards or your favorite board games in your emergency preparedness bag. Include your child’s favorite toys, as well as some snacks your family enjoys. These items will become a source of comfort in an emergency situation.

joining-a-survival-group-007

Form a survival group as soon as possible to gain advantages with numbers of like-minded people

Prep as a Community

One important aspect of prepping is to become a part of a community that shares your preparedness. This way, in a crisis, you can all support and help one another to survive. Having a community with the same mindset will make you stronger in adversity. If no one around you shares your gusto for prepping, talk to your family and close friends about the importance of being prepared for a disaster or emergency crisis. Upon finalizing your plan, share your preparation tips and tricks, as well as some resources and knowledge with one another.

Emergencies can take place in a moment’s notice — at home, work or in public places — and knowing what to do next can very well safeguard you from injury

Your list of home remedies is about to get even more interesting and spicier. Although these natural herbs are have been used hundreds of years, doctors and scientists are now recommending them to be used for healing purposes. These natural medical resources can be easily substituted as traditional methods of medication. The plants have capabilities to heal and reduce cholesterol, high blood pressure and arthritis pain to name a few. Some of the best healing herbs even have the ability to treat cancer cells and also help alcoholics to curb their drinking habit.

The natural medical resources or herbs and other natural remedies are as effective as traditional treatments. In some cases, they are even more effective without any side effects. Here are some of the best medical resources that you can get from nature. These super-healers can be added into your natural medicine or herbal products cabinet along with your favorite recipes. Fitting a few of them in your daily routine can be beneficial for the body.

Turmeric

Turmeric is a rhizomatous herbaceous perennial plant of the ginger family, Zingiberaceae. It is native to southern Asia

Turmeric contains anti-oxidant, anti-inflammatory and anti-cancerous properties. Whoever thought an ingredient used for taste in curry can help to relieve pain? This spice which is popular for its use in curry contains curcumin that helps to treat arthritis. Curcumin is a powerful anti-inflammatory and an important element that works just like Cox-2 inhibitors drugs to reduce the Cox-2 enzyme which results in the swelling of arthritis.

The herb is known for doing wonders. Another reason why turmeric is popular because it reduces precancerous lesions when taken with quercetin which is found in apples, onions, and cabbage. Turmeric also helps to clear plaques in the brain that are an important characteristic of the disease.

Cinnamon

A recent study on type 2 diabetics showed that taking cinnamon extract every day reduces the blood sugar level in the body by 10%. It reduces risks related to heart and slash cholesterol by about 13%.

1 g capsules of cinnamon extract every day help to tame blood sugar while 1 to 6 g capsules reduce cholesterol. However, a large amount of actual spice is not good for health. Thus, it’s better to stick to water-soluble extract.

Rosemary

Heterocyclic amines or HCAs are some vital carcinogens that are present in several types of cancers. These amines are created after grilling, frying and broiling meat at high temperatures. Rosemary extract which is a common powder mixed in beef after cooking reduces HCA levels in the body.

Rosemary extract also prevents carcinogens from binding with DNA and stops them from entering the body. It is the first step of the formation of tumor and rosemary extracts helps to prevent cancer at an initial stage. Thus, taking rosemary extract will kill carcinogens before they turn into a tumor. This research has been only carried out on animals but the extract has a tendency to prevent cancer.

In order to reduce HCAs in the body, make sure that you add rosemary extract in any spice mix. It will also enhance the taste, making the dish stronger in flavors. You can mix the herb with oregano, parsley, thyme and onions for a perfect mix.

Ginger

Ginger can protect your stomach from various sources including motion sickness, pregnancy, and chemotherapy. This is an old home remedy that we often hear from our mothers and grandmothers. They are right because it really works!

Ginger is a powerful antioxidant that blocks the effects of serotonin in the body. It is a chemical that the stomach and body produce when you feel nausea by stopping the production of free radicals which is also another cause of an upset stomach.

Garlic


High consumption of garlic have cured colorectal and ovarian cancers. People have also experienced a reduction in the number and size of precancerous growths. The benefits of garlic are not only limited to lowering risks of cancer, but it also decreases high blood pressure. There are about 70 active phytochemicals in garlic including allicin that deceases blood pressure by 30 points.

Garlic in your diet slows down the arterial blockages and prevent strokes. Fresh and crushed garlic offers the best cancer-fighting and cardiovascular benefits. However, one should have at least five crushed garlic cloves to enjoy maximum benefits.

Holy Basil

Several animal studies back holy basil, a special variety of the plant you use in your pesto sauce, Holy basil is effective in reducing stress by increasing the noradrenaline and adrenaline along with decreasing serotonin in the body. The herb is also popular to relieve headaches and indigestion. Tea leaves of the holy basil is a great natural resource which is more effective than traditional methods of relieving pain.

Aloe Vera

Aloe Vera was used in traditional medicine for treating skin disease, constipation, infections, worm infestation and colic. In Chinese medicine, it is popular for treating various fungal diseases. In today’s modern times, the herb is used in various cosmetics to make skin softer.

Surprisingly, Aloe Vera consists of more than 78 active components. Studies have shown that the herb also contains antiviral, anti-inflammatory and anti-fungal properties. It builds up the immune system and does not cause any allergic reaction.

FeverFew

FeverFew is a natural herb that has been used over centuries to ease headaches, toothaches, stomach-ache, infertility, menstruation problems and labor during childbirth. The healing effect comes from a biochemical present in the herb known as parthenolides. It fights against the widening of blood vessels during migraines. The herb also prevents blood clots, dizziness, relieve allergies and reduces arthritis pain.

St. John’s Wort

St. Johns Wort herbs are not used to treat the physical symptoms but also used for relieving anxiety and mild to moderate depression. The best thing about it is it works effectively as any other drug without any side-effects.

Saw Palmetto

Saw palmetto is used as a supplement consumed by men to treat prostate cancer. It also contributes to several health issues related to men such as hair loss, libido and enlarged prostate. Other than that, it is said to promote relaxation, treat respiratory conditions and boost immune function.


The natural medical resources or herbs and other natural remedies are as effective as traditional treatments. In some cases, they are even more effective without any side effects. Here are