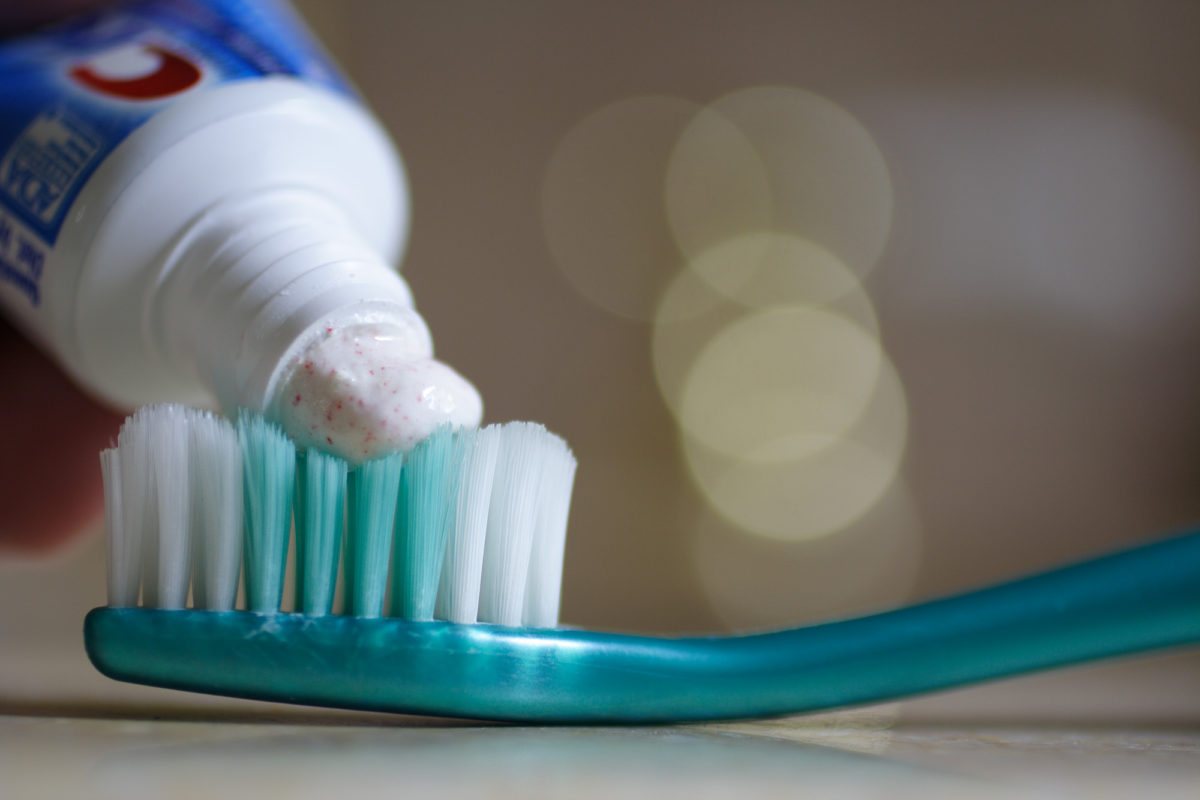
HomePosts Tagged "Survival" (Page 8)

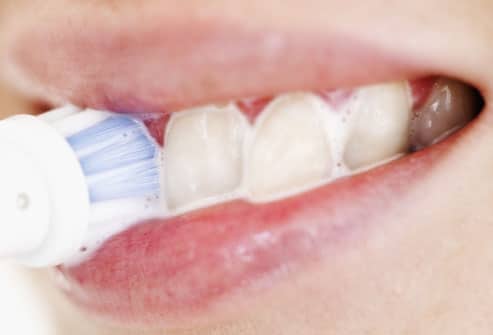
There’s no better nor frustrating way of knowing that it’s six in the A.M and you need to go to work then having to waddle all the way to the bathroom in order to massage those gums.

Have you seen The Green Mile? No matter how hard I try, I still end up crying like a toddler at that scene where Paul and the others escort Coffey to the electric chair. Well, that’s how all of my mornings fell, more or less – dead man walking the walk just to have his brain zapped by yet another glorious 9-to-5 bull session.

Anyway, rant aside, during one of the tedious morns, while shining my chicklets, a thought crossed my mind – is there any other way of using toothpaste besides, well, brushing your teeth?

As always, yours faithfully hoped on the computer and did a little bit of snooping. Of course, as you’re probably painfully aware by now, not everything you find on the Internet should be taken for granted (there was this guy who wrote this ginormous article on how common toothpaste brands such as Colgate or Lacalut can magically heal anything from brain cancer to athlete’s food).

So, after weighing in the facts and laughing my can off in the process, I’ve discovered a couple of nifty and very real ways of using toothpaste outside the bathroom.

Because talk’s cheap and so is the author, let’s get down to business. Here are 10 ingenious ways you can use toothpaste in any SHTF situation.

Acne buster

Do you think that only pre-pubescent guys and girls have to deal with acne? Dead wrong! Acne is a long-term skin condition. Very long-termed, I might add, and this is not coming from a guy who wrestled with acne until his late 30s. Anyway, besides taking your prescription meds (which is a must), you can try rubbing a bit of toothpaste on some of the more problematic areas.

You don’t need much; just a squirt the size of a pea. Gently massage the area, rinse with cold water, and you’re all set to go. It won’t make acne vanish overnight but, in a couple of weeks, you’ll see fewer whiteheads and pimples on your face. This trick is also great for people with oily skin – rub a bit of toothpaste, and your skin will become smoother than a baby’s bottom.

Getting rid of mosquito bites

If it’s one thing I hate more than doing taxes, it’s mosquitos. Summer comes, those dreaded seem to pop out of the ground to spread their reign of terror. Sure, a can of bug repellant will do the trick, but I usually find myself covered in tens of mosquito bites, long before I get around to using the bug spray. A mosquito bite shouldn’t be a reason for concern (unless you live near the Nile area), but there’s nothing you can do about the itching.

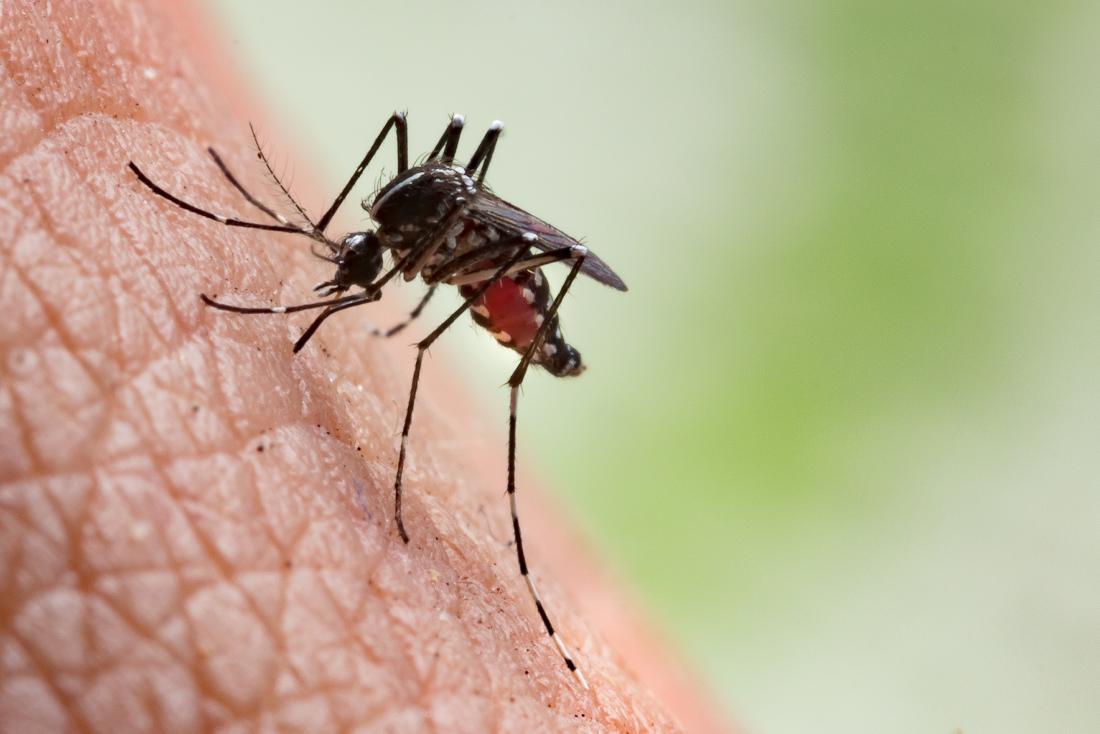
Probably most of you end up with bites ten times their original sizes because you can’t simply stop scratching yourself. Well, after trying everything from soothing sprays to medicinal alcohol, I’ve discovered that you can get rid of the itching if put a pea-sized amount of toothpaste on the bite area. I would go with the peppermint variety because it has that cool feeling to it. Works just fine on other types of insect bites.
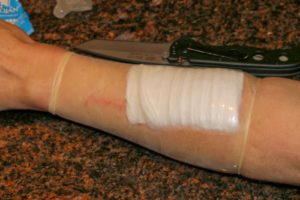
Treat burns

A great way to relieve pain and to prevent blistering is by putting a little bit of toothpaste on the scorch mark. Before applying sterile gauze, submerge the burn area in cold water and apply a tiny amount of toothpaste. Since the stuff has powerful antibacterial properties, it will keep the nasty germs at bay and, in addition, create a waterproof barrier.

What can I say? It’s a win-win situation. Word of caution, though – this works for minor burns (a drop of hot oil or wax on hand, applying too much pressure on cigarette butt). For more severe burns, ditch the toothpaste, and get your can to the hospital.

Plugging empty nail holes

For me and my family, spring is more about redecorating than actually doing any cleaning. So, old pictures end up in the attic, and new ones take their place. However, there are instances when the pic we choose for a room really doesn’t match the décor. The result – we end up with one more empty spot and a nail sticking out of the wall.

Most times, I let them nails alone because pulling them would not solve anything except ending up another hole in the wall. If you have the same problem, try this simple hack – get a little bit of toothpaste and plug the hole. Use a hair dryer or something to harden up the paste. You can leave it like this if your rooms painted in hospital-white or take a brush an apply a coat of paint. Easy-peasy!

Poison Ivy treatment

Because mosquito bites are the least of your worries when you’re out camping or hiking. Two words: poison ivy. Apart from the fact that you feel that your entire skin’s on fire or something, not even the best cream will make the itching go away. Now, if you want to skip the step whereupon you’re forced to wear gloves or something as not to upset those pustules, try applying a little bit of toothpaste on the sting area. Of course, the skin sores won’t go away overnight, but you would feel less itchy.

Defog your goggles and windshield

Having to wear prescription glasses since adolescence sort of made me come up with cookie solutions to the cleaning and defogging issues. Back in my days, lenses were made from regular glass. Sure, they were heavy as shit, but at least there was no fogging. Fast-forwarding a bit, nowadays prescriptions are lighter, cheaper, more resilient to scratches, but they do tend to fog out more frequently compared to their glassy counterparts.

Anyway, if you want to prevent fogging, which becomes particularly dangerous when you’re behind the wheel, rub a little toothpaste on the lenses and rinse before leaving the house. I wouldn’t recommend doing this more than a couple of times per month since excessive use of water, and other stuff can wipe away the anti-glare and blue light coatings.

No more bruising

Bruising’s the inevitable denouement of any kind of sudden pressure exerted on the tissues. Remember when we were kids, and we used to come home covered in scrapes and bruises after a whole day of biking?

Well, times might have changed, but habits have not. I for one can’t let the week go by without a brownish patch on my arms and legs. A quick fix for bruises – making a thick paste out of water and toothpaste and applying it to the future bruise area.

The ingredients inside the toothpaste will restore circulation, preventing major discolorations and cutting down on recovery time.

Word of caution though – if you see more of those bruises on your body and know for a fact that you haven’t hit yourself within the last couple of hours, you should ditch the toothpaste remedy and go see a doctor. It may be the beginning of a simple iron deficiency or something life-threatening.

Makes for stronger nails

Brittle nails can be solved by dunking your hands in a bowl of water mixed with toothpaste. Yes, I know it sounds a little bit far-fetched, but do keep in mind that nail brittleness has all sorts of causes, one of them being germs. Since toothpaste contains quite a bit of that stuff, it will eliminate most bacteria, leaving your nails stronger, longer and shinier (was kidding about the longer part).

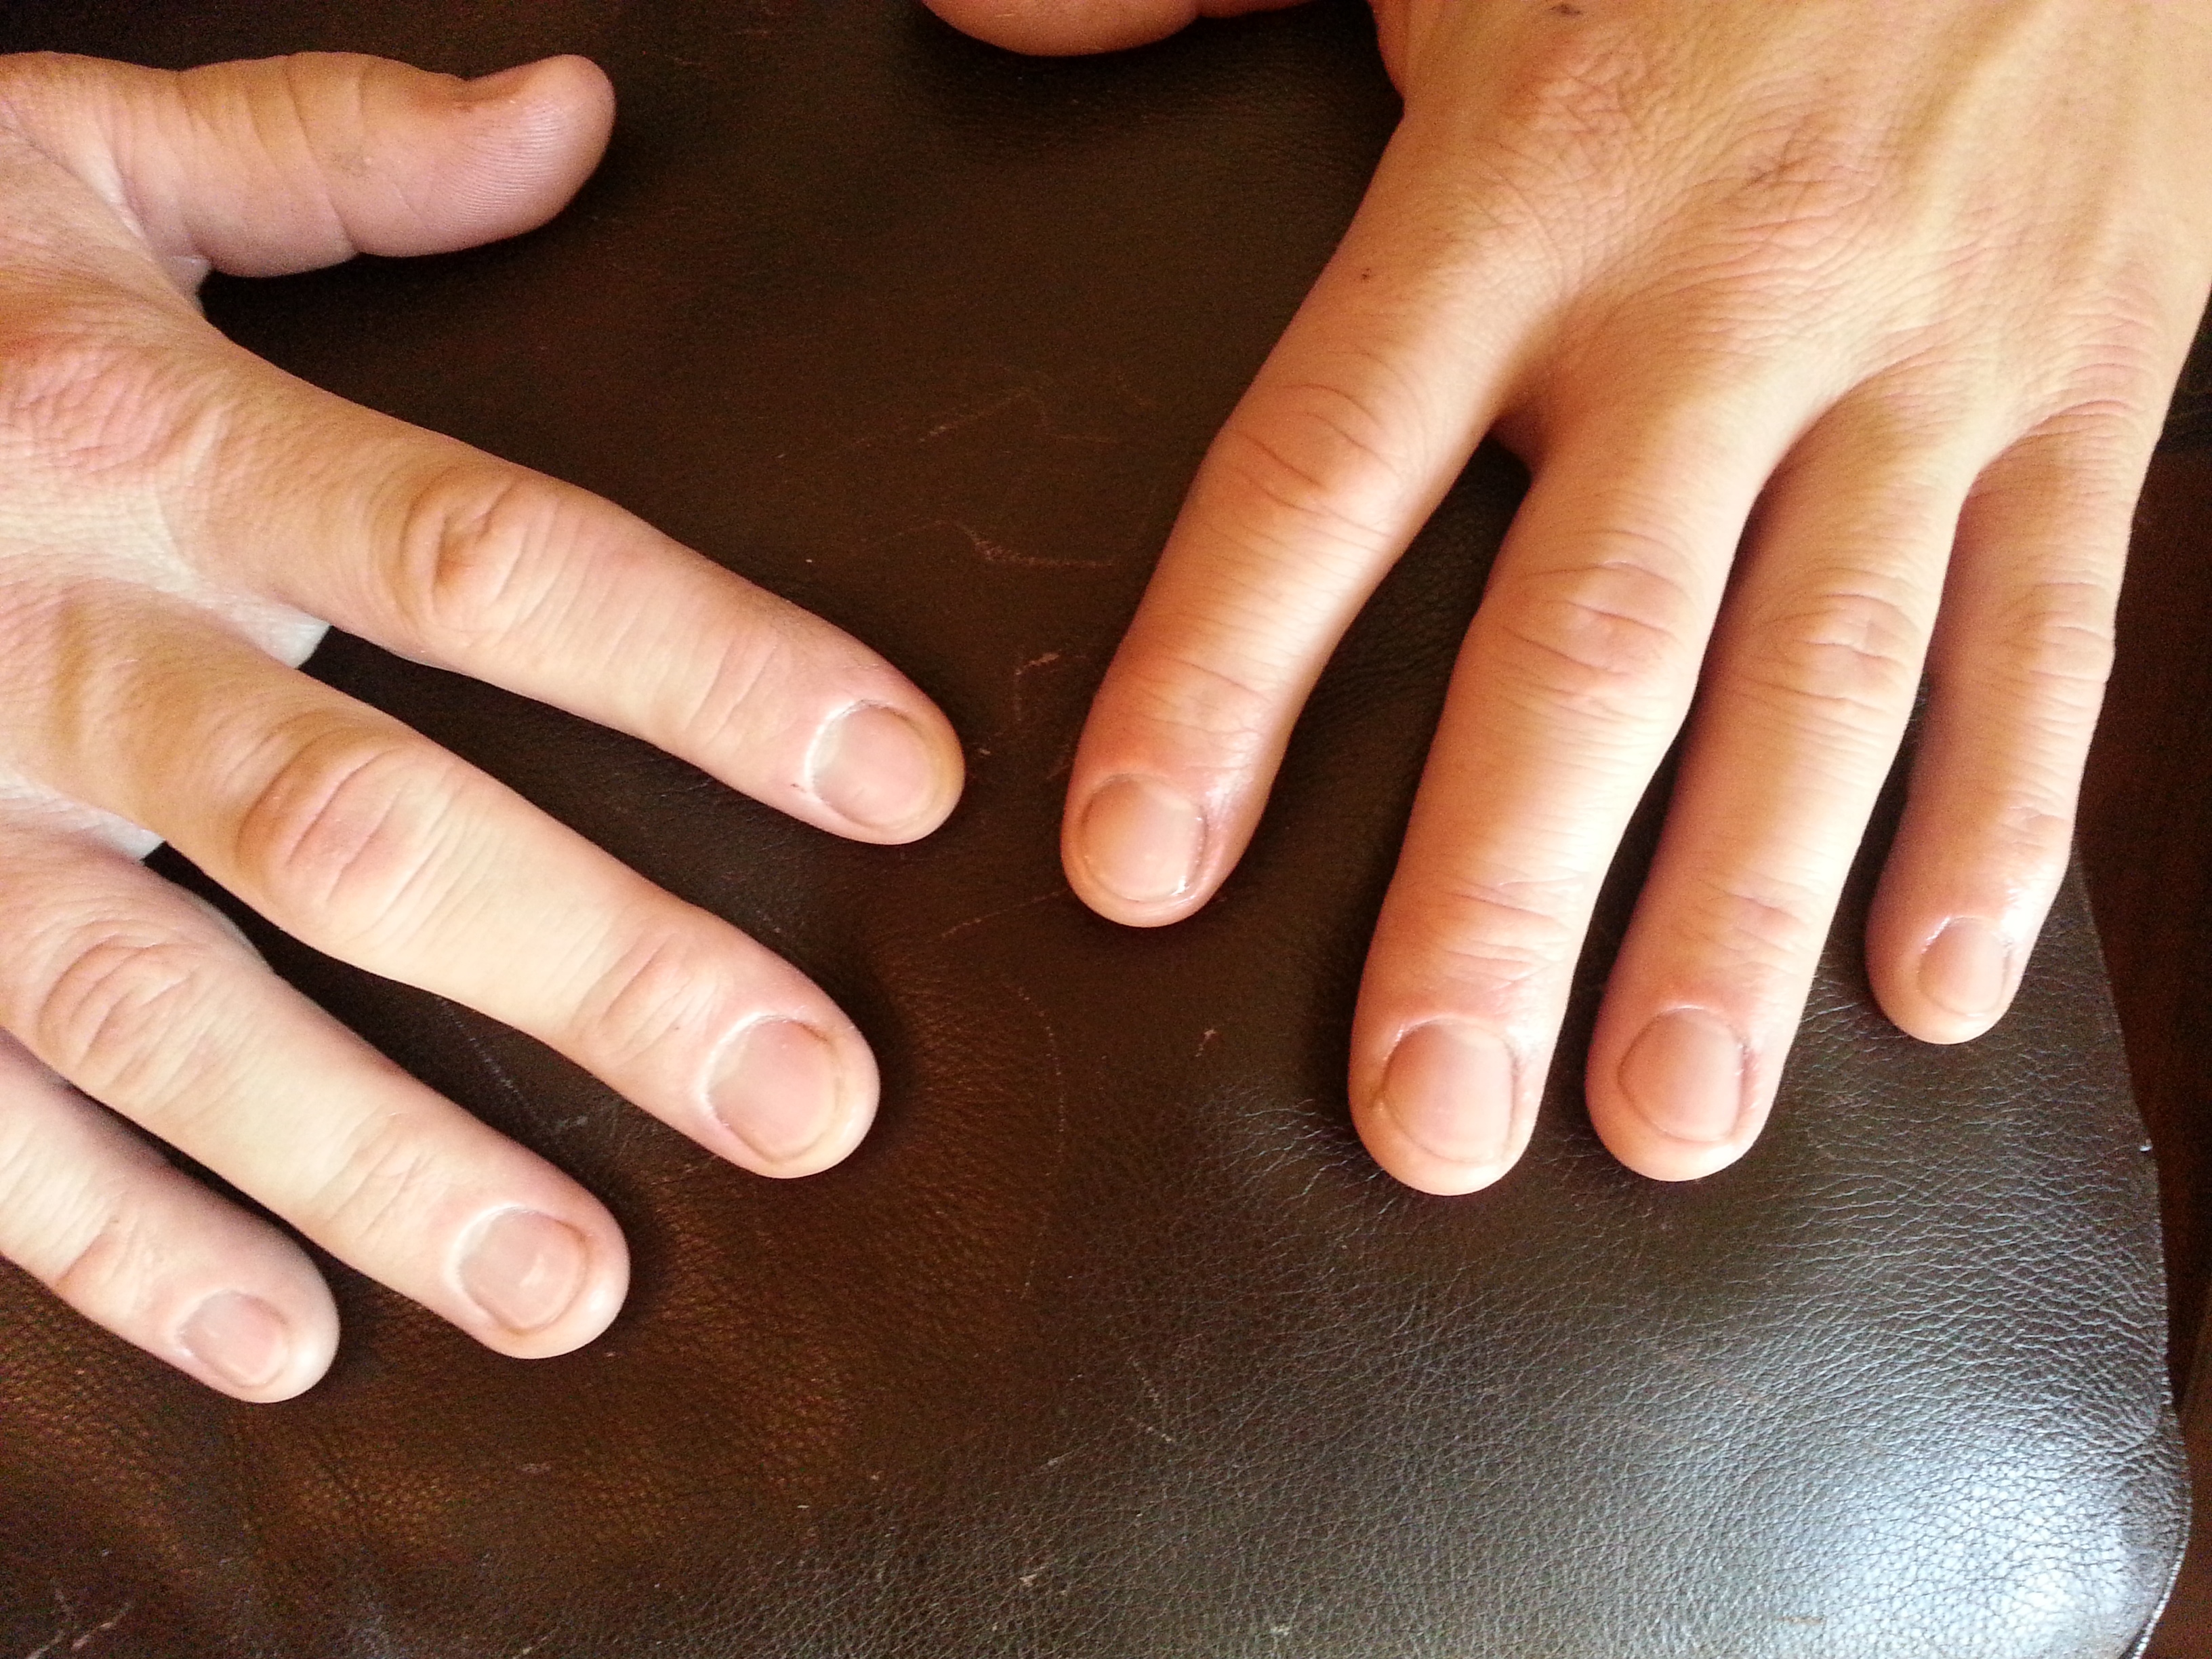
If you’re that kind of person whose nails tend to exfoliate no matter what you do, I would advise taking some calcium supplements or eating calcium-rich foods. Of course, you should also use this at least twice a week.

Revive your CD and DVD collection

Growing up in the era of computers and laptops, I managed to amass a collection of CDs, DVDs, Blue-Rays, and, yes, even floppy disks. Although most youngers don’t even know what a floppy was or how hard it was to store docs and games on them, from my experience I found them to be more resilient compared to optical storage devices such as CDs or DVDs.

Not even keeping them inside their original cases doesn’t seem to safeguard them from scratches. Sure, losing a CD or two is no big deal, considering that most of them are probably filled with all kind of crap we don’t need.

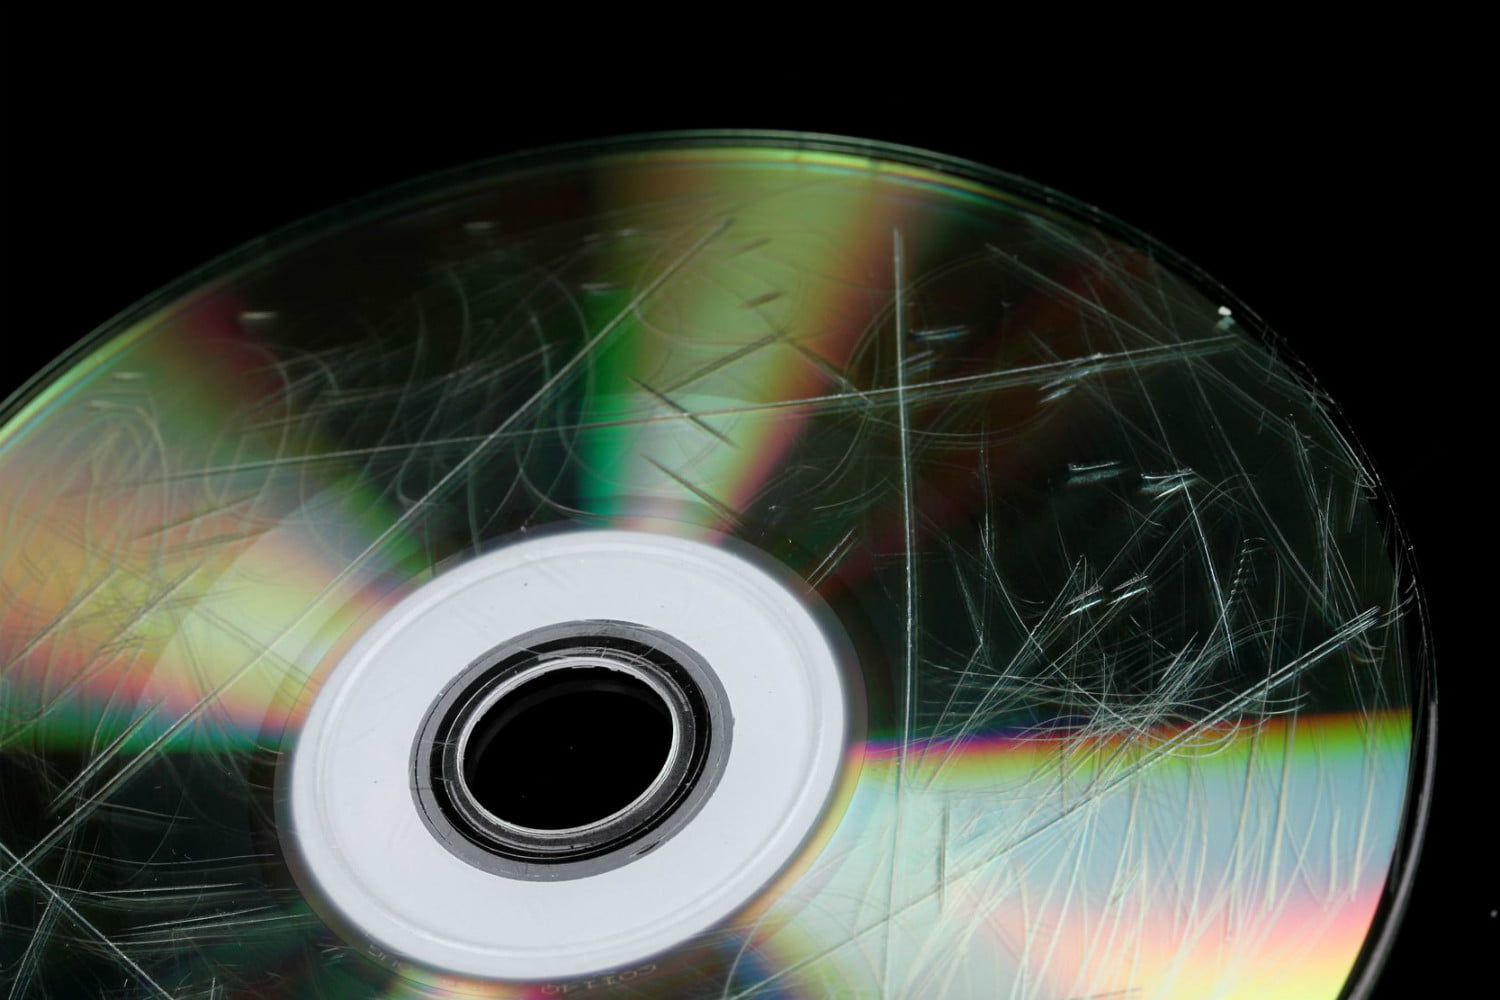
Still, it becomes truly tragic when we lose stuff like those CDs\DVDs where we stored family vacation photos or the holy wedding DVD (guilty!). It’s a gamble, but there may be a way to access that CD or DVD long enough to copy the data to your laptop or computer.

Take a closer look on the back side of the recording device and notice where the scratches are. Put a little bit of toothpaste on that area and wipe thoroughly with a clean cloth. As I’ve said, it may or may not work, but what have you got to lose?

Remove ink and tobacco stains from hands

Since everybody’s now bonkers about working on the computer, the ink has become less and less popular. Still, for those of you for who the fountain pen still means anything, ink spots from the fingers can be very difficult to remove.

A quick workaround would be to run some toothpaste on the stain and rinse with clean water. Works for clothes too. As for tobacco stains, you will need to prepare a mixture consisting of water, toothpaste, and baking soda. Stir and use a toothbrush to put the stuff on your fingers. Give it a good scrub and, voila – no more stains.

That about wraps it up on my cookie 10 alternative uses of toothpaste. If you were still in doubts about toothpaste should be stockpiled or not, here’s the answer to your question. As always, if you feel that I’ve missed anything, don’t be shy and hit the comment section. Would also love to hear about more how you people use toothpaste in the field.

Before you go, you may also like:

This is more than just about your guns…
How to survive any medical crisis situation with ease
10 Easy Steps to Secure your privacy
Secret Military Solution For Power Independence

DIY Unlimited water source
Why a food reserve is way better than the Federal Reserve
Lost Skills of our Ancestors that still work today

A thought crossed my mind – is there any other way of using toothpaste besides, well, brushing your teeth? I found not one, but ten.

Probably most of you have included some kind of wound cleaning substance in your first-aid kits. Sure, hydrogen peroxide’s the way to go for getting dirt and other stuff out of the wound, but it’s hardly the only antiseptic out there.

Anticipating that some of you can get a little freaky like me when it comes to having a complete medical kit, I’ve decided to use this opportunity to write about potassium permanganate – prince and pauper, at the same time, among antiseptics. What’s even more interesting is the fact that knowing what this stuff is will allow you to use for stuff other than cleaning wounds.

Before I start talking about the many uses of potassium permanganate, here’s a historical tidbit. During the latter years of the Korean War, the North was so desperate to gain a foothold that it began deploying unconventional weaponry. White phosphorus rounds were one of the weapons used against the South Korean soldiers and friendly American GIs. I won’t go into many details as to what kinds of wounds these devilish contraptions inflicted; suffice to say that it wasn’t a welcoming sight.

Anyway, the trouble with phosphorus rounds was they continued to burn inside the would long after leaving the gun’s barrel. Almost invisible to the naked eye, the Army surgeons had to improvise. And here’s where potassium permanganate comes into play – phosphorus reacts to potassium permanganate; quite violently I might add.

However, if used in small amounts the compound makes phosphorus light up like a Christmas tree. So, in order to operate, surgeons would dunk wounded patients in tubs filled with water, pour in some potassium permanganate, switch off the lights, and operate.

Outside of surgery, this compound can be used for tons of other stuff, most of them having to do with our favorite topic – getting out of SHTF situation. So, after probably boring you half to death with my little historical detour, here’s how potassium permanganate can serve you in a survival-type situation.

  1. Wound managed and various life-threatening scenarios

Let’s start by stating the obvious – potassium permanganate is a very effective antibacterial agent and just the thing you’ll need to keep infection at bay. However, the thing with this compound is knowing what forms works best depending on the nature of your emergency. For instance, in the case of wound management, the liquid solution would be the best approach. However, the powdered form can be successfully employed when having to deal with stuff like snake bites or poisoning.

By the way, if you or someone close to you has ingested poison, you can induce vomiting by using a 0.2 percent permanganate solution. Doctors would often order stomach washes using this compound. Conditions of the skins like irritations, sores or eczema may also be treated using potassium permanganate. Still, if you consider including this compound into your B.O.B or household emergency kit, I wouldn’t use it for more than wound washing.

  1. Getting rid of the dreaded morning breath

Although it’s far trickier to use than baking soda\salt with others, it may be possible to use potassium permanganate to 86 the dreaded morning breath. To prepare a mouthwash, dissolve one gram of powdery potassium permanganate in two gallons of water. This stuff will burn your esophagus and stomach, so be sure you spit it out. By the way, since potassium permanganate is known for its astringent effect (making the skin cells contract), you can use the mouthwash mix to get rid of stinky feet. Use this in conjunction with purified water and soap, and you won’t need another foot spray ever.

  1. Water filtration

If you’re all out of water filtration tablets or can’t lay your hands on charcoal, it may be possible to use powdered potassium permanganate to remove bacteria from the water. According to the FDA’s safety guidelines, the concentration should be around one unit of potassium permanganate to 10,000 units of water.

To figure out what this means, imagine you have a well with very dirty water. By applying the dilution ratio, it means that you will need to use around 7 grams of powdered potassium permanganate to purify one gallon of water. Do the math if you plan to sterilize smaller amounts of liquid.

  1. Fire-starter and probably self-defense weapon

Here’s my favorite way of using this stuff outside medical emergencies – to start a quick fire. For this, you will need around 10 grams of potassium permanganate and one-quarter of a teaspoon of glycerin (if you can’t find glycerin, use a water and sugar mixture). Place the permanganate on a small plate. For extra safety, you should do this experiment outside, as far away from flammable sources as possible. It would also be wise to put the plate on a hard surface like concrete slab or brick.

Now grab a pipette, draw a bit of glycerin and put a few drops in the middle of your permanganate mound. Stand back because the fumes are highly toxic. In a matter of seconds, you’ll see smoke rising from the mound, followed closely by purplish flame. When it’s safe to approach, grab yourself a handful of kindling and longs, move the place to your firepit (don’t forget those safety gloves) and, voila! You now have a cozy fire.

As for the weapon part, I guess you can create makeshift pipe bombs using potassium permanganate and phosphorus. I don’t know for sure if phosphorus is an over-the-counter compound or not, but in SHTF situation, you may be able to combine these two in order to make defensive weapons.

Be extremely careful when mixing potassium permanganate with other compounds. As you’ve seen from the above-mentioned experiment, permanganate doesn’t behave like an English gentleman when combined with stuff like glycerin. Always wear protective gear when working with volatile compounds.

Well, that above covers my take on using potassium permanganate outside the medical field. I hope you’ve enjoyed my article. As always, if you feel that I’ve missed anything, don’t be a stranger and leave a comment.

Outside of surgery, this compound can be used for tons of other stuff, most of them having to do with our favorite topic – getting out of SHTF situation.

Everyone simply adores it and, truth be told, a meal would never be the same without it. I was, of course, referring to salt or, as I like to call it the uncrowned king of spices (that’s because salt is not actually a spice nor a condiment, but a mineral). Anyway, no matter how bad the food tastes, a pinch of salt can make all the difference in the world.

Of course, without this wonder mineral, we wouldn’t have yummy stuff like beef jerky, jerk-style chicken or the wondrous pickled meat. Come to think of it; our own body would have a hard time coping with, well, like it didn’t have enough sodium chloride. Lest not forget about the marvelous sayings this mineral inspired such as “take everything with a pinch of salt” or “being the salt of the Earth.”

Entire books and stories could be written on the topic of salt and for a darn good reason. As for the subject at hand, yes, it is true that sodium chloride can be of help in many SHTF situations, and not just for curing meat or making pickled veggies. Because I’m such a big fan of salt and salty stuff (though my doc told me I should use less) I’ve decided to write this wonderful piece on survival uses of salt.

Little Black book 2

Call it my tribute to the spice that crowns every dish, regardless if it’s a stove-cooked meal or a fancy plateau whipped up by a chef with two Michelin-stars. Now, if you thought that salt’s only useful for brining, pickling or putting taste back into food, you’re dead wrong. After doing a bit of research, I can wholeheartedly say that I’ve stepped into a whole new salt-using dimension. Don’t believe me? Check it out for yourself. Here are 12 ways salt can save your sorry can a shit hits the fan situation.

  1. Gum-massaging early in the A.M.

Fact check – no matter how hard you try or what toothpaste use, you can never get that great shade of dentist white- that’s mostly because they use stuff like hydrogen peroxide and light-accelerated bleach. Great if you want to get rid of tobacco stains or plaque, but wouldn’t be recommended it in the long-run since all teeth whitening agents are notorious for weakening the enamel.

Anyway, a very quick, easy, and all-out natural way of getting in a couple of shades of white is by using salt in combination with baking soda and your favorite toothpaste. There are many to do this, the most straightforward one being garbling a mixture of water and equal parts baking soda and salt. If you want to make your own teeth-whitening substance, take a bell-glass and add one tablespoon of salt (aim for the fine grain variety) and one tablespoon of baking soda. Put a bit of water on your toothbrush and sprinkle some of this one top. Wash, rinse, and finish off with regular toothpaste. You’re welcome!

  1. Removing clingy stains

There’s nothing more frustrating than having to toss a T-shirt back into the washing machine just because that pesky stain didn’t come off. Leave the washing machine alone! Here’s the prepper’s way of removing any kind of smudge – while the stain’s still fresh, sprinkle some salt over it. Take a paper towel, dip it in water, and start rubbing. After a couple of seconds, you’ll see that the stain is gone. Works for all kind of smudges – ketchup, blood, dirt, mayo, blueberries. If you have chunky salt, you can try throwing one inside the washing machine for extra cleaning power.

  1. Putting out a fire

Sodium chlorine is held in very high regards not just for its food-rejuvenation properties, but also for being a great fire retardant. If you get yourself lost in some neck of the woods and need to put out a fire fast, forget about sand, dirt or water. Just toss a handful of salt, and everything will be over faster than you realize (I was talking about the camping fire, of course).

  1. Making the itch go away

Stung by poison ivy? Can’t resist scratching that mosquito bite? No problem. Just rub a bit of salt on the sore spot, rinse with a bit of water, and it all goes away. By the way, salt and water can also be used for throat soreness – just garble a bit of salted water two or three times a day and you’ll be on your feet before you know it.

  1. Removing fish scales

In an SHTF situation, fishing can become your only food source. Sure, mostly anyone can reel in a fish with the right tools, but removing the scales – now that’s an art. I managed to cut myself more than a few times while attempting to scale a fish. That’s until I’ve learned this nifty trick – fill a bowl with ice-cold water and add two tablespoons of regular salt. Put the fish inside and allow it to soak overnight. When it’s cooking time, take the fish out, give it a good rinse, and peel off the scales (yes, the scales peel off like snakeskin or something).

  1. Preventing candles from dripping

At some point, probably each of you had to wait out a blackout by the light of a candle. Have no problem with using them, especially in cases that call for this sort of approach (wink-wink), but no matter what I do, I can’t seem to stop that irritating hot wax from reaching my pants. So, if you’re a candle-yes, wax-no kind of a person, you may try soaking the candles in salted water. Leave them overnight, take out, rinse, allow to dry, and that’s basically it. You will have noticed that there’s no more dripping. Awesome!

  1. Patching up plaster or sheet-rock walls

Though it’s safer to call in a pro for this kind of job, you can patch them up yourself in the meantime using water, salt, and corn starch. Do keep in mind that this neat trick works only on plaster or sheet-rock walls (wouldn’t try it on carpentry or heavy masonry). Get yourself a bucket, add some water, and equal parts salt and corn starch. Mix until it becomes pasty. Use a trowel to spread the mix over the wax and cover with a thin layer of paint. Easy-peasy!

  1. Dealing with mosquitos and other pests

And because I’ve mentioned something about mosquito stings and itches, here’s a great way to keep them at bay. Get yourself one of those spray cans and pour inside a water and salt mix. Spray yourself with this mix and around your campsite. Works for ants too. On that note, if you want to keep ants outside your tent, draw a thin salt line around the sleeping area. Will keep out ants, bugs, and even mischievous ghosts.

  1. Open wound management

Yes, I know that the last thing you’ll want to do is to put salt on a wound, especially a nasty one, but this is exactly what you will need to do order to keep infection at bay. Put that salt shaker aside, because that’s not how this thing works. Let’s backtrack a bit. Your blood serum contains sodium chloride, which is used to maintain vital organs like the liver, heart, and kidney in working order.

Docs use so-called isotonic salt solutions (sodium chloride concentration equal to that of your blood serum) to flush out wounds and, if necessary, replace lost levels. And because bacteria abhor salt, a water and salt mix is very useful in the treatment of severe wounds. Here’s what you will need to do in order to flush out an open wound in the field: grab a plastic bottle and fill it with clean water. Add a teaspoon of rock salt and shake the bottle until the salt dissolves. Put on the cap and use your survival knife to make a small hole in the middle of the cap. When you’re done removing any debris from the wound, flush it with this saline mixture before applying sterile gauze, clean cloth or anything you have on hand.

Little Black Book

  1. Removing nasty smells from shoes

If you’re just like me (thanks mom for the awesome glands!) then you know just how difficult it is to remove nasty smells from your shoes. Tried every footcare products out there – all of them are worth zilch! Do you know what removes pungent smells from your favorite blue suede shoes, apart from not wearing them in the first place? Yup, you’ve guessed it – water and salt. Here’s what you need to do. Dissolve one tablespoon of salt in half a liter of water.

Fill up a spray can with this mix. Spray the inside of your shoes and allow the water to evaporate. You can do the same with new shoes. One other advantage of using salt in footcare – it severely cuts back on blistering. Just use the same solution to spray your soles before wearing those shoes. Might be a good idea to do is if you’re planning on breaking new shoes any time soon.

  1. Whacking driveway weeds

I really lost track of all the times I had to get down on my knees to pick up those f-ing weeds that seem to sprout out of every crack in the driveway. What’s even worse is that, if you wait too long before rooting them out, those things can make a hole in the driveway. So, to prevent those weed from growing, grab a little salt from the kitchen and put some in every crack you see. You should also consider mixing up some mortar to patch up those cracks.

  1. Extend milk’s shelf life

I know that the fridge is milk’s BFF, but even this cookie refrigeration contraption can’t keep milk fresh forever. Nothing can, by the way, but there’s a clever trick that can help you extend the milk’s life by at least a couple of days – putting some salt inside the container. Yes, I know it sounds strange, but salt does have this kick-ass property of preventing milk from getting sour. Just be sure you don’t use too much. Otherwise, you’ll probably end up with something that can hardly be called palatable.

So, that’s about it about using salt in a shit hits the fan situations. I’m aware of the fact that some of tips and tricks I’ve shown can hardly be associated with disasters, natural or otherwise, but hey you don’t need a nuke or EMP to be up your neck in crap. Anyway, hope you’ve enjoyed my article on how great salt is (I can never seem to stop praising it). As always, if you feel that something’s missing from the list, be sure to hit the comments section and let me know.

Before you go, you should check out these 7 most wanted goods this month:

Book of Income (Get an extra $6,840 per year out of your Social Security benefits) [Complementary Book Inside]
Cash for Patriots (Trump’s shocking new plan to help distribute cash to American Patriots)
Cancer Curing Vaccine (U.S. Government Document Admits We’ve Had It Since 1962)
Secret “$50 Marijuana Stock Blueprint” (Turn a single $50 bill into a massive fortune)

Little Black Book (46 Ways to Collect Consistent, Work-Free Income) 
Klebsi Plague (If you were born before 1961 you are at immediate risk)
Marijuana Millionaire Playbook (Now is the time to bet big on Marijuana) [Complementary Book Inside]

Call it my tribute to the spice that crowns every dish, regardless if it’s a stove-cooked meal or a fancy plateau whipped up by a chef with two Michelin-stars.

I have so much coffee in my system that each time I go to the doctor for tests, the nurse asks me if I have any blood left to give. Indeed, I could write novels about my lifelong relationship with coffee, but today I’m going stick to a topic which is more on the lines of prepping and SHTF – how to use coffee filters in a survival-type situation. Let me just grab a quick cup of Joe before I tell you about the most ingenious ways to repurpose those lovely paper filters. Yes, I know I shouldn’t drink that much coffee, but I can’t help myself. So, what were we talking about? Oh, yes – coffee filters.

Without further ado, here are 15 creative ways to make use of plain filters during a shit hits the fan situation.

To wipe your bum

You need to go number two but have no TP left in that fancy bug out bag of yours? No problem! Grab a handful of coffee filters and let nature take its course.

To dine like a hopeless ‘romantic.’

Each time I go hiking, I always forget to bring my portable eating set. Well, there’s nothing wrong in eating with your hands, but what about plates? Grab a coffee filter, cut it along the edge with a pair of scissors or survival knife, and voila, you have a disposable plate.

Keeping your glasses clean

There’s nothing worse than fogged or dirty glasses. Yes, I know that you know where all the things are and that you don’t need to clean those specs, but, hey, we live in a world of conventions. If you lost your cleaning rag or have nothing else on hand, just use a coffee filter to give them glasses a good wipe.

Making an ice-pack

If you need to apply ice to something, grab some from the freezer, place in a couple of coffee filters and tie around the neck using your cordage of choice.

Improv Band-Aid

No more Band-Aids in your first-aid kit? Grab a coffee filter from the kitchen or backpack and place it on the wound. Keep that pressure steady to stop the bleeding.

Improv funnel

If you have to transfer liquids from one bottle to another, take a coffee filter, and snip the tip. Place over the opening and pour the liquid.

Water filtration

Water filtration tables may be cheap, but those things are worth their weight in gold during a shit hits the fan situation. If you ever run out of purification tablets, stack a couple of coffee filters, and use them to sort of strain the water.

Remove persistent stain from clothes

A quick and headache-free way of removing nasty stain from clothes would be to apply some baking soda or hydrogen peroxide and to scrub clean with a small piece of the coffee filter.

Use them as food wrappers

In the wilderness, there is no corner store to buy food wrappers such as plastic or aluminum foil. If you haven’t got any of those in your bug out bag, put your food inside coffee filters and tie them using a piece of dental floss.

Improv feeding bowl for pet

The trouble with food bowls is that you have to search far and wide to find high-quality items. In my experience, ceramic bowls are the best – resilient, cheap, and the pet’s food won’t have a metallic taste to it as in the case of aluminum. In the meantime, you can use coffee filters to feed your pets. Just stack a couple of them, fill them with wet or dry food and keep hitting those pet shop for better feeding bowls.

No more poison ivy itching

If you tiptoe through the wrong vegetation, you may end up with some nasty poison ivy rashes. There’s no need to hit the drug store for this one. Run a hot bath. Meanwhile, get some coffee filters and stack them. Fill them with dry oatmeal and tie with string or dental floss. Toss this satchel in the bathtub and get in. After a couple of minutes, you won’t feel any kind of itches. You’re welcome!

Freshen up your linen closet

If there’s too much stink in the linen closet or wardrobe, you can make an air freshener using a couple of stacked coffee filters and some dried-up lavender flowers. Place the flowers inside, make a knot, and toss inside the closet\wardrobe. You can also make a similar satchel for your car or living room. If you cannot stand the smell of lavender, grab one of those potpourri mixes from the supermarket and replace.

Keep your toolbox neat and tidy

It usually takes me at least a couple of hours to fix stuff around the house. Well, most of this time is spent searching for the right screws or nails, which end up at the bottom of my toolbox. To keep that bag of tools organized, place smaller items like nails, screws, pins or bolts inside coffee filters. You can either use a small piece of dental floss to tie each satchel or some duct tape.

Keeping those nasty insects away from your food

Yes, I know this is the third time I’m complaining about insects on my food, but I just can’t help myself. If you’re having trouble keeping those nasty buggers away from your yum-yums, take a coffee filter, cut it along the edge, and use it to cover your food. By the way, in case you lose the wine cork, you can stick a couple of coffee filters inside the bottle.

Drying your hair and body

Towels are a must-have for every B.O.B, but sometimes they’re more useful for other stuff than drying your body. If you want to take a quick shower but have nothing to dry yourself with, use a couple of coffee filters.

That’s it for my article on ways to use coffee filters in an SHTF situation. What’s your take on this? Hit the comments section and let me know.

Before you go, you may also like:

This is more than just about your guns…
How to survive any medical crisis situation with ease
10 Easy Steps to Secure your privacy
Secret Military Solution For Power Independence

DIY Unlimited water source
Why a food reserve is way better than the Federal Reserve
Lost Skills of our Ancestors that still work today

So, what were we talking about? Oh, yes – coffee filters.Without further ado, here are 15 creative ways to make use of plain filters during a shit hits the fan

I would lie if I said that I don’t envy all those wonderful homesteaders who managed to put a couple of bucks outside for the root cellar. Yeah, those things are really great (if you have them, of course) and not to mention very useful during any kind of shit hits the fan situation – a hole in the ground, some stones, a couple of shelves, and you’ve got yourself a gigantic fridge capable of storing veggies, legumes, pickles, and whatnots.

Ingenious, that’s what it is! However, if your home doesn’t come with a root cellar, building one from scratch takes a lot of time, energy, and, yes, a shit-load of money.

Fortunately, there is a way to tap into Mom Nature’s icy powers without the need to fork over too much cash. Being a very determined guy, I have searched high and low for ways to recreate a root cellar without actually having to build one. Sounds crazy, right? Not in the least, as you’re about to see.

The idea to write this short and sweet piece came to me after watching a documentary on National Geographic about ancient food storage methods. Can’t remember the name of the show, but there were these two guys traveling around the world and interviewing homesteaders about how they make food last longer.

In the last part of the show, there was this man from China who was quite a bit of a local celebrity, thanks to his top-notch Kimchi. For those of you who don’t know, Kimchi is Asia’s version of pickled cabbage. However, instead of using canning jars, homesteaders would place the thinly-sliced cabbage inside a ceramic jar, which would later seal with wax before burying it in the Earth.

So, with this in mind, I snooped around the Internet and found a simple and cheap way of making a mini version of the root cellar using only an old metal barrel. Here’s how to whip up a backyard cellar in order to store your veggies.

Gathering the necessary materials

For this project, you’ll need the following:

  • A shovel.
  • A barrel (I would go with a galvanized metal barrel because they’re easier to clean and fare much better underground compared to the plastic ones).
  • Rocks (shape and size don’t matter).
  • Straw.
  • Several pieces of plywood to cover the lid.

Ready with the gear? Neat! Let’s get to work, then.

How to build a mini root cellar in the backyard

Step 1. Find a suitable place to dig a hole. I would advise you to place your barrel\future root cellar in a sunny spot. You should also make sure that there are no water pipes or electrical lines running nearby.

Step 2. Once you found a suitable location, grab your shovel and start digging. The hole will need to take the shape of the barrel. As for depth, it all depends on the size of the barrel. Just be sure that the rim stays on top, with the remaining underground.

Step 3. After you’ve finished digging the hole, remove any deep roots or pebbles from the bottom. Moreover, ensure that the end of your pit is dry.

Test the ground – if it feels moist to the touch, it means that there’s water underneath which is a big no-no. I know it’s annoying, but if this happens, you will need to find another location for your root cellar. Mark the spot in case you’re thinking about adding a well to your property.

Step 4. Fill the bottom with the rocks you’ve brought.

Step 5. Place the barrel on top of the rocks. Ensure that the body of your barrel remains below the freezing line while keeping the rim up top.

Step 6. Place some earth around the barrel to seal it in. Don’t put on the lid yet.

Step 7. Prepare the veggies or fruits for storage. If you’re not sure about the thingamajig’s cooling action, you can try it out on a couple of potatoes.

Step 8. Place a handful of straw on the bottom of the barrel.

Step 9. Place your veggies on the straw. You can add more vegetables if you like. Just remember to put some straw between your veggie layers.

Step 10. Put the lid on the barrel, put the plywood boards on top, and cover with dirt. Congrats! You’ve just made your first backyard root cellar.

Additional Consideration on Mini Root Cellars

Building’s the easy part, but knowing what and how to store – that’s a bit challenging. The first rule of the game is never to mix your veggies with fruits. If you plan on storing fruits, you should consider placing a second root cellar.

The reason why fruits and veggies should never be placed in the same barrel is because of ethylene, a plant hormone which induces ripening in fruits. The same substance that makes fruits yummy-yum-yum will cause your veggies to ripen and rot a lot faster.

A root cellar built in this fashion will allow you to store food at a decent temp (somewhere between 32- and 40-degrees Fahrenheit), with humidity at around 95 percent.

For this reason, you’ll be able to store even short-lived veggies such as cauliflower, brussels sprouts, celery, kale, endive or leaks. If the seal holds, you can look forward to a scrumptious carrot-based dish even after six months. As far as fruits are concerned, you should ensure that your root cellar has a bit of moister compared to the one used to store veggies.

After consuming every veggie or fruit from the barrel, I would recommend giving it a good wash with the power hose and use plenty of detergent. I can’s put my finger on it, but I believe that this kind of contraption can also be used the summer to keep your fruits and veggies cool.

In most cases, the mini root cellar can extend the shelf life of fruits and veggies by at least a couple of months, with one exception – kale. If you’re planning on storing some kale, keep in mind that you can’t keep it in for more than two weeks.

Think I’ve missed something? Have another way of building a root cellar in your backyard? Hit the comments section and let me know.

If you didn’t start digging, you may also want to check out this offer coming from our partners at Easy Cellar. As well as the many benefits of having one in your backyard.

A hole in the ground, some stones, a couple of shelves, and you’ve got yourself a gigantic fridge capable of storing veggies, legumes, pickles, and whatnots.

The pen may be mightier than the sword, but nothing beats the common pencil when it comes to shit hits the fan situations. Have you ever stopped to think for a second what would life be without that curious thing? Yes, I know that most of you have little need for pencils since there are computers and laptops and printers.

But what happens if there are no more PCs around? Do we stop writing? Nope. Anyway, I’m not here to wax philosophy. Today, I want to talk about some clever, dare I say witty ways to use pencils in a survival-type ballgame. So, without further ado, here’s what that the common pencil can do for you when your ass is on the line. Enjoy!

Fire-starter

This one’s a doozy – since pencils are made out of wood or, at least stuff that has the same properties as wood, it’s obvious that they can be used to start a fire in case of an emergency. I would advise salvaging the lead and use the pencil’s body. You can use that stuff to create a portable water filtration system. You can also add a couple of pencil splints to your tinder box – mine contains a piece of char cloth, a wad of steel wool, pencil splints, and a dash of sawdust.

Reveal hidden messages

Can’t really make out the writing on a surface? Use a pencil. Put a piece of paper on top and use the flat edge of your pencil to make a rubbing. FYI, that’s how I figured out that my son was doodling in school instead of taking actual notes.

Make those cloth moths skedaddle

Finding too many moths in your wardrobe? No problem. There’s a quick and cheap way to get rid of them. Use a pencil sharpener on at least three pencils. Grab a small satchel and place the shavings inside. Since most of them are made out of cedar wood, moths will not even dare to get close.

Getting a zipper unstuck

If you have zipper issues, use the gum on the other end of the pencil to get it, well unstuck. Just rub a bit of that stuff over the zipper’s teeth and give it a few tries. Works like a charm every time.

Magically open any lock or padlock

In a survival-type situation, there’s not much time for playing nice with a key that simply refuses to go inside the lock. You have two options: either use your 6-in-1 survival tool to break that lock or use a pencil. Here’s what you will need to do. Using your survival knife, shave a tiny amount of graphite over the keyhole. Now get that key inside and give it a twist.

Plugging holes

There’s nothing worse than spending minutes at an end trying to get a screw to fit inside a hole that’s just too big. A quick workaround would be to plug it using graphite shavings. You can also rip out a small piece of the gum and use in on the hole.

Replace cutlery

If you forgot to pack a fork, you could always replace it with two pencils. Yup, it’s just like eating Chinese food with chopsticks.

First-aid

If you need to improvise a small splint for a toe or a finger, use a small pencil or cut one to shape. I’ve heard that there’s a guy up in Nebraska that uses graphite on minor wounds. Don’t know if pencil leads have this kind of properties, but you’re welcome to try if you’ve got nothing else on hand.

Water filtration

Since I’ve already said something about using pencil lead to create a rudimentary water-filtration system, it’s only fair that I show you how to do it. Grab a plastic water bottle, sand, pebbles, two pieces of cloth, and as many pencils as you can find. Using your survival knife, get the graphite out of each pencil and ground it into a fine powder.

Now, cut the bottom part of the plastic bottle and add a thin layer of pebbles. Next, add some sand, followed by the graphite shaving, and a piece of cloth. To finish off your water filtration system, add one more layer of pebbles, sand, graphite shavings, a piece of cloth, and some pebbles. Make a small hole in the cap and hang the bottle from a branch. Get a canteen underneath and pour the dirty water in the upper part. That’s it!

Extend the life of rechargeable batteries

After a quick trip to the hardware store, I found it useful to add another gadget to my bug out bag: a portable battery charging station and a couple of rechargeable batteries. They’re very useful, especially if you have gadgets that eat through batteries like there’s no tomorrow. Anyway, if you want to extend the life of your rechargeable cells, rub the terminals with some pencil gum.

Get a pair of muddy boots squeaky clean

It doesn’t matter how thing shitty gets – clean clothes and boots are one of those small things that keep us going. If you’ve been traipsing through the mud, you can easily remove the dried-out mud from your boots using the tip of a pencil.

Keeping your fishing supplies and sewing kit organized

If you find it hard to keep your fishing hooks, safety pins, and needles organized, try using a pencil’s gum. You literally have to stick them in the gum, and that’s the end of the story. If you have a paracord grenade or other mini version of the B.O.B, you can use pencils to keep your cordage neat and organized.

Tweak your landline

In 9 out of 10 cases, the reception’s bad because there’s too much gunk on the phone cradle. To clean those metallic bits and improve reception, use the pencil’s gum. Are all done with the cleaning? Call someone to see if there’s any improvement.

That’s about it on creative ways to use a pencil in SHTF. Anything missing from the list? Let me know in the comments section.

The pen may be mightier than the sword, but nothing beats the common pencil when it comes to shit hits the fan situations.

I admit that I’m somewhat of a hoarder when it comes to food. No shame in this, only the fact that I’m on round-the-clock freezer and fridge cleaning duty. Yeah, I know it’s kind of a bummer to take a garbage bag and throw away that awfully good food just because you consider your family’s needs nor the fridge’s capacity (true story).

Anyway, after cleaning the fridge this morning, a thought stroke me: what if there’s some magical way of telling if the food’s safe to eat or not? Well, that would spare the trouble of having to clean the damned thing each week, not to mention the fact that I would probably save a lot of money.

As a prepper, you probably know by now that food past its prime is unsafe to eat, no matter how SHTF-ish the situation gets. This is the reason I’ve spent the rest of my day searching for a way to tell apart rotten from safe to eat food. Yes, I needed to ask Google for directions because I’m really bad at colors and, because of this damned cold, my sense of smell is close to nonexistence.

So, before you grab your garbage back to summer-clean your fridge, freezer or both, you may want to take a closer look at my kick-ass list on how to figure out if your food’s still good or packing a six-shooter.

  1. Soggy edges

Could never tell for sure how off my veggies were. I always assumed that as long as they don’t give off a funky smell, they’re good for eating. Dead wrong! Apparently, soggy edges, especially in green-leafed veggies like lettuce, kale, spinach, watercress or cabbage is, in fact, the first sign of spoilage.

Yes, I know that it’s a no-brainer, but as I discovered, people usually disregard this part, telling themselves that the veggie’s safe to eat if you cut around the soggy part. So, if you see any sogginess, brown patches or if the vegetable sort of deflates, it means that it has gone bad and, therefore must be thrown in the trash can.

  1. Discoloration

Of course, nothing spells “spoilage” better than an unnatural color. However, in some cases (red bell pepper) it’s hard to tell if that’s part of the vegetable’s life cycle or a tell-tale sign of spoilage. The best way to see how fresh your veggie is would be to make a small nick on the green part. Pull it aside. If it’s green on the inside, it means it’s safe to safe. On the other hand, if it has a brownish tint to it, do yourself a favor and throw it in the trash.

  1. Molding

While you’re cleaning your fridge and freeze, you may want to take a closer look at the bread and any other pastry you may be hoarding. See, no matter how well you keep your bread, there’s always that chance of mold growing on it. If you see any, throw it away as fast as you.

Heard a doozie some time ago that moldy bread may be safe to eat, at least for a couple of days, if you remove the moldy part and stick the loaf in the oven for 10 minutes. That’s a big no-no, and I would advise you to throw away the bread as well as the other stuff it came in contact with.

  1. Limpness

Veggies such as green beans have a limp-type of aspect after being kept in the fridge for too long. If you see any of that, it means that the legume is way past its prime, meaning that it has lost all nutritional value and could severely compromise your health if consumed. Yes, I know that most of you are in the habit of quick-freezing green beans and other stalky veggies.

Still, the freezer’s not always the best option for long-term food storage. Sure, it can extend the shelf-life by a couple of weeks or even months but, eventually, all of it will go bad. In case of veggies look for paleness and a thick layer of ice. As for meat, ice plus a violet tint equals garbage bag.

  1. Foul smell

The nose always knows! If you pick off any strange odor coming from your food, then it’s more than safe to assume that it really has gone bad. Meat will give off a rotten smell, while veggies will smell just like forest fungi. The same smell can emanate from eggs and eggplants. Keep in mind that eating rotten stuff can result in food poisoning or worse.

  1. To float or not to float?

In some cases, it’s quite difficult to figure out if they’re spoiled or not. Take eggs for instance. If there’s no expiration label on them, it’s nearly impossible to tell the difference between a fresh and an old one. Luckily there’s a test you can use to figure out if the eggs are safe to eat or not. Fill a bowl with cold water and place all your eggs inside. If they went under and lay flat on their sides, it means that they’re fresh. If not, then you should consider going to the store to buy a new carton.

  1. Discoloration in meat

There’s a bit of an argument on this one. While some say that meat discoloration is solely the result of poor packaging and exposure to air and, therefore safe to it, others argue that meat turned grey or brown should be tossed in the trash. Can’t say for sure which side is right, but my humble opinion, it’s not a good idea to begin experimenting on food. Best to throw away anything that has an unusual color.

That’s it for my short and sweet guide on how to tell if the food’s still edible or not. As always, if you feel that’s, I’ve missed something crucial, do hit the comments section and speak your mind.

Before you grab your garbage back to summer-clean your fridge, freezer, or both, you may want to take a closer look at my kick-ass list on how to figure out

In a mood for a sing-along? I got just the tune for you – the blackout golden oldie. Yes, it’s a catchy song, and goes along with great with the other great things in life like running of food, water, and brooding in the dark. The piece I did on the makeshift stove using cooking oil inspired me to do a little snooping around for quick and easy-to-do light sources.

Of course, nothing beats a flashlight or an emergency candle in case the power goes out, but what are you going to do when there’s no more juice in that lantern and the last piece of flick died out like the ambitions and desires of a crestfallen lover? Make some more, of course, because that’s we preppers are good at.

In today’s article, I’m going to show you a fast way to create 24-hour emergency candles by harnessing the raw power of your favorite dish – bacon. Yup, you’ve read that right. Bacon’s not only great for breakfast, but can also be used to make portable and highly efficient light sources. So, enough chit chat! Let’s take a look at how bacon candles are made.

Gathering your materials

To pull this off, you will need:

  • A pack of bacon (go for a family pack).
  • A bell glass jar.
  • A wick or a piece of string.
  • A pencil.
  • A cooking pan.
  • A funnel.
  • A strainer.

Ready with the ingredients? Great job! Here’s what you’ll need to do next. Tr

Making Bacon Emergency Candles

Step 1. Put half a tablespoon of cooking oil into your pan. Don’t put too much though because the bacon will leave enough grease.

Step 2. Fire up your stove and start cooking the bacon. Your goal is to melt each and every bacon piece. Don’t trouble yourself too much if a piece is too stubborn because you’re later going to strain the “brew.”

Step 3. When the last bacon piece has melted, kill the fire, and allow the mixture to cool down. Careful while handling that pan because you can get some nasty burns from hot grease.

Step 4. While waiting for the mix to cool down, prepare your candle. Now, depending on how much bacon you’ve used, it may take more than one jar. No problem there – the more, the merrier.

Step 5. Untighten the lid and store it for future use.

Step 6. Tie a knot around the pencil and rest it on the jar’s rim.

Step 7. Make sure that there’s enough of the string inside your jar. Be sure to place the wick right in the center. For reference, leave at least one inch from the rim of your jar.

Step 8. Check up on your grease. Don’t leave it to cool down completely because you won’t be able to pour it into the jar.

Step 9. Grab a container from the pantry and place the strainer on top.

Step 10. When you’re done, use the funnel to fill up the glass jar with the grease. Ensure that the pencil holding the wick remains in the middle.

Step 11.  After you pour the last drop of fat inside the jar, allow the container to put down completely. Stick it in the fridge and wait for the fat to harden.

Step 12. When the grease has hardened, take a pair of scissors and cut just below the know you made. Congratulations! You’ve successfully made your first bacon-powered emergency candle.

More on grease candles

The best thing about this candle-making recipe is that you can pull it off with just about any kind of grease. I prefer bacon because it’s ludicrously cheap and I usually have enough to go around the house. It’s possible to make these beauties using other fat from other animals. Duck meat, for instance, is a great source of fat. Didn’t try it myself but I don’t see any reason why you can’t use other types of fat.

As I’ve mentioned, during the cooking part, it may be possible to get stuck with undissolved bacon chunks. I wouldn’t advise you to continue cooking the mix as you will probably end up setting fire to the kitchen. Use the strainer to pick up the rogue chunks or a pair of thongs to remove the pieces directly from the pan.

Ideally, you should use special wicks. They’re not that expensive, and they do a far better job compared to other textiles. However, should you find yourself short on wicks, you can always replace them with thin pieces of strings or shoelaces (just be sure to snip off both ends before using them).

Word of caution of using shoelaces as wicks – some of them have a rugged coating on them. Great for weather-proofing, prevents warping, but not so great for burning. Stick with regular cotton shoelaces. Of course, you can always a piece of paracord or another kind of cordage.

Yes, I know that the idea of staying on a bacon-candlelit porch may be enticing, but I would advise you not to take them outdoors as there’s a fair chance of being overrun by bugs, especially mosquitos.

The pencil part is not mandatory. You can use anything to keep the wick aligned, like a toothpick or a small twig.

Yes, it is possible to make candles that last longer, but you will need more bacon and a bigger jar. Still, I don’t see the point of making bigger ones as the entire idea is to make something light enough for your B.O.B or backpack.

Be extra careful when handling the bacon pan. That stuff burns like Hell. You should also keep the fire on low or medium-high to prevent the hot grease from jumping off the pan. In case you get a grease burn, stick your hand in running cold water and keep it there for at least 15 minutes. You may need to apply a sterile bandage afterward.

That’s about it on homemade candles! Be sure to hit the comment section and let me know how your project went.

Of course, nothing beats a flashlight or an emergency candle in case the power goes out, but what are you going to do when there’s no more juice in that

As the saying goes, there are more ways to skin a <please insert name of an animal other than a cat, because Mr. Jynx is giving me the death stare while I’m writing this> and even more ways to use a pleasure rubber when the shit hits the fan. Yes, you’ve nailed it – today’s article will be about that one item that flushes out first-daters, being the embodiment of unbridled passion, lost nights, and broken hearts  – the condom.

With a history that spans at least one millennium, this STD prevention is, in some parts of the globe, standard equipment for infantry and other military branches. Did you know that during the Juno beach landing of 1944 US soldiers used natural rubber condoms to prevent sand and enter seeping into their weapons? Yes, it’s quite an ingenious trick which kind of proves to us that even an object wildly associated with bouncy-bouncy can have many uses, some of them even outside the bedroom.

Anyway, ever since writing that piece on survival uses of chapstick, I’ve been messing around the Internet searching for even more ‘odd’ objects that have a great SHTF potential. Of course, I could’ve gone with anything like bobby pins, household bleach, zip ties or whatever, but yours faithfully seemed to be more drawn to the wondrous world of bedroom games and ear-ripping onomatopoeia rather than shed-ware.

So, without further ado, here are 17 great ways of using pleasure rubbers in a shit hits the fan situation.

  1. Water carrier

Remember when we were kids, and we used to buy rubbers by the dozen only to use them as water balloons? Well, wouldn’t you know it, condoms can double up as water carriers in case of an emergency. And if you’re now wondering just how much water a condom can hold, let me clear that up for you – most of the ‘regular’ fit types can carry up to a gallon of water or even more.

If you’re looking to enhance your B.O.B with additional water-carrying items, you should consider throwing in a pack of ginormous condoms. Word of warning though – don’t rely too much on condoms when it comes to storing water. Making do with one on an emergency is okay, but in the long run, you may get off with a very bad taste in your mouth after drinking water (that would be the lubricant or the anesthetic, depending on the brand).

  1. Open wound management

Bandages may be hard to come by during an emergency (happens all that time). That’s why you need to be ready to improvise. Though odd, carrying a condom or two in the first-kit may be more beneficial than you realize.

If you run out of sterile gauze or pads, you can tape a condom over the cleaned and debrided wound. This acts as a water sealant and as a barrier for bugs, dirt, or anything in between. In case of light luxation, you may be able to use a condom as an icepack (just fill the thing with ice or ice-cold water and apply on the affected area).

  1. Food storage

Yikes! Condoms used as plastic bags for food storage! What has the world come to? Actually, it’s a far better idea to store food in such a container, since condoms do a great job at keeping moisture away.

More than that, because most respectable condom manufacturers add a trace amount of disinfectant inside the rubber, those bad boys can also whack germs away apart from keeping moisture away. Remember when we were kids and used to think that milk-filled rubber gloves are udders? Use your imagination on this one.

  1. Sterile gloves

Any wound management protocol dictates that any nick, cut or open wound should never be touched without sterile gloves. Sure, that’s true in a world with ample medical supplies, but may become something of luxury during an SHTF situation. If you run of gloves or, worse, you sterilize medical supplies have gone bad; you can pull a condom over your hand and use them as rubber gloves. Of course, it’s trickier to worth with stuff that has no fingers, but then again, who cares?

  1. Corking bottles

I’m the kind of person that always loses bottle caps. Yes, I know it’s frustrating, and in most cases, those darn caps disappear as if wished away by a trickster or something. Don’t panic! If you have a condom within reach, you can use it to cover the opening of a container.

I wouldn’t use on fizzy drink, because the surface is not good enough to prevent the gas from getting out. In case you were wondering, yes, I did, in fact, used an open condom to cover a milk bottle, which I later placed in the fridge. I imagine my wife was not too pleased to discover a pleasure rubber stuck in the bottle when she made breakfast.

  1. Fire-starter

There are always plenty of ways to start a fire, but it all depends on what kind of tinder or fuel you’re using. If you don’t have char cloth or whatever, you can always rip open a condom pack and use it as a fire-starter. Be careful about lighting it though – it’s going to get up in flames really fast so keep a safe distance to prevent breathing in those toxic fumes.


  1. Water-proofing gadgets

The rain in Spain may, indeed, stay mainly on the planes, but out here it tends to knock out everything that’s electronic in nature. I had to pay a whopping $1,000 for two new phones because of the rain- yes, I don’t always carry an umbrella or raincoat.

Anyway, if you’re caught in the rain and don’t have anything on hand to protect your smartphone or tablet, you can use a condom to create a water-repellent barrier around the device. Just make sure you tighten the other end of the condom. Might be a good idea to keep the case on, as many smartphones have jagged edges which can punch holes in the condom.

  1. Slingshot

If you’re out hunting for small game or just target practice, you may be able to use a condom to fashion a slingshot. All you have to do is to find a y-shaped piece of wood. Tie both ends of the condom, put some padding in the middle, and that’s basically it. Good huntin’!


  1. Tourniquet

Although the tourniquet should not be used outside the hospital or by people who have minimal medical training, some cases call for drastic measures. If you’re dealing with an arterial bleeder, you will need more than one pressure point to control the bleeding. Condoms are great for this job – since the outer surface is dry, you can be sure that the thing won’t slip when you’re tying it around a wound.


  1. Weather-proofing matches

Saw a movie once about two Canadian soldiers fighting in the mud-filled trenches of Passchendaele who were having a chat on crucial field-survival techniques. While the first one argued that keeping you gun dry or having a full canteen are the most important things to consider in a survival situation, the other said that keeping your matches dry is much more essential (having something to light a cig and soothe your nerves before the big push).

War aside, the weather-proofed match can take quite a beating, but in some situations (dropping the box in a river or stream), not even goodwill can make those matches come back to life. This is where the condom comes in – before setting out, place your matchbox inside a condom to add an extra water-proof layer. Of course, you can do the same for other fire-starting gadgets the tinderbox, lighter, and emergency candles.

  1. Flotation device

If you ever find yourself floating on the ocean or any body of water for that matter, you can always blow up a condom and use it as life preserver or vest. Keep in mind that condoms can usually hold one or two gallons of water, which means that they tend to displace the same volume of liquid.

  1. Trash bag


Whenever in doubt, use a condom. In case you don’t have anything on hand to dispose of trash, pop open a condom and use it as a garbage bag. Sure, it won’t look pretty, but at least it gets the job done.

  1. Opening jars

Have you ever heard about the expression “mom-sealed jars”? Those aren’t your regular sealed jars, but the doing of someone whose aim was for the jar to stay that way forever. Yes, my mom always had a fiendish delight in seeing me getting read in the face when I tried to open one of her canning jars. Fortunately, there’s a way to breaking the seal without using torch blowers, saws or hammers – wrapping a condom around the lid. That will give you more grip than usual.

  1. Footcare

I could never wear a new pair of shoes without ending up with tons of blisters on the soles. And, apparently, I’m not the only having this problem. Now, if you’re just like me when it comes to new shoes, I would advise placing a condom on each foot before trying them on. This will minimize friction, thus allowing your foot to get used to the new shoes. Try this one for size!


  1. Hand care during woodworking

Doing a little bit of carpentry in your spare time is great. Except for those damned splinters that somehow end up in your fingers. Fortunately, there’s a great workaround for that and, yes, it does not involve wearing padded gloves – wrapping condoms over the fingers holding the wood. I know it looks silly, but don’t judge it before you try it.

  1. Keeping away peeping Toms and animals

I shit you not when I say that those things can really leave a mark if you know how to throw them. Having a hunting cabin means I’m accustomed to dealing with the regular scavenger bear and other two-legged beasts. In case of bears, I like to fill a condom with water and to throw it as close to the critter as possible (don’t hit it though, because this will surely prompt an attack). You can always do the same for people hanging around your property or for pulling a prank on a family member.

  1. Defensive weapon

There’s nothing more manly than that feeling you get when holding or making a weapon. If you find yourself in a close encounter situation, you can always defend yourself using a condom filled with sand, dirt, rubble, small rock or anything you found nearby. Sure, it would awfully silly to smack someone over the yapper with pink condom stuffed with sand, but a man’s got to do what a man’s got to do to protect himself.

That’s it for my killer list of how to use a condom in a survival-type situation. Thought of any other uses for a condom in SHTF case? Let me know in the comments section.

Remember when we were kids, and we used to buy rubbers by the dozen only to use them as water balloons? Well, wouldn’t you know it, condoms can double up

There’s nothing more American than bacon, and don’t even try to deny that. We love it, cherish it, and with good reason since breakfast isn’t the same without those mouth-watering, fat-laden pork strips. I know that for the most part bacon’s a big dietary no-no, but what would life be if we couldn’t indulge on simple things like bacon?

Yup, you’ve guessed it – since he’s a big fan of bacon and, to that end, he has searched high and low for all kinds of wacky ways to make those juicy strips last longer. That’s the trouble with bacon I guess – you’ve got to cook it as fast as possible. Otherwise, you will end up with some bad to the bone meat (insert guitar riff here), along with a lot of crushed breakfast dreams and hopes.

Anyway, since yours truly hasn’t better things to do around the house than looking for ways to preserve food, in one of my scavenger hunts, I’ve stumbled upon a kick-ass bacon storage method. Of course, I couldn’t resist the urge of writing about it and sharing it with you wonderful people. What stroke me the most was the method’s simplicity.

Come to think of it; it’s almost elegant. What’s even better is that, according to the guy who recommended it, by following a couple of simple steps you can potentially increase the bacon’s shelf life by at least 15 years if not more.

As far as the ingredients are concerned, I’ve only tried it on a single batch of common supermarket bacon. Still, if you’re the kind of person that fancies pancetta or prosciutto over bacon, you could try canning those as well (as someone who a lot of cooks, I can tell you that there’s virtually no difference between the three types of meats, except for the fancy names).

Well, time’s a-wasting, and you’ve grown tired of hearing me talk about my buds and exploits. So, without further ado, here’s the well-kept, military-grade secret of storing bacon.

Ingredients and materials:

  • Bacon (as much as you can find).
  • Pressure canner (I use a traditional one).
  • Canning jar (be sure they’re sterilized).
  • Parchment paper (use the unbleached kind. I don’t have some nearby, use masking paper instead).

How to prepare

Step 1. Get your pressure cooker ready. If you opted for the no-power version, it would be a good idea to bring it to a boil before placing the canned bacon inside. As for the electric version, plug it in, pour water inside, and set the pressure between 10 and 15 PSI.

Step 2. Take the parchment roll and use a pair of scissors or sharp knife to cut a long piece (it should be at least 18 inches in length).

Step 3. Get your bacon out of the fridge and separate the slices.

Step 4. Arrange the bacon slices on the parchment. Don’t leave any gaps between them. You’ll see in a moment why this is essential.

Step 5. After arranging the bacon on the parchment, fold over both paper and bacon in half. By the way, someone suggested that you can make the bacon last longer in the fridge or even in a space without refrigeration by coating each piece with a very thin layer of maple syrup.

‘Twould be better to do this after placing the bacon on the parchment paper. Otherwise, the pieces will be a sticker and, therefore, harder to arrange on paper.

Step 6. Upon folding the paper into half, grab the other hand and start rolling it. Just like you do with the newspaper when the dog goes number two on your grandma’s Persian rug. Tuck in the excess paper at both ends to ensure that the parchments don’t unravel inside the jar.

Step 7. Put the Bacon Parchment of Absolute Truth and Might inside a CLEAN and STERILIZED canning jar. Regarding the latter part, there are various ways to do it. If you’re just as lazy as I am, fill a tub with hot water, pour liquid detergent, and dump your canning jars inside. Let them soak for about half a day.

Afterward, take them out and rinse out the excess detergent. Still, if you want to take the high road, you can always boil the living Hell out of those jars before using them for canning. The choice is entirely up to you.

Step 8. Put the lid on each jar and tighten them gently. You won’t need to apply too much force as your pressure canner will do all the heavy lifting.

Step 9. If the water inside your pressure canner has reached the boiling point, carefully place the cans inside. Put the lid on, set the pressure to 10 PSI, and let them simmer for approximately 90 minutes.

Step 10. When it’s over, kill the fire, pop the lid off the pressure cooker, and carefully remove each jar. Place them on a wooden support or something and allow them to cool down. Word of caution – don’t try to force-cool the jars. Heard my mother-in-law say that ‘cooked’ jars are liable to blow up in your face if you run them under cool water or submerge them in ice.

Your best choice would be to leave them be for the time being. Another thing I should mention is that the canned bacon will leave quite a lot of fat on the bottom of the jar. Don’t concern yourself with that part, ‘cause it’s normal.

That’s it! You now know how to can bacon, prepper-style. As I’ve mentioned, this method extends the bacon’s shelf life by at least 15 years. Perhaps even more. To store, either place the canning jars inside the fridge or stick them in the pantry you usually keep your emergency supplies.

Works both ways. To eat, pop the lid, unroll the bacon, cook, and enjoy. I personally like to eat plain canned bacon – it’s less smoky compared to the fresh variety, but has a gentle aroma that reminds me of meatloaf.

What’s your take on this awesome canning method? Let me know what you think in the comment section.

What’s even better is that, according to the guy who recommended it, by following a couple of simple steps you can potentially increase the bacon’s shelf life by at least

Yesterday evening I had a couple of friends over for a kick-ass movie night. Of course, you know how these things usually turned out – after the second movie, we’ve decided to take the party outside (yes, I know it’s still kind of nippy, but after a couple of cold ones, who cares?) Anyway, one of the movies we’ve watched was what you might call a prepping cult-classic: Kevin Reynolds’ Water World, starring Kevin Costner and Dennis Hopper. You can’t get more old-school than this.

Now, halfway through the movie, there was this brief scene depicting some shady and raggedy characters huddling around a fire made in this rusty fuel barrel. Not the most breath-taking scene from the movie but actually the only one that somehow got stuck in my head. So, after replaying this scene a couple of times in mind, something clicked in there – what would happen if we all had to find fuel barrels in order to keep warm?

Yes, I know it’s one hell of depression though, but anything can happen when shift hits the fan. Think you’ll still be able to use the water heater or your fancy, voice-activated smart AC? Obviously that everything goes down the brown swing when disaster hits. And you don’t need a nuke or EMP of the coming of the second Black Plague to witness first-hand what it means to get on your knees and beg for a heating source.

Anywho, you know what I’m talking about, so I won’t go into many details. So, after the movie night, I put on my mad scientist lab coat and decided to do a little home experiment. My goal was to come up with a heat source that was powerful enough to heat up a small room and, at the same time, help me prepare something very basic, like hot water.

Easier said than done. The first challenge was finding some fuel, but not gasoline or petroleum or gas. Those are the first things that disappear during an SHTF situation. So, I needed something that was easy enough to obtain, cheap, and, if possible, lying around the house. Although it took me a couple of hours to figure it out, even though the answer was staring me in the face, I ended up using cooking oil as food. Neat, but “how the Hell am I going to burn this?”, I asked myself.

So, after some deliberation, I hopped into my van and went into town for a couple of supplies. For this project, I bought two 4-ounce ball jars – you can find them in every thrift store – two wicks, and four bricks. Yes, I know it’s a weird shopping list, but then again, most of the stuff we preppers do can pass as peculiar to most people.

Now, for the first step of my project, I’ve tried to make emergency candles from cooking oil. It’s super easy, and they really put out quite a flame if you’re careful enough to screw the lid nice and tight. Here’s what you will need to do in order to complete the first phase of your alternative heating source project.

Making Quick Cooking Oil Candles

First thing’s first – choosing your poison. For my part, I stuck with sunflower oil since I have a near-endless supply in my pantry and I could always go and get more if I want. However, you’re free to use any kind of oil you like; heard that palm oil is a great alternative to sunflower and not just in matters of crafting heating devices. It’s ludicrously cheap and has, more or less, the same taste like the one made from sunflower seed. You can also reuse the oil from your deep fry machine or cast-iron pans.

So, after getting all the stuff together, here’s what you will need to do in order to make those candles\burners.

Step 1. Take an awl or anything pointy and puncture the lid. You don’t need a large hole. Should be enough for your wick to pass through.

Step 2. Get one end of the wick through the hole. If you can’t find any wicks, you can also use cotton shreds or any piece of cloth. Just don’t use textile that has been treated with fire retardant textile substances (winter jackets, pieces of carpet, and upholstery, in general).

Step 3. Put the other end of the wick inside the bell jar. Make sure that you have enough of the stuff, as the fire will eat through that stuff. If you’re thinking about upscaling your project, you may be able to make a sort of lamp out of a canning jar and a longer wick.

If I were you, I would pick one of those jars that come in with a handle – just be careful not to burn your paw while holding the thing. Moreover, about the moving part – it’s not a good idea to move the thing into another room. The chances of a house fire are very real and very scary.

Step 4. It’s now time to add the fuel. Carefully pour the cooking oil inside the jar. Don’t spill any on end sticking out of the lid. Otherwise you’ll have trouble setting fire to the wick.

Step 5. Secure the lid, and that’s it. Now, for the best results, I would advise you to leave you burners be for at least 24 hours. By that time, the wicks would have drawn enough fuel to allow you to light them up fast. If you’re using regular cotton or ripped fabric instead of wicks, you should allow them to soak a little longer. Moreover, I wouldn’t advise dipping the other end in oil to make the candlelight faster because you’ll end up with more smoke and less flame.

Already done with your emergency candles? Great! If everything’s hunky-dory, then you’re ready for phase two of your heating project. For this, you’ll go to need some bricks or two concrete slabs, a thin tray (I “borrowed” a cookie tray from my wife) and a pan. Here’s what you will need to do in order to create an awesome room-heating device.

Piecing together the heater

Step 1. Place the concrete slabs or brick on the ground, preferably in the center of your room with all the doors and windows closed. You may want to grab a thermometer for your experiment in order to take a reading before and after the heating device has been switched on.

Step 2. Lay the tray on your slabs or bricks.

Step 3. Place two homemade emergency candles\burners right beneath the center of your tray.

Step 4. Light up your candles. It will take a while for them to generate heat. I know I told you to keep the doors and windows closed to see just how much heat your thingamajig can generate, but you may want to keep the front door ajar, especially until the heaters go into stasis.

The thought never crossed my mind while performing the experiment, so I ended up fumigating the entire living room. Yes, I know that it will probably take me days to get rid of that smell, but hey, at least I managed to whip up a device capable of heating up a small room in case of an emergency.

Step 5. After half an hour or so, the flames are going to stabilize. Of course, your tray will take quite a bit, but you know the saying – it’s for the good of science. So, after you get a steady flame, you may try to see if the tray resting on top of the concrete slabs can boil water.

As far as the heating part is concerted, I managed to get a 10-degree rise with just two burners. It may be possible to convert the whole thing into an efficient house heating device, but that would require more makeshift heaters and, of course, a metal surface capable of deflecting heat far better than a tin tray. I was thinking about using four burners and thing steel sheet for my next experiment.

Remember that show Jackass which used to air on MTV? They had this message at the beginning of the show: “all the stunts have been performed by professionals. Don’t try this at home.” Well, that’s exactly the sort of advice that I want to give you – don’t try this indoors.

No matter how fire-proofed your test area is, there’s always a chance of something bad happening. If this is your first time, you would be better off doing it in an area without flammable substance. If you have a fire extinguisher at home, keep it close just in case – I really wouldn’t try to put out that kind of fire with water.

Anyway, keep a close watch on the top of the try. Once it turns black, it means that you’re all set to begin the third and final phase of the experiment – bringing water to a boil. I know that for the layman this may be a bit silly, but do keep in mind that in any SHTF situation, the whole idea is to get more while spending the minimum amount of energy and available resources.

So, after the thin tray starts to black, fill a pan with tap water. Place it in the middle of the tray and keep a close watch. Now, this is the point where the results differ. From what I understood after doing a bit of research, someone who attempted the experiment said that he managed to boil a gallon of water in 15 minutes.

Was a bit suspicious about that but, hey, that’s what experimenting’s for. Turned out that I was right all along. After waiting around for about 45 minutes, nothing was happening – no bubbles, no mist, no nothing. It was as though I’d placed the pan on the floor or any other cool spot.  So, after the frustration kicked in, I took the pot off the tray and placed on the stove.

I got to a boil really fast, and then I transferred the pot back to the improvised heater. Again, nothing happened. In fact, even though both burners were working, they weren’t strong enough to maintain a steady temperature.

As for the results of this little experiment, here’s what I managed to jot down in my notebook. In case you’re looking for a heater or AC alternative, this Bunsen burner wannabee is quite efficient. Even with two sunflower oil-based candles, you’ll still be able to get a 10-degrees ambient temp increase.

However, as for the part of using this device to boil water or to cook food, I wouldn’t bet my last dime on it. Of course, the design itself may be faulty, since most of the heat’s lost through the gaps created by the tray and concrete slabs, but then again, the whole purpose of this experiment was to create a quick and efficient heating device with fuel that can literally be found anywhere.

Anyway, instead of my usual wrap-up, I’m gonna end this article with a question for you: Do you think this device is able to fully substitute a water heater, AC or your run-of-the-mill oil barrel bonfire? Would love to read your answers in the comment section. Meanwhile, I’ll try my best to get rid of this awful smell before she gets home.

My goal was to come up with a heat source that was powerful enough to heat up a small room and, at the same time, help me prepare something very

‘Couple of days ago I was at home watching this movie about Cowboys and Indians. Great flick (Dances with wolves, it’s called), great actors – all in all, two hours well spent.

Why cowboys, Indians, and frontiersmen, you ask? Well, without getting into many details, the image of the tobacco-spitting, gun-slinging, man-of-fortune, which Hollywood was kind enough to sear into our retinae, it’s not quite what you would call representative.

In fact, life in the Wild West was not that wild – the village fool wasn’t made Marshall and trains weren’t robbed on a daily basis. Still, papa Hollywood did get one thing straight; life was pretty rough, meaning that the man had to do what a man had to do in order to pull through and to make a name for himself.

And then it struck me – cowboys weren’t those guys in goofy hats and chaffing pants, but the first preppers. The same thing could also be said about all those great and brave men who wore the shoes or rather the hat of David Crockett. Yes, those gun-toting maniacs were, indeed very knowledgeable when it came to surviving; you had no choice back then. One mistake, and it was curtains for you.

Anyway, in doing a bit of research on cowboys and frontiersmen, I stumbled upon something very curious – those guys were packing, and I’m not talking about guns here. Imagine that those goofy outfits had a reason for being that way; more pockets and satchels means more space to store things.

And, let me tell you – those guys really knew a thing or two about what I like to call carrying smart. So, history lesson aside, let me show you what I learned about packing from cowboys and frontiersmen. Without further ado, here are 7 objects 19th-century preppers carried in their pockets to survive.

  1. Knife

You thought I was going to start my list with the old six-iron, didn’t you?. So, about the knife – everybody was carrying one, regardless if he was Marshall, bank robber, saloon keeper or the town’s drunkard. Why? Because it was very useful for a lot of stuff like skinning game, splitting wood, cutting leather, and, of course, self-defense. Most 19th-century cowboy knives had a six-inch blade and were made from steel, not the stainless variety though.

Still, they were quite sturdy, mostly because all of them were made in a smithy and from cast steel. I even read somewhere that the WW1 bayonet design (the one with the groove running along the blade’s length) was mostly inspired by the bush knives carried by cowboys and frontiersmen alike.

One of the things I liked about these types of knives is the sheath – made from tanned skin and looks awfully cool. Tried making one for one of my SOG knives. I’ll tell you all about in another article.

2. Bedroll

Now, this is an interesting piece of history. For most people, bedrolls are just pieces of cloth filled with hay or something. But they’re actually more than that. In doing a bit of research into Wild West survival items, I found out that bedrolls were, in fact, multi-layered.

So, you had two outer layers, which were made from rubberized tarpaulin. These were the ones that prevented direct contact with the ground. And, when rolled up, they also prevented the inside layers from getting wet. But wait, there’s more. Apart from the exterior tarpaulin layers, the bedroll had three or four inner layers made from the quilt.  They were also called sougans. As I came to understand, all four inner layers added padding and extra insulation, especially during those cold, windy nights.

Yes, you can say that the bedroll, which was, by the way, carried on the back of the saddle or tied up to a rucksack, is, in fact, the ancestor of the sleeping bag. Possibly not as comfortable or easy to carry as nowadays bags, but hey, at least they didn’t have to sleep on the bare ground.

If you go thinking that this went out of fashion along with cowboys, you would be mistaken. Seeing that there are so many people out there ready to pay a fortune to live like a true 19th-century outdoorsman, some companies have actually rebooted the bedroll (check out Smith & Edwards Co. if you’re interested in going retro).

3. Canteen

Times may change, but canteens stay the same. There’s no denying in the fact that a canteen is one of the most important pieces of survival gear, regardless if your Crockett’s disciple or someone with an acquired taste for off-grid living.

I remember the stories my grandma used to tell me about how the French soldiers used canteens for virtually anything during WWI. There’s this one that always makes me chuckle. Apparently, during the battle of Somme, considered to one of the bloodiest in the history of modern warfare, one of those clunky Mark V tanks froze shut one night. Neither the engineers nor the crew could get the thing open.

And so, to prevent the guys inside from dying of thirst, some soldiers came up with the idea of getting water and wine through the tank’s main gun barrel. Long story short, they’ve raised the barrel high enough for them to pour water through it.

The soldiers at the other end just had to hold their canteens in front of the loading hole until they filled up. According to grandma, they kept doing this thing for a couple of days straight, until someone came up with the genius idea of blasting open the hatch with a hand grenade.

Anyway, long before WW1, canteens were in very high, mostly because they doubled up as booze holders. Interestingly enough, back then, the canteens were much bigger compared to the ones used today and made from tough materials such as steel or cast iron.

Apparently, most of them were able to hold a gallon of water or liquid. Ingenious and resourceful as they were, they even came up with a way of cooling down the water even in the scorching sun. Before blazing the trail, the Cowboys would soak a cloth, which they would wrap around the canteen. The evaporation process would prevent the water’s temp from going up. Neat, right?

4. Tinder Box

There’s something that will give just about any prepper a run for his money. Let’s get one thing straight, though – there were matches back then, but were so expensive that most outdoorsmen would often save them for trading.

However, they did have a nifty way to start a fire – the so-called tinder box. Basically, it was a weather-proof box which contained several dry pieces of wood or thin steel wool and a flint. To start a fire back then, you would have had to use your knife on the flint for sparks. Yes, I know – simple, stupid, yet very effective.

You can create a cowboy-style tinder box using char cloth and a little piece of flint. I made one at home using an old tin matchbox found in grandma’s chest of wonders. And, because I’m kind of a nutcase when it comes to B.O. Bs, I placed this one in my heavy-duty bug out bag, along with a magnesium rod, weather-proof matches, and a Zippo lighter.

5. Slickers

Yes, I know they look cool as shit, but that’s hardly the point. Back then, there were no water-repellant ponchos or raincoats. So, cowboys had to rely on the so-called slickers, which were basically, a long coat made from rubberized or tarred canvas.

Some models even came with hoods, but they were not that sought out since our outdoorsmen relied on them hats most of the time. Slickers were great at keeping the water as far away from the skin as possible, but they also doubled-up as winter clothing. And, of course, it was far easier to pack a lever-action under a slicker that on your back.

6. Bandannas

Also called wild rags or mascadas, the long pieces of cloth were useful for a lot of things, not just to conceal one’s face during a brazen heist. During the cold months of the winter, outdoorsmen would use their bandannas as scarves.

If the firefight got out of control, the brave desperado could use the bandana to spot the bleeding. Also, quite handy when it came to manual labor. For instance, farmhands would wrap their wild rags around the hands to prevent sores or even bleeding when working with the plow or pulling on ropes.

Since water filtration gadgets came long after the Wild West era, our frontiersmen had to improvise. The bandana, albeit ineffective, was sometimes used to remove chunks of dirt or rocks from puddles or other water sources. And because smelling like the insides of a dead horse would have gotten you thrown out even from the most decrepit watering hole, these bandanas would have been used as sponges or washcloths.

7. Coffee Pot

Of course, I can’t help myself from saying a thing or two about coffee and caffeine. Back in the days of the Old West, a cowboy’s most treasured possession besides his shooting iron was the coffee pot. You may laugh now, but back then a coffee pot was somewhat of a luxury. Being made from steel or cast iron meant that it was quite hard to carry in a backpack or something.

Chuckwagon drivers would usually carry one or two pots for trade or personal use. As for the lone ranger, a good morning wouldn’t have been complete with beans, bacon, cornbread, and a mug of coffee. Of course, carrying a coffee pot would be for naught if you’re missing the key ingredient which is, coffee.

Life in the Wild West was very basic, even by 19th century standards. People wanted to make a living and, at times, that was more dangerous and life-threatening than one could imagine – if the outlaws or warring Indian tribes didn’t get you, the disease would.

We do tend to have this romanticised idea of the dare devilish stranger who participates in high-noon gun duels, with a crooked smile on his face, and his teeth brighter than peals. It was never like that, and those of you who took the time to do a little bit of research about the Wild West came to realize that life, indeed, was pretty quiet.

Sure, there were bar fights and shootings at the OK Corral but those were what I like to call history’s little whims.

Hope you’ve enjoyed my article on cowboy survival gear. Don’t forget to hit the comment section and let me know what your thoughts are.

The image of the tobacco-spitting, gun-slinging, man-of-fortune, which Hollywood was kind enough to sear into our retinae, it’s not quite what you would call representative. This is.