If you look at old black-and-white photographs from the early 20th century, you’ll often see people wearing suits to baseball games and fishing trips. Have you ever wondered why that is? Why people living a hundred years ago would wear fine clothing for everyday activities?
One reason is that clothes are significantly cheaper nowadays, and the average person has more disposable income. For previous generations, that meant that they could only afford a few sets of clothing, so they needed to look very good and be built to last. But these days most people can afford to buy a large and diverse wardrobe consisting of cheap, casual clothes.
And as a result, we don’t really take very good care of our garments. You don’t have to when clothing is so cheap. Clothes rarely last as long as they’re capable of lasting, because we treat them like they’re cheap and disposable, which is often what they are. But if you don’t like to waste money buying new outfits every few months, there are a few things you can do to make your favorite clothes last for many years.
Don’t Over-Wash Denim
Most people treat jeans the same way they treat t-shirts, socks, and underwear. They think that jeans need to be washed after every use. That’s simply not true. Unless they’re visibly dirty, your jeans can be worn five to ten times in a row before they need to be washed. And washing, of course, causes a lot of wear and tear. So spare your jeans and keep them out of the wash until they really need it.
Avoid Dry Cleaning
Unless the tag on your clothes recommends dry cleaning, you should avoid it. The chemicals involved in dry cleaning can be pretty harsh on fabric, especially wool. Plus, the kinds of clothes that often need to be dry cleaned like suits, usually don’t need that treatment very often. Not unless you wear the same suit every day, and even then you probably don’t need to dry clean your suit every week. For most of us who rarely wear suits, they only need to be dry cleaned once a year.
Air Dry Your Clothes
Most of us don’t give much thought to the lint that we scoop out of the dryer after every load of laundry. But it’s important to remember that those wads of lint represent severe wear and tear on your clothes. Every time your garment goes through the dryer, its fibers are being stripped away. If possible, you should air-dry your fabrics on a clothesline.
Zip It Up
And it’s not just the dryer that wears out clothes. If you want to protect your clothes from the rigors of the washing machine, there are a few precautions you should take. First, consider turning your clothes inside out before washing them. This will protect the color and texture of the outside layer for longer. Second, zip up and button your clothes, which will keep buttons and zipper from snagging on other garments. And finally, don’t try to cram too many articles of clothing into a washing machine. That creates a lot of friction that will wear your clothes down faster.
Protect Your Buttons With Nail Polish
When shirt and jacket buttons begin to fray and fall off, you have two options. you can either replace the garment or sew the buttons back on. The latter of those options isn’t much better than the former. It’s often the case that a resewn button won’t stay as long as the original. The fabric underneath the button just isn’t as tight as it used to be. Fortunately there’s another way. You can apply nail polish to the threads, which will help keep them from fraying for a while.
Treat Your Leather Right
Jackets and boots made out of leather are often the most expensive clothes we wear, so it’s wise to take good care of them. That includes wiping them down with a damp cloth from time to time and applying waterproofing products at least once a year. If these clothes do get soaked, it’s best to let them air dry, and not store them in direct sunlight.
Other self-sufficiency and preparedness solutions recommended for you:
If you look at old black-and-white photographs from the early 20th century, you’ll often see people wearing suits to baseball games and fishing trips. Have you ever wondered why that
I recognize that there is a significant number of people in the world that do not tolerate wheat well, or at all. My father-in-law has celiac disease, and one of my sons cannot have any whole grains. However, even these individuals should consider storing wheat in some measure, and I’ll be discussing the reasons why at the end of this article. Of course, those that will benefit most from this article are those who can eat wheat.
Wheat is the staple grain of the North American diet. It’s what we grow here all across the Great Plains. It’s what we’re accustomed to eating. We have the recipes for breads and other baked goods. (You do have recipes, right? Hard copies, right?) Amaranth, quinoa, spelt and such are great, but most people don’t store or use them. They don’t know how to work with them. TEOTWAWKI won’t be the time to learn. And exotic grains are expensive. At least for now, wheat is very cheap.
Because wheat is what we grow here, it’s what will be available post-TEOTWAWKI, if anything is. Even if you can’t eat wheat, consider storing it for those who can, especially those in your family or those who may be coming to you. That way you have cheaper food for them and you can keep your costlier non-wheat preps for yourself.
Nothing smells better, or tastes better, than freshly baked bread. Really good food improves morale in a crisis. And unfortunately, bread is one of those items that cannot be stored. It has to be made fresh every week. Furthermore, most people can’t make bread. It is definitely one of those skills that takes practice and should be mastered while we can still feed the loaves that flop to the chickens without feeling wasteful.
Non-GMO Hard Red Spring Wheat
Wheat is nutritious.
Wheat combined with milk (in the same meal) will provide all the essential amino acids for building protein. Wheat is a primary source of B vitamins. Because B vitamins are water-soluble, they can’t be stored by the body. We need a constant supply of vitamin B to maintain good health. In addition, sprouted wheat berries (more on that later) are an excellent source of vitamin C and also provide some vitamins A and D.
While being able to bake bread is probably the main reason for most of us to store wheat, there is still plenty that can be done with wheat berries until you are able to obtain a grain grinder and while you learn to bake your bread. The whole grain can be boiled for cereal. Any leftover boiled berries can be mixed in with ground beef to extend it (meat loaf, meat balls, hamburger patties, etc.) without too much notice by the rest of the family. The whole berries can be used to make blender pancakes or blender waffles (full recipes and tutorials at storethisnotthat.com). The berries can be popped and eaten like popcorn.
But wait, there’s more!
Wheat Berry Salad with fresh tomatoes from the garden.
Wheat can be sprouted for even greater nutritional benefits. In a nutshell, wheat berries are soaked in cool water for about twelve hours. Drain the berries and rinse and drain again. Rinse the wheat well three to four times per day. (For the specific how-to’s of sprouting wheat, click here.) The two to three-day old sprouts can be added to soups or salads. At this point they are already much higher in calcium and vitamin C and several other minerals. Or let the sprouts continue to grow and green up a little for adding to sandwiches, like alfalfa sprouts. Or dehydrate the sprouted berries and grind them into flour for sourdough baking. Or toss them into soil for growing wheat grass for juicing.
Furthermore, wheat berries can also be used to grow fodder for our animals. Basically, the wheat berries are soaked and sprouted as described above, but instead of sprouting in a jar they are spread in a plastic tray with drainage holes. The rinsing is the same—three to four times per day, and the wheat berries are allowed to grow into wheat grass. The roots develop into a thick mat, and the grass and mat are fed as fodder to livestock about ten days from the initial soaking. So even people who can’t eat wheat benefit from storing it as the fodder is fed to chickens, rabbits, goats, and sheep who turn the fodder into eggs, meat, milk, and sometimes even fiber.
While it does take a little time and effort—but just a little—to grow fodder, bear in mind all the benefits. One pound of wheat berries becomes seven pounds of highly nutritious natural fodder. Wheat has a much, much longer shelf life than commercial feeds, it is much cheaper, and takes much less space. Fodder is a great way to provide greens in winter when grasses and weeds aren’t growing.
Wheat can be sprouted for even greater nutritional benefits. In a nutshell, wheat berries are soaked in cool water for about twelve hours. Drain the berries and rinse and drain again.
What is the best type of wheat to stock up on?
As you start researching the possibilities of adding wheat to your storage program, you find that there are actually a lot of different kinds of wheat. So now what? What kind to purchase? After all, you don’t want to make any mistakes here.
Durum wheat is what is used to make pasta, and soft white wheat is used for baked goods that do not use yeast—biscuits, cookies, cakes, etc. Soft white wheat also has less protein (gluten) than hard white. Most people do not store these two grains, at least not in significant quantities.
Hard white spring wheat sprouts best, but some research shows that it doesn’t store quite as well as the hard red and hard white winter wheat’s.
Hard red wheat has very slightly more protein than hard white. However, because hard white lacks the bitterness of hard red, less sweetener is needed in baked goods. For all of its advantages—milder taste, superior baking qualities, and ease of sprouting, hard white winter wheat is what we store.
And just how does wheat need to be stored? Regardless of the variety you choose, if stored properly wheat can remain viable and edible for hundreds of years. There are a variety of storage options, each with their pros and cons. Mylar bags are easy and very portable, but rats and mice can chew through them. Grain stored in #10 cans is pest-proof, but the cans are subject to rust, especially in humid areas. And storing enough wheat in cans gets a little pricey, at least for us. Some choose to store their wheat in large plastic or metal barrels. I just don’t like them because they aren’t very portable. Our family has moved (with our food storage!) eight times in the past 25 years. I can’t imagine what a nightmare moving large barrels would have been.
You can find free food-grade buckets at local stores around town.
Storing Wheat in your home or retreat
We choose to store our grains in plastic buckets that we get free from bakeries and donut shops. They’re free, they’re food grade, they’re portable. Yes, mice or rats could eventually chew through the buckets. Admittedly, we have had some seasons with an overabundance of mice and rats (isn’t even a single critter an overabundance?), but we’ve never had any critter chew on the buckets. The cons are that the five-gallon buckets can be difficult for some people to carry. And those lids can be nearly impossible to remove. Make sure you have a few bucket wrenches for them. They’re a lifesaver.
Store your wheat in a cool, dry place—50-60 degrees is ideal. Wheat that has been stored at higher temperatures for even a short time will not sprout as well or at all and will not make good yeast bread. It will also have lost some nutritional value.
Exactly how much wheat should you store? Well, that’s going to vary from one person to the next. The LDS Church advises 400 pounds of grains per person per year as part of their food storage recommendations for a 2200 calorie per day diet. That’s what I use for my family, with about 300 pounds of wheat per person. However, in addition to that we also store 50 pounds per chicken or rabbit to grow into fodder. When it comes to wheat, I think the day will come when it will be worth its weight in gold. With all its uses, the ease of storing it, and its low-cost, you just can’t ever have too much.
Other self-sufficiency and preparedness solutions recommended for you:
Why does everyone talk about storing wheat?I recognize that there is a significant number of people in the world that do not tolerate wheat well, or at all. My father-in-law
Those of us who are part of the prepping and survival community tend to look down our noses at the government’s emergency response agency, FEMA. Granted, there’s plenty of reason for this, as FEMA doesn’t exactly have an exemplary record for the quick response and cutting through government red tape. In fact, they seem to carry the red tape with them wherever they go. But one thing we forget is that we owe our own movement, at least in part, to FEMA. While there are some of us who have been living the survival and preparedness lifestyle for years, most have not. It really wasn’t until FEMA developed the ready.gov website and started promoting the idea of being prepared for a disaster that the idea began to get a widespread promotion. They’re also the ones who made the idea of a bug-out bag popular, as attested to by the fact that most people talk about having a three-day supply in your bug-out bag, an idea that originated in the offices of FEMA.
So, while they aren’t perfect, FEMA has been a help to us. They still are, as they are one of the most widely recognized sources of information about disaster preparedness and strategies for survival. While you can quickly go through all their information and want more, they do provide a good starting point for people just getting into the prepping movement.
One of the things that the ready.gov website has is a list of basic disaster supplies that we should all be sure to have. Some of those are even things that those of us in the prepping movement don’t regularly talk about. So it’s a good idea to review what they are saying and the way they are saying it.
On their Basic Disaster Supplies Kit list:
Battery-powered or hand crank radio and an NOAA Weather Radio with tone alert – The most common disasters to strike the United States are weather-related ones, especially hurricanes, tornadoes, and snowstorms. Good information is critical to surviving these, as well as knowing when it is safe to come out of a bunker or other shelter. The advantage of the hand crank type is that you never have to worry about having dead batteries.
Whistle – There are countless situations where you could end up awaiting rescue, from an earthquake destroying your home to getting lost in the woods. Three blasts on a whistle is a universal call for help, which can be heard much farther than your voice. Not only that, it’s a whole lot easier on your throat and energy level than yelling all the time.
Dust mask – Whether you’re talking about dust storms or pandemics, a good dust mask will help protect you and your lungs. Spraying that dust mask with a small amount of disinfectant will go a long way toward protecting you from airborne pathogens. Just be careful not to spray too much.
Plastic sheeting & duct tape – As with the dust mask, this will help protect you if you have to shelter in place from an epidemic or even a chemical spill. While it is difficult and even unrealistic to create a totally sealed environment, the more you can seal off, especially around doors and windows, the better. These simple materials can save your life in such a situation.
Manual can opener – We all stockpile food, but do we stockpile can openers? More specifically, do you have a good quality can opener in your stockpile? I’ve gone through many a cheap can opener through the years, proving to me that the money for a top-quality one is money well spent. In a long-term survival situation, I would get awful tired of using the P-38 on my key ring.
Local maps – We tend to keep maps in our bug-out bags, but what about sheltering in place? A good topographical map will show you lots of useful information, such as where to find water and where to go to find high ground to escape flooding.
On their Additional Emergency Supplies list:
Prescription medicines – If anyone in your family needs prescription medications, especially maintenance doses for a chronic condition, you’ve got to have these medicines on hand. They may not be available in an emergency situation.
Glasses and contact lens solution – For those of us who need some help to see, this is essential. A spare pair of glasses is a good idea, as they can easily get lost or broken.
Pet food – Don’t forget your four-footed friends, or you’ll end up feeding them food that you need for yourself. Pets can be a great comfort in the midst of a crisis, especially for children.
Cash – Few of us bother keeping much cash on hand, even those who prepare. We’re more likely to keep silver around for bartering. But cash is important too. Even in the worst of TEOTWAWKI events, cash will be useful for some time, until people realize that it is worthless.
Important family documents – If you are forced to bug out, having documents to prove home and car ownership, as well as insurance policies and bank account information, may be essential for recovering financially and getting your life back on track. Medical and school records are important as well. It is best to save these electronically for ease of carrying, but hard copies are better in the case of an EMP.
Sturdy shoes – The shoes that most of us wear on a day-to-day basis are impractical for walking long distances. If you are forced to bug out on foot and have to walk 100 miles to get to shelter, you’re going to want some sturdy but comfortable hiking or work boots.
Fire extinguisher – Probably one of the most basic pieces of emergency equipment, but one that you never see talked about in the prepping community. Get a commercial one, as it will be larger and rechargeable.
Feminine supplies & personal hygiene items – It will be bad enough having to bug out and live in a survival shelter, without forgetting the most basic items to keep yourself clean. This is important for maintaining your health, as well, as the infection spreads much more easily in a dirty environment.
Paper plates, cups, towels, and plastic utensils – We use these all the time but don’t think of them as survival supplies. But if water is limited, having something that you can use and throw away saves that limited water for more important things than just washing dishes.
Paper and pencil – Something else that should be considered a basic survival item, but is often overlooked. I have a basic rule, “If it isn’t written down, it doesn’t exist.” That’s because I don’t trust my memory to remember things like names, dates, addresses, and phone numbers. Better to write it down, especially if it is something critical to your survival.
One Final Note:
The same page on FEMA’s ready.gov website which lists their recommended emergency kit items, also mentions where you should keep your kit or kits. According to them, that is home, work, and your vehicle. That pretty much covers it. Basically what they are saying is to always make sure you have an emergency kit available to you, no matter where you are.
This will require having multiple kits. Ideally, you want one in each of your vehicles, one in each family member’s workplace (although vehicle ones can double for this, assuming you can get to your vehicle), and one at home. Don’t depend on just one kit for everything. Not only do different situations present you with different needs, but your family will probably be scattered in different locations. Each family member must have emergency supplies available to them, in case they have to shelter where they are.
The hardest family members to do this for, are the children. If your child has a locker at school, you can prepare a kit to keep there. But if not, they’ll be limited to their backpack (unless they drive to school). That means you’re going to have to think carefully about what you have them carry, as you don’t want to burden them unnecessarily. Besides, doing so merely guarantees that they’ll take the kit out of their backpack and leave it at home.
Finally, make sure that each kit is appropriate to the number of people it must serve. Your home kit will obviously need to be the largest. One kept in your office merely needs to take care of one person, like the ones in your kids’ lockers. Car kits will depend on who uses that car and what they use it for. A car that is only used by one or two people won’t need as big a kit as the primary family car will.
Those of us who are part of the prepping and survival community tend to look down our noses at the government’s emergency response agency, FEMA. Granted, there’s plenty of reason
Land and water temperatures cause drought. As overall temperatures increase more water evaporates and severe weather conditions increase. … Soil moisture levels also contribute to drought. When soil moisture is depleted there is less evaporation of water to create clouds.
As a result, the climatological community has defined four types of drought:
Meteorological drought
Hydrological drought
Agricultural drought
Socioeconomic drought.
Meteorological drought happens when dry weather patterns dominate an area.
Drought is a continuous period of dry weather, when an area gets less than its normal amount of rain, over months or even years. Crops and other plants need water to grow, and animals need it to live. … A drought is a natural event, caused by other weather events like El Niño and high-pressure systems.
During our boiling, broiling, blistering summer of 2012, water was a topic of conversation wherever we went. Creeks and ponds dried up (some never recovered) and the water table dropped, forcing a few neighbors to have their well pumps lowered or to even have deeper wells drilled.Many folks shared memories of rain barrels, cisterns, hand pumps and drawing water with a well bucket as a child, usually on grandpa and grandma’s farm. Some said they’d never want to rely again on those old-time methods of getting water. But, at least they knew how it was done.
It seems we have lost much practical knowledge in the last 50 or so years because we thought we’d never need it again. Now we are scrambling to relearn those simple know-hows.
A tattered, 4-inch thick, 1909 book I happily secured for $8 in a thrift store reveals, among umpteen-thousand other every-day skills, how to make homemade water filters. The instructions in “Household Discoveries and Mrs. Curtis’s Cookbook” are quite basic as everyone had a rain barrel back then and presumably knew how to filter rainwater. Now, 104 years later, I am thankful the authors had the foresight to preserve their knowledge for us, and pointed out that rainwater collected in barrels from a roof is a necessity in some locations, but also is best for laundry and “often more wholesome for drinking purposes than hard water.”
The “wholesome” observation applies to plants, too. I noticed during our 6-week dry spell (not a drop of rain) that I was only able to keep my vegetables alive with the garden hose – until our well, too, began sucking air. The pitiful potato, tomato and bean plants actually seemed petrified, like faded plastic decorations. Then, after a 2-hour rain shower, the plants miraculously leapt to life – vibrant, green and THRIVING. I did, too.
100-year-old instructions
For gardening, rainwater is, naturally, best unfiltered. But, for household use, the vintage book says the following instructions yield a cheap and easy way to make a filter just as good as a patent filter costing 10 times as much:
Take a new vinegar barrel or an oak tub that has never been used, either a full cask or half size.
Stand it on end raised on brick or stone from the ground.
Insert a faucet near the bottom.
Make a tight false bottom 3 or 4 inches from the bottom of the cask.
Perforate this with small gimlet holes, and cover it with a piece of clean white canvas.
Place on this false bottom a layer of clean pebbles 3 or 4 inches in thickness;
Next, a layer of clean washed sand and gravel
Then coarsely granulated charcoal about the size of small peas. Charcoal made from hard maple is the best.
After putting in a half bushel or so, pound it down firmly.
Then put in more until the tub is filled within 1 foot of the top.
Add a 3-inch layer of pebbles; and throw over the top a piece of canvas as a strainer.
This canvas strainer can be removed and washed occasionally and the cask can be dumped out, pebbles cleansed and charcoal renewed every spring and fall, or once a year may be sufficient.
“This filter may be set in the cellar and used only for drinking water. Or it may be used in time of drought for filtering stagnant water, which would otherwise be unpalatable, for the use of stock. This also makes a good cider filter for the purpose of making vinegar. The cider should first be passed through cheese cloth to remove all coarser particles.
“Or a small cheap filter may be made from a flower pot. A fine sponge may be inserted in the hole and the pot filled about as directed for the above filter. It may be placed in the top of a jar, which will receive the filtered water.”
On a different note, here’s some other self-sufficiency and preparedness solutions recommended for you:
The Lost Ways (The vital self-sufficiency lessons our great grand-fathers left us) Survival MD (Knowledge to survive any medical crisis situation) Backyard Liberty (Liberal’s hidden agenda: more than just your guns…) Alive After the Fall (Build yourself the only unlimited water source you’ll ever need) The Lost ways II (4 Important Forgotten Skills used by our Ancestors that can help you in any crisis) The Patriot Privacy Kit (Secure your privacy in just 10 simple steps)
The oceans contain 97% of all the earth’s water, so if you and your family are searching for a healthy supply, don’t worry about moving your homestead to the coast.
It takes loads of energy to desalinate seawater (and resources, on a large scale), so it’s impractical even in regionally water-stressed areas. Of what is left, 2.5% of the earth’s water is not available, which means that it is too cold, too frozen, or too dirty. Which leaves just 0.5% of the planet’s available fresh water for individuals and land-dwelling species.
No wonder our utility bills are so big, then. The average person also uses 3,000 gallons of it a month without barely thinking of such a restricted resource. This is flushing money down the toilet, literally. If there is an emergency and the entire town loads up on bottled water, what’s even crazier is, like that’s going to do a lot of anything. In an emergency, there is only one way to minimize utility costs AND provide enough water on hand, and that is by being independent of water, not relying on public works.
When you’re responsible for your own water supply, you’re also more conserving with it, too. The good news is that your property has plenty of untapped freshwater supplies, and the right conservation and ingenuity scheme will help you become more independent and prepared for tough times.
Each of these networks of off-grid water is better when combined. You are more at risk of not getting enough water on hand, relying on one alone, but using two, three, or more will ensure there is plenty for you and your homestead.
The Most Simple One
Probably, some positive things do fall from the sky. It is possible to set up rain barrels somewhere under the heavens and provide a large supply of clean water with one torrential downpour.
A 50-gallon plastic trash can with a lid, some landscape cloth, a 3⁄4″ garden spigot, a double threaded bulkhead with an inner thread size of 3⁄4″, some Gorilla Tape and Teflon tape, a pen to draw a hole, and a razor blade to cut it out, are an easy way to make one in five minutes.
The spigot is going to go near the bottom of the trash can, so trace and cut out a hole around the bulkhead there. The bulkhead is inserted and the nut is screwed backward. Next, loop the Teflon tape around the thread on the spigot a couple of times, then screw the spigot into the bulkhead until it is secure and facing down. Cut a large hole out of the lid of the trash can.
With Gorilla Tape and the cover with a hole put back on top of this, the landscape fabric will be pulled tightly over the top of the can and sealed. That way, the rainwater, which should filter through the fabric and into the barrel, would not be polluted by debris and mosquitoes.
The Second System
To pump it to the surface, hand pumps involve drilling down into an aquifer and using manual labor.
Electric pumps can be used, but you would wish you had the more strenuous alternative if it went out during an emergency.
In the U.S., there are existing companies that will build and drill for you, but at least expect to pay a few thousand dollars.
Another Idea For Your Property
Instead, building a permaculture swale is a perfect way to avoid rainwater from escaping downhill as runoff and soaking into a garden’s soil.
This will take planning and observation of water flow and drainage on the ground you build upon but can make a planting area more efficient and less maintenance.
When it rains, you need to watch how the water flows, then dig a trench uniformly along those contour lines to slow down and hold the water, generally 6 inches to 1.5 feet deep, and 18 inches to two feet wide. On the downhill side of the trench, the soil removed would be constructed as a berm.
The trench is then planted in desert environments, and the berm is usually in non-desert climates. Instead, the water pooled and slowed from draining off would flow into the immediate soil, making it better over time as organic matter rises.
A Water System For Huge Supplies
A cistern will give you peace of mind knowing that on standby, you have a large supply of water.
These can range from materials made of stone or metal and depending on what you and your property can accommodate, can hold 10,000 gallons or more or less.
When complete, however, and where it’s constructed, their potential weight is something to be mindful of. If the ground isn’t solid enough, it will sink. Also, if it freezes where you live, it could also be stopped from doing so by burying it in the snow.
Related: What Is The Best Way To Store Water For SHTF?
An Underground System
A natural or man-made pond can contain plenty of water, and organisms to prevent stagnation or possibly be eaten, too.
Of course, the water would have to be thoroughly washed before being used for drinking or cooking, but if necessary, it’s still a viable choice.
A bonus food supply is supplied by stocking it with fish. If it freezes, a pond dug from 8-12 feet will allow them to survive. Before you dig, a lot of care should be taken, but filling the pond with a tarp and some geotextile material will decrease seepage after it’s completed.
Another Idea For Your Backyard
A well would be a reasonably safe and clean water source on your property. Usually, they are anywhere from 20 to 300 feet deep, which means being protected in the winter from freezing.
If your property doesn’t already have a well, however, digging and implementing one would cost at least a few thousand dollars. But the saved money is going to outweigh the cost.
Aqueducts
In all those National Geographic documentaries, I’m sure you’ve seen the Romans harness the force of gravity by aqueducts. This will be easier to build if you have some elevation changes on your farm, and gravity is a good way to add water pressure around the homestead.
Most modern showers use about 80-100 psi, but a simpler water system using gravity can be very accommodating if you can be comfortable scaling down to around 20 psi.
A Natural Water Source
If you’re fortunate enough to have a spring on your property bubbling out of the rocks, then you might already have a natural source of clean, delicious water.
The hard part is constructing the infrastructure around the homestead to harness it, however, it is possible with the assistance of gravity.
Related: The Easiest And Cheapest Way To Filter Water With Shungite
“Cascade” or Water Flow
This is more of a procedural device than a mechanical one. But with it, you are going to conserve and optimize water. Generally, there are 3 kinds of water: white, green, and black. To do laundry, wash dishes, or even water gardens and livestock, you do not need water that’s suitable for human consumption. You can “cascade” water from one level to the next using a proper water flow.
The same water can be used to clean the dishes if you boil water for food. To flush the toilet, the water you used to wash your hands will then be used. When you begin to become more conscious of where your water comes from and more involved in achieving it, you can get more ideas about how to conserve and use it to its full potential.
The Last Off-Grid System
A water filter will help out a lot.
You can buy a common but costly, heavy-duty one from Berkey, or you can make one called a Biosand Filter from materials on your property.
To download a free manual on building it, check out a website from a Canadian charitable organization named CAWST, but the gist of it requires a barrel full of sand and gravel and a top layer of micro-organisms that all kill dangerous pathogens through a process of predation, trapping absorption, and natural death.
There are several more potential structures, and for every homestead, some of these may not be possible. A smart way to get some ideas is to explore what other individuals have achieved on assets close to yours. In the event of anything occurring, it is important not to have just one device, but as many as possible. Water can be contaminated, can run out, or become poisoned. If SHTF, the first step to surviving and thriving would be to have a healthy supply of good water.
Other Self-sufficiency and Preparedness solutions recommended for you:
The Lost Ways (The vital self-sufficiency lessons our great grand-fathers left us) Survival MD (Knowledge to survive any medical crisis situation) Backyard Liberty (Liberal’s hidden agenda: more than just your guns…) Alive After the Fall (Build yourself the only unlimited water source you’ll ever need) The Lost ways II (4 Important Forgotten Skills used by our Ancestors that can help you in any crisis) The Patriot Privacy Kit (Secure your privacy in just 10 simple steps)
The oceans contain 97% of all the earth’s water, so if you and your family are searching for a healthy supply, don’t worry about moving your homestead to the coast.It
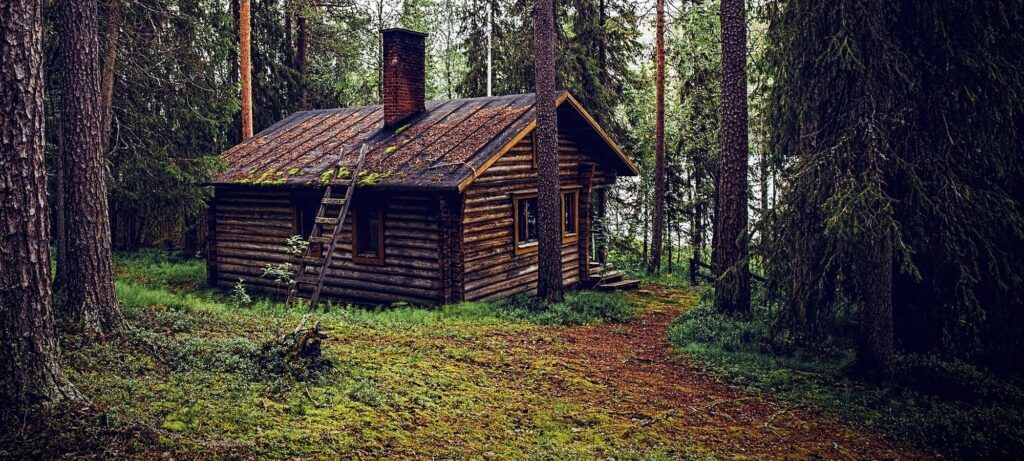
The idea of bugging out is popular, and mostly for good reason, among survivors. If you are ever forced by the authorities to leave your home or area or if death is inevitable if you stay, then bugging out is really your only valid option.
Bugging out may not always be always the best option, of course. With bugging out, there are a lot of dangers, with the most noticeable ones being that you are leaving the area and abandoning your property and stockpile while also rendering yourself highly vulnerable to criminals on the open road.
Therefore, you’re going to need a good bug-out place to mitigate the amount of risk you’re taking, which will keep you mostly safe at least.
In other words, you need to have a plan in place if you are forced to leave your house, and that plan needs to consist of where you’re going to go and how you’re going to get there. There needs to be a lot of thought put into your bug-out area. It is not just some random place that will work.
There are specific variables that need to be taken into consideration and specific features and luxuries that your location would also need to provide, and that’s what we’re going to talk about today.
When searching for a new bug-out location, here are the top things to look for:
It Must Be Within A Reasonable Distance
Your bug-out location can’t be on the other side of the country. It must be within a fair driving distance, instead. The idea is that the location of your bug out would be out of the immediate vicinity of danger (so outside your town or city) but still close enough to access it by car or even on foot if you are forced to.
A hundred miles may not sound like much, but driving that example with heavy traffic will take a long time in the middle of a disaster, and it will take a long time on foot, particularly. Your bug-out position must therefore be somewhere that you can hopefully drive to within a few hours via vehicle.
It Must Be Accessible
Your bug-out location must not only be a safe driving distance from your house, but it must also be available, and that means being accessible by car.
That’s a concern if the dirt roads get so bad that you’re forced to embark on the rest of your journey on foot. For starters, what if you have a lot of stuff stored in your vehicle? Are you just going to give it all up, or are you able to go on multiple trips?
You’d most likely answer no if you’re like most people. That is why, just as it needs to be within a safe distance from your house, your bug-out position needs to be accessible by a car, but also …
It Must Be Hidden
Yes, at the same time, your bug-out position needs to be both accessible and hidden. Too much to ask, is that? Not at least at all. What you need to do is do some more digging.
Your bug-out place needs to be away from highways and freeways, at the very least. Hopefully, it’s going to be far enough that you won’t even hear vehicles driving by on the main roads.
Either by trees or by natural terrain such as hills and mountains, and ideally both, your position would need to be covered. In other words, individuals should not be able to see your bug-out location from the road. You can prepare to receive company if they do, or even for individuals to turn up at the place before you do.
It Must Be Easily Defensible
In any disaster situation, one of the most significant priorities is security and protecting yourself. No matter how well your bug-out position is hidden, if possible, you must always be ready to defend it, just as you must always be ready to defend your home as well.
By the way, when securing your bug-out spot, the terrain will either be your greatest friend or your greatest enemy. The last thing you want is to be in the lower part of a valley or ravine for your bug-out spot, where the attacking force can easily be given the high ground.
Defend Using Fortifications
By setting up defensive fortifications as well, you can also make your bug-out location more defensible, similar to how you could set up defenses in an SHTF scenario around your own house.
You may build a perimeter with barbed wire fencing or thorny bushes, for example. You can further build trenches or bunkers to give you cover positions as well. Creating all of that would definitely take a lot of effort, but it can be accomplished.
One of the most powerful defensive fortifications to be set up will be to build one layer of barbed wire fence around the property area in a perimeter, followed by a layer of nail boards (flat pieces of plywood with nails pounded through them and then turned upside down), and then followed by another layer of fencing of barbed wire.
Setting all of that up would definitely be a time-consuming process, but if you value keeping your bug-out location as defensible as you can possibly, it would certainly be worth setting it all up.
It Must Have An Abundance of Natural Resources
How long would you stay at your bug-out place? If you accept that it is likely that you will be there for several weeks or months (if not longer, in the worst of conditions), then it will be completely important to have an abundance of natural resources.
The natural resource examples you will need include, but are not limited to:
Natural Water
Fish
Agricultural Land (for farming and growing crops)
Timber/Wood
Sunlight (the entire area can’t be wooded)
Wild Game
Edible Plants
Each of those resources cannot be understated in terms of its importance.
Natural Water
Getting a flowing body of water such as a river or stream would be preferable to have a source such as a lake or a pond as far as a natural water source is concerned. A water well would also be an option, but it is costly to get it installed. This is because there are normally more pollutants in still water.
For drinking, washing, personal hygiene, and growing crops, water is important. If an area that you are considering for your BOL does not have a natural water supply, you should automatically not consider it.
Land
There still needs to be enough land and soil for you to use for growing crops because if you need to be, you will be self-sufficient over the long term. An open clearing would be perfect here with good soil and plenty of sunshine.
Although you certainly want your BOL to have open clearings, you will also need to have plenty of wooded areas for timber as well. To help build shelters, perimeters, or campfires, you’ll need to use wood to heat up your stoves. An open prairie would not only be a bad choice for a bug-out location because it is exposed and easy to find, but also because it also lacks timber.
Food
Finally, what is the situation with your BOL for wild edibles and games? Do you ever see the wild game, like deer, turkey, or grouse? Are there fish in the water? Are there any wild edibles and berries you’ve come across?
It is not a deal breaker in a BOL to not have access to wild edibles and games, but there is no denying that it would be good to have backup choices available for food.
In other words, you don’t want to depend on food for game, fish, and wild edible plants, but it’s always undeniably good to have the choice when it gets hard.
It Must Have a Shelter
It’s important to have shelter, and whether you have an RV or a trailer or something similar, you can’t just continue to sleep all the time and hang out in your car.
The good news is that you have a number of different ways to set up a shelter at your bug-out location, such as:
Tents
Yurts
Cabins
Shipping Containers
RV’s/Travel Trailers
For shelter, it would be enough to simply park a travel trailer at your bug-out location or have a tent ready to set up.
So really, all of those alternatives are going to do it, but what’s important is that you already have a shelter already set up so you don’t have to spend all of your time setting it up when you arrive.
Some individuals like to prefer a piece of property for their BOL that already has a house built on it. It instantly provides you with shelter as well as storage spaces, even though the house is a bit of a fixer-upper. Speaking of areas for storage …
It Must Have A Storage Area
A storage area for you to stock provisions is something else that you would need to set up at your BOL, just as you would at home.
With all you need in your car, you can’t expect to bug out. You simply won’t be able to bring anything you need with you in your vehicle, even though you have a Suburban or an RV for bugging out. You simply won’t.
That’s why you need to build your provisions in a shed or a cabin or something for you to house. You would need to have a healthy stockpile of food, water, medical/first aid supplies, cooking equipment, clothing, ammunition, tools, and sleeping items such as blankets and cots, much as you would have at home.
Dividing your stockpile, at least into two halves, might also be a smart idea. This way, if someone arrives at your location before you do it and takes your supplies, they can not actually locate the second stash.
Conclusion
Without having an appropriate place for you to actually evacuate to, no bug-out plan is really complete.
You would be very wise to keep the above information in mind when checking out various properties that you are considering for your bug-out place.
In short, each of the following conditions must be met for your bug-out location:
It must be out of the vicinity of danger (so away from an urbanized area)
It must be within reasonable distances
It must be easily accessible by vehicle
It must be concealed and away from any main roads
It must be easily defensible
It must have an abundance of natural resources
It must have a shelter (you’ll need to build this yourself)
It must have a storage area (you’ll also need to build this yourself)
Even if the position you’re looking at fits all but one of the above conditions, it’s a major red flag. Be picky and have patience.
The good news is that if you have an ideal location that fits the selected criteria above, you will be comforted to know that when disaster hits, you have a (hopefully) safe place to bug out.
Other Self-sufficiency and Preparedness solutions recommended for you:
The Lost Ways (The vital self-sufficiency lessons our great grand-fathers left us) Survival MD (Knowledge to survive any medical crisis situation) Backyard Liberty (Liberal’s hidden agenda: more than just your guns…) Alive After the Fall (Build yourself the only unlimited water source you’ll ever need) The Lost ways II (4 Important Forgotten Skills used by our Ancestors that can help you in any crisis) The Patriot Privacy Kit (Secure your privacy in just 10 simple steps)
The idea of bugging out is popular, and mostly for good reason, among survivors. If you are ever forced by the authorities to leave your home or area or if
I find you can grow most in a container and some crops are even better off in a container. I may combine the soil with the crop’s preference: good acid soil for my blueberry bushes and loose sandy soil for root crops such as carrots and radishes. Each plant gets the amount of water it needs and they’re sitting next to each other with only a little space in between.
Container gardening encourages the planting of a few new varieties per season without giving them a large amount of room. However, my passion for container gardening is weeding. I get very few weeds in my pots and they’re easy to deal with when I do. I also get fewer pests and soil-borne diseases.
What Can I Grow in Containers?
You can grow most of anything in containers but with very little care and some plants are doing exceptionally well, while others are paying more attention. Be not afraid of doing something. Let’s start with the easiest to grow.
Leafy Greens like are easily grown in buckets or a dish pan. I like starting them early in the spring and planting them in the fall again with a few phased plantings along the way. They normally bolt as soon as the weather turns hot but by keeping them inside on the coldest nights I can prolong the growing season in the winter.
Here Are the Greens I Plant in Containers:
Herbs and Microgreens
In my place, I could never get away with growing watercress in the ground, but it’s easier in a container. I just have to make sure it gets the right amount of sunlight, so I can enjoy it most of the year in my salads.
I also grow a nice variety of microgreens and sprouts for my salads, including broccoli sprouts, cress, red clover, and spicy salad mix. I grow my microgreens on a patio shelf, which gives me even more room for the rest of the greenhouse. There they get plenty of late afternoon sun without burning or drying out.
My herb garden also thrives mainly in containers. I like being able to pick any herbs I want from the back patio instead of having to plan ahead and make a costly trip to the shop, only to have my supermarket herbs going bad in a couple of days.
My rosemary bush generally lives in its bucket during the year but most of my herbs are replanted throughout the spring and fall. Once again, if you want, you could bring them in during extreme weather, or bring in a small plant to keep going through the winter. I have a small tower garden containing most of my herbs and taking up very little room on the patio.
My French tarragon grows relatively well in a six-gallon bucket, but a larger container would probably be preferable. It likes a little more room for the roots. My container garden contains:
Vegetable Crops
My favorite bucket plants are peppers and tomatoes. In the spring and fall, both do very well, when temperatures are not too high. If the daytime temperature is too high, tomatoes won’t set fruit and that seems to be more of a concern in containers where the soil is often colder. But in the spring and early fall, I can get a bit longer season by shifting the plant to a shady location when the temperatures get too hot.
One problem with certain vegetables grown from containers is pollination. Usually, there would be no problem if you have multiple pots of tomatoes. But if you have only one tomato plant or one cucumber, or whatever, you may need to hand pollinate. It is easily done with an artist’s brush, but usually, the wind or insects will take care of it for you.
For climbing vines like pole beans, cucumber, and some tomatoes, I place them next to the fence or I give them a tomato cage for support.
With a little extra care these vegetables grow well in containers:
Root Crops That Grow Well in Containers
I have tried to grow root crops mostly wherever I have lived with limited success, generally from rocky or clay soil. But root crops are much more likely to do well in a bucket or deep dish pan, as you can easily monitor the soil, moisture, and nutrients. I’m not growing a lot of root crops but they’re doing well.
Fruits That Grow Well in Containers
I wish I had planted my original fruit trees in containers but I was eager to plant and select locations around the property when we purchased the land. Originally, I planted a mango tree that produces a few fruits for the squirrels, a sour carambola that overproduces, and a fig tree that succumbed to the lawn mower. I would have much more range and more bright places to grow vegetables now if I had planted them in containers.
However, I have learned my lesson and now I’ve got quite a few fruits in containers. Those fruits perform really well in containers, surprisingly:
Special Care for Container Plants
Plants with containers are a little different from growing in the ground. A hot day will very easily strip the soil of all moisture. I make sure there is plenty of drainage on my containers and I water them frequently. If the plant starts to wilt, the leaves become brittle, or the soil becomes dry, give them water.
Another factor is fertilizer for container gardens. Your plants need nutrients, particularly if the same soil is reused annually. Organic fertilizers, compost, and other nutrients are accessible. You need to be mindful of and prepare for what the plant wants.
Leafy greens need a lot of nitrogen and a few other nutrients. But fruiting vegetables require other nutrients to bear fruit. I typically fertilize the individual plants according to the recommendations. This takes longer but allows for optimum yield per plant.
Container Sizes
Most plants in a 5-gallon bucket or dishpan will do well, but some plants need more space. Plants with a tap root prefer a deeper container, and some need space to spread out. When preparing your garden and selecting the container, take the plant growth patterns into consideration.
Save the Seed Envelope
If you are buying seeds, read the tags and save them. Typically for seeds, I file the seed envelope for later consultation. Label your container with a stake showing what you’ve planted and when in a permanent marker or paint. After a few weeks have passed, it is easy to forget that all the leaves look alike.
Other Self-sufficiency and Preparedness solutions recommended for you:
The Lost Ways (The vital self-sufficiency lessons our great grand-fathers left us) Survival MD (Knowledge to survive any medical crisis situation) Backyard Liberty (Liberal’s hidden agenda: more than just your guns…) Alive After the Fall (Build yourself the only unlimited water source you’ll ever need) The Lost ways II (4 Important Forgotten Skills used by our Ancestors that can help you in any crisis) The Patriot Privacy Kit (Secure your privacy in just 10 simple steps)
The Advantages of Growing in Containers
I find you can grow most in a container and some crops are even better off in a container. I may combine the soil with
For when SHTF, we all have our food storage. Without outside interference, some of us can survive on our supply for years. What happens, though, when our supply is threatened by an outside interruption? Hungry neighbors can try to force their way in to steal your surplus food in a desperate scenario.
We, as preppers, are ready for anything. It is nice for storage to have a dedicated space in your basement or root cellar, but it can have easy access to intruders. You would have to start building your surplus from the ground up, again, if a burglar discovers all your food in one place. If people have already resorted to stealing food in this case, that is an expensive hassle.
Instead of having all of your long-term non-perishables in one place, I personally prefer to spread out my food in various hiding locations. I keep a thorough list of my hiding places and what is stored there, in order not to lose track of my inventory. It is also beneficial to have expiration dates clearly marked on the list as well. Keep this list easily available but secured, such as on your tablet or computer, or inside a safe with a physical list.
Not to state the obvious, but when storing, please bear in mind obvious fire hazards. In addition to electrical wires, etc., cardboard or wood boxes of food would not fit well. They should be 100 percent critter-free whether your hiding spots are under floorboards or behind walls. Just make sure that you search your hiding places long before you store them.
Here are some of my favorite unspeakable secret places for non-perishable food.
A Hidden Room
Like me, maybe you know your way around a project at home. If the space is completely shielded, home invaders will never be able to locate a cache, and most homes do not come with secret rooms upon purchase (unless you’re lucky).
Tons of homes have “dead space” between the walls, leaving a few rows of vacant square footage here and there. It is possible to excavate, reframe, and add shelves to these rooms. A bookshelf or cabinet will mask the entry to your new secret food storage to conceal the space entirely.
Emergency Shelter
You may already have an underground storm shelter if you are living in a tornado area. In these areas, surplus food can easily be stored. Since they are underground, the humidity levels for food storage should be sufficient.
It should be stored under benches or on shelves. It is also a smart idea in your climate to have sustenance during increasingly dangerous conditions.
Under Stairwells
There’s always a lot of empty space beneath your basement’s stairwell, or from the first floor to the second floor.
This is a great opportunity to store food, as this room is normally dry and regulated by temperature. At the very back of the stairwell, I like to store food and store household furniture and other stuff to hide the food behind it.
Survival Caches
You can dig some proper storage caches all over your property in the case of SHTF. Moisture, critters, elements, and temperature are immune to all cache containers. Remembering where you buried them is the hardest part!
Closets
Sure, it might be obvious to store food in a closet. But it’s the place you need to pay attention to inside the closet.
In your coat closet, boxes of non-perishables can be kept under hanging coats. On top of most closets, the high shelves often go unused, making them the ideal place to store lighter items, such as lighter bags or vacuum-sealed foods.
Rental Storage Unit
Just in case your home is destroyed or stolen, you can never store all of your food in one location at home. If your house is under pressure, getting some food surplus in a storage unit is a smart idea.
Rentals that are temperature regulated and reputable can be found. Some are even elevated in the off-chance the unit has a critter or two. The unit should also be well-shaded and facing away from direct sunlight.
Bug Out Location
If you are lucky enough to have a place to which your family retreats in a global emergency, make sure that you have a non-perishable rotation hidden in that location. This way, packing food is one less thing on their mind if family members have to run.
It is helpful to share this room with trusted family members and friends if anyone is in trouble. Both participants can consent to continue to add to the stock as they take it.
Galvanized Steel Garbage Cans
These garbage cans store some items very well, such as dried beans or grains. They can be stored in a garage, basement, or barn and will retain optimum temperature and moisture. This is also a perfect place to store extra pet food if you are a pet owner. Using brand new bins, with food containing oxygen absorbers in mylar packets.
In The Ground
How do you store food in a garden of your own? In cold weather regions, root vegetables can be stored immediately in the soil after harvest during the winter months.
Vegetables that can be stored in this way range from beets, to potatoes, to carrots. To ensure the veggies are free from rot or critters, check regularly.
Chamber
A perfect place to hide food is the guest bedroom/home office. N on-perishables can go inside a desk or be stacked inside the closet. Without being in plain sight, storage shelves may also conceal additional food.
Some Places You Should NEVER Store Food Are:
The attic – hot temperatures fluctuate during the summer, spoiling all of your food.
A crawl space – critters can easily penetrate these and crawl spaces typically get warm in the summer.
The shed or barn – again, temperature and rodent control is too difficult here.
Near chemicals or excess fuel. Just don’t do it.
In the event of an emergency, we all have excess food storage to support ourselves, so having some secret food somewhere will ensure that you have enough in a crisis.
It’s never fun to think about what if it was, like what if I was robbed? What if my stock of food is compromised? If that is the case, it will secure our safety by being prepared on all fronts.
For when SHTF, we all have our food storage. Without outside interference, some of us can survive on our supply for years. What happens, though, when our supply is threatened
Nature is giving us everything that we need. The problem is that most people have long ago lost the requisite skills and information to make use of all that nature offers. The insane part of it is, nature gives us an incredible abundance of food even in the middle of town. I think we all know of an oak tree somewhere in or around our neighborhood.
Acorns are a gem in the world of natural food, a diamond concealed in plain sight. In part, they make a perfect food for survival because they are so easy to find and harvest. Plus, acorns can be used in so many ways, including as a substitute for coffee and in a wide range of cooked dishes. These do provide a good nutritional level with nutrients including healthy fats, tons of protein, carbohydrates, some calcium and iron, and tons of magnesium, potassium, and vitamin B-6. However, you need to learn how to harvest and store these nuggets of protein in order to be able to use them.
Harvesting Acorns
It’s pretty quick to pick acorns-you just wait for them to fall off the tree. You must first be sure that you know which trees are oak trees and what an acorn looks like. Typical oak leaves and acorns are seen in the picture shown here.
When considering the harvesting of acorns, it is best to know which varieties of oak trees are in your area. Taking the time to identify the oak trees around you in the spring by looking at their leaves and referring to a tree book. When looking at their leaves, oak trees are much easier to recognize than by looking at their Acorns.
Here are the types of oak trees and the type of acorns they produce:
Emory Oak: Produces mild acorns that don’t need processing.
White Oak: These produce blander acorns that are good for harvesting. The best white oak trees form which to harvest include the burr oak, the Swamp Oak, and the Oregon White Oak.
Red Oak: These acorns are more bitter and will require more processing.
Black Oak: These are the most bitter acorns and will need to be leached a lot to get rid of the bitter taste.
Emory Oak White Oak Red Oak Black Oak
Of course, from any of those trees you can harvest and eat acorns. It’s just that the bitterer the acorns are, the more they will need processing. The bitterness is attributed to a substance called tannins in the nuts. The more acorns have tannin, the more bitter they are. Plus, the tannins can cause an upset stomach, but these tannins can be removed, which we will speak about below.
If you’re searching for acorns to harvest; the best time to harvest is late in September and into October (climate can vary), but you can recover them through spring. The best thing to do is make sure that the day is dry and that’s early in the season. Go and just pick the acorns up from the table.
When selecting acorns, it is important to select nuts that do not have any visible holes in them. Weevils are particularly fond of acorns, so any sign they have bored through the nutshell indicates that the nut is no good. It is the weevil larvae that are the main concern, and only the nuts from which they emerged can be described. That’s right, it emerged I said. The weevil larvae come out from the inside of the nut, so you could get home from your harvest to find other weevil larvae infested nuts.
Shelling
When you get your acorns home, put them all in a large bowl of water is a good idea. This will enable you to detach the good from the bad. If t hey are good, they are going to sink. If it’s bad, they’re going to float. Once you have done that, you’ll want to dry them completely before shelling them. You can do so by setting them down for 15 minutes in a 150 degree oven. You can do that too by putting them in the sun for a couple of days. Drying them out will make it possible for the nut inside the shell to shrink slightly, making it easier to seal.
It is relatively easy to shell the acorns. If they’re still green, you can get into them with a knife. Otherwise, simply remove the cap (if not removed already), put the nut flat-side down, and strike the pointing end with a hammer. If the nut is longer and will not be at its end, only touch the nut ‘s side. Sometimes, it is best to put your acorns in water as soon as they are shelled, at least to make the acorn flour more aesthetically pleasing. The nuts will oxidize really quickly and if they do, the color of your flour won’t be as bright. The oxidation process is prevented by water.
When it comes to Red Oak acorns, the nut inside the shell has a skin on it which is very hard to extract. For this reason, boil the red acorns before shelling them and shell them while they’re still dry. When you do this, the skin and the shell will come off.
Removing the Tannins
OK, we’ve spoken about acorn bitterness and the need to eliminate the tannins that trigger it. Fortunately, that’s not hard to do. First, let’s think about the way the tannins are extracted quicker. You need to put the shelled nuts in water for this, and bring the water to a boil. When the water starts boiling, pour it away, add fresh water, and repeat. Repeat this as many times as needed to make the water run clearer (it starts dark) and the nuts go sweeter to taste.
But here’s the stuff. When you boil the acorns, you remove a starch present in the acorns that works in wheat flour much like gluten, allowing the acorn flour to bind to itself. You don’t need heat to dissolve the tannins, however, water can do that alone. The thing is, it will take days without the heat, rather than hours.
To remove the tannins from the acorns, particularly if you are going to grind them and use them as flour, you must grind them into flour and mix them in a ratio of 1:3 with the water. Put the mixture into a glass jar and hold in the refrigerator. You have to shake the container every day, and then dump out the water 12 hours later, replacing it with fresh water. Deleting the tannins with this process will take 1 to 2 weeks.
Drying
You’ll need to dry your acorns or the flour you’ve made until you’ve drained the tannins. The best approach is to spread them and set them out in the sun on a baking sheet. If this is not an option, you can use a dehydrator that will not destroy any of the nutrients, or you can use the lowest setting of the oven. If the acorns or the acorn flour are dried, you need to store it in the refrigerator. Alternatively, you can freeze it, but it must be kept cold, as it will easily rancid.
Food You Can Make
Acorns have such a wide variety of uses that they are curiously not part of our daily dietary choices. You should roast acorns first and foremost, and eat them that way. They are yummy!
These roasted acorns can also be grinded into a meal, and used as a great coffee substitute. If you don’t want to totally replace your coffee, you can still add a nutty flavor to your daily coffee with the roasted acorn meal.
As discussed above, acorns can be ground into flour that is great when baking. You can use it to bake the following:
Bread
Cookies
Corn cakes
Acorn porridge
Pancakes
Burgers
Used whole or in pieces, acorns can be used to make:
Acorn brittle (as a substitute for peanuts)
As a substitute for any nut in any recipe
As a substitute for beans and legumes in soups and casseroles
Sprinkled on the top of salads or mashed potatoes
Finally, you can grind acorns into a rich and yummy nut butter as with any other nut. Really, acorns, either whole or ground, can be applied in many ways. They make one of the best, easiest to find, and most nutritious foods for survival, but they are so plentiful and easy to process that you don’t have to wait until the end of the world as we know it to harvest and use those little beauties. They are available anytime and ready to take!
Nature is giving us everything that we need. The problem is that most people have long ago lost the requisite skills and information to make use of all that nature
Cattails (Typha latifolia) are among Earth’s most versatile plants. With good reason it is called the “Supermarket of the Swamp,” because it can be used in all four seasons. They even inspired the motto of the Boy Scouts: “You name it, and we’ll make it from cattails!”. The plants can be found virtually anywhere in the wilderness, where there is a source of water throughout the entire continent of North America and almost everywhere in the Western hemisphere.
Alternative Practical Applications
It is said that if a person lost found cattails in the forest, they would have had four of the five items required to ensure their survival: water, food, shelter, and fuel. For so many different reasons the Native Americans used the cattails:
Crafts (using green or dried leaves or fluff):
Shelters’ covers
Making mats, blankets, and baskets
Making cordage used for hunting or fishing, as ropes, for belts and straps, for defense equipment, as arrow shafts, and so on
The fluff was used to insulate footwear and hats, for stuffing pillows, or for a baby’s cradle board.
Medicine
The pollen is hemostatic and astringent. It was used for controlling external and internal bleeding, chest pains, and other forms of blood stagnation. The pollen is also mildly diuretic.
Roots were used to treat burns, insect bites, scrapes, and bruises. Fresh, ponded roots were used directly as a poultice for open blisters and infections but also as a toothpaste if mashed up.
The ash of burnt plants was used for its antiseptic properties and is good for treating wounds and abrasions.
Fuel and illumination
Boiled, filtered, and fermented cattail roots release ethanol, which is now used as a biofuel.
The fluff inside the cattail’s head makes for an excellent tinder for starting fires.
The brown flower heads could be used as torches or as an illumination source if dipped in wax. The smoke will also drive away any insects.
This part of the young plant can be eaten raw or cooked like corn on the cob or asparagus. They contain potassium, phosphorus, and vitamins A, B, and C, and they taste like a cross between a cucumber and a tender zucchini. Additionally, the cattail shoot is one of the strongest protein and unsaturated fat natural resources and it contains enzymes and minerals rich in nutrients.
Late Spring:
Leaves
The cattail leaves are excellent for salads or sandwiches when they are young and tender.
Eatable Parts of Cattail During Summer:
Pollen
There is probably no other pollen on the planet as easy to harvest by the pound as cattail and there are so many tasty things to do with this fine, flour-like staple. To collect it, you’ll need to place a bag over the end of the cattail plant and shake to capture the pollen. It can be eaten raw—sprinkle it in yogurt, fruit smoothies, oatmeal, or salads—or use it as a flour supplement or thickener for gravy and soups.
Eatable Parts of Cattail During Autumn and Winter:
Roots/Rhizomes
The underground lateral stems are called rhizomes—although most of us would simply call them roots—and the best period to harvest them is from late autumn to early spring. These parts are edible any time of the year.
Cattails contain ten times the starch of an equal weight of potatoes.
In order to harvest the starch, which is very sweet and tasty, you’ll need to thoroughly clean the roots and mince or crush them before you put them in clean water. Then you can either leave the pounded chunks in clean water and wait for the starch to settle to the bottom, you can filter it or you can boil them down. The best time to collect the starch is in late fall and winter, when the starch is stored in the rhizome.
A single acre of cattails can produce approximately 6,474 pounds of flour during an average year.
First, you need to peel and chop the roots and then clean them very well. Next, you’ll have to remove the long fiber strings, pound them into a powder after they have been allowed to dry completely, and then use that as flour.
Recipes
1. Scalloped Cattails
Ingredients:
2 cups of chopped cattail tops
2 eggs
½ cup melted butter
½ tsp. sugar
½ tsp. nutmeg
½ tsp. black pepper
1 cup milk (scalded at 180°F)
Instructions:
Mix the cattail tops, eggs, butter, sugar, nutmeg, and black pepper in a bowl while slowly adding the scalded milk and blend well.
Pour the mixture into a greased casserole dish, top with grated Swiss cheese (optional) and add a dab of butter. Bake at 275°F for 30 minutes.
Related: A Gold Storm Is Coming(Even the most prepared Americans will be blindsided by what’s about to happen.)
2. Cattail Pollen Biscuits
Ingredients:
3 Tbsp. baking powder
1 1/3 cup flour
¼ cup cattail pollen
1 tsp salt
4 Tbsp. shortening
1/3 cup milk
Instructions:
Preheat oven to 450°F.
Mix all ingredients.
Cut the dough into biscuit shapes; and bake them at 425 for 20 minutes.
3. Cattail Pollen Pancakes
Ingredients:
½ cup cattail
½ cup flour
2 Tbsp. baking powder
1 Tbsp. salt
1 egg
1 cup milk
3 Tbsp. bacon drippings
Instructions:
Mix all ingredients.
Pour onto a hot skillet or griddle in four-inch pancake amounts.
4. Cattail Casserole
Ingredients:
2 cups scraped cattail spikes
1 cup bread crumbs
1 egg (beaten)
½ cup milk
1 diced onion
Salt and pepper (according to taste)
½ cup shredded cheddar cheese
Instructions:
Combine all ingredients in a casserole dish; and place in an oven set to 350°F for 25 minutes. Serve hot.
5. Cattail Acorn Bread
Ingredients:
1 cup acorn flour
1 cup cattail flour (or another flour with gluten)
2 Tbsp. baking powder
½ tsp. sea salt
3 Tbsp. honey, agave nectar or pure maple syrup
2 omega-three eggs (or regular), beaten
¾ cup whole milk
3 Tbsp. olive, grape seed or coconut oil
Instructions:
Mix all of the ingredients together.
Pour into a greased loaf pan.
Bake at 400°F for 30 minutes.
6. Cattail Wild Rice Pilaf
This recipe can be made with brown rice; but the wild rice adds a special dimension to it.
Ingredients:
1 cup dry wild rice (4 cups cooked)
2 Tbsp. sesame oil
½ cup chopped green onion
2 cups cattail shoots, sliced (about 30 cattails)
2 Tbsp. salt
½ cup slivered almonds
Instructions:
Cook the wild rice until tender.
Sauté the onion and cattail shoots in sesame oil until tender and translucent.
Mix the rice and the sautéed cattail shoots and onion together.
Add the salt and slivered almonds.
Serve hot.
7. Cattail Wild Rice Soup
Ingredients:
1 cup dry wild rice (4 cups cooked)
2 tablespoons sesame oil
½ cup chopped green onion
2 cups cattail shoots, sliced (about 30 cattails)
2 Tbsp. salt
Instructions:
Cook the wild rice until tender.
In a heavy-bottomed soup pot, sauté the onion and cattail shoots in sesame oil until tender and translucent.
Add the cooked wild rice, salt, and 4 cups of chicken broth or other soup stock of your choice.
Simmer together for 15–20 minutes and serve.
8. Cat-on-the-Cob with Garlic Butter
Ingredients:
30–40 cattail flowerheads; peeled
Garlic butter:
½ cup unsalted butter
½ cup olive oil
½ teaspoon salt
12 garlic cloves; crushed
1 cup freshly chopped wild greens (or parsley or other fresh garden herbs)
Instructions:
Make garlic butter in a food processor by whipping the butter, oil, salt, fresh garlic, and parsley together until smooth.
Note: If using salted butter, eliminate the salt from the recipe.
The olive oil makes the butter nice and creamy and spreadable, even after refrigerating. I like to make a batch of this to keep handy in the fridge. You can also make a larger batch ahead to freeze in small containers when the greens are in season.
Boil cattail flowerheads in water for 10 minutes.
Make garlic butter in a food processor by whipping the butter, salt, fresh garlic, and parsley together until smooth.
Drain the cattail flowerheads and slather them generously with the garlic butter.
Eat them just like miniature corn on the cob.
9. Cattail Flower/Shoots Refrigerator Pickles
Ingredients:
Enough cattail flower heads/shoots to tightly fill a quart jar; about 30 or 40
4 garlic cloves; peeled
1 tsp. whole black peppercorns
4 to 6 bay leaves
¾ cup apple cider vinegar (use some of your herbal vinegar!)
1½ cup olive oil
3 Tbsp. salt
1¼ cup water
Instructions:
Boil the cattails in water for 5 to 10 minutes and drain thoroughly.
Stuff flowerheads/shoots, garlic, peppercorns, and bay leaves into a clean, sterile quart jar.
Combine vinegar, oil, water, and salt in a saucepan.
Bring to a boil, remove from heat, and pour over the cattail heads.
Add a little more oil, vinegar, and water if the liquid does not reach to the top of the jar.
Cover and let marinate in the refrigerator overnight.
If you are experienced at making pickles, you could experiment with some of your favorite pickle recipes and put them up as preserves.
10. Indian Cattail Spoon Bread
Preheat oven to 400°F.
Ingredients:
½ cup butter
2 cups fresh flower buds or cattails on the cob
½ cup diced onions
½ cup diced green pepper
salt
1 cup sharp cheese
pinch of chili powder
Instructions:
Melt butter in a skillet and add cattail buds, onions, green pepper, and salt.
Sauté for 5 minutes or until tender.
Pour into greased baking dish.
Sprinkle with cheese and chili powder.
Bake until cheese melts.
Spoon onto plate while hot.
Other Self-sufficiency and Preparedness solutions recommended for you:
The Lost Ways (The vital self-sufficiency lessons our great grand-fathers left us) Survival MD (Knowledge to survive any medical crisis situation) Backyard Liberty (Liberal’s hidden agenda: more than just your guns…) Alive After the Fall (Build yourself the only unlimited water source you’ll ever need) The Lost ways II (4 Important Forgotten Skills used by our Ancestors that can help you in any crisis) The Patriot Privacy Kit (Secure your privacy in just 10 simple steps)
Cattails (Typha latifolia) are among Earth’s most versatile plants. With good reason it is called the “Supermarket of the Swamp,” because it can be used in all four seasons. They
The idea of bugging out is popular, and mostly for good reason, among survivors. If you are ever forced by the authorities to leave your home or area or if death is inevitable if you stay, then bugging out is really your only valid option.
Bugging out may not always be always the best option, of course. With bugging out, there are a lot of dangers, with the most noticeable ones being that you are leaving the area and abandoning your property and stockpile while also rendering yourself highly vulnerable to criminals on the open road.
Therefore, you’re going to need an acceptable bug-out place to mitigate the amount of risk you’re taking, which will keep you mostly safe at least.
In other words, you need to have a plan in place if you are forced to leave your house, and that plan needs to consist of where you’re going to go and how you’re going to get there. There needs to be a lot of thought put into your bug-out area. It is not just some random place that will work.
There are specific variables that need to be taken into consideration and specific features and luxuries that your location would also need to provide, and that’s what we’re going to talk about today.
When searching for a new bug-out location, here are the top things to look for:
It Must Be Within A Reasonable Distance
Your bug-out location can’t be on the other side of the country. It must be within a fair driving distance, instead. The idea is that the location of your bug out would be out of the immediate vicinity of danger (so outside your town or city) but still close enough to access it by car or even on foot if you are forced to.
A hundred miles may not sound like much, but driving that example with heavy traffic will take a long time in the middle of a disaster, and it will take a long time on foot, particularly. Your bug-out position must therefore be somewhere that you can hopefully drive to within a few hours via vehicle.
It Must Be Accessible
Your bug-out location must not only be a safe driving distance from your house, it must also be available, and that means being accessible by car.
That’s a concern if the dirt roads get so bad that you’re forced to embark on the rest of your journey on foot. For starters, what if you have a lot of stuff stored in your vehicle? Are you just going to give it all up, or are you able to go on multiple trips?
You’d most likely answer no if you’re like most people. That is why, just as it needs to be within a safe distance from your house, your bug-out position needs to be accessible by a car, but also …
It Must Be Hidden
Yes, at the same time, your bug-out position needs to be both accessible and hidden. Too much to ask, is that? Not at least at all. What you need to do is do some more digging.
Your bug-out place needs to be away from highways and freeways, at the very least. Hopefully, it’s going to be far enough that you won’t even hear vehicles driving by on the main roads.
Either by trees or by natural terrain such as hills and mountains, and ideally both, your position would need to be covered. In other words, individuals should not be able to see your bug-out location from the road. You can prepare to receive company if they do, or even for individuals to turn up at the place before you do.
It Must Be Easily Defensible
In any disaster situation, one of the greatest priorities is security and protecting yourself. No matter how well your bug-out position is hidden, if possible, you must always be ready to defend it, just as you must always be ready to defend your home as well.
By the way, when it comes to securing your bug-out spot, the terrain will either be your greatest friend or your greatest enemy. The last thing you want is to be in the lower part of a valley or ravine for your bug-out spot, where the attacking force can easily be given the high ground.
Defend Using Fortifications
Through setting up defensive fortifications as well, you can also make your bug-out location more defensible, similar to how you could set up defenses in an SHTF scenario around your own house.
You may build a perimeter with barbed wire fencing or thorny bushes, for example. You can further build trenches or bunkers to give you cover positions as well. Creating all of that would definitely take a lot of effort, but it can be accomplished.
One of the most powerful defensive fortifications to be set up will be to build one layer of barbed wire fence around the property area in a perimeter, followed by a layer of nail boards (flat pieces of plywood with nails pounded through them and then turned upside down), and then followed by another layer of fencing of barbed wire.
Setting all of that up would definitely be a time-consuming process, but if you value keeping your bug-out location as defensible as you can possibly, it would certainly be worth setting it all up.
It Must Have An Abundance of Natural Resources
How long would you stay at your bug-out place? If you accept that it is likely that you will be there for several weeks or months (if not longer, in the worst of conditions), then it will be completely important to have an abundance of natural resources.
The natural resource examples you will need include, but are not limited to:
Natural Water
Fish
Agricultural Land (for farming and growing crops)
Timber/Wood
Sunlight (the entire area can’t be wooded)
Wild Game
Edible Plants
Each of those resources cannot be understated in terms of its importance.
Natural Water
Getting a flowing body of water such as a river or stream would be preferable to have a source such as a lake or a pond as far as a natural water source is concerned. A water well would also be an option, but it is costly to get it installed. This is because there are normally more pollutants in still water.
Water is important for drinking, washing, personal hygiene, and growing crops. If an area that you are considering for your BOL does not have a natural water supply, you should automatically not consider it.
Land
There still needs to be enough land and soil for you to use for growing crops because if you need to be, you will be self-sufficient over the long term. An open clearing would be perfect here with good soil and plenty of sunshine.
Although you certainly want your BOL to have open clearings, you will also need to have plenty of wooded areas for timber as well. To help build shelters, perimeters, or campfires, you’ll need to use wood to heat up your stoves. An open prairie would not only be a bad choice for a bug-out location because it is exposed and easy to find, but also because it also lacks timber.
Food
Finally, what is the situation with your BOL for wild edibles and game? Do you ever see the wild game, like deer, turkey, or grouse? Are there fish in the water? Are there any wild edibles and berries you’ve come across?
It is not a deal-breaker in a BOL to not have access to wild edibles and games, but there is no denying that it would be good to have backup choices available for food.
In other words, you don’t want to depend on food for game, fish, and wild edible plants, but it’s always undeniably good to have the choice when it gets hard.
It Must Have a Shelter
It’s important to have shelter, and whether you have an RV or a trailer or something similar, you can’t just continue to sleep all the time and hang out in your car.
The good news is that you have a number of different ways to set up a shelter at your bug-out location, such as:
Tents
Yurts
Cabins
Shipping Containers
RV’s/Travel Trailers
For shelter, it would be enough to simply park a travel trailer at your bug-out location or have a tent ready to set up.
So really, all of those alternatives are going to do it, but what’s important is that you already have a shelter already set up so you don’t have to spend all of your time setting it up when you arrive.
Some individuals like to prefer a piece of property for their BOL that already has a house built on it. It instantly provides you with shelter as well as storage spaces, even though the house is a bit of a fixer-upper. Speaking of areas for storage …
It Must Have A Storage Area
A storage area for you to stock provisions is something else that you would need to set up at your BOL, just as you would at home.
With all you need in your car, you can’t expect to bug out. You simply won’t be able to bring anything you need with you in your vehicle, even though you have a Suburban or an RV for bugging out. You simply won’t.
That’s why you need to build your provisions in a shed or a cabin or something for you to house. You would need to have a healthy stockpile of food, water, medical/first aid supplies, cooking equipment, clothing, ammunition, tools, and sleeping items such as blankets and cots, much as you would have at home.
Dividing your stockpile, at least into two halves, might also be a smart idea. This way, if someone arrives at your location before you do it and takes your supplies, they can not actually locate the second stash.
Conclusion
Without having an appropriate place for you to actually evacuate to, no bug-out plan is really complete.
You would be very wise to keep the above information in mind when checking out various properties that you are considering for your bug-out place.
In short, each of the following conditions must be met for your bug-out location:
It must be out of the vicinity of danger (so away from an urbanized area)
It must be within reasonable distances
It must be easily accessible by vehicle
It must be concealed and away from any main roads
It must be easily defensible
It must have an abundance of natural resources
It must have a shelter (you’ll need to build this yourself)
It must have a storage area (you’ll also need to build this yourself)
Even if the position you’re looking at fits all but one of the above conditions, it’s a major red flag. Be picky and have patience.
The good news is that if you have an ideal location that fits the selected criteria above, you will be comforted to know that when disaster hits, you have a (hopefully) safe place to bug out.
Other Self-sufficiency and Preparedness solutions recommended for you:
The Lost Ways(The vital self-sufficiency lessons our great grand-fathers left us) Survival MD(Knowledge to survive any medical crisis situation) Backyard Liberty (Liberal’s hidden agenda: more than just your guns…) Alive After the Fall(Build yourself the only unlimited water source you’ll ever need) The Lost ways II (4 Important Forgotten Skills used by our Ancestors that can help you in any crisis) The Patriot Privacy Kit (Secure your privacy in just 10 simple steps)
The idea of bugging out is popular, and mostly for good reason, among survivors. If you are ever forced by the authorities to leave your home or area or if
As you look around, you are aware that electricity and electronic devices have made permanent changes in how we all live. It is one thing to say you can do without electricity, and then actually be able to achieve that goal.
In fact, many people that lose access to electricity for one reason or another either wind up extremely sick or dead in a matter of weeks. No matter whether they are unable to refrigerate foods or keep the house warm, surviving without electricity may not be as easy as it looks.
Since an EMP will disrupt both electrical power distribution and ruin devices that use it, the wise prepper will do everything possible to prepare for an EMP blast.
There are two basic ways that electronics will be damaged by an EMP. Protecting them from an EMP means protecting them from both of these potential sources of damage.
Direct EMP radiation from E1 & E2 – The first two pulses of the EMP will send massive amounts of electrical energy into the atmosphere, where it will be attracted to anything metal, like wires. This will enter electronics, burning out circuitry. But the key here is the wires, which act as an antenna, capturing that electric energy. Devices which don’t have wires attached to them are less likely to be damaged.
Voltage surge from E3 – The third pulse will affect the Earth’s electromagnetic field, which will end up causing a massive voltage surge in power lines. Any electronic device which is plugged into your home’s electrical current will receive this surge, blowing through any surge protectors you might have and overloading the device’s electronics.
With all those risks in mind, it only makes sense to be prepared for the potential risk of an EMP attack. While it may never come, that’s not a chance we can afford to take. So here are some new ideas of how you can protect yourself from an EMP.
EMP Protective Phone Case
A number of companies are now manufacturing EMP protective phone cases. These cases are essentially a portable Faraday Cage, just the right size for your phone. The case has the necessary metal shielding hidden away inside the cover, making it portable protection that’s not particularly obvious or obtrusive to your day-to-day life.
The one problem with these cases is that they will cut down your signal somewhat, due to the shielding. You may find yourself missing some calls, especially if you are at the edge of a cell’s coverage area and you don’t have a strong signal. To mitigate against this, be sure to use one that fits your phone well. If it is too big, it is more likely to cover too much of your antenna.
Most people use laptop computers today, rather than desktop computers. This is advantageous, as you can buy EMP protective covers for laptop computers. These cases won’t protect your laptop if the case is open and you are using it, nor can they protect it from the voltage surge; but when the laptop is closed up and not in use, as well as not plugged in, it will be protected.
Bluetooth
Bluetooth devices are naturally protected from EMP, because they don’t have electrical connections attached to them, bringing in the E1 & E2 pulses. Nor are they going to receive the voltage surge caused by the E3. Even if they are plugged into recharge, the E3 pulse will probably destroy the charger, which will prevent it from reaching the Bluetooth device.
The advantage here is that buying Bluetooth devices, especially small ones, provides you with a level of protection that you wouldn’t otherwise have. Even if those devices are in operation during the EMP, they are likely to continue working. The trick then will be charging them.
Related: A Gold Storm Is Coming(Even the most prepared Americans will be blindsided by what’s about to happen.)
Solar Panels
Most people don’t know it, but solar panels are naturally resistant to EMP. While the EMP will cause minor damage to them, it will only reduce their output by about five percent. Considering that solar panel systems are already designed with a buffer to account for inefficiencies and cloudy days, you should be able to use your solar panels more or less like normal.
The problem will be in using the power coming from the solar panels. This normally flows through a solar charge controller, then on to charge a battery backup system. The power can then be drawn out of the batteries directly or run through a voltage inverter to turn it into a house current for use.
The solar charge controller would definitely be destroyed by the EMP and the voltage inverter probably would as well. But the batteries should be able to ride out the EMP without damage. So, having a spare solar charge controller and voltage inverter would allow you to have your own power generation capability back up and running, within an hour after the EMP shuts off the electricity.
That replacement solar charge controller and voltage inverter should be stored in a place where they will be protected from the EMP, like a Faraday Cage. If you don’t have a Faraday Cage, they can be kept in any metal enclosure, such as a galvanized metal trash can, a steel filing cabinet, a metal toolbox, a metal cabinet, or even the trunk of your car. As long as it is in its packaging so that the device doesn’t touch the metal skin of where it is stored, it will be protected.
Related: A Gold Storm Is Coming(Even the most prepared Americans will be blindsided by what’s about to happen.)
Other Self-sufficiency and Preparedness solutions recommended for you:
The Lost Ways (The vital self-sufficiency lessons our great grand-fathers left us) Survival MD (Knowledge to survive any medical crisis situation) Backyard Liberty (Liberal’s hidden agenda: more than just your guns…) Alive After the Fall (Build yourself the only unlimited water source you’ll ever need) The Lost ways II (4 Important Forgotten Skills used by our Ancestors that can help you in any crisis) The Patriot Privacy Kit (Secure your privacy in just 10 simple steps)
As you look around, you are aware that electricity and electronic devices have made permanent changes in how we all live. It is one thing to say you can do


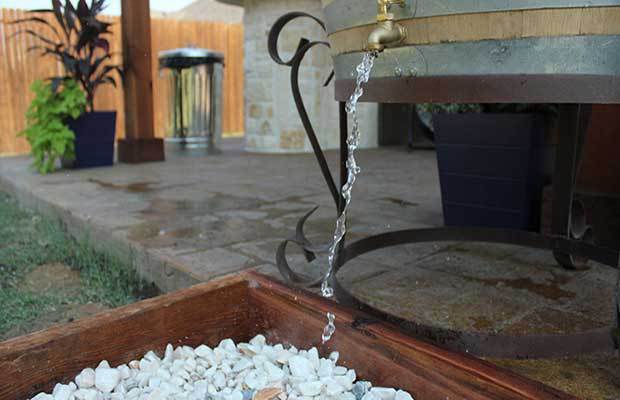

 Many folks shared memories of rain barrels, cisterns, hand pumps and drawing water with a well bucket as a child, usually on grandpa and grandma’s farm. Some said they’d never want to rely again on those old-time methods of getting water. But, at least they knew how it was done.


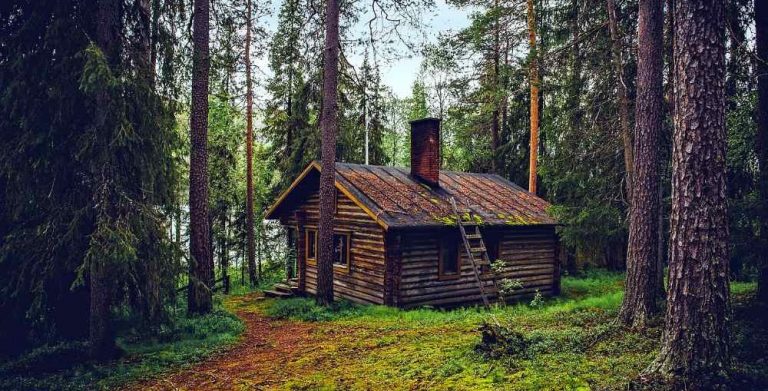


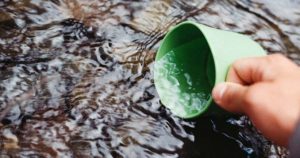


 Ingredients: