You know that S really HTF and broke it when you have no other choice than to drink water out of muddy puddle you found on the side of the road. Perhaps a call-to-action to some but, to most of us is what makes survival gritty. Fortunately for us, there’s plenty of ways to make that unpalatable water safer to drink, and not all of them rely on water purification tablets or sterilization bottles.
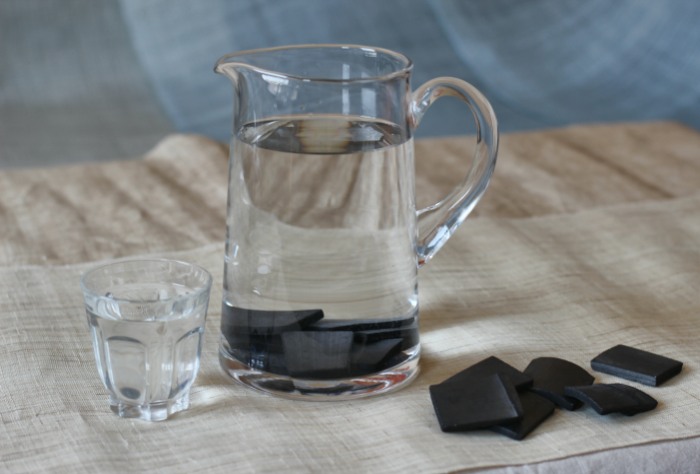
In an SHTF situation, it’s possible to filter water by using charcoal and nothing else. Yes, I know that the charcoal and water really don’t mix, but truth be told, this is the second-best water purification method after boiling. What I like about this little experiment is that it really brings out that cavemanish side of us which we desperately try to suppress and hide.
So, if you’re stuck out there in the wild, with no water-filtration sippy cup, no purification tablets, and not sources of water other than puddles and stinky ponds, here’s what you will need to do in order to whip up a charcoal-based sterilization system.
Word of warning before we start – through the time-honored method is great at getting rid of most bacteria and dirt, I would advise you to start looking for another water source. Works like a charm for a day or two, but wouldn’t bet my kidneys on it for anything longer than that.
Materials needed
- Empty plastic bottled (I’ve tried it on an old Coca-Cola bottle).
- Canteen.
- Survival knife.
- A handful of pebbles.
- A handful of sand.
- Charcoal
- Water carrier (cup, mug or anything to store the purified water).
- A clean piece of cloth or a bandage.
Making a charcoal-based water purification filter
Step 1. Gather all your materials. You can use a piece of charcoal from your campfire. Still, seeing that some necks of the woods are filled with tourist, there’s a slight chance of stumbling upon an extinguished fire pit, thus sparing you the trouble of starting a fire.
Step 2. Use your survival knife to cut the bottom of your plastic bottle. Don’t discard the keep.
Step 3. With the cap still on, put a couple of pebbles inside the bottle.
Step 4. Use the pommel of your knife to stuff the peddles.
Step 5. Add a layer of sand. Again, use the back end of your knife to make sure everything’s neat and tidy.
Step 6. Add the piece of cloth or bandage and arrange it.
Step 7. Toss in your charcoal. You may have to smash it in order to fit inside the bottle.
Step 8. Add another piece of cloth or bandage.
Step 9. Add more sand.
Step 10. Put some pebbles on top, and you’re all set to go.
More on the makeshift water filtration system
See how simple that was? Congrats on your first charcoal-based water filtration system. However, there’s one more thing you’ll need to do – test it. Do bear in mind that although the system’s great at removing most of the dirt, slime, and bacteria from the water, it won’t get rid of everything. So, in order to test your charcoal filter, fill your canteen with water from a puddle or other water source. Be careful to avoid picking up too much dirt or other things floating in the water.
Put an empty water carrier underneath your water purification system and begin pouring water from the canteen. Don’t fret or pout if the water inside the carrier is still dirty. It takes about three or four attempts to get clear water. Just keep trying. The results will certainly speak for themselves – not like you got any other choice.
Design-wise, it’s very important not to forget about the cloth pieces. Apart from charcoal, they also play a key role in the whole water purification system. What happens if you add a single layer or forget about them? You end up with charcoal-black water, and that’s a major turn off.
Careful when choosing the pebbles and sand. If possible, remove as much of the dirt and dust from them before sticking them inside your bottle. As far as the sand part is concerned, if you cannot find any, you can also replace the sand layers with more cloth and pebbles.
For the best possible results, I would 2-liter plastic bottles. You should also consider attaching some sort of handle near the open end to make the filtration device easier to hold. If you want to add an extra layer of filtration, cut a small hole in the plastic cap and fill the inside with a thin piece of bandage or cloth. You may have to wait a while longer for all the water to drain in the carrier, but at least it’s a bit cleaner.
Again, this water filtration method is designed for short-term use, not for the long-run. If you’re still lost, try to look around for other water sources. For instance, some tree holes contain a fair amount of water, but you’ll need to whip up some sort of siphoning system (that’s why I included a small tube in my B.O.B). You can always crush the stems of fleshy plants for extra water.
One more thing – choosing the right pieces of charcoal. Sure, all charcoal is the same, but for this to work, you will need to scavenge two intact pieces. You will end up with zilch and a lot of dirty water if you use crushed charcoal. Ideally, you should at least keep one or two pieces of charcoal inside your tinder box, but you can also make some by starting a fire.
That’s about it on how to make an efficient charcoal-based water filtration system. It’s a very basic rig, but it gets the job in a shit hits the fan situation. Do you think my design needs some improvement? If you feel like something’s missing, don’t be a stranger and hit the comment section. Would also like to hear your thoughts on other ways to purify water in the field.
See also the video below that shows you how the charcoal works in purifying the water:


