This article only takes into account the effects of a nuclear EMP and not a solar flare. A solar flare will impact just about grid-connected electronics.
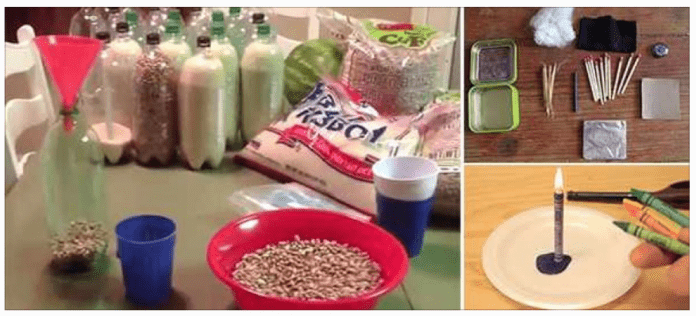
1. Will a microwave work as a Faraday cage?
No. If an EMP strikes, you will notice that all the electronic devices that you stored in a microwave oven will be rendered useless. The microwave is not a Faraday cage.
2. Will a refrigerator work as a Faraday cage?
No, most refrigerators do not work as a Faraday cage. I tested mine, and it’s definitely not a Faraday cage.
3. If I keep a backup mobile phone in my Faraday cage, will it work when I need it?
Yes, your phone will work perfectly. However, it will be rendered almost useless because the network will not be functional. The only form of communication after an EMP will be the radio.
4. Do I need to store batteries in a Faraday cage?
No. They will continue to work regardless and will just take up space in your Faraday cage.
5. Do Faraday cages need grounding?
No.
6. Do I need to keep my solar panels in a Faraday cage?
No. Your solar panel inverter is the only component of the device you need to think about. Do not think about your solar panels; they are going to be okay. Buying an extra inverter is best, and holding it in your Faraday cage so you can remove the useless one after the EMP.
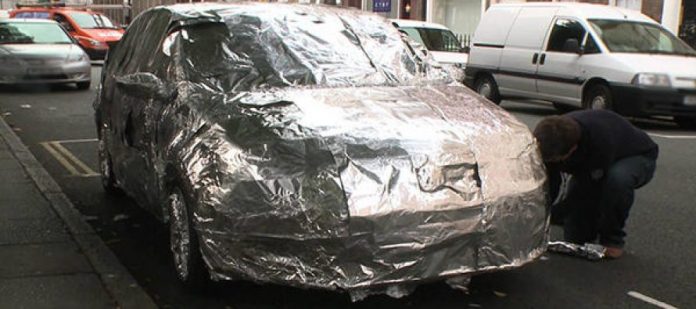
7. If I wrap electronic devices in heavy-duty aluminum foil, will that work?
No. But if you wrap the cardboard box in which you bought them in heavy-duty aluminum foil, this would be an effective Faraday cage.
8. Will flashlights continue to function after an EMP Strike?
Some flashlights will continue to function, and some will burn out. It all depends on the power and distance from the blast.
9. Is a shipping container a Faraday cage?
Yes, but just remember that you can’t just put the electronic devices directly in contact with the metal. Some people board the interior of the container with wooden panels.
10. Can I use this shipping container as a “Faraday garage” for my car?
Yes, you can definitely do that. Most cars fit in a standard shipping container, but just to make sure, go ahead and take the measurements before buying a shipping container.
11. If you turn off your devices, will they be EMP-proof?
No.
12. Are airplanes Faraday cages?
No. Planes operate on the basic principles of lift and thrust, so they will become more or less gliders. They will be very difficult to control and most of them will fall from the sky and crash.
13. How do I test an object to see if it will work as a Faraday cage?
You can test any device that you think might work as a Faraday cage with a radio. Simply turn the radio on and place it inside your device. When a signal is still being transmitted by the radio, then it is not a Faraday cage. You can use a mobile phone if you don’t have a radio, but the tests won’t be 100% accurate in the sense that if your mobile phone still rings, it’s certainly not a Faraday cage, but if it doesn’t, you can’t be sure. To be 100% sure you have a Faraday cage, you need to test it with a radio.
14. Can you EMP-proof a car?
You could build a Faraday cage, but that would mean either you’ll never use your car or you’ll need to purchase a new one. I’ve seen some pictures online of people wrapping them in aluminum, but as I said earlier, it makes no sense.
Instead of making your car EMP-proof, I think you’d better buy an old, cheap car that has a much less vulnerable electric system. Here are the top 6 EMP-proof vehicles.
15. Will a galvanized steel trash can make a good Faraday cage?
Yes, but they can have to close perfectly, and you will have to line the walls with cardboard.
This article only takes into account the effects of a nuclear EMP and not a solar flare. A solar flare will impact just about grid-connected electronics.
1. Will a microwave work
A lot of preppers are worried that, in the event, we’re ever attacked with EMP weapons, most of our vehicles will instantly turn to junk. This isn’t a far-out belief, either; it’s based on testing by the EMP Commission.
It’s true that those tests didn’t cause any permanent damage to the vehicles, but the Commission freely admits that they stopped testing at the level of EMP where the vehicles stopped running – and that was far below the levels that would be emitted by an actual attack.
It’s difficult to predict what damage an EMP attack would do to vehicles because so many variables are involved. We can make some educated guesses, though. We do know that EMP can destroy solid-state electronics, and late-model vehicles depend on those for almost everything. Without its engine management computer, a modern car won’t even start.
If your new truck is caught by an EMP the chances are it’s going to take a lot of work to get it running again. You’re almost certainly going to have to replace all the computers if you can find undamaged spares, and EMP can do funny things to wiring as well.
As the wiring harness is one of the first things installed in cars, replacing it is a huge job. Is it going to be feasible in a country devastated by the attack? I’m not betting on it.
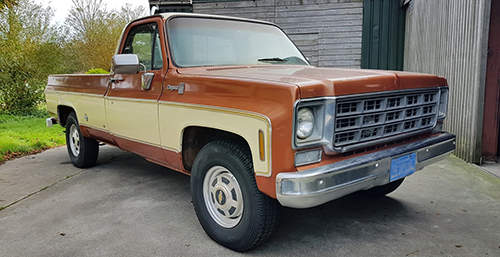
There is another option, though – find yourself a vehicle that doesn’t rely on electronics. Computer-controlled car engines didn’t really exist until the mid-1970s and there were plenty of new cars without them at the end of the decade, so most vehicles that age or older will be much more resistant to EMP. Carbureted engines with simpler wiring looms don’t give the pulse much to get their teeth into.
The bad news is that we’re talking about some pretty old, and often hard-used, vehicles here. The good news is that in many cases you should be able to get a running one for a reasonable amount of money. Here are six EMP-proof vehicles you can pick up for less than $2,000.
Volkswagen Beetle
You can easily pay over $100,000 for a classic Bug in immaculate condition – but you can also get a runner for under $2,000. In fact, while I was writing this I saw one for $500 that just needs some work on the hubs to put it back on the road. The post-1971 “Super Beetle” is usually cheaper than the classic flat windshield model.
The Beetle is built on really old technology. It has a flat-four air-cooled engine without any hint of electronics.
It’s also a rugged and reliable car that’s good enough off-road that the German army put an open-topped body on it and used it as a jeep. It won’t even notice an EMP.
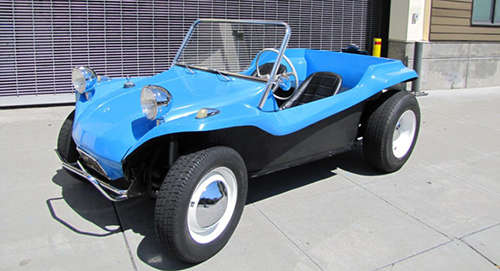
Dune Buggies
VW Bugs are classic cars now, but from the 60s through the early 80s they were just cheap imports – and a lot of people used their simple mechanicals as the basis for a dune buggy. Usually, this involved shortening the Beetle chassis by about a foot and fitting it with a simple, lightweight fiberglass body.
Dune buggies have decent fuel economy and off-road performance, and they don’t rust. They’re also very easy to modify into survival vehicles, and they don’t need a lot of maintenance. You can find a running one for about $800 upwards.
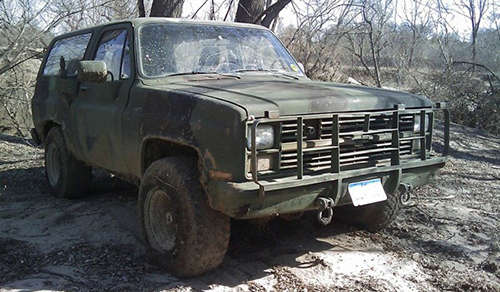
CUCV (Commercial Utility Cargo Vehicle)
In the mid-1970s the US military was running out of utility vehicles. The HMMWV program hadn’t produced anything yet and the old M151 jeeps were wearing out. As a stopgap, thousands of commercial wagons and trucks were purchased, in slightly militarized versions.
There are a few different models of CUCV, but the most common is the M1109 – a 1984-model Chevrolet K5 Blazer. This is a simple vehicle with plenty of load space, 4wd, and a powerful 6.2-liter diesel engine, and it’s ideal as a post-SHTF vehicle. Thousands have been disposed of at auctions and you can easily find a usable one for under $2,000. Try eBay.
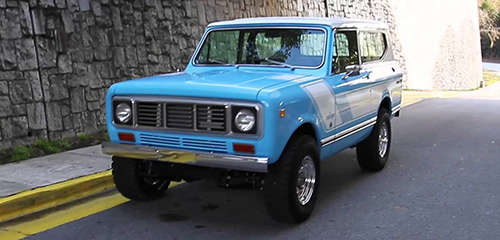
International Harvester Scout
The Scout was probably the first mass-produced SUV, even if it was never the most exciting or popular. It’s a simple, sturdy, and reliable vehicle, though, and it has great off-road performance.
The original Scout is starting to get expensive, so look for a Scout II. Manufactured from 1971 to 1980, this is a lot cheaper and just as reliable. You can find rough but repairable ones for under $1,000; $2,000 will get you a good runner.
Chevrolet Cheyenne
Chevrolet produced this full-size truck from 1959 through to the turn of the century, but what you’re looking for is a pre-1980 third-generation model. With a computer-free engine and easily maintained mechanicals, it’s a tough and practical utility vehicle.
A lot of these are still hanging on in rural areas, and you can pick up a running example for under $1,500 if you hunt around. Can’t find a Cheyenne? No problem; most other pre-1980 trucks will do just as well.
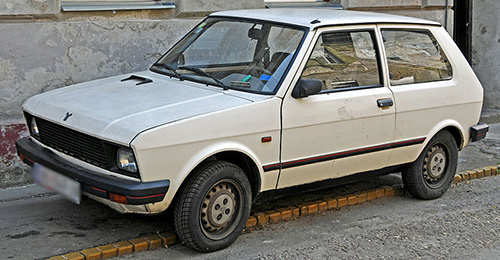
Yugo
No, don’t laugh. This cheap and nasty car was imported into the USA from 1985 to 1991 – but mechanically it’s a 1970s Fiat 127, so its 900cc engine is EMP-proof. Incredibly, good examples now sell for up to $15,000 – but you can get an average one for under $1,000 because nobody wants them.
The thing is, this is a cheap communist-built car with a tacky finish and unreliable accessories, but the engine is simple and reliable. It might be an embarrassing car to drive, but it’s a lot less embarrassing than one that won’t start because its electronics are fried.
Other self-sufficiency and preparedness solutions recommended for you:
A lot of preppers are worried that, in the event, we’re ever attacked with EMP weapons, most of our vehicles will instantly turn to junk. This isn’t a far-out belief,
One of the best ways to ensure your family is prepared for no matter what is to have a useful, and plentiful supply of stored food. I love MREs and freeze-dried meals, specifically, because they are so easy to prepare and work so great if we have to bug out. However, to supplement your supply, there is nothing like storing some basic food staples to make sure your family never goes hungry.
Most of these items, perfect for long-term storage are extremely basic and generally cheap to obtain, but they pack a major nutritional punch and can be cooked and baked into hundreds of different meals to keep your family, fed and satisfied. In addition, most of these items will have excellent barter potential too.
1. Rice
All kinds of white rice are acceptable for long-term storage. When stored properly, rice can stay good for 30 years or more making it a perfect long-term storage food item. To Properly Store Rice: Pack it in an airtight container, or food-grade bucket, to keep oxygen and pests out. Keep it in a cool, dry area.
2. Flour
Flour, wheat, or white, can stay good on the shelf for 5 to 10 years. If you have space; freezing your flour can extend its life exponentially. To Properly Store Flour: You can store it in the traditional paper sack they come in if you can keep it refrigerated, but it is better to pack your flour in an airtight bag or storage bucket and keep it in a dry, cold place – the colder the better.
3. Honey
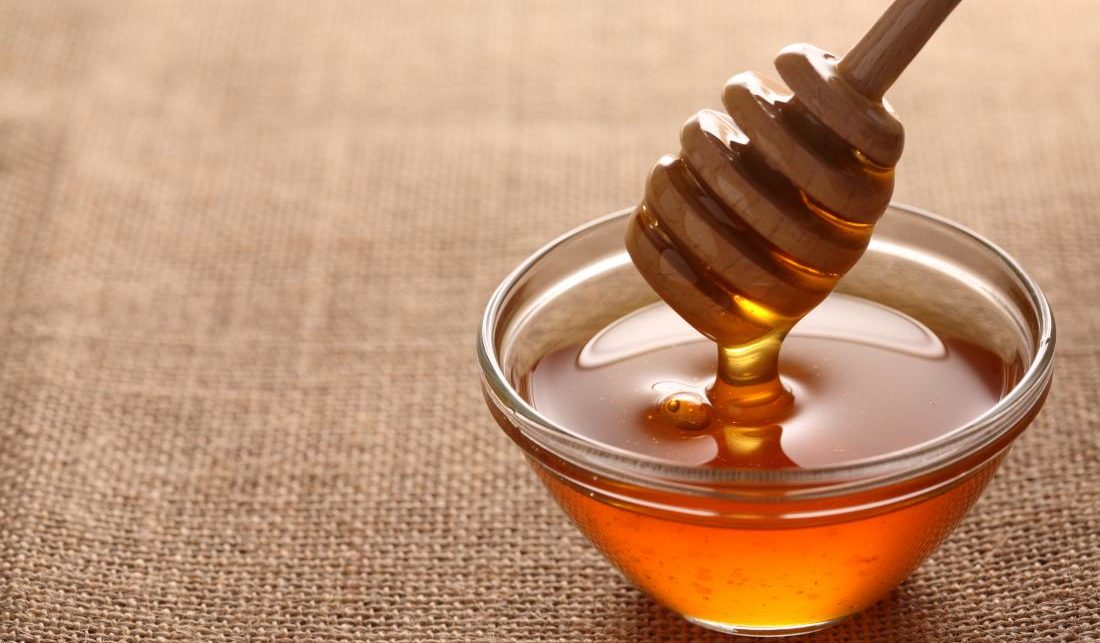
Honey is a great item to have on hand, not only is it a great sweetener, but it has medicinal properties and is enjoyed by kids and adults alike. The best part is, that it will not go bad. Honey may change its color or even crystallize a bit, but none of that changes the fact that it is still good to it. You can actually buy granulated honey, which is all ready for long-term storage and can be used like sugar or reconstituted the gooey stuff itself. To Properly Store Honey: keep it in an airtight jar and keep it in a cool dry place away from sunlight if possible. If the honey crystallizes, you can run warm water over the jar, or add small amounts of water and stir, to reconstitute it.
4. Salt
Salt may be one of the most important items you can stockpile. Not only is it important in everyday cooking, but its ability to preserve food will make it a popular item to not only have, but to barter with as well. To Properly Store Salt: Salt is easy to store, just keep it in a cool, dry area away from sunlight.
5. Sugar
Sugar, much like salt, will likely be a popular bartering item and it makes sense why. Having sugar on hand will go a long way to provide our family with some home comforts when times are uncertain and hard. Like honey, sugar can crystallize, but it simply does not support any sort of bacterial growth, so no matter what it will be good. To Properly Store Sugar: To prevent crystallization, store in an airtight container, but no matter what store it in a cool dry place.
6. Popcorn
Popcorn or dried corn can stay safe indefinitely, which is why it is such an important resource to the indigenous people of this country… it could be used fresh, and then dried to be used throughout the winter. Dried corn can be ground and used as cornmeal or in any recipe that calls for fresh corn too. To Properly Store Popcorn: Once dried, keep it in a cool, dry place. Store in an airtight container or bag to keep out pests and keep away from light and heat.
7. Cornstarch
Cornstarch is a great tool in cooking, especially if you are trying to stretch your food supply with gravies and sauces. You don’t need much, and it doesn’t take much to store either, so it’s really no wonder so many preppers keep this on hand. To Properly Store Cornstarch: Keep it in a dark, cool, and dry place. Pack tightly to minimize air and contaminants getting in.
8. Vinegar
White vinegar lasts indefinitely on the shelf, and having it on hand is a must for the smart prepper. It is good for cooking and canning, but it is also a powerful natural cleaning agent and will be no doubt a popular barter item as well. To Properly Store Vinegar: Keep in a bottle with a tight lid or cap, and store in a dark, dry place.
9. Pasta
Even packaged the way it comes from the store, the pasta will keep for a few years. It is a great item to store, and a crowd pleaser and comfort food especially in survival situations. To Properly Store Pasta: You can buy pasta that is packaged for the long term, or you can store it in mylar bags with oxygen absorbers. Store in a bucket, or in another cool, dry place.
10. Pinto Beans
Beans are so cheap, easy to store, and pack serious nutritional value that they are a no-brainer for any prepper to consider in their stockpile. Dried pinto beans can last for many years. To Properly Store Pinto Beans: For the longest shelf life store them in mylar bags with oxygen absorbers. While they won’t go bad, they may get drier and harder over time. Even if they do get dry you can still grind them up and use them in most of your cooking, they will still be edible and nutritious.
11. Dried Peas
Dried split peas have an indefinite shelf life and can be used in soups, stews, or just as good ole peas themselves. To Properly Store Dried Peas: Much like beans and other legumes, the best method is to pack them in a mylar bag with oxygen absorbers, once packed they will last for many years. You can also stock up and buy a bucket, which is already packaged to last up to 30 years.
12. Baking Soda
Baking soda has a variety of uses, for cleaning, baking, and medicinal purposes. If stored properly, it will last for years; though it can lose potency over time. To Properly Store Baking Soda:Keep in an airtight container and store in a cool dry place. Remember that baking soda absorbs odors, so you will want to keep it airtight and away from any of your other storage items. To test if your baking soda has lost its potency, add a little vinegar to a small amount of the baking soda… if it bubbles, it’s still good.
Food-grade buckets and mylar bags should be used whenever possible, and if oxygen is an enemy, oxygen absorbers. I also like to upgrade my buckets with gamma lids, that allow you to screw the lids on and off easily so you can access foods in your stockpile without fumbling around with difficult bucket lids. They stack nicely too. Food Bricks are also great for stacking and accessing your foods so you might consider them too.
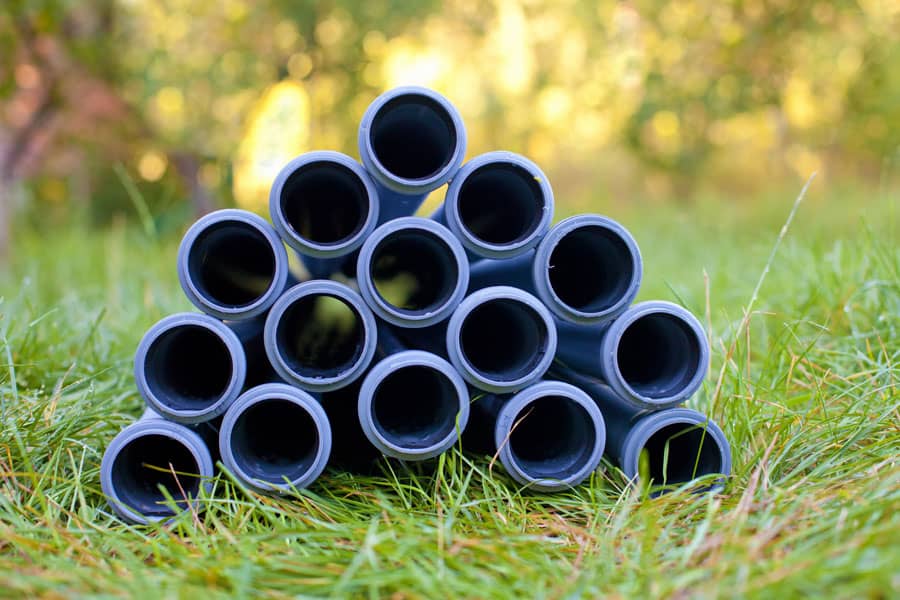
There are so many projects that you can do on your homestead. Have you considered DIY projects with PVC pipes? There are a number of things that you can do from animal care to garden hacks. The projects can be very simple to more complicated depending on what you are going for. You can be very colorful or plain when you are building your projects.
PVC pipes are lightweight and easy to use. They are bendable and easy to use. Working with PVC can be done on your own or very easily a team project. The pipes are durable enough to withstand the wind. The pipes won’t change shape or expand with contact from water. PVC pipes are also non-toxic so they are safe for use for animals and human contact.
Let’s look at some fun and creative ideas to make out of PVC pipes. I will list them in part of how you would use the project on your homestead. Garden jobs and hacks, animal care, and even clothing help for chores. There are so many other projects that can be done by using PVC pipes but these are aimed more at homesteading.
Garden Uses
Being that the PVC pipes do not react to chemicals they are perfectly safe to start seeds in. They are also safe for your food and soil to be in contact with the pipes.
Tomato Cages
These are a handy and reusable cages for holding up your tomatoes. You can make the cages according to the type of tomatoes that you grow.
Also, the cages can be made small for individual plants or for several plants such as in a row.
Cucumber Trellis
Cucumbers can be grown on the ground but they do better growing up a trellis.
The trellis can be shaped however you desire.
The PVC pipes will keep the trellis sturdy and give you space to run lines for the cucumbers to climb.
Cold Frames
When you work with PVC it can be shaped how you like.
A cold frame is a small tunnel-shaped ground cover.
These PVC frames are great for fall and winter gardening.
Deep Irrigation
This is a great way to really water the roots of some of your plants.
With this irrigation system, you simply take a pipe and drill a few holes and then insert it into the ground next to the plants and dump water down the pipe for a good deep watering.
Handheld Seeders
This handmade contraption is a back saver when it comes to planting your seeds.
The seeds can also be made to your height for added ease and comfort.
Take the seed and drop it through the pipe at the bottom is making a hole in the ground for the seed.
Ground Irrigation
This form of irrigation can be more complex. You can make as many lines and cover as much of your area as needed. This requires more work to build but saves a lot of work and watering once it is finished.
Garden Tool Holders
This PVC holder is very handy for organizing your tool shed.
Be sure to always put your shovels, rakes, and hoes away when you are finished and you will always know where they are and this helps to keep the tools out of the weather.
Garden Hose Holder
When making this hose holder you can add wheels for toting it around with you.
This can hold your hose wrapped up on it and allow a place to hang your spray nozzle also.
Aquaponics Growing
A PVC pipe is great for holding water so it makes a great aquaponic garden.
Cap the ends and drill holes to the desired size for the plants.
Window Gardens
The PVC can be cut to heights and lengths needed for either horizontal or vertical growing in your window sills.
In the PVC window gardens, you can grow whatever you want inside.
Container Gardens
With the various sizes of PVC pipes, the options are endless for making containers for a container garden.
The containers will do great in the garden, on the patio, or raised beds.
Small Greenhouse Frames
There are many types of greenhouses that can be made out of PVC pipes.
The pipes can frame a hoop greenhouse, a small square one, or even one that is built onto a wall for half a greenhouse.
Tomato Stakes and Waterer
This is an awesome idea for helping grow your tomatoes.
We all know how crazy the tomato patch can get.
With this, you can tie your plants up the height of the pipe and also our water down the pipe for good root watering.
PVC Berry and Fruit Picker
This is a great way to reach the fruit in those tall trees.
A little tweaking on the tip and a piece of pipe round enough so that the fruit can be picked and travel down the pipe to your basket.
Easy Peasy fruit collection.
Animal Care
The safety of PVC makes them great for use in animal care. There are so many options for animal care from feeding to comfort.
Chicken Feeders
My chickens eat a lot of feed and like to get in my way when I am trying to feed as they are ready.
Making a PVC chicken feeder is genius as it holds lots of feed, eliminates waste, and keeps them from flocking around your feet.
Hog Waterers
Now this hog waterer can be huge or small depending on the pen size and the number of hogs you are watering.
For fair, we made small round but tall pipes.
Purchase a nipple and thread into the pipe, cap, and waterproof then you have a waterer.
Milking Stand
A milking stand can even be used as a shearing stand.
This project will be a lot more difficult to complete but if you have milk goats or sheep then your back will appreciate the extra effort.
You will need to make sure that the stand is sturdy for being able to hold the weight of your livestock.
Chicken Tractor
A mobile chicken coop is nice.
A lightweight mobile coop is even better.
The Chicken tractor can be made to fit the size needed for your flock.
Chicken Waterer
A PVC waterer takes some work to not leak.
This waterer is somewhat of an automatic waterer as it can hold several gallons.
Bird Feeder
Hanging bird feeders are appreciated by the wild birds, especially in the winter months.
The bird feeder can be made very simple or even can be built to deter squirrels from getting into it.
Birdhouses
The wild birds will also appreciate a birdhouse.
The PVC birdhouses can be decorated in very nice colors and can be spacious enough to be able to comfortably make a home for a bird or even a nest of them.
Dog Cot
Not all of our pets are allowed on our furniture. Some may not even like a big fluffy bed or pillow to sleep on so make them a cot.
For the smaller dog, you can build the cot low to the ground or vice versa. You can also use some really cute materials to make the cot with.
Frozen Tubes for Keeping Cool
This project is nice to have around. It serves the same purpose as a frozen two-liter bottle but will hold ice longer.
The frozen pipes can be put in pens to keep animals cool by laying against or they can be put into water bowls to help keep the water cool.
Dog Food and Water Stand
This PVC pipe project is very appreciated by your taller dogs.
My mastiff is very tall and it is a stretch to eat from a bowl on the floor, he usually just lays down to eat.
The legs of the stand can be made to height and adjust them to the size of your food and water bowls.
Small Animal Pen
With some PVC pipes and elbows, you can build a nice little pen for your pet to play outside in.
I used to have guinea pigs and they liked to be outside but couldn’t be loose or tied up so a small pen was perfect.
This pen can even be taken apart for easy storage.
Homesteading Chores
When working around your homestead it is always helpful to have a “life hack” to make your chores easier or more fun. These projects can be very helpful to be able to finish your chores,
Gutter Cleaners
The PVC gutter cleaner is a whole lot safer than climbing a ladder.
The pipe hooks to a hose and then reaches up to the gutters for spraying and cleaning out.
Camp Chairs
You can never go wrong with chairs.
These PVC chairs are lightweight and easy to move around.
Build your chair and then take it around with you for when you need a break from your chores.
Tapestry Loom
Not every homesteader needs a tapestry loom but if you do or would like to give it a try this is a cheap way of making a loom.
Wagon
Every homestead needs a wagon. This PVC wagon is lightweight and mobile.
Frame the walls of the wagon and place it on some wheels and you have the means to move around a lot of items on your homestead. You can also pull the kiddos around on it for fun.
Clothes Rack
This clothes rack is meant to be smaller than a regular clothesline.
You also have a mobile drying rack to take with you on trips or camping or when swimming to dry your wet towels.
Target Stands
On my homestead, we like to shoot.
A PVC target stand makes for different levels and paces for shooting. The stand can be made to hold different items for target practice.
Trash Bag Dispenser
This is a very simple project. Make a wide cut into the side of the pipe and you can even mount it onto the wall or cabinet.
Slide the roll of trash bags through an end and pull them individually out the slit in the side.
Outside Shower
An outside shower is not a requirement but it sure is nice to have.
Having an outside shower will make it easier to rinse off from the real hot sweaty days from the hayfield.
Or when you have been out cleaning the hog barn and stink from high heaven and don’t want that trailed into your house.
Pipe Spool Holders
This project is more for organizing.
The pipes make nice organizers for hanging things such as ribbon, tape, and even wire from.
Recycling Bag Holders
This holder is an easy project to accomplish.
Build a frame that will stand and put a large trash bag in it.
Now for parties or yard work you have a light open container to discard trash or recycle items into.
Waterproof Cache
Make a waterproof cache out of PVC. You can store anything of importance to you in this cache. You can make the cache as long or as big around as you like with the pipe of your choosing. Cap and waterproof the ends to be sure that your stuff is protected. Food, money, or even medicine are great items to put into your cache and store.
Take your packed belongings and then you can dig a hole in a secret location for security and not have to worry about it until it is needed.
Working with PVC doesn’t require many tools. Most of the needed tools are simple hand tools that can be used by a single person making these projects very doable. The projects can be cut, shaped, and fitted together easily for fun and handy projects. Paint even sticks well to the plastic to make for the projects to be decorative along with useful. With some measuring and a little work, you will have homesteading projects to make your life easier.
There are so many projects that you can do on your homestead. Have you considered DIY projects with PVC pipes? There are a number of things that you can do
Sure, shoveling a couple of tin cans and ready-to-eat packs inside a pantry or emergency household kit may be a no-brainer, but what happens when a real emergency blows your way and you’ll need to eat those stuff to stay alive? More than that, are you really sure that everything stays fresh until the time for unboxing comes? There are a lot of things to consider when creating a long-term food stockpile: shelf life, type of food, the very environment where you choose to store the food, and, the containers themselves.
As you know, emergency food should be stored in a cool and dark environment to keep them from getting rotten. Still, that leaves you to deal with other unforeseen dangers such as rodents clawing your way into your food stash, insects, and, of course, indirect environmental factors that can make long-term storage food stored in metal cans go bad. Last but not least, moisture can severely affect your food, even if it’s neatly wrapped in packages.
What I like to do in this case is to take the original pack and place it inside individual zip-lock bags before placing them inside airtight plastic containers.
You can even throw in a couple of desiccant silica gel packs to remove any moisture remaining inside. For a while, I thought long and hard about finding a more permanent solution to the excess moisture issue inside the pantry I use to store my food and I eventually ended up buying a dehumidifier. It works very well, and mine takes triple-A batteries (you can switch them with rechargeable power cells).
Now, regarding today’s topic, some foods are more endearing than others. For instance, lentils can be stored for at least 5 years. On the other hand, rice, if deposited in a proper environment, can last for 30 years if not more. This is why I’ve always pushed for smart stockpiling, aka buying only those stuff with a very long shelf life that could, theoretically, last forever.
This is not something new under the sun. In fact, if you remember your history lessons when Carter and Lord Carnarvon popped open Tut’s tomb, they found perfectly edible food stored inside wax-sealed angoras. And it’s not the only example – the Chinese and even the Mayans. So, what are these wonder foods that can be kept for decades at an end in the pantry before going rotten? Stick around to find out.
Carrots
Packs with flavonoids and tons of other nutrients, carrots are excellent for stews, broths, and even by themselves. What most people don’t know is that those bright-orange wonders can be stored for decades. Dehydrated carrots have a shelf life of 25 years or even more. The trick is to place them in air-tight containers right after removing all the water to minimize contact with the air. I recently found out that it’s way easier to remove the water if you chop them into small pieces.
To whip up a quick batch of dried carrots:
Peel them off.
Wash and rinse.
Blanch them in a pot.
Put them on a tray.
Preheat the over to 125.
Place the carrots inside and allow them to dry. It takes about 4 to 5 hours depending on your oven.
Don’t forget to still every hour. Take them out of the oven and allow them to dry before tossing them inside a zip-lock bag.
2. Pasta
Mamma mia! Who doesn’t adore a plateful of pasta with meatballs? I, for one, am very much in love with pasta. It’s the type of food that can be cooked in every way imaginable. Even better, pasta, especially the deep-frozen variety, has a very long shelf life (at least 20 years).
Still, if you store them in a moist-free environment, you can take them out and whip up a quick pasta dinner even after 40 or 50 years. I read somewhere that pasta products can even last for a century and even more if placed in special storage containers like aluminum-lined mylar bags.
3. Salt
No meal’s complete with a sprinkle and tinkle of salt. This awesome condiment, which has been around since the dawn of time, does not ever go rotten if stored in the proper conditions. You need not worry about bacteria getting inside, because salt has a way of dealing with them.
Still, the only thing you should concern yourself with is moisture. If the container isn’t properly sealed (been there, done that), then it’s bye-bye salt and hello mush. I usually keep my salt in a heavy-duty plastic container in which I throw a pack or two of desiccant silica gel wrapped in plastic just to be sure.
4. Baking soda
There’s nothing baking soda can’t do or fix – you can use it to bake delicious cookies, cakes, and clean stuff around the house. Before I went to the doctor to get my molar fixed, I used to gargle baking soda in the morning before brushing my teeth (great for morning breath as well).
If you’re a computer buff, just like myself, you can use a light baking soda mixture to remove persistent stains from plastic computer cases (also works wonders on those yellow spots!). As you’ve guessed it, baking soda has no expiration date, provided that you store it in proper conditions – no moisture and sunlight.
5. Soy Sauce
Care for some Chinese? Well, if you’re a fan of Asian cuisine then you must know that no dish must be without soy sauce. The salty, smokey, flavor gives that sea-foody taste to each meal. Are you ready for the good news? Soy sauce never goes bad. Ever!
Since it’s packed with sodium, that stuff will never spoil due to bacteria. Watch out for moisture and exposure to sunlight though. To protect that black gold, pour the contents of a bottle into a sealable and air-tight glass jar. You can line up the jar’s mouth with aluminum foil and plastic wrap for extra protection.
6. Powdered milk
I know that nothing beats the taste of real cow’s milk, but the bacteria inside it make it impossible to store it over long periods. On the other hand, powdered milk is not pretentious and very handy to have around the house for dishes and drinks. If stored in a moisture-free environment, powdered milk can last forever. I usually store powdered milk in a large plastic container with a couple of moisture-absorbent packs inside.
7. Instant drinks (coffee, cocoa powder, and tea)
No emergency stockpile should go without easy and quick-to-prepare drinks. I cannot and will not imagine a world without coffee or tea. Since they’re dehydrated, all instant drinks can last up to 10 years if you remember to store them in a moisture-free room.
8. Honey
Yes, dear? No, I was talking about bee honey, the one you use to make cookies or sweeten your drinks. The high sugar contents inhibit bacteria from developing. And, if stored properly (lid screwed on tight, no sunlight and moisture), a jar of honey can last for 100 years or even more!
9. Stock and bouillon
These are great during those cold winter days when you want to whip up a bowl of soup or your favorite comfort food. Everything boiled and set to cool down before being placed in bottles or something can last for ten years or more. A funny thing happened to me the first time my wife and I prepare bouillon for our stockpile.
So, the pantry which I used to store my food had a slight design issue – heat seeped through one of the holes in the wall. After the bottles cooled down, we placed them inside and forgot about them for a couple of weeks. One night, I heard this long bang coming from the pantry. Half-asleep and almost naked, I ran up to see what the Hell was happening.
When I opened the door to peek inside it was like stumbling upon a crime scene – two of the bottles exploded and there was tomato sauce everywhere. After a while, I realized that the heat made the bouillon bottles blow up. So, make sure your pantry is insulated. Otherwise, someone might think you’ve killed someone and hid his body inside the room.
10. Sugar
Spice and everything nice – these are the ingredients to create the perfect prepper. Very much like baking soda and honey, sugar can be stored indefinitely. The only problem is that it tends to harden over time. No problem. Just place it inside a large container and use a spatula or a spoon to break down those big chunks.
11. Beans
Delicious, nutritious, and easy to prepare, beans are at the very top of the food pyramid. Although you’ll probably end up passing more gas than usual after a bean-based dish, it’s nevertheless a versatile food. More than that, if you’re careful enough to store them in proper condition, a single bag of beans can last up to 30 years. There’s one catch about beans – you will need to reseal the bag from time to time. This is why I switched to aluminum-lined mylar bags instead of plastic, airtight containers.
12. White vinegar
What happens when the wine goes bad? You get up from the table and argue with the waiter, of course. Kidding – wine has this outstanding quality of transforming into vinegar, which is one of the most useful items found in your pantry, apart from salt and baking soda.
Vinegar can be used in salad dressings and other dishes, but it’s also a great helper around the house (my wife uses it to remove cat hair from the carpet and I use it in very small amounts to remove pigeon droppings from the car’s hood). White vinegar never goes rotten, so you can store as much as you want without a problem.
13. Maple Syrup
Fancy some pancakes with maple syrup for breakfast? My kids go absolutely bonkers over this dish. Can’t say that it’s really good for their teeth but, hey, try arguing with a hungry and screaming toddler. Just like honey, maple syrup has high sugar contents, which means that it can be stored for long periods of time (50 to 80 years, by some accounts).
However, you should know that there’s a huge difference between maple syrup stored in plastic and the one stored in glass bottles. The first, even unopened, has a shelf life of 5 to 18 months, while the later can last as much as half a century.
14. Ghee
I don’t know if most of you are familiar with this ingredient. Ghee is a type of base which is prepared from boiled butter. Basically, you get ghee by removing all the water from the butter. Great for Indian dishes and preparing low-calorie foods. If you store it in an airtight container, ghee will never go bad on you.
15. Corn starch
Momma always used to say that if the food looks too watery, add some cornstarch to make the spoon stand up on its own. Corn starch is very useful around the house – you can cook with it, clean up stuff, and even use it in combination with water to soothe sunburns. Stock up on cornstarch now because this stuff will never go bad.
Okay! To wrap this up in a neat and elegant manner, check out this small list of all the foods and their shelf-lives. Hope you’ve learned by now that smart stockpiling is all about knowing your food and not shoveling them in a pantry and throwing away the key.
Food
Shelf Life (years)
Carrots (dehydrated)
25+
Pasta
20+
Salt
Forever
Baking Soda
Forever
Soy Sauce
Forever
Powdered milk
Forever
Instant drinks
10+
Honey
100+
Stock & Bouillon
10+
Sugar
Forever
Beans
30+
White Vinegar
Forever
Maple Syrup
50~80
Ghee
Forever
Corn Starch
Forever
Other self-sufficiency and preparedness solutions recommended for you:
Sure, shoveling a couple of tin cans and ready-to-eat packs inside a pantry or emergency household kit may be a no-brainer, but what happens when a real emergency blows your
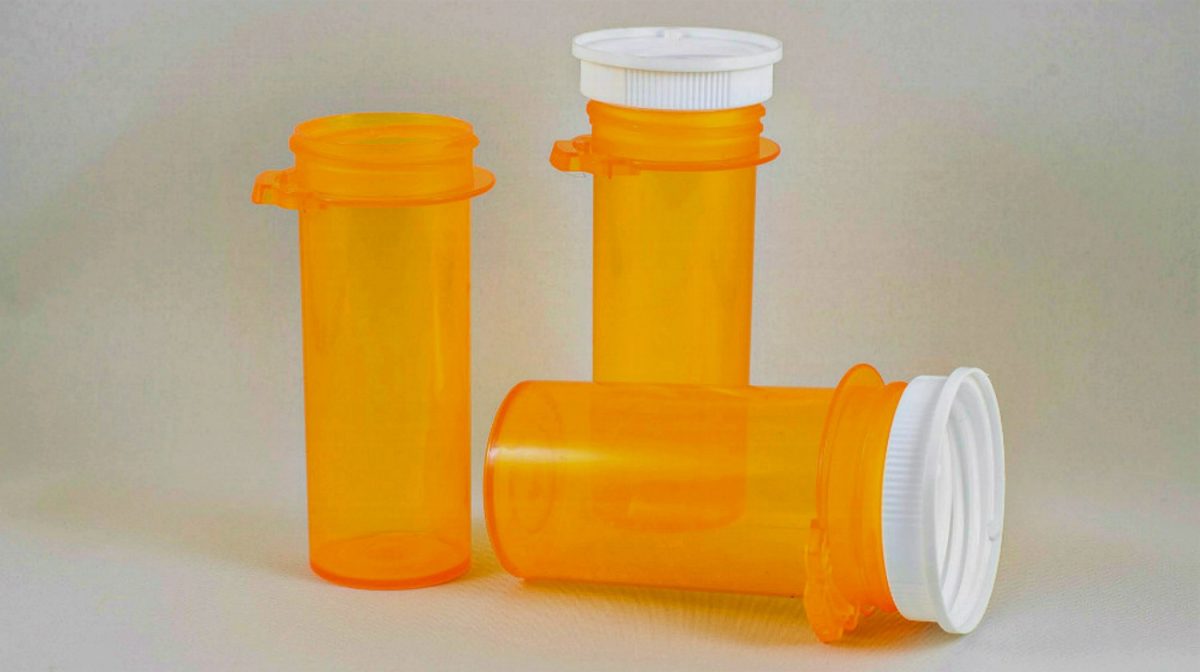
“It’s never lupus,” as the iconic Dr. House put it. Don’t know too much about that, but I have a saying of my own – “it’s never just a pill bottle.” Yup, you’ve guessed it. Today I’m going to show you a couple of nifty ways to reuse your old med bottles.
Some are them are no-brainers, while others are quite ingenious. Heck, when it comes to human ingenuity, even something as insignificant as a match can be turned into a unique item. So, because talk’s cheap, here are 11 ways to use your old pill bottles around the house.
Big life lesson – when you reach the point where two paychecks aren’t enough; you have to make some sort of change. I won’t deny the fact that with all my prepping training I still end up spending a couple of thousand dollars each year buying all sorts of crap.
Well, ever since my lovely wife realized that money kept flying out of my wallet, she used a clever trick to put something aside for rainy days – stuffing dollar bills in old pill bottles. Yup, took me a while to figure it out.
Long story short, the cash pill bottle trick worked, and we managed to put aside enough to buy our son a new smartphone. So, if you’re just like me when it comes to burning dough, use an old pill bottle as a piggybank.
Make a small emergency candle
You can make a 4-hour emergency candle by filling an old pill bottle with wax, lamp oil, tallow, or fat obtained from melted bacon. Stick a wick inside, allow it to soak the fuel, and set it ablaze.
Fishing kit
If you don’t have the resolve to make a paracord grenade, you can at least try to make e small fishing kit using a pill bottle, some cordage, hooks, and a couple of feet of fishing line.
Here’s how to do it. Wrap the paracord tightly around the pill bottle, place your fishing implements inside, and put the cap back on. You can attach a small carabiner to the cordage if you want to hang the fishing kit to your bug-out bag or belt.
Travel-size shampoo and conditioner
You really don’t need to throw a whole bottle of shampoo, conditioner, or shower gel in your luggage or bug-out bag. Pour as much as you need inside pill bottles, put some plastic wrap on top, and screw the cap in place.
Store key to ammo locker or safe
You know how the saying goes: if you want to hide something, put it in plain sight. If you’re worried about your children finding the key to dangerous storage lockers like the ammo cabinet, propane tank locker, or fire-proof safe, use old pill bottles to hide the key. You should also fill them with small pebbles or kitty litter to give off the impression that they’re really pill bottles.
Create a waterproof money container
Since I’ve mentioned something about saving money, you can create your own waterproof cash container by repurposing a bottle. Remember that cash will always be king, and that’s why it would be wise to have a small amount on you. To make a money container, you’ll need a small drill, epoxy glue, paracord, and, of course, some money.
Start by drilling a hole in the pill bottle’s cap. Draw the paracord through it and apply some glue. Put your cash inside, screw the cap back on, and that’s it. You can also make a square knot at the base of the pill bottle to ensure that the thing doesn’t fall off your bug-out bag or belt.
Make a small med kit
Although nothing can replace your B.O.B’s first-aid kit, it is possible to make a smaller and more portable version using a pill bottle. You can also use the steps for crafting a waterproof money container for your mini-med kit.
As for the contents, I added a couple of aspirins, some Ibuprofen, Alka-Seltzer, one Iodine prep pad, and one alcohol-soaked prep pad. Of course, you’re free to add or remove items.
Make a perimeter alarm
I don’t know about you, but I always like to install some sort of perimeter alarm when I want to camp for the night (I usually end up using the beer cans I brought along for the ride).
If you’re not much of a beer lover, you can make your own perimeter alarm using a couple of pill bottles filled with kitty litter or pebbles. Put a couple of stakes in the ground, connect them with some dental floss or string, and tie the filled pill bottles.
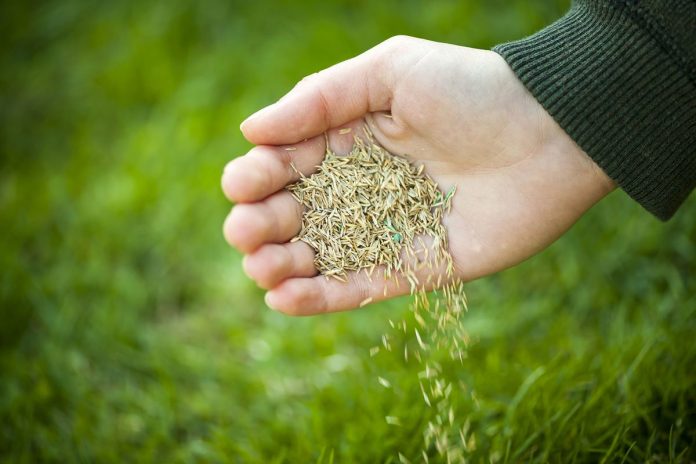
Store seeds for later use
If you want to protect seeds from the sun or extra moisture, store them inside clean and dry pill bottles. Don’t forget to label them.
Make a field sewing kit
There’s no way of telling what could happen in the field. And, during a shit hits the fan situation, your clothes will get torn to shreds. Sure, you can always patch them with some zip ties or dental floss, but you can also take the high road by using your sewing kit.
You can quickly make one from an old pill bottle. Place a needle, some thread, and a couple of patches. Put the cap back on and store it inside your B.O.B.
Make a deodorizer
If you want to ward off those nasty smells from your clothes, place some dried-up lavender flowers inside a pill bottle. Use a needle or a small knife to poke a couple of holes in the lid.
Finally, place it inside the wardrobe and, voila, no more rancid smells. You can also make one for the fridge. However, for that one, I would advise replacing the lavender leaves with apple cider vinegar, baking soda, or diatomaceous earth.
That’s about it for my take on repurposing an empty pill bottle. Would you like to add anything to the list? Hit the comments section and scribble away.
One of the disasters that preppers fear the most is an EMP (electromagnetic pulse). Why? Because it would literally throw us back a couple of hundred years by knocking out the power and rendering all electronics useless. That means no more cars, lighting, hospitals, internet, cell service, hot water… the list goes on and on.
It’s been estimated that 90% of people would die after a year without power. To avoid being one of those people, you need to stockpile things that are EMP-proof.
As you will soon see, there are many items that are fully invincible to an EMP
Are you preparing for an EMP disaster? It’s about more than just the Faraday cage. How many threats and voices will our nation shun before the lights go out and America starts to eat itself?
Here are 10 items to hoard before an EMP attack:
LIGHTERS
A successful EMP attack is the end of modern heating and cooling systems. We will be thrust back hundreds of years and outside of our ingenuity, wood will be how the average man stays warm. Fire will be a massive part of your life. You will use it to purify water, cook food, heat your home, and preserve food.
Forget the bow drill or the fire plane and just hoard tons of lighters so that starting a fire is something you never have to worry about. Lighters are one piece of modern tech we can take into a post EMP setting.
CASH
Americans are just terrible when it comes to saving money. The good news is there is no better time to start. Don’t throw all your money in the bank. When the EMP runs through your neighborhood it will shut off those ATMs permanently. How will you get your money?
Keep a healthy store of cash either in your home, in a safe, or hidden somewhere that is easily accessible without electronics.
Ideally, a month’s worth of cash makes for a great disaster fund. Your EMP goal should start there.
BULLETS
Whether you plan to barter or besiege your way through the post EMP landscape you will need ammo. Ammo makes every list of best bartering items and for good reason. Here is a great method to get cheap and reliable ammo for SHTF to start your stockpile today.
Store ammo for your weapons and popular rounds for weapons you may not own.
.22, .22LR, 9mm, .45apc, and 5.56 are all great options to store and buy in bulk.
TOOLS
Right now, tools are cheap. Dirt cheap. High-quality tools are being produced on a massive scale and waiting to be gobbled up. What’s the harm in storing multiple sets of wrenches, hammers, axes, and sockets?
Beyond just the tools themselves, now is the time to stock up on things like mineral oil to protect our metal blades and tools from rusting. Also, hoard some linseed oil for treating those wooden handles. Tool maintenance will be a huge part of surviving an EMP.
Also, stock up on sharpeners. If you are out of electronics you will at least want the sharpest axes knives and saw blades to make the demanding work a little less taxing.
COOKING OIL
The process of creating commercial cooking oil will take a huge hit following an EMP. The large harvesting machinery and the manufacturing machinery that produces the oil will all be offline following an EMP. Cooking oil is one of those items that most preppers forget about. Right now, you can buy basic cooking oil for less than $3 a bottle.
BOOKS
While we all have access to the oracle through our phones or computers it won’t be there after an EMP. Some experts think that the effects of an EMP will not be completely felt by all electronics, I can promise you that our intricate network of information will fall apart after an EMP, even if they are right.
Suddenly you will be left with only the hard copy information that exists on your bookshelves.
First Aid Gardening Repairs Home Maintenance Self Defense Philosophy Prepping (of course) Homesteading These are all great options for the average person to have on their shelves.
WATER IN MANY WAYS
After an EMP water will become a gamble. While taps may work for a limited time, there is no assurance that we will have clean and safe water coming out of them. In order to prepare for this, you must start hoarding water today.
Do not depend on one source for your post EMP water. Instead, take a tiered approach to water storage and maximize your methods for water procurement.
You should have access to plenty of the water that comes from the sky. Rainwater collection is a crucial method for hoarding water. While the 55-gallon barrels work well, you may just want to make the investment in a massive 1200-gallon cistern.
Retail water can be purchased and stored as well, or you can use tap water to fill things like waterbricks for the future. If you do store retail water just be sure it gets cycled through because the cheap plastics will no doubt leech toxins into your water over time.
MEDICINES
Medicines are tricky. You gotta have them and you should most definitely hoard them but you should also be careful when it comes to cycling them out. Unlike food, you can’t just pull an older bottle of Tylenol out of the cabinet and have it for dinner. That is unless you don’t want to worry about the EMP anymore.
After a medicine expires its effectiveness will begin to decrease and this will make it harder to dose properly.
When it comes to hoarding meds, I think you have to take a loss on some items. It’s a bet. When meds get close to expiration start asking around. Someone will need them. Buy a fresh stock and start the process again.
Spend a little extra and buy things like children’s medications even if you don’t have kids. These will be gold in a collapse.
FIRST AID
Filth. That is what comes to mind when I think of a post-EMP world.
Filth, pests, and the diseases they harbor. Remember, waste will sit around, and trash will sit around. You will be working and moving more than usual to survive. You are going to get cut and you are going to get sick.
Along with basic first aid, you should also hoard the materials needed to set up a simple quarantine. Our scientists will not be working around the clock to create vaccines for illnesses anymore. It will be up to good hygiene, immunity, and the ability to quarantine the sick.
Rolls of plastic N95 Masks Rubber Gloves Plenty of Soap Feet Covers Coveralls
TRASH BAGS Trash trucks are broken down, and the water system is compromised but all your trash and excrement must go somewhere. Do you have a plan for that? Trash bags will give you options when it comes to how you handle your waste.
This will affect your general health exponentially. It will keep pests away from your home and you will limit your exposure to harmful bacteria both in pests and in waste. Sickness will be one of the biggest killers in a post EMP world.
Starting a Stockpile
I subscribe to three hard and fast methods of stockpiling or hoarding items for a collapse. These methods will give you options based on where you are financially as well as where you are on the rungs of preparedness.
SUPERMARKET HOARD
Supermarket hoard is a slow and plodding process that involves buying a handful of small extra items each trip to the supermarket. This is how you build a strong first aid haul or how you slowly gather your lighters and trash bags.
Think about it this way. You hit the supermarket about 52 times a year. If you grab an extra box of trash bags half the time imagine what you could have by the end of one year!
BULK PURCHASE
If you are in a hurry and have the means you can also bulk purchase items. This will work best if you can get neighbors or other preppers to join in on the purchase. When it comes to things like ammo this is your only option.
The bulk purchase will consistently get you more for your money, but you must have a chunk of money to make the purchase. Do not make bulk purchases on credit unless you are paying them off quickly.
DISCOUNT EXPLORER
If you have the time and the inclination you can also hunt for hoarding deals. Mastering the world of coupons and discounts will allow you to build your stockpile fast and at a great price. The world of discounts can offer you incredible benefits.
Of course, the only problem with discounts is they are inconsistent.
Use a combination of all three methods to ensure you are hoarding all the items you need to survive an EMP.
Other Self-sufficiency and Preparedness solutions recommended for you:
The Lost Ways (The vital self-sufficiency lessons our great grand-fathers left us) Survival MD (Knowledge to survive any medical crisis situation) Backyard Liberty (Liberal’s hidden agenda: more than just your guns…) Alive After the Fall (Build yourself the only unlimited water source you’ll ever need) The Lost ways II (4 Important Forgotten Skills used by our Ancestors that can help you in any crisis) The Patriot Privacy Kit (Secure your privacy in just 10 simple steps)
One of the disasters that preppers fear the most is an EMP (electromagnetic pulse). Why? Because it would literally throw us back a couple of hundred years by knocking out
Get a few preppers together, and you can pretty much guarantee that at some point bug out bags and bartering will come up. My personal take is that it’s a little bit foolish to stock something solely to barter – especially stuff that relates to addictions because people with addictions can be a little bit crazy about their vices. Stocking things that can get used by the household means there’s little regret about expenditures in 2-10 years, whether a disaster occurs or not.
There have been other bartering articles on FP, and they’re totally worth looking at. I have zero arguments with the gear, meds, candles, batteries, foods, and feel-goods that show up on those lists and are so very common when it comes up on forums. Still, there are some things that are very, very useful, readily affordable, readily portable in a bag or loaded into a game cart to take to Bartertown, and that I see very few people talk about – period, but almost never in the “barter” conversations and posts.
So those are where I’m focusing today.
In many cases, they’re not going to be the first things to run off shelves. Know your area and know what disappears – and when seasonally it tends to disappear even without a disaster. I tend to focus my own efforts on those things I don’t expect to find 3-9 months after a major crisis. I’m also cognizant that some things are never in much bulk – or enough bulk – and that even beyond looters and municipal groups that stand up to try to save their communities and go salvaging, there’s the risk of fires spreading and taking out stores.
With that in mind, here’s my list of 8 barter items that end up ignored as barter items and that aren’t without merit as backups for our own stockpiles.
Canning Jars – Especially Lids
Tattler Reusable Canning Lids & Rubber Rings
It’s pretty rare to find stores with nothing but canning jars on the aisles these days. In most cases, a store at its max display capacity has fewer jars than a single family would need to can only a veggie supplement for 6-9 months, and sometimes even fewer spare lids.
That makes lids and jars pretty much number one on my stock-up list, both for home use and to trade with neighbors and locals.
You’re not going to stick more than a box or two of spare lids in a bag, so this is one of the cases where if you’re on foot, you might want to go ahead and stick with some of those things like batteries, candles, an airgun and pellets, meds, and other lightweight items that will go pretty quick and that people 5 days, 50 days, 5 months and maybe even 50 months into a disaster will still be interested in taking off your hands.
Sevin Dust
If you’re big on health, go with dish soap, vinegar, and water as a spray, and just skip on down to the next one. I’m pretty much required to turn in my greenie card for promoting Sevin Dust.
But, see, Sevin is pretty darn handy. Back in the ‘80s and ‘90s, my father used to coat pretty much anything alive in the stuff – ducks, horses, goats, veggies, trees, wasp houses. He used it as flea and tick control as well as on garden pests.
We now have health concerns and concerns about wiping out beneficial bugs and microbes, but if your garden’s getting eaten by eight different things, if you absolutely have to have it to have anything but beans and wheat – or if your beans are being eaten by three different things – you’re going to be willing to think seriously about pretty much anything on the table to get your hands on easy-to-apply dust that will kill almost any of them, something you can spot-treat by hand or hook up to a backpack blower.
I specify the dust because it’s more compact, stores easily, and comes in both big bulk bags and small-container three packs that make it a viable option to cart to the church or community potluck, market, or specific neighbors. It also has some of the shortest interval-to-harvest periods of a commercial pesticide.
Liquid Sevin doesn’t store as long, but it does kill extra things and it’s easier to get on the underside of leaves than powder.
Diatomaceous Earth
First, an apology to our Canadians. I have gathered the impression that this stuff can be tough for you guys to get ahold of, especially in bulk, and it’s not especially cheap there. Here we can just swing by on a whim and get it in packaging from the size of a deck of cards, by the gallon, or even by the 55-gal barrel.
There aren’t as many uses for Diatomaceous Earth as there are for baking soda and Epsom salt, but, man, it’s pretty handy.
It’s the active ingredient in SMITE for poultry, it clears up everything from bed bugs to livestock and pet ear mites, ants to roaches. It can form protective barriers around plants or be spread over them as a powdered insecticide. It’s natural, physical as opposed to chemical, has a nearly endless shelf life because it’s really just ancient plankton shells, can help protect stored foods – especially those we’re harvesting and our next-year seeds – and it has at least a dozen health and beauty uses.
The more uses something has, the less variety we have to store and the better the chances that when somebody has a problem, we have a valuable solution. DE checks those boxes in a big way.
Baking Soda & Baking Powder
It’s hard to bake without the leavening of some sort, and baking soda has about a million uses outside baking – and about a million more totally outside the kitchen. Both have long expirations and easily extend beyond their best-by dates even at room temperature and with fluctuations from 60 to 80 degrees. They’re sensitive to moisture in their smallest packaging forms, but it’s easy to get several or a whole handful in a gallon bag to keep in buckets and pull out as needed.
I don’t expect them to simply run off the shelves as soon as a disaster is announced, but they’re inexpensive, cheaper yet to buy in bulk bags, and it’s worth having some baking soda stocked because it’s one of those that when you want it, there’s not a lot of substitution.
Epsom Salts
First, sorry, Australian readers (and maybe Brits). I know this stuff is expensive and controlled to a ridiculous degree for you guys. It’s cheap and plentiful in the U.S.
Epsom Salts is what I consider an absolute, 100%, no-arguments prepper must-have. If there’s not already a reminder of how awesome Epsom salt is on an annual basis, there should be. Epsom salt is another one like baking soda, with fifty million uses for human health and hygiene, cleaning, livestock, and gardens. There are so many uses, it truly deserves its own article just as a primer on how useful Epsom salt is.
I’ll take just a moment here to point out that Epsom salt is far, far different from table salts. Epsom is magnesium sulfate, not sodium chloride.
When you want to burn it down and salt the earth so nothing grows (or clean a cutting board and preserve food), use table salt, kosher salt, and sea salt.
When you want to encourage flowers, reduce soil deficiencies so plants can uptake their macronutrients properly and produce healthy, bountiful yields, fix an ear infection, reduce swelling, pamper your feet and skin, create barriers for certain types of pests in the home and garden, clean a wound, clear up skin conditions in humans, poultry and hoofstock, that’s what Epsom salt does.
And more.
As with everything else mentioned here, it can be purchased in bulk, or it’s available in small, moisture-resistant containers that make it very viable for trade when somebody’s struggling with any of a multitude of issues.
Rat Traps
Rat traps have a ton of uses, but number one is their actual pest-control job. Eventually, I think the rat population will level out one way or another, but between death and waste-removal shutdowns, I think they’ll boom for a while first. There have also been some historic accounts from Rome, London, and other sites of major fires, where rats flee the cities and end up a plague on outlying areas in waves – and I anticipate fires since they happen daily even now.
Rat traps also have applications as squirrel and songbird traps for feeding families and pets, protecting gardens from small raiders, and combining with fishing line and various magnetic strip alarms or things like chem lights to create visual and audio alerts for home and property alarms. They can also be rigged with bells on a line to alert a barrier run of pigs that something has tripped the wire, and with some training, the pigs will rush in to remove threats to chickens and gardens.
They’re small, light, and typically pretty cheap.
For smaller rodent controls, there are several ways (at least) to turn cans and buckets or rubber bands and 2L bottles into pretty effective rodent traps, and some additional ways to use PVC for squirrels and rats. They’re reusable and potentially can be made out of scavenged refuse or scrap, so it’s worth looking up those, too.
After all, sometimes know-how is as valuable a barter object as a physical item.
Water Catchment Faucets, Spigots, & Overflow Fittings
We’re almost guaranteed to see increased attempts to catch and store rain if a disaster ever occurs. Drought and periodic no-boil orders already make water a valuable – and expensive – resource right here in North America.
Having extra fittings for turning our emptied and scavenged buckets, totes, barrels, and tubs into more effective catchment systems has the potential to make not only our lives easier but convince somebody to share a tool or pasture they’d rather not, or sweeten a deal over somebody else’s offer.
I doubt hardware stores will empty of plumbing fittings super early, but there’s always a chance since few areas have enough in to truly impact catchment for every farmer and rooftop in the area. There’s also the risk of fire.
The washers and faucets for making the simplest conversions are lightweight, and at most should cost a few bucks. They have the potential of appeal to a much larger community than just smokers, drinkers and tokers, and will appeal to those as well. That makes them a pretty easy item to keep in even an INCH bag and definitely worth throwing in a cargo pocket when we patrol or go to a neighbor – you never know when the opportunity for new boots, tampons, or better bullets will appear.
Various silicone tubes and thread tape have value even outside the rain barrel creations. Some of our local stores and contractors are pretty happy to let us have odds and ends of PVC from jobs for free. The faucets or spigots valves and washers are the more pocketable pieces, but some short runs of PVC and small tubes of aquarium repair silicone can sweeten a deal, even more, when suggesting or building a system for somebody.
Portable Solar Chargers
Small, portable battery and device solar chargers abound on the market today, from $5-50. The battery chargers are useless without fresh batteries to charge, but having access to downloaded music, movies, games, and pictures may mean a great deal to some folks.
They’re small enough even for folks who aren’t ready for $100-3,000 systems to keep phones, iPods, walkies, and headlamps going, and their value will go up further in protracted crises or a situation with regular brownouts. They’re already something you see folks gouge prices on and hit the streets with during “normal” natural disasters.
I wouldn’t fill up buckets with this one, but having a few for us, a few as backups, and a few I’m willing to part with for the little pocket versions and maybe a couple of the larger laptop-tablet or C-9V or combo chargers and rechargeable batteries for them is worth it to me. I also keep Nokeros and some of the little flat flashlights in my windows, though (and use them nearly daily instead of a bedside lamp or regular flashlight).
Backups and Bartering Alternatives
As I said, I tend to think folks should focus on things they’ll use in a disaster or daily life over something they never have and plan to never want. I also really like the items that can sit on a shelf for years even before best-by dates expire, especially the ones that don’t need additional packaging.
I have no problem with the lists of the common items like meds, batteries, and knife sharpeners. There are always going to be others, from things like clip-on books and cap lights to the ammo that leads to so much back-and-forth and conditional settings. This is just a list of options that I rarely see discussed as storage items, and almost never see on the bartering lists – even though they can be had compactly and they offer so much in so many ways, for the most part, that really don’t have replacements or are rare to find on shelves even now.
Get a few preppers together, and you can pretty much guarantee that at some point bug out bags and bartering will come up. My personal take is that it’s a
The number one thing I prepare for is a POWER OUTAGE when SHTF. Every SHTF series of events includes the inevitable power outage. In fact, whenever the power goes out, even temporarily, I wonder if SHTF has arrived. I lived through several hurricanes in Houston, Texas where the power went out for a week. I’ve also traveled to Beirut, Lebanon several times where I learned how they deal with daily rolling power outages. I find it interesting that Beirut has blackouts each day and people manage to persist with their normal daily lives. One day, in Beirut, I was having my hair cut when the power went out, but the hairdresser simply pulled out a flashlight and continued my hair in the semi-dark.I’m not going to discuss basic prepping in this article. Instead, I am going to present a list of things to consider that relate directly to short-term, long-term, and permanent power outages. In fact, as you develop your preps and preparation plans it is essential to consider every aspect of your preparations with regard to short-term, long-term, and permanent SHTF situations. I would not have considered all these things if I didn’t have the experiences without power. I hope these ideas help others in their preparations.
1. Getting stuck in an Elevator. One of the number one concerns of residents in Beirut is not getting stuck in the elevator each day during their power outage. They often live in buildings with many floors of stairs but most people opt to take the stairs rather than risk the elevator. I witnessed someone nearly every day trapped in the elevator. Unfortunately, some of the elderly cannot climb stairs. I learned never to take the elevator after this experience because you really never know when you could get trapped. People die or become seriously injured sometimes because they try to get out and fall into the elevator shaft. Consider the number of people in elevators each day at any given moment! One day, unknown to anyone, the power could go out and strand all those people inside the elevator. I justify taking the stairs as not only a safe option but an opportunity to get a little exercise.
Make sure you take the stairs if you don’t want to be stuck in the elevator.
2. Rig your house to have backup lights. In Beirut, many people have cleverly put strings of lights all around the house attached to a car battery. There are two light switches so when the power goes out they simply flip the other switch. I’ve thought of a series of variations for this same idea. In addition to LED string lights, I also have solar string lights. In addition to a car battery, I also have a solar generatorand solar power sources. I found solar lights are generally listed as gardening decor. After experiencing Beirut’s daily power outage, I realized no matter how many candles and matches you store, these will run out one day. Keeping your solar items in Faraday cages is most likely the only long-term lighting solution for a variety of SHTF events.
3. Keep keys with you to your home/business/buildings instead of relying on electric card keys. Not everyone needs to worry about card keys but If you do rely on a card key to enter your apartment or buildings this could be a grave problem. You certainly don’t want to get locked out during an emergency so it is wise to keep regular keys with you even if most of the time you rely on card keys.
4. Make sure you own some manual Tools. You need a variety of manual tools and backup tools in case they break. During a hurricane, I couldn’t find my manual can opener and panicked searching around for it for over an hour one day. Now I have six can openers. I try to find very sturdy, all-metal manual tools. The cheap ones are not reliable or worth the risk. I want to purchase a wringer washer like my grandma used to use. It is a shame that we lost contact with manual tools and how to use them. During hurricanes, I’m amazed how fast dirty clothes accumulate, especially if the weather is hot and you have difficulties getting clean. I can only imagine how smelly people will become in SHTF.
5. Prepare your refrigerator and freezer. Learn which foods spoil first so you know what order in which to eat the food during the power outage. Eggs can last longer outside the fridge if you coat them in olive oil. During the hurricanes, I had about 30 jars of pickles in my fridge. Pickles can last outside the fridge so long as every day you skim the top of the jar. I have a butter saver which is the old-fashioned way to preserve butter. The butter saver is a ceramic cup that you fill with butter and place inside another cup with cold water; you have to change the water each day to keep it fresh. If you keep water bottles in the freezer you can prolong the time your freezer will keep the food cold and then switch some of the refrigerator food into the freezer. You don’t want to open the fridge or freezer too much when the power is out so you have to know what is inside, plan carefully, and close the door quickly.Also, you don’t want to throw away your food. During a hurricane people often get together and grill the contents of their freezer with their neighbors. In Beirut I was surprised to see how people cook and save leftovers without relying constantly on power. I didn’t know many things really don’t need refrigeration if you eat it by the next day, like rice or cheese. People with gas stoves fare better than those with electric stoves during hurricanes.
Power outages are too common for you not to be prepared for them.
6. Keep lots of fresh fruit in your house if you think a power outage is coming. Fresh fruit really doesn’t need to be kept chilled and this is one of my last second hurricane preps. During hurricane season I constantly have extra fresh fruit around the house just in case. I think this is a great SHTF practice all the time.
7. Utilize the last drops of water. Being without a fresh source of water becomes an issue much more quickly than you imagine. Obviously, you need water for so many daily activities! When I learn a hurricane is on the way the first thing I do is fill every single container I have with water and cover them with plastic wrap. I put containers of water in the bathrooms and by the bed. I have an old-fashioned water and pitcher which is great for hand washing. I save the old water too, and reuse it for some other purpose. I have a Water Bob that I use to store last-minute water in the bathtub. Also, when the water goes off you can still suck a few more cups out of the pipes for flushing the toilet. If you are lucky enough to foresee any kind of power outage, I can’t stress this last-minute collecting enough. When you think you have enough, think again and keep filling those containers.I have a water barrel for long-term water needs but I plan to rely on that after my short-term water supply is finished. I learned from hurricanes that when the water goes out, you must beware of the first water out of the tap because it is contaminated. I filter my water anyway, but people always get sick drinking contaminated water after the hurricane. Get in the habit of drinking the juice from the can of fruit and cooking with the water from the can of vegetables.
Make cleaning up easier in a Power Outage
8. Baby wipes and Facial Wipes. I stock up on baby wipes before a hurricane because without power it is hard to stay clean. I really appreciate face wipes so I can wash my face without using any water. This prep clearly doesn’t last forever but I figure that the longer you can maintain a ‘normal’ life the better. I plan to prolong ‘normal’ as long as possible, especially for my children.
9. Have Paper plates, napkins, and silverware. These are a staple for the hurricane. Again, this isn’t a long-term prep but it maintains a normal feeling. It takes a lot of water to wash your plates and silverware. Also, it is a good idea to have lots of trash bags because the paper plates end up creating more garbage. The garbage piles up very badly even during a week-long power outage.
10. Flush the Toilet with a bucket of water. If you save the water you use, reuse the water to flush the toilet as long as you can. You’ll eventually need a camping toilet or a bucket. Cat littler is a good idea for the toilet/bucket. Plus, it is essential you bury the contents of the toilet. However, I was pleased that my toilet flushed during outages. The easiest thing to do is scoop water from a nearby pool and flush the toilet. I keep a large glass jug (old wine jug) by the toilet for the hurricane. During hurricanes, there are always reports of people in apartment complexes around Houston who go to the bathroom in the hallways. You have to wonder what is wrong with people who can’t figure out a plan for a week without power when they knew a hurricane was coming in advance and had an opportunity to prepare. The lesson here is that people will do surprisingly disgusting things not long after SHTF.
This picture taken on February 24, 2013, shows Pakistani youth crossing a street during a nationwide power blackout in Karachi. Pakistan was hit by a nationwide blackout for more than two hours after the breakdown of a major plant caused power stations to stop working across the country, officials said on February 25. AFP PHOTO/Asif HASSAN
11. Stores will become EMPTY faster than you can imagine. If people notice a need to prepare in advance and that they are not prepared, the food and supplies will disappear within seconds. When we experienced our first hurricane we didn’t understand the need to prepare.
By the time we went to the grocery store, there was NOTHING there but a can of squeezed cheese. The squeeze cheese has become a family joke of what happens if you fail to prepare in time. I’ve been to stores immediately after a hurricane. It is so weird to see stores as they start to restock but the power is still out or unreliable. The credit card machines don’t work and they only accept cash. The gas won’t pump. Some unethical vendors raise the prices even though it is illegal. I’ve been to stores before a hurricane and seen people fighting over cans of food. Right before a hurricane in Houston, it is impossible to find a bottle of water. I read that statistically people have only three days worth of food in their house.
Once, at a Denny’s, a waitress was lamenting to me that a thief came and emptied the contents of her kitchen, which she said was in total: a package of Funyuns, a six-pack of orange Slice and a package of Marlboro Lights. I fear that this woman’s testimony of her kitchen supplies is more typical than I would imagine. In Beruit even the poorest survivors of the recent wars always stock rice and powdered milk.
12. Life without 911. It is not a comforting feeling knowing that you are completely on your own regarding medical problems and safety. I put burglar bars at my house just because I needed that extra feeling of security, especially during hurricanes. I can’t imagine a power outage without self-defense. I’ve heard of looting and rioting in other areas immediately when a power outage begins. I’m proud to say that my neighborhood in Houston has signs that say residents are armed. I’ve never once heard of reports of looting during hurricanes here. I’m certain that the reality of armed citizens keeps away looters and others who would take advantage of a power outage. Also, if you know that you can’t go to the hospital, and maybe the hospital generators are about to go out too, you learn to be extra careful. During the power outage you have to be able to put out a fire yourself, so stock up on fire extinguishers. Fireproofing your home is a good idea.
13. People die doing weird things when the power goes out. After a hurricane, there is always a strange series of reports on the news about how people died in dumb ways. Once, a lady cleaned her bathroom with the windows and door closed and the chemical fumes killed her. She was found dead after the hurricane because she lived alone. The lesson here is that when the power goes out, especially if you are alone, take extra precautions for your safety. The elderly always die during hurricanes because they fail to regulate their temperatures or run out of medicine. This means, that if you are at risk you really need to make sure you don’t run out of medicine, have a solar fan, or some way to keep cool/warm. When I believe a power outage is pending, I check up on my elderly neighbors and offer to help them get supplies. After hurricanes, people drive into the water and drown. During the power outage, people play in the water outside and it turns out that the water is filled with fire ants, rats, roaches, dead cats, dead dogs, worms, fleas, snakes, and the occasional alligator. Some people become immediately unhinged when the power goes out and are ready to kill someone over a can of food.
14. Beware of mass evacuations. I’ve witnessed multiple mass evacuations out of Houston. First, people become panicked. Second, everyone runs out of gas. Third, the gas stations run out of gas. Fourth, the freeways become parking lots. In one mass evacuation, a bus from a nursing home exploded into flames because it overheated. One of my friends was in an evacuation and he mentioned that he, his wife, his five kids, and two dogs all became overheated and suffered from heat sickness complete with gastrointestinal issues. Basically, avoid mass evacuations by trying to find another route if you must leave. I think more people died in the mass evacuation than in the hurricane itself.
15. Create a ‘last minute’ shopping list. It is possible you might get the opportunity to do some quick last-second preparations before SHTF. Have in mind a list of warning signs which indicate when you will run out of last-minute supplies. Tell your family if they see certain events begin to happen that they should immediately stock up on water. For example, my family knows that if North Korea bombs South Korea or if a nuke goes off anywhere in the world they promise to immediately stop at the store and buy extra water. This is one of my triggers, along with if I know a hurricane is coming or if some huge terrorist attack happens in the USA. Even if the lights don’t go out, it is never stupid to have bought extra water. In Beirut, the people who have survived the recent wars are very paranoid about leaving the house if they suspect any sort of violence is possible. Thus, if they need last-minute supplies they refuse to travel further than about a block from home.
16. Act like everyone else during SHTF. You certainly don’t want everyone around you to become aware that you are not suffering from a lack of preparation like they are. When the government comes after the hurricane to hand out water and bananas I always get mine like everyone else. Even if you only accept a handout in order to trade it later, just act in need like everyone else. I do not have a plan to accept vaccinations if the government insists we take them during SHTF. I feel they could easily taint medicine, food, and water. I also believe that if certain things happen in SHTF the government might offer food if you trade in guns.
17. Beware of FEMA shelters. Luckily I have not been to a shelter during a power outage in Houston but I know multiple people who shared their experiences. They didn’t feel safe sleeping in a giant room with strangers, there is not enough privacy and there are always reports of rapists and thieves at these shelters. They never have enough supplies. After Hillary mentioned ‘fun camps for adults’ I always wonder if they really want to help you with these shelters or if they will use the crisis to create concentration camps or reconditioning camps. In Houston, these FEMA shelters pop up for a variety of reasons; power outages, flooding, chemical spills, and large apartment fires. They round people up onto buses and deliver them to a makeshift FEMA shelter at a school or a giant sports stadium. I’ve seen some schools have watch towers like prisons. Sometimes they relocate students from public schools to a shelter without parental notification until later. Whatever the case is about these FEMA shelters, now or in the future, I do not plan to ever go to one for any reason.
18. Boards for your windows. During hurricanes, everyone puts boards on their windows in order to keep debris from breaking them. I think boards are a great prep for power outages because you’d not want to have a broken window, they deter people from breaking in and they secure privacy. I also like large wooden privacy screens and wooden shutters. Black-out curtains would become essential for a long-term power outage so you don’t draw attention to yourself.
19. Own backup Radios. After the hurricanes, I realized how important crank radios are for news and a connection to the outside world. I know this is a common preparation but I’m stressing the need to have backup crank radios with phone chargers. It will be important to remain updated as much as possible and any information you can gain about what is going on during SHTF will be helpful.
20. Plan family activities and fun when the blackout starts. When everyone is nervous, obsessed over the news and the power outage begins it is easy to just sit there, waiting and fretting. I always feel sick to my stomach with anxiety when the hurricane starts. Having been through multiple power outages, I find that especially for the well-being of my kids, it is a good idea to make an effort to have a family dinner with candles, play some games, and celebrate the time you have together. Plus, when you plan a family night in reaction to a power outage you don’t feel like a victim and you can de-stress a little. Some of my favorite family memories actually happened during power outages.
The number one thing I prepare for is a POWER OUTAGE when SHTF. Every SHTF series of events includes the inevitable power outage. In fact, whenever the power goes out,
Being prepared means being prepared all the time; at least in my book it does. That can be a bit challenging at times, especially since we don’t really know what life is going to throw our way. That’s why I always carry a complete survival kit as part of my EDC, along with emergency equipment in my car. This includes a variety of food items so that I always have something to eat with me.
Granted, there are few places where you can drive in this great land of ours, where you aren’t going to find food to eat. Even so, I’ve been in a few. I’ve also been stranded in my car a number of times, whether because of mechanical failure or simply being stuck in traffic. At those times, it’s nice to have something to eat, especially something for the kids to eat. They just don’t understand phrases like, “There isn’t a McDonald’s here in the middle of nowhere.”
Keeping food in your car can also help out with a number of other emergency and semi-emergency situations, such as low blood sugar, heat exhaustion, and low energy. So it really makes sense to keep food in the car, even if you’re not thinking of bugging out or getting stranded. Now the only question is, what to keep? Here are the types of things I find useful to keep in mind.
Water
I always start out by putting a couple of gallons of water in the car. I know some people prefer to use bottles, but I find that I can carry more water in less space if I use gallons. If I need to drink that water, I can easily pour it into water bottles; but if I need to use it for the car, gallons are more convenient.
The water bottle in this picture is aluminum. I always use metal water bottles, because they can be put in the fire. So, I can use this water bottle to purify water, heat up water for coffee, and heat up water for soup. That’s a whole lot better than using a plastic water bottle and needing to have something extra for heating up water.
Gatorade Powder
I live in a hot part of the country, so it’s not unusual to overheat and become dehydrated from sweating too much. Many people deal with that here by drinking copious amounts of Gatorade. Carrying liquid Gatorade in bottles is one option, but it takes up space. Since I’m carrying water anyway, I tend to carry the powdered Gatorade, rather than the bottles.
Of course, the container of powdered Gatorade is pretty large too; about the size of a number 10 can. So for the car, I just dump some of it into a label. This jar held pickles at one time until I cleaned it out and repurposed it for my Gatorade. A plastic container would work too.
You might want some instant coffee, as well as your Gatorade, especially if you do a lot of driving at night. With the metal water bottle and a way to start fires, you’ll be all set to make yourself a cup of coffee, even if you are in the middle of nowhere.
Jerky
My favorite snack food is jerky. Nutritious, low calorie and it is meat; what more could you ask for? The American Indians made jerky as survival food and our early ancestors learned that from them. While there are other places in the world that make something similar, our jerky tradition goes back to those early Indians.
Jerky also provides you with something that you can make a meal out of. Mix it with Ramen noodles and come dried veggies and you’ve got a fairly decent soup; something that can keep you going and warm you up on a cold night.
Just remember that you will need to replace your jerky periodically if you don’t eat it. Heat will draw the oils out of it, drying it even further.
Ramen & Dried Vegetables
Good old Ramen is the college staple. I think every college student goes through a time when they live off of it. It’s a great source of carbohydrates to give you energy to keep you going. Mix it with some cut-up jerky and some dehydrated vegetables and you can have a much heartier soup.
This kind of Ramen comes with dried vegetables already mixed in. I usually dry my own, but I’m out of them until harvest time, so I bought the kind that comes with veggies. While a bit more expensive, it really doesn’t cost all that much. Besides, it comes with a cup to mix it in.
Dry Fruit
Speaking of carbohydrates, fruit is another excellent source for them. If you have someone with low blood sugar, giving them fruit is much safer than giving them a candy bar. The natural fructose sugar is much easier for the body to digest and won’t shock their system like candy will.
Dried fruit also provides you with something that’s easy to take along, if you have to leave your car for any reason; whether due to an emergency, taking a hike, or for work. A bag of dried fruit in your pocket can keep away hunger pains for the whole afternoon.
Canned Fruit
Canned fruit, like dried fruit, is a great source of carbohydrates and sugar. Some people prefer it. I wouldn’t want to carry this around in a backpack, due to the extra weight; but last I checked, that much weight isn’t going to bother anyone’s car.
These mandarin oranges and applesauce are “canned” in plastic cups, with foil lids. That works well for short-term canning; but not for long-term (more than a year). The plastic might release some chemicals into the fruit during hot times, so you want to be careful about that. Even so, canned fruit can be much more refreshing than dried when you need something to eat.
Granola Bars
I’m almost as big a fan of granola bars for emergency food as I am of jerky. It’s worth spending the money to buy the better brands, even though they are considerably more expensive. But the amount of nutrition you get from those better brands makes them worth the money.
Granola bars are great, in that they are an ideal pick-me-up sort of snack, packing a lot of carbohydrates into a small amount of food. Watch out for the ones with chocolate or yogurt, as those ingredients can melt, making a mess for you to deal with.
Nuts & Sunflower Seeds
Nuts are a good source of both fats and protein. Of all the nutrients we eat, protein is one of the most important, as the body can’t really synthesize it well, without having consumed proteins to break down into amino acids. Fats digest slower than carbohydrates, providing you with long-term energy to burn. Eating a combination of fats and carbohydrates together will keep you going for hours.
I always keep sunflower seeds on hand, as well. Like nuts, they provide you with protein and fats, but they also do something else; they help keep you awake. If you’re driving long distances, especially at night, eating sunflower seeds while you are driving will keep you active enough that you can probably keep driving all the way through the night.
Hard Candies & Gum
These might be a bit surprising, but I have a good reason for keeping them in my car. First of all, hard candies are great for that quick burst of sugar, when you need some energy. They’re a whole lot safer to eat than energy drinks too. But they also work to help you if you have a sore throat and don’t have any throat lozenges around. Sometimes, I just carry the throat lozenges and use them as hard candy.
Peppermint is also useful for settling an upset stomach or relieving pain. Peppermint essential oil is one of the best ways to relieve headaches there is. So if you’re in pain, have a headache, or have indigestion, mints are nice to have.
The gum isn’t as much for use as candy, as it is for relieving the pressure in your ears when changing altitude quickly. If you’ve spent any time traveling by air or in the mountains, you’re familiar with the need to pop your ears every once in a while. Chewing gum helps with that. It can also help to keep you awake while driving at night, just like the sunflower seeds.
Breakfast Cereal
This is for the kiddies. If you have small children, breakfast cereals, especially sweet breakfast cereals are one of the easiest ways of quieting them down, when they are hungry. Not only do they like the taste, but they like eating the cereal out of these cool little containers. Yeah, you can put it in baggies too; but for the price, these are worth it.
Doritos
Many people have touted Doritos as a fire starter. Actually, what they are is a good tinder for a fire.
The combination of the dried corn and the oils they are cooked in, make the chips burn well. You can even ignite them with a spark, let alone using a flame to get them going.
If you don’t need them for a fire, I suppose you can always eat them. Doritos, like any other chips, are a good source of carbohydrates.
Being made of corn, rather than potato, they probably digest a little slower; so they’ll help you feel full longer than if you were just eating potato chips.
Spices
This is another one that you might think is a bit strange, but there is a good reason for it.
Whether you’re in an actual survival situation or you’re just stranded somewhere, there’s a good chance that you’ll end up eating things that you might otherwise not want to eat.
But when you’re hungry, you go for what’s available, right?
But that doesn’t mean that you have to choke it down if you don’t like it. Rather, bring some spices with you, so that you can make it more appealing. It’s amazing what you can do with just a few spices, especially if they are stronger flavors that you like.
Both of the container styles shown below were bought on eBay.
The ones with the red stoppers are small test tubes and the others are just miniature containers. I wrote on them with a Sharpie marker and I’d recommend covering that with tape, so that the marking doesn’t wipe off. Put the closed containers in a small zipper bag, so that nothing can rub against the lids and open them.
Other self-sufficiency and preparedness solutions recommended for you:
Being prepared means being prepared all the time; at least in my book it does. That can be a bit challenging at times, especially since we don’t really know what
Undoubtedly, most of the developed world lives with the luxury of disposable everyday items and nearly immediate replacement from a well-planned supply chain store. But you must always consider what would happen if the supply chain for household items, hygiene products, food, water, and tools stopped being available. In order to prepare for such an event, preppers around the world save, reuse and re-purpose many items that other folks tend to toss in the trash can.
Without further explanation, here are 23 things that a prepper should never throw away.
Dryer Lint: Dryer lint is highly flammable. Dryer lint is an easy item to collect, compresses to save on space, and will help to get a fire going for cooking and staying warm when the power is out.
Plastic Soda & Water Bottles: Plastic bottles have many uses, but one of the main things they’ll be used for by the prepper is drinking water. Water glasses break and need replacing. Plastic bottles won’t break when you drop them; they’re lightweight and can be sealed for transport. With a drop of bleach, preppers can store fill and store an otherwise empty plastic bottle with water, every day, for long-term use while the lights are still on.
Old Shoes & Boots: Most folks buy new shoes when their pair starts to look dingy, but they are still very functional. Clothing one’s feet is something the prepper can’t forget to plan for in SHTF. If nothing else by saving old shoes, the prepper will create a wealth of barter items to trade with people. And you can bet the value of a pair of shoes in a post-apocalyptic world is going to be fairly high. Here’s how to make your boots last longer.
Old Clothes: Just like old shoes, we tend to give away clothing or throw it away when we have a small hole or stain on our shirt. The prepper knows that he can still use that clothing for wear in a survival situation, but he can use the fabric to mend, replace and re-purpose many household items. Many people don’t consider sources of fabric in SHTF, but old clothes are great for that.
Wood Scraps: This goes without saying, but wood scraps should always be collected, kept organized, stacked, and dry. While it’s easy to toss scrap wood in the trash, consider the need to keep a cooking fire going if you haven’t had power for 3 weeks.
Cord, String, and Rope Pieces: From sewing clothing to securing shelter, string, cord, and rope will be a highly-valued items that the prepper should never “toss to the curb”. It’s very easy to fold, wrap and store spare cordage, so never throw it out!
Wire: There are two types of wire the prepper should never throw away – conductive and non-conductive wire. The conductive wire should be saved as barter pieces for barter for electrical repair or for making a tin can directional WiFi antenna to extend your communication after an EMP. The non-conductive wire should be saved for utility and fastener use. Don’t throw even a hand-length piece of wire away. Instead, organize it, and put it away in a dry spot.
Spare nuts, bolts, and screws: In an extended grid-down situation, folks will eventually set up some form of commerce. If you’re astute, you can provide income for your family post-SHTF and repair items as needed collecting all the spare fasteners that most folks throw in the garbage.
Used Candles: The prepper can scrape out the last little bit of wax in used candles. When enough wax is collected it can be melted and consolidated into one candle container. New wicks are fairly easy to make. When the lights go out for good, a source of light like candles will be invaluable.
Broken Crayons: Children are great for making broken crayons, but don’t throw the broken ones away! Instead, remove the wrappers and throw the pieces in with your saved used candle pieces, so they too can be used to make more candles.
Broken Pencils: Broken pencils can be cut in half a long way, exposing graphite. The prepper can store them in the glove box of a car. When either end of the exposed graphite in the pencil is hooked up to a car battery and cable, it turns red hot and bursts into flames. Every prepper’s bug-out vehicle should have a bag of cut-in-half pencils. Don’t throw them out!
Zip ties: Extra zip ties come with all sorts of products as extra fasteners. We tend to throw them out. But the prepper cannot throw them away. These are too useful. Zip ties had hundreds of uses and take up virtually no space.
Coffee Grounds: Did you know that you can run your coffee grounds through your coffee machine twice? Some people like weak coffee, and some like a less caffeinated cup of coffee before bed. One can also use coffee grounds as compost for the garden.
Vegetable scraps: Plant and veggie scraps can be used for compost, just like coffee grounds, but the prepper can also throw these scraps out for their chickens to eat.
Hair Clippings: Hair clippings are another great addition to your garden compost pile. If you were thinking of throwing that pile of hair on the floor away, don’t! Your garden will love the nutrients added to the compost pile.
Soap chips: Usually the little leftover soap bar chips go down the drain or are thrown out. But reconsider collecting and compressing them to make new soap bars. In SHTF the prepper will have to make the most of hygiene products to keep from becoming ill.
Toilet Paper Rolls: Toilet paper rolls are another great source of tinder for starting fires. They can be cut and flattened out for easy storage. Combine cut-up toilet paper rolls with dryer lint the prepper will have a warm fire in no time. You can also make your own substitute for toilet paper.
Broken Rubber Bands: Broken rubber bands really aren’t broken. By tying the two ends together, the rubber band works just fine again. In SHTF a broken rubber band is still an excellent temporary light-duty fastener.
“Expired” Honey: Raw honey really doesn’t expire. Think twice before trash-canning that jar. While most commercially bought raw honey shows 2 years for expiration, the truth is, that honey can be stored almost indefinitely when housed in a cool, dry place.
Rusted Tools: In SHTF, preppers won’t have the luxury of going to the hardware store. If tools become rusted or dingy looking, clean them up with oil and store them in the garage. Another man’s dingy, rusted tools are another man’s lifesaver in SHTF. Old tools are an excellent barter item.
Metal Breath Mint Containers: These types of containers are great for condensing the last portion of chapstick, balm, and salve. The containers usually fit well right inside a shirt pocket. Breath mint containers also work well for survival kits.
Plastic Milk Jugs: Cut the top off the plastic milk jug and you have an excellent pot for small plants. This is a great way to start your garden and move the sprouted plants to a fixed location when you’re ready.
Paper clips: I cannot count the times paper clips are thrown into the trash at an office or put through the shredder, but the prepper wouldn’t do that. Paper clips are essentially robust twist-ties ready to help the prepper fasten shelters and projects in a post-SHTF world. They can be used as shims for repair mechanics as well.
Hopefully, this list has inspired you as a prepper to think of items you can also reuse instead of throwing away.
Undoubtedly, most of the developed world lives with the luxury of disposable everyday items and nearly immediate replacement from a well-planned supply chain store. But you must always consider what
We’ve all heard the news reports of seeds discovered in ancient tombs that germinated when they were planted; even the seeds you purchase are labelled with dates of expiration or seasonal use. What is the reality regarding the viability of plants, and how long will it last? Here is what we know.
Seed Expiration
Seeds don’t necessarily die, but they might not germinate. You will be very near to maximum germination the first year. But the germination rate will decrease each year that goes by. How long they stay viable depends on the seed form you have, and how it is handled.
How to Save and Store Seeds for Best Viability
If you store surplus seeds from year to year, or seeds from your heirloom plant, storing them in a cold, dry place is safest. Put the seeds in an airtight container like a tight cover pot, an old-fashioned movie tub, or like I do, wrapped in mylar. Mark and date the seeds, and provide the initial seed packet details with the seeds if appropriate. You should dump all the packets into a pint jar with a desiccant packet or a little rice in the bottom for seeds in packets to remove moisture and securely seal the container.
Harvesting Seeds from the Garden
If you save seed from your greenhouse, wait until the fruit or vegetable is completely mature until the seeds are collected and extracted. Make sure the seeds are fully dried until they are placed into the containers.
Then hold the seed containers in a cold, dry place which is regulated by temperature. I’d like to put my seeds on a basement rack, but I’m working for the time being on a refrigerator rack. My downside to the fridge is that most refrigerators are very warm, and if your jar seal is not secure, seeds may have molding issues.
Save seeds from the heirloom varieties only when saving seeds from your greenhouse. Hybrid seeds don’t produce true from generation to generation and you could end up with a poor crop the following year.
How Long Do Seeds Keep?
If you’ve stored your seeds in a safe, dry place, the next year they’ll likely be viable. Plant any earlier than normal however, so others may not germinate. It depends on the sort of seeds you hold, in addition to storage. Some seeds need to be immediately planted, and some need to hold for several years.
This chart shows how long you should anticipate your crop seeds to attain reasonable viability. Seeds can germinate for a longer period of time, however they are hit or skipped, so you should usually only begin with fresh seed. This chart does not ensure durability, note that there are a number of variables. Those periods are normal, but under optimal conditions can be much longer:
Seed Viability Over Time
0 to 1 Year – Plant Now
2 Years
Corn
Leeks
Okra
Peppers
Swiss Chard
3 Years
Bean seeds of all kinds
Beets
Carrots
Lettuce
Melons
Oriental greens
Peas
Rutabagas
Squash
4 Years
Collards
Fennel
Kale
Mustard
Pumpkin
Tomato
Turnips
Watermelon
5 Years
Broccoli
Brussels sprouts
Cabbage
Cauliflower
Celery
Cucumber
Eggplant
Kohlrabi
Radish
Spinach
Storing Seeds in Less Than Ideal Conditions
Even if the seed is kept in less than optimal circumstances, after several years, I have known seeds to germinate and yield a successful harvest. A neighbor once purchased a large number of corn seeds one year, kept them in his garage, and used them with good results for over 10 years until he ran out. If I had done so, they would definitely not have germinated at all, his thumb is greener than mine.
Live plants are crops. Against all odds, some will develop, others will not germinate even though held in ideal conditions. In addition, in adverse environments, many plants perform better. It’s an impossible rule of nature. So, before throwing out some seeds, plant some or check them as I describe below. They might be viable for another year.
Test Your Seeds
There are many ways you can check the plants. You can plant 5 or 10 and see how many germinate, but for most plants, planting many seeds on a pad of moist paper towels is likely easier. Turn them over and growing them in a plastic bag. Put them in a warm place (but not extreme, room temperature is ok). Test them for germination every couple of days. If the seeds are sprouting, you are good at planting. If not, throw them out and start with fresh crop.
What About Survival Seed Vaults?
You’ll notice other online survival seed products packed for 20 to 25 years to keep. Can they still hold those seeds for 25 years? Unfortunately, “maybe” is the best answer I can offer. So much depends on how the seeds are processed. The producers of such sets of seeds bundle the seeds into mylars or cans to keep it dry and cool. If you store them in a cool environment, then you are likely to have viable seeds when you need them. Buy more seeds than you’d plan to need for extra insurance.
Another consideration when seed vaults are considered is that many are filled with popular varieties of seed that may not develop in your neighborhood. Look for vaults containing heirloom seeds which are well established to thrive in your soil and environment.
I prefer to select my seeds individually, because many of the seeds in the common vaults in my location will not grow. If you reside in certain areas of the world, a large-variety vault will fit well for you.
Packing Your Own Seeds
My seed vault consists of packets of heirloom seeds that I have explicitly selected for getting successful results in my region with them. I cover them with a desiccant solution in a mylar bag, since it’s just too hot here. I don’t use an oxygen absorber but other gardeners do. My hypothesis is that seeds are alive and do need some oxygen. I keep them in the fridge. I’ve only stored them this way for around 5 years, but the ones I’ve tested this year have been germinating well. I’m hoping to upgrade them after 10 years but they may last a lot longer.
Related: A Gold Storm Is Coming(Even the most prepared Americans will be blindsided by what’s about to happen.)
Other Self-sufficiency and Preparedness solutions recommended for you:
The Lost Ways (The vital self-sufficiency lessons our great grand-fathers left us) Survival MD(Knowledge to survive any medical crisis situation) Backyard Liberty (Liberal’s hidden agenda: more than just your guns…) Alive After the Fall (Build yourself the only unlimited water source you’ll ever need) The Lost ways II (4 Important Forgotten Skills used by our Ancestors that can help you in any crisis) The Patriot Privacy Kit (Secure your privacy in just 10 simple steps)
We’ve all heard the news reports of seeds discovered in ancient tombs that germinated when they were planted; even the seeds you purchase are labelled with dates of expiration or