HomePosts Tagged "SHTF"

Sure, shoveling a couple of tin cans and ready-to-eat packs inside a pantry or emergency household kit may be a no-brainer, but what happens when a real emergency blows your way and you’ll need to eat those stuff to stay alive? More than that, are you really sure that everything stays fresh until the time for unboxing comes? There are a lot of things to consider when creating a long-term food stockpile: shelf life, type of food, the very environment where you choose to store the food, and, the containers themselves.

As you know, emergency food should be stored in a cool and dark environment to keep them from getting rotten. Still, that leaves you to deal with other unforeseen dangers such as rodents clawing your way into your food stash, insects, and, of course, indirect environmental factors that can make long-term storage food stored in metal cans go bad. Last but not least, moisture can severely affect your food, even if it’s neatly wrapped in packages.

What I like to do in this case is to take the original pack and place it inside individual zip-lock bags before placing them inside airtight plastic containers.

You can even throw in a couple of desiccant silica gel packs to remove any moisture remaining inside. For a while, I thought long and hard about finding a more permanent solution to the excess moisture issue inside the pantry I use to store my food and I eventually ended up buying a dehumidifier. It works very well, and mine takes triple-A batteries (you can switch them with rechargeable power cells).

Now, regarding today’s topic, some foods are more endearing than others. For instance, lentils can be stored for at least 5 years. On the other hand, rice, if deposited in a proper environment, can last for 30 years if not more. This is why I’ve always pushed for smart stockpiling, aka buying only those stuff with a very long shelf life that could, theoretically, last forever.

This is not something new under the sun. In fact, if you remember your history lessons when Carter and Lord Carnarvon popped open Tut’s tomb, they found perfectly edible food stored inside wax-sealed angoras. And it’s not the only example – the Chinese and even the Mayans. So, what are these wonder foods that can be kept for decades at an end in the pantry before going rotten? Stick around to find out.

  1. Carrots

Packs with flavonoids and tons of other nutrients, carrots are excellent for stews, broths, and even by themselves. What most people don’t know is that those bright-orange wonders can be stored for decades. Dehydrated carrots have a shelf life of 25 years or even more. The trick is to place them in air-tight containers right after removing all the water to minimize contact with the air. I recently found out that it’s way easier to remove the water if you chop them into small pieces.

To whip up a quick batch of dried carrots:

  • Peel them off.
  • Wash and rinse.
  • Blanch them in a pot.
  • Put them on a tray.
  • Preheat the over to 125.
  • Place the carrots inside and allow them to dry. It takes about 4 to 5 hours depending on your oven.

Don’t forget to still every hour. Take them out of the oven and allow them to dry before tossing them inside a zip-lock bag.

2. Pasta

Mamma mia! Who doesn’t adore a plateful of pasta with meatballs? I, for one, am very much in love with pasta. It’s the type of food that can be cooked in every way imaginable. Even better, pasta, especially the deep-frozen variety, has a very long shelf life (at least 20 years).

Still, if you store them in a moist-free environment, you can take them out and whip up a quick pasta dinner even after 40 or 50 years. I read somewhere that pasta products can even last for a century and even more if placed in special storage containers like aluminum-lined mylar bags.

3. Salt

No meal’s complete with a sprinkle and tinkle of salt. This awesome condiment, which has been around since the dawn of time, does not ever go rotten if stored in the proper conditions. You need not worry about bacteria getting inside, because salt has a way of dealing with them.

Still, the only thing you should concern yourself with is moisture. If the container isn’t properly sealed (been there, done that), then it’s bye-bye salt and hello mush. I usually keep my salt in a heavy-duty plastic container in which I throw a pack or two of desiccant silica gel wrapped in plastic just to be sure.

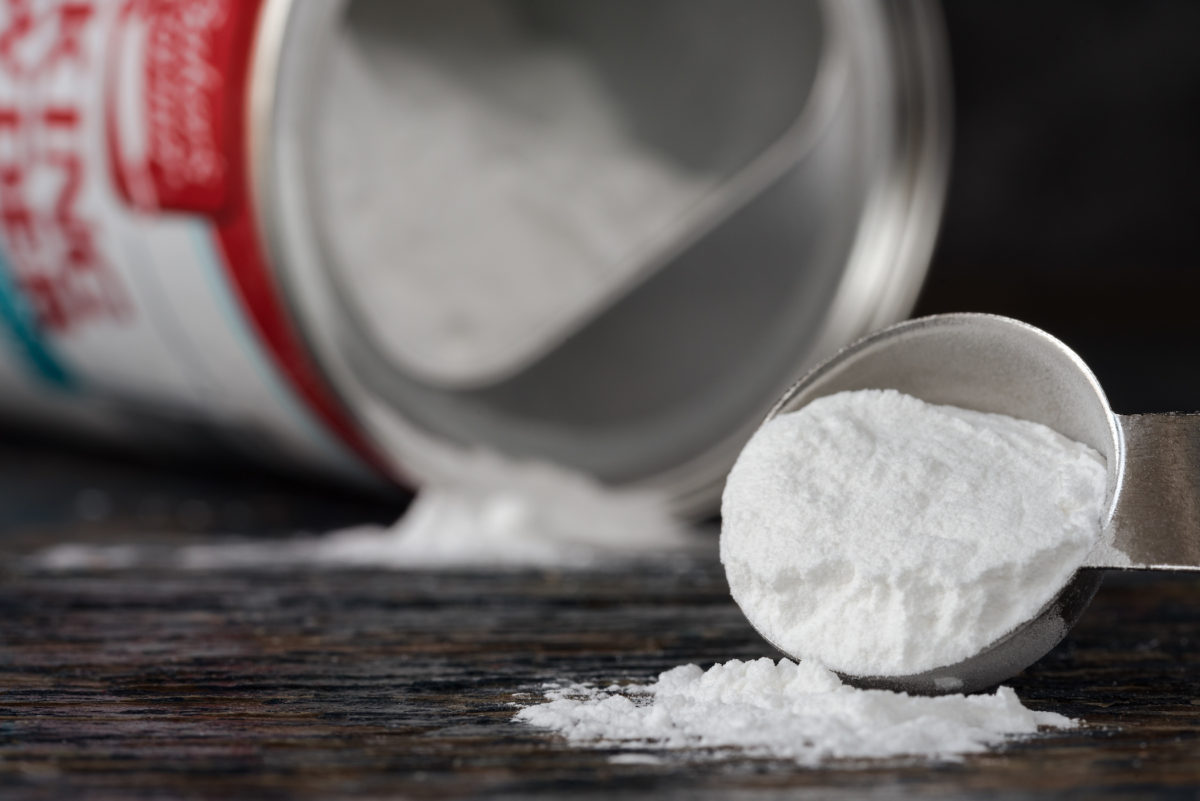
4. Baking soda

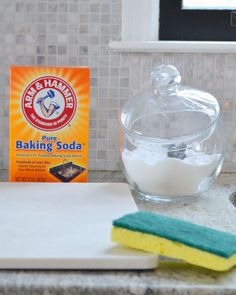
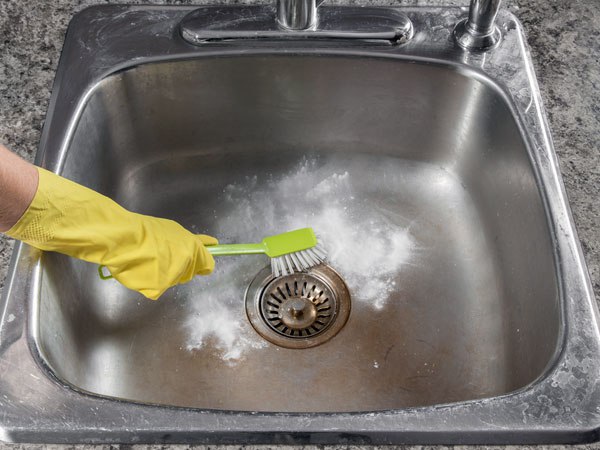
There’s nothing baking soda can’t do or fix – you can use it to bake delicious cookies, cakes, and clean stuff around the house. Before I went to the doctor to get my molar fixed, I used to gargle baking soda in the morning before brushing my teeth (great for morning breath as well).

If you’re a computer buff, just like myself, you can use a light baking soda mixture to remove persistent stains from plastic computer cases (also works wonders on those yellow spots!). As you’ve guessed it, baking soda has no expiration date, provided that you store it in proper conditions – no moisture and sunlight.

5. Soy Sauce

Care for some Chinese? Well, if you’re a fan of Asian cuisine then you must know that no dish must be without soy sauce. The salty, smokey, flavor gives that sea-foody taste to each meal. Are you ready for the good news? Soy sauce never goes bad. Ever!

Since it’s packed with sodium, that stuff will never spoil due to bacteria. Watch out for moisture and exposure to sunlight though. To protect that black gold, pour the contents of a bottle into a sealable and air-tight glass jar. You can line up the jar’s mouth with aluminum foil and plastic wrap for extra protection.

6. Powdered milk

I know that nothing beats the taste of real cow’s milk, but the bacteria inside it make it impossible to store it over long periods. On the other hand, powdered milk is not pretentious and very handy to have around the house for dishes and drinks. If stored in a moisture-free environment, powdered milk can last forever. I usually store powdered milk in a large plastic container with a couple of moisture-absorbent packs inside.

7. Instant drinks (coffee, cocoa powder, and tea)

No emergency stockpile should go without easy and quick-to-prepare drinks. I cannot and will not imagine a world without coffee or tea. Since they’re dehydrated, all instant drinks can last up to 10 years if you remember to store them in a moisture-free room.


8. Honey

Yes, dear? No, I was talking about bee honey, the one you use to make cookies or sweeten your drinks. The high sugar contents inhibit bacteria from developing. And, if stored properly (lid screwed on tight, no sunlight and moisture), a jar of honey can last for 100 years or even more!


9. Stock and bouillon

These are great during those cold winter days when you want to whip up a bowl of soup or your favorite comfort food. Everything boiled and set to cool down before being placed in bottles or something can last for ten years or more. A funny thing happened to me the first time my wife and I prepare bouillon for our stockpile.

So, the pantry which I used to store my food had a slight design issue – heat seeped through one of the holes in the wall. After the bottles cooled down, we placed them inside and forgot about them for a couple of weeks. One night, I heard this long bang coming from the pantry. Half-asleep and almost naked, I ran up to see what the Hell was happening.

When I opened the door to peek inside it was like stumbling upon a crime scene – two of the bottles exploded and there was tomato sauce everywhere. After a while, I realized that the heat made the bouillon bottles blow up. So, make sure your pantry is insulated. Otherwise, someone might think you’ve killed someone and hid his body inside the room.

10. Sugar

Spice and everything nice – these are the ingredients to create the perfect prepper. Very much like baking soda and honey, sugar can be stored indefinitely. The only problem is that it tends to harden over time. No problem. Just place it inside a large container and use a spatula or a spoon to break down those big chunks.


11. Beans

Delicious, nutritious, and easy to prepare, beans are at the very top of the food pyramid. Although you’ll probably end up passing more gas than usual after a bean-based dish, it’s nevertheless a versatile food. More than that, if you’re careful enough to store them in proper condition, a single bag of beans can last up to 30 years. There’s one catch about beans – you will need to reseal the bag from time to time. This is why I switched to aluminum-lined mylar bags instead of plastic, airtight containers.


12. White vinegar

What happens when the wine goes bad? You get up from the table and argue with the waiter, of course. Kidding – wine has this outstanding quality of transforming into vinegar, which is one of the most useful items found in your pantry, apart from salt and baking soda.

Vinegar can be used in salad dressings and other dishes, but it’s also a great helper around the house (my wife uses it to remove cat hair from the carpet and I use it in very small amounts to remove pigeon droppings from the car’s hood). White vinegar never goes rotten, so you can store as much as you want without a problem.


13. Maple Syrup

Fancy some pancakes with maple syrup for breakfast? My kids go absolutely bonkers over this dish. Can’t say that it’s really good for their teeth but, hey, try arguing with a hungry and screaming toddler. Just like honey, maple syrup has high sugar contents, which means that it can be stored for long periods of time (50 to 80 years, by some accounts).

However, you should know that there’s a huge difference between maple syrup stored in plastic and the one stored in glass bottles. The first, even unopened, has a shelf life of 5 to 18 months, while the later can last as much as half a century.


14. Ghee

I don’t know if most of you are familiar with this ingredient. Ghee is a type of base which is prepared from boiled butter. Basically, you get ghee by removing all the water from the butter. Great for Indian dishes and preparing low-calorie foods. If you store it in an airtight container, ghee will never go bad on you.


15. Corn starch

Momma always used to say that if the food looks too watery, add some cornstarch to make the spoon stand up on its own. Corn starch is very useful around the house – you can cook with it, clean up stuff, and even use it in combination with water to soothe sunburns. Stock up on cornstarch now because this stuff will never go bad.

Okay! To wrap this up in a neat and elegant manner, check out this small list of all the foods and their shelf-lives. Hope you’ve learned by now that smart stockpiling is all about knowing your food and not shoveling them in a pantry and throwing away the key.

Food Shelf Life (years)
Carrots (dehydrated) 25+
Pasta 20+
Salt Forever
Baking Soda Forever
Soy Sauce Forever
Powdered milk Forever
Instant drinks 10+
Honey 100+
Stock & Bouillon 10+
Sugar Forever
Beans 30+
White Vinegar Forever
Maple Syrup 50~80
Ghee Forever
Corn Starch Forever

Other self-sufficiency and preparedness solutions recommended for you:

The vital self-sufficiency lessons our great grand-fathers left us
Knowledge to survive any medical crisis situation
Liberal’s hidden agenda: more than just your guns
Build yourself the only unlimited water source you’ll ever need
4 Important Forgotten Skills used by our Ancestors that can help you in any crisis
Secure your privacy in just 10 simple steps

Sure, shoveling a couple of tin cans and ready-to-eat packs inside a pantry or emergency household kit may be a no-brainer, but what happens when a real emergency blows your

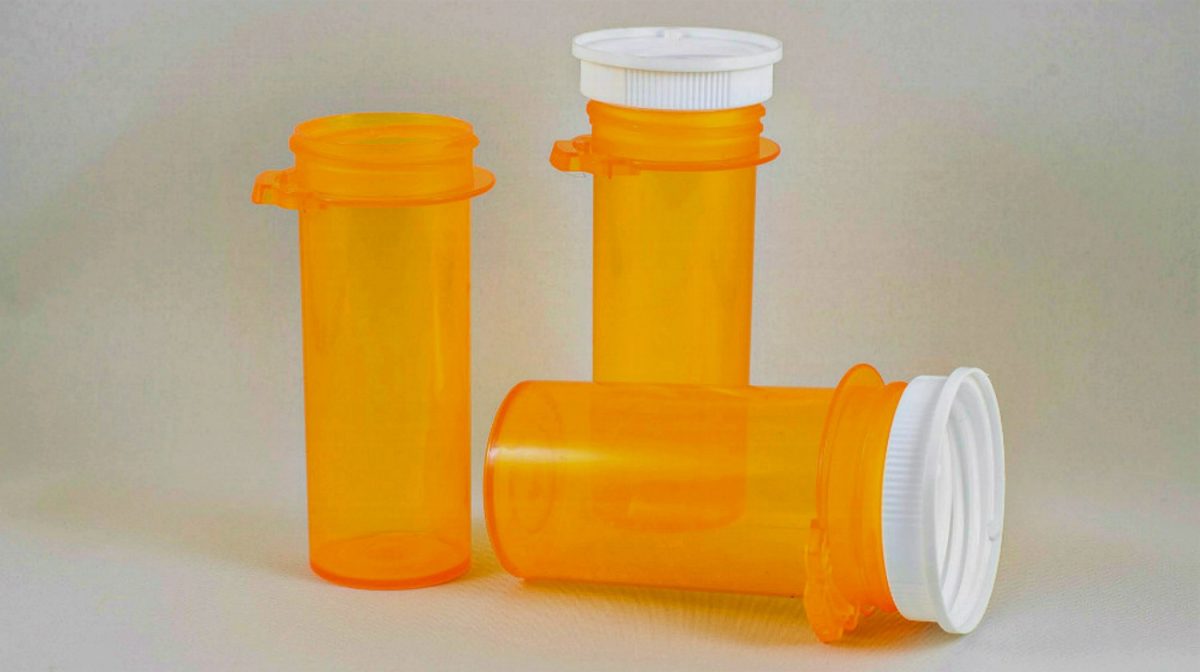
“It’s never lupus,” as the iconic Dr. House put it. Don’t know too much about that, but I have a saying of my own – “it’s never just a pill bottle.” Yup, you’ve guessed it. Today I’m going to show you a couple of nifty ways to reuse your old med bottles.

Some are them are no-brainers, while others are quite ingenious. Heck, when it comes to human ingenuity, even something as insignificant as a match can be turned into a unique item. So, because talk’s cheap, here are 11 ways to use your old pill bottles around the house.

Big life lesson – when you reach the point where two paychecks aren’t enough; you have to make some sort of change. I won’t deny the fact that with all my prepping training I still end up spending a couple of thousand dollars each year buying all sorts of crap.

Well, ever since my lovely wife realized that money kept flying out of my wallet, she used a clever trick to put something aside for rainy days – stuffing dollar bills in old pill bottles. Yup, took me a while to figure it out.

Long story short, the cash pill bottle trick worked, and we managed to put aside enough to buy our son a new smartphone. So, if you’re just like me when it comes to burning dough, use an old pill bottle as a piggybank.

Make a small emergency candle

You can make a 4-hour emergency candle by filling an old pill bottle with wax, lamp oil, tallow, or fat obtained from melted bacon. Stick a wick inside, allow it to soak the fuel, and set it ablaze.

Fishing kit

If you don’t have the resolve to make a paracord grenade, you can at least try to make e small fishing kit using a pill bottle, some cordage, hooks, and a couple of feet of fishing line.

Here’s how to do it. Wrap the paracord tightly around the pill bottle, place your fishing implements inside, and put the cap back on. You can attach a small carabiner to the cordage if you want to hang the fishing kit to your bug-out bag or belt.

Travel-size shampoo and conditioner

You really don’t need to throw a whole bottle of shampoo, conditioner, or shower gel in your luggage or bug-out bag. Pour as much as you need inside pill bottles, put some plastic wrap on top, and screw the cap in place.

Store key to ammo locker or safe

You know how the saying goes: if you want to hide something, put it in plain sight. If you’re worried about your children finding the key to dangerous storage lockers like the ammo cabinet, propane tank locker, or fire-proof safe, use old pill bottles to hide the key. You should also fill them with small pebbles or kitty litter to give off the impression that they’re really pill bottles.

Create a waterproof money container

Since I’ve mentioned something about saving money, you can create your own waterproof cash container by repurposing a bottle. Remember that cash will always be king, and that’s why it would be wise to have a small amount on you. To make a money container, you’ll need a small drill, epoxy glue, paracord, and, of course, some money.

Start by drilling a hole in the pill bottle’s cap. Draw the paracord through it and apply some glue. Put your cash inside, screw the cap back on, and that’s it. You can also make a square knot at the base of the pill bottle to ensure that the thing doesn’t fall off your bug-out bag or belt.

Make a small med kit

Although nothing can replace your B.O.B’s first-aid kit, it is possible to make a smaller and more portable version using a pill bottle. You can also use the steps for crafting a waterproof money container for your mini-med kit.

As for the contents, I added a couple of aspirins, some Ibuprofen, Alka-Seltzer, one Iodine prep pad, and one alcohol-soaked prep pad. Of course, you’re free to add or remove items.

Make a perimeter alarm

I don’t know about you, but I always like to install some sort of perimeter alarm when I want to camp for the night (I usually end up using the beer cans I brought along for the ride).

If you’re not much of a beer lover, you can make your own perimeter alarm using a couple of pill bottles filled with kitty litter or pebbles. Put a couple of stakes in the ground, connect them with some dental floss or string, and tie the filled pill bottles.

Store seeds for later use

If you want to protect seeds from the sun or extra moisture, store them inside clean and dry pill bottles. Don’t forget to label them.

Make a field sewing kit

There’s no way of telling what could happen in the field. And, during a shit hits the fan situation, your clothes will get torn to shreds. Sure, you can always patch them with some zip ties or dental floss, but you can also take the high road by using your sewing kit.

You can quickly make one from an old pill bottle. Place a needle, some thread, and a couple of patches. Put the cap back on and store it inside your B.O.B.

Make a deodorizer

If you want to ward off those nasty smells from your clothes, place some dried-up lavender flowers inside a pill bottle. Use a needle or a small knife to poke a couple of holes in the lid.

Finally, place it inside the wardrobe and, voila, no more rancid smells. You can also make one for the fridge. However, for that one, I would advise replacing the lavender leaves with apple cider vinegar, baking soda, or diatomaceous earth.

That’s about it for my take on repurposing an empty pill bottle. Would you like to add anything to the list? Hit the comments section and scribble away.

“It’s never lupus,” as the iconic Dr. House put it. Don’t know too much about that, but I have a saying of my own – “it’s never just a pill

Get a few preppers together, and you can pretty much guarantee that at some point bug out bags and bartering will come up. My personal take is that it’s a little bit foolish to stock something solely to barter – especially stuff that relates to addictions because people with addictions can be a little bit crazy about their vices. Stocking things that can get used by the household means there’s little regret about expenditures in 2-10 years, whether a disaster occurs or not.

There have been other bartering articles on FP, and they’re totally worth looking at. I have zero arguments with the gear, meds, candles, batteries, foods, and feel-goods that show up on those lists and are so very common when it comes up on forums. Still, there are some things that are very, very useful, readily affordable, readily portable in a bag or loaded into a game cart to take to Bartertown, and that I see very few people talk about – period, but almost never in the “barter” conversations and posts.

So those are where I’m focusing today.

In many cases, they’re not going to be the first things to run off shelves. Know your area and know what disappears – and when seasonally it tends to disappear even without a disaster. I tend to focus my own efforts on those things I don’t expect to find 3-9 months after a major crisis. I’m also cognizant that some things are never in much bulk – or enough bulk – and that even beyond looters and municipal groups that stand up to try to save their communities and go salvaging, there’s the risk of fires spreading and taking out stores.

With that in mind, here’s my list of 8 barter items that end up ignored as barter items and that aren’t without merit as backups for our own stockpiles.

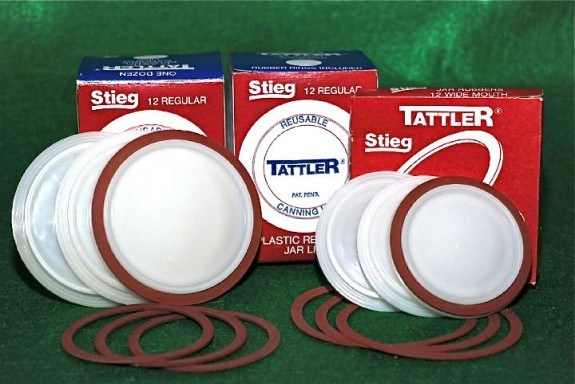
Canning Jars – Especially Lids

canning-jar-lids-tattler-header

Tattler Reusable Canning Lids & Rubber Rings

It’s pretty rare to find stores with nothing but canning jars on the aisles these days. In most cases, a store at its max display capacity has fewer jars than a single family would need to can only a veggie supplement for 6-9 months, and sometimes even fewer spare lids.

That makes lids and jars pretty much number one on my stock-up list, both for home use and to trade with neighbors and locals.

You’re not going to stick more than a box or two of spare lids in a bag, so this is one of the cases where if you’re on foot, you might want to go ahead and stick with some of those things like batteries, candles, an airgun and pellets, meds, and other lightweight items that will go pretty quick and that people 5 days, 50 days, 5 months and maybe even 50 months into a disaster will still be interested in taking off your hands.

Sevin Dust

sevin-dust-mixed

If you’re big on health, go with dish soap, vinegar, and water as a spray, and just skip on down to the next one. I’m pretty much required to turn in my greenie card for promoting Sevin Dust.

But, see, Sevin is pretty darn handy. Back in the ‘80s and ‘90s, my father used to coat pretty much anything alive in the stuff – ducks, horses, goats, veggies, trees, wasp houses. He used it as flea and tick control as well as on garden pests.

We now have health concerns and concerns about wiping out beneficial bugs and microbes, but if your garden’s getting eaten by eight different things, if you absolutely have to have it to have anything but beans and wheat – or if your beans are being eaten by three different things – you’re going to be willing to think seriously about pretty much anything on the table to get your hands on easy-to-apply dust that will kill almost any of them, something you can spot-treat by hand or hook up to a backpack blower.


I specify the dust because it’s more compact, stores easily, and comes in both big bulk bags and small-container three packs that make it a viable option to cart to the church or community potluck, market, or specific neighbors. It also has some of the shortest interval-to-harvest periods of a commercial pesticide.

Liquid Sevin doesn’t store as long, but it does kill extra things and it’s easier to get on the underside of leaves than powder.

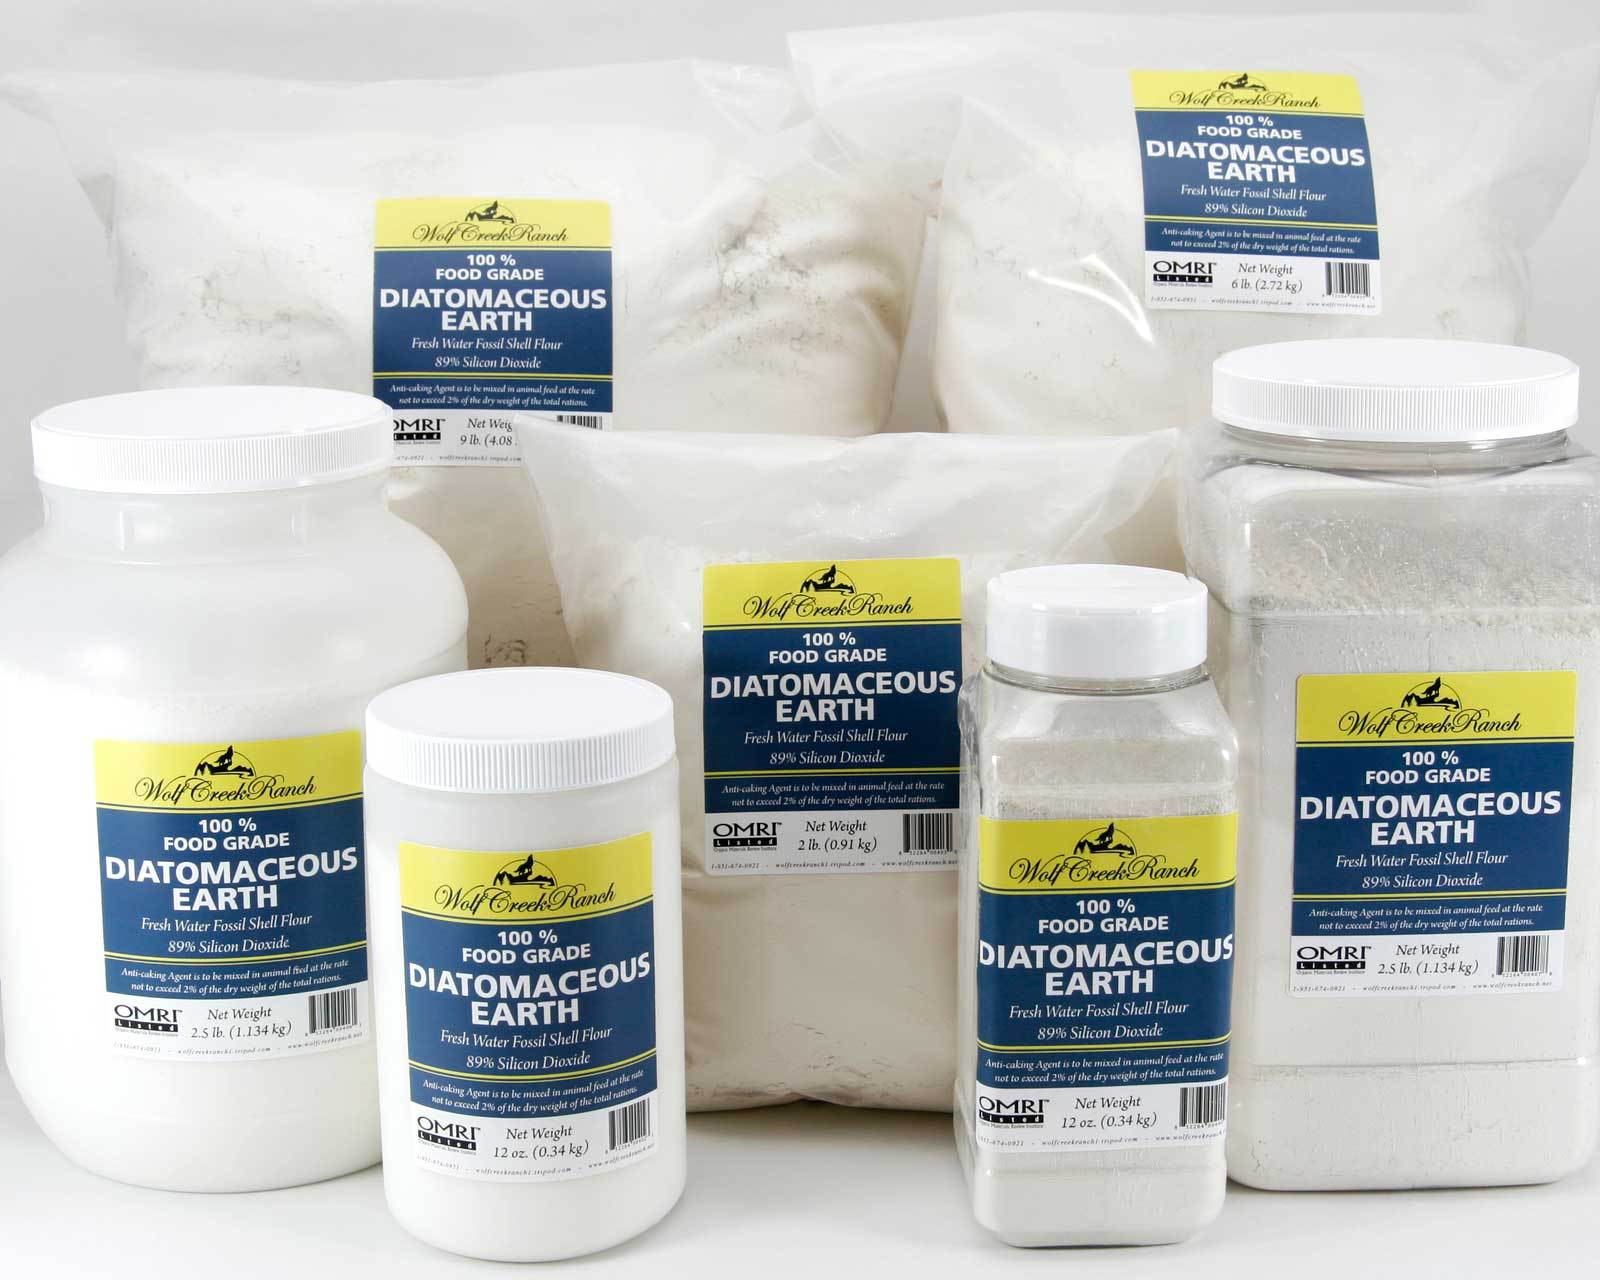
Diatomaceous Earth

de_group

First, an apology to our Canadians. I have gathered the impression that this stuff can be tough for you guys to get ahold of, especially in bulk, and it’s not especially cheap there. Here we can just swing by on a whim and get it in packaging from the size of a deck of cards, by the gallon, or even by the 55-gal barrel.

There aren’t as many uses for Diatomaceous Earth as there are for baking soda and Epsom salt, but, man, it’s pretty handy.

It’s the active ingredient in SMITE for poultry, it clears up everything from bed bugs to livestock and pet ear mites, ants to roaches. It can form protective barriers around plants or be spread over them as a powdered insecticide. It’s natural, physical as opposed to chemical, has a nearly endless shelf life because it’s really just ancient plankton shells, can help protect stored foods – especially those we’re harvesting and our next-year seeds – and it has at least a dozen health and beauty uses.

The more uses something has, the less variety we have to store and the better the chances that when somebody has a problem, we have a valuable solution. DE checks those boxes in a big way.

Baking Soda & Baking Powder

baking-soda-baking-powder
It’s hard to bake without the leavening of some sort, and baking soda has about a million uses outside baking – and about a million more totally outside the kitchen. Both have long expirations and easily extend beyond their best-by dates even at room temperature and with fluctuations from 60 to 80 degrees. They’re sensitive to moisture in their smallest packaging forms, but it’s easy to get several or a whole handful in a gallon bag to keep in buckets and pull out as needed.

I don’t expect them to simply run off the shelves as soon as a disaster is announced, but they’re inexpensive, cheaper yet to buy in bulk bags, and it’s worth having some baking soda stocked because it’s one of those that when you want it, there’s not a lot of substitution.

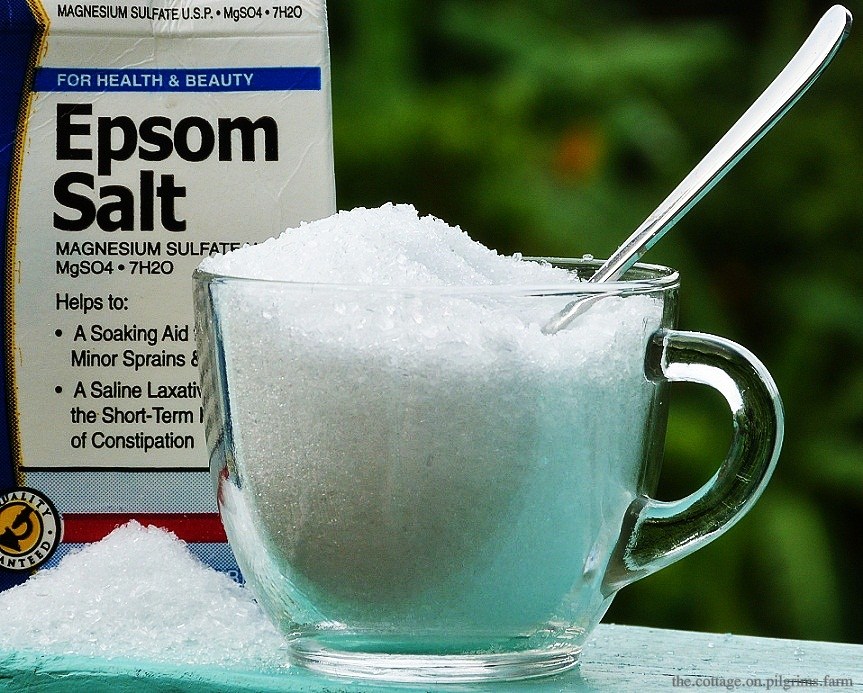
Epsom Salts

epsom

First, sorry, Australian readers (and maybe Brits). I know this stuff is expensive and controlled to a ridiculous degree for you guys. It’s cheap and plentiful in the U.S.

Epsom Salts is what I consider an absolute, 100%, no-arguments prepper must-have. If there’s not already a reminder of how awesome Epsom salt is on an annual basis, there should be. Epsom salt is another one like baking soda, with fifty million uses for human health and hygiene, cleaning, livestock, and gardens. There are so many uses, it truly deserves its own article just as a primer on how useful Epsom salt is.

I’ll take just a moment here to point out that Epsom salt is far, far different from table salts. Epsom is magnesium sulfate, not sodium chloride.

When you want to burn it down and salt the earth so nothing grows (or clean a cutting board and preserve food), use table salt, kosher salt, and sea salt.

When you want to encourage flowers, reduce soil deficiencies so plants can uptake their macronutrients properly and produce healthy, bountiful yields, fix an ear infection, reduce swelling, pamper your feet and skin, create barriers for certain types of pests in the home and garden, clean a wound, clear up skin conditions in humans, poultry and hoofstock, that’s what Epsom salt does.

And more.

As with everything else mentioned here, it can be purchased in bulk, or it’s available in small, moisture-resistant containers that make it very viable for trade when somebody’s struggling with any of a multitude of issues.

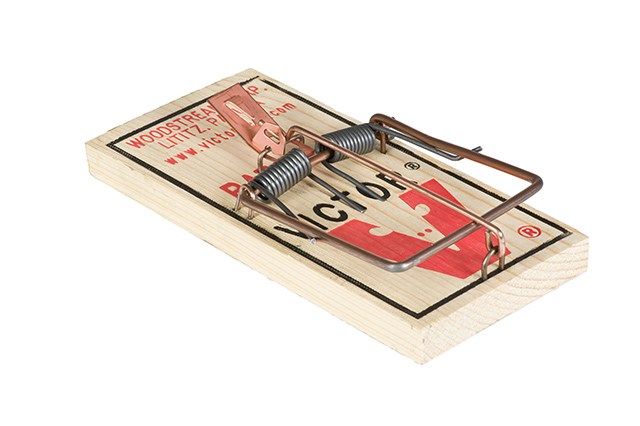
Rat Traps

rattrap

Rat traps have a ton of uses, but number one is their actual pest-control job. Eventually, I think the rat population will level out one way or another, but between death and waste-removal shutdowns, I think they’ll boom for a while first. There have also been some historic accounts from Rome, London, and other sites of major fires, where rats flee the cities and end up a plague on outlying areas in waves – and I anticipate fires since they happen daily even now.

Rat traps also have applications as squirrel and songbird traps for feeding families and pets, protecting gardens from small raiders, and combining with fishing line and various magnetic strip alarms or things like chem lights to create visual and audio alerts for home and property alarms. They can also be rigged with bells on a line to alert a barrier run of pigs that something has tripped the wire, and with some training, the pigs will rush in to remove threats to chickens and gardens.

They’re small, light, and typically pretty cheap.

For smaller rodent controls, there are several ways (at least) to turn cans and buckets or rubber bands and 2L bottles into pretty effective rodent traps, and some additional ways to use PVC for squirrels and rats. They’re reusable and potentially can be made out of scavenged refuse or scrap, so it’s worth looking up those, too.

After all, sometimes know-how is as valuable a barter object as a physical item.

Water Catchment Faucets, Spigots, & Overflow Fittings

catchment-bucket-spigot

We’re almost guaranteed to see increased attempts to catch and store rain if a disaster ever occurs. Drought and periodic no-boil orders already make water a valuable – and expensive – resource right here in North America.

Having extra fittings for turning our emptied and scavenged buckets, totes, barrels, and tubs into more effective catchment systems has the potential to make not only our lives easier but convince somebody to share a tool or pasture they’d rather not, or sweeten a deal over somebody else’s offer.

I doubt hardware stores will empty of plumbing fittings super early, but there’s always a chance since few areas have enough in to truly impact catchment for every farmer and rooftop in the area. There’s also the risk of fire.

The washers and faucets for making the simplest conversions are lightweight, and at most should cost a few bucks. They have the potential of appeal to a much larger community than just smokers, drinkers and tokers, and will appeal to those as well. That makes them a pretty easy item to keep in even an INCH bag and definitely worth throwing in a cargo pocket when we patrol or go to a neighbor – you never know when the opportunity for new boots, tampons, or better bullets will appear.

Various silicone tubes and thread tape have value even outside the rain barrel creations. Some of our local stores and contractors are pretty happy to let us have odds and ends of PVC from jobs for free. The faucets or spigots valves and washers are the more pocketable pieces, but some short runs of PVC and small tubes of aquarium repair silicone can sweeten a deal, even more, when suggesting or building a system for somebody.

Portable Solar Chargers

solarcharger

Small, portable battery and device solar chargers abound on the market today, from $5-50. The battery chargers are useless without fresh batteries to charge, but having access to downloaded music, movies, games, and pictures may mean a great deal to some folks.

They’re small enough even for folks who aren’t ready for $100-3,000 systems to keep phones, iPods, walkies, and headlamps going, and their value will go up further in protracted crises or a situation with regular brownouts. They’re already something you see folks gouge prices on and hit the streets with during “normal” natural disasters.

I wouldn’t fill up buckets with this one, but having a few for us, a few as backups, and a few I’m willing to part with for the little pocket versions and maybe a couple of the larger laptop-tablet or C-9V or combo chargers and rechargeable batteries for them is worth it to me. I also keep Nokeros and some of the little flat flashlights in my windows, though (and use them nearly daily instead of a bedside lamp or regular flashlight).


Backups and Bartering Alternatives

As I said, I tend to think folks should focus on things they’ll use in a disaster or daily life over something they never have and plan to never want. I also really like the items that can sit on a shelf for years even before best-by dates expire, especially the ones that don’t need additional packaging.

I have no problem with the lists of the common items like meds, batteries, and knife sharpeners. There are always going to be others, from things like clip-on books and cap lights to the ammo that leads to so much back-and-forth and conditional settings. This is just a list of options that I rarely see discussed as storage items, and almost never see on the bartering lists – even though they can be had compactly and they offer so much in so many ways, for the most part, that really don’t have replacements or are rare to find on shelves even now.


Other self-sufficiency and preparedness solutions recommended for you:
The vital self-sufficiency lessons our great grand-fathers left us
Knowledge to survive any medical crisis situation
Liberal’s hidden agenda: more than just your guns
Build yourself the only unlimited water source you’ll ever need
4 Important Forgotten Skills used by our Ancestors that can help you in any crisis
Secure your privacy in just 10 simple steps

Get a few preppers together, and you can pretty much guarantee that at some point bug out bags and bartering will come up. My personal take is that it’s a

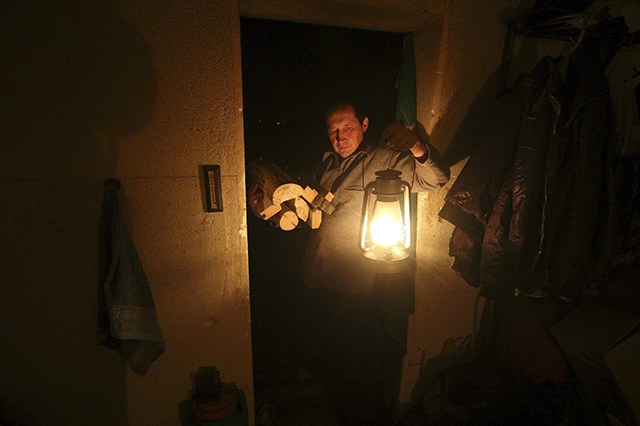
The number one thing I prepare for is a POWER OUTAGE when SHTF. Every SHTF series of events includes the inevitable power outage. In fact, whenever the power goes out, even temporarily, I wonder if SHTF has arrived. I lived through several hurricanes in Houston, Texas where the power went out for a week. I’ve also traveled to Beirut, Lebanon several times where I learned how they deal with daily rolling power outages. I find it interesting that Beirut has blackouts each day and people manage to persist with their normal daily lives. One day, in Beirut, I was having my hair cut when the power went out, but the hairdresser simply pulled out a flashlight and continued my hair in the semi-dark. I’m not going to discuss basic prepping in this article. Instead, I am going to present a list of things to consider that relate directly to short-term, long-term, and permanent power outages. In fact, as you develop your preps and preparation plans it is essential to consider every aspect of your preparations with regard to short-term, long-term, and permanent SHTF situations. I would not have considered all these things if I didn’t have the experiences without power. I hope these ideas help others in their preparations.

Plan ahead for living through a power outage

1. Getting stuck in an Elevator. One of the number one concerns of residents in Beirut is not getting stuck in the elevator each day during their power outage. They often live in buildings with many floors of stairs but most people opt to take the stairs rather than risk the elevator. I witnessed someone nearly every day trapped in the elevator. Unfortunately, some of the elderly cannot climb stairs. I learned never to take the elevator after this experience because you really never know when you could get trapped. People die or become seriously injured sometimes because they try to get out and fall into the elevator shaft. Consider the number of people in elevators each day at any given moment! One day, unknown to anyone, the power could go out and strand all those people inside the elevator. I justify taking the stairs as not only a safe option but an opportunity to get a little exercise.

stairs

Make sure you take the stairs if you don’t want to be stuck in the elevator.

2. Rig your house to have backup lights. In Beirut, many people have cleverly put strings of lights all around the house attached to a car battery. There are two light switches so when the power goes out they simply flip the other switch. I’ve thought of a series of variations for this same idea. In addition to LED string lights, I also have solar string lights. In addition to a car battery, I also have a solar generator and solar power sources. I found solar lights are generally listed as gardening decor. After experiencing Beirut’s daily power outage, I realized no matter how many candles and matches you store, these will run out one day. Keeping your solar items in Faraday cages is most likely the only long-term lighting solution for a variety of SHTF events.

3. Keep keys with you to your home/business/buildings instead of relying on electric card keys. Not everyone needs to worry about card keys but If you do rely on a card key to enter your apartment or buildings this could be a grave problem. You certainly don’t want to get locked out during an emergency so it is wise to keep regular keys with you even if most of the time you rely on card keys.

4. Make sure you own some manual Tools. You need a variety of manual tools and backup tools in case they break. During a hurricane, I couldn’t find my manual can opener and panicked searching around for it for over an hour one day. Now I have six can openers. I try to find very sturdy, all-metal manual tools. The cheap ones are not reliable or worth the risk. I want to purchase a wringer washer like my grandma used to use. It is a shame that we lost contact with manual tools and how to use them. During hurricanes, I’m amazed how fast dirty clothes accumulate, especially if the weather is hot and you have difficulties getting clean. I can only imagine how smelly people will become in SHTF.

5. Prepare your refrigerator and freezer. Learn which foods spoil first so you know what order in which to eat the food during the power outage. Eggs can last longer outside the fridge if you coat them in olive oil. During the hurricanes, I had about 30 jars of pickles in my fridge. Pickles can last outside the fridge so long as every day you skim the top of the jar. I have a butter saver which is the old-fashioned way to preserve butter. The butter saver is a ceramic cup that you fill with butter and place inside another cup with cold water; you have to change the water each day to keep it fresh. If you keep water bottles in the freezer you can prolong the time your freezer will keep the food cold and then switch some of the refrigerator food into the freezer. You don’t want to open the fridge or freezer too much when the power is out so you have to know what is inside, plan carefully, and close the door quickly.   Also, you don’t want to throw away your food. During a hurricane people often get together and grill the contents of their freezer with their neighbors. In Beirut I was surprised to see how people cook and save leftovers without relying constantly on power. I didn’t know many things really don’t need refrigeration if you eat it by the next day, like rice or cheese. People with gas stoves fare better than those with electric stoves during hurricanes.

poweroutageukraine-1

Power outages are too common for you not to be prepared for them.

6. Keep lots of fresh fruit in your house if you think a power outage is coming. Fresh fruit really doesn’t need to be kept chilled and this is one of my last second hurricane preps. During hurricane season I constantly have extra fresh fruit around the house just in case. I think this is a great SHTF practice all the time.

7. Utilize the last drops of water. Being without a fresh source of water becomes an issue much more quickly than you imagine. Obviously, you need water for so many daily activities! When I learn a hurricane is on the way the first thing I do is fill every single container I have with water and cover them with plastic wrap. I put containers of water in the bathrooms and by the bed. I have an old-fashioned water and pitcher which is great for hand washing. I save the old water too, and reuse it for some other purpose. I have a Water Bob that I use to store last-minute water in the bathtub. Also, when the water goes off you can still suck a few more cups out of the pipes for flushing the toilet. If you are lucky enough to foresee any kind of power outage, I can’t stress this last-minute collecting enough. When you think you have enough, think again and keep filling those containers.   I have a water barrel for long-term water needs but I plan to rely on that after my short-term water supply is finished. I learned from hurricanes that when the water goes out, you must beware of the first water out of the tap because it is contaminated. I filter my water anyway, but people always get sick drinking contaminated water after the hurricane. Get in the habit of drinking the juice from the can of fruit and cooking with the water from the can of vegetables.

Make cleaning up easier in a Power Outage

8. Baby wipes and Facial Wipes. I stock up on baby wipes before a hurricane because without power it is hard to stay clean. I really appreciate face wipes so I can wash my face without using any water. This prep clearly doesn’t last forever but I figure that the longer you can maintain a ‘normal’ life the better. I plan to prolong ‘normal’ as long as possible, especially for my children.

9. Have Paper plates, napkins, and silverware. These are a staple for the hurricane. Again, this isn’t a long-term prep but it maintains a normal feeling. It takes a lot of water to wash your plates and silverware. Also, it is a good idea to have lots of trash bags because the paper plates end up creating more garbage. The garbage piles up very badly even during a week-long power outage.

10. Flush the Toilet with a bucket of water. If you save the water you use, reuse the water to flush the toilet as long as you can. You’ll eventually need a camping toilet or a bucket. Cat littler is a good idea for the toilet/bucket. Plus, it is essential you bury the contents of the toilet. However, I was pleased that my toilet flushed during outages. The easiest thing to do is scoop water from a nearby pool and flush the toilet. I keep a large glass jug (old wine jug) by the toilet for the hurricane. During hurricanes, there are always reports of people in apartment complexes around Houston who go to the bathroom in the hallways. You have to wonder what is wrong with people who can’t figure out a plan for a week without power when they knew a hurricane was coming in advance and had an opportunity to prepare. The lesson here is that people will do surprisingly disgusting things not long after SHTF.

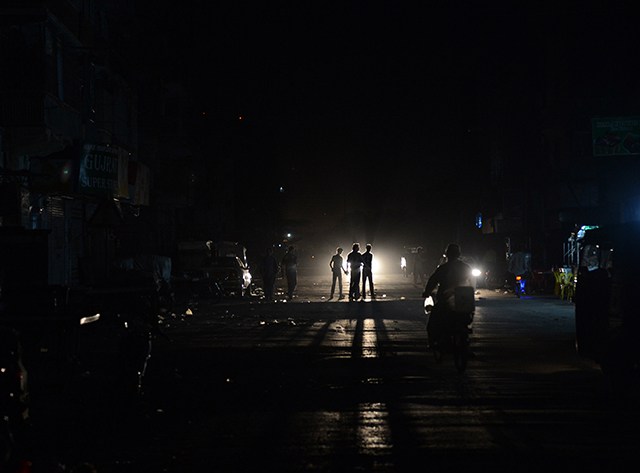
PAKISTAN-ENERGY-ELECTRICITY

This picture taken on February 24, 2013, shows Pakistani youth crossing a street during a nationwide power blackout in Karachi. Pakistan was hit by a nationwide blackout for more than two hours after the breakdown of a major plant caused power stations to stop working across the country, officials said on February 25. AFP PHOTO/Asif HASSAN

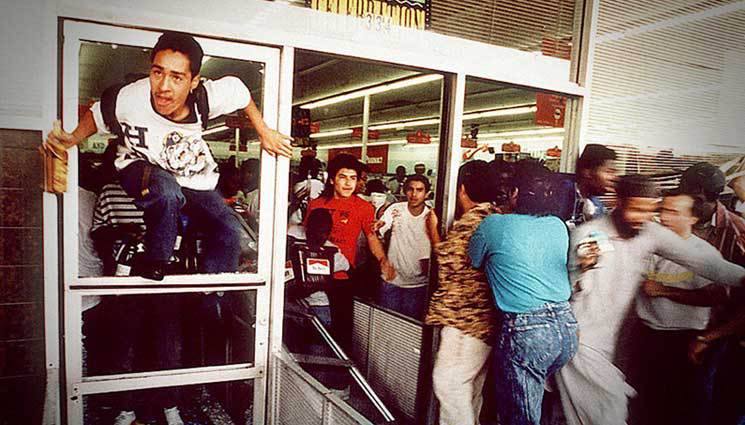
11. Stores will become EMPTY faster than you can imagine. If people notice a need to prepare in advance and that they are not prepared, the food and supplies will disappear within seconds. When we experienced our first hurricane we didn’t understand the need to prepare.

By the time we went to the grocery store, there was NOTHING there but a can of squeezed cheese. The squeeze cheese has become a family joke of what happens if you fail to prepare in time. I’ve been to stores immediately after a hurricane. It is so weird to see stores as they start to restock but the power is still out or unreliable. The credit card machines don’t work and they only accept cash. The gas won’t pump. Some unethical vendors raise the prices even though it is illegal. I’ve been to stores before a hurricane and seen people fighting over cans of food. Right before a hurricane in Houston, it is impossible to find a bottle of water. I read that statistically people have only three days worth of food in their house.

Once, at a Denny’s, a waitress was lamenting to me that a thief came and emptied the contents of her kitchen, which she said was in total: a package of Funyuns, a six-pack of orange Slice and a package of Marlboro Lights. I fear that this woman’s testimony of her kitchen supplies is more typical than I would imagine. In Beruit even the poorest survivors of the recent wars always stock rice and powdered milk.


12. Life without 911. It is not a comforting feeling knowing that you are completely on your own regarding medical problems and safety. I put burglar bars at my house just because I needed that extra feeling of security, especially during hurricanes. I can’t imagine a power outage without self-defense. I’ve heard of looting and rioting in other areas immediately when a power outage begins. I’m proud to say that my neighborhood in Houston has signs that say residents are armed. I’ve never once heard of reports of looting during hurricanes here. I’m certain that the reality of armed citizens keeps away looters and others who would take advantage of a power outage. Also, if you know that you can’t go to the hospital, and maybe the hospital generators are about to go out too, you learn to be extra careful. During the power outage you have to be able to put out a fire yourself, so stock up on fire extinguishers. Fireproofing your home is a good idea.

13. People die doing weird things when the power goes out. After a hurricane, there is always a strange series of reports on the news about how people died in dumb ways. Once, a lady cleaned her bathroom with the windows and door closed and the chemical fumes killed her. She was found dead after the hurricane because she lived alone. The lesson here is that when the power goes out, especially if you are alone, take extra precautions for your safety. The elderly always die during hurricanes because they fail to regulate their temperatures or run out of medicine. This means, that if you are at risk you really need to make sure you don’t run out of medicine, have a solar fan, or some way to keep cool/warm. When I believe a power outage is pending, I check up on my elderly neighbors and offer to help them get supplies. After hurricanes, people drive into the water and drown. During the power outage, people play in the water outside and it turns out that the water is filled with fire ants, rats, roaches, dead cats, dead dogs, worms, fleas, snakes, and the occasional alligator. Some people become immediately unhinged when the power goes out and are ready to kill someone over a can of food. bangladesh_blackout_ap_650

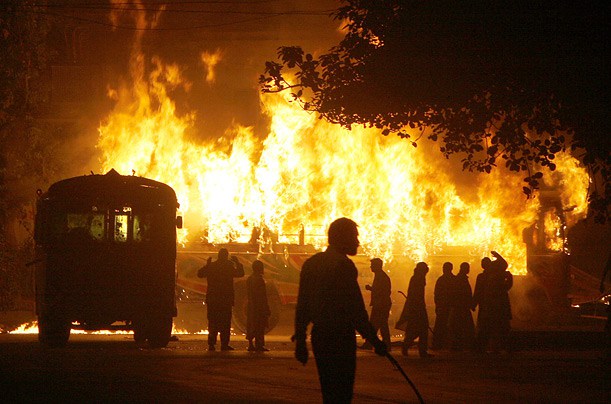
14. Beware of mass evacuations. I’ve witnessed multiple mass evacuations out of Houston. First, people become panicked. Second, everyone runs out of gas. Third, the gas stations run out of gas. Fourth, the freeways become parking lots. In one mass evacuation, a bus from a nursing home exploded into flames because it overheated. One of my friends was in an evacuation and he mentioned that he, his wife, his five kids, and two dogs all became overheated and suffered from heat sickness complete with gastrointestinal issues. Basically, avoid mass evacuations by trying to find another route if you must leave. I think more people died in the mass evacuation than in the hurricane itself.

15. Create a ‘last minute’ shopping list. It is possible you might get the opportunity to do some quick last-second preparations before SHTF. Have in mind a list of warning signs which indicate when you will run out of last-minute supplies. Tell your family if they see certain events begin to happen that they should immediately stock up on water. For example, my family knows that if North Korea bombs South Korea or if a nuke goes off anywhere in the world they promise to immediately stop at the store and buy extra water. This is one of my triggers, along with if I know a hurricane is coming or if some huge terrorist attack happens in the USA. Even if the lights don’t go out, it is never stupid to have bought extra water. In Beirut, the people who have survived the recent wars are very paranoid about leaving the house if they suspect any sort of violence is possible. Thus, if they need last-minute supplies they refuse to travel further than about a block from home.

16. Act like everyone else during SHTF. You certainly don’t want everyone around you to become aware that you are not suffering from a lack of preparation like they are. When the government comes after the hurricane to hand out water and bananas I always get mine like everyone else. Even if you only accept a handout in order to trade it later, just act in need like everyone else. I do not have a plan to accept vaccinations if the government insists we take them during SHTF. I feel they could easily taint medicine, food, and water. I also believe that if certain things happen in SHTF the government might offer food if you trade in guns.

17. Beware of FEMA shelters. Luckily I have not been to a shelter during a power outage in Houston but I know multiple people who shared their experiences. They didn’t feel safe sleeping in a giant room with strangers, there is not enough privacy and there are always reports of rapists and thieves at these shelters. They never have enough supplies. After Hillary mentioned ‘fun camps for adults’ I always wonder if they really want to help you with these shelters or if they will use the crisis to create concentration camps or reconditioning camps. In Houston, these FEMA shelters pop up for a variety of reasons; power outages, flooding, chemical spills, and large apartment fires. They round people up onto buses and deliver them to a makeshift FEMA shelter at a school or a giant sports stadium. I’ve seen some schools have watch towers like prisons. Sometimes they relocate students from public schools to a shelter without parental notification until later. Whatever the case is about these FEMA shelters, now or in the future, I do not plan to ever go to one for any reason.

18. Boards for your windows. During hurricanes, everyone puts boards on their windows in order to keep debris from breaking them. I think boards are a great prep for power outages because you’d not want to have a broken window, they deter people from breaking in and they secure privacy. I also like large wooden privacy screens and wooden shutters. Black-out curtains would become essential for a long-term power outage so you don’t draw attention to yourself.

19. Own backup Radios. After the hurricanes, I realized how important crank radios are for news and a connection to the outside world. I know this is a common preparation but I’m stressing the need to have backup crank radios with phone chargers. It will be important to remain updated as much as possible and any information you can gain about what is going on during SHTF will be helpful.

20. Plan family activities and fun when the blackout starts. When everyone is nervous, obsessed over the news and the power outage begins it is easy to just sit there, waiting and fretting. I always feel sick to my stomach with anxiety when the hurricane starts. Having been through multiple power outages, I find that especially for the well-being of my kids, it is a good idea to make an effort to have a family dinner with candles, play some games, and celebrate the time you have together. Plus, when you plan a family night in reaction to a power outage you don’t feel like a victim and you can de-stress a little. Some of my favorite family memories actually happened during power outages.


Other self-sufficiency and preparedness solutions recommended for you:
The vital self-sufficiency lessons our great grand-fathers left us
Knowledge to survive any medical crisis situation
Liberal’s hidden agenda: more than just your guns
Build yourself the only unlimited water source you’ll ever need
4 Important Forgotten Skills used by our Ancestors that can help you in any crisis
Secure your privacy in just 10 simple steps

The number one thing I prepare for is a POWER OUTAGE when SHTF. Every SHTF series of events includes the inevitable power outage. In fact, whenever the power goes out,

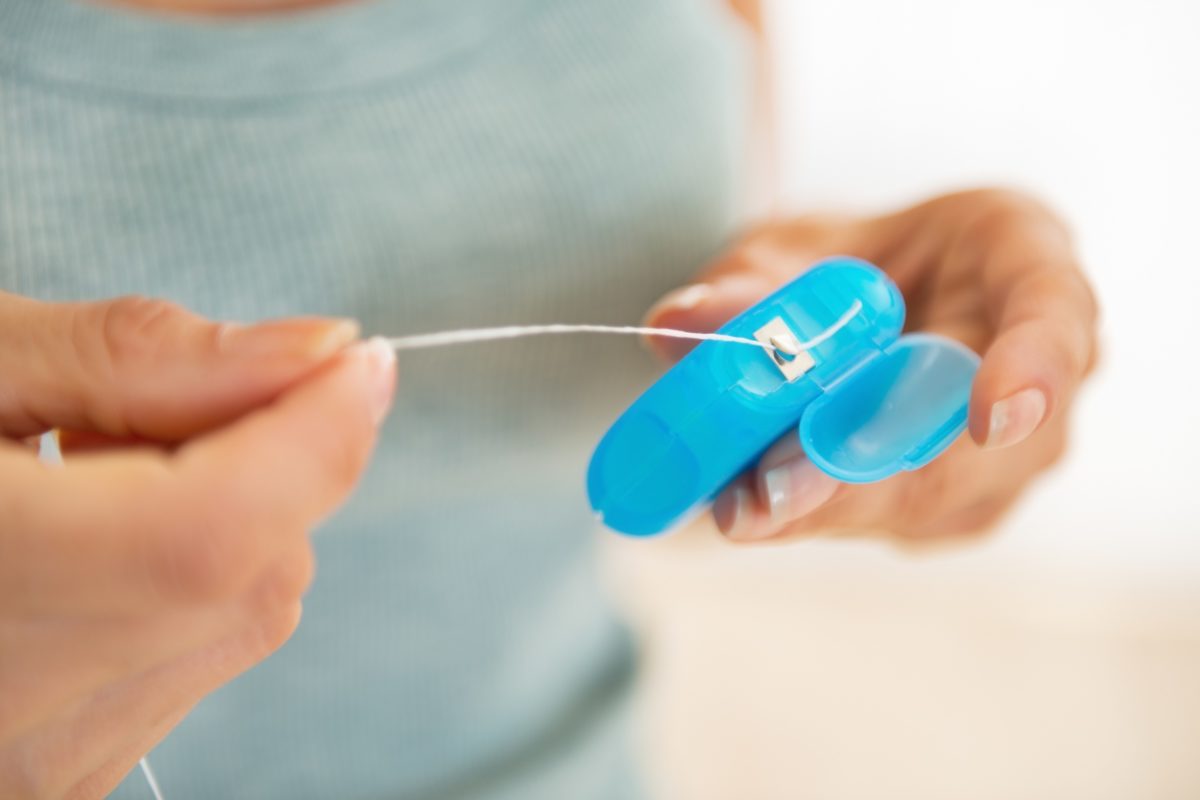
You’ve probably heard this one before – brush and floss before hitting the sack. I can wholeheartedly say that dental floss is the best thing to happen for yapper health right after ceramic implants. Have you ever stopped to wonder if the same stuff we use to floss our teeth can be used for other purposes?

Of course you did, and I have to admit that most of you can become very inventive when it comes to, let’s say, repurposing floss (you really should that news piece about that guy who ended up in his hospital after his SO tied him to the bed with dental floss for a wild sex game).

Anywho, floss is very handy to have around, especially when the shit hits the fan. It doesn’t take too much imagination that dental floss can be successfully employed as cordage when the need arises.

From crafting weapons to drying your clothes above the firepit, dental floss is a powerful ally, one that can help you get stuff done without too much effort. So, what are the survival uses of dental floss? Well, keep reading, and you will find out. Maybe I’ll even manage to surprise you.

Weapon-making

Though I can’t say that I’m very comfortable around weapons, bladed or otherwise, in case of an SHTF situation, you can craft yourself a sturdy weapon which can be used for hunting, self-defense, and both. Easy enough to do it – take a long pole and tie your survival knife to one of the ends using as much dental floss as necessary. You can also use floss as a bowstring if you can find a piece of wood with the right curvature.

Fishing

No fishing lines? No problem. Just cut a long piece of dental floss and tie the hook to the other end. If you don’t have anything on hand to act as a floater, you can always inflate a condom and attach it to the dental floss line. You can create your custom fishing box – just like a tinder box, but with fishing implements – using a small oval container (I fashioned mine from an old coconut shell coated with resin), a few hooks, dental floss, a floater, and some piece to act as a weight.

Tying your shoes

There’s nothing worse than a ripped hiking boot shoelace. But wait! It gets even better – no reason to cry over ripped shoes when you’ve got a spare, but that usually never happens. So, if you’re out and find yourself with nothing to tie your shoes, just grab a long piece of dental floss, cut it to size (use the other shoelace as a reference point) and carry on.

Drying your clothes

Anything can happen when you’re in a survival-type situation. I personally abhor anything that ends in me having to sit for any number of hours with soaking-wet clothes. Of course, you can always use the extras in your B.O.B, but that still leaves you with wet apparel.

The best and quickest way to dry them would be over a fire. Take two long sticks and insert them into the ground just about the firepit. Use your survival knife or another sharp implement to create grooves at each end of the stick. Cut a long piece of dental floss and connect the two sticks. Now that you have a clothesline, the only thing left would be to start your fire and hang your clothes out to dry.

Making a simple alarm

Whether you’re alone in the woods or have a small mountain refuge, you’ll need some sort of alarm system. Of course, when you’re still in contact with the rest of the world, you can always hit the local hardware store to purchase an alarm. However, when you’re out there, things take to change a little, in the sense that you will need to improvise.

To make a simple alarm for your overnight camp, plant a couple of sturdy sticks around your location and connect them using dental floss. Attach a couple of cans or empty container, and that’s about it. You may not be able to see what comes your way, but you’ll certainly be able to hear it long before it can set foot inside your tent.

Mend ripped clothing

I know that sewing is not on your top 10 favorite activities list, but any prepper should know how to repair his clothes, especially when there’s no one around to do it for him.

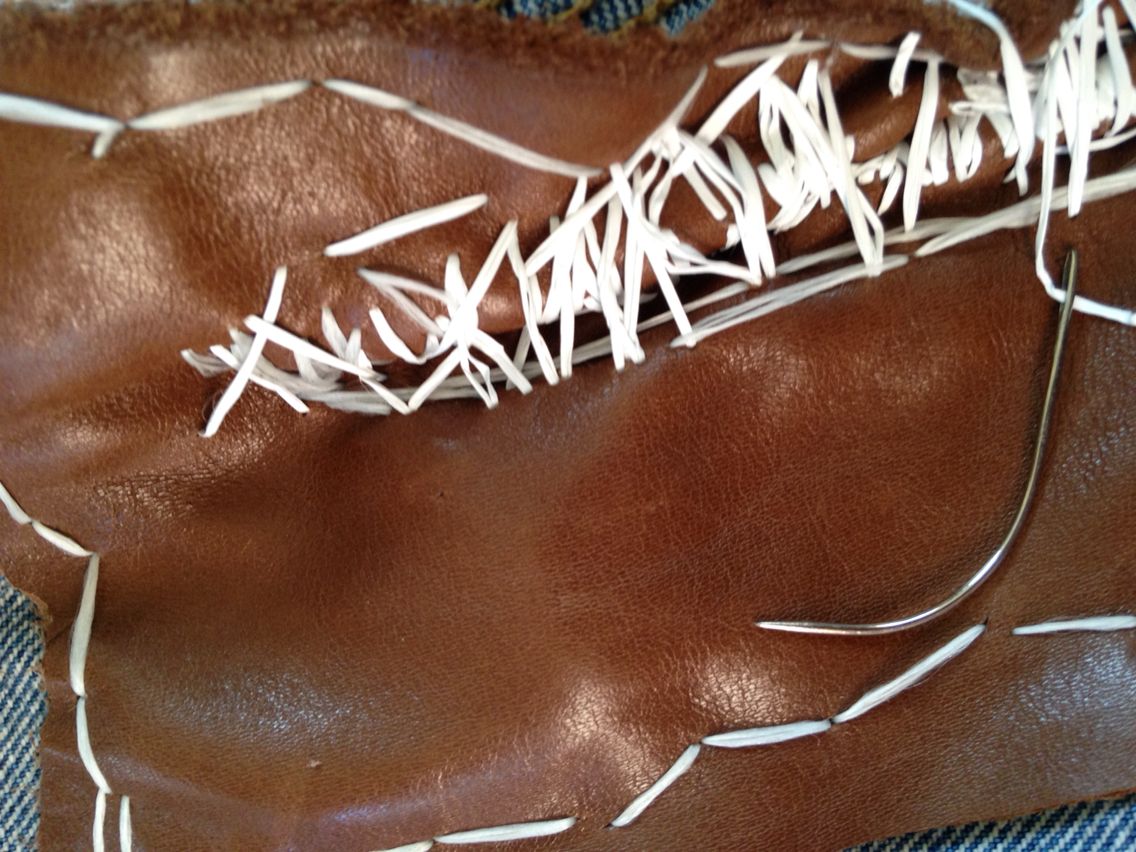
Sewing kits should be a part of your B.O.B. However, in case you’ve forgotten to throw in some needle and thread, you can always use a fishing hook and some dental floss to patch up your clothes. If your first-aid includes a suturing kit, you can also break open a pack and use the sterile thread to seal holes in your clothes.

Stitching up wounds

And because I already broached the subject of suturing, if you’re unfortunate enough to wind up with a big bleeder, you can always use dental floss to make stitches. As for the needle, grab a fishing hook from the kit, and throw it in the fire. You will also need something to hold the hook during the procedure – if your first-aid kit doesn’t come with a pair of straight scissors, you can always use your multitool’s plier.

After cleaning the wound with whatever you have on hand (I would recommend clean water and mouthwash), grab the needle by its midsection, run it through the first incision line, cross the gap, and piece the other edge of skin from beneath.

Pull the thread, grab the longer end, loop the thread four times around the pliers, open it a bit, grab the smaller end, and pull. Repeat the procedure until you close the wound. Congrats! You now know how to make simple interrupted sutures.

That’s it for my 7 cookie ways of using dental floss in an SHTF situation. Have something more to add to the list? Hit the comments section and let me know.

Before you go, you may also like:
Put This Spice In Your Shoes To Fix Toenail Fungus
The vital self-sufficiency lessons our great grand-fathers left us
Knowledge to survive any medical crisis situation
Liberal’s hidden agenda: more than just your guns
Build yourself the only unlimited water source you’ll ever need
Secure your privacy in just 10 simple steps

You’ve probably heard this one before – brush and floss before hitting the sack. I can wholeheartedly say that dental floss is the best thing to happen for yapper health

Why does everyone talk about storing wheat?

I recognize that there is a significant number of people in the world that do not tolerate wheat well, or at all. My father-in-law has celiac disease, and one of my sons cannot have any whole grains. However, even these individuals should consider storing wheat in some measure, and I’ll be discussing the reasons why at the end of this article. Of course, those that will benefit most from this article are those who can eat wheat.

Wheat is the staple grain of the North American diet. It’s what we grow here all across the Great Plains. It’s what we’re accustomed to eating. We have the recipes for breads and other baked goods. (You do have recipes, right? Hard copies, right?) Amaranth, quinoa, spelt and such are great, but most people don’t store or use them. They don’t know how to work with them. TEOTWAWKI won’t be the time to learn. And exotic grains are expensive. At least for now, wheat is very cheap.

Because wheat is what we grow here, it’s what will be available post-TEOTWAWKI, if anything is. Even if you can’t eat wheat, consider storing it for those who can, especially those in your family or those who may be coming to you. That way you have cheaper food for them and you can keep your costlier non-wheat preps for yourself.

Nothing smells better, or tastes better, than freshly baked bread. Really good food improves morale in a crisis. And unfortunately, bread is one of those items that cannot be stored. It has to be made fresh every week. Furthermore, most people can’t make bread. It is definitely one of those skills that takes practice and should be mastered while we can still feed the loaves that flop to the chickens without feeling wasteful.

wheat-1530321_640

911dIl0izBL._SL1500

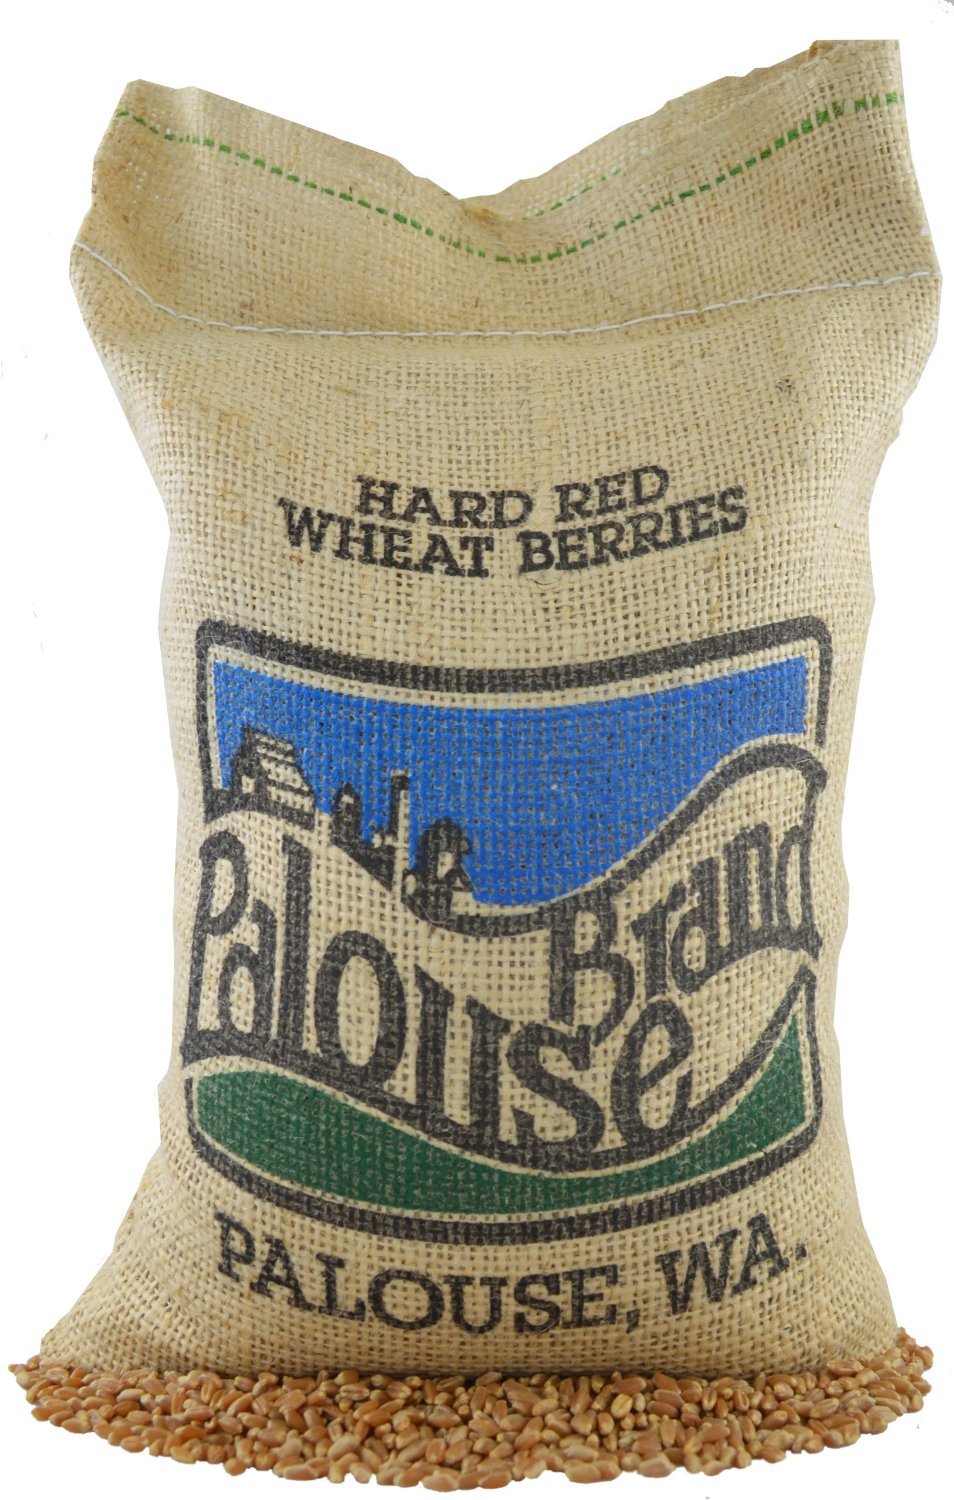
Non-GMO Hard Red Spring Wheat

Wheat is nutritious.

Wheat combined with milk (in the same meal) will provide all the essential amino acids for building protein. Wheat is a primary source of B vitamins. Because B vitamins are water-soluble, they can’t be stored by the body. We need a constant supply of vitamin B to maintain good health. In addition, sprouted wheat berries (more on that later) are an excellent source of vitamin C and also provide some vitamins A and D.

While being able to bake bread is probably the main reason for most of us to store wheat, there is still plenty that can be done with wheat berries until you are able to obtain a grain grinder and while you learn to bake your bread. The whole grain can be boiled for cereal. Any leftover boiled berries can be mixed in with ground beef to extend it (meat loaf, meat balls, hamburger patties, etc.) without too much notice by the rest of the family. The whole berries can be used to make blender pancakes or blender waffles (full recipes and tutorials at storethisnotthat.com). The berries can be popped and eaten like popcorn.

But wait, there’s more!

WheatBerry_Salad

Wheat Berry Salad with fresh tomatoes from the garden.

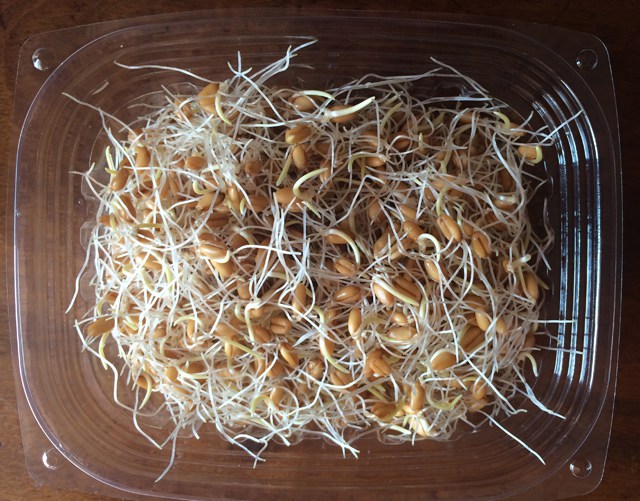
Wheat can be sprouted for even greater nutritional benefits. In a nutshell, wheat berries are soaked in cool water for about twelve hours. Drain the berries and rinse and drain again. Rinse the wheat well three to four times per day. (For the specific how-to’s of sprouting wheat, click here.) The two to three-day old sprouts can be added to soups or salads. At this point they are already much higher in calcium and vitamin C and several other minerals. Or let the sprouts continue to grow and green up a little for adding to sandwiches, like alfalfa sprouts. Or dehydrate the sprouted berries and grind them into flour for sourdough baking. Or toss them into soil for growing wheat grass for juicing.

Furthermore, wheat berries can also be used to grow fodder for our animals. Basically, the wheat berries are soaked and sprouted as described above, but instead of sprouting in a jar they are spread in a plastic tray with drainage holes. The rinsing is the same—three to four times per day, and the wheat berries are allowed to grow into wheat grass. The roots develop into a thick mat, and the grass and mat are fed as fodder to livestock about ten days from the initial soaking. So even people who can’t eat wheat benefit from storing it as the fodder is fed to chickens, rabbits, goats, and sheep who turn the fodder into eggs, meat, milk, and sometimes even fiber.

While it does take a little time and effort—but just a little—to grow fodder, bear in mind all the benefits. One pound of wheat berries becomes seven pounds of highly nutritious natural fodder. Wheat has a much, much longer shelf life than commercial feeds, it is much cheaper, and takes much less space. Fodder is a great way to provide greens in winter when grasses and weeds aren’t growing.

WheatSprouts

Wheat can be sprouted for even greater nutritional benefits. In a nutshell, wheat berries are soaked in cool water for about twelve hours. Drain the berries and rinse and drain again.

What is the best type of wheat to stock up on?

As you start researching the possibilities of adding wheat to your storage program, you find that there are actually a lot of different kinds of wheat. So now what? What kind to purchase? After all, you don’t want to make any mistakes here.

Durum wheat is what is used to make pasta, and soft white wheat is used for baked goods that do not use yeast—biscuits, cookies, cakes, etc. Soft white wheat also has less protein (gluten) than hard white. Most people do not store these two grains, at least not in significant quantities.

Hard white spring wheat sprouts best, but some research shows that it doesn’t store quite as well as the hard red and hard white winter wheat’s.

Hard red wheat has very slightly more protein than hard white. However, because hard white lacks the bitterness of hard red, less sweetener is needed in baked goods. For all of its advantages—milder taste, superior baking qualities, and ease of sprouting, hard white winter wheat is what we store.

And just how does wheat need to be stored? Regardless of the variety you choose, if stored properly wheat can remain viable and edible for hundreds of years. There are a variety of storage options, each with their pros and cons. Mylar bags are easy and very portable, but rats and mice can chew through them. Grain stored in #10 cans is pest-proof, but the cans are subject to rust, especially in humid areas. And storing enough wheat in cans gets a little pricey, at least for us. Some choose to store their wheat in large plastic or metal barrels. I just don’t like them because they aren’t very portable. Our family has moved (with our food storage!) eight times in the past 25 years. I can’t imagine what a nightmare moving large barrels would have been.

StoringFoodLongTerm

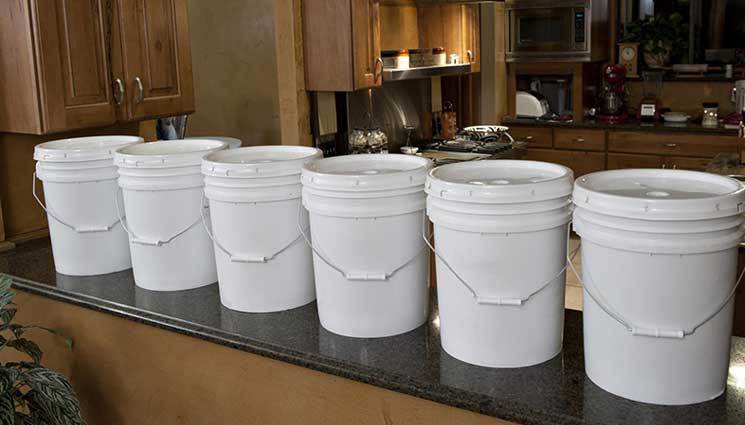
You can find free food-grade buckets at local stores around town.

Storing Wheat in your home or retreat

We choose to store our grains in plastic buckets that we get free from bakeries and donut shops. They’re free, they’re food grade, they’re portable. Yes, mice or rats could eventually chew through the buckets. Admittedly, we have had some seasons with an overabundance of mice and rats (isn’t even a single critter an overabundance?), but we’ve never had any critter chew on the buckets. The cons are that the five-gallon buckets can be difficult for some people to carry. And those lids can be nearly impossible to remove. Make sure you have a few bucket wrenches for them. They’re a lifesaver.

Store your wheat in a cool, dry place—50-60 degrees is ideal. Wheat that has been stored at higher temperatures for even a short time will not sprout as well or at all and will not make good yeast bread. It will also have lost some nutritional value.

Exactly how much wheat should you store? Well, that’s going to vary from one person to the next. The LDS Church advises 400 pounds of grains per person per year as part of their food storage recommendations for a 2200 calorie per day diet. That’s what I use for my family, with about 300 pounds of wheat per person. However, in addition to that we also store 50 pounds per chicken or rabbit to grow into fodder. When it comes to wheat, I think the day will come when it will be worth its weight in gold. With all its uses, the ease of storing it, and its low-cost, you just can’t ever have too much.


Other self-sufficiency and preparedness solutions recommended for you:

The vital self-sufficiency lessons our great grand-fathers left us
Knowledge to survive any medical crisis situation
Liberal’s hidden agenda: more than just your guns
Build yourself the only unlimited water source you’ll ever need
4 Important Forgotten Skills used by our Ancestors that can help you in any crisis
Secure your privacy in just 10 simple steps

Why does everyone talk about storing wheat? I recognize that there is a significant number of people in the world that do not tolerate wheat well, or at all. My father-in-law

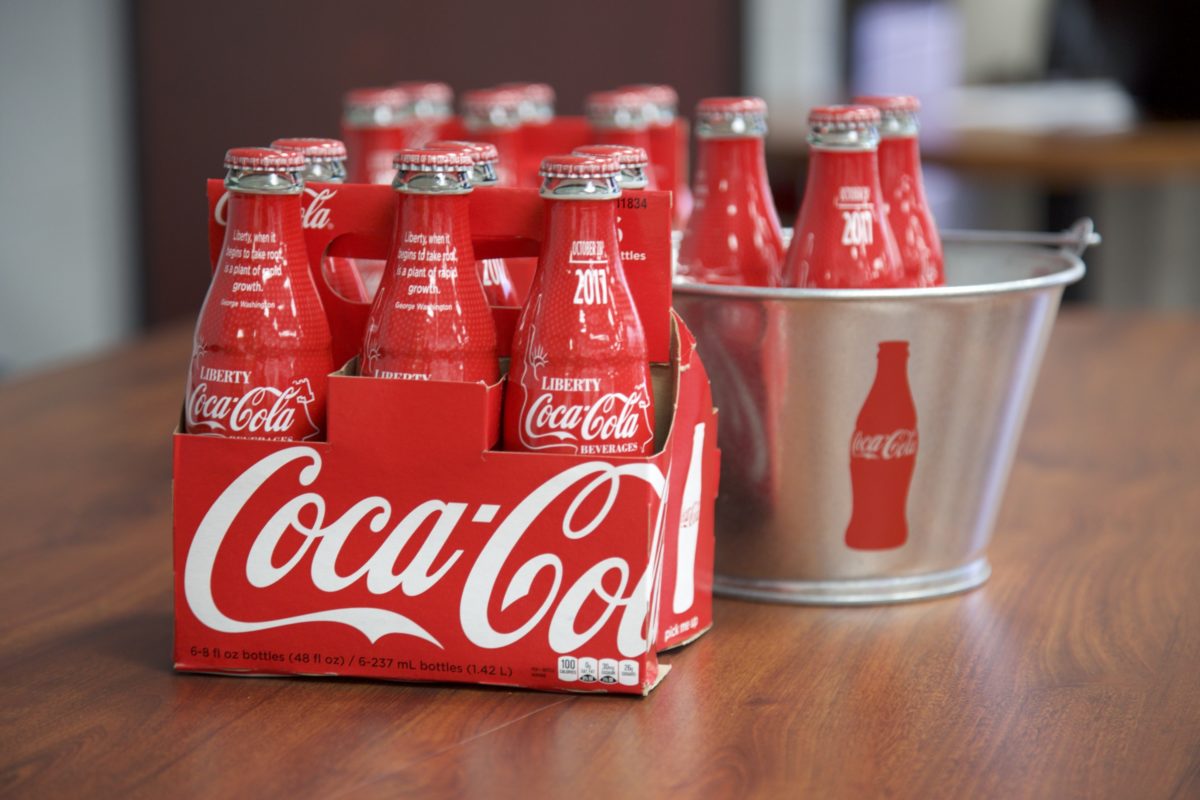
Everybody loves it, and everybody hates it – that’s what I like to call the Coca-Cola paradox. Even though the doctors scream at the top of their lungs that Coke’s as poisonous as arsenic, we cannot conceive a cozy family meal or a game night without at least one uncorked bottle of coke.

As far as I’m concerned, I can’t say I have any love for fizzy drinks, no matter their backgrounds. Of course, I would prefer a glass of freshly-squeezed lemon juice any time, but that doesn’t mean that I want to see the Coke factory burnt to the ground.

There’s no denial of the fact that people who drink too much Coca-Cola expose themselves to all manner of nasty diseases such as leukemia, thyroid cancer, morbid obesity, tooth decay, COPD, asthma, heart disease, and the list goes on and on. Still, it doesn’t mean that this type of beverage doesn’t have its uses. No, you’re not going to die if you drink a bottle of Coke every now and then, but don’t make it into a habit.

Anyway, since my dad’s been a big fan of Coke since the early ‘50s, I spend a lot of time doing research on this drink’s side effects in an attempt to convince him to tone it down a notch. Can’t say that I had too much success, but I did uncover something really interesting. Coke can be used in SHTF situations. Yup, you read that right. How? Stick around to find out.

Boost the efficiency of your compost

If your compost’s not good enough for the plants with munchies, add a bottle of Coca-Cola. It will increase the acidity of the compost and, at the same time, it will give those tiny organisms all the sugar they’ll need.

Get rid of dirt and stains from the toilet

If you don’t have anything else on hand to clean the toilet bowl, try using Coca-Cola. Pour half a liter in the toilet, wait 15 minutes, then flush the toilet a couple of times. There you have it! No more stains or smudges and, best of all, you didn’t even have to scrub it.

Related –  A terrifying disaster is upon us (What you can do to keep your loved ones safe during the coming chaos)

Remove gum stuck to your hair.

You really don’t have to cut away those precious locks if get gum stuck in them. Instead, soak them in a bowl with Coca-Cola for a couple of minutes. You can now remove the gum by hand.

Set a trap for pesky bugs

There’s nothing worse than having to dodge stinging insects like wasps or bees when you’re at the picnic. Want to take your revenge on them? Try this trick. Fill a small bowl with Coke and place it as far away as possible from your picnic area. Attracted by the sweet smell, the suckers will go for the Coke and leave you alone.

Get rid of congestion fast

Yes, I know that drinking too much Coke can lead to all kinds of intestinal mishaps, but, apparently, this stuff can be used to relieve congestion. Take a pan and add one can of coke and some water. Bring to a boil, wait a couple of minutes for that stuff to cool down a notch, and serve.

RelatedA Gold Storm Is Coming  (Even the most prepared Americans will be blindsided by what’s about to happen.)

Hack away windshield ice

Tired of having to wait around for the engine’s heat to melt away the ice on a windshield? Pour a bottle of Coke over it and wait to see what happens.

Make a diversionary device

If you need to get out of Dodge fast, it’s possible to create a diversionary device using a big bottle of Coke and a couple of Mento’s pills. Unscrew the cap, get a couple of Mento’s pills inside, put the cap back on, shake for 10 seconds, and throw.

No more nausea

If you feel like your stomach makes a loopty loop, open a can of Coke and let it go flat. Take on a teaspoon of that stuff every hour or so, and you’ll be up and kicking in no time.

Hack away the powdery corrosion on car battery’s terminals

Tired of seeing that white and blue stuff on your battery’s terminals every time you pop open the hood? Use Coca-Cola – pour a small amount over each terminal and wait. Finally, use a clean cloth to remove the smudges.

Make a grown bolt budge

If a rusty bolt’s preventing you from opening something, pour some Coca-Cola over it to unloosen it. By the way, this beverage works wonders on rusty screws and bolts. Don’t replace the rusty ones. Instead, dunk them in a bowl filled with Coke and let them soak overnight.

No more scorch marks on pots and pans

Did I tell you how much I hate scrubbing them pans after cooking? Well, I’m going to say it a thousand times if it’s necessary. Luckily, I have discovered a secret weapon – Coke. If there are too many burn marks on your pots and pans, pour some Coke inside, and let them soak overnight. Drain, wash, rinse, and you’re done.

No more ouchie from jellyfish stings

Remember the last time you went for a swim and ended up getting stung by those jellyfish? Well, if you feel like your skin’s about to melt, pour some coke over the sting site. Coke’s ingredients will neutralize the poison.

Kill slugs and snails

I really don’t have anything against slugs, snail,s or lummoxes. However, every time I see them munching on my veggies, I go berserk. If you’re having the same problem, use some coke on them. The acid inside America’s favorite fizzy drink will make them curl and die in agony.

Remove blood from clothes

Well, this might sound a little odd, but Coke’s very useful in removing blood stains from just about any type of clothing or fabric. Just so you know.

Coca-Cola for hiccups

Again with the hiccups? If holding your breath doesn’t solve the issue gargle some ice-cold Coca-Cola for a couple of seconds. Works like a charm.

That’s it for my ways of repurposing Coca-Cola. Think anything’s missing from the list? Head to the comments section and let me know.


Other Self-sufficiency and Preparedness solutions recommended for you:

The Lost Ways (The vital self-sufficiency lessons our great grand-fathers left us)
Survival MD (Knowledge to survive any medical crisis situation)
Backyard Liberty (Liberal’s hidden agenda: more than just your guns…)
Alive After the Fall (Build yourself the only unlimited water source you’ll ever need)
The Lost ways II (4 Important Forgotten Skills used by our Ancestors that can help you in any crisis)
The Patriot Privacy Kit (Secure your privacy in just 10 simple steps)

Everybody loves it, and everybody hates it – that’s what I like to call the Coca-Cola paradox. Even though the doctors scream at the top of their lungs that Coke’s

Kit, gear, or whatever you like to call it. The equipment we buy to survive, protect, get home, bug out, etc. Some of us that have served in the military and had to use all kinds of gear for our jobs, realized some of it was excellent and some just didn’t work for us. So we either bought or improvised our gear or kit to ensure we had what worked for us. This article will discuss organizing your survival kit into levels more so than the specific contents. I will discuss each level in more detail in further articles.

When it comes to buying your kit, look at what works for you. Do not go and buy the latest and greatest because of a slick marketing campaign or trend. Always find the biggest bang for your buck. A word of caution, do research and read reviews of those who used and/or tested the gear. You do not want to buy cheap gear that won’t last, but you don’t also have to buy expensive gear that does not work for you. So it is a personal choice. I don’t buy just from a single brand, I own items from various manufacturers like:

  • HSGI taco pouches
  • TAG battle belt
  • 5:11 backpacks
  • Duluth pants
  • Solomon hiking boots
  • Boker knives
  • SOG multi-tools, etc.

I research the items for the specific need I will use and in most cases look at the multipurpose use of the item. I also look for the compatibility of the brands with other brands for modularity. One note to make; be sure to check the fastex buckles on the items, not all brands use the same type of buckle, and make sure they are good for the weight/tension that will be placed on them. You don’t want to be moving through the Appalachians to your bug out location and have your chest rig fail and fall apart at the wrong moment. You will need to be ready to make some field repairs once you establish security. So always have some 550 cord, heavy-duty sewing needles, 100 MPH tape, and/or sturdy safety pins on hand.


When I plan out my survival kit or gear, I think of it in levels. Each level has a purpose and compliments the others. One level of kit has duplicate items as the others so you can resupply your lower level kits or it has more robust items that may weigh heavier and require more logistics. In each kit you need the basic sustainment items to build a fire, gather, carry and purify water, build a shelter, signal for help or link up, hunt or trap for food, fix things, and basic medical needs like trauma to colds. The higher the level of kit, the more you have at your disposal.

Level 1 Kit – Think of Every Day Carry (EDC)

Level 1 should be items that you will have on your person no matter what you are doing. Some items are a good knife (folder or fixed), Flashlight, Watch, Wrist compass, Lighter, 550-cord bracelet, Multi-tool, and/or Concealed carry firearm. So imagine walking around the mall with your family, what do you have on your person that can help in a crisis? Medical items can be a CAT tourniquet on your belt or in a pocket to a bandana for an improvised tourniquet. It would be hard to always have that IFAK level of TCCC gear on your person. There are some decent “Patrol” IFAK’s out there that are slim in design.

Level 2 Kit

Should be some kind of load bearing equipment. Like a chest rig, old style LBE, or battle belt (w or w/o suspenders). It is also your get home bag, since this bag is smaller than a bug out bag and only set up to “get you home” it will have supplemental items that are similar to your chest rig. So depending on your scenario, you might only have the GHB and not your chest rig. I will discuss more the GHB in another article.


On this level, you can have items that will augment your level 1 kit. Enable you to carry ammunition for your rifle and/or pistol to be readily available. You will have your Individual First Aid Kit (IFAK) attached. You can also add more items for redundancy (2 is 1 and 1 is none). This kit can be kept in your vehicle, place of work, or at your residence.

Level 3 Kit

This kit should be a back pack of some type, about 4,000 to 6,000 cubic inches or 65 to 95 liters. This would be considered a week-long bag. A bug out bag should not only be “72 hrs.” you should have enough gear to last you 5-7 days depending on your skill sets, AOR, and proximity of your other levels of kit. This level 3 Kit is also used as your Bug out Bag, which will be discussed further in another article. Remember, Bugging Out refers to leaving your homestead to another location for an undetermined amount of time. Hopefully you have planned out your scenarios to ensure you have the mindset, skill sets, tactics and kit to make it to where you are going. This kit should be kept in your home, unless you plan on bugging out from your work location etc.

Level 4 Kit

This Kit should be several durable containers or bags that you can load into your vehicle. The containers could be pelican cases, action packers, military kit bags or other type of durable containers. They should not be too large to move by oneself. Your vehicle should be part of this level of kit. Since you can load more fuel, water and gear in and on your vehicle. Your GHB bag, that you take with you to work and trips will become a “bail out bag” if you have to retreat from your vehicle under duress. Level 4 should contain items that will aid you in moving longer distances to get to your destination. Ideally, it is located at your house to aid you if you need to bug out and move to your cabin in the Appalachians.


If you are departing from your house, load up your Level 3 Backpack and your level 2 GHB (now bail out bag) and/or Chest rig for additional augmentation depending on the situation. If you have to move on foot due to vehicle breakdown, then you have your Level 3 backpack, level 2 chest rig and GHB is you designed it to attach to your Level 3 BOB. But one thing to remember always make every attempt to stay with and repair your vehicle during a crisis. Your vehicle provides a lot of advantages but also has several disadvantages. It may give you a sense of security, noise, harder to hide, and mobility is restricted to where a vehicle can go.

As you can see, the levels of kit you have, augment and complement each other. Don’t forget your homestead should also have plenty of supplies. You could use this TTP and make your house your level 5. So depending on your scenario, you may not have all levels of kit with you. I normally have my Level 1 (EDC), Level 2 (GHB), and Level 4 (modified) with me whenever I drive my vehicle anywhere within my AOR. If I have to drive further like to another state or across the country, I add more items to my Level 4.

How to use your levels of kit

You should always use your kit from the highest to the lowest, Level 4 to Level 1. So you always have the critical gear on your person if you need to abandon the vehicle or your backpack. If you do use items form your level 1 or 2 use the higher levels to resupply those items. For example while I was in the military it was SOP that we drink out of our 2 QT canteens attached to our rucksacks before we drink out of our 1 QT canteens on our LBE/Chest rig. This way if we did a recon patrol without our rucksack we had full canteens or if we made contact and had to ditch/destroy our rucks we had full canteens.


Other self-sufficiency and preparedness solutions recommended for you:

The vital self-sufficiency lessons our great grand-fathers left us

Knowledge to survive any medical crisis situation

Liberal’s hidden agenda: more than just your guns

Build yourself the only unlimited water source you’ll ever need

4 Important Forgotten Skills used by our Ancestors that can help you in any crisis

Secure your privacy in just 10 simple steps

Kit, gear, or whatever you like to call it. The equipment we buy to survive, protect, get home, bug out, etc. Some of us that have served in the military

INTRODUCTION

While we all want to do our best to prepare for a coming crisis, and many of us realize the city is perhaps the worst place to live, very few people are really prepared to pack up the old Winnebago and head for the hills. Most Americans, whether they’re aware or not, are going to stay in the cities.

This is not a hasty decision for most people. Most of us depend on the city for our livelihood, and we can be better prepared by continuing to live in the city, earning a good income, and making preparations for exiting the city at the appropriate time or by staying in the city and living off existing supplies.

This special report explains some of the most critical dangers of living in a city and presents some solutions to surviving them. If you are one of the people who has decided to stay in the city, you’ll benefit greatly from this information.

CITIES ARE ARTIFICIAL

Every city is an artificial construct. Cities formed as people came together to conduct business, participate in social interaction, and benefit from efficiencies in public services (such as schools, sewers, water, etc.) and a common defense. Yet cities cannot survive alone. They need resources from the country; most notably, food, water, and electricity. While electricity and water can sometimes be created or found within city limits, the acreage requirements of food dictate that no city could possibly feed its own people.

Read that last phrase carefully: No city can feed its own people. Not one. Cities are, by their very nature, dependent on the importation of food. The advent of just-in-time delivery systems to our grocery stores means that most cities would run out of food within a week if supplies were for some reason disrupted.

Remember, cities are not self-sufficient. Although they may seem to be in 2013, they have for a long time been entirely dependent on the American farmer for their support, something almost all Americans take for granted (except the farmer, of course.)


RISKS IN THE CITY

The city presents some serious risks during a crisis. The four most serious ones are:

  1. The collapse of social order (riots).
  2. The failure of the water treatment and delivery systems.
  3. The depletion of food supplies.
  4. The failure of the power grid.

While not every situation will appear in every city, every situation will most certainly appear in some cities. Will that include yours? We’ll tackle these one at a time:

1. THE COLLAPSE OF SOCIAL ORDER

“Social order” is a delicate thing, and it exists as a psychological barrier that could easily collapse under the right conditions. We all saw this during the L. A. Riots following the Rodney King trial verdict as citizens of L. A. set fire to their own town, yanked people from vehicles and beat them literally to death, and even fired guns at firemen attempting to save their buildings! More recently we were all witness to the looting, violence, and total breakdown of society following Hurricane Katrina in New Orleans.

Societal_Collapse

Riots can spring up quickly.

What allowed this to happen? Simple: the simultaneous melting away of the psychological barrier of “order.” Once people realized 911 couldn’t handle the load or was offline, that the local police were helpless or had simply abandoned their posts, “Law and Order” ceased to exist in their minds. They then conducted their lives in the way they always wanted to, but couldn’t because of the police. That is, they ran out to the local stores and just took whatever they wanted (looting). They took out their racial frustration on innocent victims who happened to be driving through the area, and they let loose on a path of destruction that only stopped when men with rifles (the National Guard) were called in to settle things down. In other words, only the threat of immediate death stopped the looting and violence. Rifles work wonders.

Imagine store owners lying prone on the roofs of their stores with AK-47’s, firing at anyone who approached. This is exactly what happened in Los Angeles. But worse, imagine the lawless horde firing at the rescue copters trying to bring in supplies to the desperate masses.

The National Guard eventually got things under control. This event was isolated, however, to one city. Imagine a hundred cities experiencing the same thing. Will the National Guard be able to handle the load? Not likely. What about local police? They aren’t fools; if things look bad enough, they’ll grab their families and head for the hills, just like they did in New Orleans. No pension is worth getting killed for. A few U. S. cities could be transformed into literal war zones overnight. It would require all-out martial law and military force to have any chance whatsoever of bringing order to these streets. And the reality is that there is not enough military in the USA to secure all of the cities if this happens.

This collapse of social order is perhaps the greatest risk of staying in the city during a crisis. What, exactly, would cause this collapse of social order? Lack of three things: food, water, and money. When people run out of food, some will begin ransacking their neighborhood, searching for something to eat. (Remember that in a city, a “neighbor” does not mean the same thing as a “neighbor” in the country. They are not necessarily your friends.) It won’t take long, then, for violence to take over in some cities. While certain regions will certainly manage to keep things under control and people will form lines at the local (depleted) Red Cross shelter, other cities will see an explosion of violence. Imagine the gang-infested regions of L. A., Chicago, New York, St. Louis & New Orleans. Do you think those people are going to stand in line and wait? They already have guns; now they finally get to use them. Pent-up racial tensions & hostilities will simply serve as justification for shooting people of the same or other color in order to get their food.

Even if the food somehow gets into the cities, lack of money (due to the government not sending out checks) could cause the same thing. Eventually, lack of money results in looting and mass theft. As the stealing balloons, it also results in a collapse of social order. Water; the same thing (but faster). The collapse of social order is also very dangerous because it doesn’t require any “actual” collapse of the power grid, telecommunications, transportation, or banking. Social order is a psychological artifact. It is a frame of mind, and any global panic can quickly remove the mental barrier that right now keeps people basically “lawful.”

2. THE FAILURE OF WATER TREATMENT AND DELIVERY SYSTEMS

Will the water treatment facilities fail during a crisis? Many will. Some won’t. The problem lies in figuring out whether yours will. Certainly, they depend on electricity, and testing conducted on some plants has already revealed weaknesses in the system.

In one such test, the water treatment plant released a fatal dose of fluoride into the water system when tested. The computers thought they were 99 years behind in releasing minute doses of fluoride, so they made up the difference. If you happened to be downstream, drinking that water, you were dead. Fluoride, no matter what misinformed dentists tell you, is actually a fatal poison. A major crisis likely to demonstrate this fact in more than one city.

The most important question here, though, is about what will happen when the water stops flowing (or if it is flowing, but it’s not drinkable). As you are probably aware, while people can live without food for long periods of time (2-3 weeks), water is needed on a daily basis. You can go 2-3 days without it, at most, but beyond that, you’ll quickly turn to dust.

That means people will do anything to get water because not having it means death. And guess where it’s going to be the most difficult to actually get water? You guessed it: in the cities. On the first day of the water crisis, many people still won’t figure out what was going on. They’ll figure it’s a temporary breakage of a water main and the government will get it fixed within hours. As those hours stretch into the next day, these people will get very worried.

By the second day, more and more people will realize the water isn’t coming. At that point, you could easily see a breakdown of social order, as described in the previous section (as you can see, these things all tend to cause each other.). People will begin their “search for water,” and the first place they’re likely to go is where they always go for liquids: the grocery store, the local Wal-Mart, the 7-11. The shelves will be cleaned out rather quickly.

Beyond that (because those liquids aren’t going to last long), you’re going to see people engaged in a mass exodus from the cities. They’ll take the gas they have left in their tanks and they’ll leave the city in search of water. Some will go to “Grandma’s house” out in the country where they might at least find a pond or stream to drink from. Others will simply go on an expanded looting mission, stopping at any house they see and asking the residents (with a gun in their face, likely) if they have any water to “donate.”

As a result of all this, if water stops flowing, here are the events you can expect to see in some of the worse-off cities:

  • Looting of all the grocery stores by the second or third day (remember New Orleans?).
  • Minor outbreaks of violence during the looting. Shop owners, for example, may attempt to defend their shops with firearms (ala L. A. Riots).
  • Mass exodus of residents from the city in search of water.
  • Ransacking of any houses or farms within a gas-tank radius of the city.
  • Mass traffic jams on the outbound highways as people run out of gas and abandon their vehicles (if bad enough, this could actually block the highways and trap people in the cities) (Remember Hurricane Rita?).
  • Mass outbreak of water-borne diseases as people use streams and rivers as both a water fountains and a bathroom. People crapping upstream are going to infect the people drinking downstream. Very few have any kind of water filtration device. That last point is really critical. Once the water flow stops, the disease is going to strike.

3. THE DEPLETION OF FOOD SUPPLIES

The food supplies will likely dwindle quickly as we approach a possible crisis due to people stocking up just in case. Once the crisis actually hits, expect to see breakdowns in the transportation sector that will result in major delays in food delivery. This means food may arrive in a sporadic fashion in some cities (if at all).

Once this happens, food suddenly becomes really valuable to people (even though they take it for granted today). And that means any small shipment of food that arrives will be quickly grabbed and eaten or stored. It only takes one week without food to remind people how much they actually need it, so expect the atmosphere to be that of a “near panic” if food is delayed by as little as three days. The level of panic will vary from city to city. Some cities or towns may experience very little difficulty receiving food. Others may face near-starvation circumstances.
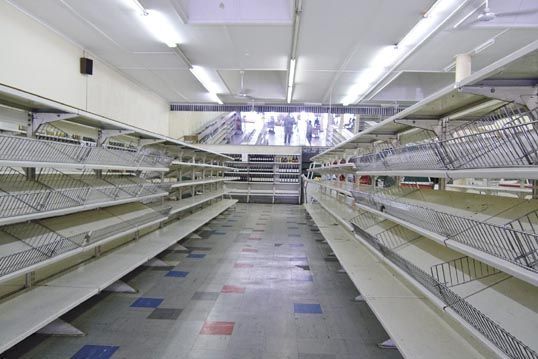
empty-shelves

The shelves will be emptied quicker than you can say EBT.

Remember, the cities depend entirely on food shipped in from the farms and food processing companies. Also, note that if there’s a water problem as mentioned in the previous section, and the mass exodus begins, the highways may be jammed up at critical locations, causing gridlock for the trucking industry. If we’re lucky, some trucks will continue to roll. If we’re not, assume that nothing gets through.

A shortage of food ultimately results in the same behavior as a shortage of water. First, people eat what’s in the pantry, then they loot the grocery stores. After that, with all local supplies depleted and no hope on the horizon, they leave the city and start ransacking nearby homes. Some will hunt in nearby forests, but most city-dwellers don’t know how to hunt. In any case, anyone with the means to leave the city will likely do so soon after their food shortage begins.

4. THE FAILURE OF THE POWER GRID

Nothing is as suddenly obvious nor has such a gigantic psychological impact as the failure of the power grid. When the electricity stops, almost everybody knows it at the same instant (unless it happens at night).

Naturally, during the first few hours of the power failure, if it occurs, people will assume it’s a temporary situation. Maybe a tree fell on some power lines, or perhaps a transformer blew up somewhere nearby. They’ll sit tight and wait for the power to come back on.

What if it doesn’t? Then the city faces a severe problem. Without power, obviously, everything shuts down. Within hours, the looting begins in the more crime-ridden cities (we saw this in New York a few decades ago.). The longer the power stays off, the worse the social disorder.

The loss of power will bring the entire city to a halt. While vehicles may get around for a few more days (using whatever fuel they have left), businesses obviously won’t be operating. Houses that depend on electricity for heat will quickly reach Winter temperatures, freezing many occupants to death. While those that depend on electricity for Air Conditioning will just as quickly reach Summer temperatures, resulting in death from heatstroke. Hospitals and police stations may have generators on hand, with a few days worth of fuel, but in short order, that will be depleted, too.


But the water treatment plant will almost certainly be off-line without power, causing all the events mentioned in the water section, above. Let’s face it, power is the worst thing to be without in the city. If you have power, you can survive a food shortage, perhaps even a short water shortage. But without power, all bets are off. If you have a “bug-out” vehicle stocked and ready to go (see below), this might be the time to bail.

SOLUTIONS IN THE CITY

Okay, so you’re stuck in the city. You’ve made the decision to stay. You’ve read the problems above, you believe they make sense, and you’re intelligently frightened. What now? You really have two strategies. You can:

  • Stay and defend your house
  • Bug out (leave the city and head for the hills)

Important! This is not an either/or situation. You can begin by staying in your house and assessing the situation. You’ll want to have a “bug-out” vehicle stocked and ready, just in case, if you can afford one, but you may never actually choose to bug out. You’ll have to be the ultimate judge of this. Just remember that when you bug out, you face major risks and disadvantages. Among these:

  1. You’re severely limited in how much you can carry
  2. You have limited range due to fuel
  3. You expose yourself to social chaos, roadblocks, random violence, etc.
  4. Your house will certainly be looted while you’re gone
  5. You run the risk of mechanical breakdowns of your vehicle
  6. You must have a place to go that you know is in better shape than where you currently are.

DSC_0028

Being prepared to defend yourself is necessary.

In general, unless you have a specific, known safe place as your final destination, I don’t advise people to bug out. Just “heading for the hills” is a very poor plan. You might not make it. But heading for Grandma’s house or some known, safe place could be a very good plan indeed, depending on whether Grandma is ready, willing, and able to accept you!

For these reasons (and more), staying and defending your house is sometimes the only reasonable course of action, even if it seems dangerous. For the most part, looters and people looking for food are going to have plenty of easy victims, so if you show a little willingness to use force to defend your property, you’ll likely send people on to the next house.

That is until the next house is already empty and you appear to be the last house on the block with any food and water left. If you’re in a bad enough area, your neighbors may “gang up” on you and demand your supplies or your life. This is truly a worst-case scenario, and unless you literally have a house full of battle rifles and people trained to use them (and the willingness to shoot your neighbors), you’re sunk. This is why the best situation by far is to keep your neighbors informed and help them get prepared. Then you (both your member and non-member neighbors) can act as a group, defending your neighborhood and sharing the supplies you have with anyone willing to help defend you.

When you have this kind of situation going, your neighbors realize you are their lifeline. You supply them with food and water, and they will help support you because they are, in effect, supporting their own lives. The best situation is when your neighbors and other ward members have their own food and water supplies. That way, they aren’t depleting yours, and they have a strong motivation for getting together with you to defend your neighborhood. (More on this below.)

STORING (AND HIDING) YOUR FOOD

Storing food is just as important in the city as in the country, but hiding it is far more important. That’s because, in the worst areas, marauders will be going from house to house, demanding your food or your life. If you’re dumb enough to put everything you own in the obvious places, you might as well not buy it in the first place. They will find it. To count on having any amount of food leftover after the marauders break-in, you’ll need to hide your food.

One alternative is to plan on defending your home with force. If you have enough gun-wise people in the house, and enough firearms and ammo, you can probably pull this off. But most of us aren’t nearly as experienced with firearms as the gang members. A better alternative might be to plan on bringing your supplies to your ward/stake building where all of the Saints can both pool and defend their resources. This of course will depend greatly on your local Bishop and Stake President.

Back to hiding: the best way to hide your food is to bury it. You’ll need airtight containers, long-term food that won’t rot and you’ll need to plan ahead. Bury your food at night so nobody will notice, and make sure you don’t leave the map on the refrigerator door! (Better to memorize it!) Try to get the ground to look normal after you’re all finished. You’ll want to bury your food as early as possible because it gives the grass time to regroup over the spot. If you’re in an area that snows, you’ll have a great concealment blanket! Most food marauders won’t go to the trouble to dig up food, especially if you insist you don’t have any.

Best plan: Have some smaller amount of food stashed around the house, letting them find something. Better to give them something and send them on their way. The art of hiding your food is an ancient one. You’ve got to get creative. Use the walls, the floors, and the structure of the house.

If hiding your food is simply not an available alternative, then try not to advertise it. Keep it put away in your house or garage in as discreet a manner as possible. Don’t make a point of telling people that you have a year’s supply (or more). Word gets around fast that Bro. Jones has a ton of food in his garage. Boxes of food fit nicely under beds, behind furniture, in the attic, etc… Be Creative!!

To sum up the food storage, you really have three strategies here:

  • Store it all in your house and plan on defending it by force.
  • Bury it in your yard in case you get overrun by looters.
  • Store part of it in your house, and hide the bulk of it.
  • Relocate all of it as soon as you recognize a major disaster is in progress.

One of the best ways to store food for burying, although it will only last 2-3 years in high-humidity areas, is to purchase 55-gallon good-grade steel drums. Once you obtain the drums, dump in your grains or other food items. If you purchase bags of food from Walton Feed, this is the perfect way to store it. Don’t leave it in the bags unless you’re actively eating it. [Note: Plastic barrels do not rust.]

Then sprinkle some diatomaceous earth into the drum. You’ll need about two cups to treat a 55-gallon drum, and it must be mixed in well. Diatomaceous earth is made from ground-up seashells, and it kills bugs by getting into their joints.

You want diatomaceous earth that is food grade, and on the bag, it says, “Fossil Shell Flour.”

Once you get these drums filled and sealed, you can then bury them in your yard. This is actually a HUGE UNDERTAKING and is a LOT more difficult than it sounds since you’ll need to dig to a depth of around 5 or 6 feet in order to sufficiently bury these drums. You’re likely to attract a lot of attention unless you do it at night, and you’ll definitely be removing a lot of dirt that you’ll need to find some use for. Because the drums are steel, they will also deteriorate unless you line the outside with plastic (a good idea) and treat the drums with some kind of protectant or oil. (Don’t use WD-40.) Even Vaseline would work well, although you would definitely need a lot to coat a 55-gallon drum.

When you’re all done, you should have your protected grains in 55-gallon drums, buried in your yard, and protected against the humidity of the surrounding earth. It’s a big effort, but then again, the food inside may save your life. You’ll find it much more efficient to bury several barrels at once; side by side.

In reality, it would be faster and easier to simply build a false wall in your garage and seal up your food behind the false wall. Sure, you might lose 2-3 feet of useable space in your garage, but the tradeoff is knowing everything is safe and sound.

STORING EXTRA WATER

Water can be stored in exactly the same way, although you might want to bury the barrel before you actually fill it with water. Make sure you treat your storage water, rotate it, or have filters on hand when you get ready to use it.
WaterIf you don’t have a yard, or it’s not practical to bury your water, you’ll have to store water inside your house. This can get very tricky because water takes up a lot of space and it’s very difficult to conceal. It’s best to get containers made for long-term storage, but in a pinch, you can use almost any container: soda bottles, milk jugs (although it’s very difficult to rinse the milk out), and even rinsed bleach bottles (in that case, you won’t need to add bleach). But a lot of these containers will deteriorate quickly, and they may break easily. Also, consider what happens if your water may be subjected to freezing. Will your containers survive? Be sure to leave enough air space to handle the expansion.

In order to prepare yourself for the water shortage, assuming you’re going to stay in the city, stock at least six months of water at a minimum of two gallons a day per person. That’s nearly 400 gallons of water if you have two people.

Of course, even with the best in-house preparations, you may find yourself depleted of water supplies. In this situation, one of your best defenses is to have a really good water filter that can remove parasites and bacteria from the water. You can also treat your water in other ways (iodine, distillation, silver solution, bleach, etc.). Armed with these items, you can safely use stream or river water (or even pond water) for drinking.

WATER WELLS

By far, the best solution for obtaining long-term water supplies is to drill a well. Buy the best-quality hand-pump available (cast-iron pumps available from Lehman’s) and a good cylinder. They will last a lifetime if installed properly. With this setup, you’ll have a near-unlimited supply of water.

The total cost of doing this, depending on where you live, ranges from about $4000 – $6000. Is it worth it? If you’ve got the money, I think so. However, many cities simply don’t allow the drilling of wells, so you may not be able to get one drilled even if you want to.

The deeper your well, the more expensive it gets. Most well drilling companies charge by the foot. When water is deeper, you also need a bigger pump and a more powerful cylinder, so the costs tend to really grow the deeper you go. If you can find water at 20′, you’re very lucky and it might not cost you even $2000. If you have to go down to 200′, it might cost you $7500, and you’re at the depth limit of hand-powered pumps anyway.

DEFENDING YOUR LIFE AND PROPERTY

Let’s talk about force. No doubt, there are plenty of nice people in this country, and I think that in small towns and rural areas, people are going to find ways to cooperate and get along. I also think, however, that some cities will suffer complete social breakdown and violence will rule. If you happen to be stuck in one of these cities, you’re going to need to use force to defend your house. The section that follows discusses what I consider to be extreme responses to violence in the direst situations. Hopefully, you won’t find yourself in these circumstances, but if you do, the information below may be valuable.

Important: Do not use your lights at night. If you are stocking propane-powered lanterns, solar-powered flashlights, or other unusual supplies, using them at night will announce to everyone within line of sight that you have more than the “usual” supplies. Expect them to come knocking on your door. At most, let a fire burn in the fireplace, but in general, avoid drawing attention to your house.

Defending your house is a crucial element of your stay-in-the-city plan. Make your house your fortress, and hold drills to help other family members practice some of the more common activities such as hiding, defending, evacuating, etc.

Some useful items for home defense include:

  • A guard dog.
  • Pepper spray.
  • Firearms.
  • Smoke bombs (military-grade).
  • Tripwires

Let’s go over these: The guard dog is certainly a welcome addition to any family trying to defend their house. Although he probably eats a lot of food, the investment is worth it. Dogs also tend to sleep light, so let them sleep right next to the food storage areas, and make sure you sleep within earshot. If the dog barks, don’t consider it an annoyance, consider it an INTRUSION.

Pepper spray is a great alternative to the firearm. It will incapacitate people and certainly give them a painful experience to remember. On the downside (potentially), it might just remind them that next time they come back for food, they better kill you first. So understand the limitations of pepper spray.

Firearms are useful for obvious reasons. In the worst-case scenario, when looting is rampant, you may have to actually shoot someone to protect yourself or your family. If you’re squeamish about pulling the trigger under these circumstances, don’t plan to stay in the city. Use the “bug out” plan instead.

Smoke bombs can be useful for covering a planned escape from your house. You can purchase high-volume smoke bombs that will quickly fill up any house with an unbreathable cloud of military-grade white smoke.

Tripwires are great perimeter defenses. You can buy them from Cheaper Than Dirt (they run a few hundred dollars). They will give you an early warning if someone is approaching. You can connect the tripwires to flares, shotgun shells, light sticks, or other warning devices. This way, you can have an audible or visible alert, your choice.

In addition to these devices, you can make significant fortification-style improvements to your home. While none of these are very affordable, they certainly help defend your home:

  • Replace glass windows with non-breakable Plexiglas.
  • Add steel bars to the windows.
  • Replace all outside door locks with heavy-duty deadbolts.
  • Replace all outside doors with steel doors, preferably without windows.
  • Remove bushes and other shrubs where people might hide.
  • Blackout the windows entirely to avoid light escaping at night (similar to what residents of London did during the WWII bombing raids).
  • Build secret hiding places for food, coins, or even people.
  • Create escape hatches or passageways.
  • Rig pepper-spray booby traps.

These aren’t as absurd as they might at first sound. Many people living in rough cities already have steel bars covering their windows, and removing extra bushes and shrubs is a well-known tactic for making your home a safer place.

LIGHT

To light your home when there’s no electricity, try the following:

  • Use LED flashlights and rechargeable solar-charged batteries. You can buy all these items from the Real Goods catalog.
  • Use propane-powered lanterns. You can find these in the camping section of your local Wal-Mart. Be sure to purchase extra mantles and store lots of propane.
  • Purchase quality oil lamps from Lehman’s and stock up on oil. You can also purchase cheap kerosene lamps from the Sportsman’s Guide or Wal-Mart, then simply purchase and store extra kerosene.
  • Buy extra candles.
  • Purchase lots of olive oil. Not only can you cook with it (and besides, it’s a lot healthier than corn or vegetable oil), but olive oil also burns as a clean candle fuel. You can float a wick in a jar half-full of olive oil and light the wick. Viola, a homemade candle. Olive oil is a fantastic item for your storage anyway because even if you purchase all the grains in the world, you’ll still need cooking oil, and you obviously can’t buy powdered cooking oil. Well-stored olive oil can last for thousands of years.

STAYING WARM

Did you know that people won’t steal giant logs? Although they may easily steal wood you’ve already chopped, most people won’t have any way of stealing logs. They’re too heavy, and the vehicles won’t have any gas left. For this reason, your best bet in regards to stocking fuel for your house is to stock up on UNCUT wood logs.

It takes a lot of extra research to find out how to get them (took me a few weeks of asking around), but you can find a source if you look hard enough. Or you can usually get a permit to go out and cut your own. The effort is worth it because this will give you a ready-to-go source of heat and fuel that cannot be easily stolen.

The catch, of course, is that you’ll need equipment to cut and chop the wood. A chainsaw is REALLY nice in this way, but it requires fuel. Fortunately, chain saws don’t use much fuel, so if you have a way to store as little as 50 gallons or so, you’ve got enough to power your chainsaw for a few years (at least!). You’ll need fuel stabilizers, too, which you can buy at your local Wal-Mart. (Be sure to buy extra chains for your chainsaw, too.)

You’ll also need splitting hardware. You can buy log splitters or just buy an ax, a wedge, and a sledgehammer. Better yet, buy all four so you have a choice of what to use. And remember, wood splits much better when it’s frozen, too, so you might just wait until the cold hits in Winter to start splitting your wood. Only split a little at a time, because you don’t want to end up with a big pile of nicely-split wood sitting out in your yard. It will invite theft from people who don’t have any. If you already have trees on your property, you’re all set. Cut down about 4-5 cords right now, so they can start drying out, then chop them as you need them.

A “cord” of wood, by the way, is a volume measurement. It’s 8′ x 4′ x 4′, or 128 cubic feet of wood (stacked). Some people that sell wood will try to rip you off, so make sure you know what you’re buying. If you purchase logs, it’s better to get a price per linear foot, based on the diameter of the log. For example, you might ask for logs that are an average of 10″ in diameter, and you’ll ask how much the charge per linear foot would be. Something in the range of $1 – $2 would be great.

RELATIONS WITH NEIGHBORS

I’ve already mentioned the importance of getting along with your neighbors. It really is crucial to your city-based survival plan. The best situation to be in, as mentioned before, is to have neighbors who are aware of the issue and who are getting ready for it by stocking their own food, water, and other supplies. Every neighbor that becomes self-reliant is one less neighbor or member you’ll have to support.

The range of neighbor situations, from best to worst, is as follows:

  • Best case: your neighbor is aware of and both temporally & Spiritually prepared for an emergency with their own supplies and training.
  • Good case: your neighbor is aware of a potential crisis, and even though they don’t have their own supplies, they’re willing to help defend yours as long as you share.
  • Bad case: your neighbor didn’t prepare for it, figuring they would just steal from you if things got bad. They are aware of YOUR supplies but don’t have their own.
  • Worst case: your neighbor isn’t aware of anything, and he’s a violent, angry neighbor just released from prison. He is going to be caught off guard by the ensuing events and will likely attempt to use violence to get what he needs or wants.

Your decision on whether to stay in the city may depend greatly on the quality and quantity of your neighbors. If you do live in a bad neighborhood, do what you can to relocate. If you live in a good neighborhood, do the best you can to educate and inform your neighbors.

GUN CONTROL IN THE CITIES

No matter how you felt or thought about gun control in the past, it’s time to face disaster-induced reality. The gun-control politicians (and the people who supported them) have placed Americans in a situation where not only can the police not protect us in a timely manner, but we cannot lawfully defend ourselves. Criminals unlawfully have firearms; citizens lawfully don’t. Intentionally or otherwise, gun-control supporters have created a situation where an unfortunate number of innocent men, women, and children are going to be in danger during a crisis simply because they could not obtain the tools of self-defense.

It also happens that the cities where the rioting will likely be the worst are precisely the cities where firearms are most likely to be banned from lawful ownership (and where criminals may wield near-absolute power for a while.). Perhaps when society recovers from it, we can review the fallacy in the cause/effect logic that keeps people voting for gun-control laws, but in the meantime, millions of people are going to have to resort to breaking the law in order to protect their families. And yes, you too will have to resort to breaking the law if you are to acquire a firearm in an area where guns are entirely banned from private citizens (like New York, Los Angeles, etc.).

After the disaster hits, if the rioting gets really bad, we’re going to see local police begging law-abiding citizens for help. Your firearm will be a welcome addition to the force of law and order, believe me. No local cop is going to mind you having a handgun if you’re manning a roadblock protecting a neighborhood of families with children. Act responsibly, tell them what you’re doing, and they’ll probably give you a big thanks. But if you’re carrying a gun while you smash a window of the Wal-Mart and walk off with a stereo; well that’s a different story. Be prepared to get shot.

See, cops don’t mind private ownership nearly as much as we’ve all been led to believe. I know, I work with law enforcement officers in a small town, and I ask them about topics like this. When the crisis hits, they’ll be more than happy to have your cooperation. We’re all going to need as many law-abiding gun-toting citizens as possible in order to fend off the criminals and establish some degree of order.

ONE MORE REASON TO MOVE OUT

If you really feel you need a firearm to protect yourself and your family, your best bet may be to move to a city or state where people are a lot more accepting of firearms. You’d be surprised what a difference the locale makes. Check the gun laws in any state you’re considering moving to. Obviously, “cowboy” states like Arizona, Texas, and Wyoming will have fewer restrictions on firearms (and, interestingly, they have less of a problem with gun violence). States, where the population is denser (like California & New York), tend to have much greater restrictions on private ownership of firearms.

BUGGING OUT

Suppose it’s July 19, 2017, and you’ve changed your mind about this city thing. You happened to be right smack in the middle of one of the worst-hit cities in the country. The looting is getting worse, the power has been out for two weeks, and your water supplies are running low. You still have enough gas in your truck to make it out of town if you can get past the gangs, that is. You’ve decided to BUG OUT!

SOME BASIC POINTERS:

  • Don’t try to bug out in a Chevy Geo. You will likely need a big heavy 4×4 truck in order to go off-road and around stalled vehicles.
  • Get something that can carry at least 1000 pounds of supplies. A big 4×4 pickup will do nicely! Yes, it requires more fuel, but you can carry the fuel as cargo.
  • Don’t bug out unless you can have someone ride shotgun, literally. You will need an armed passenger in case you run into not-so-nice people.

WHAT TO TAKE

Ahh, the bug-out supply list. All this will fit in your truck. Here’s what you should take if you’re preparing to bug out with two people:

  • Your 96 hour kits for each person in the vehicle
  • 20 gallons of water
  • 40 gallons of extra fuel or more (and a full gas tank)

WHERE TO GO

As mentioned earlier, if you have a designated place of refuge (Grandma’s house, a cabin in the woods, etc.), head straight for it. If not, you’re basically driving anywhere you can go, so try to head for an area that forested and near a creek or river where you can get some water.

CONCLUSION

Choosing to remain in the city is a rational choice for many people in many situations. However, as you have seen from the dangers described here, the further away you can get from the population centers in general, the better your chances of surviving.

Most people, perhaps yourself included, have a difficult time actually accepting that a major disaster is going to be as bad as described in this report. And after all, if you leave the city, sell out, quit your job, move to the country, and then nothing bad happens? You will have disrupted your life, and you may find yourself broke, jobless, and homeless. You COULD assume it will be a mild event, which I suppose is also a credible possibility. In that case, surviving in the city will be quite feasible, especially if you have neighbors that can support your efforts and you don’t live in a dangerous city with high racial tensions. However, the very nature of a major disaster means that if only one or two major infrastructure components go down, the ripple effect will quickly create a much worse scenario. It seems there is very little room for “mild” effects unless they are minuscule. The most likely scenario at this point clearly points to massive disruptions, severe shortages in food and water, loss of power in some areas, and a breakdown of social order in certain areas where the population density is high.

But you can survive anything with good planning, an open mind, and plenty of practice. Why not start now?

INTRODUCTION While we all want to do our best to prepare for a coming crisis, and many of us realize the city is perhaps the worst place to live, very few
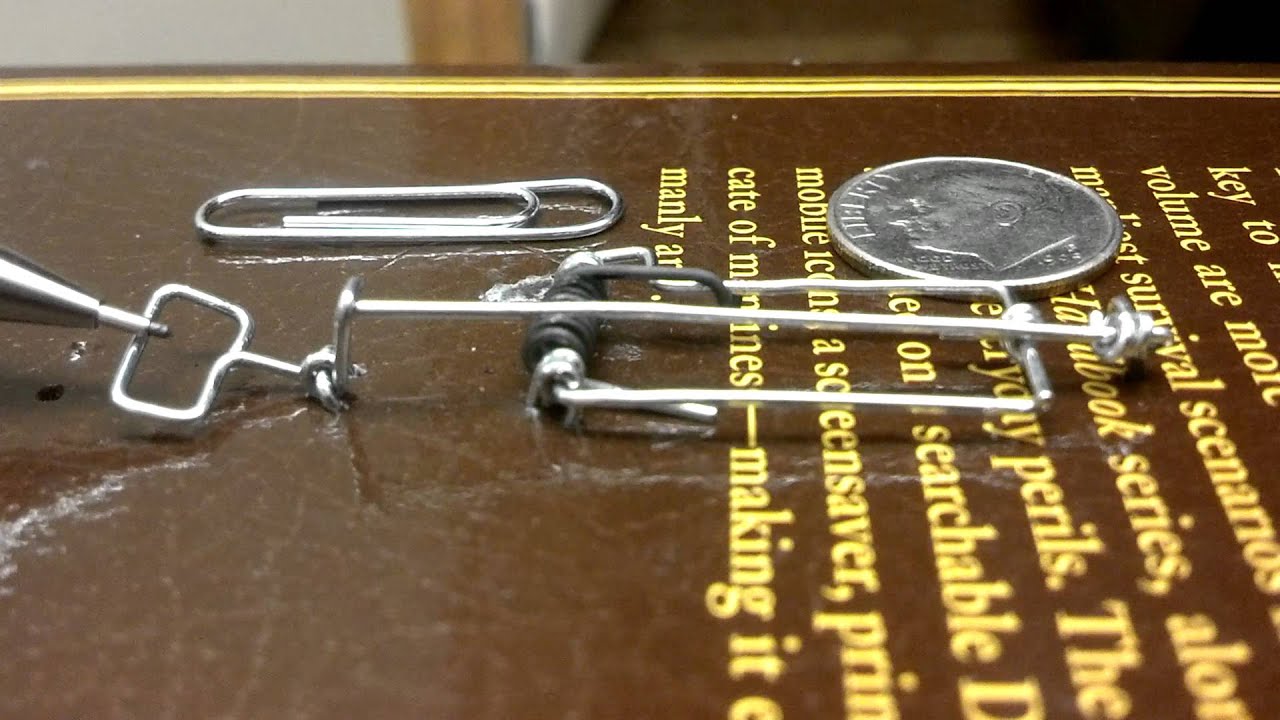
A Prepper Must-Have – Baking Soda

I have it on good authority that some people actually bake with baking soda. That’s not why it’s stocked like a mighty brick in my house. Baking soda is one of those items that has about a hundred and one uses, only some of them limited to the kitchen. It’s nice and cheap, and while I don’t think it’s one of the things that runs off the shelves in any crisis – snow storm, hurricane, or larger – it’s hugely beneficial to have plenty of it on hand.

To me, the price and the usefulness put it way up on any must-have list for preppers (or pretty much any adult).

First we want to be sure of what we’re talking about. On store shelves, baking soda is most usually going to be a box, although it can be found in big bags for those of us who use it a lot. It’s the one with sodium bicarbonate listed as the active ingredient, not cornstarch and 4-6 other things in a little round carton. That other one is what you use for bannock bread and microwaved mug brownies – baking powder.

Shoe satchels

baking-soda-for-shoes

Stomping out smells in your shoes is one of baking sodas great claims to fame.

Those of us who have ever had a fridge or dishwasher that’s been turned off for a while have probably heard of sticking an opened box of baking soda in there. Arm & Hammer even creates packages with a mesh-lined side flap for just that purpose. That same deodorizing capability combines with a low-level desiccant, and can be used to dry out and kill the sweat or swamp funk in our boots and shoes. This is the stuff that gets added to kitty litter boxes, after all. Stomping out smells is one of its great claims to fame.

The satchels can be made out of cloth, old socks whose mates have gone missing, coffee filters, or used dryer sheets. The imagination is really the only limiting factor here. As long as it allows easy airflow between the footwear and the baking soda inside, it’ll work. Add at least a tablespoon and a half of baking soda, tie up, and drop inside.


If you want to jazz up the shoe satchels further you can add all kinds of things from dried flowers and herbs (lavender, rose, rosemary, mints, eucalyptus) to bath crystals or salts.

This one works not only on shoes, but also on things like old gym bags, the lunch bag from two years ago, a small cooler, a tool bucket or box that has a case of the funk, or a softball bag that’s being repurposed.

Foot Soak

foot-soak-recipes-600x399

If the smell from shoes is originating because of the feet in them, you can combine baking soda with any number of things to create a foot soak.

Mouthwash, herbal teas, various oils like lavender or eucalyptus or rosemary, lemon slices or juice, Epsom salts (excellent addition), apple cider vinegar, and dried herbs like rosemary, mints, or plantain all get added. A simple soak of 1-2 cups in a gallon or two of warm water for 15-30 minutes can soften and rejuvenate feet, and help control various fungus that want to live in warm, sweaty environments.

Surface Cleaner

cutting-board-plastic

We know that baking soda is one of the things we can stock to use as a toothpaste alternate, or to concoct our own toothpaste. It cleans more than mouths, though.

Just sprinkling it on carpets and wooden decks or porches, letting it sit, and then sweeping or vacuuming it up works wonders for some odors and fungi. We can also clean our cutting boards by rubbing with baking soda and-or salt and a lemon, or just scrubbing with a brush and the dry ingredients and then letting it sit for a bit. The powders create a habitat that discourages many microbes, like the kind that live in tiny scratched crevices and outlive even dish soap and the dishwasher.


We can use that trick on dog bowls, sinks and counters, as well, using fresh lemons or limes or bottled lemon juice, or just scrubbing and allowing it to sit, then sweeping it and wiping it up.

Pipe & Drain Cleaner

Getting rid of shower and tub mildew and *that* smell in any pipe uses basically the same ingredients as above: baking soda, salt in some cases, and lemon. Vinegar of pretty much any kind can be substituted for lemon juice if somebody likes that price enough for a different smell, or wants to go with apple cider vinegar.

I like the method where you boil 2-8 cups of water to pour down the drain, then throw a cup of baking soda in and let that sit for 5-60 minutes, and follow it up with 1 cup of vinegar or lemon juice mixed with a cup of water.

baking-soda-scrub-sink

There are a few variations, so poke around a bit. Some say to cover it to direct the reaction downward (not so sure about that), and some to limit the fumes in the air (just don’t use white vinegar). Some say to give it 6-8 hours, and some say to just wait until the bubbles stop. Some suggest just rinsing with tap water, and some suggest boiling more water to flush the remnants away. Up to you.
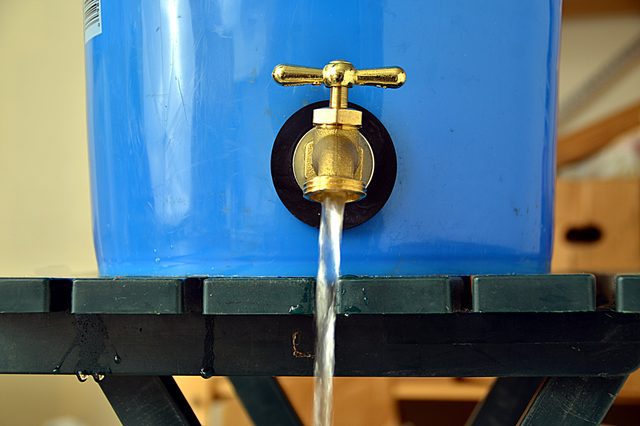
It doesn’t always work, especially in the bathroom where *somebody* sheds 2’ hair with every shower. Sometimes a repeat or upgrade to/of vinegar to the stronger cousins works. Every once in a while, you have to go to a snake or “real” drain cleaner, but a lot of the time, whether it’s a slow drain, a for-real clog, or a smell, the baking soda does the trick.

There are apparently schools of thought where this is bad and degrades things, so research that too.

Fungicide (Outdoor)

spray

We can add one tablespoon of baking soda to one quart of water (4 tablespoons/1 quarter-cup per gallon) and use it to treat black spots in the yard, roses, and berry brambles suffering from the various black fungus illnesses.

One of the things that helps baking soda kill smells is that the sodium bicarbonate is an antacid, a highly reactive one. A lot of growing things prefer an acidic environment. Fungi – from mold to mildew – is one of those things. The beauty is that baking soda is a stabilizing antacid. It’ll react with anything in an extreme, and go through a severe reaction initially (which can also kill bad stuff) but then it’ll self-regulate and return its surroundings to a near-neutral state.

No wonder this stuff is called miracle powder, right?


That miracle powder can help us in a big way with some common crop and garden pests – mildews.

We can add one tablespoon of baking soda to one quart of water (4 tablespoons/1 quarter-cup per gallon) and use it to treat black spots in the yard, roses, and berry brambles suffering from the various black fungus illnesses.

Powdery mildew on any plants can be prevented and treated with the same, however, the addition of a teaspoon of dish detergent and a teaspoon of vegetable oil per half gallon will help it stick better. Once powdery mildew gets started, it’s a constant battle, so having the spray last longer on the plants can save us a lot of time and heartache.

Creepy-Crawly Pests

destroying-ants

Fungus gnats aren’t usually harmful, but they are annoying, and there are times there are so many that the soil-dwelling larvae stage start stunting plant growth because they’re consuming the tiny root hairs of plants. A teaspoon of baking soda with a teaspoon of dish detergent in a full gallon of water can also help remove or reduce the populations, without changing soil pH so much that acid-loving veggie plants and perennials can’t handle it and die, too. As with mildews, all soils in the area need treated and the treatment will have to be repeated to break the infestation completely since there are multiple stages and locations in the gnats’ life cycles.

Mixing baking soda 1:1 with powdered sugar and surrounding an ant hill with a 1”x1” wall of the stuff can help reduce those garden pests, too. I’ve had it decrease the visible numbers, but they seem to pop back up. Still, it’s nicer working in beds and playing fetch or weed-eating with a few less ants getting aggravated with you. A ring of baking soda will also help deter slugs. (Grits and cornmeal help with ants and slugs, too.)
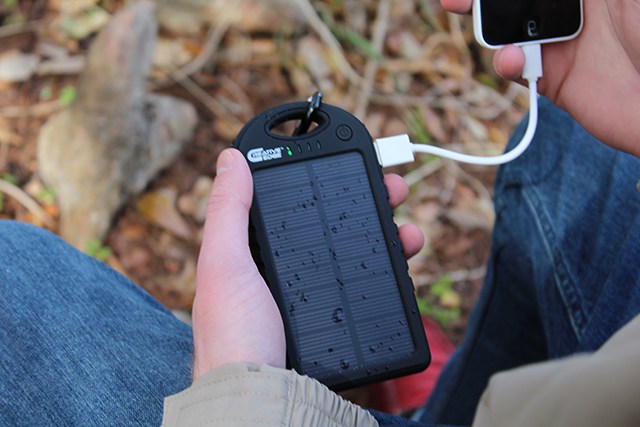
Pest Sting & Itch Relief


Baking soda recently got crowned the Most Prized Possession in my house. I was attacked by some sort of not-bee striped flyer, and ended up with welts roughly the sizes of eggs, from dainty little quail all the way up to jumbos, with 3-6” red raised areas around the big welts. Yay! A poultice of just baking soda and water reduced the swelling and pain.

That poultice is best applied with large Band-Aids already open and waiting, especially if you’re trying to doctor your own elbow and thigh.
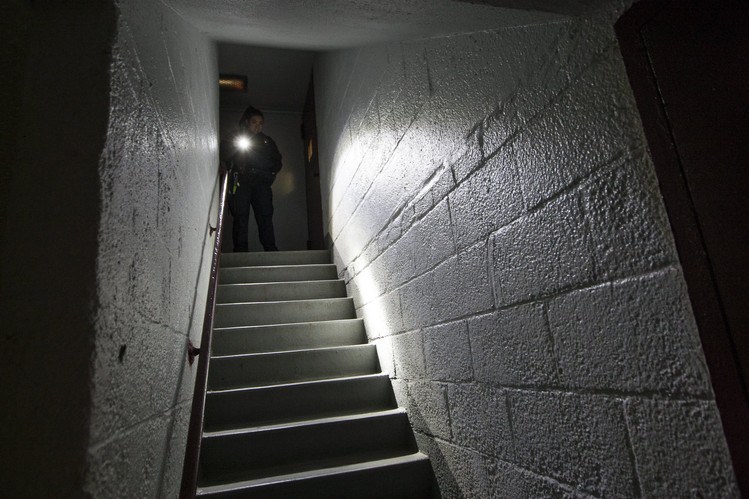
If the poultice is allowed to dry, it will come off in big flakes or shingles, and can actually help extract a broken-off stinger, fang or tick head.


Like the satchels, the poultice can be improved on. Chamomile tea is awesome, but any kind of tea contains fabulous stuff that helps reduce swelling and pain more and faster. Let it cool and add it to the poultice, open a bag to mix in before the water, or open a used bag to add to the paste. Aloe can be stripped and chopped and added, as can commercially available gel. So can witch hazel, chamomile flowers, lavender oil or flowers, fresh or dried plantain, Echinacea (purple cone flower), chickweed or jewelweed, and lemon balm.

Some people also apparently make their poultice with milk. Not my thing. Likewise, I’m not adding to the mess or pains by using honey or honey crystals in there, but there are proponents of honey as well.

Go as crazy as you like with that one.

Maybe the sting or bite isn’t making you crazy enough to coat your wounds with paste and Band-Aids. Sometimes we’re just hot and itchy and can’t really identify a single place to treat, and a shower or bath isn’t really cutting it.

Baking soda in a tub with or without soothing additives like oatmeal can help.

You can also make a satchel similar to the first use listed, although you’ll want it to be bigger. Again, alone or with things like chipped aloe, oatmeal, chamomile flowers or oil, or tea leaves from a regular grocery-store brewing bag (Camellia sinensis species) can be added. You use the satchel to dab yourself while you’re in the shower.

Baking Soda

There are just so many uses for baking soda, with these the very tip of the iceberg. Run any google search for uses, and you’ll find dozens more, from killing weeds to repelling rabbits and silverfish. It goes in laundry and it gets used for facial masks. Use it to deodorize dogs, make Play Dough, or get gum/caulk out of your hair. The stuff is so cheap, so easy to find, and does so much, it’s worth filling a box or drawer and keeping handy, especially if we live well outside shopping areas.

It’s not one that I expect there to ever be massive runs on, not like generators, snow shovels, tarps and plywood, peanut butter, and toilet paper. However, in a long-term disaster, we could potentially run out. For me, it doesn’t replace a fire alarm and fire extinguisher, some extra batteries that fit that alarm, or having spare oil and coolant in the truck, but it’s right up there with the food and water supplies as a must-have item.

Hopefully you’ll explore its uses a little more, print out some of the many 11, 30, and 50+ uses lists, and stock up at least a little.


Other self-sufficiency and preparedness solutions recommended for you:


The vital self-sufficiency lessons our great grand-fathers left us

Knowledge to survive any medical crisis situation

Liberal’s hidden agenda: more than just your guns

Build yourself the only unlimited water source you’ll ever need

4 Important Forgotten Skills used by our Ancestors that can help you in any crisis

Secure your privacy in just 10 simple steps

A Prepper Must-Have – Baking Soda I have it on good authority that some people actually bake with baking soda. That’s not why it’s stocked like a mighty brick in

Beef jerky…the stories I could tell you about this stuff. I’m just going to say that I would marry beef jerky if that were possible (thinking about moving to state or country). Anyway, beef jerky’s awesome and, from where I stand, has but one caveat – not enough of it to go around. I mean, c’mon, I know it’s supposed to be emergency food or trail food, but who in God’s name eats just one 20g bag? It’s like saying “hey, it’s game night, and I’m gonna drink just one beer or eat one bag of chips.”

As far as a survival food is concerned, jerky’s the right call since it’s packed with just enough protein and fats to keep that engine of yours running. Sure, they’re salty AF and feels like you’re chewing on a rubber band, but it’s amazingly delicious. Since most of you are busy with your jobs and have neither the time nor the mood to replenish your beef jerky stocks, I thought about sharing with you my mouthwatering homemade beef jerky recipe.

It’s super easy to make and, most importantly, it mostly requires ingredients you probably have in your pantry. Why make beef jerky at home when you can always order some online? Because, let’s face it – as cheap as store jerky is, it’s pretty hard to find one that’s exactly the way you like it. Some are chewy, others salty as Hell and some, well, taste like crap.

First of all, preparing your own beef jerky puts you in full control of the dish, from choosing the beef cuts, all the way to the cooking part. Second, by choosing to cook rather than buy, you can make it as salty or sweet as you like. Last, but not least, beef jerky’s one of those recipes that don’t require an advanced degree in rocket science in order to prepare.

So, without further ado, here’s how to make some delish beef jerky at home.

Ingredients and Utensils

For this recipe, you will need the following:

  • Angus beef sirloin. I use around two pounds of beef for this recipe. Once you get it dried, you end up with one large zip-lock bag of beef jerky.
  • Worcestershire sauce (three-quarters of a cup).
  • Soy sauce (three-quarters of a cup).
  • Smoked paprika (one tablespoon).
  • Honey (one or two tablespoons).
  • Ground black pepper (two teaspoons).
  • Hot chili flakes (one or two tablespoons, depending on preference).
  • Garlic powder (one teaspoon).
  • Onion powder (one teaspoon).

That’s it for the ingredients. As for kitchen utensils, you will need a large bowl to mix your ingredients, an oven tray, baking paper, a pair of scissors, and, of course, a zip-lock bag for the jerky. All done gathering your utensils and all of the ingredients? Take your time. I ain’t going anywhere. When you’re ready, here’s how to put everything together.

Preparing mouthwatering beef jerky

Step 1. Take your beef cut out of the bag and wash it thoroughly. Dry with a couple of paper towels or place in a strainer.

Step 2. In a large bowl add your Worcestershire sauce, soy sauce, smoked paprika, honey, ground pepper, hot chili flakes, powdered garlic, and powdered onions. Whisk the ingredients using a fork or, well, a whisk.

Step 3. Cover the bowl with some plastic wrap and place it inside the fridge for half an hour.

Step 4. It’s now time to tend to the meat. Using a very sharp butcher’s knife, cut the meat into thin strips – if it’s easier, make stake-sized bits.

Step 5. Take a big zip-lock bag from the pantry and put the beef inside.

Step 6. Get the bowl out of the fridge and pour over the beef. Seal the bag and place in the refrigerator. Leave the meat to soak up all those juices for at least a couple of hours. Ideally, you should leave it overnight. Remember – the longer you marinate your meat, the tastier it will be. I usually keep it in the fridge for one or two days.

Step 7. When you’re ready to cook the meat, preheat the oven to 176 degrees – yup, you’ll need ultra-low heat. The idea is to dry the beef cuts, not to bake it.

Step 8. Take the marinated beef out of the bag.

Step 9. Place the meat on an oven tray covered with baking paper. Use a paper towel to soak the excess marinade.

Step 10. When the oven reached the desired temperature, stick the tray in the oven and cook for 4 to 5 hours. Every hour or so, flip the beef cuts.

Step 11. When they’re done, take them out of the oven, allow the cuts to cool down, and cut them into thin strips using a pair of scissors or a knife. Bag and tag!

Another Way to Prepare Beef Jerky

Don’t go anywhere, because this was just the warm-up. Okay, so you now know how to prepare beef jerky at home. But can you do the same, say during a shit hits the fan situation? Beef jerky is, more or less, the beauty of the best – thought it looks totally unpalatable, it’s actually delicious, nutritious, and, on top of that, it can be made anywhere and with any type of meat.

Now let’s imagine for a moment that you’re lost in the woods and you run out of food. Obviously, you’ve got to do something about it. Now, if you still have your bug out bag with you, whip out a snare and wait. Keep in mind that beef jerky can be made with any kind of meat.

However, if you want your trail snack to contain all the proteins and fats your body needs to keep on going, you would want to stick with red meat or fish. When you’re done with the gutting and butchering parts, here’s what you will need to do in order to prepare jerky.

Step 1. Find a clean spot to set up your working area.

Step 2. Use your survival knife or a very sharp rock to cut the flesh into very thin strips (half a centimeter). Don’t forget to cut across the grain, not with the grain (those muscle fibers will make meat harder to chew).

Step 3. While the meat’s still wet and tender, season it with your condiments of choice. I like to keep stuff like ginger, cumin, sugar, salt, pepper, and chili in small pill bottles. You can also make your own mix which you can use to season the meat. Put a little bit of sugar if you have some in your bug out bag.

Step 4. It’s now time to create some sort of drying rack. Look around for twigs, long stick or branches. If there’s nothing available, you can always hang the meat cuts by a low-lying branch using heavy duty zip ties. Just be careful to place that meat within eyeshot because it’s bound to attract some unwanted attention (flies, mosquitoes, and, yes, even bears).

(Optional) If you want to a little smokey flavor to your meat, place it over a small campfire. Don’t leave there too long, though. You’ll want to dry your meat, not cook it. Of course, there’s nothing wrong with some BBQed game, but it tends to spoil faster.

Step 5. If you manage to improvise a drying rack, flip the meat every couple of hours. Depending on weather conditions, like wind, humidity, and temperature, it can take up to four days for the meat to lose all moisture.

Yes, I know it’s a painstaking process. More so because you’ll need to be on the lookout for critters. On that note, when it’s time to hit the sack, don’t forget to bring the meat inside your tent or improvised shelter. Obviously, you won’t be able to keep an eye out while you’re asleep.

Step 6. After a couple of days have passed, take a look at the meat. You’ll know it’s ready to eat when the meat has a brittle aspect. If you prepare jerky from red meat, the color you’re looking for is a purple-brown. On the other hand, if you’re using white meat, the jerky will turn pink-grey when it’s done.

Step 7. All that remains to be done is to cut the meat into thinner strips and to store it in a zip-lock bag or an airtight container.

Wrap-up

Taking all these facts into account, I would have to say that jerky is indeed the ultimate survival food. Given the right storage conditions, a batch of jerky can last for at least a couple of months, if not for a whole year.

Now, as far as the oven-drying version is concerned, I would advise ditching the salt. Yes, I know that salt and jerky is a marriage made in Heaven, but the soy sauce adds and smoky taste to the meat, which means that it doesn’t need extra. Of course, if you’re not a big fan of soy, you can always replace with two tablespoons of rock salt.

I don’t know about you, but I like to add some kick to my jerky. If you want your snack to be spicier, you can add half a teaspoon of Tabasco in addition to the chili flakes. Yes, I know it sounds pretty hardcore, but hey, at least your jerky won’t be bland.

One of my friends told me that it’s also possible to prepare beef jerky using a dehydrator. Remember my powdered eggs recipe? Well, the method’s more or less the same. The only advantage of using a dehydrator instead of a regular oven set on ultra-low heat is that it reduces the cooking time by at least one, maybe two hours. If you have one of those gadgets in the kitchen, you should definitely try it out.

One more thing – the meat itself. Though I highly recommend using sirloin for this recipe since the cut will be, well, chewier, you can use whatever meat you prefer. Just be sure it has the same amount of fat as sirloin. Haven’t tried it yet, but from what I heard, jerky prepared from fish like rainbow trout, tuna or salmon is absolutely divine. Trouble is that it’s very hard to get ahold of a good recipe and most of the stuff on the market looks way too nasty.

So, here’s where I take my love. Hope my little winding has managed to convince you that making your own beef jerky is better than having to go through hundreds of Google pages in order to find the right one. As always, don’t think of cooking as something you need to do – have fun around the kitchen. Play some tunes. Work on your air guitar skills; whatever floats your boat. What do you think about my beef jerky recipe? Hit the comments section and let me know.

Beef jerky…the stories I could tell you about this stuff. I’m just going to say that I would marry beef jerky if that were possible (thinking about moving to state

One of the central pillars of preparedness is being able to feed yourself. Preppers focus some of their attention on stockpiling food as well as creating renewable sources like gardens or livestock (chickens and rabbits) as protection against the possibility that the local grocery store is no longer able to provide something to eat. The average person it has been said only has about 3 days’ worth of food in their homes and if that is true, feeding your family in certain disasters could prove to be possibly your biggest problem.

We have already seen time and time again, scenes of grocery store shelves stripped clean anytime there is a concern in the public. Greece was just the most recent example of this behavior preppers warn against. Starvation would surely be a horrible way to die and it seems as though collectively we all consider this a threat that must be dealt with to ensure the safety of our loved ones. The question is how you will deal with the risk of not being able to feed your family. Will you stock up on food now while you are able, or will you try to swim through the crowd of potentially thousands of other people raiding the local grocery store in the hopes that you can secure enough food to last your family through whatever disaster you are facing?

For many preppers, this may not be as grave of a concern from your perspective. If you have been diligently preparing, you may already have quite a large supply of food that would conceivably last you and anyone else in your home a long time. You might have plenty of food stocked already so you plan to sit back in the safety of your home while everyone else goes crazy; fighting over the last can of olives. But as you are sitting back feeling confidently comfortable, gazing at your full pantry, those 5-gallon buckets of Winter Wheat and metric tons of beans, have you ever considered how long that food will actually last you when you start needing to eat it?

Determining how long your food storage will last

The default amount of calories we consider to be recommended for an adult is approximately 2,000 calories per person. I know there are differences in age, activity level, and gender, but for simplicity’s, sake let’s just take that amount as our baseline. For general health, each member of your survival group will need to consume on average 2,000 calories per day to simply maintain a “healthy” weight.

Rice and beans are a great long-term stable food supply for preppers. They have an impressive storage life as long as they are kept cool and dry and they are very cost-effective as well. You can purchase a 50-pound bag of rice for around $20. Rice and Beans together give you carbohydrates and protein. Each 50-pound bag of rice has approximately 500 servings and there really isn’t anything like the satisfaction you can get from staring at a shelf full of rice and beans. But how long will that last your family?

A 50-pound bag of rice has about 500 servings.

Each serving (1 cup) of rice is 206 calories

Each serving of pinto beans has 245 calories

If you ate three meals of Rice and Beans in a day you would consume only 1353 calories. (451 X 3). If you had a family of 4, that 50 pound bag would last you about 41 days but that isn’t all the calories you would need. To just stay healthy and not lose any weight you would need to come up with another 700 calories per person, per day.

Calories are more important to measure than servings

Well, you could supplement that rice and beans with the wild game you plan on hunting, right? Did you know, a 0.5-1 pound roast venison tenderloin has a whopping 127 calories? That doesn’t get you much further toward your calorie targets, does it? What about chicken? One grilled chicken breast has only 141 calories.

Now let’s make the assumption that life without grocery stores is going to require more work out of you. Possibly much more work. So, the 2,000 calories per day amount aren’t likely to be a realistic count of the number of calories you will actually need. You might be digging latrines to deal with sanitation, hunting for food, or foraging in the forest all day. You could be patrolling your neighborhood or lugging water from a mile away. You would be washing clothes by hand, chopping wood; building fires and the 2,000 calorie amount would likely be more like 3,000 or 4,000 for some people just to maintain their weight. How long will your food last now?

To really get a good idea of how much food you have, you need to look at how many calories that food you plan on eating is going to give you. You can’t simply look at serving amounts and call it done because a serving of a fruit roll-up might make you think you will get a meal out of it, but they won’t come anywhere near close to what you need.

In addition to food make sure you plan on a good source of vitamins to augment austere eating conditions. This won’t be as good as the real thing but could help stave off some health effects of a less than ideal diet. You should take the time to conduct at least a cursory inventory of your food stockpiles, check the serving size and calorie amounts. You can get really detailed and put this into a food storage spreadsheet if you like, but that will give you a true picture of the amount of time your food will last the number of people you have. Instead of looking at this from a poundage viewpoint, you consider calorie counts. That way it will be easier to forecast how long your food will last and adjust for different people in your care.

What happens when we start to starve?

The more food you have, the better off you will be in a collapse scenario where we have no hope of the lights coming back on. Gardens and livestock greatly add to this cumulative total you have, but unless you have a very productive garden or a large supply of animals, the food you have on hand is likely to start running out. At some point in time, if the supply of food is interrupted, rationing might be a consideration you need to make.

Another consideration is the needs of the various people in your group. You may find you have hard choices to make. Someone who is old for example, who is less active may not get the same share of food as a younger person who is working outside all day. You may have to choose between roles and which people in which roles are given extra allotments of food. What if someone is out digging graves all day? Do you believe that someone who is sitting inside or not working as hard should get the same ration of food or the same dispensation of calories? If so, how long before the person who is working physically harder starts to decline in health? How long could you shovel or defend your home in a starvation state?

We talk about food storage as a solution to the grocery stores closing, but that will only buy us time in a true collapse. Yes, it will help your family tremendously to have additional food stocked up, but it will run out if the crisis lasts long enough. When calories are seriously limited, health starts to decline.

When we don’t get enough calories for a long enough time, our organs begin to shrink and gradually start to lose function. We can have bouts of chronic diarrhea, anemia, reduction in muscle mass, and the weakness that goes with that.

We have all seen images of refugees on TV. Poor children covered in flies with distended bellies staring blankly at the camera might elicit a sense of guilt in us today as we sit on the sofa and flip through the channels. In Haiti, there are areas where people make and sell mud pies for people to eat because there is no other food and the worms in their stomachs would rob the person of any nutritional value from real food before it could help them.

What will you do when these poor souls are your children?

Kwashiorkor and Marasmus

Kwashiorkor and Marasmus are two conditions that are seen with acute malnutrition. It causes the swollen bellies you see on TV and I can see this appearing in our country where we to go through some horrible SHTF event. The pictures you see on TV could be not from around the world, but in your own backyard.

As in other places in the world, this will lead to violence and death as everyone fights for food resources to fend off dying.

“Kwashiorkor is the most common and widespread nutritional disorder in developing countries. It is a form of malnutrition caused by not getting enough protein in your diet. Foods that contain protein include meat, milk, cheese, fish, eggs, soy, beans, nuts, seeds, and some types of grains like quinoa.”

Children who are deprived of calories for long enough will never reach their full potential for height and growth. These two conditions are treated in the beginning by simply getting more food with a healthy balance of protein. In more severe cases, you can’t just give a starving person a cheeseburger. You will have to introduce food slowly and something like powdered milk is good (reconstituted of course) to start them out until strength has increased and more food can be slowly added to their diet.

Anyone who has children will tell you that they will do anything to take care of their family. This manifests itself in a lot of imaginative ways, some violent. Before you have to get to that place where you are thinking of doing whatever is necessary to feed your family, make plans now to have as much food security as possible. A good strategy of food storage to include foods you eat every day, long-term store-able food, and renewable sources will put you in a better position to provide for your family. Think about this now so you have to worry about this less when it actually is an issue.

What are your food storage plans and how long will your food hold out?


Other self-sufficiency and preparedness solutions recommended for you:

The vital self-sufficiency lessons our great grand-fathers left us
Knowledge to survive any medical crisis situation
Liberal’s hidden agenda: more than just your guns
Build yourself the only unlimited water source you’ll ever need
4 Important Forgotten Skills used by our Ancestors that can help you in any crisis
Secure your privacy in just 10 simple steps

One of the central pillars of preparedness is being able to feed yourself. Preppers focus some of their attention on stockpiling food as well as creating renewable sources like gardens