HomePosts Tagged "SHTF" (Page 6)

You wouldn’t be reading this article trying to figure out what tools you needed to build stuff with if you thought life was like the Sound of Music. But if you’re reading this to add another layer of knowledge to your prepping arsenal, you are at the right spot. Figuring out the basic tools and machines that can get you productive in a time of crisis or in everyday life is more important than you think.

Needs

Let’s start with the basics. Having a mix of manual tools and battery operated power tools will not only keep you efficient but will ensure accuracy in whatever you decide to cut, saw, chop or drill. Here are the tools that will provide the best versatility in a time of crisis or just when you are trying to figure out how to mount those deer antlers above your master bed.

Manual tools:

  1. 16’ Measure tape and 100’ measure tape –  just in-case you want to draw that line in the sand that you dare your neighbor to cross or just need to measure the board length you are going to hand saw.
  2. 8” and 48” level – which allows you to check the horizontal and vertical (plum) of anything you want to truly keep squared.
  3. A good set of chisels – that run in sizes ¼”- 1 ½”. They work great for knocking down corners on wood and cleaning out saw cuts and joints. Make sure the handle is made to handle a hammer strike so if you need to carve out a Billy stick you won’t damage the handle.
  4. Prybars – in a few different sizes, 8” 16” and a 24” big one made for when you are really needing to pry your neighbors food supply door open.

    solarpanelstarterkit

    Solar Panel Starter Kit 400W – You might appreciate a way to recharge your cordless electric tools.

  5. Clamps– you can never have enough clamps! C-clamps, F-clamps, Spreader clamps, Pipe clamps, everything you need to hold stuff together during a glue up or spread things apart.
  6. 6” layout square – It’s a triangle usually made out of aluminum or metal used to make square cuts on lumber stock. Framers sleep with this tool like it’s the Holy Grail. You just can’t make your life any easier with such a simple device.
  7. Block plane – Used to flatten edges of wood, smooth joints and works fantastic for cleaning an edge to glue up to.
  8. Handsaw – For when your battery operated reciprocating saw runs out of juice and the solar panels you are using are working less efficiently because it’s raining outside.
  9. Mallet – Use it as an attitude adjuster or for its real purpose: to coerce things into fitting correctly without destroying or denting them.
  10. T-Bevel/Sliding bevel – Made to measure all kinds of angles you may encounter when building your survival tree-house. Use it to cut angle trim or a slew of other things.
  11. A good screwdriver set and bit set that has a Phillips, star and flathead slotted bits in it.
  12. Utility scissors – A good industrial pair of scissors will be great for opening MRE’s or cutting your jeans to treat yourself when the neighbors Pit-bull decides to use your shin as a drumstick.

workshop

Enough of the manual stuff, lets dive into battery operated POWER TOOLS! As you already know we no longer live in the Stone Age, and technology can help us even when the grid is down. With advancements in solar, hooking up and using the sun to charge your tools through solar panels and inverters is a great way to keep efficient.

With Solar in mind, your power tool arsenal list should include the following:

  1. 20 Volt Jigsaw– Great for cutting angles, circles, arches and works when you need some speed when pumpkin carving.
  2. 20 Volt Impact Driver– you never know when you need the power, but at least you have it.
  3. 20 Volt 6 ½” Circular Saw made to cut lumber quickly and rip large sheets of plywood.
  4. 20 Volt Reciprocating Saw with multiple types of blades including smooth cut, rough cut and a few for all-purpose use. This tool is a must. It’s great for cutting low-lying tree limbs, flush cutting plugs and all sorts of things inside and outside of the shop.
  5. 20 Volt drill driver or simply called a drill. You will have the manual one that you will realize after ½ a turn makes the hair on your knuckles fall off due to the strain of a screw stuck in hardwood. But when you really need to screw stuff down fast this will be your Huckleberry.

For the serious hardcore woodworkers out there, you always have the Amish option. Which is going out and buying a Tablesaw, Jointer, Planer, Sander and Wood Lathe; pulling all the motors and attaching a pulley system so your buddy who lost at your poker table the night before, can pedal power your machine while you woodwork away. For the rest of us, the list above will enable you to handle 95% of most jobs around the house or when building your dream artillery bunker!

You wouldn’t be reading this article trying to figure out what tools you needed to build stuff with if you thought life was like the Sound of Music. But if

You need to have confidence in your ability and training to be able to handle hostile situations. Over the years I have had students come to my classes who have been through self-defense and tactical programs and told how they can prevent themselves being victimized and how as a potential victim they could defend themselves. To me these people were already being placed at a severe disadvantage by being told they were a potential victim, you’re only a victim if you let yourself be. You need a positive attitude, why should you be afraid of some scum bag that tries to intimidate, bully and rob people for a living.

What a lot of people forget is that when a criminal is going to commit a crime they are going to be scared; they are breaking the law and can get arrested, beaten up or shot in the process. Criminals look for easy targets; they don’t want problems as they are bad for business. Remember if you are going to be scared and nervous so are your attackers. Your attitude needs to be that with the knowledge and ability you have you can stop anyone who wants to mess with you, your clients or your family.  The criminal made the mistake of starting the fight with you and they are going to lose, that’s it!

The bad guys will have put together a mental plan and strategy for attacking you, so shouldn’t you have a plan for dealing with confrontations? The easiest way to assess someone’s personal security is to go up and ask them a question like what’s the time etc. By doing this and reading their reaction you can tell if they are security aware or clueless. Now think about how you would react if a stranger approached you and asked you the time; what’s your body language going to be saying, are you going to tell them the time, will you be looking at your watch or assessing their body language, will you be in a defensive stance, are checking for any obstacles in your area that can trip you up, can you access your weapons, would you even be thinking about your weapon etc. The criminals want to set you up and catch you off guard, to do this they will use distractions or surprise. If you understand how the criminals operate you can hopefully spot a potentially hostile situation and avoid it or if it’s unavoidable reverse the situation and set the criminal up for failure.

Once you have identified that you are going to have to deal with a violent situation you need to quickly workout your strategy and put into operation your counter attack. There are three elements needed to win a confrontation; surprise, speed and aggression. If you can combine two of these elements in your counter attack, there is a greater chance you’ll be successful.

  • Surprise: This is the main thing that you require. Surprise will give you the edge in all confrontations, if the criminals don’t expect you to attack them; they won’t be ready to defend themselves.
  • Speed: Your actions need to be fast and decisive, no hesitation!
  • Aggression: Aggression will always beat fancy techniques.

If you understand how the criminals operate you can hopefully spot a potentially hostile situation and avoid it or if it’s unavoidable reverse the situation and set the criminal up for failure.

Other things you will need to consider is what do you want your body language to say, can you access your weapon, are your standing on slippery or uneven ground, are there objects that can trip you up, look for objects that can provide you with cover etc.  If you have already planned you reaction you’re not going to panic, you’ll just be going through your procedures and be setting the criminal up for your counter attack. So, if a stranger approaches you start setting them up by assessing their body language, assessing your surroundings, getting yourself into a defensive stance, consider what you want your body language to be saying, select target points on the stranger and think about how you’ll access your weapon.

Shootings generally take place at very close quarters and there will be many obstacles which you can trip over like curb stones, chairs and tables etc. be aware of what’s around you. Chances are you will not have the space or time to get into textbook shooting stance, so this is where training in one handed close quarter shooting is a must. You should use distractions as they can give you the seconds needed to deploy your weapon or move to cover. When you are out and about on your daily business always consider how you would react if attacked by those around you. The next time you are at the mall or in a coffee shop look around workout if you could access your weapon quickly, are you in a good position, what you could use as cover and how you would exit the building safely!

One of the main things that you need to learn is how to assess someone’s body language and control your own. This is very important skill as you need to try to identify someone’s intentions and not telegraph to them your potential response.

There are three main components of communication between humans; spoken words contribute 7%, vocal tone and volume make up 38% and body language makes up 55% of the message. So, let’s say you’re approached by someone while pumping gas into your car and they are telling you how much they like your car; their breathing rate is shallow and accelerated, their sweating and making agitated movements with their hands. Are you going to engage them in a conversation about the car or read their body language, assess your surrounding and be ready to deploy your weapon!

What to look for – Observe these very common traits and you should be ready.

Start reading people’s body language, at a basic level you can generally tell if people are happy, sad or angry. Even though it’s not 100% reliable, someone’s facial expressions are good indicators to what mental state the person is in. If someone is stressed, their faces will be flushed, they may be sweating, have veins protruding in their neck or forehead and they may be a tensing their facial muscles.

When you are out at the mall or in a restaurant or bar, watch the people around you and try to identify what mood they are in or what type of discussion they are having with others. It should be easy to identify if a man and a woman are on a romantic date or two business people are having a heated discussion, when in a coffee shop try to determine what people are looking at on their laptops; are they concentrating or goofing around. You must learn to read body language, because this will help you identify, avoid and if necessary react to potential threats.

When a person is involved in a stressful situation their body will undergo over 150 different physical stress reactions. These stress reactions will happen to you and criminals alike, you need to be aware of them and be able to notice them in yourself and others. A bodies stress reactions include: adrenal surges, increased heart rate and blood circulation, sweating, increased respiration, increased muscular tension, reduced peripheral field of vision, reduced decision-making ability and auditory exclusion.  If you have ever been involved in a car accident, try to remember how you felt just before, during and after then try to remember if you felt any of the above reactions. If you have ever tripped over something and subsequently fell, try to remember what it felt like; for example, did the time between you actually tripping and hitting the floor seem longer than the fraction of a second it took in actuality, were you sweating and was your heart beating rapidly when you hit the floor?

Learn to read your own body language as well as others, if you are in a situation and your heart rate starts to increase or you start to breathe quickly; try to identify why this is happening. Look for these stress reactions in people around you, if someone approaches you and their face is flushed, eyes are wide and bloodshot and have veins protruding in their forehead and neck, maybe you want to try to avoid them or get ready for a confrontation!

Warning signs that identify someone is agitated and a potential threat include direct prolonged eye contact, flushed face, accelerated breathing rate, sweating, veins in neck and forehead are protruding, hands moving towards a concealed weapon, hands rising getting ready to strike, eyes narrowing, looking to see if you are armed or at intended target’s areas on your body, changing to side on shooting or fighting stance and lowering the body before launching an attack.

Always remember, if the criminal is street wise they will be monitoring your body language and trying to predict your reactions. You should never give any indication that you are going to defend yourself or are armed; your reactions should be a total surprise to you attacker. You must have an offensive mindset, not defensive. You should always keep a low profile, do whatever you can to avoid problems but if put in a situation where you have to use force the bad guys will be totally over whelmed. Remember, fighting is for amateurs, you just end things!

You need to have confidence in your ability and training to be able to handle hostile situations. Over the years I have had students come to my classes who have

A term you will hear frequently on Prepping and Survival websites is a Get Home Bag. You could also hear this called by other names (Get Me Home, Get Back) and they are all pretty much the same thing. Today we are going to discuss why a Get Home Bag is so important and something you should consider having if you are like most people and have to commute away from home every day for work. A Get Home Bag is similar to your Bug Out Bag but they have different purposes and what you need to put into your Get Home Bag will be different.

What is a Get Home Bag?

A get home bag is simply a bag of supplies you can use if you are forced to walk back home after some disaster or crisis. The assumption is that for whatever reason you are away from home, possibly far away and you can’t simply call AAA or a cab to come and get you. There could be several levels of Get Home Bag and I will discuss those below depending on how far away from home you are which could determine how long it will take you to get back home.

I used to have a job for a short time that had an 86 mile (one way!) commute. It was an opportunity that was too good to pass up but thankfully I found another position much closer to home. Every day I would jump in my car and set out on the highway for an hour and a half drive. Naturally, I never really imagined anything would prevent me from driving back home at the end of the day, but if some disaster struck while I was away, 86 miles would be a pretty long haul on foot.

When I worked that job I didn’t have any supplies with me except an iPod probably. I don’t even think I had water in my car. If something had happened, I would have been in trouble if I had to rely on what I had on hand and a Get Home Bag is the answer to that problem. You don’t have to work 86 miles away from home to need a Get Home Bag because the important supplies you have in there could save your life even much closer to home.

GetHomeBag2

Maxpedition makes excellent bags.

Is a Get Home Bag even necessary?

You may be thinking ‘Hey, I don’t work 86 miles away from home’ so why would I need a Get Home Bag and I will concede that in some cases, the distance you are traveling away from home will dictate what you might need to make it home in the first place. Let’s say there is a disaster and you are only 5 miles away or closer from home. You could probably crawl home if you needed in a day. Assuming you didn’t live in an insect infected swamp, the dessert or in a war zone, you might not need a get home bag.

But there doesn’t really have to be a disaster for a get home bag to help you out. Winter storms are a natural occurrence. Last year, there was a huge traffic snarl in Atlanta when a relatively minor amount of snow and ice shut the city down over night. Your Get home bag could give you the supplies you needed to make it home or just as easily make your overnight stay more comfortable.

Get Home bags don’t have to see the end of the world as we know it. There could be earthquakes, wildfires, hurricanes, landslides, winter storms and on and on. Just having this backup could come in handy.

Your Get Home Bag packing list

So enough about the purpose of a get home bag, what do you pack in there? I think that we could logically break this down into different tiers or levels for how long the get home bag would need to be called into service to get you home. There will be seasonally adjusted items but I will call those out on the list below.

Assuming the average uninjured adult walks approximately 3 miles per hour we will have three tiers below for distances of 3 to 90 miles. As with everything else in prepping your needs and situation as well as the actual disaster will have an effect on what you will need to use and how your preps would be different. This is just a general guideline but should be enough for the average person in average conditions.

Tier 1 – 1 – 3 Hours away

If you had to walk back home for 3 hours that could mean that you work approximately 9 miles away from home. This is very similar to my commute now and unless meteors hit the ground or we were bombed by someone, I think all things being equal I would be home in a relatively short time. Anything I pack is going to help me along my journey but does not anticipate an overnight stay. I would add some items just in case because I like to be prepared for surprises.

  • A good folding knife – This should be common sense. A knife and actually the first 6 items on this list are part of my Every Day Carry (EDC) so technically I have them wherever I go. I carry the Spyderco Tenacious.
  • Multi-Tool – From pliers to a small saw, there are a surprising number of things you can do with a good multi-tool.
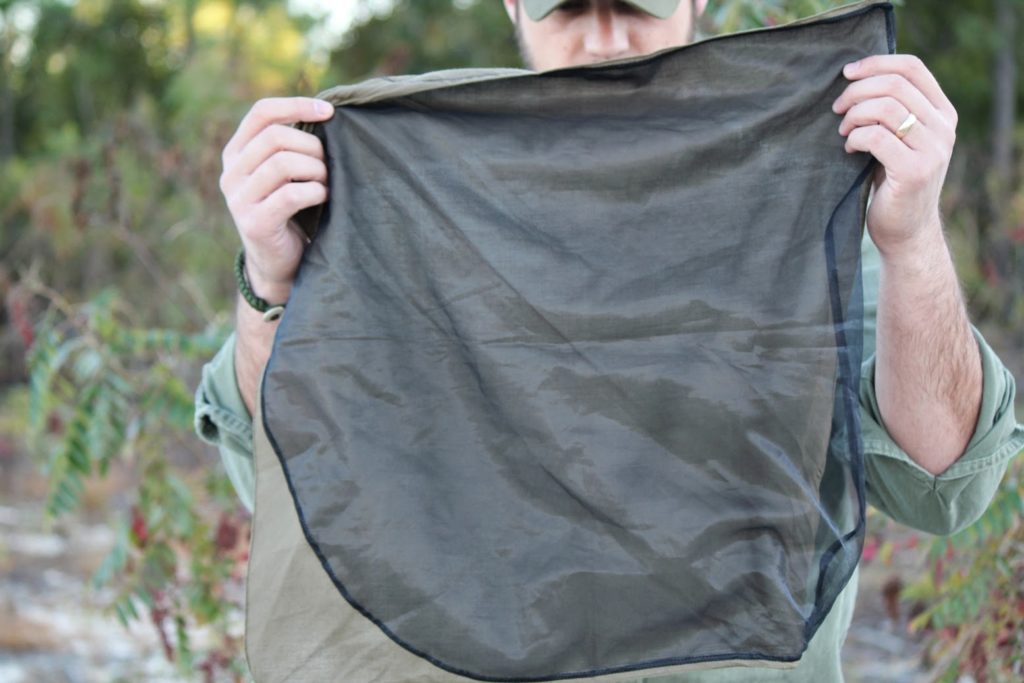
  • Bandanna – Bandanas make a great filter for the first stage of water, a dust mask, bandage, and sling or if you plan on robbing a bank you will be in style. Just kidding on that last part.
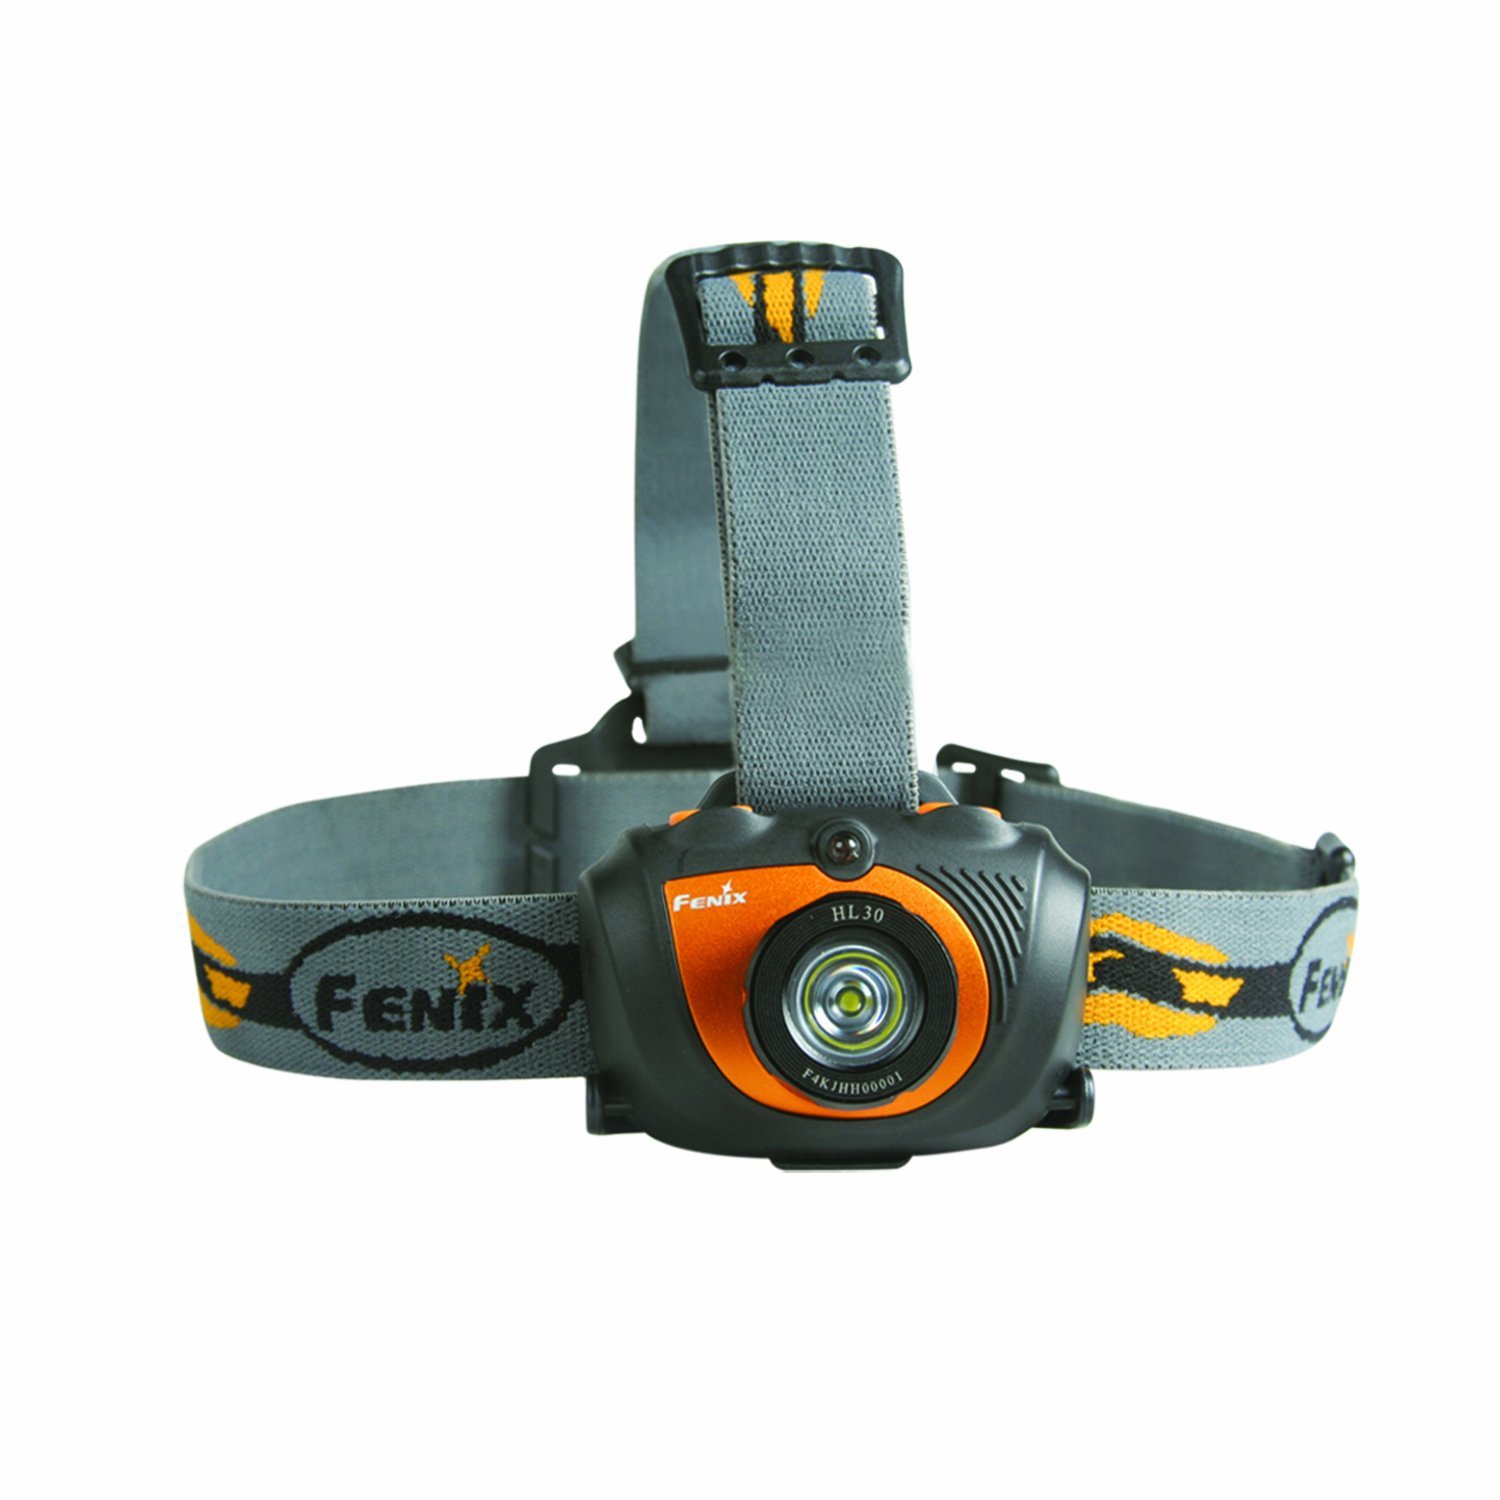
  • Flashlight/headlight – I have a flashlight on my belt and a headlamp in my Get Home Bag. You can’t beat a headlamp at night when you need to have both hands free.
  • Water bottle – Ideally a stainless steel water bottle which can be used over a fire to boil water. Even if you don’t have a stainless steel version, something to carry water in.
  • Concealed Carry Weapon – Never leave home without it.
  • Comfortable/Sturdy footwear – I have written about the importance of good footwear before. You don’t want the S to hit the fan and you are in flip flops.
  • Rain gear – Always plan for rain because you do not want to be soaking wet without a chance of drying off. Hypothermia will sap your energy and could kill you at even moderately warm temperatures. An umbrella isn’t a good option because it will require you to hold it and you will just look like a dork if you have to run.
  • Gloves – Sturdy gloves will be a huge advantage if you have to do work you aren’t accustomed to. They can prevent cuts, burns and blisters.
  • Simple First Aid Kit with Blood Stopper – I am not talking about the cheap kind with Band-Aids and some Neosporin. If you have to walk home you can tough minor cuts out, but a blood stopper or Israeli bandage can be used for large bleeds. If things are bad enough you are walking home, you probably don’t want to go to the hospital if you can avoid it.
  • Dust Mask – I have regular dust masks that are really only good for dust and N95 masks which should be used in certain situations.
  • Hat – Good at keeping the rain, sun or snow off your head.
  • Sunglasses – The ideal pair of sunglasses are also safety glasses to protect your eyes from debris.
  • Snack/Energy Bars – Let’s face it you will not die if you have to walk home for a few hours but a little snack bar can lift your spirits and occupy your mind for a while. A little shot of energy never hurt anyone either.
  • Spare Ammo – Make sure you can refill that magazine if it empties out.
  • Lighter – I have a couple of lighters because they are just simpler than using a fire steel.
  • Spare Cash – In a power outage or worse, you may not be able to access the ATM. Credit cards may not be accepted either but cash usually is.
  • Paracord – A million and one uses.
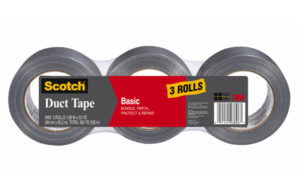
  • Duct Tape – Two million and two uses.

Nalgene_stainless_steel_mug_fire

A Stainless Steel water bottle like this Nalgene will allow you to boil water if needed.

Tier 2 – 4- 8 hours away

To walk for 8 hours at the average pace of 3 miles an hour that would put you approximately 24 miles away from home. I would have everything in the Tier 1 Get Home Bag plus the following items.

  • Spare batteries for flashlights
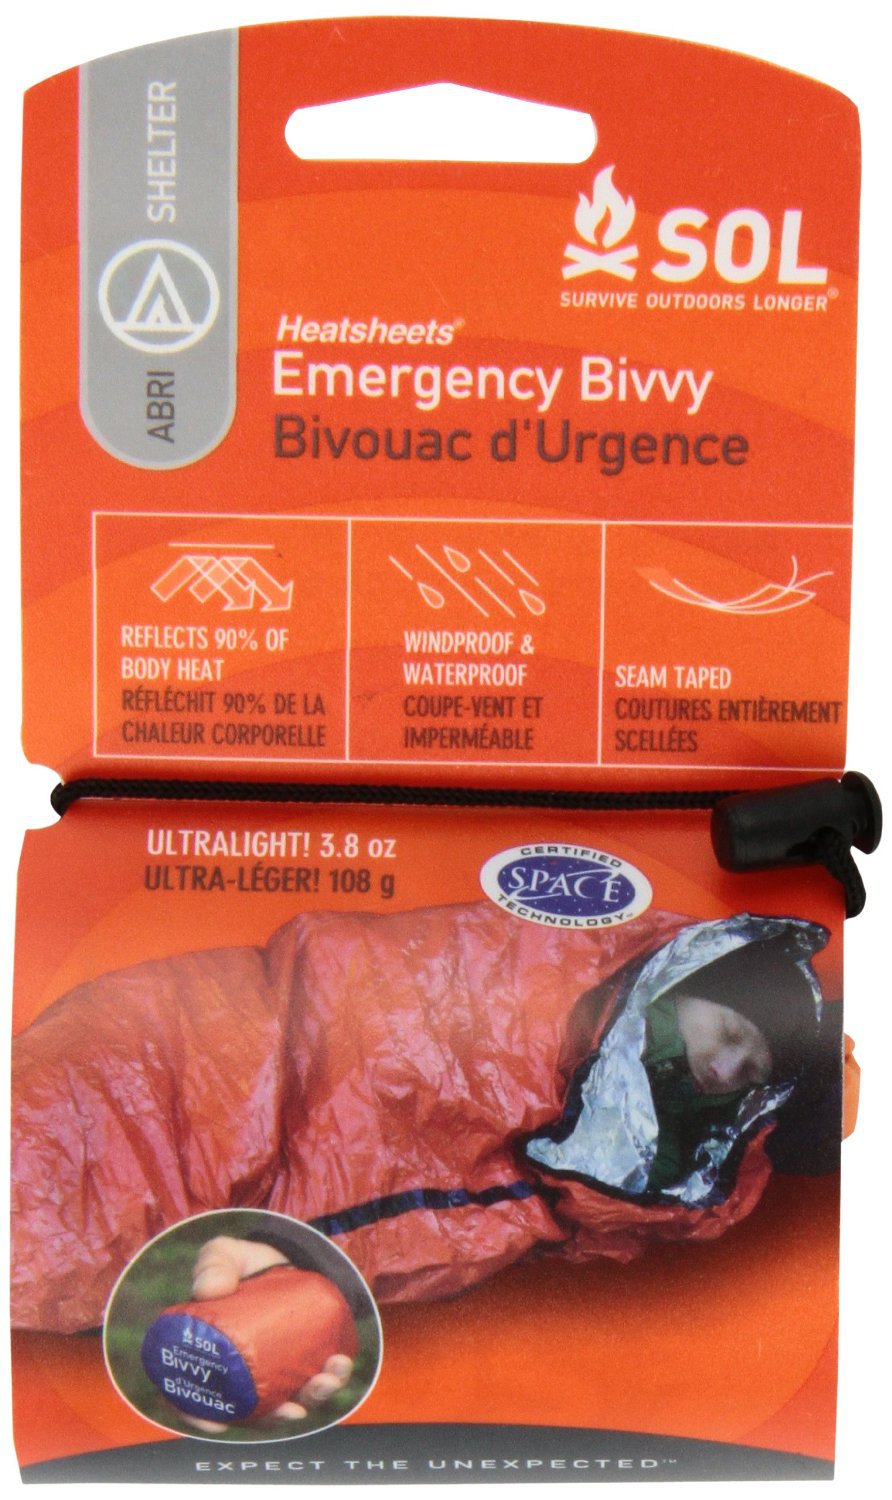
  • Bivvy sack or Wool Blanket – SOL makes a great emergency bivvy sack that will keep you alive in pretty cold temperatures. This or a wool blanket if you have to spend the night outdoors.
  • Tarp or Poncho – Either can be used to keep the rain off of you. A camouflage poncho can also help keep you hidden.
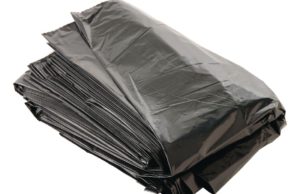
  • Garbage Bags – You can lay or sit on these to keep water off your backside.
  • Spare Medications (if needed)
  • Spare socks – If you are walking for over 4 hours or are sweating a lot you will want to change your socks. Hang the old ones off your Get Home Bag to dry out. As a bonus you may want foot powder and moleskin for blisters.
  • Additional Layer for warmth – Simple base layers are lightweight and take up little space.
  • Wool or fleece cap – Nights get cool even in the summer.
  • Radio
  • Tinder materials for fire – I have seen some people add dryer lint and some WetFire tabs and place them inside their roll of toilet paper.
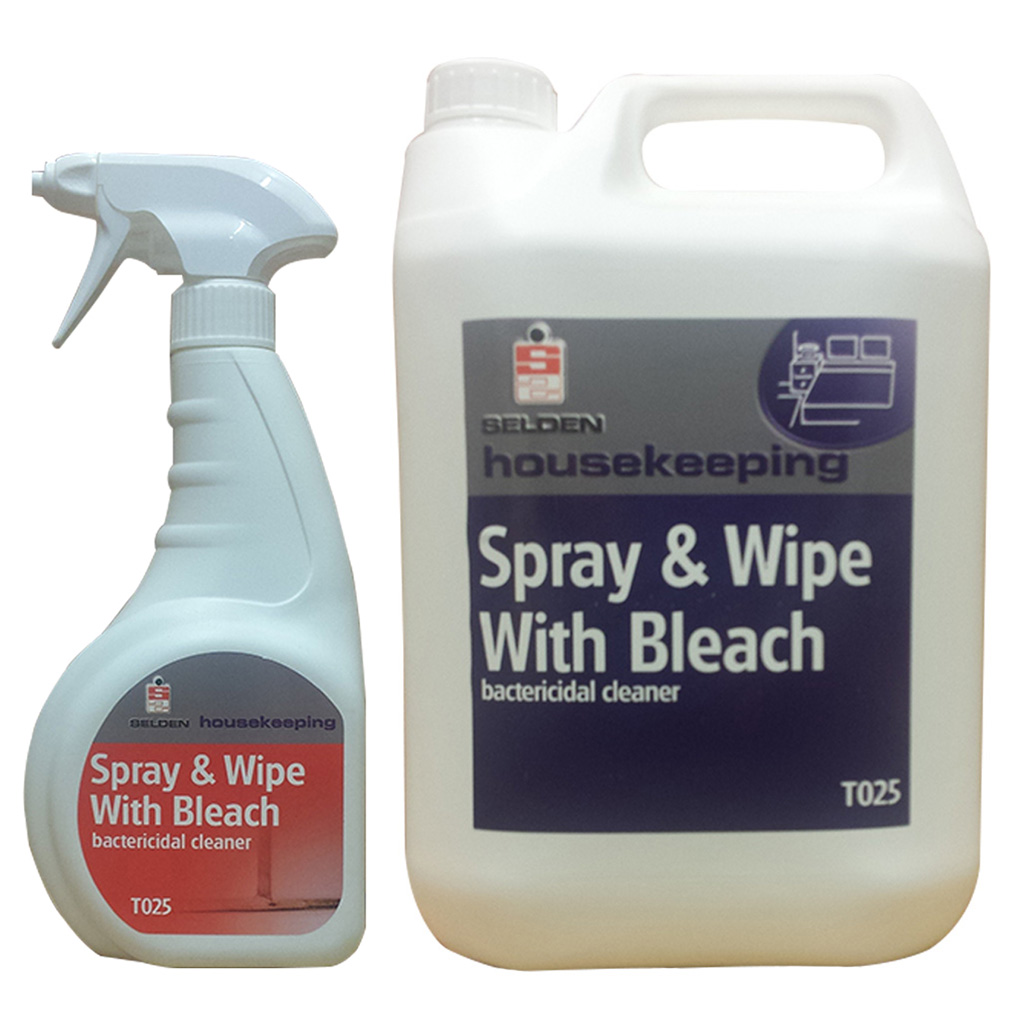
  • Water purification tablets – Simpler than bleach, cheaper than a LifeStraw and take up less room than most filters. Of course if I was going to carry a water filter I would carry the Sawyer Mini water filter because it takes up minimal room and weighs ounces.
  • Toilet Paper – Hey, when the SHTF you might need to take a… well you know what I mean. Also useful for cleaning glasses, blowing your nose or as tinder for a fire.

Tier 3 – Overnight Distance 80 + miles.

If you are like me and the commute was extra-long or the traveling conditions were hazardous it may take you 24 hours to make it home. This will involve sleeping somewhere overnight unless you just have to plug on and make it all in one shot. For a Tier 3 Get Home bag, I would add to the contents of the first two tiers, the following:

  • Sleeping bag – Size and temperature appropriate to your climate and season.
  • Large fixed blade knife – This could be used for larger chores like chopping firewood for your fire or making larger holes in people. I carry the Gerber LMF II.
  • Spare magazine for pistol – Can’t be too safe.
  • Walking Sticks – If you are walking 80 miles you would probably need a walking stick before it’s all over with. Walking sticks relieve pressure on your knees and can also be used with your poncho to make a shelter.
  • Advanced First Aid – Blood Stoppers, Celox and Ace Bandage
  • Additional Energy Bars or Survival Rations

What is the best bag to use for a Get Home Bag?

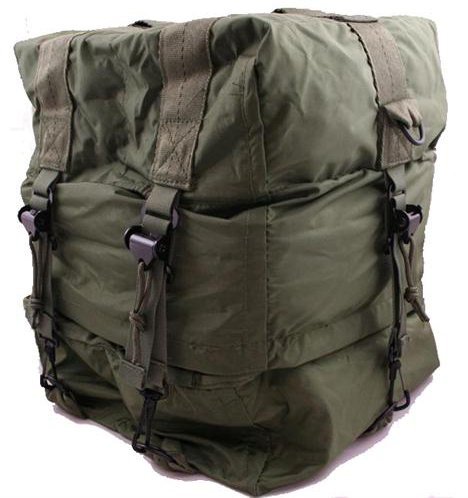
That is the million dollar question isn’t it? Well, first it helps to assemble all of your items to see how much space you need. For my Tier 1 Get Home Bag I use a Maxpedition Jumbo Versipack which fits everything I have, minus the shoes very nicely. I haven’t used them personally but am interested in the 5.11 Rush bags that come in three sizes to coincide with the duration of your stay (12, 24 and 72). I know the 5.11 brand and have several of their products, just not any bags and they have been of the highest quality. You do pay for that quality, but I think it is worth it and I want to get my hands on one of these bags for a review.

I have also been interested in looking at the Paratus 3 Day Operator’s Pack from 3VGear. The price is certainly reasonable so I am considering getting one of those to review also. At less than half the price of a 5.11 bag, it’s worth considering. There are so many options out there and you don’t have to spend a fortune on a bag to hold your gear. Most likely you aren’t being dropped into hostile territory in Afghanistan so most regular backpacks will do the job for you but your own needs and tastes will decide what works best.

In conclusion, you might be wondering what the difference between a Bug Out Bag and a Get Home Bag is and if you count all of the tiers together, throw in some more food and maybe cooking utensils you are pretty much looking at the same thing. It might be a good indicator that you have too much if you can’t tell the difference. Either that or you work a long way from home.

Hopefully this helped with some information. Any items I missed?

A term you will hear frequently on Prepping and Survival websites is a Get Home Bag. You could also hear this called by other names (Get Me Home, Get Back)

One of the hardest cords to cut for homesteaders is dependence on commercial feeds. Our modern livestock – even a lot of the dual-purpose homesteading breeds – are accustomed to certain types of feeds, heavy on mass-production monoculture grains and hay. Sometimes planting options seem limited, sometimes storage space is at a premium, and sometimes we struggle to figure out what folks did before Buy’N’Large made kibble and meal mix cheap and accessible. There is no one way to do anything, and no solution is going to work for everyone. However, I’ve put together some ideas for root vegetables and their tops that can cut some of our feed bills and feed dependency and alternative or “forgotten” ways of storing and using grains, legumes that might help cut feed costs and increase resiliency and self-sufficiency.

The methods here can be applied from sprawling homesteads to suburban homes and lots. Some of the tips actually apply to humans, too, especially the storage tidbits. There will be another article on alternative livestock feeds that will have even more help for smaller lots with livestock like rabbits and a couple of ducks or goats, and will also include some alternatives that are feeding people and animals on a larger scale in other parts of the world.

Corn Storage

Corn can be collected sweet or allowed to dry on the stalk for grinding and feed types, and an awful lot of livestock is happy with rough-grind “cracked” corn. Dry corn can also be soaked overnight to become more palatable and attractive to livestock. Natives used to dry corn on mats, both shucked and rubbed from the cobs or still attached to cobs, and colonists regularly had stacked racks that allowed good airflow beneath a roof for further drying before corn is transferred to a bin. Corn will keep better (stay dryer) if it’s left on the cob. Leaving the cob on can be space consuming, however. White folks have traditionally used large silos and smaller cribs for dry corn. Once it’s dried on the stalks, husks that have been left on can also be braided into ropes or wider bands, then suspended from ceilings in barns, cellars or homes. Birds and rats are still a risk, but it can be a space-saving way to store corn compared to old-style cribs, since it can go right over our heads, livestock heads, or additional storage areas.
Common grass grains

For households that are putting in limited amounts of grass grains like wheat, barley and oats, each square foot is precious. When there are small amounts, such as turning one or a few 5’x20’ plots and 5-10 pounds of seed into 40-65 pounds of grain or next-year’s planting-for-consumption stock, it’s incredibly important for that seed to dry properly. On a small scale, the cost of specialty machinery may not be available, especially at first, despite the time it can save.

Old-school stooking of stalks helps get them up into the air and at least somewhat away from some pests. However, if a corn bin has drying racks, or there’s a shed with wide doors and enough power to run a box fan, heads can also be cut from the stalks after bundling into stooks, and the bundles hung upside down in tiers, similar to old tobacco barns or even overhead in homes and barn walkways. Doing so cuts down on the amount of floor space needed while protecting the grains from rain, and increases protection against pests.

Old tobacco shed (braided corn or inverted grain bundles can be stored from racks and chains as tobacco once was)

Old tobacco shed (braided corn or inverted grain bundles can be stored from racks and chains as tobacco once was)

Storing corn and other grains overhead, even once bagged, can save space on the floor and shelves for harvests of apples or* potatoes, autumn and winter squashes, yams, and sweet potatoes, or for jarred and dehydrated produce.

* Potatoes and apples in the same space will make each other ripen/rot faster, but pears, yams and sweet potatoes get along like white on rice with pretty much all other crops once they’ve had their cure period. Since grain storage is ideally drydry, crops that like bins of damp sawdust and sand like carrots and turnips aren’t really great sharing space with corn, oats, barley, teff, buckwheat, or any other grain.

African grains

Millet and teff are incredibly difficult and time consuming to mill, but poultry can handle them easily without that step. Teff also makes a good hay and an excellent straw. The major advantage to the relatively rare teff is that this African crop is accustomed to some pretty harsh conditions, nutrient-depleted soils, and hand- and low-mech harvest. Millet is largely seen in game plots and songbird feed, but has plenty of nutritional value and some of the millets can handle pretty much any conditions. Both millet and teff are available in varieties can be had for serious clays, droughts, flood-drought, and saturated field tolerances, which can make them a huge asset for small homesteaders trying to cut feed-store cords.

Millet and corn kernels can also be turned into a type of silage for storage, or the entire still-green plant can be used – as can other grains, legumes, and leafy plants.

Silage

Silage is basically a type of fermentation that produces a high-moisture feed. Haylage and oatlege are basically just specialty types of silage. Brits produce a version called balage. In World War II, farmers sometimes used silage made from turnip and rutabaga tops to help get their breeding pigs and cattle through spring.

It can be created small-scale in heavy-duty contractor or special-purpose bags, in kegs and casks, by round-bale equipment and covers, or in bins from 5-10’ stock tanks to pits and shelters measured in meters. The green matter is chopped, packed down in layers, and covered. Sometimes something absorbent and lightweight like finished straw or chaff is added on top or a sweetener like honey or molasses or tree syrup is used in the layers. The important part of any silage process is to press out the oxygen, and to cover it against reintroduction of oxygen and precipitation.

Silage

Cows munching on silage.

Silage can be beneficial in that the starting moisture content is very high. A hay harvest that would be ruined by dews and rains can still become safe animal feed by converting it to silage instead.

It’s not pretty, but just like it got some of our heritage and rare breeds through World War II, in a disaster, the waste-not, want-not aspect of using the tops of storable feed and food crop, “ruined” hay crop, or a grain crop that isn’t going to get all the way to our frosts and freezes to feed our livestock may make it worthwhile for some raisers.

There are naysayers on the topic of silage as animal feed, so do research about the nutrients of various components and methods. Ducks and turkeys can’t have it and I haven’t seen a horse willing to chomp in, but most goats, cattle, pigs, chickens, rabbits, and donkeys could have at least part of their diets replaced, putting that much less pressure on hay and grains for winter and spring.

Roots & Tubers – Swedes, Beets, Sweets, Yams, Radishes and Turnips

Along with pea hay and straw, something farmers haven’t done in a while is maintain big stacks of root veggies along with their tall stacks of hay and straw, or keep tubers in big cellars to haul to their calves, rams, and steers. Forking forage turnips and swedes to cattle and pigs used to be just part of daily life, especially early in winter, and it wasn’t uncommon even up until the 1950s for British farmers to shred or grate swedes to a consistency we’d use for drying apples or potatoes, then use it for weanling cattle and goats, or “slop” them for their meat chickens and pigs.

Turnip Slicer

Image – Turnip slicer from WWII

Britain’s farming directives in response to World War II offers us a fair number of clues for hard-times livestock feeding, and one of the other fabulous nuggets that came out of it was the cooking of slop for pigs. Cooking makes things like potato and sweets and yams safe to eat, skin to “meat”, and boiling allows things like junk meat from pest animals to be included.

Although they aren’t as traditional, most of the cellar- or pit-worthy long-storage root crops like African yams, Chinese yams, and sweet potatoes can be used the same way for our vegan livestock (oca can be used for some livestock in low quantity, but those New Zealand and South American “yam” is a gas-producer capable of twisting up even goats and pigs). They tend to be low on protein, they aren’t the calorie powerhouses of grains, but they work well for stud stock, meat stock, un-bred stock, and things like rabbits and chickens that convert leafy foods efficiently.

Forage and sugar beets and turnips can be had relatively inexpensively as deer plot and pasture-improvement seed. Daikon-type radishes are available in the same genres, but some of the field-improving radishes are bred to produce a spongy biomass and then dissolve in a pretty short amount of time, so we need to pay attention to what we purchase.

BeetFodder

Image – Dairy cattle on forage beets.

Some livestock will eat a daikon radish as-is, but some will pass it unless it’s been boiled – and it’s as much animal-to-animal as it is species or breed. Introducing new foods should progress slowly, but livestock that is regularly exposed to a variety of foods is more likely to nibble something new when it’s mixed in with the old favorites.

Things like sweet potatoes, radishes, turnips and beets are double winners, because both the tops and the roots are edible – for us and for livestock. They can either be grazed early and allowed to develop roots later with pasture rotation, pigs can be rotated in after goats and cattle to dig up tubers (not sweets), tops can be culled and delivered to livestock as green food a little at a time to avoid serious stunting where climates are less forgiving and then the roots can be harvested, or tops can be removed and fed or added to silage when the tubers are being harvested.

Some of the root veggies are ideal to grow in spring, others in the heat of the year. With yams and sweets on the Southern summer end of the spectrum and swedes and Daikons on the shake-off-frosts end, there’s a livestock augmentation in the root crops for pretty much everything but ducks, horses and turkeys. Even donkeys can chomp into some cooked radishes, yams and sweets along with their hay.

*Ducks can nibble some, but they aren’t really supposed to be grazers; they really need grain seeds and more proteins than root veggies provide.

Apples and Pears as Fodder

Images – Hogs on apples

Images – Hogs on apples


Chickens and hogs have historically been scrap compactors, turning odd ends and wilted produce into nummy bacon and eggs, but, again, evolution means they’re not quite as good as it as they used to be. Look for foraging-capability in breed and lineage descriptions (sometimes in percentages and sometimes a rating system), and try to buy from people who at least partly pasture raise their livestock.
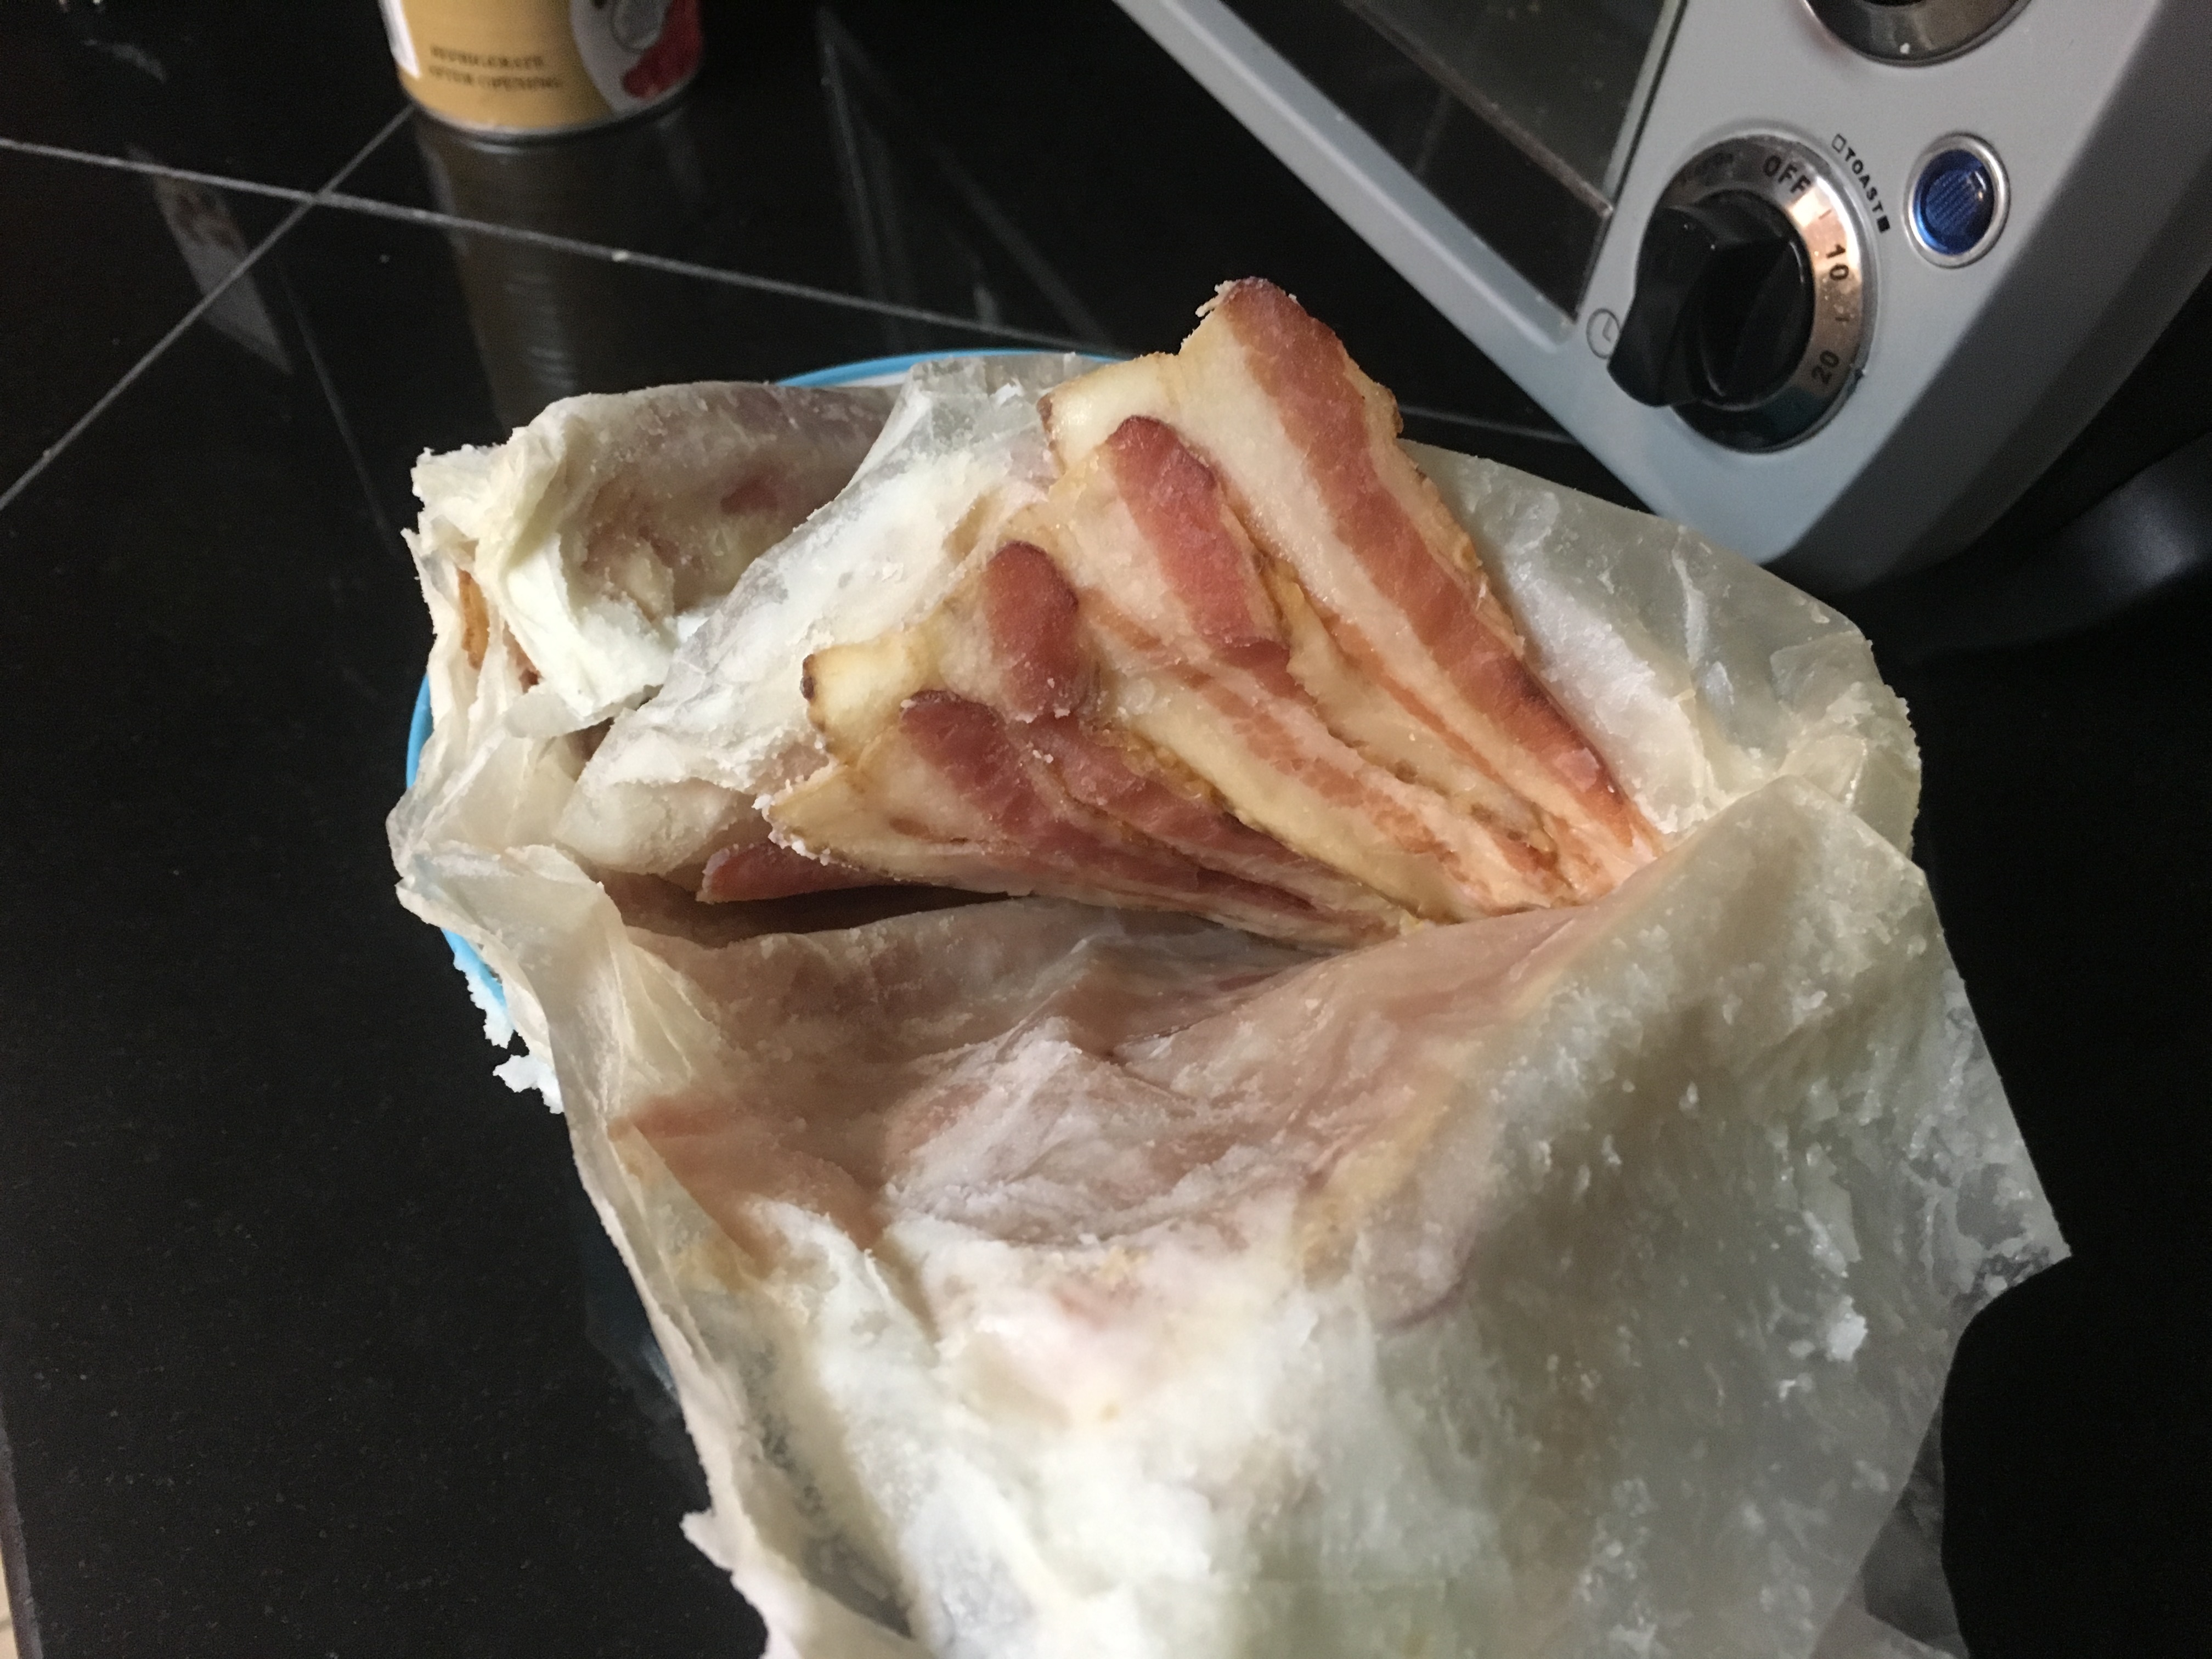
Goats, sheep and cattle will chomp into apples, pears and plums as well as the chickens and pigs that go ga-ga for them, but chickens and hogs can handle a higher amount of sweet fruit in their diet. Chickens can also easily handle crabapples and wild plums. Using even just windfall and wormy fruit from existing trees or planting some storage and needs-to-cure apples to our tree fruit can help increase the amount of nutrients and calories we produce on our property, especially if we’re able to situate chickens and rabbits under the canopy – stacking our food production into an even smaller footprint.

Extra bonus: Most meat stock that is finished on apples, pears or beets ends up with really excellent flavor once it’s in the pot. At least a week, but up to a month with a diet supplement or change in those directions can make a huge difference. They still need access to hays while finishing. In Southern climes where sweet potatoes will grow in abundance between traditional crabapple and wild plum hedges, they can have the same effect on hogs, lambs, kids and chickens, making for some seriously succulent eats.

Growing & Storing Livestock Feed

Another article is in the works looking at alternative livestock feeds, things that go even further out on a limb than turnip-top silage and researching African grains and tubers (like tree hay and tree fodder options, and boosting protein for game birds and young chicks).

Even with more traditional foods and feeds, we can start impacting our livestock costs by looking back at history to see what was used – and how – before we depended on fuels and electricity for delivering kibble. We can learn a great deal especially looking at hard times when farmers and small raisers had to make due with limited feed options, such as in Great Britain during World War II and Cuba during the initial months and years of the oil embargo. Those methods can help us figure out how to cut costs and how to develop a sustainable plan for our modern livestock should we ever need it.

As mentioned, modern livestock – even the heritage breeds to some degree – has half a century or more of the Green Revolution under its belt. They are accustomed to pressed and formed feeds in large part, the condensed calories of grains. Modern livestock is largely built for enormous feed conversion, which may be slowed or delayed with certain types of feed, and in many cases, they won’t have correct gut microflora to immediately switch to something new. Always keep good stock records of production and feed, and always transition feeds slowly for livestock, especially small and young livestock.

One of the hardest cords to cut for homesteaders is dependence on commercial feeds. Our modern livestock – even a lot of the dual-purpose homesteading breeds – are accustomed to

For Preppers, unless you think the government will never be interested in you, reducing what they know about you and yours is a necessity. Perhaps you have switched over to cash to avoid being tracked through credit, debit, gift, phone and customer loyalty cards, but have you stopped to consider how safe is your cash? Maybe you have heard about the possible threat of radio-frequency identification (RFID) chips that are or might someday be embedded in paper money. Don’t worry, the Feds have a potentially much easier way to follow you and your cash. And even if this technology is not as good as RFID, it probably has the potential to provide the government, and hackers, with information you really wish they did not have.

For most of us, the point of origin of our cash is an ATM or bank teller, while some of us use check cashing services. If you get paid by cash, be patient, we will get to that by the end of this article. All that money is counted by machines. It is likely those machines can scan serial numbers to check on the number and denomination of the bills they count or dispense. You can no longer just avoid new bills with consecutive serial numbers; circulated unmarked bills are no longer safe either. So the NSA can know where you were, when, how much, in what denominations and what serial numbers your cash withdrawals are. If they do not know this now, then they will, just as soon as they want to; the technology already exists.

What do you do with your money?

Eventually you have to spend it; otherwise it is useless, unless you like really expensive toilet paper. If you spend it at a business, then they get your $20s. If the cashier will not accept $50s, $100s or cash checks, then they do not give out $20s as change to anyone. Those $20s go to the bank every night. Now the government knows where, what day, and about how much money you spent at that business. Now if you spend it at QuickChek or Wawa, then all they know besides your movements is that your cholesterol is probably going up. They wouldn’t let your health care insurance know, would they? But what if you spend it at a gun store, strip club, drug dealer, gay bar, church donation plate, liquor store, casino or the gas station nearest your survival hideout? How much of your sense of safety would you bet that the administration would not give this information to the ATF, DEA, FBI, IRS, your spouse, your employer or let it leak to social media? Maybe they will hold the information until they need your silence or compliance. Think about this: Are all hacks and data breaches really done by anti-government activists? Maybe some information is intentionally released, or left in insecure places. The government knows when and where you get your cash and knows the day and location that you spend your $20s.

nsa-prism-government-surveillance-humor

What about other denominations? Since people get much of their money in $20s, they do not get most of their $1s, $5s and $10s from banks or check cashing services; they get them as change. Some of that change comes from the float that stores need to make change, but the rest comes from customers. A lot of places find it easier to withdraw a new float each day when they deposit their cash. Now the government knows the point of origin of those smaller bills. The closer to opening time that you buy something, the more likely you are to get a bill from the float. Of course, Uncle Sam cannot be sure the change you receive comes from that store, maybe it got to you through a third-party, but over time a pattern emerges.

It is a lot more likely, especially if you frequent the same store, that the money is yours and not some third party’s. Still, the government does not know who you are, unless you deposit those bills. If Washington D.C. is using face-recognition software through the security cameras at your local 7-Eleven to track you, then you have got bigger problems than having them follow your cash. If you spend money at most stores, unless it is almost closing time, then your small bills go to the next person and you become their third-party. Basically you are pretty safe with small bills, unless you deposit it in a bank or use a credit card with the transaction, such as for the room deposit at a motel.

What if you run a cash business?

If you accept some checks, then your cash revenue is probably close to being equal to your expenses. At least some of your customers do not care about cash security and you cannot tell them you will not take anything bigger than a $10 bill on a $1,000 job. Now you have $20s with your customers name on them. Small businesses like to use cash to pay their suppliers and employees. Those businesses will put your $20s into their bank and now the government knows that your customers’ money just went to one of your suppliers, but they do not know who you are, yet. Even minimum wage employees will deposit part of their pay if they have a bank account. Now the government knows your employees were paid, ultimately, from your customers. If they mine all the meta-data on your customers, employees and suppliers, can the government find you, determine your customer list, know your gross and net revenue, and what taxes you have due? Maybe, maybe not. But, if you deposit even one $20 bill from a customer, the odds they can track you just went way up. Why, because you are one of the few small business owners in the loop.

allseeingbigbrother

Oh, what if you are the customer? The government now knows where you shop and to a certain extent, for what you shop. Building a grow room (so you will be positioned when your state legalizes marijuana)? Building a shelter or secret room? Bulletproofing your hideaway? Getting your car survival-ready? Bought a safe, an attack dog, a hunting bow, ammonium nitrate, acetone & hydrogen peroxide, 10,000+ rounds of ammunition? $20s and larger bills can have the government at your door, either now or when they think the SHTF.

What if you get paid in cash? Much of the above also applies to you. Plus, if you get paid in twenties that originated from several of your employers’ customers and you deposit them in a bank, then the government can quickly tell you are being paid under the table. Now they can blackmail you, or get you to turn state’s witness against your employer. If your bank, like mine, is paying 0.03% interest, why do them the favor of depositing money?

Here is a potentially difficult and inconvenient, but very helpful trick: trade your cash with other people in cash intensive businesses:

  • Taxi drivers
  • Contractors, electricians, roofers, plumbers, etc.
  • Convenience stores
  • Adult entertainment clubs
  • Used car, motorcycle or boat dealers that finance their own sales
  • Liquor stores
  • Restaurants
  • Parking garages
  • Car wash facilities
  • Charitable organizations
  • Jewelers

If they are hesitant to swap cash, you can offer them $1 on every hundred. Obviously, only trade with people you do not mind the government thinking you do business with (i.e. leave out your drug dealer). Also try to trade with as many different people (and not too many preppers) as possible, lest they pick up on a pattern.

Bottom line: Get rid of your $20s ($50s and $100s) at places you do not care if Big Brother knows you shop there. Do not use your small change near closing time or deposit it in a bank. Do not deposit cash in a bank anyway, you will need it soon enough. The last question is not “Am I being paranoid?” the last question is “Am I being paranoid enough?”

For Preppers, unless you think the government will never be interested in you, reducing what they know about you and yours is a necessity. Perhaps you have switched over to

I wanted to address a few common misconceptions that I think some people have with how they plan to address a SHTF event in their lives. There are some that are more dangerous than others granted, but all of these prepping myths give us an opportunity to dissect various topics in the prepping community to better understand the risks and rewards of various approaches. In this article, I want to discuss the myth that some preppers have that if the SHTF they are simply going to don their brand new Bug Out Bags and quietly walk into the national forest. This is the bug out to the woods strategy that I read about often in comments or on forums.

This weekend I was walking with my dog on a new trail we had discovered and as often happens, I began to look around at the trees and water sources and soak in the apparent solitude. I think about how remote we are when we get into the woods and the sounds from roads, picnic areas or nearby neighborhoods falls away and you are left with the feeling that you are in the middle of nowhere. I think about this even though I know full well that I am just a short walk back to the parking lot where myself and dozens of others have pulled in temporarily to enjoy the outdoors and a relatively undisturbed spot of nature that our tax dollars are funding.

I was walking down trails, crossing small creeks and envisioning how someone could think that if a disaster happened how they could run out here and survive for a while at least. I was even thinking this myself for a while, but the idea that many people could survive a SHTF event simply by walking into the woods and making a shelter is foolhardy. If this is your plan, you might want to consider a few things first before you leave it all behind and step into the woods for what could be the last time.

Could other people have the same idea as you?

What do you think you are running to?

As with any conversation on topics common to the prepping community, it helps to set a framework for discussion. For the purposes of this article, we will assume that you and your family must leave your home. This could be for a whole host of reasons, but we will go on the assumption that you are running from a bad situation (riots, war, plague, and zombies) and your hope is to find peace, safety and perhaps a new life hidden in the woods of a nearby forest. This could be a large national forest or simply a few thousand acres in your town that hasn’t been developed.

It sounds logical at first doesn’t it? You have the gear you need in your bug out bag, you have been camping before so living in the woods on its face doesn’t seem like a bad idea. There is no place else to go and if you simply walk into the forest, you can find a place next to a stream or a lake, set up camp and begin hunting for wild game and frying some freshly caught fish. Maybe you even have a location that you have been to before that you know is perfect and you think that you will be safe in this remote space in the woods and that somehow you will be able to avoid whatever it was you were running from.

Now, I will admit that there are people who can walk into the wild and survive, even thrive. The number of people who can do this with only what they carry on their back is a miniscule number though and the people I have witnessed (usually on TV if I’m honest) have a tremendous amount of skills, experience and luck. Is this a group you consider yourself a member of?

Most of us, even the crustiest through-hiker on the Appalachian trail needs supplies to live. Can we go out for brief times and survive? Of course, but if you plan to walk into the forest for the rest of your life with nothing more than some snares you have never used, your trusty .22 rifle , and some dehydrated food I think you need to revisit your strategy.

What are the downsides?

The downsides to this approach are numerous but I think the main two are that most of us do not live in the middle of nowhere. If a societal collapse were to happen, there would be a lot of other people with bug out bags hiking into the woods right along with you. That wild game you are depending on catching just like they do on the survival shows, won’t stand up to an onslaught of weekend warriors with their expensive sleeping pads and high powered rifles. In this scenario, it isn’t like you can walk back to Walmart and get some groceries and go back to your tent in the woods.

Where I live we have a homeless population that disappears every night. I know that in warmer months, a good number of them live in a wooded area between two interstates, but my assumption is that area isn’t the safest place in the world. These homeless people have a stable society they can walk to for shelter or a handout on most days. What if the stable society collapsed and started moving in with them? What if nobody could eat and there were no shelters to go when the temperature gets cold? Maybe you could find a reasonably remote place to stay where you wouldn’t have other people around you, but you would still find the issues of acquiring food a major obstacle.

If that isn’t enough, safety would be a huge consideration in the woods. Your tent offers zero protection from a sharp stick, much less bullets. Additionally, have you tried to live in them for weeks at a time? Even the best tents start breaking down and hand-made shelters would need to be constantly worked on to maintain their weather proofing. If you are surrounded by forest, it will be harder to see people approaching you and it would be easy for them to spy on you from a distance without being seen. If the SHTF and times are desperate, anything you have could become something that unscrupulous people want to take from you. What about if you wanted to leave camp? You couldn’t lock anything up could you so it could easily be stolen while you were away. Leave someone behind and they could be overwhelmed by larger numbers. Would you leave a woman alone in this situation?

Is there a better plan?

I have said numerous times that my first plan is to bug in at almost all costs. Does that mean I will never leave my house regardless of the reason? No, but I would have to be under extreme pressure before I would take my family into the woods. If I was making my way somewhere and only needed to stop in the woods for the night – that would be one thing. I would not plan on packing all our stuff on our backs and hiking into the forest though and expect to survive for very long.

What if you know how to forage off the land and you can eat nuts and berries? That’s great but all the other issues are still there. Other people are going to be with you in the forest, and you can’t defend a tent as well as you can your house. If you believe that your bug out plan is to hike into the National Forest that connects to your property and you haven’t considered some of these points, maybe it’s worth a second thought. I myself will know when it’s time to retreat and run away, but I will be very slow to leave my home and although I love walking, hiking and even backpacking in the woods I don’t think it is a valid plan to try and live there if the grid-goes down. Give me my home and zero electricity or water over the nakedness of the forest any day.

I wanted to address a few common misconceptions that I think some people have with how they plan to address a SHTF event in their lives. There are some that


Preparedness means different things to different people. Some may be comfortable with just an emergency kit in their cars, while others stockpile ammo, food and toilet paper in a secret underground fortified bunker. Prepping will always run the gamut.

My husband and I are somewhat new to the idea of prepping, and have taken only a few measures ourselves at this point in time. But in our many discussions, we decided we don’t just want to survive if the SHTF, we want to thrive—live well, prosper, flourish. It is our goal to position ourselves well for a good life in bad times, especially if life as we now know it in the USA comes crashing down.

Skill building may just be the most important prep of all, but it is not something that everyone immediately considers ahead of stockpiling and other preps. Your skills go with you no matter where you are, for one thing, so you’ll have them if you need to bug out. And the better developed any particular skill is, the more it can be of service to you. A simple illustration of this is shooting a gun; target practice will help you be more accurate if you need to hunt for food or defend yourself.

But skill building is important for more than an emergent situation or immediate crisis. Knowing how to do some of the things we take for granted in this consumer-product-driven society can make daily life better in a protracted survival situation. And certainly, when you have skills, you are better able to put yourself in a position to barter for items you lack; you can trade goods and you can also trade services.

How skill building could help you if SHTF

As a natural part of my personality, I have always liked to learn to do things hands-on. But when I stop to think about it, much of what I have learned from others or taught myself has been driven by having that nagging feeling of uncertainty from time to time which all preppers are familiar with to varying degrees. The more self-sufficient we are, the better, right?

Take gardening. When we were deep in the great recession, I applied for and received a USDA grant to assist with putting up a very large high tunnel greenhouse. I didn’t know it at the time, but I was becoming a prepper. We are self-employed, and the drop in our income was significant during the recession. While we made it through mostly unscathed, at the time I was eager to get the high tunnel to be able to grow more of our own food in case things got worse. The high tunnel allows us to start plants earlier and keep them going later into the fall. In winter survival conditions, we could grow cool weather crops like carrots and salad greens in the high tunnel under floating row covers, which effectively drops the zone we are in from a Wisconsin zone 5 to more like a Georgia zone 7.

We also do traditional summer gardening outdoors, and dabble in hydroponics and straw bale gardening. All of these techniques require very different management for success, and learning them has made us more adaptable and prolific food growers.

I also have learned to keep bees, which helps the garden and gives us wonderful no-expiration barterable products: honey and beeswax. Another shelf-stable item I have learned to make that we could trade is maple syrup we make, thanks to the handful of very large old maple trees planted by my husband’s ancestors. I think the old-timers planted them for more than just shade—they were a small insurance policy against the possibility of tough times.

No easy way out

Is it work to do these things? Yes. I have a garden every year, and it is far from pristinely weeded. I don’t make maple syrup every year and there have been times I’ve been too busy to deal with honey so it sits in the frames and waits for me to process it. I’ve resigned myself to my imperfection and the fact that I can’t clone myself. But knowing I have the skills and equipment on standby is comforting in and of itself.

What do I do with all of the fruits of my labor? Sell some and preserve a lot. Thanks to the “buy local” movement, I sell a several hundred pounds of produce each year to the local grocery store and some of the small farm markets—which is very helpful since there are times everything seems like it is coming in at once! I registered as a farm as part of the grant process for the high tunnel. Since I am selling produce, I can also legitimately deduct some of my farming costs on my taxes, like seeds and seed-starting supplies (always helpful.) Will we get rich doing this? No, but we do save some money, which can be put toward other preps. I think of it this way: I am turning my tomatoes into ammo.

Preserving is kind of therapeutic for me as I imagine other sorts of stockpiling are to other people. Seeing all of the jars lined up with good things in them is satisfying and makes the labor and time spent worthwhile. Not being afraid to experiment with new techniques and recipes has expanded my knowledge, and increased the variety in my pantry. One of the essential components of thriving, in my mind, will be to have variety. It’s not only better for the body in terms of getting enough of the necessary nutrients and calories, but in a prolonged survival situation food takes on a greater psychological value in terms of boosting morale. Imagine living on spaghetti for dinner for thirty days versus having thirty days of spaghetti, beef stew, and navy bean soup. Without variety, you’re surviving but not necessarily thriving.

Speaking of variety, I have a ton of cookbooks, many of which pertain to fermenting and preserving. Although they take up a lot of space, I think they’re important to keep around, especially since our family hasn’t yet taken the step of getting a solar or wind energy system. There’s always the possibility that a smart phone might be useless for looking up ways of pressure canning everything in my freezer that is suddenly thawing due to a catastrophic grid failure. (Keeping a couple of cases of empty jars and lids on hand also takes up space, but could be very useful in such an event.)

The Art of Fermentation: An In-Depth Exploration of Essential Concepts and Processes from around the World

Items most people purchase rather than make that I have learned to produce successfully at home include sourdough bread, handmade pasta, wine and beer (including mead from our honey), wine vinegar, sauerkraut, and mustard. If you think about these products in particular, they are easy to make, and you could get by without refrigerating or canning them. Added to shelf stable items in my pantry (and what’s in the garden depending on the time of year) we will be eating like kings if things go south. Is it necessary as a part of prepping to make all of these things and keep them on hand? I don’t think so. But having some fermentation equipment available for when you need it is not a bad idea (you can ferment so many things as a preservation method) as is keeping things like yeast and flour in good supply.

Another skill I picked up over the years is knitting and crocheting. It was something I was always sort of interested in, and I finally just buckled down to learn it in my thirties. I would consider myself only an intermediate skill level, but I think if I were in a survival situation I could do things like make or repair simple garments or even make something useful in capturing food, such as a net or a rope.

One of the women in my knitting circle was a homesteader who raised meat animals for sale. As her daughter went off to college, she and her husband were short a worker for processing turkeys at Thanksgiving. I offered to help, and she let me, although I think she had her suspicions I would be grossed out. I found it to be a little rough at first, but then a natural rhythm set in and the gross factor dropped away. That experience led me to raising our own chickens, including meat birds. It was great to eat the eggs (and sell a lot of them!) and eat the meat knowing the birds were treated humanely. I now know what to do with a dead animal if we ever need to hunt for food, or if raising our own livestock becomes a necessity. Once again, skill building, even if it is not in your comfort zone, can truly benefit your quality of life in a survival situation. My garden is still benefiting from the chicken manure although we are taking a break from raising birds!

Soap-making is one of my more recent interests, which I am slowly turning into a small body-care business, with lotions and other products. This came about because I bought a beef quarter from the aforementioned farmer to fill my freezer, and the butcher asked me if I wanted the suet when I was telling him what cuts I wanted. At the time I thought I would make suet cakes for the wild birds, but little did I know how much I was going to get! I rendered it, poured it into plastic containers and froze it, and eventually decided to try my hand at soap. It is so much better than store-bought soap, I love the “kitchen chemistry” of it, and it is such fun to unmold it the next day and see how it turned out. In a survival situation, soap is one of those things that could be traded for something you don’t have, given how fast humans get to smelling bad!

Again, we are not “advanced” preppers yet, although we’ve always had some prepper tendencies. I must admit I am not super-skilled in the down and dirty survival stuff. But I have upped my game in two major areas in the last year: firearms and power tools. Those have been my husband’s domain until recently. I took a gun safety course last fall, and I learned to be more comfortable using a number of scary power tools last summer. I discovered in both cases, these potentially dangerous things are not that big of a deal as long as you pay attention and think about what you are about to do.

I would encourage anyone to step outside their comfort zone and at the very least get familiar with firearms. Even if you cannot envision ever using a gun to defend yourself, try to imagine that you could be in a situation someday where you have to pick a gun up and unload it just to neutralize it. Knowing how to check if a gun is loaded, empty it, and be sure it is empty is an important skill to have.

Knowing how to use common tools can make you more of an asset in an emergency or in a prolonged survival situation. If two people instead of one can operate a circular saw, for example, one can be cutting plywood while the stronger person nails the cuts up over the windows. If everyone in the group bugging out has fire-starting skills, one person can get the blaze started while the rest gather enough fuel for the night. Basically, extra working hands, not just helping hands, can make all the difference.

When you consider how this great nation was settled, both men and women had to have a number of skills to be able to build a homestead, make it through a harsh winter, or protect themselves and their property. There was more of a crossover between what was considered “men’s work” or “women’s work.” For example, in our family, my husband’s great uncle was an island lighthouse keeper in the late 19th/early 20th century, and knit all of the socks and mittens for the family.

Back in the day, people knew how to preserve more than just vegetables, and used every part of an animal from “nose to tail” because it served a purpose in daily life or for the future, not because of personal ethics, environmental purposes, et cetera. Prepping was part of life, because in the wilds of America, the S could hit the F on any given day and there would be no neighbors, and no government entity to help you out.

Those with no skills died, those with basic skills survived, and those with lots of different skills thrived. Those that thrived were able to settle the land, build wealth, and have strong, healthy heirs. Although I’m short-cutting the telling of history, our thriving forefathers and mothers passed on their legacies to subsequent generations, and thus America was built into the greatest nation on earth.

Renogy 400 Watt 12 Volt Monocrystalline Solar Starter Kit will help you thrive if the power goes out.

I hesitate to use the word “Darwinian” to describe what I am getting at, but when you think about, it is evident that smart people with well-developed skill-sets who work hard applying their skills do better in life, and in turn they tend to pass on their genetics and knowledge to the next generation. (And here is why government handouts don’t actually help people at the low-end of the economic spectrum lift themselves out of poverty; handouts do not teach them anything they can use, and therefore they don’t learn to improve their own positions and pass that on to their children. But that’s another discussion altogether.)

What are my next skill building preps? One will be spending more time at the firing range getting comfortable with shooting. Also, my fermentation obsession is going to expand very soon into kombucha and lacto-fermented pickles of all sorts, especially since probiotics have been found to be extremely important for a healthy gut, and may help prevent any number of diseases. Good health is important to thriving, after all!

As a fellow prepper, I encourage everyone to pick up new skills or expand upon existing ones, and break out of gender molds. If you’re a man, although it might seem like “women’s work,” you may be surprised at how rewarding it is hearing your sourdough bread’s crust “sing” when you take it from the oven, or at how much your friends appreciate getting your homemade soap (future customers when the SHTF.) If you’re a woman, and power tools frighten you, find someone willing to show you how and try a beginner’s project, like a birdhouse or a Leopold bench. Soon you’ll be amazed to find yourself with the confidence to take care of things on that “honey do list” instead of nagging the old man!

Fair warning to both sexes: you might just get hooked, and new skills could become lifelong hobbies or obsessions. Since you have the prepping gene, it’s highly likely! But if the SHTF, you can rest assured by expanding your base, you and yours will not be living in mere survival mode. You will enjoy a better quality of life and have more creature comforts than your neighbors because you can do things yourself and/or barter to meet your needs—in other words, you’ll thrive!

  Preparedness means different things to different people. Some may be comfortable with just an emergency kit in their cars, while others stockpile ammo, food and toilet paper in a secret

Disasters and emergency situations are a part of our lives. You may not plan on getting lost in the wilderness while heading out on adventure plans, but it can happen to any of us. You may lose your way or get in an accident and end up in the wilderness.

Now, it is all about how you respond to such a situation that plays a significant role in your survival. With the right skills and knowledge, your chances of surviving the emergency situation will be high. Having a positive attitude will greatly increase your chances of finding solutions to problems that can occur in a survival situation. The key is to put your knowledge to use and create your master plan for survival in the wilderness.

While it is nice to have all the tools, food and water along with you, you may lose your basic survival kit and would have to survive the emergency situation with nothing except the tools in our head. No matter how scared and alone you may feel, optimism makes a big difference and impacts your ability to handle the survival situation.

This article is about all the skills you need to learn and remember that can help save your life in any wilderness survival situation. Having a working knowledge of these skills will improve your ability to survive in the wilderness drastically. You may not have any equipment with you, but with the right knowledge of the below-mentioned skill you will still do fine.

This survival guide ensures that you are physically and mentally prepared to face any situation without any tools with you and help yourself at all times. Learning these skills can help you make it through most dangerous survival situations and bring you back home safely.

There are a number of skills but the seven survival skills mentioned below are the most basic ones that you should be mastering first because these are the skills that will help keep you safe for a longer time until you are rescued.

Making Fire

It is important to keep the wind direction and the surrounding area in mind when trying to start a fire.

The first survival skill you must know is how to make a fire. Knowing how to build a fire that burns through the night is crucial. Fire provides you heat, light and smoke keeps you warm and comforts you during the night. You can use it to cook food, purify water, as a signal for help, as a source of light, to see in the dark, make tools and also for keeping critters away. It also creates a sense of security and safety.

When traveling in the wilderness, it is always better to carry a few fire-starting tools like lighter, matches, firesteel, etc.  You could also light a fire with the help of eyeglasses, water bottles, and cell phone batteries. In case you do not have any of these available then fire by friction is the most effective technique that you can use.

There are various other methods of starting a fire with a bow drill, flint, and steel, fire plow, fire saw, hand drill, etc., depending on what resources you find around you. It is important to keep the wind direction and the surrounding area in mind when trying to start a fire. Make the fire away from hanging branches, stumps, logs, dry grass, and leaves as it could turn out to be dangerous.

Finding and Purifying Water

Finding water will be mostly dependent on the surroundings you are in.

The next most important priority is water. Finding and purifying water is of primary concern in a wilderness survival situation. The best sources for drinking water in a wilderness are springs, headwater streams, and morning dew. You can find water by following the sound of a flowing river or grazing animals.

Finding water will be mostly dependent on the surroundings you are in. Large plastic bags can draw water from tree leaves; you can tap a tree to get some water. Dew on the grass is another brilliant source of water; you can collect water by running a piece of cloth through the grass. In the desert area, you can find water by digging up a dry creek bed. Stagnant water is not suitable for drinking even if you boil it.

Once you have found water, purifying it is another task. You can purify water by either boiling or filter it.

If you have a fire then boiling is the best way to purify water. Even if you don’t have a container to put water in, you can heat up some rocks, drop them into the water and let it boil for 2-3 minutes.

For filtering, allow the water to stand till the mud settles to the bottom and then you can use any cloth to strain out remaining silt.

Building Shelter

You can collect materials that could be put together as a rough shelter to help you get through until help reaches you.


You are going to need a shelter at some point until you are rescued. You should at least carry a tarp in your kit, if not a tent. A tarp could be a lifesaver when stuffed with leaves or grass as a barrier from the wind, snow or rain. In case you lose your bag, you can build your shelter as long as you can collect materials that could be put together as a rough shelter to help you get through until help reaches you.

Being able to build a shelter is vital in a wilderness survival situation. You need to consider the location before planning to build a shelter. A good survival shelter must block all the outside elements and protect you from the ground, freezing temperatures, heat, winds that insulate cold or heat, snow, driving sleet and rains.

There are various kinds of natural shelters to consider such as caves, hollow stumps, and logs. You can also build shelters such as a debris hut, lean-to, scout pit, snow shelter, etc., The type of shelter depends on the supplies available to you. The debris hut is the most practical and easiest to construct in almost any environment.

Finding Food

If you do not have any food with you, you will have to find something to eat


Food might not top the survival essentials list, but it is equally important as you will start to lose strength if you do not eat for a long time.  It is wise to keep a small container of olive oil as it is packed with a huge amount of calories and can be used for other things as well. But if you do not have any food with you, you will have to find something to eat. Fishes, small animals, plants, and berries are some options that you can look for in the wilderness.

Most of the natural environments are filled with all these and various other foods. If you are around a lake or a river, fishing could be the best option in any survival situation. Hunting small animals with snare traps could also be considered if placed at the right spot.

Plants are another natural and best options that can satisfy your hunger during survival. But it is very important to identify any plant you plan to consume. Do not eat unless you are not sure about the plant as many plants can be poisonous. The best and readily available options are acorns from Oak tree, nut and inner bark from Pine tree, stalk, root and tuber from the Cattail of the grass.

Paracord Use and Paracord Knots

There are extensive uses of this survival tool like building shelter, making fire bow, snares, fishing lines, and stringer, securing an animal, building raft, ladder, etc.

Paracord is a very important survival tool that should always be kept handy. It is made of nylon, and it gives incredible strength and durability that can accomplish a variety of tasks. It is made in a braided form and can hold up to 550 pounds of weight. It is quick drying and resistant to rotting.

Paracord could be used in almost any wilderness survival situation. Paracord can be used intact, or the inner strands of it can also be separated and used for any work. There are extensive uses of this survival tool like building shelter, making fire bow, snares, fishing lines, and stringer, securing an animal, building raft, ladder, etc.

There are some cool Paracord projects that you can try yourself.

Paracord also has many uses in first aid and can be used as a signaling tool as well. All these abilities make paracord a powerful weapon.

Paracord Knot tying is another essential skill in survival techniques. It is a fast & easy way to make a quick safety harness. There is a kind of knot for every survival situation. There are numerous ways of tying paracord knots but taut-line hitch, figure eight knot, square knot, clove hitch and bowline are the most important and widely used paracord knots in any survival situation.

Self Defense

Self-defense is another very important skill in any wilderness survival situations. It is always recommended to carry a few tools or some weapon with you like a knife or pocket saw or any other sharp object that you can protect yourself with. If you do not have any of these, then you can probably make a weapon with the resources and materials available to you. You can find many potential weapons in the wilderness.

Self-defense weapons could be anything like a sharpened stick, branch, or a club or bow and arrow or an axe or simply a piece of rock. You can make a war club or an axe by using a sharp rock and a branch of the tree. All these could be a defensive weapon even in the most untrained hands in survival situations.

If you are at risk from any animal, do not panic or run away from it. It is better to face the animal and get away from it slowly. Throw anything that you can find at it. In case the animal attacks you, try to block its mouth with your non-dominant hand and smash its snout or directly hit it in the eye. Once the animal is temporarily disabled, run to find something that you can hide in. Arm yourself with any sharpened object that you can attack the animal with.

Learn to Communicate

Survival is your priority, but you also need to be rescued. One of the skills required in any survival situation to be rescued is to communicate. Communication is the key, and proper signaling plays an important role. Signaling is drawing attention. The rescuer must be able to recognize your signals and so you need to know effective communication skills.

Considering some wilderness places might not have cell coverage, you can use the following ways to communicate.

  • Construct unnatural objects that do not sync with the surrounding area and are easily noticeable. Use colors, materials, and shapes that can draw the rescuer’s attention.
  • A mirror can be used to reflect during the day. Aluminum foil, watches, silver parts on credit cards or anything shiny can also be used.
  • At night flares, torch and flashlights work best.
  • You can build a signal fire at a certain height in an open space and keep it ready to be lit instantly as you notice any plane or a helicopter.
  • A wave is considered as a signal to not land. Instead, form your arms in a “Y” shape indicating that you need help.
  • Wave your arms or a t-shirt attached to a branch of a tree vigorously; your movement will be noticeable.
  • Radio is surest and fastest way of communication. Learn how to operate and be familiar with the radios in your unit.
  • Whistles are another sure communicating tool that can be heard from far away. Always try to carry a whistle with you or learn how to whistle.
  • If you’re moving, it is better to leave some things behind as a signal at prominent clearings.

By maintaining a positive attitude and with the help of the above survival techniques you can not only successfully survive any wilderness situation but also you can get yourself out safely. For any situation Prepare, Adapt and overcome is the key to succeeding.

Disasters and emergency situations are a part of our lives. You may not plan on getting lost in the wilderness while heading out on adventure plans, but it can happen

I recall reading somewhere that we don’t actually measure life in hours, minutes, seconds or years, but rather in a coffee spoon. I have to agree with this one – if I did that right, I would say that my age would be around two cargo containers filled to the brim with coffee.

Anyway, today’s topic won’t revolve around coffee, per se, but the coffee ground. Yup that icky stuff that usually ends clogging the kitchen sink has many uses. So, without prolonging your agony too much, here are 9 ingenious ways to reuse coffee grounds.

Pots and pans detail

The only thing worse than burning your food is having to scrape that pot or pan afterward. It’s frustrating because no matter how hard you scrub, that scorch mark will still cling to your cookware. When everything else fails, use coffee grounds. Even though that stuff’s been drenched in hot water, it’s still quite abrasive – good news for you, bad news for whatever dirt’s left on the pot. I personally prefer giving the skillets a through coffee grounds scrub every now and then. That’s the reason why I keep a box of that stuff next to the kitchen sink.

Creating awesome marinades

Cooking’s great because it allows you to experiment with various ingredients combos. Take marinades, for instance. Each marinade consists of 5 basic ingredients: oil, salt, pepper, water, and spice mix. However, this doesn’t have to stop us from trying other things. Some use scented oils, veggie mix, Worcestershire sauce, Tabasco, and whatnots. I personally prefer to use coffee ground. Apart from the fact that it makes the meat literally melt in your mouth (try this the next time you’ll be cooking pulled pork) it also gives it a smoky, earth-like aroma and aftertaste. Not to mention the fact that it’s a great way to recycle coffee ground which in 99.9 percent of cases would end up in the trash.

Giving plants a run for their money

Many people have asked me what type of chemical I use around the garden. Well, I don’t use that stuff because I don’t want to end up with supermarket tomatoes. I usually make my own compost from coffee grounds, wilted veggies, and dung. Plants simply love it. Sure, you need to wear a hazard mask to walk around the compost pile, but nothing beat a tasty and nutritious veggie dinner.

No more ice-skating

If you’re having trouble figuring out a way to remove the ice from your driveway with destroying the driveway in the process, try with coffee grounds. That stuff provides great traction while melting the ice.

Getting rid of dead skin and acne

Acne’s always an issue, regardless if you’re 14 or 44. Don’t waste your money on expensive skin creams when there’s a cheaper alternative – using fresh coffee grounds. After grounds cool down, stick them inside a food processor and give them a couple of spins. Use this fine powder to scrub your face and other parts of the body.

No more ants in the pants (or food basket)

Summer’s just around the bend, and we all know what this means – quite family picnics, hiking, and drives. If you don’t want to see any ants or other pests crawling all over your food, sprinkle some coffee grounds the picnic area. They hate them. Apparently, according to researchers, caffeine, the very same substance that gives us a kick in the morning, disrupts their central nervous systems, making the critters feel mightily uncomfortable.

Getting rid of nasty fridge smells

I know that no one’s in the mood to take everything out of the fridge and scrub that thing clean at the end of the week. Obviously, if you postpone this for too long, you’re going to end with a smelly fridge. Now, if you’re not a clean freak, you may be able to get rid of fouls smells from the fridge by putting some coffee ground on a plate or small bowl. Place it inside the fridge, and that’s it. You can also use the same stuff as an air freshener. FIY, coffee grounds are very effective at removing tobacco smell from the room.

Grow your own shrooms

No, not those kinds of mushrooms, because they’re illegal. I was thinking more on the lines of champignons, the same shrooms you find in every supermarket. It’s super easy to do it. Take a plastic bucket and fill it with some earth. Add a handful of compost and mix with a trowel or hands. At your local supermarket, take a look around the gardening section for shroom seeds. They’re very cheap (around $1 per package). Empty the pack’s content in the bucket, water, and place in a dark room with a loss of moisture. I personally keep my bucket shrooms in the basement. After a couple of weeks, you’ll be able to harvest and use them for cooking your favorite meals.

Keeping mold away from your linen closet

Nothing beats opening your closet and taking a whiff of those freshly-ironed bedsheets. Well, you wouldn’t feel that way if your nose was to be assaulted by a rancid smell. That’s the trouble with keeping linen for far too long under lock and key – they tend to smell of mold. However, there’s a quick to prevent that from happening, and it doesn’t involve washing, ironing or buying pricey closet fresheners.

Fill a small satchel with coffee grounds and place it between the bedsheets. The coffee grounds will remove any mold from the closet and make your linen smell as if they were just taken out of the washing machine. You can also do the same for your wardrobe and drawers where you keep stuff like underwear and socks. These coffee ground sacks will also keep moths and other critters away from your clothes.

Well, that’s about it on how to reuse coffee grounds around the house. What’s your take on this? Hit the comments section and let me know.

Yup that icky stuff that usually ends clogging the kitchen sink has many uses.


First off, properly splinting any part of the body requires careful attention to details, knowledge, and practice. We strongly recommend only qualified medical personnel perform splinting (or any advanced medical treatment for that matter). However, due to any number of unknown factors, qualified medical attention may not be available. With that disclaimer out of the way, let’s get started.

General rules regarding splinting of an injury

If you suspect a broken bone, dislocation, or sprain, the suspected area should be splinted and possibly immobilized.

Splinting is not a permanent treatment of an injury, although it does reduce the chance of further escalating the injury.

How does a Splint Work?

A splint consists of a rigid material accompanied by the use of adhesives or tying material to hold the rigid material in place. This prevents the targeted area from movement, which reduces the possibility of future injury. The rigid material should be placed from one side of the injury to the other and secured on the ends. Once secured, the entire affected area is commonly wrapped to ensure a secure hold. Be sure however to not block circulation by over-tightening the splint.

How is a Splint Made?

Splints can be quickly made from a wide variety of basic materials. Common splint materials can include: sticks/branches, layers of newspaper or cardboard, cut up pieces of a foam sleeping pad, thin strips of metal, etc. Basically, anything straight and rigid can be used as a splint.

For digits, a couple of standard Popsicle sticks, (or any similar object) wrapped with tape usually does the trick.

Splinting Fingers

Fingers and thumbs are commonly splinted body parts, as we tend to unfortunately put our hands where they don’t belong. For digits, a couple of standard Popsicle sticks, (or any similar object) wrapped with tape usually does the trick. Before splinting, carefully straighten the digit and first treat any surface wounds. If you know a digit is dislocated, it should be set back into place before being splinted. Once the digit is stabilized, cooling it with ice will help to reduce any swelling.

Select a straight, rigid, relatively flat object such as a ruler, paint mixer, layers of cardboard, sticks, etc to use as a splint.

Splinting Wrists

Wrists are incredibly complex body parts and can suffer a wide variety of injuries. Without proper medical attention, it can be difficult for the average Joe to identify the specific injury suffered and exactly how to treat it. If you or a partner suffers a wrist injury however, something still needs to be done about it until it can be properly treated.

With any wrist injury, first carefully clean any surface wounds in order to prevent infection. Select a cylindrical object roughly 3 to 4 inches long and 1 to 1 ½ inches in diameter (depending on hand size). This is placed in the hand, adding stability to comfort the victim. Select a straight, rigid, relatively flat object such as a ruler, paint mixer, layers of cardboard, sticks, etc to use as a splint.

Place the splint over top the round object so it’s touching the fingers on the inside of the hand. Carefully tape around the split and forearm. Encircle the top of the hand and splint. Depending on the injury, the thumb can be left free or splinted along with the wrist. Cool the area with ice if possible to reduce any swelling.

Splinting Arms

If the injury is a forearm, it should be splinted with a straight, rigid object, secured above and below the injury using the same process as the wrist above. If unsure of the exact location and extent of the injury, err on the side of caution and splint the entire forearm, including the wrist.

Use any piece of cloth and fold it into a triangle. Carefully bend the uninjured forearm to a 90° angle, placing the elbow snugly into the folded part of the cloth.

All other arm injuries should generally be splinted with a sling in front of the body. Use any piece of cloth and fold it into a triangle. Carefully bend the uninjured forearm to a 90° angle, placing the elbow snugly into the folded part of the cloth. Tie the sling between the shoulder and wrist. Lastly, tie another piece of cloth around the victim’s waist and sling, immobilizing the arm against the side of her/her body. In the picture to the left, we used a ½ torn up shirt we had lying around that we had previously used to make some char cloth.

Splinting Legs

Lower leg and ankle injuries should generally be immobilized together with the foot placed in a neutral (standing) position. To do this, use long, rigid objects such as branches/sticks, pieces of metal, foam from a sleeping pad, etc. These should be run along both sides of the leg between the knee and bottom of the foot. Secure the splint above and below the affected area. Take care when securing around the ankle, by wrapping underneath the foot to the side of each splint. When finished, the foot should be immobilized from the knee down. Once splinted, weight should not be put on the leg, as this can lead to further injury.

Upper leg injuries are far less common and typically cannot be treated solely in the field or at home. In order to avoid further damage, a splint should be placed on both sides of the leg between the hip and knee. Carefully secure it above and below the injury, wrapping the entire splint. Cooling the area afterward will help to reduce pain and swelling. This type of injury can be very serious, and professional medical treatment should be sought as soon as possible. Meanwhile, the individual should not put any weight on the leg, instead using crutches.

Takeaway

Once again, with any potentially serious injury, we highly recommend seeking professional treatment.

When assembling your bug out bag, or any preparedness kit for that matter, having the right tools for the job is essential. Rather than hunting down the right stick for an injury, we urge you to consider adding a SAM splint to your kit. These universal splints are inexpensive, compact, incredibly lightweight and completely mold-able to fit nearly any injury. They can be used repeatedly, offering a lifetime of various uses.


  First off, properly splinting any part of the body requires careful attention to details, knowledge, and practice. We strongly recommend only qualified medical personnel perform splinting (or any advanced medical

As a prepper you’ve thought about the necessities for survival, but have you thought about your comfort? Imagine a long-term situation where you have food and water, but survival is a constant struggle. Will lack of sleep and uncomfortable surroundings take a toll on you over time? You might be sleep-deprived because of a need to stand guard against those who would do you harm, or simply because you’re not able to maintain a comfortable living environment. The inability to keep food from spoiling might result in a constant need to find food, robbing you of opportunities to rest. And, in harsh conditions, can you keep yourself clean and healthy? You may have considered bugging out, but you know that your home has most of what you need to survive, even if you’re not a serious prepper.

To get straight to the point; a reliable, sustainable, and ample alternative supply of electricity can solve the problems mentioned above and allow you the potential of living comfortably when the SHTF. A security system may include cameras, motion sensors, and trip wires to set off alarms. A surveillance system can keep an eye on your garden and animals in addition to your home, and alert you to an intrusion. Devices and systems relieve you of the need to stand guard.

An alternative source of electricity adds to your comfort by allowing you to cook meals indoors, and boil water, making it safe for drinking. You can use propane, wood, or charcoal for cooking if you have an ample supply of those, or you could use a solar oven, but nothing is as convenient as using electricity for indoor cooking.

The ability to preserve food means that you won’t have to hunt, harvest, and process food daily, providing opportunities for rest. With ample rest you’ll feel and perform better. A reliable supply of electricity allows you to use a refrigerator and freezer for food preservation. You may also need refrigeration to keep medicine from spoiling.

The biggest challenges, that is to say devices that use the most electricity, are air conditioning and heating equipment. The system described here is not large enough to handle whole-house heating and cooling systems. If you have a fireplace, you probably consider that as your source of alternative heat. If not, you may consider a wood- or pellet-burning stove. Each option has its advantages and disadvantages. If you rely on fuel such as propane or kerosene, do you have enough for a long-term situation? How much can you store safely, and how long will it last? Will you be able to replenish your supply when it runs low? Weigh your decision carefully, implement it, and then stock up on wood, pellets, or fuel. I chose to install a pellet stove. It can run up to 12 hours unattended and maintains a relatively constant output. I can safely store enough pellets to get me through the winter, and left-overs can be used the following winter. Most importantly, I’ll get a good night’s sleep, and I won’t be inhaling dangerous fumes.

Kill A Watt Electricity Usage Monitor

You’ll also need electricity for communication devices, computers and tablets, TV, and Radio. Be sure to keep energy-efficiency in mind when shopping for any of these items. Energy-Star tags are helpful, but I’d rather measure energy use myself using a Kill-A-Watt meter. A Kill-A-Watt meter is a low-cost device that measures energy use over time (kilowatt-hours). You can find it at Wal-Mart or on Ebay.

Emergencies can occur at any time, in the middle of the night for example, and may include broken glass and structural damage to your home. The importance of good lighting cannot be overemphasized. You certainly don’t want to complicate an emergency situation with an injury.

Right-Sizing the Solar Electric System and Trade-Offs

If you want the same level of comfort as you had with grid-supplied electricity, you’ll pay a high price. To avoid the high cost, I’ll describe a system that will result in comfortable living, but there will be trade-offs. The system I’m outlining here can best be described as a mid-sized off-grid solar electric system. It’s not connected to your house wiring, so you’ll need extension cords, power strips, and light fixtures. I keep all of these items in a plastic container, so I won’t be fumbling around for them when grid power fails. I think you’ll agree that this modest system offers good trade-offs where comfort and cost are concerned. Don’t be fooled by pre-packaged systems that won’t actually meet your needs.

Home Heating

I’ve already listed alternatives to your existing whole-house system. In exceptionally cold weather you may want to use an electric blanket, and limit heating to one or two rooms. Table top and window fans are the most energy-efficient way to move heated or cool air.

Heating Water

As a substitute for your water heater, heating water over a fireplace or on a wood stove are good options. Since you won’t be using a fireplace or a wood stove when the weather is warm, you can heat water with one or more of your kitchen appliances, but the best option for heating water involves using the sun.

Harnessing the heat of the sun for water.

I’ve installed a PVC tubing grid in the attic portion of my storage shed for heating water. Mine is not the most efficient system, but I wanted a solution that would be out of sight and maintenance free. I use a hose to force water through the system when city water is available, but I can also use an electric pump. A fifty-gallon plastic barrel and a couple of hoses round out the system. Either way I can have a warm shower just about any afternoon or evening, using little or no electricity.

Other Decisions and Trade-Offs

I’ll begin by establishing some basic needs that will apply to many people, and then I’ll provide design details for a system large enough to meet those needs. Finally, I’ll discuss the cost, and some design options. I’ll assume that you’ve already ruled out a generator. You know that choosing a generator means that you’ll have to purchase, transport, and store a lot of fuel. What happens when the fuel runs out? Will noise from the generator attract unwanted attention, or mask the sound of approaching intruders? Instead, this is about a quiet and sustainable solution. You may only need to darken your windows to hide the fact that you’re living comfortably.

Honda EU2000I 2000 Watt Super Quiet Inverter Generator

Prerequisites

To keep the size, and therefore the cost, of a solar electric system down, there are a few things you can do. Often, adding insulation to an existing home can reduce the need for heating and cooling. Lights to be used with the system should be energy-efficient CFL or LED types. If your washing machine and other appliances are old, replace them with energy-efficient ones. Use a hotplate or microwave oven, instead of your gas or electric stove.

Identifying Your Needs

Once you’ve listed the devices you want to use, and estimated how long each device will run each day, you can calculate the total energy you’ll need by simple math. For example; a fan rated at 35 watts, running for 3 hours each day, will need 3 times 35, or 105 watt-hours each day. Likewise, a 10 watt lamp, running for 6 hours each day, would need 10 times 6, or 60 watt-hours each day. Adding the daily requirements of both equals a total need of 165 watt-hours per day. The following chart is an example of total daily energy use, where energy availability is limited. It assumes cold-weather conditions, where circulating warm air, or powering a pellet-stove in my case, is the largest single energy requirement.

4 10 watt LED bulbs 4 hrs each 160 wh per day
1 40 watt Laptop Computer 2 hrs 80 wh per day
1 120 watt Blower Motor (stove) 12 hrs 1440 wh per day
1 105 watt (intermittent) Chest Freezer 6 hrs 630 wh per day
1 80 watt Television 2 hrs 160 wh per day
1 30 watt Modem 2 hrs 60 wh per day
1 6 watt Clock Radio 24 hrs 144 wh per day
1 26 watt Cell Phone Charger 1 hr 26 wh per day
1 1000 watt Hot Plate 0.75 hr 750 wh per day
1 900 watt Toaster 0.10 hours 90 wh per day
1 1000 watt Microwave Oven 0.15 hours 150 wh per day

During periods of warm weather, when the stove is not used, my daily average load is greatly reduced. When the stove is used less, I can use devices not listed here, such as a vacuum cleaner and washing machine, and still not exceed the capacity of the system.

Determining the daily energy use of the Chest Freezer is a little tricky because its compressor runs intermittently. This is where a Kill-A-Watt meter comes in handy. Simply connect the Kill-A-Watt meter to the chest freezer and take note of how much energy it uses (in kilowatt-hours) over a 24 hour period. You can do the same for other devices that use electricity intermittently. (One kilowatt-hour equals one thousand watt-hours).

Tip: In a situation where keeping energy use to a minimum is important, move your chest freezer or refrigerator to the coolest part of your home. The compressor will run less, cutting energy use.

Renogy 400 Watt 12 Volt Monocrystalline Solar Starter Kit

Tip: When you have a choice, use energy during the day and limit night-time use. During the day, when the sun is shining, energy travels from the solar panels to the load. Nighttime energy comes from the batteries, and therefore is subject to charging and discharging losses and battery inefficiencies. Cooking, pumping water, and washing clothes are examples of tasks that can be relegated to daytime hours. Do this, and you’ll help to offset the negative effect of cloudy days and system losses.

Selecting the System Components

In the example above, the total energy used each day (the sum of the energy used by each device), is 3690 watt-hours. To determine how many solar panels you need, divide the need by the total hours of peak sunlight, in this case it’s 3690 by 4 ½, or 820 watts of solar panel capacity. Solar panels come in different sizes. Seven 120 watt solar panels will provide a little more power than you need, (840 watt-hours per day), while five 160 watt solar panels will provide a little less (800 watt-hours per day).

GM Deep Cycle 12v 125ah SLA rechargeable Battery for Use with Pv Solar Panels

Next, calculate the size of the battery bank you’ll need. Since batteries are rated in amp-hours, convert amp-hours to watt-hours. As an example: For a 12 volt deep discharge battery rated at 100 amp hours, calculate watt-hours by multiplying volts times amps. In this example, that single battery can theoretically supply 1200 watt hours. However, to avoid damage and maintain high life expectancy of the battery, you should not discharge the battery below 50%. This leaves you with 600 usable watt-hours for a fully charged battery. Because of battery inefficiencies, plan on the actual usable energy to be at least 10% less, or 540 usable watt-hours. Since you need a total capacity of 3690 watt-hours, you’ll need 7 batteries (7 times 540 ), to provide 3780 watt-hours of storage.

In the event that the cost of a system large enough to meet your needs is prohibitive, you may opt to cut back a bit on energy usage. There are many ways to do that. Preparing meals in a microwave oven, instead of on a hot plate, is one way:

Using a 1000 watt microwave oven for 15 minutes results in an energy use of 250 watt-hours.

Using a 1000 watt hot plate for 45 minutes results in an energy use of 750 watt-hours.

Read More: Cooking when the Grid goes Down

A slow-cooker (crock-pot) might seem like an energy-efficient choice, but remember, using a small amount of electricity over a long period of time is the energy-equivalent of using a large amount of electricity over a short period of time. A slow cooker might be a good option when something needs to be simmered for an hour or two.

The chart lists a small chest freezer, and no upright refrigerator/freezer. Upright refrigerator/freezers are inefficient because the cold literally “falls out” each time the door is opened. A chest freezer is much more efficient, and a 6 cubic foot chest freezer uses much less electricity than a 12 cubic foot chest freezer. A chest freezer not only keeps frozen food frozen, it makes ice for use in an ice chest for items that need to be kept cold, but not frozen.

How Much Will it Cost?

I’ll assume that you’re doing all of the work yourself, and will not include labor costs.

Once you’ve calculated your needs, you may choose to build larger or smaller than the system described here. Adding solar panels helps to improve system performance by increasing charging power, and adding batteries helps to improve performance by increasing the storage capacity. If you want to maintain a system output in excess of 3690 watt-hours each day, consider adding at least one more solar panel and two more batteries. Anticipate extended periods of cloud cover.

The per-watt cost for solar panels is currently between one and two dollars. Therefore, 820 watts of solar panel capacity will cost between $820 and $1,640. Shop around for the best price. Sometimes you’ll find sales or special deals.

Having explored various battery types and compared costs, I’ve determined that the best value when considering cost vs storage capacity to be GC-2 deep-discharge batteries. GC-2 batteries are rated at six volts, so you’ll need a series-parallel wiring arrangement. It’s easy to do. For the system described here, you’ll need at least 6 of the GC-2 batteries for a total watt-hour storage capacity of just over 3700. GC stands for “Golf Cart”. These are available under several different brand names and at many stores, including SAMs Club. You’ll pay about $100 per battery, for a total cost of $600.

Consider 8 batteries if your budget will allow it. Although you can get by with 6 batteries, making your battery bank larger than your calculated need offers three advantages. 1. A larger battery bank helps to compensate for extended periods of cloud cover. 2. The load on the battery bank will be distributed over more batteries, resulting in an efficiency boost. 3. Distributing the load across more batteries will extend the life of the battery bank.

The next component is a charge controller. A charge controller uses power from the solar panels to safely and efficiently charge the batteries, and prevents overcharging. A charge controller helps to extend the life of the batteries.

Top of the line charge controllers have advanced features which can, in some cases, dramatically improve system performance. However, these features come at a high price, and not all advanced features are beneficial to a system such as the one described here. For now we’ll consider a reasonably priced, but good, charge controller.

Renogy Tracer 4210 40 Amp MPPT Charge Controller, 12/24V 100VDC Input

The charge controller you’ll need will be one that can handle the maximum current that your solar panel array can produce. For the system we’re describing here, a 60 amp charge controller will do the job, and leave room for expansion. While it’s not your only option, a Morningstar Tri-Star 60 will do nicely. I highly recommend the remote meter option, and the battery temperature option. The cost for the controller, with options, is about $350.

So far, I’ve listed all of the major components for a 12 volt DC system, but you’ll probably want to add an inverter. An inverter converts 12 volts DC (your battery bank voltage), to 120 volts AC. In making your decision, you should understand the pros and cons of two basic types, MSW, (Modified Sine Wave), and PSW (Pure Sine Wave). PSW inverters can safely power sensitive devices, but are much more costly than MSW inverters. A TV or Radio can be powered with a MSW Inverter, but you’ll probably hear an annoying buzz in the sound, and the picture may have streaks. Motors may run at the wrong speed, or overheat when using a MSW inverter. Inverters are rated by how much AC power they can provide. If you opt for a 600 watt inverter, you won’t be able to use a toaster, microwave oven, or any other device that requires more than 600 watts. If you want to watch TV, use some lights, and power a chest freezer at the same time, the total power (the sum of the individual power requirements), cannot exceed the capacity of the inverter.

My preference is an inverter that doesn’t harm sensitive devices, has enough power to handle most high-power devices, and can power most of my devices simultaneously. An Exeltech 1100 watt PSW Inverter can handle just about any load I’ll connect to it, but not all at the same time. For example; if I decide to use my 1000 watt microwave oven, I can’t use my 900 watt toaster at the same time. The total would be 1900 watts, exceeding the capacity of the inverter by 800 watts. My choice was to accept that inconvenience, rather than to pay an additional $1100 for a more powerful inverter. The cost of the Exeltech inverter is about $575, which is about $1100 cheaper than a good quality 2000 watt PSW Inverter. I’m aware of lower-cost PSW inverters, but I’m not sure if they match the quality, performance, and reliability of Exeltech products.

Tip: Some electric motors have a high starting current requirement. If the inverter you purchase can’t provide that initial starting surge, the device will not run.

Mounting the Solar Panels, Wiring, and other Considerations

Solar panel mounting can be as simple as bolting them to a south-facing roof for less than $50, or more complicated if you intend to build a mounting framework. Your creativity can help to keep the cost low.

Wire, wiring hardware, fuses, and a lightning protection device round out the requirements for a complete system. Because of the high current flow, battery wiring is the heaviest (thickest), wire. The wire you’ll use between the solar panels and the charge controller should be able to handle the maximum output current from your solar panels, and should be rated for outdoor use. Your local hardware store should have what you need. Since it’s a 12 volt system as far as the panels and batteries are concerned, I opted for low-cost automotive fuses and in-line fuse holders. I used heavy-duty terminal blocks, the kind you find in circuit breaker boxes, to tie the wiring together. You’ll need battery terminals or lugs, tie-wraps, tape, and other hardware. The cost of the wiring depends upon how far the solar panels are from the controller, but you may get everything you need for less than $300.

The total cost of your system, not including labor, should be in the neighborhood of $3000. You may choose to build with fewer panels and fewer batteries and add to the system at a later time. If you start small, buy a charge controller large enough to handle a bigger system so you don’t have to replace it when you expand. For less than $1000 you could build a system that can provide power for lights, TV, radio, fan, computer, and other small devices, but with limited use of course. For a little bit more than that you could power a small chest-freezer or refrigerator, in addition to those other devices.

The total cost may seem expensive compared to the cost of a generator, but don’t forget it’s sustainable and there are no operational costs. Assuming no physical damage or vandalism, solar panels will last 25 years. The batteries, with good care, can last in excess of 5 years. A properly constructed system will be almost maintenance-free.

Become an expert (or at least knowledgeable)

If you think a system like this is right for you, start by learning all you can, especially about batteries. Batteries are the most expensive component when you consider that they’ll need to be replaced more than once for the life of your system. Most importantly, know when to shut down your system to prevent over-discharge. Learn about battery types, paying special attention to those that last longer, but at a higher cost. Compare inverters and read reviews on them. Purchase reliable components, because you can’t afford a failure when the SHTF.

When you’ve built your system, test the heck out of it. This is where the Charge Controller’s remote meter comes in handy. Simulate grid power failures and see how long your system can power the loads. Upgrade if you’re not satisfied with the run-time.

Tip: As a capacity test I’ve connected two light bulbs, one 60-watt and one 100-watt bulb. A load of 160 watts over a 24 hour period equals a daily load of 3840 watt-hours. I’ve connected a Kill-A-Watt meter to the inverter’s output to keep track of the power that the system delivers. In bright sunlight the solar panels provide enough power to charge the batteries and power the load simultaneously. However, batteries charge more quickly if no additional loads are present. I record test results each time, which helps me determine when my batteries need to be replaced.

Failure Considerations

Perhaps the biggest threats to your system are lightning, and EMP events. You will, no doubt, use a lightning protection device, but it may not save your system in the event of a direct hit. An EMP event would have to be close and strong, to do any damage. In either case, it’s not likely that the solar panels and batteries would be damaged. The most vulnerable component is the charge controller. Here’s the good news: In the event that a replacement charge controller is not readily available, you can connect the solar panels directly to the battery bank. You’ll have to monitor the battery voltage, disconnecting the solar panels (charging source), when the batteries are fully charged. It’s inconvenient, but at least you won’t be without electricity. You shouldn’t have to worry about disconnecting the loads when the battery SOC falls below 50%, because most inverters will automatically disconnect at that point. You might also consider a low-cost MSW inverter as a back-up for your primary inverter.

Bartering

Assuming that you have an ample supply of electricity, you might consider charging batteries for your neighbors. I’m assuming a SHTF situation where those around you are also trying to live comfortably. A fully-charged automotive or deep-discharge battery might be used for lighting, to power a TV or radio, a fan, tablet computer, etc.

Taking it to the next level

If you build the system described here and then wait for a SHTF situation, you’re wasting a great resource. Why not use the system every day, and cut your electric bill? I’ve added two components to the system described here and accomplished just that.

I use an IOTA Automatic Transfer Switch to select either grid-supplied power or inverter-supplied power to run my refrigerator. When my batteries are above 50% SOC (state of charge), the refrigerator gets power from the batteries, via the inverter. When the battery SOC drops below 50%, the refrigerator is powered by the grid. I use a Morningstar Relay Driver to monitor battery voltage, and switch the inverter on or off. I can fine-tune the upper and lower thresholds as I see fit. When the transfer switch senses the loss of power (because the inverter is switched off), it automatically switches to grid power for the refrigerator. The Relay Driver is programmed to not turn on the inverter again until the batteries are once again fully charged. This happens automatically. It’s a wondrous thing to observe.

Should you decide to build the system I’ve described, or something like it, you’ll probably have many questions. The Wholesale Solar website has a wealth of information for solar do-it-yourselfer.

Summary

How much does electricity contribute to your survival? Try switching it off for a week and see how well you cope. With electricity you’ll live comfortably, not just survive, while the world around you crumbles. A good night’s sleep, vital to your long-term survival, is made possible because of sensors, appliances, and automatic systems. If you wait until things get bad you’ll be forced to use the resources you have, not the system you planned to install someday. Surviving a crisis doesn’t need to be unbearable, or even uncomfortable. It won’t be if you prepare in advance.

Perhaps some will say “I’m looking for ways to survive, while you’re talking about watching TV, wrapped in an electric blanket, after a hot meal and a warm shower.” I get it, but I want to live for a few more decades, and I plan do it in comfort.


As a prepper you’ve thought about the necessities for survival, but have you thought about your comfort? Imagine a long-term situation where you have food and water, but survival is

When the subject of Survival comes up in conversation, what do you think of? I am sure context plays a big part in the answer to that question, but for me personally it used to always conjure up the shipwrecked on a deserted island idea of survival. It was that or the lone hiker scenario where you are lost in the wilderness, miles away from civilization. I used to love watching Bear Grylls’ Man vs. Wild many years back on his first TV show where he would present just those types of scenarios and show tips on how to survive and get back to civilization.

The word ‘survival’ has a very different connotation to a lot of people but I think that many people out there limit their view of surviving to the way I used to. When I started getting into the concepts behind prepping, part of my thought process was that I would only need my true survival skills if I was shipwrecked or lost. I almost neglected the more likely scenario that I would need survival skills where I lived and worked every day. While I see the benefit of wilderness survival skills, I would be much more likely to need urban survival skills on any given day. There are some skills that overlap, but there are many differences between trying to survive in the woods and trying to survive in the urban jungle.

For this post I wanted to list several urban survival skills that while they may share some characteristics of their wilderness cousins, could still help you more in an urban environment if you are faced with some type of urban SHTF scenario.

Urban Survival Skills

Finding and disinfecting water – Enough with the water you say! I know, at times I feel myself like I am beating a dead horse, but water has to be a priority for survival regardless of where you are. Scratch that, clean water needs to be a priority especially in an urban survival scenario where larger concentrations of people and unhygienic conditions breed disease very quickly. When the water is contaminated with Cholera you won’t be engaged much in the old survival mode of defending your homestead, you will be defending the bed from getting made and the bathroom (if you make it there) from smelling fresh. Knowing how to find sources of water in urban environments is a very important skill.

Bartering/Negotiating – I lumped these two skills in here because I think they are similar enough that it makes sense. In my urban survival nightmare I picture chaos in the short-term followed by a long period of trying to work together for most and trying to get over on people for some. Bartering for goods is a topic we talk about all of the time, but along with bartering (trading a good or service for another good or service) you will have to have the soft skills of negotiating. When you are trading someone eggs for a few extra rounds of 9mm, the negotiating is more soft-skills based. In a time like this emotional intelligence will go a long way. The other side of this coin is that you might find yourself negotiating with people who have an animosity toward you. You might have to negotiate an end to violence or the release of one of your party who has been captured. Don’t laugh; we are talking about the end of the world as we know it here.

Medical Skills – Just like in the wilderness, people get injured in the urban environments too and like almost any SHTF scenario we discuss you can plan for the local Primecare to be out of business when you really need it. The hospital emergency room, if you can get there might be overflowing with other people and it’s possible you would want to avoid sickness as much as humanly possible anyway. Knowing how to treat injuries, wounds, burns and illnesses could keep both your group healthy and could even be used as a source of barter in the worst of cases. Resources like survival medical books, books on medicinal herbs and even old-fashioned remedies might be a good addition to your growing survival library.

Can you make a hobo stove?

Adaptability/Creativity/ Flexibility – These aren’t technically what you might consider as skills but the ability to modify your behavior in beneficial ways based upon what you are currently faced with is a huge advantage. The shower doesn’t run anymore so you set a camp shower in the sun for a few hours, screw a plant hook into the wall in the shower and Voila! You now have maybe the only working shower even in austere environments. Bonus points if you don’t even have a camp shower but you were able to reuse some old plumbing parts and an empty 5 gallon bucket that used to have dry wall compound in it. Showers might seem like a pretty simple problem to solve but it is that type of thinking that will serve you well when you aren’t going to be able to do things the normal way. You have to be able to think outside the box and as cliché as that sounds it is going to help you. For instance, could you make a hobo stove out of nothing but your survival knife and a big empty can?

Gunsmithing would be a highly specialized and sought after post SHTF skill.

Repairing things – If the grid goes down you likely won’t be able to call the dishwasher repairman, or the plumber or the electrician or a lot of people. Of course if the power is out, then you have other problems. Mechanics, engineers and people who like to tinker with things to see how they work; crack them open and fix on them will be a good addition to your survival team. If you have the ability to repair broken items you will be not only valuable to yourself, but you might even be able to open your own post-apocalyptic store and charge for your services. Gunsmithing comes to mind as a possibly appropriate skill to know along with all of the tools you would need to work on weapons.

Gardening – Yes this is a skill. If you have never gardened then you should take the time now to learn because it isn’t as simple as Jack and the Beanstalk made it look. Sure you have grown a couple of tomato plants on your porch, but what about growing enough food for your family to live off of all year long? That is a lot of work and isn’t something you can take lightly. Even if you have that awesome can of survival seeds, you better not wait until SHTF to start digging in the dirt.

Maintaining a secure shelter – I wrote in another article about the subject of defending yourself from the perspective of being able and willing to keep someone from taking your stuff. Stuff in this case could be practically anything but having first the determination (not fear) to do what is required to keep yourself and your family secure in times of chaos is perhaps less a skill but it is no less necessary. It is one thing to find a dry space under a cardboard box in the back of an alley but can you defend yourself if needed? Do you have a mindset that is going to position you to see who is approaching and the means to deal with them, possibly violently if the threat calls for it? It is going to be much harder to hide in urban environments. A true SHTF even will make the riots in Baltimore look like a Sunday picnic. Are you ready for that urban survival scenario?

What skills do you think could help someone in an urban setting stay alive if it all went south?

When the subject of Survival comes up in conversation, what do you think of? I am sure context plays a big part in the answer to that question, but for