Prepping Supplies: The Medical Bag
Equipped with a large database of knowledge, co workers and all the equipment/supplies they need at their fingers tips.. it is no secret that America is home to some of the best doctors and medical professionals in the world. If SHTF, what happens if all the lights go out? Would the equipment still function? What if all the supplies run out? What if all the doctors are sent to make-shift-camps or hunkered down with their own families? What if there is no hospital, no 911, no help coming?
Believe it or not, this actually happens all around the world each and every day. Out there right now there are doctors, nurses and medics working around the clock without power or computers, without their co workers, without all the fancy equipment.. They are equipped with nothing more than their knowledge and whatever is packed into their medical bags. That is right, they are saving lives out of the contents of their medical bags.
Most of us are not doctors nor do we have access to the same kind of supplies that they do. However, having a medical bag is one of the most important things we should all consider while preparing for those situations we hope never happen. You may be wondering what to put in your own medical bag or if you are forgetting anything so I’ve provided my own list to help get you started.
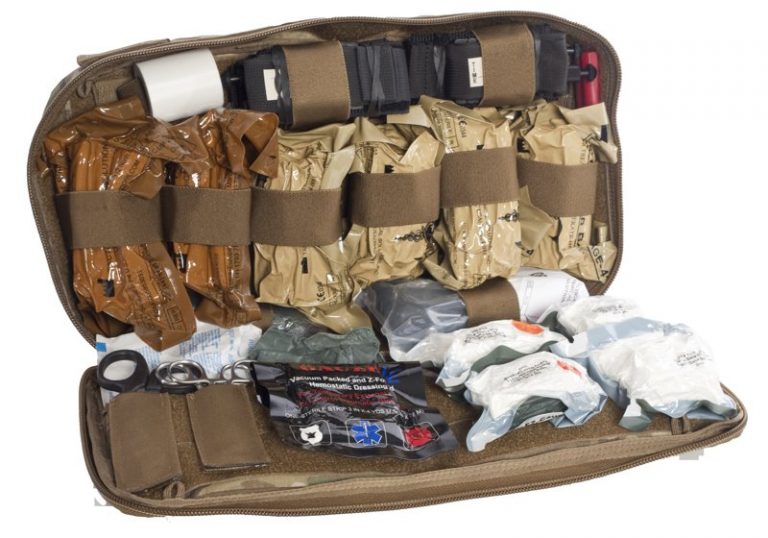
The Medical Bag

There are all kinds of options out there for medical bags. Use what works best for you. I have seen people use back packs, tackles boxes and shoulder bags. I personally went with the shoulder bag because my bug out bag is a back pack and I only have one back. I also would like to keep both of my hands free so this was the best option for me.
Sanitation and Personal Protection
Regardless of the emergency, sanitation is not something that should never be overlooked. For your own protection and the protection of your patient, always WASH YOUR HANDS!!!! I cannot stress the importance of hand washing. For this reason and so you never forget.. choose the most easy to access part of your bag to store your sanitation supplies. Most of these items can be found at your local dollar store so there are no excuses not to be hygienic when providing first aid. These very simple step could mean the difference between life or death.
**Tip: Keep a small zip-lock bag with a maxi pad and bandanna in with your sanitation supplies. In the event someone is bleeding you can buy yourself a minute to wash up by having the injured use the maxi pad to apply direct pressure, if they are unable, you can hold it in place with the bandanna.
Items to include:
- Bar of hand soap and a case to put it in (dollar store)
- 4 oz hibiclens hand cleanser (if your budget allows)
- Nail clippers, nail file, scrub brush (keep nails short and clean – dollar store)
- Large bottle of hand sanitizer (you will need a lot of this – dollar store)
- Hand disinfecting wipes (for when washing isn’t possible $2 at pharmacy)
- 2 oz hand cream (sanitizer and gloves dry out your hands – dollar store)
- 3 mini soaps/3 mini hand santizers (these are for giving away. It is important to keep the patient clean, too – dollar store)
- 50 pairs of latex free gloves (latex is a common allergy)
- 3 pairs nitrile gloves
- 10 surgical masks
- 3 N-95 masks
- 10-20 surface disinfecting wipes (dollar store)
- 10 puppy training pads (will work well as underpads – dollar store)
- 10 garbage bags (for plastic backing – dollar store)
- 5 bio hazard bags (if budget allows)

Equipment
The more we have to work with, the easier it will be so some basic equipment is good to have. If your budget is tight you can pick up some of these items at the dollar store and then add the rest when you are able
**Tip: Know how to use these items!! They are all easy to use, I promise.

Items to include:
- Headlight with extra batteries (good hands free lighting may be needed)
- LED penlight with pupil gauge
- Stainless steel sheers (for cutting away clothing)
- Kelly-Clamp straight and curved scissors
- Iris scissors
- Tweezers
- Thermometer
- Stethoscope
- Blood pressure cuff
- Permanent Marker/Pencil and Sharpener
- Note Pad
- Duct Tape
Wound Care
From superficial scrapes to life threatening bleeding it is no surprise that there are millions of wound care products out there. Try not to get too overwhelmed with this. The first thing we need to do is to make sure that whatever caused the injury is no longer a threat. We then need to make sure the person wants our help!! Before we rush in to play doctor, we should always let the injured person know who we are and what training we may have. In the event this person is or at any time becomes unconscious implied consent is given. Once we have established that there is no current threat to ourselves and that we have consent to help then the main objectives are to stop the bleeding, monitor for shock and prevent infection. It may be wise to divide this into 3 sections so if you are ever in a panic, you’ll be less likely to miss a step.
**Tip: Pack what items you can afford then add to it as you are able to.

Items to include:
Bleeding Control
- 3 Maxi pads and a bandanna (extras!! – dollar store)
- 2 hyfin chest seals (for both entrance and exit wounds)
- 3 different size quikclot sponges (these are cheaper then celox)
- Celox Products (These are expensive, I would start with the powder)
- 20 gauze 4x4s
- 10 ABD pads 8×10
- 1 Israeli bandage
- 1 SWAT tourniquet
Wound Cleaning
**Tip: this will be a lot easier if you can keep the person calm. Consider pain management ideas for while you are treating. Flushing a wound with clean drinkable water will be the ideal method. You may need to pick out tiny pebbles or dirt with tweezers and possibly even scrub it. It is very important to make sure the wound is clean. You will then want to use an antiseptic such as peroxide, alcohol or iodine. If a person had been bitten, infection is much more likely use a BZK wipe.
- Stress ball (give it to the patient to squeeze but never in the arm they are bleeding from)
- 5 paper bags (having the patient breathe into one for a couple of minutes may help distract them and will remind them to breathe)
- Dermoplast antibacterial spray (this works wonders on pain for after birth, scrapes and cuts)
- 4oz of drinking water (something so simple may not be available if you don’t pack it)
- 60cc irrigation syringe and a perinatal bottle (I personally get better pressure with the perinatal bottle)
- Tick remover
- Poison ivy soap bar
- 50 alcohol wipes
- 10 Sting wipes
- 5-10 BZK wipes
- hydrogen peroxide (dollar store)
- 1 oz (30ml) iodine
Wound Closure
It is almost never a good idea to close a wound in a non-sterile setting, you can pack a suture kit for just in case but this should be a last resort. I did not pack a stapler because I personally am not comfortable with using for a number of reasons.
- 100s of different size band-aids (dollar store)
- Mole skin
- 50 butterfly closures
- liquid band-aid
- super glue (dollar store)
- Suture kit
- 10 triple antibiotic ointment packets (you can buy a tube but this would be cleaner)
- Burn gel (for pain relief)
- Vaseline (for making non-stick dressing)

Dressings
- 50 2×2 gauze pads
- 50 4×4 gauze pads
- 10 8×10 ABD pads
- Rolls of gauze (at the very least 2 in different sizes)
- Medical tape
- Reusable cold packs (for swelling)
- Ace wrap (for sprains)
- 1-3 triangular bandages
Other emergencies
If possible divide up other emergency supplies into sections to keep them more organized and easier to access. Try to keep these in plain view when you open your bag.
Items to include:
Section 1 – Breathing Difficulty/Chest Pains
- Manual suction device with extra tubing
- Areochamber mask with asthma inhalers (if someone in your group has asthma)
- Berman oral airway kit (has 6 different sizes)
- Children’s liquid benadryl and syringe (this works slightly faster then the tablets)
- 10 aspirin (if you suspect a heart attack)
- 2 CPR masks (one for you and one your assistant if you are lucky enough to have one, CPR is exhausting)
Section 2 – Hypothermia
- 2 emergency rain ponchos (1 for you/1 for them)
- 2 Mylar thermo blankets (one for under them and one for over)
- 4 instant hand and body warmers (corner stores have these)
- Warm hat (dollarstore)
Section 3- Dehydration/Low Blood Sugar/Weakness
- Bottle of water
- 10 oral rehydration salts (the treatment for Cholera)
- 10 electrolyte tablets
- Glucose Paste (a quick boost of sugar)
- 10 ammonia inhalants (to wake someone)

Section 4 – Eyes and Ears
- 4 oz eye wash
- Eye cup
- 2-6 eye pads
- Visine total care eye drops
- Polysporin plus pain relief antibiotic ear drops (for ear aches and ear infections)
- Q-tips (dollar store)
Section 5 – Nose, Lips and Throat
- Saline Nasal Spray
- Bulb syringe (for babies)
- 3-6 Vicks Vapor Inhaler (if one person gets sick you all might and these shouldn’t be shared – dollar store)
- Chapstick (dollar store)
- Blistex (dollar store)
- Abreva coldsore treatment
- Vicks Vapor Rub (dollar store)
- Throat lozenges
Section 6 – Oral/Dental
- 5 tounge depressors
- Dental Mirror and Scraper (can be bought at dollar store)
- Small toothbrush (dollar store)
- 2 oz mouthwash (dollar store)
- Dental floss (dollar store)
- Temporary dental filling kit
- Red cross toothache complete medication kit
Medications
If you are reading this.. then chances are pretty good that you can still run out to the local pharmacy whenever you may need to. If SHTF easy to access pharmacies may become a thing of the past. Without power and oil production it would become extremely difficult for pharmacies (or any stores for that matter) to re stock their shelves. This is why it is so important to buy these things while we still can and while we still have health care professionals to ask all our questions to.
First and foremost, everyone with medical needs should pack at least a 30 day supply (the more the better) of any medications that have already been prescribed or recommend to you by your doctor, pharmacist or health care provider. Nothing you read on the internet should ever substitute the advice from your health care provider. Seek their care and medical advice whenever necessary for as long as it is available.
The amount of medications you should pack is going to vary greatly from person to person. I recommend packing enough for yourself and at least one other person, if you can. If you have a larger group then pack accordingly. I have not included any amounts as to how much you should pack because it is important for you to carefully think numbers through based on your own groups size. Talk to your health provider before taking any new medications.
Again, you may pack these however you choose but breaking them to sections may help you find what you need faster. Toiletry kits work great for this.
Items to Consider:
Bag 1 – Indigestion and Upset Tummies
- Tums (for heartburn)
- Antacids (for more severe Indigestion)
- Ginger and Peppermint tea bags (a natural aid for nausea and upset tummies)
- Gravol tablets (for adults and children – for motion sickness, nausea and vomiting)
- Pepto tablets (for all your tummy needs)
- Metamucil (for constipation)
- Anti Diarrhea tablets
- Small cup (for the tea)
Bag 2- Fever, Pain and Discomfort
- Tylenol (for infants, children and adults)
- Advil (for adults) and children’s Motrin
- Ultra strength advil liquid gels (works faster)
- Muscle Rub (for sore muscles)
- Preparation h (hemorrhoids)
- Gold Bond Powder (foot odor)
- Vaseline and Diaper ointment (I highly recommend Beaudreaus butt paste – for rashes)
- Cold pack and heat pack
- Numb 520 with 5% lidocaine (amazing deep numbing pain relief, this will numb someone enough for suturing)
- Vasocaine Numbing Spray (also amazing, it’s mostly used for tattoos)
Bag 3- Infections and Supplements
- Rehydration salts (yes, I’ve included these twice)
- Activated Charcoal (accidental ingestion of toxins)
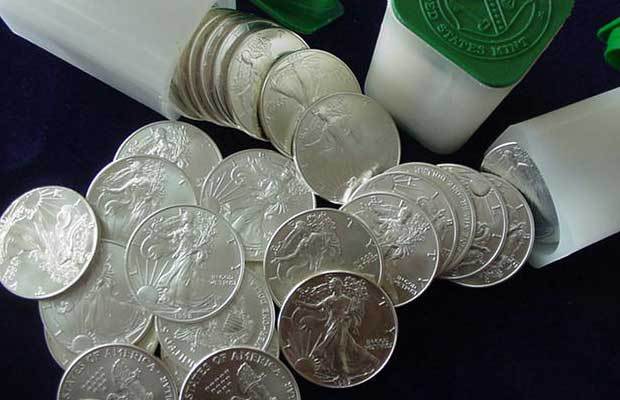
- Colloidal silver (Talk to a health care provider first)
- Oral Antibiotics (for infection – I’ve chosen 3 – talk to your health care provider)
- Essential oils (tea tree, clove, lavender, eucalyptus and oil of oregano were my choices)
- Polysporin and Neosporin (for minor scrapes and burns)
- Triple Antibiotic Ointment (in a tube)
- Honey
- Foot Fungal Ointment
- Nystatin (yeast infections)
- Monistat (yeast infections)
- Hydrocortisone Cream (treats many skin conditions)
- Children’s vitamins (Safe for pregnant woman, children and adults)
- Vitamin D drops (for breastfed babies)
- Iron supplements (after blood loss)
Education
I have saved the best for last.. Education. Take all the classes you can and read all the books you can get your hands on. In fact, pack your favorites in your very own medical bag!! One of my personal favorites is “Where There is no Doctor“. It is also completely FREE to call or drop in to your local pharmacy to ask all the questions you may have about any items you are including in your own medical bag. Talk to your doctor about any pre existing conditions or concerns. Your knowledge is your best chance of survival.
P.S) Don’t forget to WASH YOUR HANDS!!
Equipped with a large database of knowledge, co workers and all the equipment/supplies they need at their fingers tips.. it is no secret that America is home to some of


 A urban survival kit can give you the survival items you need to make it out of the city fast.
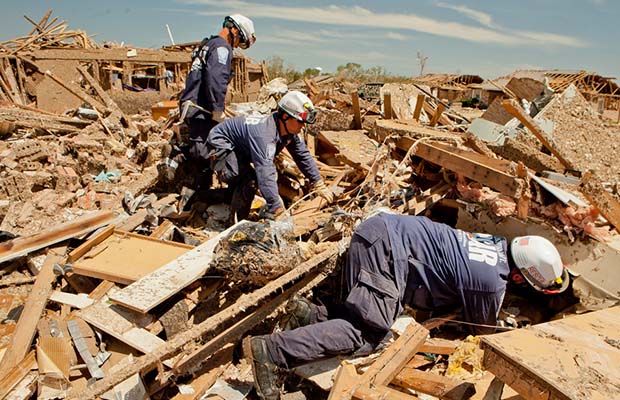
 In a disaster or crisis you could find yourself running for your life. Will you have the gear you need?
 Rush 24 by 5.11 Tactical