HomePosts Tagged "SHTF" (Page 3)

I haven’t been able to understand why the expression “to live like an Amish” has a pejorative meaning. Not until I started to love like a prepper. They are simple folk, trying to live a very simple life; some may call them minimalists, but I can’t see why they’re mock just because they chose to live without electronic gadgets, electricity, and as far away as possible from the hustle and bustle of the city. I would be lying If I were to say that I’m envious about their life choices.

Yes, I am a prepper and, even more than that, a person who’s ready to sacrifice comfort for safety, if the situation demands it, but not willingly. Sure, I can make do without a tablet, the latest Samsung Galaxy with four motion-triggered cameras or going to the cinema every weekend to see a movie, but there are some things I just can’t part with (well, not right away).

Anyway, the other day, as I was taking my daughter back from school, I stopped at a light downtown. Even though it was well after two o’clock, the traffic was downright infernal – you know what that means; lots and lots of patience. So, while standing there, waiting for the green light, I noticed that the driver on my right side kept sliding his hand out of the window in an attempt to snap a picture.  Nothing curious about that considering that, sometimes, becoming stuck in a traffic jam brings out the artist inside all of us.

However, the man kept on doing this, whilst talking to someone on the driver’s seat. When I looked in the direction of his camera I saw the embodiment of ‘screw you, I do what I want with my life.’ Standing in the dicky of four-wheeled coach, there were two men – father and son, I gathered. Both of them were dressed in black from head to toe, had these thick, bushy beards, glasses, and clergymen hats.

What amazed me was the fact that although most of the drivers were snapping pictures and mocking them, they went on about their business as if nothing was wrong. I can’t imagine being that calm when someone is calling me names. But, then again, I can very well assume that this isn’t the first, nor the last time that they had to deal with people staring at them as if they were zoo animals.

Well, long story short, once I got home, I started to read a bit about the Amish community.  And, as you’ve probably guessed it by now, the article you see before you is the result of, shall I call it, an exploration into America’s most conservative community. So, without further ado, here are 6 life and survival lesson I’ve learned from the Amish. Enjoy!

Family and togetherness mean a lot more than all the treasures of this world

Last time I paid my folks a visit, I sort of got one of those Hollywoodian flashbacks. More than 20 years ago, I was in the living room with my mom, dad, and grandma. ‘Twas around the time of the prom. I wanted to tell my parents that right after the party, I was going to hit it off with my girlfriend and two classmates.

As you would imagine, my parents were not too thrilled about this. Dad was adamant about me getting back home. Guess he would have rather seen me hitting the books for my college entry exam then reenacting Adam’s intro of Summer of ‘69. Long story short, we argued, a lot, and everything ended with me saying some very nasty things about my family.

This is one of the things I kinda envy the Amish – no matter how shitty things are; they stay together. Everything they do, they do for the family. More than that, they do not believe in stuff like “hey, I have this thing, but you can’t have it, because you will have to work for it just like I did.” Nope. If one family makes more than it needs, it will wholeheartedly share with the rest of the community, especially with the more unfortunate ones.

I can’t say that my family is perfect. No, we don’t argue all the time, scream at each other, say things like “I’m going to leave you and take the kids with me,” but tempers do flare from time to time. In those moments I come to realize that we have everything we need and we should try to play nice with each other. I mean, the Amish communities are like stepping into a time machine and ending up in pre-colonial America- no electricity, no Internet, no gadgets. And yet, they still have more tightly-knitted families than 90 percent of the people I know or grew up with.

You really don’t need to become a member of the Amish community to figure out the meaning of “family.” Just talk or read some books about them. Trust me – after doing this, you won’t be that eager to raise your voice at your wife, punish your kids for stuff they didn’t do or laugh in your neighbor’s face when he asks for help. Remember the saying: “give an inch and take a mile.”

The Amish rehashed “self-reliance.”

There’s no such thing as being too self-reliant, whether it refers to cooking your own meals, washing your stuff or learning to make things rather than buying them from the store. Emerson’s Walden may have been a good read for a lot of preppers, but for the Amish, that book’s almost sacred. Imagine living in a very small community with no money, no debit or credit cards, and no stores. Sounds interesting, does it not? Well, in traditional Amish communities, a family’s only way to obtain certain goods they need around the house, say lamp oil, is trading. And yes, everything being trading within the boundaries of this community is produced or manufactured there.

And let me tell you, those people really know their business – I’ve seen Amish canned goods, oil lamps, furniture, tobacco, bread, coffee, and even toys for the little ones.

There’s a lesson in this, folks – when you do decide that it’s time to drop off the grid, you must ensure that you know how to make stuff. Otherwise, it’s just what I like to call prepping with benefits.

Treating your livestock as if it’s part of the family

Can’t really say that I like livestock that much – sure, baby goats and horses are gorgeous, but not as cute as kitten or puppies. What struck me the most when watching YouTube videos about the Amish community is the bond they share with their livestock. When I was a kid, my grandma used to tell me these stories about her parents keeping animals like baby horses, goats, sheep or chicklings inside the house during the winter.

Sure, it’s a heartwarming story, but I didn’t take it for granted. However, after seeing these people care for their livestock, I kind of began to believe in them. If there’s one worthy takeaway, it’s learning how to see if your livestock is healthy or there’s an illness running amok.

Overcomplicated farming is not a recipe for success

We are literally surrounded by supermarkets, farmer market’s, and hypermarkets, yet all the food we eat tastes like cardboard. Granted, we have the means to feed millions of people thanks to the advancement in farming technology, but all this stuff doesn’t mean anything if the final product lacks the very stuff our bodies so desperately need. I wholeheartedly recommend viewing a video on Amish farming methods. To say that it’s fascinating, would be a major understatement. They have no need for trucks, tractors, cultivators, subsoiler, rollers or spike harrow – they toil from dusk till dawn to sow the ground with horse-pulled plows. That’s it! Yes, I know that it’s very hard work, but, my God, their veggies are astounding. I’ve seen cantaloupes the size of a basketball and beets as big as my beer belly. Their secret – plenty of hard work, dedication, and using all-natural solutions.

Hand sewing is not just something you see in the movies

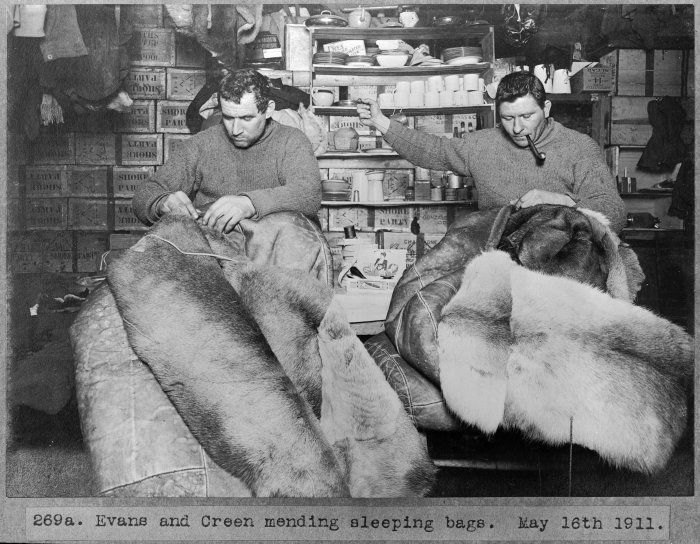
Nowadays, nobody pays too much attention to sewing – if your parka needs stitching, you just take it to tailor’s shop, and that’s basically it. If I were to ask someone about hand sewing, he would probably look at me as if I’m from another planet or something. The only thing close to actual hand sewing was this old lady who had a stand at an exposition hosted by our local history museum. She could make anything from tunics, socks, underpants to carpets and upholstery. However, for the Amish, hand sewing is a vital skill. Although the women do the heavy lifting, the men also know how to sew back a ripped button or patch a hole in their shirts.

I am well aware of the fact that hand sewing clothes and other things is not a skill that can be learned overnight. Heck, some members of the Amish communities spend half a century honing their skills and perfecting their techniques. So, the next time you see an Amish couple in your hometown, don’t mock their sense of fashion – just remember that everything they wear is made by the head. The same thing cannot be said about us town folk, who buy every piece of garment from Mall stores.

That hard work is a virtue, not just a 9-to-5 undertaking

The next time you complain that your cushy 9-to-5 is exhausting, think about the fact that the regular Amish workday begins at five in the morning and ends well after sunset. And it doesn’t matter if the weather’s nice or really bad or if that person woke up with a major headache because he drank too much last night – for the Amish community, work is sacred. And, dare I say, the results speak for themselves. I’ve never seen an Amish home in disarray or a family that has nothing to eat or to wear.

If that’s not enough for you, get a load of this – Amish don’t work just for themselves. They work for the entire community. Sure, your land and livestock are important, but so is the rest. For instance, if a new couple moved into ‘town,’ the entire community helps them settle in. Yup that means even giving them a hand to raise a house or a barn.

By the way, if you need new furniture, you may want to try out your local Amish store or get in touch with a member of the community. Why? Because their furniture’s all-wood, not that cheap crap manufacturers use to whip up low-quality beds or couches. It’s a win-win.

That about wraps it up for life and survival lessons learned from the Amish. What do you think about this topic? Hit the comments section and let me know.

I haven’t been able to understand why the expression “to live like an Amish” has a pejorative meaning. Not until I started to live like a prepper.

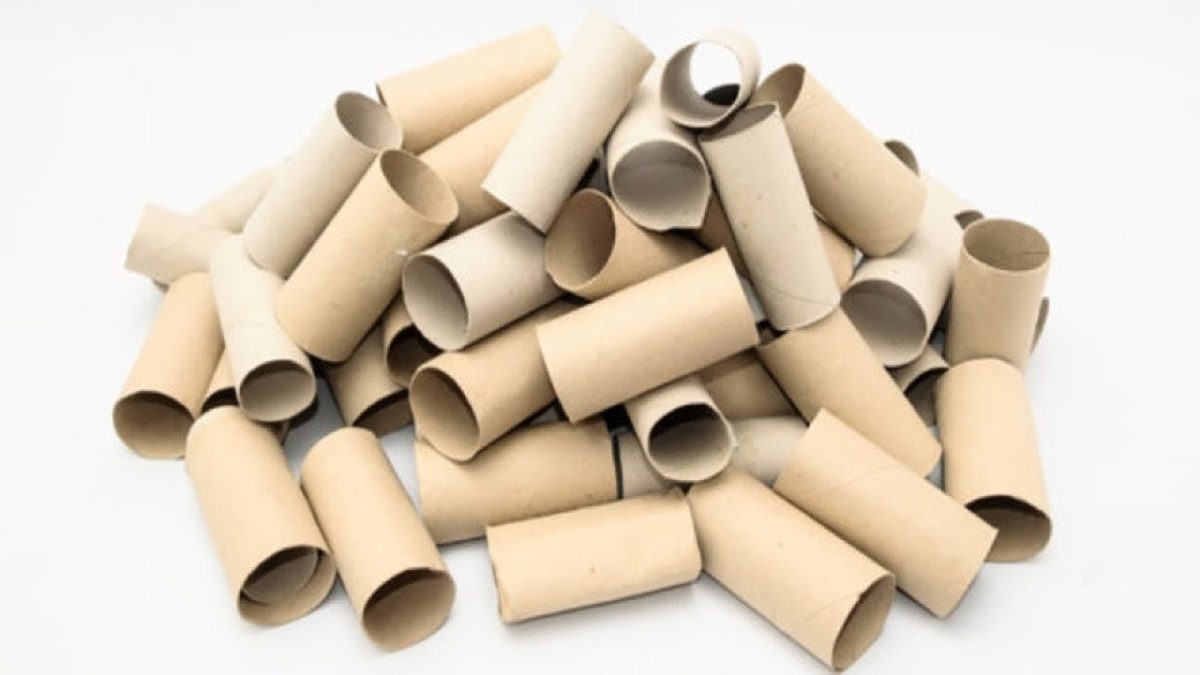
Honey! I think I shrunk the…toilet paper stockpile. Don’t like it? Try this one for size: an empty toilet paper roll by any other name would smell as sweet. Welcome, weary traveler, to yet another kick-ass presentation on how common household items can save your life, “can” is the leitmotif of this here article.

Yup, you’ve guessed it – today I’m going to talk to you about the afterlife of TP rolls. You know those carton cylinders we used to stole as kids from the trash to make “spyglasses”? Well, believe it or not, even though they’re the ghost of TP past, they can still be of some use to us. Luckily, most of those purposes revolve around our favorite topic which is survival.

So, without further ado or a-pun, here are 7 clever ways to use empty TP rolls in SHTF situations.

  1. Keeping your important docs safe, sound, and dry

In any shit hits the fan situation, there’ll be a lot of running, climbing, digging, and falling. Clothes and footwear can be washed and hung up to dry; even most electronics have some sort of waterproofing. Unfortunately, the same thing cannot be said about important documents such as driver’s license, photo ID, house deed or other things you may be carrying in your B.O.B. One easy way to make sure your precious docs don’t get totaled by water is to place them inside an empty TP roll.

Use some plastic food wrap or tin foil to seal both ends, and you’ve got yourself a weatherproof doc pouch. Well, it’s more of a roll rather than a pouch, but you get it. You can use the same trick to keep other things dry like headphones, lighters, matches or whatever.

  1. Hunting and trapping very small game

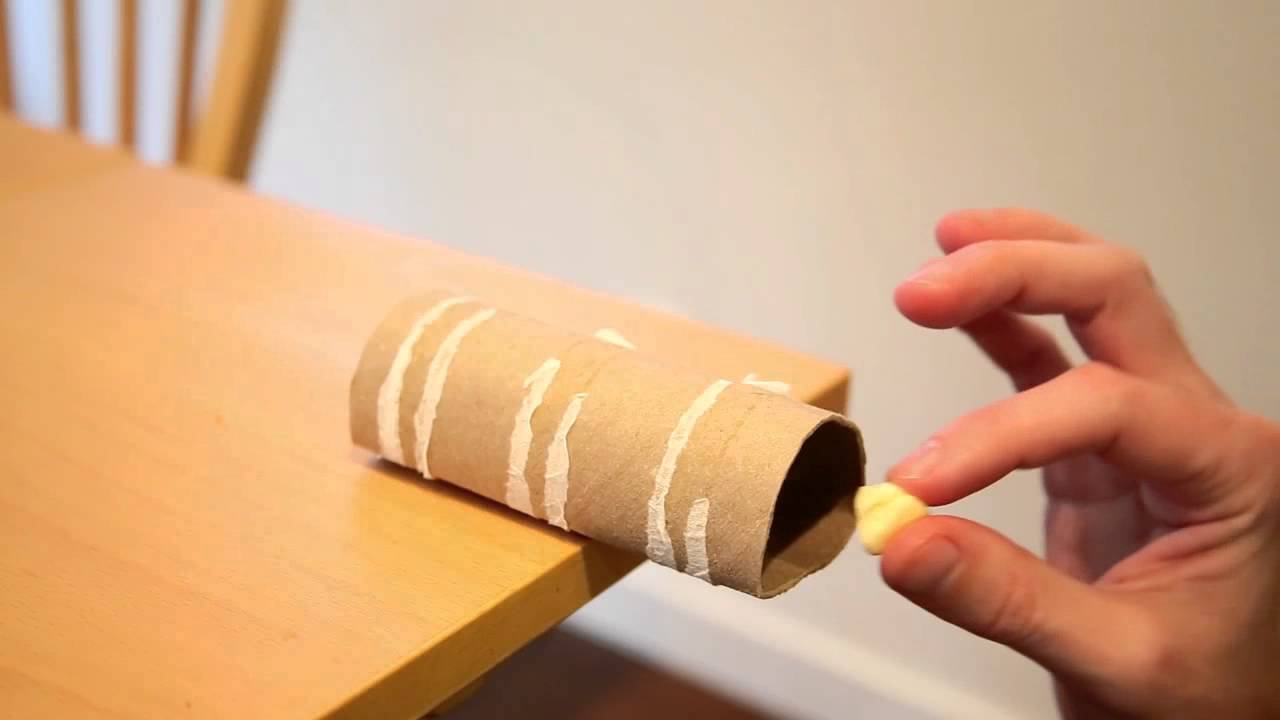
I know the perspective of gutting a small and innocent critter sounds horrific, but in an SHTF situation, you won’t have much of choice. If you’re hunting and trapping skills aren’t good enough as to allow you to create deadfall pits or body-gripping snares, you may be able to craft a small and very efficient one using an empty TP roll, some glue or double-sided tape, and something sweet.

Apply some double-sided tape to one of the openings and place the bait on the open end. Works great for small critters such as field mice. When Jerry sees the morsel, he’ll charge the tube to grab it. Once he enters the tube and takes the bait; he’ll try to get out the other end. As the double-sided tape is transparent, he won’t suspect a thing.  As for the killing and gutting part, I’ll leave that one up to you.

  1. Making a fishing box

Remember the part where I’ve told you that every heavy-duty B.O.B should contain some sort of fishing kit? Well, if you don’t plan on spending too much money on portable fishing kits, here’s how to make your own using an empty roll of TP. First of all, you will need to waterproof your container. For this, you will need some resin. Use a brush and coat the entire roll.  You will need to apply at least three layers of resin. Allow it to dry before proceeding to the next step.

Now, secure one end of the roll using a plastic or metal cap (go see your local thrift store for those). Apply some epoxy before putting on the cap. Now add a similar cap on the other end.

Don’t use epoxy because this will be the opening. Assemble your fishing kit: hooks, line, weights, small blade, flotation device, and place them inside the toilet roll. If you want to make the fishing kit look even more awesome, you can wrap it in paracord and add a small karabiner to the screwable cap (stop laughing). Enjoy!

  1. Voicing your concerns

In an SHTF situation, you may not be able to use your gadgets to make the rescuers aware of your presence. Although your B.O.B should contain at least one type of signaling device, like a whistle, signaling gun, flares or all three of them, it may possible to use an empty toilet paper tube to amply your screams for help. Yes, I know it’s sounds something a child may do, but every little bit helps. Remember that there are times when salvation comes not from intricate life-saving gadgets, but from a simple and silly thing like a TP roll.

  1. Gimme fuel, gimme fire

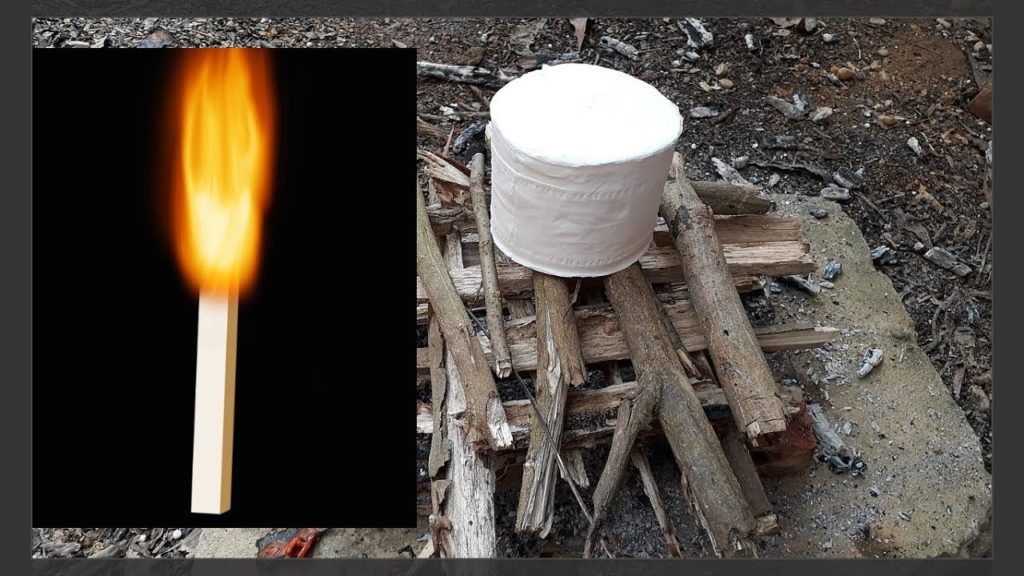
As you know, nothing’s more soothing than watching those dancing flames in the night. No matter how shitty things get, you can always rely on a campfire to make you regain your composure. In case you’ve lost your tinder box or have nothing else on hand to start a fire with, you can always use a TP roll as tinder.

  1. Prescription glass protection case

As a person who needs to wear glasses around the clock, I haven’t had much use for protective cases. Still, in a situation that call for protection, you can always place your prescription glasses or sunglasses inside an empty TP roll.

  1. Keeping your cords together

There’s nothing more frustrating than opening your bug out bag and seeing all those cords tangles. Even worse is the fact that you’ll have to spend hours on end to untangle them. Sure, that’s not a problem when you’re at home, but you won’t have the luxury of time during a potentially life-threatening situation.

A simple way of keeping your cords together and prevent tangling is to make a small crease on the side of a TP roll and to tuck the cord inside. Draw one end of the cord through this crease, and that’s it. You’ll never have to untangle another paracord again. You can also do the same with power cables and strings. Remember the golden rule: if it looks stupid, but it works, then it’s not stupid!

That’s it for my ways to repurpose TP rolls. Feel that something’s missing from the list. Hit the comments section and let me know.


Other self-sufficiency and preparedness solutions recommended for you:

The Lost Ways (The vital self-sufficiency lessons our great grand-fathers left us)

Survival MD (Knowledge to survive any medical crisis situation)

Backyard Liberty (Liberal’s hidden agenda: more than just your guns…)

Alive After the Fall (Build yourself the only unlimited water source you’ll ever need)

The Lost ways II (4 Important Forgotten Skills used by our Ancestors that can help you in any crisis)

The Patriot Privacy Kit (Secure your privacy in just 10 simple steps)

Honey! I think I shrunk the…toilet paper stockpile. Don’t like it? Try this one for size: an empty toilet paper roll by any other name would smell as sweet. Welcome,

Ever stopped to think just how useful a bar of soap can be? No, you can’t shave it and turn it into plastic explosive as Frank Burns from M*A*S*H said, but there are lots of other stuff you can do with it beyond washy-washy. No matter if you’re using the old rectangular bar, the liquid variety or dishwasher detergent, each and every one of them could save your skin one day.

Most seasoned survivalists and bushcraft experts carry at least one bar of soap with them and, as you might expect, it’s not only for washing soiled jammies or getting the dirt off your hands.

Since soap is another one of those household items that should get its own statue in the survival hall of fame, I’ve decided to do write this short and sweet piece on how soap may serve your bushcraft purposes.

So, because talk’s cheap, here are 5 ways you can use soap to get out of a potentially life-threatening situation.

  1. Shampoo

I know that most of you don’t really see the purpose of washing your hair during an SHTF situation, especially because, I don’t know, priorities tend to shift. Still, hygiene’s very important, and you really wouldn’t want to end up with lice in your hair and worse.

Don’t know for sure if the rest of you people have even considered the thought of adding one bottle of shampoo to your B.O.B or at least an all-purpose shower gel (great for hair, body, carpets, upholstery and anything in between), but I really don’t see the point of getting one if I have one or more soap bars.

Sure, you won’t get curls or fluffy hair, but at least your head’s clean and lice-free. By the way, if you find yourself without shampoo\shower gel, you can also use liquid soap or dishwashing detergent to wash your hair. Just be careful not to use that dishwasher stuff on more sensible body areas because you’ll end up with sores (true story).

  1. Removing ice from the driveway nice and fast

No rock salt or kitty litter? No problem. You can create your own ice-busting concoction using regular liquid dish soap, water, and a bit of alcohol (don’t get your hopes up because you’ll want to rub alcohol for this concoction). Here’s what you’ll need to do: take a bucket and fill it halfway with hot water. Add one tablespoon of rubbing alcohol and one tablespoon of undiluted dishwashing liquid soap. Mix and use this concoction to remove ice from your driveway.

  1. A sure-fire remedy for poison ivy poisoning

Do you know what’s worse than having a bear on your ass? Having to resist the urge to scratch after getting into contact with poison ivy. What’s even worse about this type of poisoning is that the blisters can spread if you pop those oil-filled pustules.

How to solve this? Using dishwashing liquid soap, of course. Since the stuff’s designed to deal with oil stains, it will eliminate the excess oils from the area, thus stopping the blisters from spreading. Moreover, using liquid soap on poison ivy blisters increases the healing rate of your skin.

  1. Keeping them nasty bugs away from your food

Now that spring’s finally arrived, we turn our attention to things more romantic like picnics, BBQs, and campfire sing-alongs with your intoxicated buddies. The only thing that annoys me the most, apart from having to clean that bathroom (sorry, hun) is insects crawling over my food.

Yes, I should know by know that a picnic’s not exactly, well, a picnic, but I do hate to share meals with overly insistent ants, and God knows what.

After doing a bit of snooping on the Internet, I found out that you can actually protect your food from pests using diluted dishwashing soap. It sounds crazy, but believe me, it works. And no, the food will not have a soapy taste to it. To prepare your own pest repellant from soap, get yourself one of those spray bottles and fill it with others. Add two teaspoons of dish soap, shake, and spray the table area.

Yes, you can even spray the food – in its watered-down form the stuff’s safe to eat. Only don’t use too much of it because your food will certainly end up tasting funny.

  1. Getting rid of sticky things in your hair

Well, what can I say? Shit can happen even at home. Doesn’t matter how hard you try to maintain hygiene, because there’s always that moment when you forget that you just dunked your hands in Vaseline, but that itchy spot on the top of your hand just refuses to go away. For moments like this, be thankful for the fact that dish soap exists.

This stuff’s powerful enough to remove anything from the flue, Vaseline, nail polish, gum, and, yes, even peanut butter.

However, do keep in mind that dish soap was made for washing dishes and not to be used as a shower gel. Here’s what you will need to do in order to get rid of that nasty stuff from your hair. First of all, stop scratching because you’ll only spread around the stuff, and rip some hair locks in the process.

Now, pour a tablespoon of your favorite dish soap into your palm and apply it over the sticky area. Rub the area for 5 to 10 minutes. After that, wait a while for the soap to sit and do its job. After that, get into the bathroom, rinse your hair with plenty of water.

You can also use a little bit of shower gel or shampoo to ensure that there’s no more dish soap in your hair. I know it sounds nasty, but then again you really had to scratch that itch.

That’s it for my short and sweet list of how survivalists use soap, regardless if its liquid, solid or the kind used for washing dishes. Do you believe my list lacks certain applications? Hit the comments section and let me know.


Other self-sufficiency and preparedness solutions recommended for you:

The Lost Ways (The vital self-sufficiency lessons our great grand-fathers left us)

Survival MD (Knowledge to survive any medical crisis situation)

Backyard Liberty (Liberal’s hidden agenda: more than just your guns…)

Alive After the Fall (Build yourself the only unlimited water source you’ll ever need)

The Lost ways II (4 Important Forgotten Skills used by our Ancestors that can help you in any crisis)

The Patriot Privacy Kit (Secure your privacy in just 10 simple steps)

Ever stopped to think just how useful a bar of soap can be? No, you can’t shave it and turn it into plastic explosive as Frank Burns from M*A*S*H said,

You know that S really HTF and broke it when you have no other choice than to drink water out of muddy puddle you found on the side of the road. Perhaps a call-to-action to some but, to most of us is what makes survival gritty. Fortunately for us, there’s plenty of ways to make that unpalatable water safer to drink, and not all of them rely on water purification tablets or sterilization bottles.

In an SHTF situation, it’s possible to filter water by using charcoal and nothing else. Yes, I know that the charcoal and water really don’t mix, but truth be told, this is the second-best water purification method after boiling. What I like about this little experiment is that it really brings out that cavemanish side of us which we desperately try to suppress and hide.

So, if you’re stuck out there in the wild, with no water-filtration sippy cup, no purification tablets, and not sources of water other than puddles and stinky ponds, here’s what you will need to do in order to whip up a charcoal-based sterilization system.

Word of warning before we start – through the time-honored method is great at getting rid of most bacteria and dirt, I would advise you to start looking for another water source. Works like a charm for a day or two, but wouldn’t bet my kidneys on it for anything longer than that.

Materials needed

  • Empty plastic bottled (I’ve tried it on an old Coca-Cola bottle).
  • Canteen.
  • Survival knife.
  • A handful of pebbles.
  • A handful of sand.
  • Charcoal
  • Water carrier (cup, mug or anything to store the purified water).
  • A clean piece of cloth or a bandage.

Making a charcoal-based water purification filter

Step 1. Gather all your materials. You can use a piece of charcoal from your campfire. Still, seeing that some necks of the woods are filled with tourist, there’s a slight chance of stumbling upon an extinguished fire pit, thus sparing you the trouble of starting a fire.

Step 2. Use your survival knife to cut the bottom of your plastic bottle. Don’t discard the keep.

Step 3. With the cap still on, put a couple of pebbles inside the bottle.

Step 4. Use the pommel of your knife to stuff the peddles.

Step 5. Add a layer of sand. Again, use the back end of your knife to make sure everything’s neat and tidy.

Step 6. Add the piece of cloth or bandage and arrange it.

Step 7. Toss in your charcoal. You may have to smash it in order to fit inside the bottle.

Step 8. Add another piece of cloth or bandage.

Step 9. Add more sand.

Step 10. Put some pebbles on top, and you’re all set to go.

More on the makeshift water filtration system

See how simple that was? Congrats on your first charcoal-based water filtration system. However, there’s one more thing you’ll need to do – test it. Do bear in mind that although the system’s great at removing most of the dirt, slime, and bacteria from the water, it won’t get rid of everything. So, in order to test your charcoal filter, fill your canteen with water from a puddle or other water source. Be careful to avoid picking up too much dirt or other things floating in the water.


Put an empty water carrier underneath your water purification system and begin pouring water from the canteen. Don’t fret or pout if the water inside the carrier is still dirty. It takes about three or four attempts to get clear water. Just keep trying. The results will certainly speak for themselves – not like you got any other choice.

Design-wise, it’s very important not to forget about the cloth pieces. Apart from charcoal, they also play a key role in the whole water purification system. What happens if you add a single layer or forget about them? You end up with charcoal-black water, and that’s a major turn off.

Careful when choosing the pebbles and sand. If possible, remove as much of the dirt and dust from them before sticking them inside your bottle. As far as the sand part is concerned, if you cannot find any, you can also replace the sand layers with more cloth and pebbles.

For the best possible results, I would 2-liter plastic bottles. You should also consider attaching some sort of handle near the open end to make the filtration device easier to hold. If you want to add an extra layer of filtration, cut a small hole in the plastic cap and fill the inside with a thin piece of bandage or cloth. You may have to wait a while longer for all the water to drain in the carrier, but at least it’s a bit cleaner.

Again, this water filtration method is designed for short-term use, not for the long-run. If you’re still lost, try to look around for other water sources. For instance, some tree holes contain a fair amount of water, but you’ll need to whip up some sort of siphoning system (that’s why I included a small tube in my B.O.B). You can always crush the stems of fleshy plants for extra water.

One more thing – choosing the right pieces of charcoal. Sure, all charcoal is the same, but for this to work, you will need to scavenge two intact pieces. You will end up with zilch and a lot of dirty water if you use crushed charcoal. Ideally, you should at least keep one or two pieces of charcoal inside your tinder box, but you can also make some by starting a fire.

That’s about it on how to make an efficient charcoal-based water filtration system. It’s a very basic rig, but it gets the job in a shit hits the fan situation. Do you think my design needs some improvement? If you feel like something’s missing, don’t be a stranger and hit the comment section. Would also like to hear your thoughts on other ways to purify water in the field.

See also the video below that shows you how the charcoal works in purifying the water:

Fortunately for us, there’s plenty of ways to make that unpalatable water safer to drink, and not all of them rely on water purification tablets or sterilisation bottles.

There’s more to zip than meets the tie. No? Let me try another one on you. Tie me a river? Zipper me timbers? I give up. Anyway, in case you haven’t figured it out by now, today’s top is zip ties – very common and handy household item, especially when things get way too intense in the bedroom.

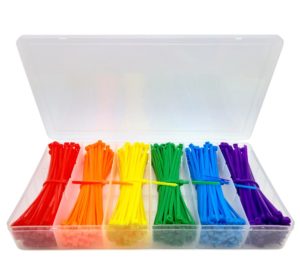
Joke aside, I believe that everyone should have at least one bag of heavy-duty zip ties around the house since they’re very useful for all manner of odd jobs – I personally use them to prevent my PC cables from getting tangled. Sometimes I even use them to organize my paracords.  Now, as you’ve guessed it, zip ties can be a great help in a shit hits the fan situation. So, without further ado, here are 25 survival uses for them zippy ties.

Splinting and securing bandages

Not every SHTF ends with you being rescued the minute you hit the “dial” button on your phone. Sometimes, you will need to fend for yourself before the cavalry comes to pick you up. Scrapes, bruises, wounds, and fractures are possible, especially when you’re forced to cross a hostile terrain.

Normally, you would use cordage (string, rope, shoelaces or dental floss) in case you need to splint a limb, toe or finger. If you don’t have anything else on hand, use one or two zip ties to secure the splint. Don’t forget to snip off the excess. The same method can be employed to ensure that the bandages stay where they’re supposed to stay and that would be the wound.

In a major medical emergency (e.g., profuse bleeding, protruding wounds), a heavy-duty zip tie can double up like a tourniquet. Only use this as a last resort or if you don’t have anything else on hand to control the bleeding like plastic tubing, surgical glove, condom or cordage. Indeed, a zip tie can be used to “clamp off” a bleeder but, in the long run, it ends up doing more damage than the wound itself.

Repair damaged gear

Missing stuff from your bug out bag like a sewing kit for instance? No problem as long as you have a bag of zip ties. They can be successfully employed to mend any kind of gear – parka with a missing button, zipper with no tab, holes in the backpack or heavy rain poncho; snip off the ends and you’re good to go.

Keeping B.O.B items within reach

Many survival items come with lanyard holes, but not all of them. That shouldn’t be much of an issue if you remembered to pack some zip ties in your bug out bag. Just run that plastic tie through anything resembling a hole and attach the item to your belt or to a mini carabiner (that’s how I keep my survival lighter).

Restrain someone

If you get caught up in the fight, use a heavy-duty zip tie to restrain the bad guy until the authorities arrive. Well, you can also use them for other restraint purposes, but I ain’t going to touch this one.

Keeping boots where they belong

One of the worst things that could happen to you during hacking is shoelaces going sour on you. Don’t have extras in your backpack? Grab a zip tie, run it through the holes, and you’re all set.

Prevent pants from falling off you

Lost your belt or had to use it for other purposes? Yup, grab a heavy-duty zip or more, run it through your pants’ belt loops, and tie it. Won’t win you a fashion contest, but at least you won’t have to go around butt-naked.

Craft a shelter

You can use zip ties to secure the beams to each other when you’re building a shelter. They’re also useful in anchoring your makeshift shelter to a nearby tree or to the ground.

Mark trails

If you have a pack of brightly colored zip ties, you can secure them to low tree branches or rocks in order to mark off a trail. They also serve the purpose of signaling, letting your rescuers know that they’re going the right way.

Make a net

It’s possible to weave a net using small zip ties – very useful for all kinds of purposes such as berry-picking or storing game before reaching the campsite.

Make a trap

You can whip up a simple trap using a zip tie, a bent sapling, and some bait. Moreover, heavy-duty zip ties can be used to hang large or medium game from a branch – makes skinning and butchering easier. If you plan on curing meat, draw a heavy-duty through the flesh, and hang the cuts on a branch or an improvised line.

Repair a broken bag

If the zipper or purse lock refuses to work, grab a zip tie and secure the ends. Yes, I know it looks awful, but hey, at least your stuff will stay inside the purse\backpack\bag\tote.

Hang clothes

Don’t have any cloth hangers around the house? You really don’t need to hit the store to buy some more; just use a couple of zip ties to hang them in the wardrobe.

Patch holes in your fence

As the proud owner of a dog which has way too much energy, I spend at least a couple of hours every week mending the chain link fence. As replacing the entire grid would cost me a pretty penny, I usually use heavy-duty zip ties to patch the holes; thanks, Nero. You’re the best!

Keep your B.O.B organized

Use small zip ties to secure paracord and to keep your cables organized. Remember that it’s an emergency survival kit, not your sock drawer!

Extra traction in cold weather

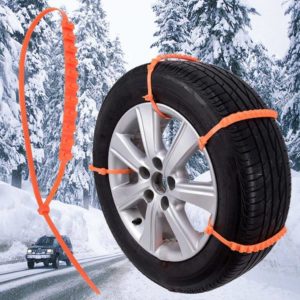
Although I wouldn’t advise you to drive around town with zip ties attached to your wheels, in an emergency, you can use two or three to gain extra traction on icy roads. Works best in conjunction with kitty litter and sand.

Quick-draw mod for pocket knives

A pocket knife is not only great for carving wood or cutting meat, but also a great ally in hand-to-hand combat. As a self-defense teacher once said, the first ten seconds of any armed encounter will determine the outcome of the fight. A pocket knife is an excellent close-quarter weapon, but getting the blade out takes a couple of seconds.

To gain an edge in combat, you can add a quick-draw mode to your pocket knife. Here’s what to do: take a piece of the zip tie and secure it to the finger hole. Snip away the excess. Yes, I know it looks dumb, but that little piece of plastic will get the blade out as soon as the knife leaves your pocket. Try it and see if there’s any difference.

Keep your travel bags safe

If you plan on going abroad this year, forget about using a padlock to secure your suitcase. Use a heavy-duty zip tie instead. Travel locks can be easily removed. The same thing cannot be said about a fastened zip tie which will take more than a pair of a bolt cutter to unfasten.

To be extra safe, use at least four of that stuff. You should use zip ties that match the color of your suitcase for concealment purposes. Don’t forget to tighten them before reaching the airport and to snip off the excess.

Leg protection

Mother Nature’s is very good at hiding stuff in plain sight. This includes poisonous plants like ivy or nettle. Now, if you’re about to cross an area with tall grass or plenty of puddles, use a heavy-duty zip tie to lash the pants to your ankles. That tie will make sure nothing gets inside your pants.

Make more room in your bug out bag

If your bug out bag comes with a bedroll, mylar blanker or sleeping bag, use a couple of heavy-duty zip ties to secure the bundle and to compress it. You can do the same for your rain poncho.

Makeshift bandana

Hair getting in your eyes? Use a bandana. You don’t have it anymore? Not a problem. Use a piece of zip tie to prevent those curly locks of your from getting into your eyes. If you have longer hair, it’s possible to use a pencil and then zip tie to make a bun.

Keeping your tomato vines in line

As a gardener, I can truly say that zip ties are what one might call a God-sent gift. Without those little plastic loops, my tomato vines would grow all over the place. That doesn’t sound so bad, I know, but I do have this obsession with keeping my garden organized; the same thing cannot be said for my clothes or socks.

Make a headlamp from any tac light

Although your tac light should come with a head attachment, in some cases the manufacturers forget to include that thingamajig. Anyway, if you find yourself unable to hold your electric torch, use some heavy-duty zip ties to secure the tac light to your head. Furthermore, you can use the same trick to tie a regular flashlight to your bike’s handle if the one you have can’t handle the darkness.

Hang a solar still

In one of my previous articles, I showed you how to make a simple solar still using a plastic bottle and a tin can. When it’s ready, use a piece of zip tie to secure your still to a nearby low-lying branch.

Patching your tent

Because I’ve been hiking ever since I could remember, I have at least one fully functional tent around the house. Now, the thing I realized about these mid-range tents is that the rivets closing the hatch tend to break after a couple of uses.

No problem if you’re still in town, but kinda shitty when you want to hit the hay and can’t close the hatch – bears are not a problem if you keep the fire running, but the mosquitoes won’t spare you.

Now, if you have issues with your hatch, use a couple of zip ties to close it. Yes, you may need a survival knife or a pair of scissors to get out of the tent, but at least those damned mosquitoes stay outside, where they belong.

Use around the house

Zip ties are great for keeping cables anchored to the wall or other kinds of odd jobs. For instance, I like to use them to dry the meat my wife will use to prepare beef jerky. If you have a little smokehouse, you can replace metallic hooks with zip ties to hang the meat.

They’re also double up as padlocks – if you have a gun cabinet, you can use one or two heavy-duty zip ties in conjunction with a lock to keep the guns out of children’s reach.

That’s it for my article on ways to use zip ties in a shit hits the fan situation. Anything missing from the list? Head to the comments section and let me know.

Not every SHTF ends with you being rescued the minute you hit the “dial” button on your phone. Sometimes, you will need to fend for yourself before the cavalry comes

Sometimes, you have to think outside of the freeze-dried food paradigm. You may find yourself in the woods forced to run from your home or camp because of marauders with nothing to eat. Fortunately, there are many edible plants that can save your life if you know what they are, how to identify them and are comfortable with preparing them.

I don’t personally think that I will love eating a bunch of weeds to survive, but I will if needed. In a long-term disaster, I would certainly consider them vital to preserving life and the right edible plants could augment your gardens and food stores. I wanted to write up this list of 20 edible plants that are found mostly in the temperate region. There are certainly others you could find growing near you, but this is a good start. If I am able to master 20 edible plants in the area where I live, I would consider that a huge benefit to my prepping needs.

There are a lot of very recognizable plants you can eat like strawberries, blueberries, blackberries and so on, but I didn’t want to add those to the list.

Plants to avoid

Before you grab a good book on edible plants and run out into the woods with a bowl and a fork, you should practice some caution with this process. Not all plants are edible and knowing what not to eat is just as important as knowing what to eat. Before you forage, here are some simple rules to follow when you are trying to identify a plant.

Do not eat any plants that have the following traits

  • Milky or discolored sap
  • Grain heads with purple/pink or black spurs
  • Beans, bulbs or seeds inside pods
  • Yellow, white or red berries
  • Soapy or bitter taste
  • Never eat plants with thorns.
  • Steer clear of plants with shiny leaves.
  • Don’t eat mushrooms. Many are safe to eat, but many are highly toxic and even deadly, so it’s not worth the risk.
  • Umbrella-shaped flowers are a bad sign. Stay away from these plants.
  • Avoid anything that smells like almonds.
  • Same as poison ivy, stay away from plants with leaves in groups of three.

Related – The vital self-sufficiency lessons our great grand-fathers left us

In addition to avoiding all of those traits, you want to forage for wild edible plants in areas that are less likely to have toxins. Plants growing near homes could have been sprayed many times with chemicals. Plants in water that is contaminated will likely hold that same contamination. Plants by the road will have picked up many harmful chemicals and pollution.

Before eating, use the Universal Edibility Test

Before taking the test, you need to fast for 8 hours. If you are desperate enough to need to find edible plants, this might be already the case.

  1. Test only one part of a potential food plant at a time.
  2. Separate the plant into its basic components – leaves, stems, roots, buds and flowers
  3. Smell the food for strong or acid odors. Remember, smell alone does not indicate if a plant is edible or not.
  4. During the 8 hours you are fasting, test for contact poisoning by placing a piece of the plant part you are testing on the inside of your elbow or wrist. Usually 15 minutes is enough time to get a reaction if there is going to be one.
  5. During the test period, take nothing by mouth except purified water and that plant part you are testing.
  6. Select a small portion of a single part and prepare it the way you plan to eat it.
  7. Before placing the prepared plant part in your mouth, touch a small portion (a pinch) to the outer surface of your lip to test for burning or itching.
  8. If after 3 minutes there is no reaction on your lip, place the plant part on your tongue and hold it there for 15 minutes. DO NOT SWALLOW.
  9. If there is no burning, itching, numbing, stinging , or any other irritation, swallow the plant part.
  10. Wait 8 hours. If any ill effects occur during this period, induce vomiting and drink a lot of water.
  11. If no ill effects occur, each ¼ cup of the same plant part prepared the same way. Wait another 8 hours. If everything is still good after all of these steps, the plant is considered edible.

Note: Just because the part you tested is edible, that doesn’t mean the entire plant is edible. Test all parts the same way before eating them.


Related – 4 Important Forgotten Skills used by our Ancestors that can help you in any crisis

List of Edible Plants

Amaranth (Amaranthus retroflexus and other species)


Amaranth is an edible weed found almost everywhere. You can eat all parts of the plant but some leaves contain spines. Boil the leaves to remove the oxalic acid and nitrates.

Asparagus (Asparagus officinalis)


Wild Asparagus grows in most of Europe and North America. This looks different than the fatter stalks you normally eat but can be eaten raw or boiled. Add a little butter and salt.

Burdock (Arctium lappa)


Young plant roots and stems can be cooked by boiling for about 20 minutes, then season to taste. Before cooking however, the stems should be peeled, and roots scrubbed in order to remove the bitter rind.

Related – Even SWAT Teams are helpless against THIS

Cattail (Typha species)


The lower parts of the leaves can be used in a salad; the young stems can be eaten raw or boiled; the young flowers (cattails) can be roasted.

Clover (Trifolium)


I have never been able to find a four-leaf clover but you can’t walk out in my back yard without stepping on this plant. You can eat the leaves raw or boil them.

Chicory (Cichorium intybus)


Leaves and root. Although the flower is edible, it is very bitter.

Chickweed (Stekkarua media)


Chickweed is a very nutritious herb, containing Vitamins A, B1, B2, B3, C, E along with Calcium, Copper, Iron, Magnesium, Manganese, Phosphorous, Potassium, Selenium, Silicon, Sodium, Sulfur and Zinc plus essential fatty acids. It can be eaten as a salad vegetable or cooked and eaten like cabbage.


Related – Knowledge to survive any medical crisis situation

Dandelion (Taraxacum officinale)


Dandelion leaves can be added to a salad or cooked. They can also be dried and stored for the winter or blanched and frozen.

Persimmon (Diospyros virginiana)


Persimmons are rich in vitamins A and B, and are a good source of fiber. To get the most nutritional value from persimmons, it’s best to eat them raw.

Plantain (Plantago species)


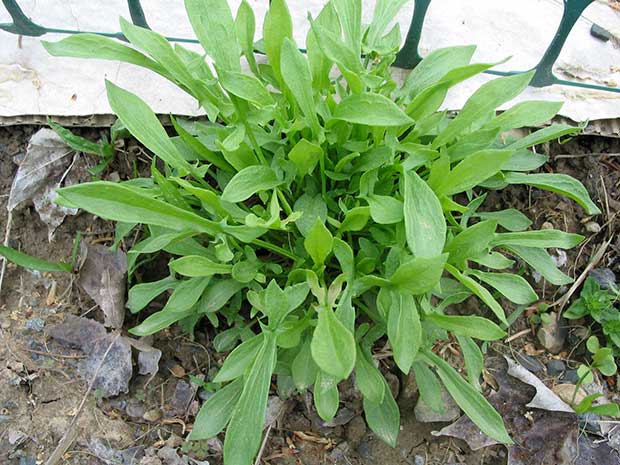
The leaves can be eaten raw or steamed for a spinach substitute, and are awesome raw in salads and blended into green smoothies, especially the younger ones as the mature leaves may taste slightly bitter.

Pokeweed (Phytolacca americana)


Pokeweed can be poisonous if not prepared carefully. You have to ensure you don’t get the roots and the shoots aren’t too long.  Make sure you learn more about the proper cultivation and preparation of this plant before eating it.

Prickly pear cactus (Opuntia species)


Both the pads and the fruit of the prickly pear cactus are edible.

Purslane (Portulaca oleracea)


The moisture-rich leaves are cucumber-crisp, and have a tart, almost lemony tang with a peppery kick.

Sassafras (Sassafras albidum)


The leaves of Sassafras texture and can be used raw or cooked in salads or eaten right off the plant, unlike the berries, the leaves have a mild pleasant taste.

Sheep sorrel (Rumex acetosella)


You can use the leaves in salad, or make into soup.

Thistle (Cirsium species)


Flower head shown: Just strip the green off the leaf leaving the very edible midrib. Rub the “wool” off and enjoy, raw or cooked.

Water lily and lotus (Nuphar, Nelumbo, and other species)


Leaves gathered anytime during the growing season (although, again, early spring growth is best of all) make good greens. Chop the pads into noodle-like strips and boil them in one change of water. The addition of a little bacon doesn’t hurt a thing.

Wild onion and garlic (Allium species)


All parts of this particular Wild Onion are edible, the underground bulbs, the long and thin leaves.

Wild rose (Rosa species)


Petals can be added to salads , desserts, beverages, used to make jelly or jam and be candied

Wood sorrel (Oxalis species)


The leaves, flowers, green seed pods, and roots are all edible, raw or cooked. It can be eaten straight out of the ground, added to soups, made into a sauce, or used as a seasoning. As a seasoning, it provides a lemony/vinegary taste to whatever it’s added to.

Now that you have some more information about the edible plants near you, why don’t you try eating some of these varieties the next time you go for a hike in the woods. Any wild edible plants that you eat that didn’t make the list?


Other Self-sufficiency and Preparedness solutions recommended for you:

The Lost Ways (The vital self-sufficiency lessons our great grand-fathers left us)
Survival MD (Knowledge to survive any medical crisis situation)
Backyard Liberty (Liberal’s hidden agenda: more than just your guns…)
Alive After the Fall (Build yourself the only unlimited water source you’ll ever need)
The Lost ways II (4 Important Forgotten Skills used by our Ancestors that can help you in any crisis)
The Patriot Privacy Kit (Secure your privacy in just 10 simple steps)


Remember, before eating these plants, use the Universal Edibility Test. Details inside.

We buy a lot of things to prepare for the unexpected…or expected, that SHTF will be at our doorstep one day. For some, this is further in time, for others comes every day with floods, hurricanes, bad weather conditions and much more.

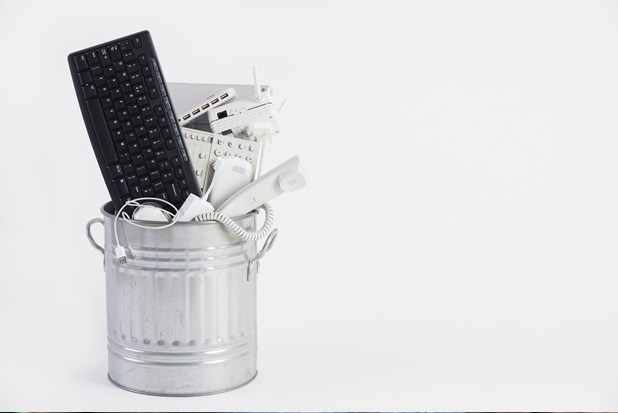
You may have in mind items for when the SHTF like duct tape, canned food, survival knives, but there is one item you might consider including in your prepper list: the trash can.

Why Trash Cans?

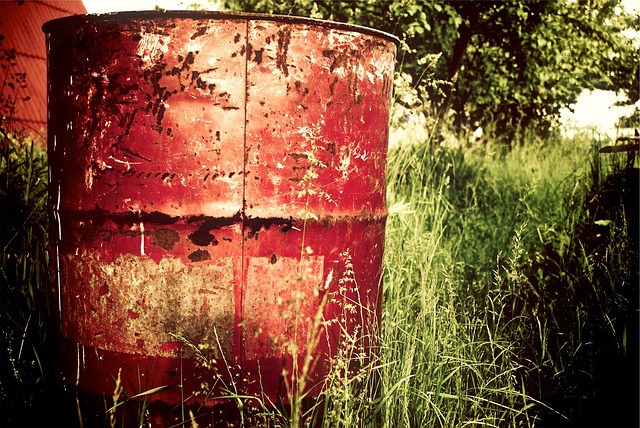
You already use trash cans. They are everywhere (inside and outside) which make them easy to access in an emergency. Trash cans are a heavy-duty item; they stand up to frequent use and they’re durable as hell. Even indoor cans, like those you’d use in an office, have potential uses you probably haven’t considered.

Here are just a few ways you can use trash cans when the grid goes down.

1: Collect Rain Water in Trash Cans

In an emergency, a trash can may be your best bet if you are running out of stored water. You can turn your trash bin, perhaps used to store other prepping supplies up to that point, into a rain barrel. This project requires two holes cut at the top and bottom for the downspout and faucet, PVC piping to construct a downspout, gasket fittings, and tubing for the faucet. Fittings may be secured with washers and sealed with silicone caulking.

My recycling bin is going into action immediately as a rain barrel if the grid goes down. After a thorough cleaning of course.

Keep all needed items with a compass saw for cutting the holes without a power drill and rain barrel-making instructions in a Ziploc bag near your trash can. Rainwater should always be treated before consumption, so figure out ahead of time if you are going to use chlorine, filters, or boiling methods to purify your drinking water.

2: Make a Super-Sized Rocket Stove

Converting a large metal trash can into a rocket stove is fairly straightforward. Cut a hole at the bottom of the trash can to accommodate a stovepipe made of 6” elbow piping; the stovepipe will need to be constructed as a double-walled chimney with a trim ring and an extra section of piping. The stovepipe will fit into the hole cut toward the bottom with its top trimmed below the top of the garbage can. The pipe should be secured with dowels and nuts arranged in a wagon wheel pattern to stabilize it. The pipe is then insulated with vermiculite poured between it and the sides of the trash can.

You will need to lay a grate across the top for a cooking surface. Load the bottom of the stovepipe with wood and light. Now you’re ready to boil water and cook food on a stove so efficient it requires very little wood to produce the necessary amount of heat.

3: Dispose of Human Waste

A smaller trashcan can work as a makeshift toilet. This is a simple solution in situations where human waste needs to be carried away for disposal. Line your trashcan with a double layer of garbage bags. Place a couple of 2x4s over the rim to create a seat. Waste can then be carried away and the trash bags replaced as needed.


4: Grow Food

Trash cans can be great tools for growing plants. A favorite trick of home gardeners everywhere: using a trash can to grow potatoes. Potatoes require large amounts of earth heaped on top of growing plants, and a large trash can (think 20 to 32 gallons) is a great way to keep soil in place as the potato plants grow upward. Either drill holes in the bottom for drainage or just cut the entire bottom off of a plastic trash can.

Potatoes don’t have to grow in the ground. You can use an old trash can to create a potato growing container

Start the potatoes in about 10 inches of soil and add more for every 10 inches or so of growth. The best part is the trash can is easily cleaned and used for a new crop as soon as the first is harvested.

5: Shovel Snow

That small trashcan in your bathroom or office can become a snow shovel. Shoveling with a small can certainly won’t be easy on your back, but a trash can may also work to move soil and sand. Just make sure the can is sturdy enough to hold up under the weight of snow before you start using it to dig yourself out.

6: Faraday Cage

A Faraday Cage is essential for keeping your small electronics safe from an EMP (electromagnetic pulse), and you can make one using a steel trash can. Wrap each item in cloth, then wrap in three layers of foil. Place the item in a box and wrap the box in two layers of foil. Store off the ground once wrapped.

Trash cans can be used for simple Faraday cages.

Completely line your trash can with cardboard and seal with its tight-fitting lid. For this protective system to work there needs to be a clear separation between both the layers of foil and between the foil and the trash can metal. Steel trash cans are sold in a variety of sizes, so you can select the one that works best with the number of electronics you are trying to keep safe.

7: Hold Emergency Supplies

Trash cans make useful storage containers for prepping supplies. They come in a variety of sizes with all kinds of lids and handles. You can even select cans in different colors to better organize your supplies. Larger trash cans may be used to store emergency supplies for a whole family– just throw it into the bed of your truck for hauling supplies the moment you need to. Then you can repurpose the trash can for any of the above ideas.

Think Creatively, Be Prepared

A trash can is useful for much more than holding garbage – it can be an integral part of how you collect water, cook food, dispose of waste, grow food, or protect your electronics. Of course, these are just a few of the ways your common trash can fits into survival plans:

We buy a lot of things to prepare for the unexpected…or expected, that SHTF will be at our doorstep one day. For some, this is further in time, for others

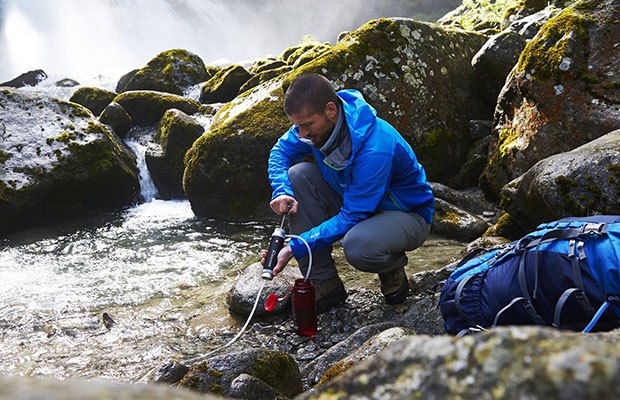
A critical prep that you have to plan for including in your bug out bag is water. When I first got into prepping, I had people saying that they would carry all of the water they needed in their bug out bags. If you figure 3 gallons (1 gallon per person per day), that would simply not be wise or possible for most people for very long. Then I started seeing people say they would pack 3 liters of water. That’s better, but 3 big plastic bottles is almost 7 pounds, not to mention you must have space for them. Not the end of the world, but not insignificant either.

One of the ideas I try to promote is to watch the weight on your bug out bags and not overload them. I recommend this for a lot of really simple reasons. If your Bug Out Bag is too heavy, it will hurt eventually. It might not hurt when you first take off walking, but it will eventually. In addition to rubbing you raw and potentially causing injury, you will be more off-balance and less able to quickly move. If you can’t move out of danger quickly enough, that bug out bag could get you killed. The better idea is to pack your bug out bag in a way that is as light as possible while still maintaining the essentials you need to survive for up to 72 hours. Don’t go minimalistic for the sake of making the scales proud, but you should look carefully at the overall weight.

Water, Food and ammo, possibly a tent are all great places to shed pounds from your bug out bag and today we are focusing on water. I have personally tried a few different water filtration methods and wanted to highlight the pluses and minuses for you today on Final Prepper as I see them. Hopefully this information you will make sure the bug out bag water filtration options you choose will work well for you if you ever need to use them.

In addition to being less heavy than simply carrying your water on you at all times, these bug out bag water filtration options will give you increased range and capabilities. Instead of being limited to only the water you are able to carry, it is easy to filter an extra liter or more from sources along your route. All the while, ensuring that the water you are drinking isn’t going to make you sick.

MSR MiniWorks EX Water Filter

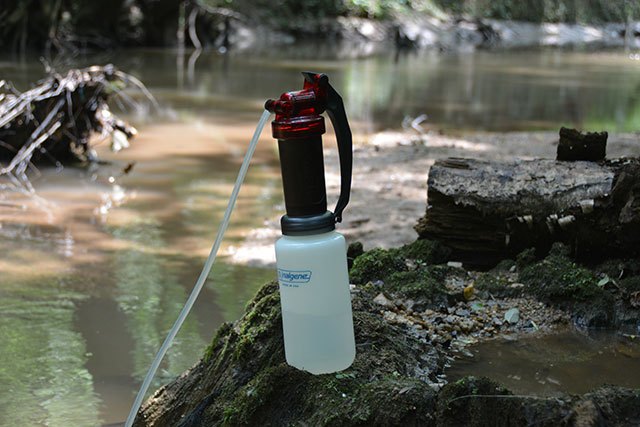
This first filter I tested is one I have owned for years and up until recently used on my backpacking trips. The MSR MiniWorks EX is a great water filter that is activated by a manual pump. You simply connect the hose, stick that into the water and screw your Nalgene bottle or dromedary bag onto the bottom of the filter and start pumping. In just a few minutes the water from your  source will be pressed through the filtration system and with a little time, you will have a full bottle of clean water to drink. Filtering a standard Nalgene bottle like below probably took 3-4 minutes.

msrminiworksfilter

The MSR MiniWorks EX was my first backpacking water filtration. We loved it when we had to depend on it in the woods.

I would take these down to the river and fill up everyone’s water bottle as well as two 48 ounce bladders we had when we stopped. The bladders were to refill bottles and went toward coffee and reconstituting our freeze-dried food.

So, good and bad about this filter. First off, I like the fact that this is pretty simple to use and you don’t have to get down into the water to collect anything. The water tastes great and the pump has stood the test of time for the most part. I did have one pump stop working on my wife when we were on a backpacking trip. Fortunately, I had two filters so we had some redundancy built-in. Pumping does take you a little while and the pump isn’t the lightest or cheapest option. Once you return from your trip you need to clean the filter element, usually with a scrubbing pad to get the gunk off of it and let everything dry completely for a few days before you put it away.

MSR MiniWorks Features

  • Ceramic/carbon Marathon™ EX element effectively removes bacteria and protozoa including giardia and cryptosporidia
  • Also removes unpleasant tastes and odors caused by organic compounds, such as iodine, chlorine and pesticides
  • Filter can be cleaned over and over for maximum field life with no tools required
  • Bottom screws onto an MSR Dromedary® Bag or Nalgene® water bottle for easy operation (both sold separately)
  • Easy dis-assembly lets you troubleshoot and maintain the MSR MiniWorks EX filter in the field

Weight: 14.6 ounces

Cost: $84 on Amazon.com

I also found this excellent review of the MSR MiniWorks EX from Black Owl Outdoors for those who like to watch videos.

Sawyer Mini

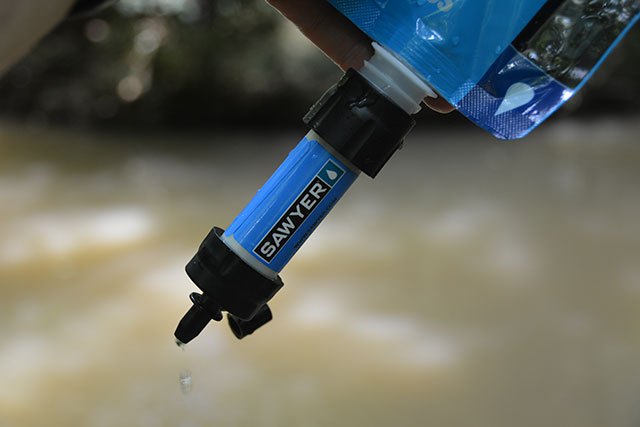
When I first tried out the Sawyer Mini I thought this was the best invention in the world at least from the standpoint of water filtration options for preppers. The filter was extremely lightweight, compact and could filter hundreds of thousands of gallons. The Sawyer Mini could be used as a straw to drink from a water bottle like the life straw or from the included squeeze bag that comes with it.

The cost, low-weight and ability to filter so much water is an incredible advantage, but using either the squeeze bag or a standard water bottle has some drawbacks in my opinion. You are still only filtering on demand unless you squeeze the water into another container and that isn’t always the most practical. One of the reasons I don’t think the LifeStraw is the best option for me in all cases.

sawyerwaterfilter

You can use the included squeeze bag to collect water and the Sawyer will make it safe to drink.

Sawyer Mini Features

  • Hollow-fiber membrane offers a high flow rate; sip on the Mini like a straw and it filters the water while it’s on the way to your mouth
  • Filter will also fit the threads on the included Sawyer 16 fl. oz. reusable pouch that you can fill at a lake or stream and then use to squeeze water through the filter
  • 0.1-micron filter physically removes 99.99999% of all bacteria, such as salmonella, cholera and E.coli; removes 99.9999% of all protozoa, such as giardia and cryptosporidium
  • Filter will also fit the threads on most bottles of water that you buy at a grocery store; can also be used as an inline filter (adapters and hoses not included)

Weight: 2 ounces

Cost: $20 on Amazon.com

I also found this review for perspective from Preparedmind 101

Polar Pure – Crystal Iodine Water Treatment

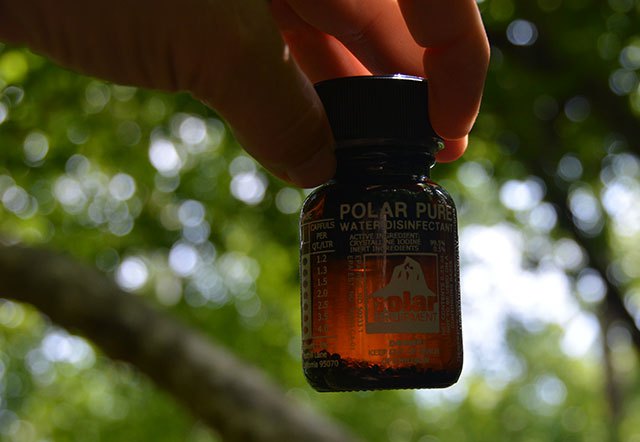
The third option I tried is Polar Pure. Polar Pure is a Crystal Iodine water treatment, not a filter. The bottle holds actual iodine crystals you might be able to see in the photo below. The process is for you to fill the bottle with water and let this sit for 1 hour. At the end of an hour you have something like concentrated iodine brine that you can use make almost any water safe to drink. There are simple to follow instructions on the bottle and even a hand-dandy gauge to tell you how many capfuls of the solution your water will need to be safe. The number depends upon the temperature of the water.

polarpure

Polar Pure uses iodine crystals to disinfect water.

You pour the recommended capfuls into your 1 liter water bottle and let it stand for 20 minutes before drinking. When you are done, just fill the bottle up with water again and it will be ready for your next treatment in another hour. This relatively small bottle will last for up to 2,000 liters of water, although I don’t know who would count them. When the iodine crystals are gone, so is your ability to use this to make your water safe.

Iodine, unlike the micron water filters above can kill viruses. Giardia, mentioned above is caught by the water filters, but if you have something like hepatitis or polio in the water, the simple filtration method above won’t work. Now, the question becomes, do you have to worry about viruses in the water you are drinking or just organisms that can make you violently ill?

The Polar Pure bottle is one that I would carry with me as an extreme back up for highly questionable water. The science is good on making your water safe. Iodine has been used for a very long time, but the bottle is glass. You could be in trouble if this is all you have and it is broken. Additionally, iodine will make your water safe, but it won’t filter it out so if you pour yourself a big cup of slightly brown pond water and treat it with iodine, it will be perfectly safe for drinking – brown pond water. Filtering your water first through a handkerchief or something like coffee filters at a minimum would be better. Some people use Polar Pure plus another filter for the ultimate in safe water.

Weight: 5 ounces

Cost: $20 on Amazon.com

For those who want to see the polar pure in action, there is a good video from Provident-Living-Today.com

Platypus 2L GravityWorks Filter

The last item I tried out for my bug out bag water filtration decision process was a relatively new purchase. I had heard about the Platypus GravityWorks Filter system from one of the readers on Final Prepper when I was initially looking at the Sawyer answer to the same functionality. The Platypus was almost half the price so I decided to give this a try because it looked like the perfect solution to me.

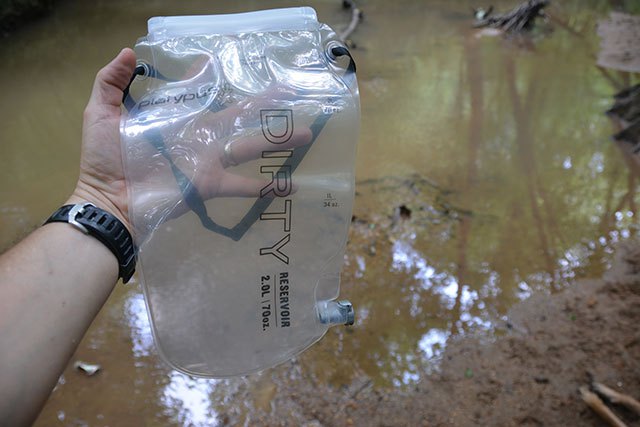
platypusdirty

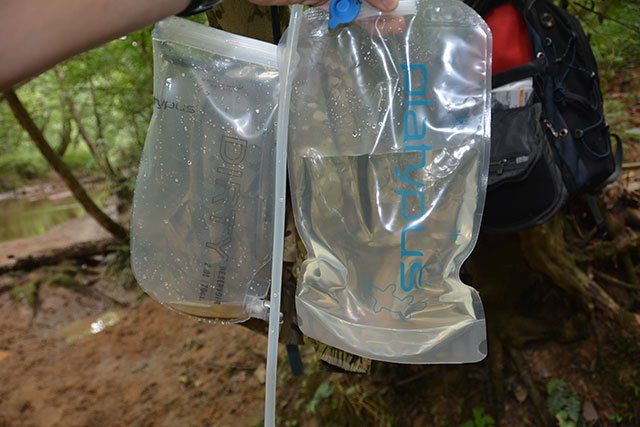
Keeping the bags separated is easy with clear labels.

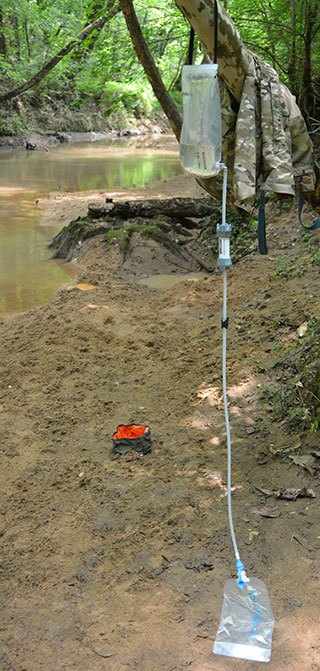
The Platypus 2L GravityWorks Filter is a two bag system. You have one bag for water collection and it is very simply labeled “Dirty”. Your dirty water goes in here and it has a wide opening at the top which works very similar to a zip loc bag. This wide opening allowed me to collect 2 liters of water from the creek very quickly and easily. You can see my test water isn’t a crystal clear glacier spring so the bag’s label was very appropriate.

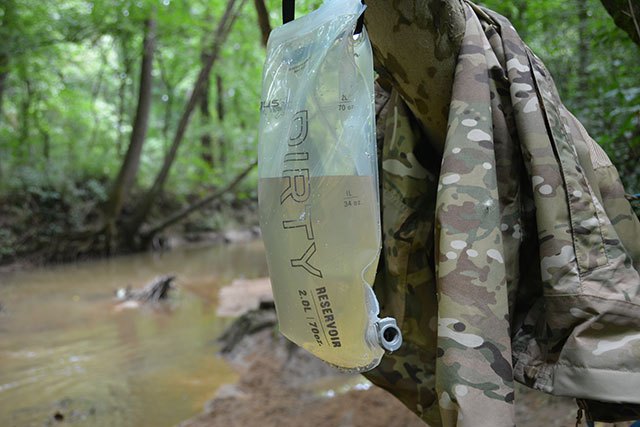
platypusbaghang

The Platypus Bag system has a simple attachment system to hang your bag of water to be treated up on a tree, bumper or anything higher than the clean bag. Gravity does all the hard work.

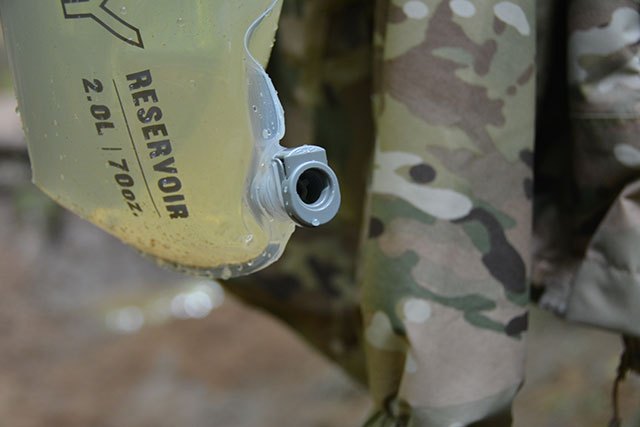
Another nice feature were the connectors. The Platypus GravityWorks has a quick connect so you can collect your dirty water and either pack it out for filtration later or carry it back to camp. The filter element snaps in and you are ready to filter.

platypusquickconnect

The Platypus filter element snaps into the reservoir quick connect and you are all set to filter water.

platypusgravityworks

This system is fast. I only filled up about 1 liter but it was filtered in less than 2 minutes.

Once the filter is snapped in, the water will flow almost immediately. The tube running from the filter has a stopper that you can use to quickly pinch off the flow while you hook up the clean bag. As long as the bag of dirty water is higher than the clean bag, the appropriately named GravityWorks filter will take care of all your heavy lifting while beautiful clean water flows into your empty bladder.

This system will hold 2 liters of water which I think gives you a lot of water for the average person. You can also just filter two liters, then collect two more liters of dirty water for later. You will be carrying four liters of water with you at all times. Two filtered and two that needs to be filtered.

Cleaning this system is as simple as lifting the clean water bag up over the dirty water bag and squeezing your clean water bag. You will see the dirty sediment flow back into the dirty bag and you know your filter is clean when that stops.

Platypus GravityWorks Filter Specs

  • Easy, Pump-free filtering
  • Fast! 1.5-liters per minute
  • Weighs as little as 7.2 oz. (203 g)
  • Ultra-Compact
  • Meets all EPA & NSF guidelines for the removal of Bacteria and Protozoa, including Giardia, Cryptosporidium, E. coli, Salmonella and Cholera

Weight: 7 ounces

Cost: $79 on Amazon.com

And I found this review from Outdoor Gear Lab that shows the larger 4 Liter system.

So What is the best bug out water filtration system?

This question isn’t something I can answer with a definitive statement that will stand for all time or in all situations, but I will share some of my thoughts. My idea of bugging out involves living possibly for some time in forested terrain. I plan to be on the move and I don’t want to slow down more than I have to for rest. Water is crucial for life so I don’t want to have to go to more trouble than is prudent to acquire it. Additionally, if I am strapping a pack on my back and walking out the door, I have to plan for being on my own so to speak for potentially much longer than 72 hours.

I have considered both caplets like the Portable Aqua Water Filter tablets and I even own some of them, but they last for a finite amount of time. The standard bottles will give you I think 25 quarts of water. With a hike for three days in the summer, enough for food and your bottle will quickly be cleaned out. It will go faster if you are sharing.

platypuswaterfiltration

I had all of this clean, fresh tasting water in a little less than two minutes.

The LifeStraw product is one I just don’t think is practical. It is a great idea, don’t get me wrong, but I for one don’t want to be forced to stick my head in a puddle just to get a drink. I want to take giant gulps of water if I am thirsty and I want to be able to take water along with me. Sure you can fill up empty bottles and drink out of them with a LifeStraw, but I think there is a better option.

The MSR Filter pump has usually been a great filter, but because it is mechanical, I have had one give me troubles. I was able to repair it eventually, but that wasn’t a good sign. I should have back-ups anyway I know, but I would rather go with a more stable platform and the MSR is heavier than all of the other options I have tested.

What about boiling water? Sure you could do that, but you have to build a fire first and then boil your water, then let it cool down. Do you want to do all of that in the heat of summer? Even in winter, that fire might be nice, but to go through all that effort for drinking water seems like a fall back plan, not the first option.

Iodine crystals like Polar Pure seem to be the best option for killing viruses, but like I said, their bottle is glass. One slip out of your hands onto a rock will end your water filtration options for that bug out trip. Even if you don’t drop it, I prefer to drink water as soon as possible and wouldn’t want to remember to keep my iodine warm for effectiveness.  I think Polar Pure makes sense as a back up, but not the sole method of water filtration in a bug out scenario. For Backpacking trips Polar pure is a great idea. If you have the time to leisurely prepare your water, I think this is a good option.

The Sawyer as it is would probably be my second choice because of the weight and size. I would have to fill a large reservoir, something like the 48 ounce Naglene Bladders and rig up some way to squeeze filter a larger amount of water into my bottles. Not the best, but it is incredibly light and could get the job done.

What about items like the SteriPEN that use UV light to make water safe to drink? What about EMP? What if it breaks? What if you run out of batteries?

I think that for me the GravityWorks system from Platypus is the easiest and fastest way to collect water that will be clean and fresh tasting. With it’s fast flow rate, I can grab a 2 liter bag of water, hook up the filter and throw them both in my bag if needed and keep on going to a safe location. This seems to offer the most capacity with the fastest filtration time and easiest system to learn and remember. I can teach my kids how to use this in about 2 minutes which is about the same amount of time it takes to produce 2 liters of clean water.

That is my take on the best bug out water filtration options. What do you use?

A critical prep that you have to plan for including in your bug out bag is water. When I first got into prepping, I had people saying that they would

In the face of disaster, preppers know we need to move quickly. We should be prepared to act in a minute’s notice when we realize our family is in jeopardy. We each have our Bug Out Bags ready to go or they should be but it is a different matter altogether if the family bug out mobile is involved. How many times have you watched a Prepper show where the family simulated loading all of their gear to escape town? Often it took them much longer than they anticipated and in at least one case, they couldn’t even take their main prep with them.

We have talked about conducting a trial load of your bug out vehicle before and that makes perfect sense, but what if you had a simple way to plan and stage your bug out vehicle equipment, food and gear that would only take you 10 to 20 minutes to load, was ready to go when you needed it and would give you just about everything you would need to live on your own for at least 30 days? What if this simple bug out vehicle load plan could get your and your family on the road faster? Do you think it would be worth it to spend a little time now as opposed to wasting life-saving hours later?

What do you need to pack if you are running away from disaster?

The idea for the bug out vehicle load plan comes from a couple of places. First, like so many of you, I have tried to figure out and plan for all my supplies if the situation dictated that I needed to throw everyone in the car and leave. I have written about my plan to shelter in place because I think everything being equal, it is much easier to weather some disasters from the comfort of your own home. However, I do realize that I don’t always get a vote. Perhaps a chemical spill 5 miles away was causing illness and evacuations. I would need to go and quickly.

I have many prepping supplies that I think are vital to living and surviving away from my home, but I don’t have them all packed and ready to go. I have some items in closets, some in sheds, some under beds, in spare closets and others strewn in numerous drawers. If I have plenty of time, I think What I have collected so far can cover a lot of bases, but in this scenario, we want to get out quickly. It could be that you want to beat the rush that could quickly cause the highways to be parking lots. It may also be that if you don’t get to safer ground, you will die.

lesak

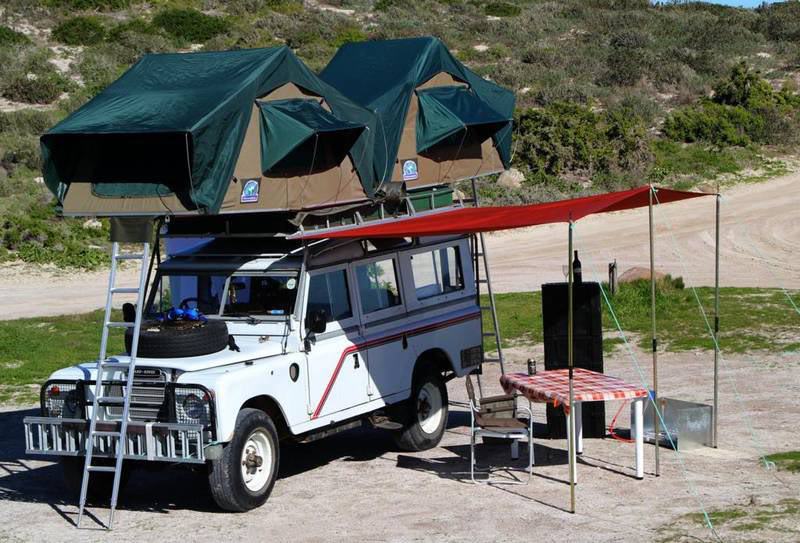
Roof racks greatly extend your cargo carrying capacity.

The list I have put together draws a lot of inspiration from camping trips. I do still maintain that in many aspects, living off the grid is very similar to camping. Yes, there are many ‘but what about’ to that analogy, but if you have the basics to live in the woods for a week without starving, you are in pretty good shape. Will that last years? Will that keep you safe from hordes of Mongolians on horses? No, but we are working towards a goal here. Not everyone is able to have a bug out retreat.

What do you need to survive?

The consistent part of prepping is that everyone needs the same core things to survive. You need water, food, shelter and security. Technically you don’t need security if you are on an island and no creatures or humans are trying to separate you from your head, but you get the idea. In this world, you will likely need to defend yourself from others, in some situations, at some point.

71rudzc9ewl-_sl1500

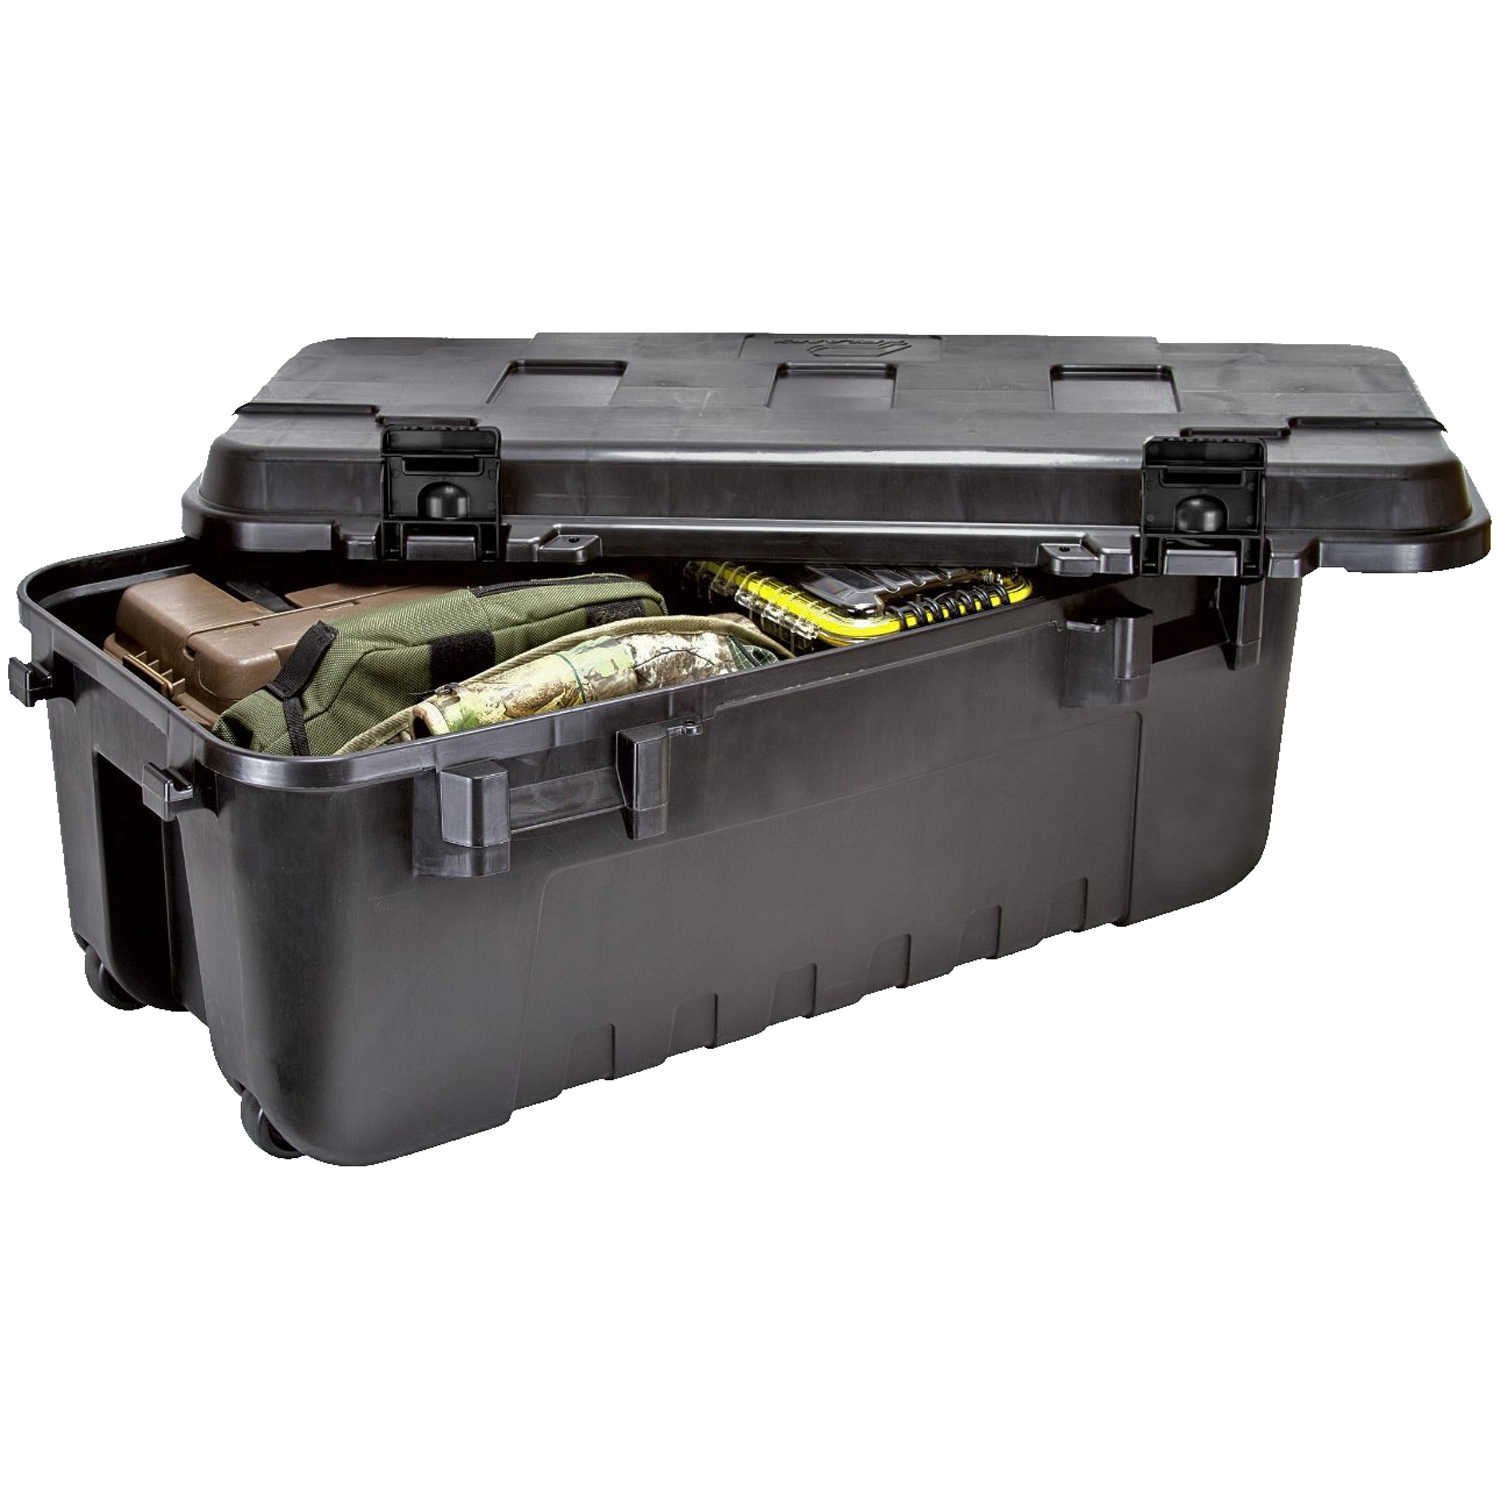
Plano 1919 Sportsman’s Trunk

So our packing list is broken down into storage cases that represent some of these crucial elements. My plan is to have weather proof cases packed with all of these supplies ready to go at all times. If I need to go, it is a pretty simple matter to load them on my vehicle, secure them and roll out of the neighborhood.

The cases I use are from Plano. They are called the Sportsman Trunk 1919. The case dimensions are 37.75″ X 18.25″ X 14″ and I have room for three of these on the top of my vehicle plus more actually. I have more room inside the vehicle too, but I will get to that later.

Case 1 – Food

I think what goes in your food case will vary greatly. What I am comfortable eating would make some of you wince with pain. You have to consider the weight, storage space and caloric benefit of what you do pack though. For example, if you fill your food case up with nothing but bags of rice and cans of beans, that will last a while, but will quickly become boring. How sad is it when nobody wants to eat your food to survive? ‘They’ll eat when they get hungry enough!’ I know, I have said that too, but we should be able to agree a little variety is better.

Hopefully, we all know that nothing refrigerated should be going in this case and I would even argue against a cooler too. You should be packing food that you can forget about and only bring out when you need to leave. Coolers are big wastes of space.

What kind of food? I have several boxes of freeze dried food from a few different vendors. With choices like chicken noodle soup, mashed potatoes, powdered milk, chocolate pudding, rice, fruit, mac & cheese, etc. there is bound to be something we can all enjoy. Plus, the freeze dried food takes up so much less space than cans.

car_expanded

There are many creative options for extending the usefulness of your vehicle to keep you comfortable away from home.

What’s in there?

  • Strawberry Fields Cream of Wheat — 64 Servings
  • Maple Grove Oatmeal — 112 Servings
  • Uncle Frank’s Italian Lasagna — 16 Servings
  • Granny’s Homestyle Potato Soup — 48 Servings
  • Traveler’s Stew — 48 Servings
  • Summer’s Best Corn Chowder — 16 Servings
  • Blue Ribbon Creamy Chicken Rice — 48 Servings
  • Liberty Bell Potato Cheddar Soup — 40 Servings
  • Traditional Fettuccine Alfredo — 40 Servings
  • Independence Hall Chicken Noodle Soup — 16 Servings
  • Cheesy Broccoli & Rice Soup — 32 Servings
  • Country Cottage Mac & Cheese — 32 Servings
  • Heartland’s Best Mashed Potatoes — 64 Servings
  • Creamy Stroganoff — 32 Servings
  • Instant White Rice — 40 Servings
  • Chocolate Pudding — 60 Servings
  • Honey Coated Banana Chips — 32 Servings
  • Orange Energy Drink Mix — 32 Servings
  • Settler’s Whey Powdered Milk — 48 Servings
  • Coffee & Filters – Plenty…

This food is stored in a cool dry place in the Plano trunk so it’s ready to go. This should last a family of 4 approximately, 30 days. There are lots of freeze dried vendors out there. I suggest you do some research and then watch for sales. You can save a lot of money sometimes and it is always cheaper to buy in bulk. Your personal case might need to be adjusted for special diets, but this is an example.

Case 2 – Shelter

This case should be pretty simple to explain. It’s just the big gear we will use to keep us out of the elements.

  • Tent – 6-man tent
  • Tent stakes
  • 3 tarps – One for our ground cover. The others can meet various other needs.
  • Coleman Lantern and spare fuel
  • Camping Axe
  • Sleeping bags/pads

Case 3 – Supplies & Extras

Cooking

Cleanup/Hygiene

Health

  • Bug Spray
  • First Aid Kit

Miscellaneous

  • Fire Bag  – Flint, tinder, wetfire, lighter
  • Toilet Paper -Probably not enough to last 4 people 30 days, but enough to get us started.

Is that it?

That is the million-dollar question isn’t it? I know that some people will have items I have missed and I can easily come up with hundreds myself, but you have to ask if those items are necessary. Can this list keep you alive? Can you store this and get it loaded quickly? I think so and in an upcoming post, I will show you how I load everything.

There are other supplies that get packed in here too like weapons, bug out bags and communication items. I also have vehicle preps and clothes so stay tuned for more.

In the face of disaster, preppers know we need to move quickly. We should be prepared to act in a minute’s notice when we realize our family is in jeopardy.

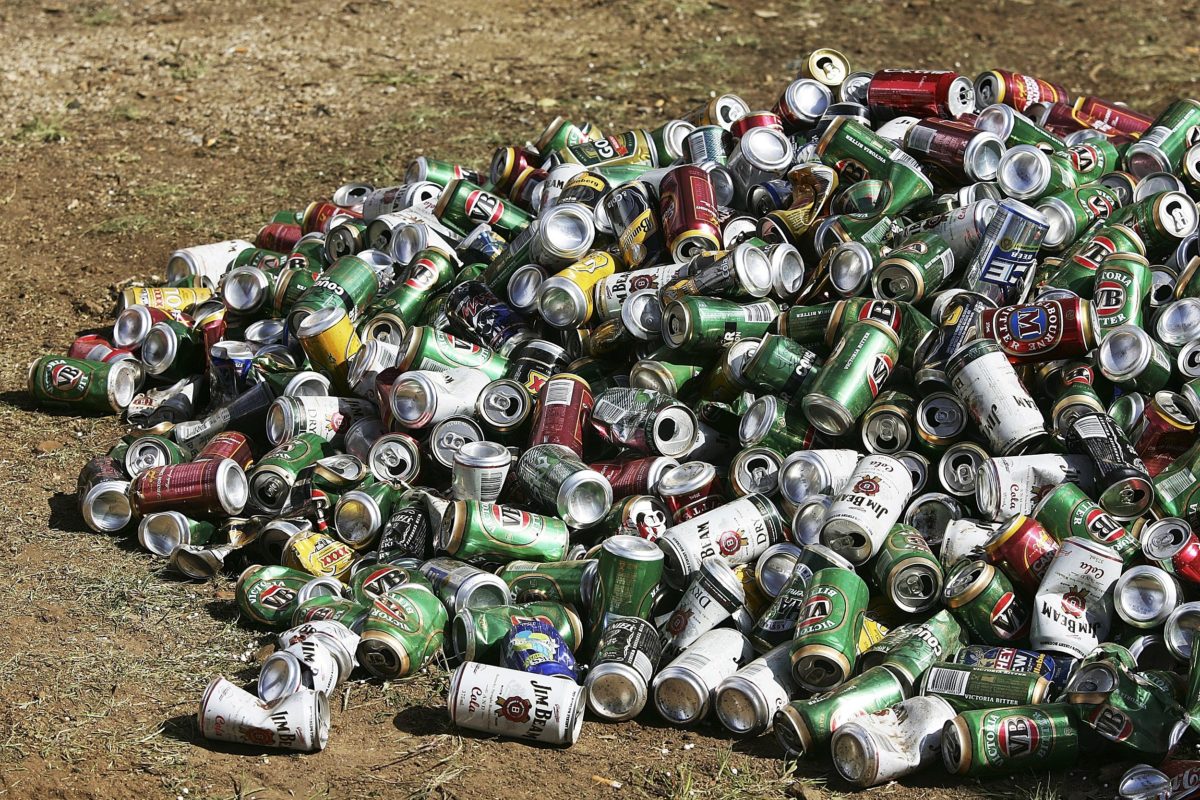
Fact: there’s no limit to what you can with a beer can. Why? Simply because it’s called a beer CAN, not a beer CAN’T. Yes, I know it’s a shitty pun, but there’s truth in what I’ve said – a metallic beer container can serve all kinds of purposes, long after the beer’s gone (sad face). Anyway, a couple of days ago, I had myself a little pow-wow with some of my buddies.

Not all preppers, but we do get along even on stuff that is not exactly related to survival. However, in talking with them, I found out that there are in fact people out there who really know how to get creative when they have to deal with what we come to an SHTF-type of situation. And because no boys’ night should be without beer, we kinda ended up talking about ale till the crack of dawn.

I’m truly sorry for not being able to share a bottle of suds with you people, but at least I can make it up to you by showing you a couple of ingenious ways to use empty beer cans in a shit hits the fan situation So, here’s my top X choices in reusing cans.

  1. Perimeter alarm

Halt! Who goes there? Maybe’s just the wind of a highwayman ready to deprive you of your valuables. Just joking. A perimeter alarm is a must-have if you’re planning on spending a night in the woods. Of course, I don’t think there are any cutthroats nearby, but there may be wild animals prowling the area.

No need to invest tons of money in one of those fancy, laser-triggered alarms when you can make one yourself using a couple of empty beer cans and some cordage. You can always replace regular cordage with dental floss if you plan on using it for other purposes.

  1. Poor man’s survival kit

If you can’t find it within you to spend a couple of bucks on a professional or military-grade survival kit, you can always make one yourself using an old beer can. Just cut a hole on the side and fill it with stuff like weatherproof matches, lighter, dental floss, shoelaces, fishing utensils or whatever.

  1. Camping Stove

As they say, survival can be a beach. If you find yourself in a tight spot with nothing to cook your dinner or warm up the inside of your tent, craft a small camping store using an empty beer can. Flatten the top, cut a hole on the side, and place a small candle on the base. Soup may take forever to cook, but at least you’ve got something to keep you warm during the night.

  1. Lantern

All out of matches? Tac light’s batteries died out on you? No problem. I got you covered. It may be possible to make a meager lantern out of an empty beer can and a small candle. Cut a hole in one side of the beer can. Fit a small candle inside. Attach a stick to the ring, fire up the candle, and, voila, you now have a small lantern. May it be a light for your in dark places, when all other lights go out (and I did not quote from The Lord of the Rings).

  1. Starting a fire

Remember that article about how to start a fire using a water bottle? Well, believe it or not, you can do the same with an empty beer can. Basically, you will need to harness the reflective power of the can’s butt in order to focus sunlight on tinder. Here’s what you will need to do. While the sun’s still high (not that kind of high), grab an empty beer can and place it on the ground. Just below its butt, place a handful of tinder. Rotate the beer can in order to focus the sun rays on the tinder.

If nothing happens after 15 or 20 minutes, it means that the can’s butt is not polished enough to reflect the sunlight. Not a problem – grab a handful of sand or rock salt and start giving that butt a good shine. Allegedly, you can also use chocolate to do the same thing, but I haven’t tested that yet. Place the can again on the ground and rotate it in order to focus the light. When you see smoke coming out, add some more tinder, and blow on it.

  1. Makeshift kettle

Cowboys went through a lot of trouble to make sure that they start each day with a hot cup of coffee. As you know, that meant carrying a heavy cast-iron pot. Well, times have changed, but our need for a hot drink remains the same. Now, if you find yourself stranded in some neck of the woods and nothing to boil water in, you can always pour water in an empty beer can and place it close to the embers. That’s also a great water purification method.

Here’s how it works. First of all, find a way to wash the beer can. Second, pour water into it and place it directly into the fire. Please bear or beer in mind that it will take a while for the water to boil, so sit tight. Once you hear bubbly sound coming from the can, use a stick or a pair of prongs to remove the can from the flame. Wait for it to cool down, pour in your canteen, and enjoy. You know what? This kind of victory calls for another beer. Cheers!

  1. Making char cloth

If you the thought of packing some char cloth has never crossed your mind, don’t worry because you can make some using an empty beer can. Get a fire running. In the meantime, fill a can with cotton, punk wood or bark. Fold both ends and toss in the fire. In a couple of minutes, the beer can will begin to disintegrate. When you see that you’re running out of a can, remove it from the fire, wait for it to cool down, retrieve the char cloth, and celebrate.

That about covers it for my list of great ways to reuse an empty beer can. Feel that something may be missing from the list? Get scribbling and let me know.

Fact: there’s no limit to what you can with a beer can. Why? Simply because it’s called a beer CAN, not a beer CAN’T.

Humanity has survived in some pretty frigid extremes, even before the advent of our sleek ski suits and long underwear. Even so, it doesn’t take all that much cold to start affecting our moods, physical capabilities, and eventually making us sick or endangering our lives. Whether bedding down in a sturdy home, on the move, or making a temporary camp for the snowy season, there are a lot of lessons we can take from history to keep us safer and more comfortable.

Tipi & Longhouse Fires

From the Vikings who dealt with some pretty gnarly conditions to the Native Americans on the East Coast, longhouses have been common throughout history. The general types share a few common traits. There’s a fire pit in the center, or several dotted in between, with sleeping or seating areas down the sides. The construction differs somewhat, with Vikings going for very solid, deep, permanent longhouses and only turning to higher floors and loftier ceilings later in history.


The First Nations and Native tribes who built winter longhouses typically built them with higher ceilings, which served the dual purpose of increasing space for storage and drying winter fish and game as well as allowing smoke to rise higher and out of faces. The higher ceilings also allowed them to vent smoke without as many drafts making it the floor.

The migratory Indians of the plains also turned to height to allow smoke to rise – yes, the large tipis of the Sioux and Lakota had fires inside them.

Tipis of original construction were seriously tall, and built with flaps that could be opened and closed near the tops. Natives could control openings to allow for ventilation but minimize drafts reaching the ground level. It took only a small fire to warm the conical space, with the shape helping to minimize rising heat loss. The shape also helped with resilience to the harsh winds of the Great Plains, and to shed snow and icy build-up when in winter camps.

We might not be able to build permanent homes to take advantage of every aspect of history, but we can apply some of the same facets, especially remembering that we need ventilation space – but it doesn’t have to be empty, wasted space. We will likely construct smaller shelters on the move, especially if we’re by ourselves, but the benefits of lessened heat loss, small space to warm, and buffering and withstanding winds and heavy snow or ice can make both a tipi shaped shelter or a geodome shape a good one to be familiar with.


Switch Sheets

Those Vikings and natives in their longhouses had another trick up their sleeve, just like everyone else in cold climates, ancient Samurai to modern Mongols: furs. When winter chilled bones, bedding was switched out so folks piled into thick, dense furs.

We might not be big into furs now, but we can still apply that. One, it was dense furs below as well as above. Throwing a comforter or blanket down over a mattress or the bottom sheet can be a fine way to buy a few degrees of warmth in winter. Likewise, instead of a sheet near the body, even a flannel sheet, the next time toes are cold, think about remaking the bed with a fuzzy flannel or fleece blanket between you and the quilt or comforter instead. Sheets are far easier and faster to wash and dry, but when it’s a difference of trying to sleep through tensed muscles or huddled together instead of stretching out and relaxing in comfort, it just might be worth it.

Backpacking in cool weather, I regularly carried a lightweight but fuzzy flannel blanket to line my bags with instead of my usual sheet. Even though my bags would have done the job, most likely and almost anywhere, the blanket also had a warm-and-fuzzy morale boost.

Caves & Construction

If we do have a chance to build from scratch, we might take note of the number of ancient and more modern folks who have survived winters by bunking down into caves. Deep places in the earth hold a more constant temperature. It may not be warm – an advantage in summer – but insulation can definitely be an aid over the lightweight and thin stick construction of today or single-layer bricks.


Erecting wraparound porches with or without screens, pulling drywall to pack in insulation, planting evergreen shrubs, or attaching greenhouses can all be ways to increase the “thickness” of our construction and help regulate the temperature inside our home.

Tapestries

Stone is not without its faults, even thick stone. Tapestries were originally conceived in the Middle Ages for a far different purpose than movable art. Originally, they weren’t ornate at all. In some cases they were plain straw mats or even animal skins. Humble or elaborate, they helped buffer residents from the cold and damp that seeped around stone and earthen walls.

We don’t have to have stone to benefit from the same. If we’re in a serious disaster, buffering our walls with blankets, quilts and comforters can provide us with the same insulated benefits. Especially if we have modern construction of planks, OSB, siding, and drywall, we might be served very well to invest in tarps and nails to line walls, and hunt up free and low-cost bedding and tablecloths at thrift stores, yard sales, and freebie websites.

Rushes for Floors

Another form of insulating used in early times on both sides of the Atlantic were rushes or straw laid across floors. Historians may have gotten it wrong though, and beyond the very earliest days, those rushes may have been woven into mats instead of strewn loose.

If you bring a bunch of dry grass into my house, I may have to hurt you. However, we can gain the same benefits layering carpets and rugs and runners.

I lived in an old farmhouse with such cold floorboards, my mother actually used to throw a quilt under a rug at the dining room table, and cover the living room floor in a comforter to get the dog beds and feet a little higher off the floor. She used another comforter or several sets of rugs under our beds, giving them just a few degrees of insulation from the cold boards – a few degrees that made a big difference.

It doesn’t have to cost a fortune – we grew up pretty poor. She made the comforters herself out of thick padding and a couple of durable pieces of fabric, sometimes old curtains from hotels, and picked up carpeting from installation companies to clean, cut to size, edge and use as rugs. Like our ancestors before us, she saved clothing and scraps, and turned them into patchwork quilts – some lovely and intricate, but most just simple squares patched together.

Canopy Beds

In the olden days, the lucky and wealthy had canopy beds that helped tremendously in cold winter nights. It’s like an igloo or tipi: The curtains and the top create a smaller space to warm up, and it’s easier to keep warm. They also cut warmth-stealing drafts from the room, and help keep heat from rising all the way to the ceiling.

We can replicate aspects of the canopy bed in a lot of ways. My father really did once pitch tents atop beds during a long, severe blizzard. For a short-term disaster, we might have low enough beds and tall enough chairs to create a small space similar to a snow cave.

For a larger personal or widespread disaster, we can prepare with four, eight, or twelve poles from unwanted bamboo stands or swing sets, or pick up some lumber. Shower rods and curtain rods, more bamboo from a roadside, and tarps, freebie curtains, layers of free or cheap sheets, and we’re in business.

Stoves vs. Fireplaces

Benjamin Franklin revolutionized more than we may know. He’s responsible for the switch from fireplaces to home-heating cast iron stoves. Fireplaces tend to be drafty and require larger chimneys – chimneys not conducive to moving or taking apart for cleaning. The cast iron stove eliminates some of the cold air drafts drawn in by the fire and chimney. It also creates a huge heat sink that more effectively radiates warmth into and throughout a room.

We can replicate some of the advantages with metal grating in front of fireplaces, and fire bricks and stone that will hold and radiate heat. We can add metal pots of water in front of a fire or on a stove to increase heat retention and radiation. We can also add actual radiators to our chimneys, increasing the warmed surface areas that can in turn help warm and heat our homes.

Hoods & Caps

There are all kinds of funny hats in history, and they worked. The folks who wore – and wear – knit caps that come over the ears and big square bonnet-like hoods stayed warmer, in bed and out in the chilly world. If we anticipate a long-term or personal disaster in winter, some sleep caps and fur-lined or wool-lined hoods we can wear with anything are a very good idea.

Chamber Pots

While the wealthy eventually used them exclusively, the poorest and earliest users turned to chamber pots overnight to eliminate the need to expose themselves to the most severe cold hours, or the hassle of getting geared up to hit an outhouse or latrine. Honeypots are still a winter staple for some First Nations and Alaskan camps, where plumbing and outhouses freeze solid. In addition to the usefulness in winter, something to stand in for chamber pots (or bedpans) are worth the investment in case of illnesses.

Furry Friends

It’s not really a joke. Body heat is a wonderful thing, and nothing pumps it off like a cat. History and the modern world are full of anecdotes about cats and dogs being lap warmers, and being allowed in to share beds – especially with children in the pre-HVAC eras. Children were also packed into beds in winter to share warmth, both to be able to layer more blankets in a single space and because of the shared body heat. Explorers and hikers have spooned to survive in countless situations.

Modern Tricks for Staying Warm

Windshield reflectors (or Mylar blankets) – Place them under beds, sheets, or bedrolls, or behind you and behind a campfire to reflect heat back towards the body.

Create a smaller space – Divide rooms with curtains or panels, or hang curtains to close off entryways and large openings where there are no doors. It creates a smaller space to warm. Remember that heat rises, so as with a proper canopy bed, closing off the top is important.


Switch Curtains – While we’re collecting goodies for hanging, we can also collect darker, heavier fabrics to switch for the lightweight, pale summer curtains in our windows. They’ll help absorb and hold heat during the dull gray days.

Flip Fans – Ceiling fans help in summer by drawing heat up and creating a breeze. In winter, changing the rotation or in some cases flipping the blades can help push rising heat back down. It can save a few degrees on the thermostat, and the electricity or wood for heating the house or room those few degrees.

Stay Dry – Forget “wool is warmer when wet”. “Warmer” is a relative term. Wet wool will give you hypothermia, blisters, and chilled footsies just the same as leather, cotton, linen or hemp. It might buy you minutes or a few degrees, and that can matter, but don’t rely on it. If you get wet or sweaty, change; plain and simple. Avoid getting wet by investing in trash bags, overboots/Mickey boots, Mucs or Bogs or similar field boots, gaiters, ponchos and rain pants.

Snug As A Bug

History is full of lessons we can apply at home and afield, now and later, whether we’re trying to cut heating costs (or labor) or trying to survive and thrive in a disaster. Most require at least a little planning and forethought, although many can be accomplished with free and low-cost salvage.

The older we are and the more we abuse our bodies, especially, the more we will feel the pains and discomfort of cold weather. It can wind up costing us our edge from poor sleep, or affect our ability to complete even simple indoor tasks from cramped fingers.

Remember, it doesn’t have to be sub-zero to be uncomfortable, or for hypothermia to take effect. Start with the body and warm the smallest area necessary in a survival or disaster situation. With a little preparation, we can take advantage of all our forbearers’ experience to stay roasty-toasty, this winter and regardless of what the future brings.


Other self-sufficiency and preparedness solutions recommended for you:

The vital self-sufficiency lessons our great grand-fathers left us

Knowledge to survive any medical crisis situation

Liberal’s hidden agenda: more than just your guns

Build yourself the only unlimited water source you’ll ever need

4 Important Forgotten Skills used by our Ancestors that can help you in any crisis

Secure your privacy in just 10 simple steps

Humanity has survived in some pretty frigid extremes, even before the advent of our sleek ski suits and long underwear. Even so, it doesn’t take all that much cold to

For preppers, a home’s location is of utmost importance. Your home is your headquarters, your castle and sanctuary. It’s the one place you hope to feel in control when chaos breaks out.

Serious preppers are beginning to invest in purpose-built retreats that are off the grid and away from the fray. But make no mistakes about it. These retreats aren’t about relaxation and taking in a scenic view. The sole intent is to have a place that is made to stand on its own if humanity were to falter. In this article we will highlight 7 factors to consider if you are looking for the best property for preppers.

Determining Access to your property

Professional movers like North American have helped thousands of people move to urban areas and remote locations. One important piece of advice they give to preppers looking for a remote retreat is to always consider access. How will you and others access your retreat location?

gate-solid-wood

Thinking about how you will control access to your retreat property is an important consideration.

For most people, it’s fairly easy to get vehicles and moving trucks to a new home. Preppers that live in non-traditional areas like a hillside may need to work out additional logistics to get a home setup or built. This can actually be a benefit since it will also be difficult for others to get on the property. However, be prepared to construct your own roads if you’re looking for raw land to build on. This could have major consequences on price.

If a property is heavily wooded there could be hidden access points. It’s important to walk the entire perimeter of the property looking for entry points and notating where fencing or barbwire will be needed to block access.

Must have sustainable Water Supply

water

A sustainable and abundant source of water is a must.

Having a ready supply of clean water is the biggest priority during natural disasters, riots, war and every other emergency situation. Preppers understand that they need to have a long-term solution that goes beyond storing gallons of bottled water.

It may be difficult to find a piece of property along a stream, river or lake that isn’t already in a developed area. Flooding is also a concern in these locations. The better option is to have a well. Currently, about 15% of Americans have private water sources. However, you will want to check the local health department for information on water regulations and testing guidelines in the immediate area.

What are the Security Issues of your property?

Securing your property is necessary for protecting your people and supplies. Many preppers look for property that’s already fenced off with access controlled by a security gate. If the property has no perimeter barrier that will need to be factored in before deciding on an asking price. It’s also important to bear in mind that vegetation is no substitute for fencing. It can slow people and animals down, but it won’t keep them out.

Do you have adequate Storage for your supplies

storage

Tiny Homes are catching on, but they don’t have anywhere near the amount of storage you would need for your prepper property.

From food containers to firearms, preppers know the importance of stocking up on supplies. The problem is you need a place to store everything so your supplies aren’t compromised. Many prepper real estate consultants suggest that people consider properties with at least five acres in order to have enough space of living, farming and storage.

How you store food could have serious implications on survival, strength, health and morale. Properties that already have a storage shed or barn that can be secured will put you ahead of the curve. Dark, underground cellars offer good storage for canned goods, but you may need a climate-controlled space with low moisture levels for wheat, grains, legumes and fresh produce storage.

What is your Off the Grid Power Supply?

solarpanels

Mounting Solar panels on roofs or moveable frames allow for easy access for maintenance.

During a worst case scenario, the power grid will likely go down. People that have prepared in advance by putting together an independent power supply will have all of the modern day conveniences, including security systems and device chargers.

Homes that have already been outfitted with solar panels, wind turbines, thermal heating and gas-powered generators are essentially move-in ready. If power supplies aren’t in place you’ll have to assess the area to gauge its wind and solar power potential. Ideally, you’ll want a variety of power sources and ample power storage for times when the wind and sun aren’t in abundance.

Soil Conditions for crops

goodsoil

The soil quality will be a major factor in your ability to raise your own food.

Like water, food is a necessity for sustaining life. You can go much longer without food (at least three weeks), but the fact remains that your rations won’t last forever. Eventually, your stock of food supplies will be depleted, and you’ll have to rely solely off the land.

Many people overlook the health of the soil on a property even though finding a spot that can support crop growth and has good drainage is critical. If the property already has fruit trees or a garden that’s a very good sign. Remember, your store bought food supply will only last so long. You have to stock up on seeds and consider how your land can produce sustenance.

Bonus – Underground Bunker

The ultimate property feature for preppers is an underground bunker. In the event there is a nuclear bombing or biological warfare a bunker is a last resort for surviving the fallout. Bunkers can be standalone structures or connected into the power grid. When connecting electrical and plumbing sources it’s important to ensure all the spaces around conduits and PVC pipes are thoroughly sealed with silicon caulking.

For preppers, a home’s location is of utmost importance. Your home is your headquarters, your castle and sanctuary. It’s the one place you hope to feel in control when chaos