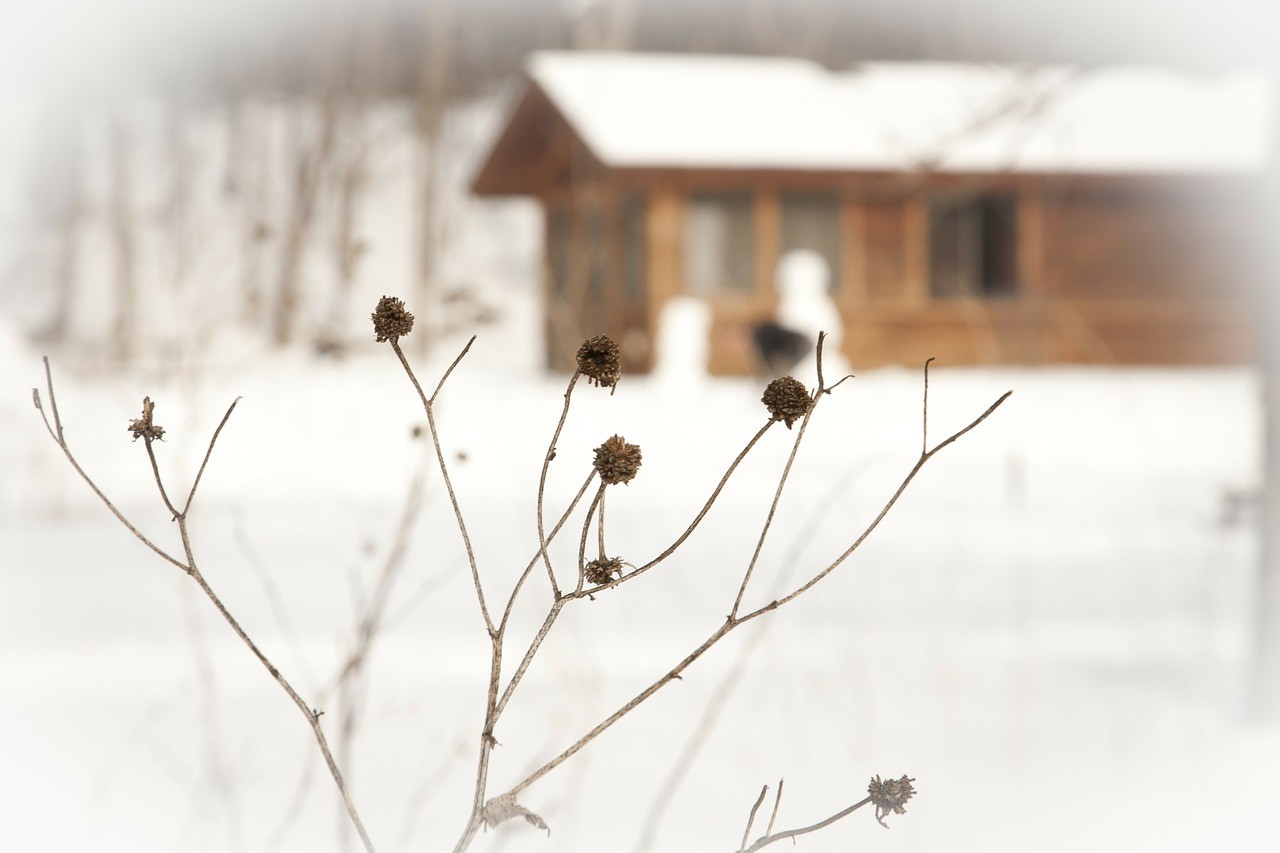
Humanity has survived in some pretty frigid extremes, even before the advent of our sleek ski suits and long underwear. Even so, it doesn’t take all that much cold to start affecting our moods, physical capabilities, and eventually making us sick or endangering our lives. Whether bedding down in a sturdy home, on the move, or making a temporary camp for the snowy season, there are a lot of lessons we can take from history to keep us safer and more comfortable.
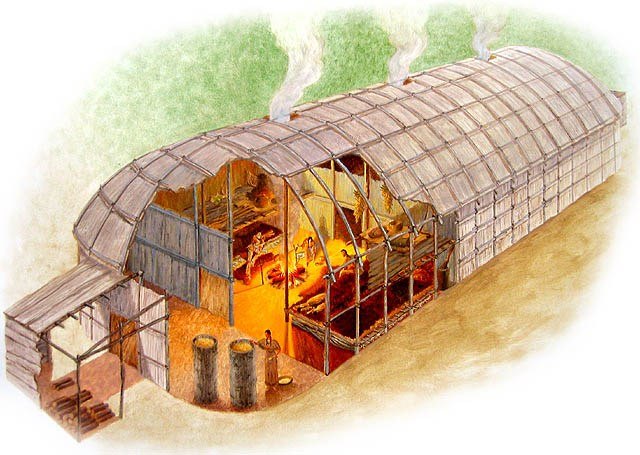
Tipi & Longhouse Fires
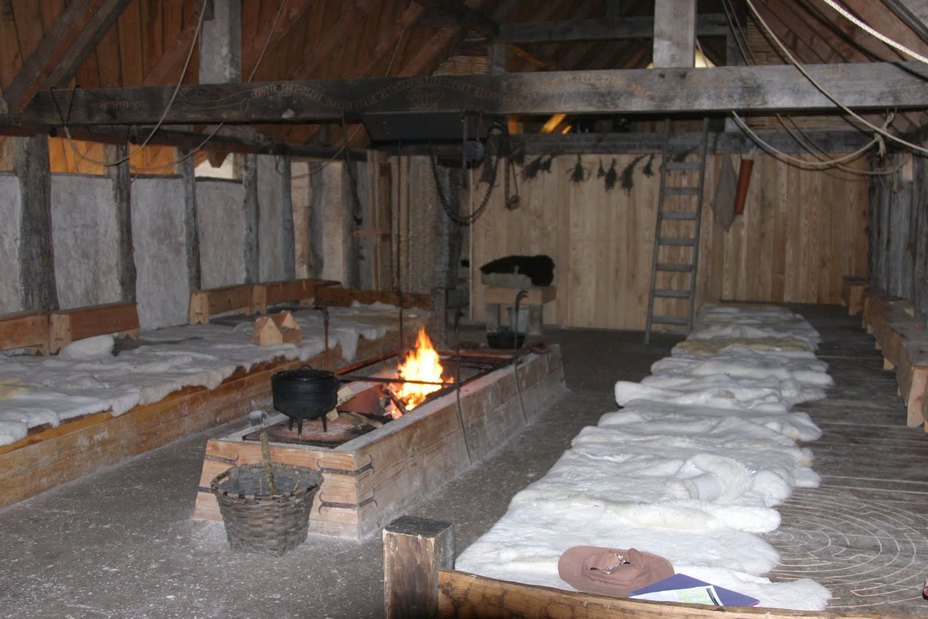
From the Vikings who dealt with some pretty gnarly conditions to the Native Americans on the East Coast, longhouses have been common throughout history. The general types share a few common traits. There’s a fire pit in the center, or several dotted in between, with sleeping or seating areas down the sides. The construction differs somewhat, with Vikings going for very solid, deep, permanent longhouses and only turning to higher floors and loftier ceilings later in history.
The First Nations and Native tribes who built winter longhouses typically built them with higher ceilings, which served the dual purpose of increasing space for storage and drying winter fish and game as well as allowing smoke to rise higher and out of faces. The higher ceilings also allowed them to vent smoke without as many drafts making it the floor.
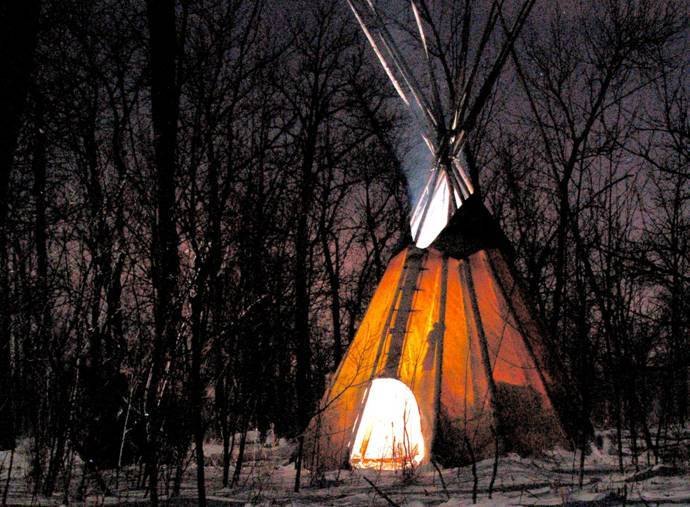
The migratory Indians of the plains also turned to height to allow smoke to rise – yes, the large tipis of the Sioux and Lakota had fires inside them.
Tipis of original construction were seriously tall, and built with flaps that could be opened and closed near the tops. Natives could control openings to allow for ventilation but minimize drafts reaching the ground level. It took only a small fire to warm the conical space, with the shape helping to minimize rising heat loss. The shape also helped with resilience to the harsh winds of the Great Plains, and to shed snow and icy build-up when in winter camps.
We might not be able to build permanent homes to take advantage of every aspect of history, but we can apply some of the same facets, especially remembering that we need ventilation space – but it doesn’t have to be empty, wasted space. We will likely construct smaller shelters on the move, especially if we’re by ourselves, but the benefits of lessened heat loss, small space to warm, and buffering and withstanding winds and heavy snow or ice can make both a tipi shaped shelter or a geodome shape a good one to be familiar with.
Switch Sheets
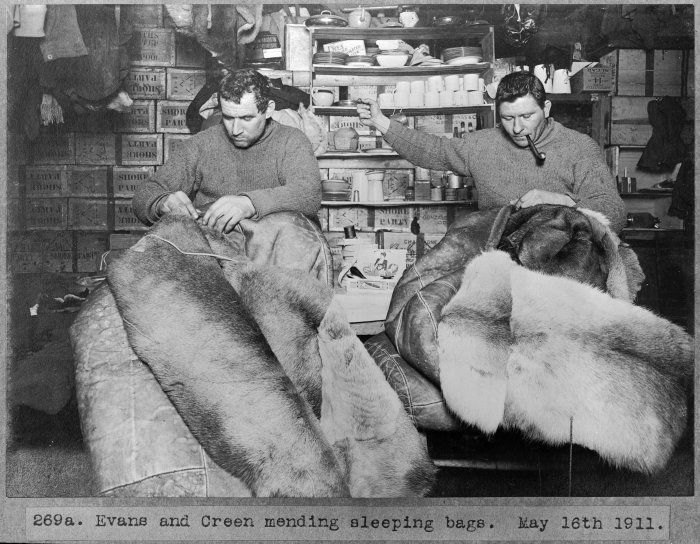
Those Vikings and natives in their longhouses had another trick up their sleeve, just like everyone else in cold climates, ancient Samurai to modern Mongols: furs. When winter chilled bones, bedding was switched out so folks piled into thick, dense furs.

We might not be big into furs now, but we can still apply that. One, it was dense furs below as well as above. Throwing a comforter or blanket down over a mattress or the bottom sheet can be a fine way to buy a few degrees of warmth in winter. Likewise, instead of a sheet near the body, even a flannel sheet, the next time toes are cold, think about remaking the bed with a fuzzy flannel or fleece blanket between you and the quilt or comforter instead. Sheets are far easier and faster to wash and dry, but when it’s a difference of trying to sleep through tensed muscles or huddled together instead of stretching out and relaxing in comfort, it just might be worth it.
Backpacking in cool weather, I regularly carried a lightweight but fuzzy flannel blanket to line my bags with instead of my usual sheet. Even though my bags would have done the job, most likely and almost anywhere, the blanket also had a warm-and-fuzzy morale boost.
Caves & Construction
If we do have a chance to build from scratch, we might take note of the number of ancient and more modern folks who have survived winters by bunking down into caves. Deep places in the earth hold a more constant temperature. It may not be warm – an advantage in summer – but insulation can definitely be an aid over the lightweight and thin stick construction of today or single-layer bricks.
Erecting wraparound porches with or without screens, pulling drywall to pack in insulation, planting evergreen shrubs, or attaching greenhouses can all be ways to increase the “thickness” of our construction and help regulate the temperature inside our home.
Tapestries

Stone is not without its faults, even thick stone. Tapestries were originally conceived in the Middle Ages for a far different purpose than movable art. Originally, they weren’t ornate at all. In some cases they were plain straw mats or even animal skins. Humble or elaborate, they helped buffer residents from the cold and damp that seeped around stone and earthen walls.
We don’t have to have stone to benefit from the same. If we’re in a serious disaster, buffering our walls with blankets, quilts and comforters can provide us with the same insulated benefits. Especially if we have modern construction of planks, OSB, siding, and drywall, we might be served very well to invest in tarps and nails to line walls, and hunt up free and low-cost bedding and tablecloths at thrift stores, yard sales, and freebie websites.
Rushes for Floors
Another form of insulating used in early times on both sides of the Atlantic were rushes or straw laid across floors. Historians may have gotten it wrong though, and beyond the very earliest days, those rushes may have been woven into mats instead of strewn loose.
If you bring a bunch of dry grass into my house, I may have to hurt you. However, we can gain the same benefits layering carpets and rugs and runners.
I lived in an old farmhouse with such cold floorboards, my mother actually used to throw a quilt under a rug at the dining room table, and cover the living room floor in a comforter to get the dog beds and feet a little higher off the floor. She used another comforter or several sets of rugs under our beds, giving them just a few degrees of insulation from the cold boards – a few degrees that made a big difference.
It doesn’t have to cost a fortune – we grew up pretty poor. She made the comforters herself out of thick padding and a couple of durable pieces of fabric, sometimes old curtains from hotels, and picked up carpeting from installation companies to clean, cut to size, edge and use as rugs. Like our ancestors before us, she saved clothing and scraps, and turned them into patchwork quilts – some lovely and intricate, but most just simple squares patched together.
Canopy Beds

In the olden days, the lucky and wealthy had canopy beds that helped tremendously in cold winter nights. It’s like an igloo or tipi: The curtains and the top create a smaller space to warm up, and it’s easier to keep warm. They also cut warmth-stealing drafts from the room, and help keep heat from rising all the way to the ceiling.
We can replicate aspects of the canopy bed in a lot of ways. My father really did once pitch tents atop beds during a long, severe blizzard. For a short-term disaster, we might have low enough beds and tall enough chairs to create a small space similar to a snow cave.
For a larger personal or widespread disaster, we can prepare with four, eight, or twelve poles from unwanted bamboo stands or swing sets, or pick up some lumber. Shower rods and curtain rods, more bamboo from a roadside, and tarps, freebie curtains, layers of free or cheap sheets, and we’re in business.
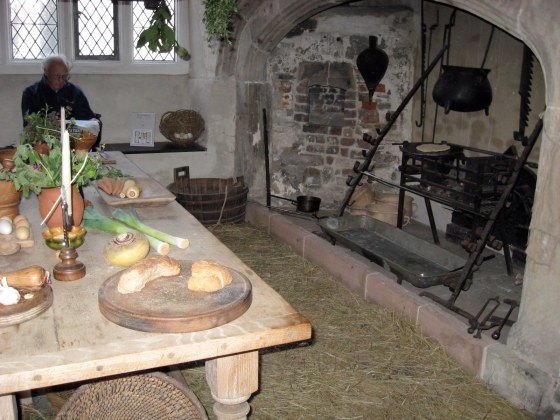
Stoves vs. Fireplaces
Benjamin Franklin revolutionized more than we may know. He’s responsible for the switch from fireplaces to home-heating cast iron stoves. Fireplaces tend to be drafty and require larger chimneys – chimneys not conducive to moving or taking apart for cleaning. The cast iron stove eliminates some of the cold air drafts drawn in by the fire and chimney. It also creates a huge heat sink that more effectively radiates warmth into and throughout a room.
We can replicate some of the advantages with metal grating in front of fireplaces, and fire bricks and stone that will hold and radiate heat. We can add metal pots of water in front of a fire or on a stove to increase heat retention and radiation. We can also add actual radiators to our chimneys, increasing the warmed surface areas that can in turn help warm and heat our homes.
Hoods & Caps
There are all kinds of funny hats in history, and they worked. The folks who wore – and wear – knit caps that come over the ears and big square bonnet-like hoods stayed warmer, in bed and out in the chilly world. If we anticipate a long-term or personal disaster in winter, some sleep caps and fur-lined or wool-lined hoods we can wear with anything are a very good idea.
Chamber Pots
While the wealthy eventually used them exclusively, the poorest and earliest users turned to chamber pots overnight to eliminate the need to expose themselves to the most severe cold hours, or the hassle of getting geared up to hit an outhouse or latrine. Honeypots are still a winter staple for some First Nations and Alaskan camps, where plumbing and outhouses freeze solid. In addition to the usefulness in winter, something to stand in for chamber pots (or bedpans) are worth the investment in case of illnesses.
Furry Friends

It’s not really a joke. Body heat is a wonderful thing, and nothing pumps it off like a cat. History and the modern world are full of anecdotes about cats and dogs being lap warmers, and being allowed in to share beds – especially with children in the pre-HVAC eras. Children were also packed into beds in winter to share warmth, both to be able to layer more blankets in a single space and because of the shared body heat. Explorers and hikers have spooned to survive in countless situations.
Modern Tricks for Staying Warm
Windshield reflectors (or Mylar blankets) – Place them under beds, sheets, or bedrolls, or behind you and behind a campfire to reflect heat back towards the body.
Create a smaller space – Divide rooms with curtains or panels, or hang curtains to close off entryways and large openings where there are no doors. It creates a smaller space to warm. Remember that heat rises, so as with a proper canopy bed, closing off the top is important.
Switch Curtains – While we’re collecting goodies for hanging, we can also collect darker, heavier fabrics to switch for the lightweight, pale summer curtains in our windows. They’ll help absorb and hold heat during the dull gray days.
Flip Fans – Ceiling fans help in summer by drawing heat up and creating a breeze. In winter, changing the rotation or in some cases flipping the blades can help push rising heat back down. It can save a few degrees on the thermostat, and the electricity or wood for heating the house or room those few degrees.
Stay Dry – Forget “wool is warmer when wet”. “Warmer” is a relative term. Wet wool will give you hypothermia, blisters, and chilled footsies just the same as leather, cotton, linen or hemp. It might buy you minutes or a few degrees, and that can matter, but don’t rely on it. If you get wet or sweaty, change; plain and simple. Avoid getting wet by investing in trash bags, overboots/Mickey boots, Mucs or Bogs or similar field boots, gaiters, ponchos and rain pants.
Snug As A Bug
History is full of lessons we can apply at home and afield, now and later, whether we’re trying to cut heating costs (or labor) or trying to survive and thrive in a disaster. Most require at least a little planning and forethought, although many can be accomplished with free and low-cost salvage.
The older we are and the more we abuse our bodies, especially, the more we will feel the pains and discomfort of cold weather. It can wind up costing us our edge from poor sleep, or affect our ability to complete even simple indoor tasks from cramped fingers.
Remember, it doesn’t have to be sub-zero to be uncomfortable, or for hypothermia to take effect. Start with the body and warm the smallest area necessary in a survival or disaster situation. With a little preparation, we can take advantage of all our forbearers’ experience to stay roasty-toasty, this winter and regardless of what the future brings.
Other self-sufficiency and preparedness solutions recommended for you:
The vital self-sufficiency lessons our great grand-fathers left us
Knowledge to survive any medical crisis situation
Liberal’s hidden agenda: more than just your guns
Build yourself the only unlimited water source you’ll ever need
4 Important Forgotten Skills used by our Ancestors that can help you in any crisis
Secure your privacy in just 10 simple steps
Humanity has survived in some pretty frigid extremes, even before the advent of our sleek ski suits and long underwear. Even so, it doesn’t take all that much cold to


 Another good reason to keep an empty fuel tank in your car. Carol is always prepared…
 The amount of daytime light during the middle months of winter may be too little for plants to survive healthily. The problem is compounded if your house is not situated to receive the most light. Move your plants close to windows and areas that get adequate sunlight during winter. To promote the entry of more light, ensure you clean the windows thoroughly. Clean off any dust that might have settled on the leaves of the plants to maximize their light absorption.
 People make a mistake of soaking their indoor plants with water during winter. This can damage your plants during the cold months. This is because water loss due to evaporation is nearly nonexistent. Besides, plants tend to grow slower during winter. Combined, these factors demand that you reduce the watering routine of your plants. A golden rule to determine when to water the plants involves sticking your finger about two inches into the soil. If it results in a dry finger then you need to water.
 If yours are indoor tropical plants, it would be wise to spray them with a light mist a couple of times a day – preferably twice or thrice a day. This is because tropical plants thrive in humid conditions. Alternatively, you can place the plants in a humid environment such as the bathroom or where there is a water feature.
 As we mentioned previously, all plants have reduced growth rate during winter. This means their nutritional need will also reduce. In case your plants are healthy, there is no need to fertilize them. If you really need to then you can dilute the fertilizer by at least 50 percent before applying. A better time to fertilize is during the fall.
 Summer plants are usually vegetative and bushy in response to the higher temperatures. As the temperatures start to plummet, they begin to die in preparation for what we call floral hibernation. You cannot prevent this process from happening. However, you can help the plants by clearing away any debris. You must also shield the delicate parts of the plant to protect them from biting cold.
 The extreme winter temperatures can take a toll on your garden soil causing it to crack. The frost caused by cold temperatures can harden the ground especially the soil type in your garden. Such cracks are bad news, especially for bulb beds. This is because the cracks in the soil can cause the bulbs to rise to the surface. The result will be catastrophic to your plants. A good tip is to spread new mulch (I’d preferably evergreen boughs) on the garden to protect the soil and the plants. The mulch will also prove help in the coming spring.
 Trimming is an important practice when it comes to taking care of your plants during winter. This is especially true with annual flowers, vegetables, and plants. While trimming, remove blackened stems and withering foliage completely. Such dying stems and foliage provide hiding grounds for pest and diseases that could compromise the health of your plants.