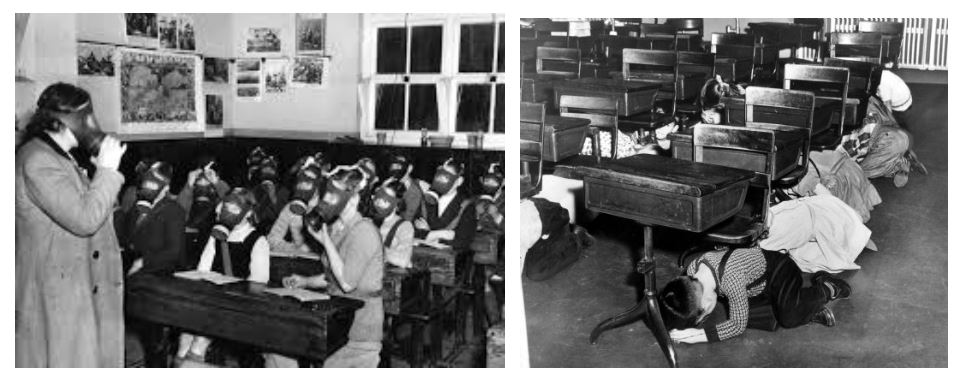
When I was growing up, nuclear war was a “real thing”. We practiced getting under our little school desks, because they apparently had built in blast and radiation shields. 🙂 Then the Soviet Union threat “evaporated” and suddenly nuclear war was no longer a serious threat. But now we have that lunatic in tiny North Korea making serious (nuclear) threats against the still somewhat significant United States. And if he can’t do what he threatens today, he is working his people slavishly to be able to do it “next week”. Hopefully the threats are a way to keep his people under control and/or extort stuff out of us, and he is not insane enough to think he could survive an attack on us (and hopefully we are willing and able to ensure he does not survive an attack on us). And hopefully he is not insane enough to not care if he dies (we know he doesn’t care if many of his subjects die). But that level of insanity does exist, so there is always a chance he would send nuclear bombs our way.
What if he does? How do we survive?
If we are near enough to a blast, we won’t survive or will be in serious trouble. How near is that? That depends on a number of factors. Perhaps the three most important factors are weather, the size of the bomb, and how far above ground it detonates. “Size” is actually the explosive force, and it is measured in “kilotons”. One kiloton is the equivalent power of 1000 tons of dynamite. North Korea just tested a “hydrogen” bomb (“thermonuclear”, a fusion reaction instead of the fission reaction used by nuclear weapons) and claimed it was “150kt”. For a 150kt ground burst, there will be a fireball which would tend to incinerate things within a third of a mile. Then there will be the blast which would tend to shred or flatten things; at a mile and a half away, most common construction residential houses would still be flattened, which could injure or kill those inside. Heat from the explosion could still cause first degree burns (think “sunburn”) five and a quarter miles away; closer, of course, there would likely be second and even third degree burns. Then there is the light; looking at the flash of the explosion can blind you temporarily and if you are actually focused on it, perhaps permanently. It is not that fire, blast, light and heat are missing from a non-nuclear explosion; it is that they are so much less intense. Remember, nuclear weapons are rated in 1000’s of TONs of dynamite. And then there is the special gift of nuclear explosions – a buffet of radiation emitted and radioactivity imposed on matter. Fatal (for 50% of those exposed, without medical attention) radiation emitted by the blast would reach out 1.2 miles as well and dangerous amounts of radioactive particles could surf the winds much further for a period of time after the blast. A bigger bomb would have further reaching effects of course. China has 5mt (megaton, 1,000,000 tons of dynamite) warheads and Russia has tested a 50mt bomb, but it is to be hoped that North Korea can not achieve that level in the near future.
The military often prefers to set for an air burst, as the immediate effects have a greater range. If high enough that the fireball does not touch the ground, there is much less fallout, since pretty much any particulates would have to come from the device itself. The naturally radioactive isotopes would tend to get into the stratosphere rather than “falling” locally, resulting in a low intensity, long lived, worldwide problem.
Note that a nuclear explosion will produce an “EMP” (Electro Magnetic Pulse) which will bring down the electrical system and fry some electrical and electronic devices. The higher above ground the explosion is, the wider the area affected by the EMP.
Radiation
There is a difference between “radiation” and “radioactive”. Radiation is ENERGY which is radiated (as “rays”). X-Rays are radiation, and for that matter, so is light. Radioactive refers to something which is emitting radiation, such as a naturally radioactive substance, or material which has had radioactivity imposed on it, such as fallout. Much of the radiation from fallout is a combination of “alpha” and “beta” particles, and “gamma” radiation. Alpha particles are very dangerous if the particle (an ejected helium nucleus) is breathed or eaten or gets in an open wound, but the effects from this particle can be blocked by a sheet of paper and often cannot even penetrate intact skin. Beta particles are moderately dangerous if the particle (an ejected electron) gets inside the body, and its effects can penetrate and damage the skin if the particles are in contact with the skin for any length of time, but normal clothing will provide decent protection from beta as well as alpha particles for a while. Gamma radiation is equally as harmful as beta, but very much more penetrating. “Good” protection from gamma radiation is provided by 4 inches of lead, 10 inches of steel, 24 inches of concrete, 36 inches of dirt, 72 inches of water, 110 inches of wood, 5000 feet of air or some combination of materials. This “safe” protection is computed by using the “halving thickness” of each material (how thick it has to be to cut the radiation intensity in half) between you and the radiation source, with a goal of having 10 halving thicknesses total, reducing the gamma ray intensity to a 1024th (2 to the 10th power) of its original strength.
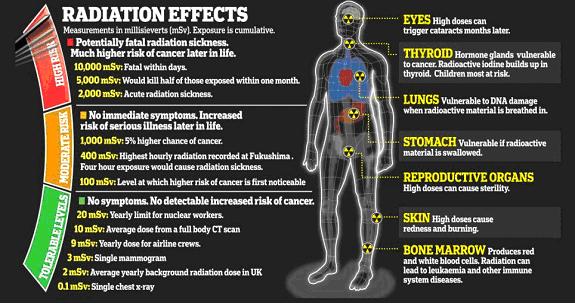
A little radiation is considered “normal” and won’t hurt you much; typical background radiation and normal medical/dental uses on average takes 18 days off a person’s life. Whereas a lot of radiation is bad news and the effects are short term. We need to know how radiation levels are specified in order to understand which levels are of concern short term and which have only “minor” long term effects (increased risk of cancer). Annoyingly, there are several different but inter-related measurements, which can be remembered by the mnemonic “READ”. The most basic measure of Radiation is the “intensity” (number of atoms which decay in a given period of time) specified in curies (Ci, English) or becquerel (Bq, metric). Bigger values are of more concern than smaller values, but this measurement is primarily of interest to those working with radioactive materials. Exposure describes the amount of radiation traveling through the air, which many radiation meters are capable of measuring. The units for exposure are the English measure roentgen (R) and the coulomb/kilogram (C/kg). This is an instantaneous measurement; more useful is roentgen per hour. Absorbed dose describes the amount of radiation absorbed by an object or person, with units “radiation absorbed dose” (rad) and gray (Gy). And then there is the Dose equivalent (or effective dose) which combines the amount of radiation absorbed with the medical effects of that type of radiation. Units for dose equivalent are the “roentgen equivalent man” (rem) and sievert (Sv). Smaller measurements are commonly displayed with a 1/1000th prefix (milli, for instance mR/h) or a 1/1,000,000th prefix (micro, for instance uSv).
When looking into radiation measurements, you are likely to run into R, rad, rem, Gy and Sv as well as /h (per hour) measurements of each of these, which can get confusing. The ones which are displayed by your meter or dosimeter are the ones of most importance to you, of course. The three brands of meters I have tried all have mR/h and uSv/h, which are both handy measurements and seemingly the most commonly used. R/h is good to see how much radiation is present around you and Sv for how much you or others around you have been exposed to (your radiation exposure risk). Here is how these measurements are related:
– rad and Gy are directly related; 1 rad = .01 Gy and 1 Gy = 100 rad
– rem and Sv are directly related; 1 rem = .01 Sv and 1 Sv = 100 rem
Beta, gamma and X-Ray radiations all do the same “base” level of damage to the human body, while neutron radiation does 10 times the damage and alpha radiation does 20 times the damage.
– For beta, gamma and X-Ray radiations, 1 rem = 1 rad and 1 Sv = 1 Gy
– For neutron radiation, 1 rem = .1 rad and 1 rad = 10 rem and 1 Sv = .1 Gy and 1 Gy = 10 Sv
– For alpha radiation, 1 rem = .05 rad and 1 rad = 20 rem and 1 Sv = .05 Gy and 1 Gy = 20 Sv
R is a measurement of radiation radiating through the air, such as gamma or X-Ray. The other units are a measurement of absorption of radiation. Each material absorbs radiation at a different rate, so there is not a standard conversion factor.
– In air, 1 R = .877 rad and 1 rad = 1.14 R
– In soft tissue, 1 R = usually between .92 and .96 rad
My meters also have CPM (Counts Per Minute) and CPS (Counts Per Second), which is an indication of the number of ionization events from alpha and beta particles. A few counts per time period is better than many counts during the same time period, but there is no universal conversion to a “useful” measurement as these measurements vary based on how the instrument is calibrated. As an example, calibrated to the commonly used Cesium 137, 120 CPM is equivalent to 1 uSv/hr.
Radiation can cause effects from unnoticeable (increased chance of cancer) through illness, severe damage to the body, and death. A single (short term) dose of 1000 mSv (1 Sv, 100 rem) will cause radiation sickness but does not (directly) cause death (although 5% of people so exposed will develop fatal cancer later). 5 Sv or 500 rem will tend to be fatal within a month without medical care for 50% of the people so exposed, and 10 Sv or 1000 rem will often be fatal within weeks.
Surviving the explosion
 Let’s face it, if you are “close” to a nuclear explosion, you are going to be dead, or probably wishing you were dead. The only way to minimize the chances of this is to build or have built your own “bomb shelter” or have access to one. And know far enough in advance that the blast may be coming so you can be in the shelter when the blast occurs. This is not a trivial prep, either in cost or in the amount of trouble you have to go through to get it installed. On the plus side, even if there is never a nuclear explosion or nuclear incident, it can also protect you from violent weather, and make you and your supplies harder to find by looters, and be a bit easier to defend than the typical house. A good “bomb shelter” is buried deep, air tight, structurally sound, has an angled entry to prevent radiation (which travels in straight lines) getting in, and a filter system to remove radioactive particles (also any chemical or biological agents) from the air. A better bomb shelter also has a hidden second way out.
 Let us say you can’t afford a bomb shelter or don’t have the ability to install a true shelter or even a hardened structure or room. Or worse, you have a perfectly suitable bomb shelter but can’t get to it in time. Try to put something between you and the blast and heat, preferably something which won’t collapse on you. Since one of the best (or at least most practical things) to protect you from radiation is three feet of dirt, a nice ditch is good to dive into, or even better would be a buried culvert to keep the local fallout off of you. If you don’t get disintegrated by the fireball or crushed by the blast or a building collapsing on you, or get a lethal dose of radiation or burned by the radiated heat, what can you to do to extend that short term survival for a useful span of time? Advance planning will make all the difference in your chances.
Since fireball, blast and heat are fairly obvious, and you are still alive, they are no longer of primary concern (unless there are fires burning nearby or “down wind”). Radiation and fallout are your primary concerns. Fallout can “fall” on you, so get under cover ASAP, and remove your clothes and put them into sealed containers which are removed from living areas, then wash yourself thoroughly to get any fallout off your skin and out of your hair. Do NOT use a conditioner on your hair, as this can bind the radioactive particles to your hair. Treat the wash water as contaminated. Once you have removed any fallout, check the radiation levels around you using a personal radiation detector.
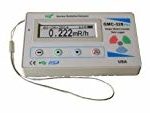 One of the better choices is the NukAlert-ER, but it is pricy ($750) and has been listed as only being available for government sales since March of 2017. If interested, contact them anyway and see if you can get on their list; occasionally they may have an extra one available. They do have a stripped down keychain version which “chirps” to indicate the level of radiation, but the price is more affordable and it is still available for individual sales. The company, KI4U.com has some good reference materials, some “old fashioned” analog radiation detection equipment, and can calibrate your radiation equipment. Alternatively, GQ Electronics has some decent digital detectors for very nice prices. I’ve tried the GMC-320 Plus and it is adequate and the customer service was excellent. You can get modern meters from China well under $100, but do you really want to gamble that they will be reliable and accurate enough to help protect your life?
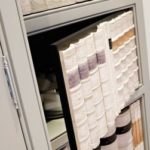
 Remember, nuclear explosions produce EMPs, so keep your electronic meter in an EMP shielded container when not in use. There are non-electronic radiation monitoring options as well, mostly “dosimeters” using badges or cards which show cumulative exposure. These are not optimal, but they are fairly inexpensive and show the more important “cumulative” exposure. Plus, they don’t need batteries and will laugh at EMPs. Even with a good meter, having these for backup and long term monitoring is a good idea. They don’t “turn off”, so keep them shielded (in a sealed bag in the freezer is best) until you want to start accumulating exposure.
Radiation is mindless, you can’t reason with it or trick it or bribe it. All you can do is block it or get away from it.
Fallout Protection
Local fallout is a fairly short term problem. The intensity goes down 90% for each time period 7 times the last one. That is, after 7 hours, the intensity is down to 1/10 of the original intensity. After 2 days (49 hours), the intensity will be down to 1/100th, and after 2 weeks (14 days), it will be down to 1/1000th, which would be fairly safe.
It is best to stay inside (or at least under cover) while fallout is a danger, although after 2 days, you can make brief forays if necessary. You will want covering which will prevent any fallout from getting on your skin and block the effects of alpha and beta particles. Coveralls might be adequate, but vinyl rain suits might be better since they can be easily washed off and cover the head. Use duct tape to seal any gaps. Nothing you can wear will protect you from gamma radiation, so keep your exposure time to the minimum possible and monitor the radiation levels you are being exposed to.
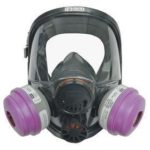 It is bad to get fallout on your skin, but it is really, really bad to get it in you. A CBRN (Chemical, Biological, RADIOLOGICAL and NUCLEAR) rated gas mask would seem to be just the ticket, but there are problems. Sure, there are a lot of surplus ones out there at quite reasonable prices. But they are surplus for a reason. Either they are obsolete, or defective or just so old that effectiveness is uncertain. A good, modern mask will cost you well over $100. Best is a mask with two (or even three) filter ports, so you can screw on a new filter before removing the old one. Plus it will allow the greatest flexibility for use with a rifle.
But wait, the mask itself is only part of the system. You need the CBRN filters as well; it is best get a mask which uses the NATO standard, 40mm canisters for the best variety and ease of installation. These are not terribly expensive compared to the cost of the mask, but they do usually cost $40 and up, and you need several. Under severe conditions, each will only last a few hours, and even “normally clean” air will use up a filter in twenty four hours. The canisters often have an expiration date; some people claim they are good as long as they are sealed, others say toss them when expired. I would get new filters when the old ones expired, and use the unexpired ones first (when it was most important), saving the expired ones for when I ran out of the “good” ones.
On the other hand, I would be tempted to not bother with the gas mask at all. They are expensive, short lived, uncomfortable, difficult to use correctly (particularly under stress), limit your vision, make it difficult to communicate, prevent you from eating, and most prevent you from drinking (some have drinking tubes, and a few have drinking tubes which work well and don’t allow in contamination). If you wear glasses, you need to make sure they fit under the mask or get a prescription insert. The purpose of the gas mask is to keep out radioactive particles, and although nothing will do that as well as the CBRN gas mask, a standard filter mask may serve. There are 95% masks readily available cheap (N95), but I would spend the extra time and money to get the 99% filtration masks (N99). There are N100 (99.97% filtration) masks which might be even better, but I have not tried them. The N ratings, as well as R and P for oil resistant versions, are the American system. The European system is Px for filters which attach to a mask and FFPx for “one piece” masks. P2 is rated for 94% filtration and P3 for 99.95% filtration. As for one piece masks, FFP2 is 94% and FFP3 is 99%. I get my FFP3 masks, made by 3M, from Israel, and they are comfortable, compact and reasonably priced. A pair of goggles to keep the particles out of your eyes as well is a good idea.
Keep in mind that the particles filtered out are still dangerous, so the used filters should be treated appropriately.
No face mask will work with facial hair other than a mustache without dangerous leaks, so be prepared to get and maintain a close shave.
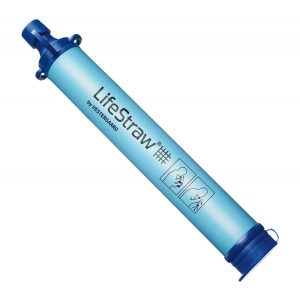
Breathing in radioactive particles is not the only way to get them into the body to wreck havoc. If your food or water is contaminated, so are you, so keep anything you plan to eat or drink in sealed containers so no particulates can get in. And keep it shielded from radiation at least as well as you are yourself.
Treatment of Radiation Poisoning
Too large a dose of radiation and you will be sick, suffer bodily damage or die without medical treatment, which may not be available. What can you do to reduce the effects of the radiation dose you received?
Potassium Iodide (KI) Tablets
You’ve probably heard of these as a “cure” or “protection” for radiation. This claim is, to be charitable, inaccurate. This substance does serve one particular (and important) function after a nuclear explosion.
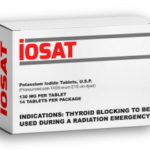 One of the byproducts of nuclear fission in an explosion are isotopes of iodine. The thyroid gland gobbles up any iodine it can get, and having radioactive iodine in your thyroid gland is bad news. The KI tablets, taken before the radioactive iodine can get to you, “fills up” the thyroid gland so little or no radioactive iodine can get in. That is it. It does not offer any protection against any other radiation or for any other organ in the body. And there are risks involved in taking it. But since any help is better than no help; check with your doctor to make sure your risk in taking KI is relatively low, and have it on hand. It is available in 65mg and 130mg pills; 130mg is the daily dose for an adult and generally has a score so it can be split into two 65mg doses (for children). It can also be taken upon notification of a nuclear accident involving fission such as the one at Chernobyl.
Water
Tritium can be “washed” out of your system by drinking lots of water.
Baking Soda
This stuff is dirt cheap, available everywhere, and surprisingly useful for combating radiation. To start with, it is really good to have it in the water you use to wash fallout from your skin (or your pets), as well as washing clothing and anything else which might have radioactive particles on it. It is useful internally as well. The kidneys are particularly susceptible to damage from uranium exposure. Old military manuals recommended doses of sodium bicarbonate (baking soda) to alkalinize the urine, chemically resulting in a less toxic uranyl ion and more easily excreted uranium-carbonate complex.
Other Possibilities
There are all kinds of claims about other things to use internally or in soak baths to treat radiation poisoning. From a medical viewpoint, here are recommended treatments for various radioactive contaminates. Many foods and other materials show up in individual research with claimed benefits against radiation exposure, and there are even historical indications of successful treatments. For instance, Japanese patients from the Hiroshima and Nagasaki bombs that daily ate wakame miso soup before the explosions did not suffer the radiation effects that people who did not eat it regularly suffered.
Antibiotics and Medical Supplies
Radiation plays havoc with your immune system. Having a stock of antibiotics on hand would be useful in combating diseases which attempt to take advantage of your reduced immune system paired with a much less hygienic environment than you are used to. If you have a good relation with your doctor, you may be able to get prescriptions from him, or there are doctors on the internet that will consult with you and sell you a large supply appropriate for your situation. If nothing else, many of the good general antibiotics are available from a pet fish store. Make sure you get the pure antibiotic, not one which includes ingredients to make your fins shinier. Most antibiotics will last much longer than their expiration date if properly stored (dark, cool, without air allowed into the container). Military studies show that most are still usable after eleven years or more; the exception is the “cyclines” (i.e. Doxycycline) class which some sources say can turn toxic.
 Of course you want to have a real good first aid kit with over the counter medications, or even an advanced medical kit.
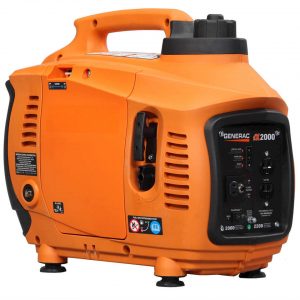
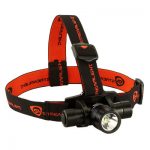
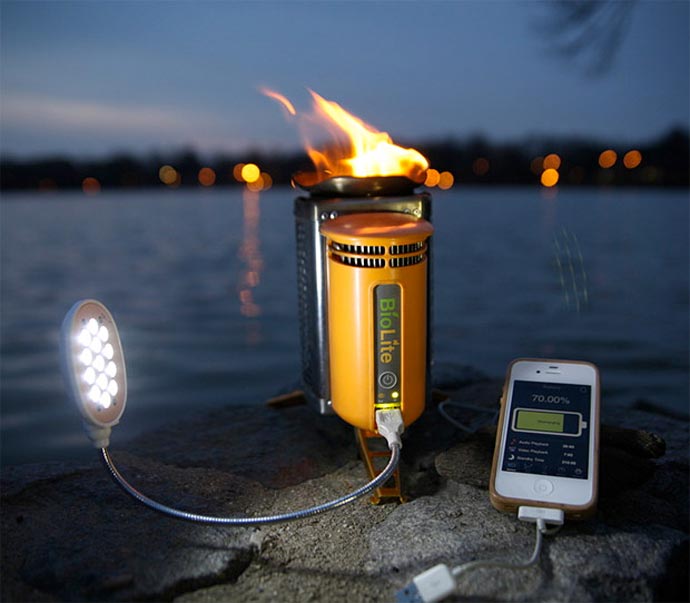
Supplies for Nuclear Explosion Survival
Other than the stuff already discussed, normal survival supplies are in order. After all, you will need to survive everything else a disaster can bring as well as radiation and other bomb effects. Remember, you will want to avoid going outside (except possibly briefly) for at least two weeks, so plan for supplies accordingly.
When I was growing up, nuclear war was a “real thing”. We practiced getting under our little school desks, because they apparently had built in blast and radiation shields. 🙂

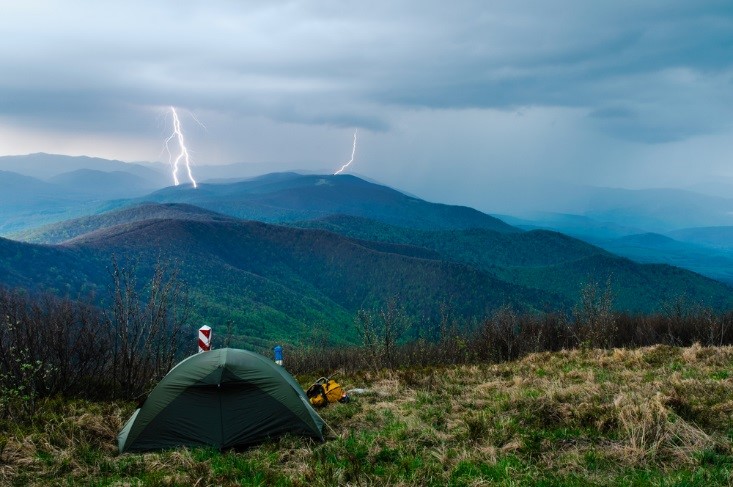
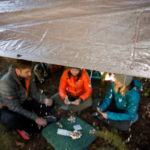 When I was a child, my family had a beautiful tradition. Every year, for my birthday we would go out in the woods and turn the celebration into three-day camping. As I was born during summer, the weather was ideal for this kind of activity. However, on my eighth birthday, the sky just broke. As rain poured, our tent, pitched at the base of a north facing peak, became soaking wet. My sleeping bag, unlike everything else in the tent, did not float. That’s when I learned the first and by far the most valuable lesson – choose your campsite location wisely.
 There are dozens of models of
 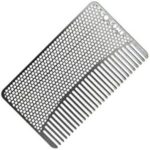 There’s no true survival purpose to the Go Comb – it’s really nothing more than a credit card sized comb, although some models do have a very flimsy bottle opener attached. That said, there are enough times during my day where I find that my hair looks just a bit out of place, or when I need to look just a little bit more presentable, like when I have an impromptu classroom observation by the superintendent, or when a parent shows up at my office door to complain about their child’s grade. It’s also great for taking to the gym and using after a workout. Taking the two seconds, it takes to run the comb through my hair does a good amount to improve my professional appearance, and has helped me more than once in making a good first impression.
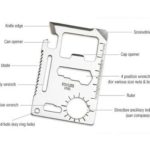
 Most people know about the Swiss Army Knife and it’s bevvy of features, but fewer are familiar with the concept of a “
 There are some versions of
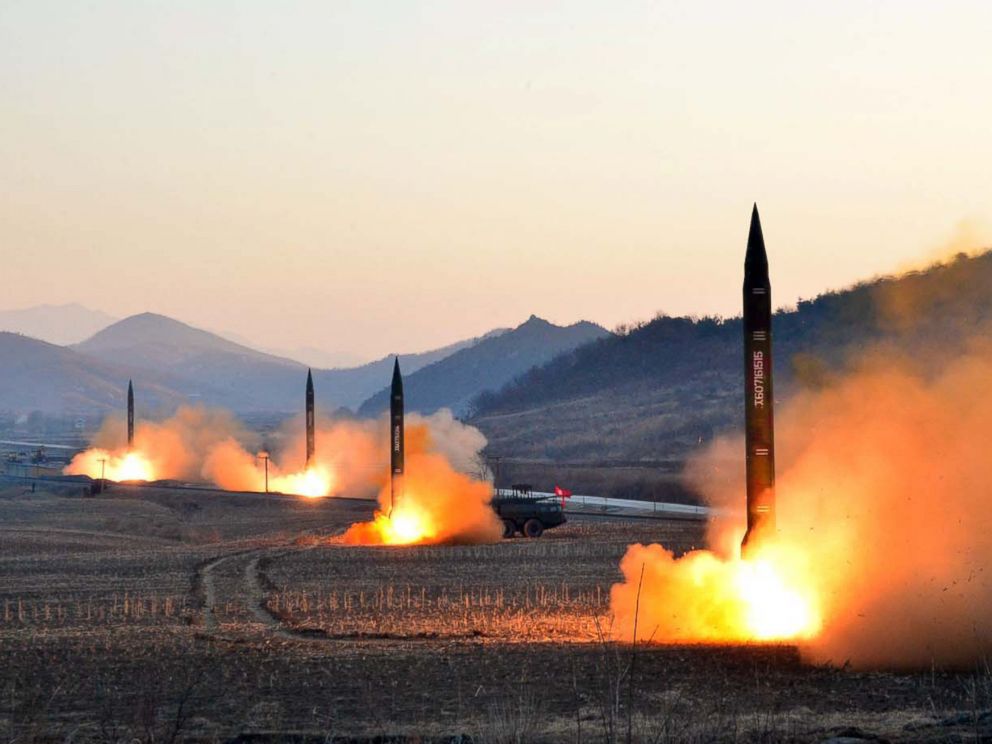
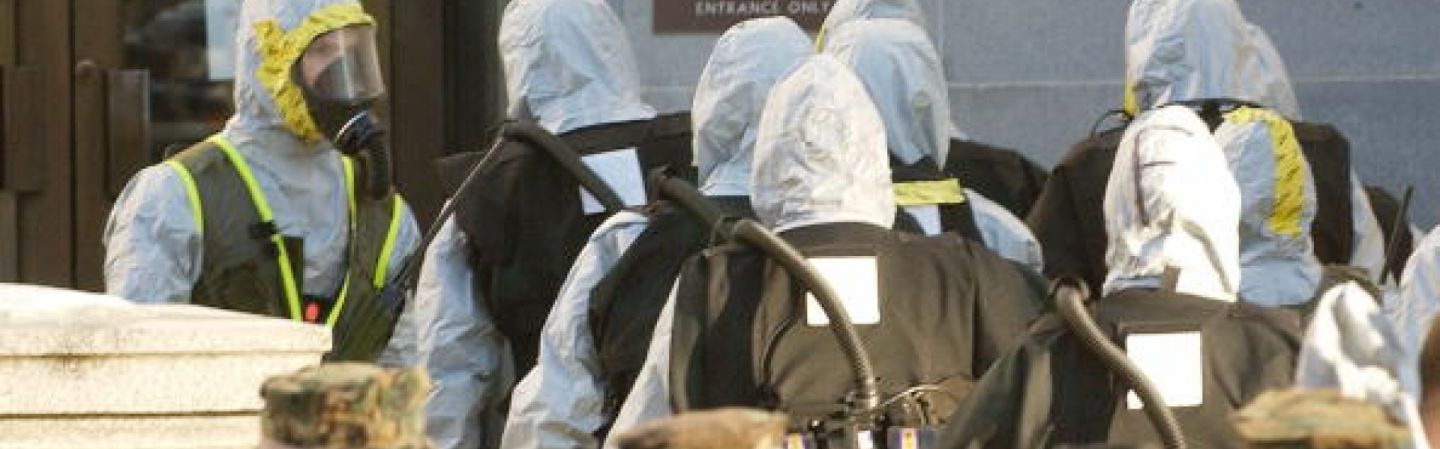
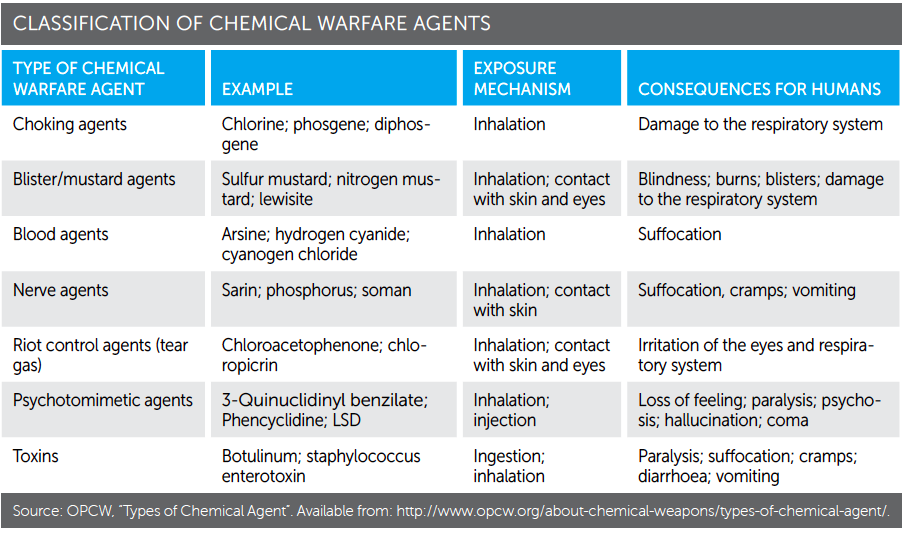

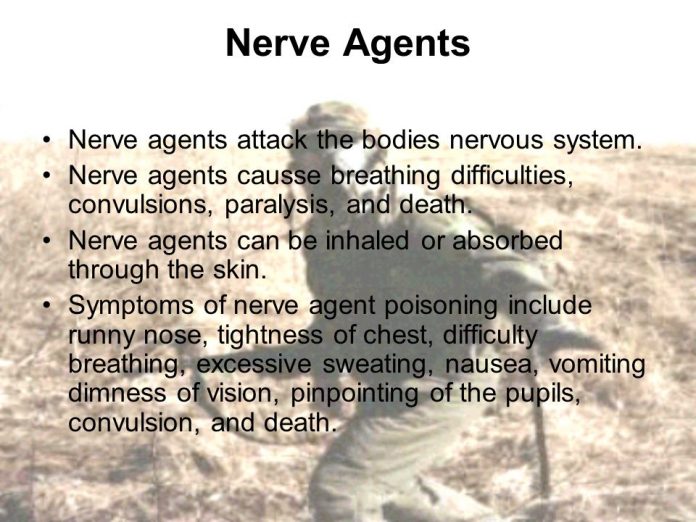
 Thus, the trick is to avoid becoming infected. This generally occurs when the disease agent (bacteria, virus or spore) enters the body, most commonly via the mouth, nose, eyes or a break in the skin. The disease agent can be in an aerosol form which is breathed or a liquid which gets on the hands and is transferred to an opening or into a wound. It can also be in what is eaten or drunk. If you can prevent these common sources of infection, then it would be unlikely that you will be infected, unless someone injects you or you are in long term close contact with a carrier or their environment. To reduce the odds of infection, use a mask over your mouth and nose which can filter out and/or kill the disease agent, goggles which seal around your eyes, and clothing which will keep the disease agent away from your skin, or at least any breaks in your skin. Decontamination; that is safe removal and containment of the clothing upon return to a “safe” location, and cleaning any possibly exposed parts of the body, will be of great importance.
 Perhaps the most noted modern biological weapon is Anthrax (Bacillus Anthracis). Others include Smallpox (Variola major), Tularemia (Francisella tularensis), Plague (Yersinia pestis), Bunyavirus (Bunyaviridae family – Nairovirus, Phlebovirus and Hantavirus), Ebola Virus and Marburg Virus (another Hemorrhagic Fever similar to Ebola). Some people think that influenza has potential to be “improved” into a useful weapon.
 When developing a chemical weapon, one tends to focus not only in producing the desired effect, but the “volatility” or how stable it is. Chemicals which are volatile (unstable) tend to “go away” or become inactive quickly, thus exhibiting low “persistence”. This might be of interest if you plan to send personnel in shortly after the weapon. On the other hand, if the goal is to cause as much damage as possible, high persistence would be preferable.
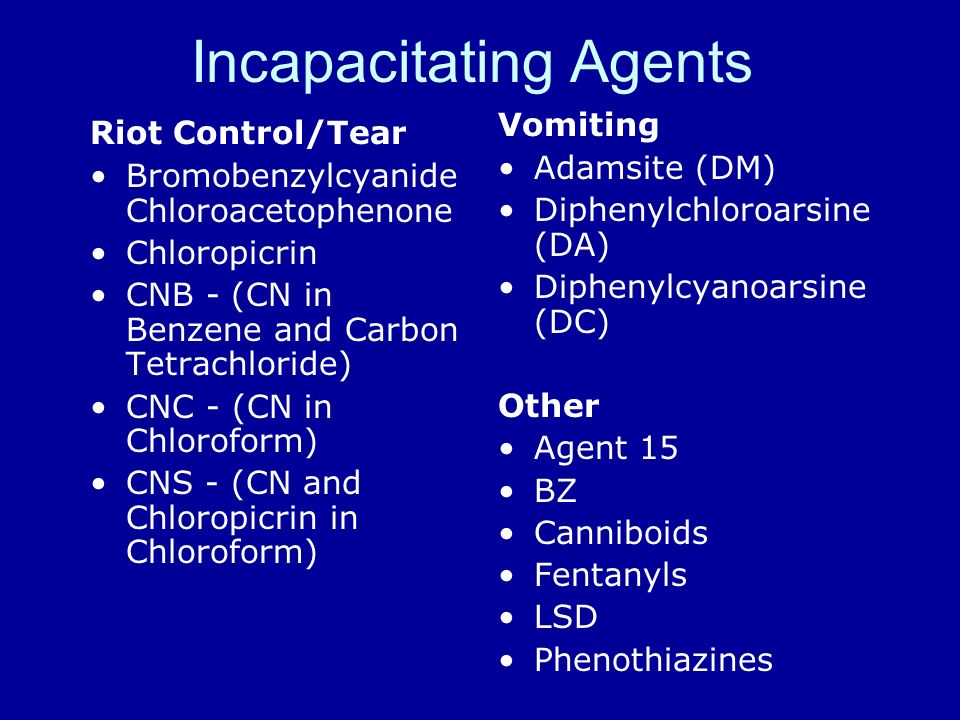
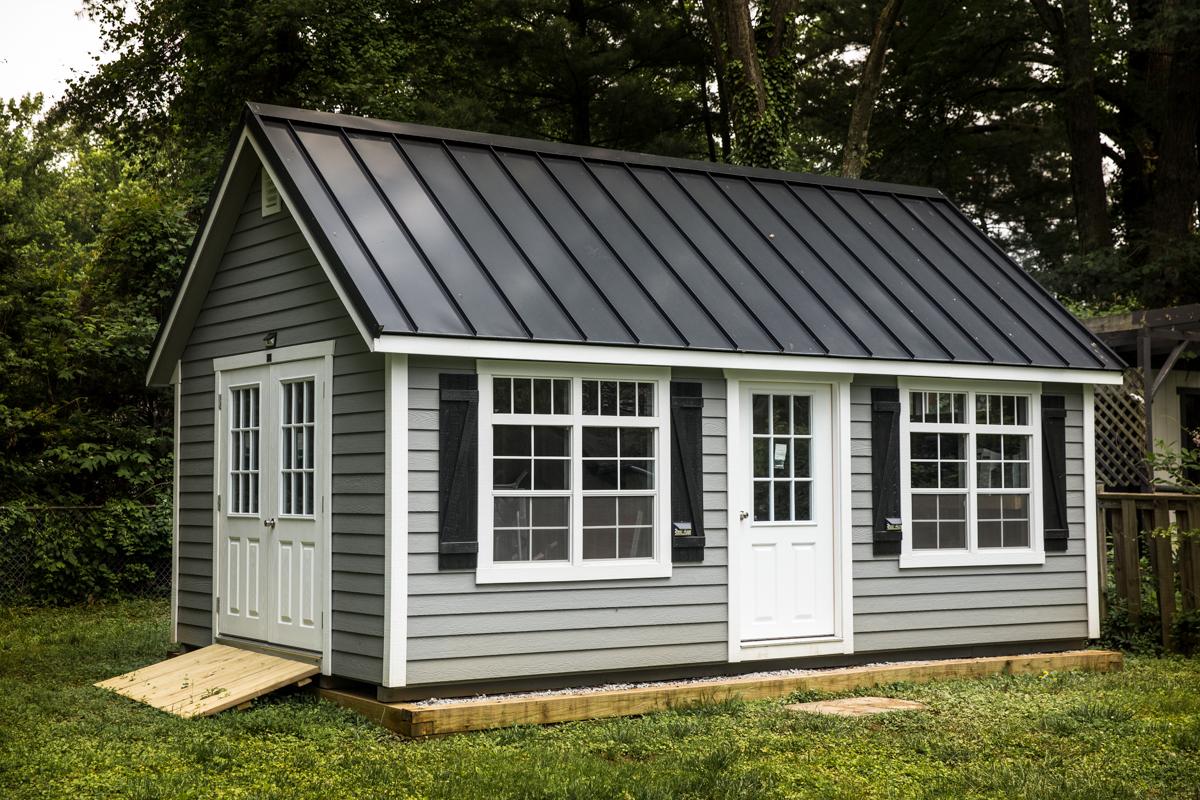
 When TEOTWAWKI hits, our plan is to hunker down. So, you better believe our hidden-in-plain-sight home office turned
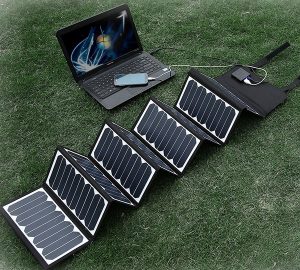
  Many see solar energy as cost prohibitive and I did too at first. I was hesitant to believe that purchasing and installing solar panels would fit into our budget. But, in the glorious age of the internet and
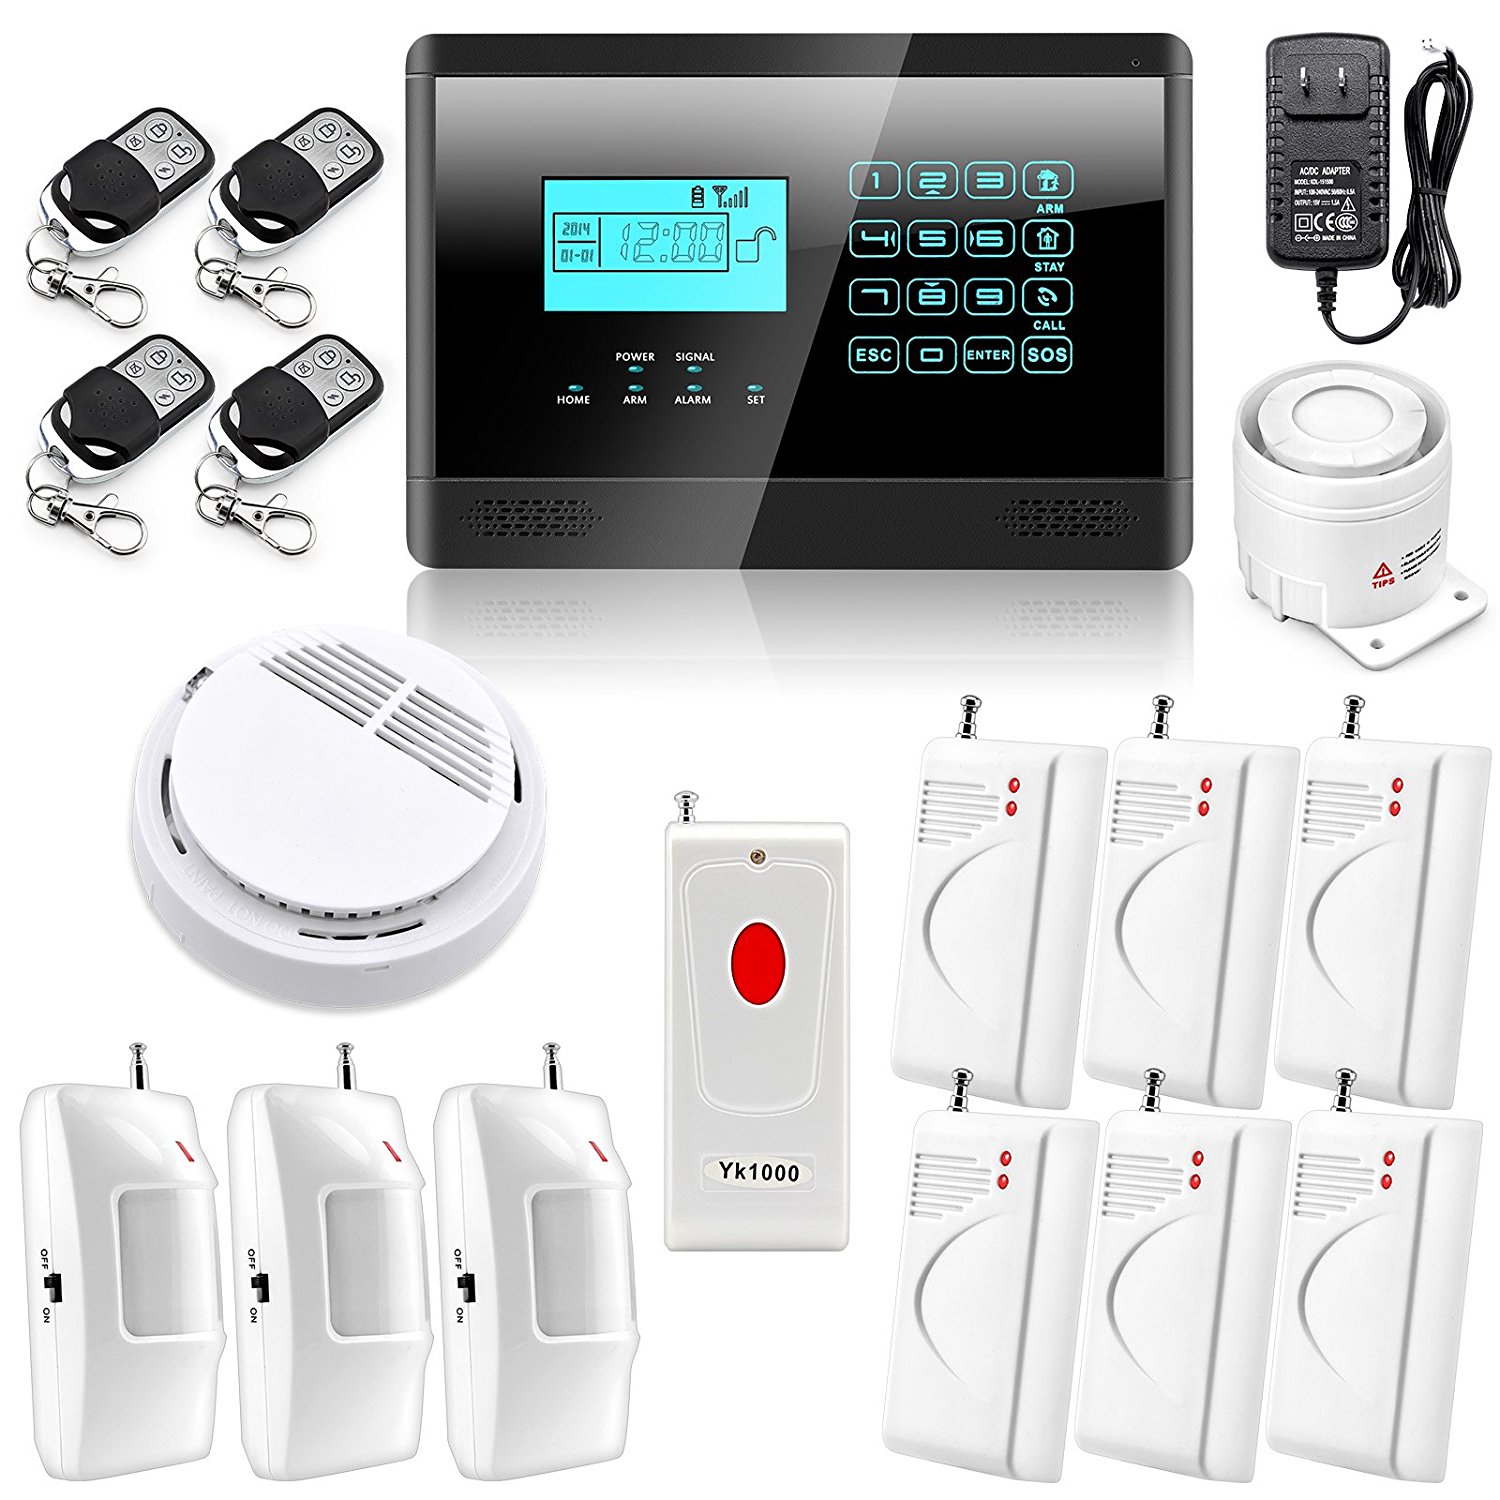
 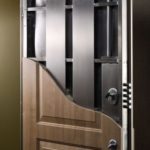 In addition to installing upgraded locks on our shed, we also opted for an
 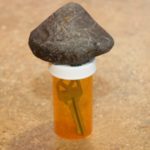 This leads to me to the final feature I want to highlight in our prepper paradise (okay, it’s a shed I know!). We all know about survival caches. This is a smaller version of just that. A key to the shed, a pill bottle and a decorative rock are all you need accomplish this final tip for securing your outdoor shed. Glue the rock to the pill bottle lid, slip the key in, dig a hole and voila! Hardly a chance your snoopy neighbor will be able to locate that key hidden in plain sight.
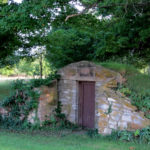 The ideal food storage idea you can have in your backyard is a root cellar. If you’re creating a big one, you simply need to dig a large hole, build supports for the wall, and set up some form of ceiling with an air flow, add an entrance, and you have a walk-in storage solution for many of your vegetables that will keep your produce cool for the season.
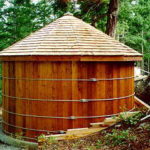 Putting a survival cache in your own tree is also an option. PVC pip can be used to create an airtight seal that can contain anything you think you might need in order to survive. What’s nice about the cache is that in case of a fire, flood, or home invasion, at least you’ll have something you can use to get you through a tough time.
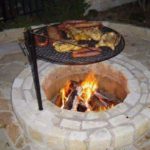 This past summer, when considering my preparedness plan, I noted that one thing we really needed was a redundant way to cook our food. We have gas appliances in our home, and I have a propane tank attached to the grill outside, but otherwise, we had no dedicated space or method for cooking. We solved this by putting a firepit in our backyard, along with a simple firewood storage box to keep nearby. Now we have a dedicated cooking area that will last as long as we keep getting branches from our trees (in other words, forever).
 In addition to
 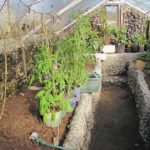 If you have the space and the equipment, there is no better “greenhouse” solution than a Walipini. A Walipini is a dug out section of earth that is enclosed with a clear plastic or glass roof. Underneath, you have a 12-month greenhouse that can help your plants endure in any climate. A traditional greenhouse is an option as well, but may not offer the 12-month guarantee of a Walipini.
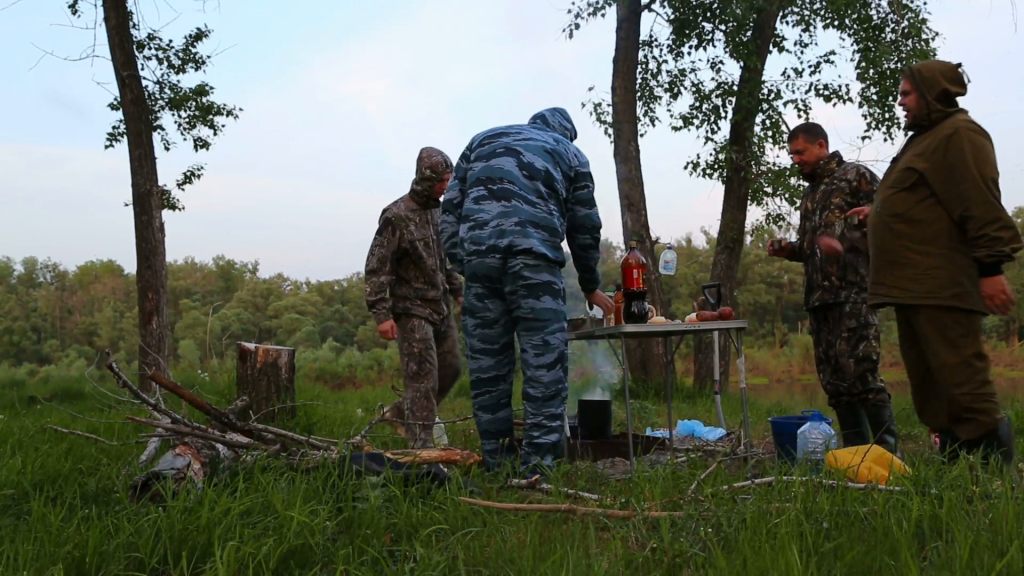
 When the SHTF scenario finally occurs, one of the surest things that will happen is that alcohol’s value will skyrocket. People crave their vices, even if the vice is not one that causes a physical dependence, and they are usually willing to give up quite a lot to get even a drop of what they know and love.
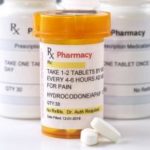 Like all alcohol, vodka can be used in place of ethyl or isopropyl alcohol in medical applications. Obviously, as a designed food item, the vodka is not quite as good of an alternative as the real thing, but in a pinch, you can certainly use it to disinfect wounds, or rub it on the body over an area you may wish to cut into or sew to reduce the risk of infection.
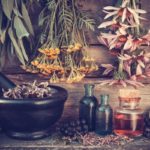 If you grow herbs, or use herbal medicine in any way, then vodka should already be part of your fall purchase list so that you can use it in creating tinctures to preserve herbaceous medicines. The process is simple – in a small, dark and opaque bottle or jar, fill the bottle or jar with herbs (leaves, flowers, roots, or whatever piece you’d normally use). Top off the bottle with vodka, and let it sit for a week or so in order to have the medicine steep into the liquid. After you’ve allowed the mixture to steep, you can strain out the liquid tincture, and store it in dropper bottles, which take up less area and have an adequate measuring system included.
 Vodka is very high in alcohol content, and as anyone who experimented in chemistry can tell you, alcohol burns hot and quick. You can use vodka as an accelerant for fires (similar to lighter fluid). It does not create a steady, long burn, but it could help you catch a few twigs on fire, and is especially useful if you’re not all that skilled with bushcraft.
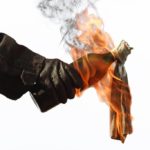 With a rag, a bottle of alcohol and a fire, you have an effective
 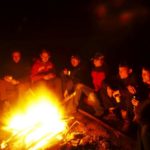 Alcohol in general can make you feel like you’ve increased your body temperature, and therefore, it is often thought of as a way to keep your internal body temperature high. In fact, alcohol does the opposite. You feel warm when you drink alcohol because it actually lowers your internal temperature, causing you to feel like you just walked out on a warm summer day wearing a winter coat. Drinking in cold temperatures can be very hazardous to your health. However, that false feeling, along with the numbing effect, can be an effective method for calming agitated people.


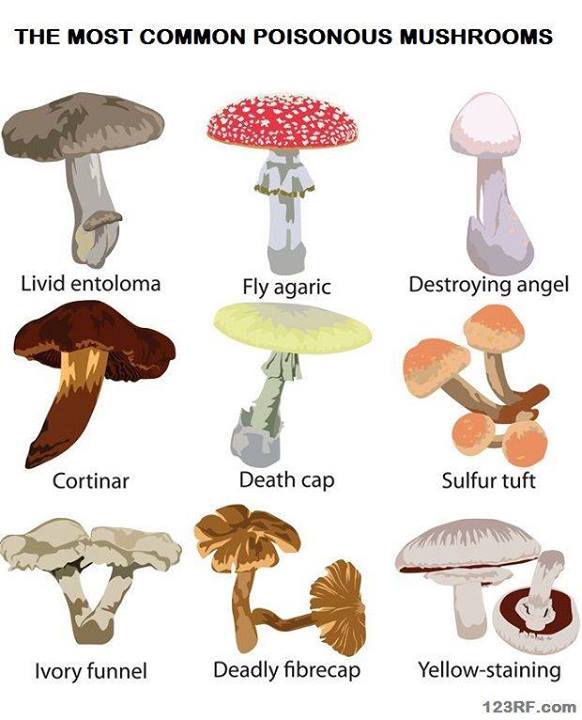
 Cardiac Glycosides are most often found in Lily-of-the-Valley, foxglove oleander and squill. First signs include headaches, confusion, vomiting, stomach pain, and dizziness. Children might also experience changes in heart rate and blood pressure.
 The best thing parents can do for kids is to teach them never to pick or eat anything from a plant they find outside, regardless of how good it smells or looks. Make sure your children know to eat plants or fruits from outside only if they have permission and if the plant has been washed thoroughly.