The Final Prepper Fitness
Why do people prep? No matter how you spin it, it’s probably going to boil down to taking care of themselves and those they love. Where the real variable comes into play is how people prep. Some stockpile and fortify, some may pack light and bug out, or others may have their own unique plans.
Ultimately there is no universal answer as to the “right way” to properly prepare for a massive disaster scenario due to the varying nature of personalities in individuals. There is, however, is a key aspect of how people prep that should be implemented to any prepper’s plan if they plan to survive: physical fitness.
Now before thinking this article is about having the best looking six-pack when things go south (trust me, it’s not), consider this question, “Am I in a condition where I feel confident to take care of loved ones and myself physically if disaster strikes?”. Apply this question to your scenario of choice, hell, apply it to your everyday life when things are going good. More than likely the answer to this question is “no”, and there is nothing wrong with that.
In all honesty, even if you are active, working out regularly, and eating healthy, there is room for improvement – it’s the nature of self-betterment and making your body best survival tool in a disaster.

How Prepper Fitness could help you in a Doomsday Scenario?
SHTF (who knows how). It’s code red and your rushing around too initiating your own variation on surviving this disaster. You’re sweating, adrenaline is pumping through you, and the only thing on your mind is getting to your checkpoint. As you’re running around, your blood pressure becomes dangerously high and you have a heart attack. Congrats, you just lost at doomsday.
Of course this scenario is a hypothetical and has no scientific analysis to back it up. But for a lot of people, a doomsday scenario could be as simple as the consequences of poor maintenance to their body in terms of diet and exercise. Physical fitness should be one of the essential building blocks of preparing, yet it seems that this foundation work on many prepper guides/plans is overlooked or simply glazed over.

As you’re running around, your blood pressure becomes dangerously high and you have a heart attack. Congrats, you just lost at doomsday.
Prepper fitness doesn’t have to be something crazy like running a marathon through the desert without water or joining a gym. Fitness can be as simple as just getting out of your comfort zone for one hour of your day. Much like prepper plans, fitness plans can vary from person-to-person depending on goals, but ultimately doing fitness based activity that pushes the limits of your body consistently will make you a stronger and a physically more efficient survivalist.
So where should someone begin if they are not as fit as they would like to be? Much like learning a new skill or plan for prepping, go to the Internet for information and ideas. Honestly, you don’t even need a gym membership for a great cardio workout – or even weights to build muscle for that matter. Focusing on body weight exercises, light jogging/power walking, and functional lifts at first can make you healthier and stronger, but can also be fun to a degree.

A general introduction to Prepper Fitness
Depending on how serious you want to take this, I would suggest investing in a few things (although not necessary, can serve to be helpful): a heart monitor, pedometer, some of your prepping supplies, and a semi-truck/tractor tire.
Cardio – This does NOT mean running per se, cardio is simply training that gets your heart rate up. Ideally for fat loss/cardio training, you want your heart rate to be “in the zone” (Target Heart Rates by American Heart Association). Cardio training can be monitored with a heart rate monitor, which can also serve as a safety precaution while training, and can be accomplished in a number of ways such as: swimming, hiking, power walking, biking, jogging, or even HIIT workouts. The key to cardio training is consistency and always improving. It’s smart to keep a log of your workouts to monitor progress. Don’t get discouraged though, sometimes progress can come in the form of walking a mile faster than you ever have or sometimes progress can come in the form of showing up to exercise when your brain wants to make a million excuses not to.

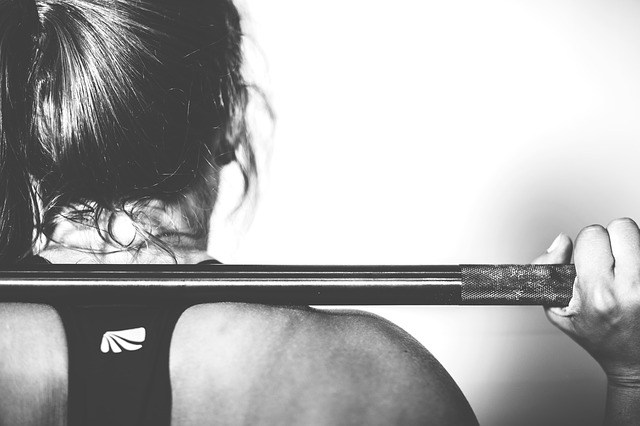
Some of the best exercises you can do, can be done using only your body weight.
“Weight” Training – as mentioned earlier, you really don’t need iron based weights to lift. Some of the best exercises you can do, can be done using only your body weight. One preface that must be mentioned in this portion is always consider your form first whenever lifting something or exercising – improper form can lead to potential injury in the short and long-term. Here is a quick list of some great body weight exercises that can be easily added to your workout circuit:
- Air Squats – excellent for your quads, glutes, and hamstrings
- Lunges – builds stamina and quads as well as works the calves, glutes, and hamstrings
- Pushups – works your chest as well as your shoulders and triceps with many variations available
- Pullups – great for your lats, back, and biceps.
- Side Leg Raises – works your hips/adductors
- Dips – adaptable workout for your triceps that also works your chest and shoulders

Functional Training – of course we are preppers, so a lot of the training done should be survival themed right? Try adding these exercises to your workout that can easily add purpose to your workout:
- Sledgehammer swings on a tire – think you might need to split a lot of wood?
- Tire Flips – for anytime you think you might have to lift something heavy off the ground…
- Bucket Carries – water is necessary, not light, and probably inconveniently located
- Rope Climbs – wonder if you may need to get somewhere when you don’t have a ladder?
- Log Carries – Get good at carrying awkward things… do you honestly think everything you need will fit conveniently in your rucksack?
- Running – this may come in handy at some point in life!
WRAP-UP
Although this is not designed to be a complete guide to prepper fitness, it is meant to get preppers thinking and give basic considerations on where to begin their journey into becoming the best survival instrument in their tool box. The best advice one can take away from this is to try to make fitness a fun and enjoyable part of your day/life, it will not only help make it a consistent part of your routine, but you may even have fun doing something that is physically great for your body!
Two final notes: 1. Remember to stretch before and after exercising, there are too many benefits to stretching and flexibility to list here. 2. Material in this article is provided for educational purposes only, and is not to be used for medical advice, diagnosis, or treatment. Not all exercises may be applicable to readers; always consult a physician before trying a new diet or exercise program. I am not responsible or liable for any injuries, damages, loss, or accidents.
On a different note, here’s some other self-sufficiency and preparedness solutions recommended for you:
The Lost Ways (The vital self-sufficiency lessons our great grand-fathers left us)
Survival MD (Knowledge to survive any medical crisis situation)
Backyard Liberty (Liberal’s hidden agenda: more than just your guns…)
Alive After the Fall (Build yourself the only unlimited water source you’ll ever need)
The Lost ways II (4 Important Forgotten Skills used by our Ancestors that can help you in any crisis)
The Patriot Privacy Kit (Secure your privacy in just 10 simple steps)
Are you in a condition where you feel confident to take care of loved ones and yourself physically if disaster strikes?