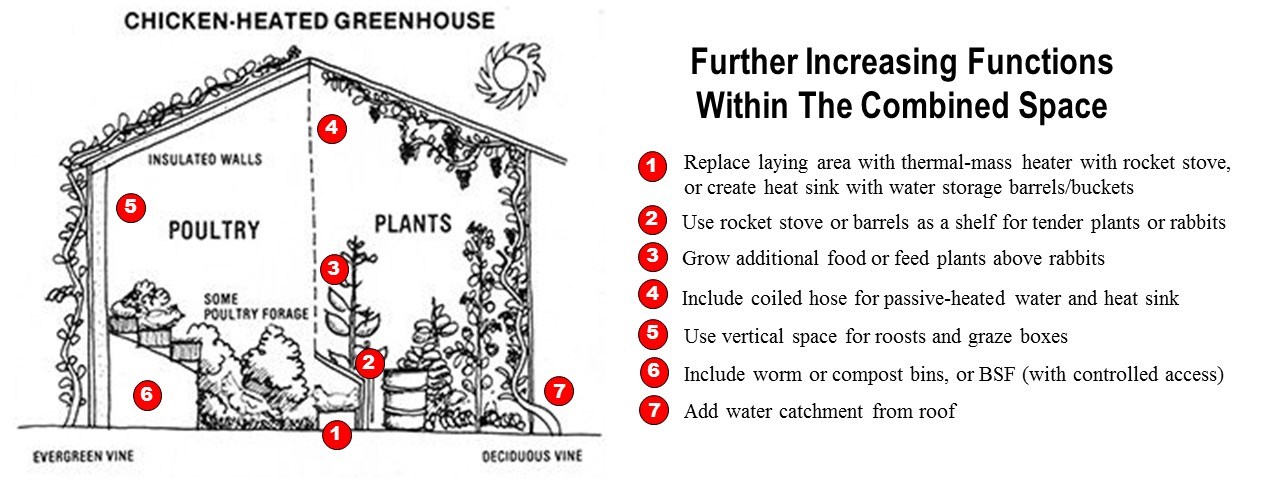
HomePosts Tagged "Prepping" (Page 32)

Introduction

DISCLAIMER: This article in intended to provide basic information regarding defensive tactics to preppers who are new to the subject. Those with a military background or other advanced knowledge in tactical maneuvers are referred to more advanced treatments of the subject, such as the excellent book Contact! A Tactical Manual for Post Collapse by Max Velocity.

The tactics discussed here are purely from the perspective of group and community defense, and are limited to tactics that would apply to active-defense situations.

Tactics are defined as “the art of disposing armed forces in order of battle and of organizing operations, especially during contact with an enemy”. While authoring my preparedness book (“When There is No FEMA“) I covered the topic of using classic military tactics in post-SHTF situations. This was a natural extension of the treatment I had already given to guns and ammunition. (After all, what good is having a gun for defense if you don’t know how to apply it effectively?)

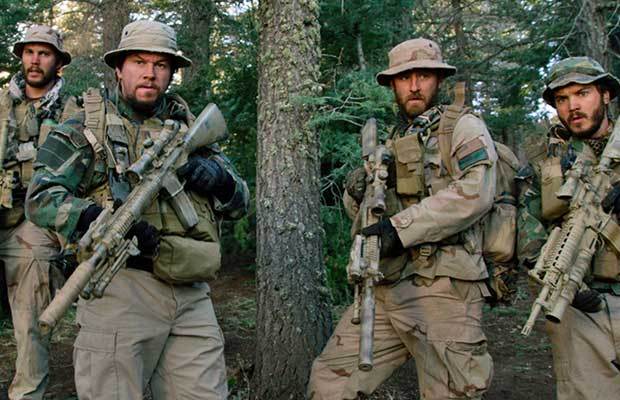
Recently, while viewing the excellent movie Lone Survivor, I came to realize exactly how important and pertinent the topic of defensive tactics is to the prepper/survivalist. As I watched the portrayal of those special forces soldiers being pursued by the Taliban across the rough, forested hills of Afghanistan I could not help but relate those scenes to the tactics I had covered in my book.

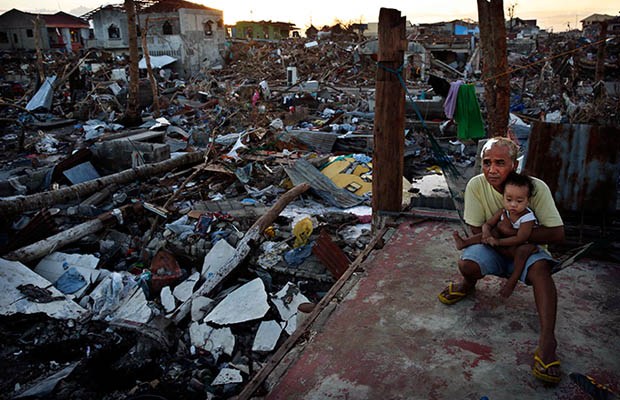
That realization of the importance of defensive tactics was further reinforced by recent social unrest in and around Ferguson, Missouri. From the news coverage of happenings there we have observed groups of loosely organized looters literally shooting their way into buildings. If and when a large-scale disaster strikes on a national level, and when pure hunger is the motivator, it is logical to infer that such violence will be acted out with much greater intensity, and almost certainly with less intervention by law enforcement.

SIDE NOTE: Many years ago I had a roommate who had dedicated his life to the pursuit of martial arts. One piece of advice he gave me that I have never forgotten was that one should always be imagining potential threats and vulnerabilities such that, when an attack materialized, one would be preconditioned to react instantly.   Needless to say, this bit of wisdom applies as much to group defensive tactics as it does to hand-to-hand combat.

The corollary to this advice is that a survival group should conduct regular drills and have regularly scheduled training sessions.

Terminology

Effective communications is essential to being able successfully carry out tactics, and communications benefits greatly from adopting a common vocabulary. The following are some common terms related defensive tactics:

  • Avenue of Approach – the path that an adversary is likely to take when approaching.
  • Field of View – a geographic zone that can be monitored through direct observation from a particular location.
  • Field of Fire – a geographic zone that can be protected by gunfire from a particular location.
  • Flank – a military formation’s undefended side.
  • Hard Cover – a location that provides both concealment and protection from weapons fire.
  • Soft Cover – a location that provides concealment only.
  • Suppressing Fire – weapons fire used to prevent the enemy from firing.
  • Kill Zone (“KZ”) – a geographic zone that has been selected to engage an approaching enemy for maximum effect.
  • Safe Zone – a location that has been specially hardened to withstand direct attack. Children and other non-combatants should generally retreat to a safe zone in the event of an attack.
  • Counter-Assault – an attack that is launched in response to an enemy attack.

Basic Tactics

Basic tactics tend to be quite simple and well known, and often involve defending from fixed locations.

They may also be combined and incorporated into more complex tactics. Basic tactics include:

  • Ambush – Concealing one’s forces and laying in wait along the anticipated avenue of approach to attack the enemy when they enter a predefined kill zone.
  • Crossfire – Firing on an enemy from two or more locations such that it is difficult or impossible for them to find cover (note that, as an example of combining tactics, an ambush may be designed to incorporate crossfire).
  • Charge – A frontal assault carried out with such speed that the adversary is (hopefully) overwhelmed before being able to mount an effective defense or counter-assault.
  • Flanking – Attacking an enemy on their undefended (or less well defended) side.
  • Hit and Run – Launching a surprise attack on a (possibly larger) opponent and quickly retreating before the advantage of surprise is lost.
  • Advance and Retreat

Knowledge of the defense-related terms defined above, as well as the basic tactics described here, should be covered by any survival group’s defensive training. By the time the group comes under any sort of attack these terms and concepts should be firmly fixed in everyone’s mind.

In addition to developing good knowledge of tactics, knowledge of the local terrain and the best possible level of physical fitness are critical. Physical strength will be necessary to carry out the tactics described here, and good tactics always required a knowledge of the local terrain (NOTE: If at all possible obtain and study topographical maps of any areas you may be defending).

Best Practices

Force Dispersal

In the case of two sides engaged in a gun battle, with each side finding hard cover in a single location, it’s easy to imagine that a dangerous stalemate condition might develop in which each side has the other pinned down and unable to move. However, if one side in that same conflict were to be able to fire from multiple locations – catching the enemy in a crossfire – then unless the enemy was in a position that provided complete protection from all angles the battle would soon be over.

The practice of ‘fanning out’ before engaging an enemy carries with it some significant defensive advantages as well. The loss of a single position (or the compromise of its cover) will not expose the entire group to direct fire. In fact, the availability of other team members to provide suppressing fire greatly increases the chances of survival for those team members who had been compromised.

The practice of trying to ‘fan out’ prior to engaging an enemy in a gun battle should be virtually built into the DNA of all defenders, and this practice should be reinforced continuously with drills and training before it is ever put to the test in the real world.

Topographic maps can be easily purchased for your entire city

.

Positioning Along a Diagonal Line

It has been common throughout history, and across all branches of service, to deploy equipment and troops along a line that is diagonal to the enemy’s line of attack. This orientation, known as the ‘echelon defense’, carries the advantage that it provides the defenders with a wider field of fire while also largely denying the enemy a flank to attack. When engaged in a firefight it is not always possible to select specific positions due to the constraints of terrain and the availability of cover, hence this deployment may not be possible. However in some cases this may be possible (e.g. when using trees in a densely wooded area for cover).

When defensive fortifications are being constructed around a fixed location it may be possible to anticipate an enemy’s avenue of approach and construct those defenses along a diagonal to that path.

Advanced Tactics and Defensive Principles

The Flying Wedge

The ‘Flying Wedge’ formation is a V-shaped formation that is basically two diagonal Echelon formations that converge. Like the Echelon, it does not present a readily accessible flank while at the same time providing the widest field of fire. This V-shape also provides a ‘spear head’ that can be used to punch through an enemy’s front line. The flying wedge would typically be employed in in a situation in which there is reason to believe the enemy forces could attack either flank.

Leapfrogging

‘Leapfrogging’ is a tactic that involves two or more defenders (or groups of defenders) alternatively advancing and retreating in steps while the other defenders provide suppressing fire. Military trainers often advise those advancing or retreating to say to themselves … “I’m up, he sees me, I’m down” … when in motion to help provide the assurance that they are not exposed long enough to come under fire. The risks associated with leapfrogging can be substantially reduced if one defensive position can serve as ‘overwatch’ and provide continuous suppressing fire.

The principle of leapfrogging applies to more than close quarters fighting. Two snipers, for example, could provide covering fire for one another over a larger geographic area.

Hills, the Defender’s Best Friend!

Use of terrain features has figured decisively into battles throughout history, and hills have proven to be particularly advantageous. In fact, the ‘reverse slope defense’ was employed quite effectively by the Duke of Wellington in 1815 during the Battle of Waterloo in his defeat of Napolean Bonaparte’s army. This simple-but-effective tactic involves the defender simply traversing a hill and then lying in wait on the opposite side for the pursuing enemy forces to crest the hill. The defenders will have taken cover or simply laid down on the ground to conserve energy, steady their aim, and present a more difficult target; while the enemy is more fatigued and silhouetted against the skyline.

This tactic is so well-proven that it merits additional discussion. An experienced adversary (particularly one with military experience) may recognize the potential danger involved in pursuing over a hill. If so then they will hesitate. If fighting in terrain that offers a succession of hills it may be wise to lay in wait behind a second hill, and observe the enemy’s behavior in traversing the first. This will provide some insight into the opponent’s own level of tactical sophistication.

When taking cover to lay in wait behind a hill, the defender’s forces should seek to fan out, as described previously, such that an approaching enemy will be caught in a crossfire.

SIDENOTE: It should be pointed out that the reverse slope defense becomes much less useful for those who are facing an enemy who has airpower.   Not only can aircraft launch attacks against the defender, but they can also communicate the defender’s position and defensive posture to any oncoming ground forces. Regardless of this, as was realistically portrayed in “Lone Survivor”, those aircraft are not always available, and they must eventually disengage to refuel. Also, if your opponent happens to be the stereotypical group of “mutant zombie bikers” they probably do not have airpower. Hence the tactic that worked so well against Napoleon may very well also be employed effectively on the modern post-SHTF battlefield.

AUTHOR’S NOTE: If I could recommend any one defensive tactic to be considered above all others it would be the reverse slope defense. Not only has it proven itself repeatedly in real battle situations, but it can also be quickly executed with minimal training.

Flanking

The ‘flanking maneuver’ is a battlefield maneuver that is as old as recorded history. It involves engaging an enemy directly while also attacking them (preferably by surprise) on one or both sides of their front line. This can be a highly effective technique because:

  • When firing at an attacker to the side the enemy puts their own personnel into the field of fire.
  • The attack from both the front and one or more sides essentially constitutes a large-scale crossfire.
  • Enemy soldiers that are constantly watching over their shoulders for threats coming from multiple directions become quickly demoralized.
  • A flanking maneuver from both sides becomes a partial encirclement.

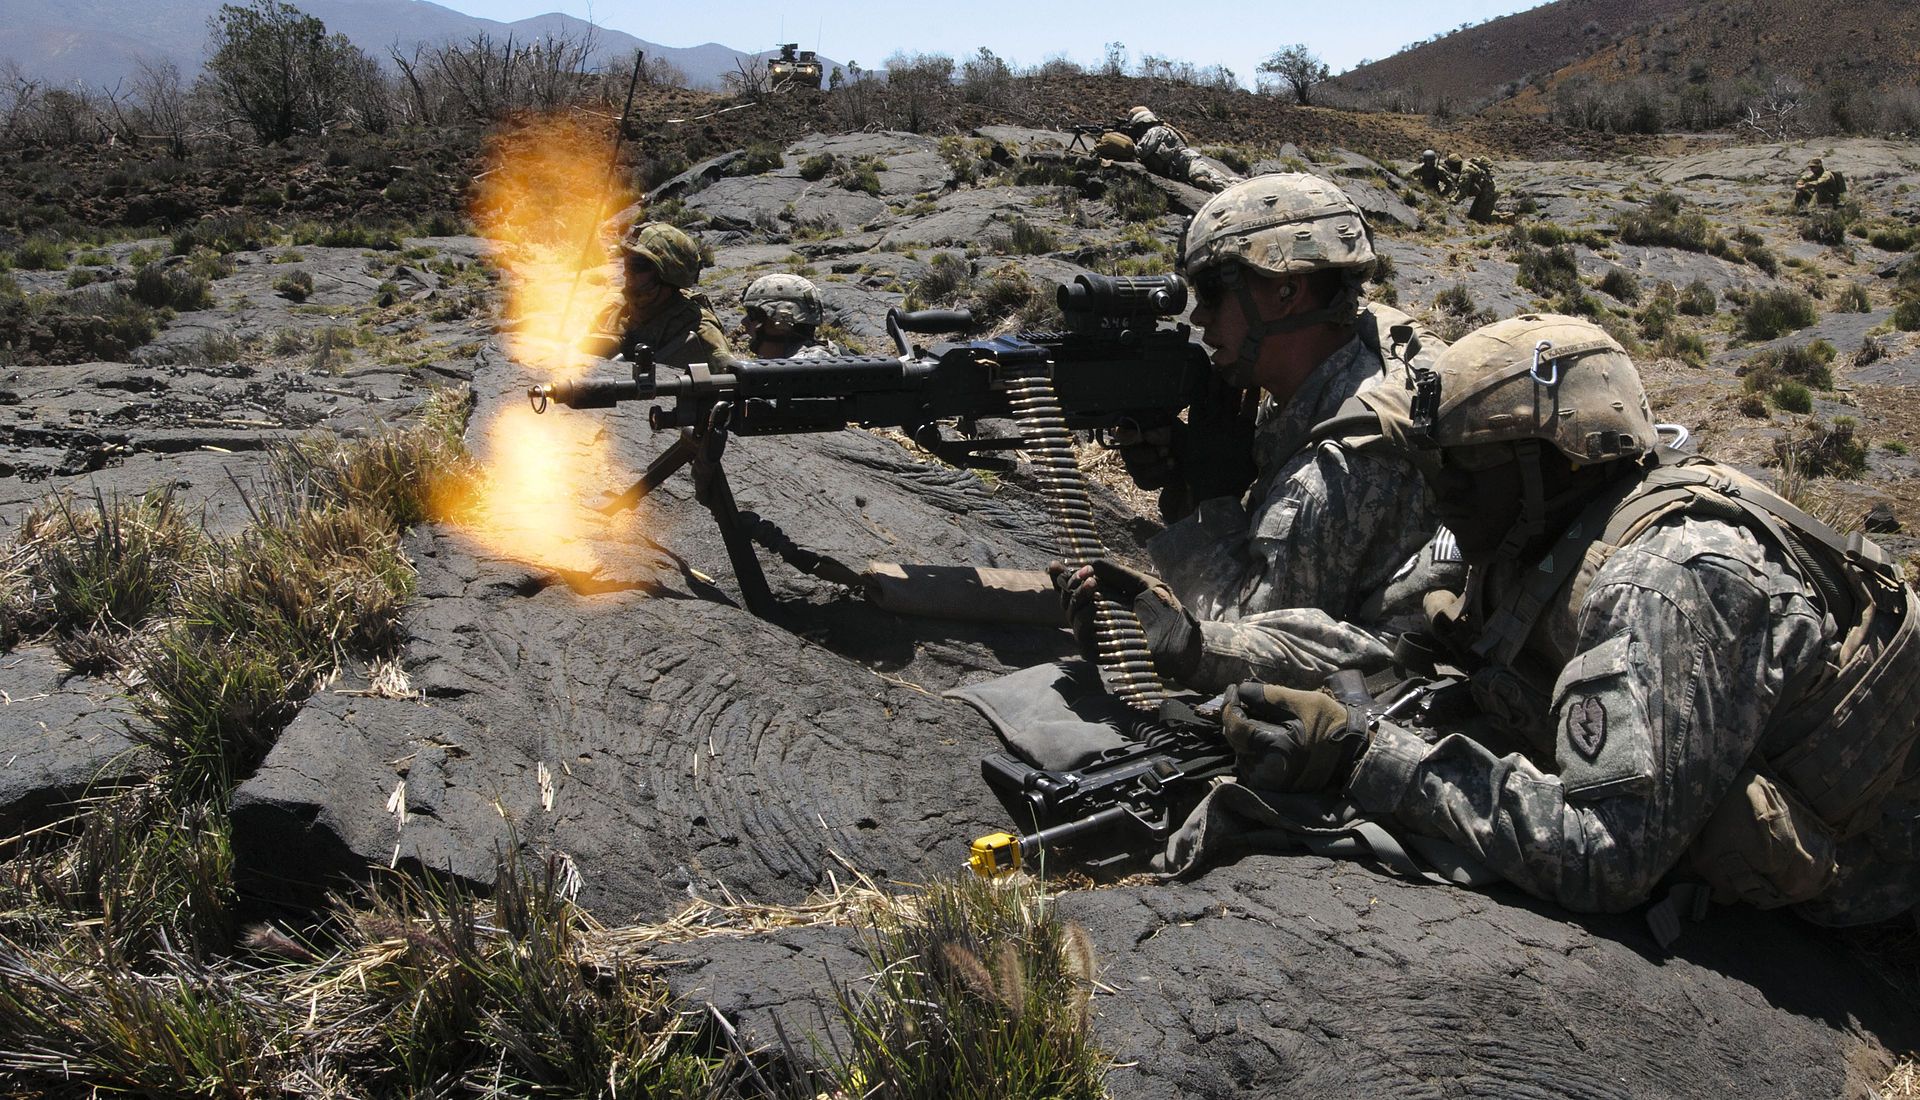
Defensive Tactics mean the difference between life and death in battle.

Flanking maneuvers are often attempted by mechanized or mounted forces, as their increased mobility helps to assure success. Nevertheless, flanking remains a very legitimate tactic for those engaged in close-quarters fighting on foot.

The best way to flank an enemy is to anticipate their avenue of approach and to have the forces attacking the flank stay concealed until the time comes to attack. In this way the enemy does not have the opportunity to observe the troops positioning themselves.

Defenses against a flanking attack include controlled retreat, which can pull the flanking forces back towards the front line; starting a new line of defense that faces the attackers on the flank, or deploying in a circular formation so that there is no flank to attack.

Encirclement

Encirclement consists of completely surrounding an enemy force and attacking them from all directions simultaneously. This tactic is much like flanking, and offers similar advantages; however it also has a serious drawback. If an enemy is surrounded and has no line of retreat then that realization can galvanize them to fight with much greater ferocity.

SIDE NOTE: The ancient Chinese military strategist Sun Tzu, in his renowned book The Art of War, describes an encirclement scenario as being ”desperate ground”. Because those on desperate ground are presented with no option but to fight to the death, he recognized the danger of engaging such an enemy. Sun Tzu’s recommendation was to always leave an enemy with a path to retreat, and to attack them during the retreat.

Hammer & Anvil

The Hammer & Anvil tactic is much like the flanking maneuver, except that rather than having the secondary force attack the flank (the side), it attacks the enemy from the rear. The name of this tactic originates from the fact that enemy is caught between the hammer (the force attacking from the rear) and the anvil (the front line fighters). Like the flanking maneuver, the Hammer & Anvil maneuver benefits greatly from the secondary force being highly mobile.

A variation of the Hammer & Anvil consists of the rear forces executing a series of hit-and-run attacks rather than fully engaging in battle.

The Hedgehog Defense – Drawing Fire and Thinning Enemy Ranks

The hedgehog defense was originally conceived as a tactic for armored warfare; however the basic principle can be applied to small arms combat as well. This tactic involves placing a strongly fortified and well-supplied defensive location along an enemy’s avenue of approach such that the enemy may commit some of their forces to attacking that position while their main forces continue to advance. This has the effect of thinning the enemy’s ranks prior to a major engagement. Once the enemy’s main forces have been defeated the defender can return to the fortified location to attack the enemy forces remaining there (in this case the returning friendly forces would constitute a hammer and the fortified location would constitute an anvil).

Ideally the hedgehog defense would incorporate a number of fortified locations along the enemy’s avenue of approach in order to successively thin their ranks.

The hedgehog defense should only be considered if some aspect of the situation really lends itself to the tactic (for example, if a fortified position already exists along the avenue of approach). The weakness of this tactic is that the enemy may choose to simply ignore the fortified location and continue advancing in full force (which is exactly what happened when Hitler’s blitzkrieg attack bypassed France’s Maginot Line during World War II).

Conclusion

Having access to weapons and ammunition is simply not sufficient for the defense of any individual or group hoping to survive a major, long-term disaster. Good equipment is part of a solid foundation for defense, however dealing with adversaries having superior numbers, equipment or any sort of organization requires training and tactics. Paradoxically, the better prepared a group is to defend itself, the less likely it is that it will find itself in danger. However, when the need to act does become inevitable, a good command of defensive tactics will make all the difference.


Introduction DISCLAIMER: This article in intended to provide basic information regarding defensive tactics to preppers who are new to the subject. Those with a military background or other advanced knowledge in

A violent mob a tad over 1,000 strong is blocking all outbound traffic on a major freeway leading out of downtown, your car is stuck in the snarled traffic and night is approaching. What are you going to do?

You were just about to pull into work on a Monday morning when an electro-magnetic pulse (EMP) leaves your car sitting in the middle of the street on a downtown city block. How are you going to move?

Record breaking 100-year flooding is quickly rushing towards your neighborhood, and you have heard the bridge to safety is already under 3 feet of water. Where are you going to go?

Civil unrest, the breakdown of society, perhaps Martial Law, or the absence of the Rule of Law, are all possible consequences of any number of doomsday scenarios, or even breaking points themselves. Solar flares or tactically deployed strategic nuclear weapons can emit an EMP capable of destroying on-board computers and sensitive electronics in vehicles manufactured after 1980, while damaging the power grid and basically returning modern technology to the peak era of horse and buggies, the butter churn, and the quill pen. Major natural disasters such as flooding, earthquakes, and wildfires can be severe, quick, and unannounced, potentially forcing you into an immediate need to evacuate, sometimes without the luxury of vehicles, boats, or other modern modes of transportation.

What is your current level of prepper conditioning?

Being in the wrong place, at the wrong time, swarmed by an angry mob can reduce a city to foot traffic, and potentially put you in direct physical danger. Think about Ferguson, Baltimore, Dallas, Milwaukee, or Reginald Denny, the truck driver during the 1992 L.A. Riots, whose beating was caught by a news helicopter:


Fight-or-Flight instincts right? We are all familiar with that clever little quip. Are you capable of fighting back? Against multiple aggressors? For a sustained period of time? If not, are you capable of the flight option? Can you escape those aggressors? Could you outrun them in a sprint, through an urban environment, and continue to lose them over a sustained longer distance? What if you do initially outrun the aggressors, but are eventually caught and then forced to defend yourself? Fighting fresh sucks enough, try fighting when you are already fatigued. It is important to consider your level of prepper conditioning before you are facing a disaster.

Many of us have our everyday carry (EDC) gear, whether on our person or in a small easily accessible bag of some sorts, at all times. Others have a get home bag (GHB) or bug out bag (BOB) loaded with tools, gear, emergency food supplies, and even defensive items, either in our vehicle, at work, or otherwise ready to grab and go at a moment’s notice. Have you ever shouldered that pack and walked any distance? Even if you know a route to get home without consulting your Google maps or in-dash navigation, have you ever actually walked it? How far is it? What type of footwear do you have on? Dress shoes, high heels, flats, sandals, all not good choices for long walks. Have you done so in inclement weather? What if your planned route is impassable (consider the angry mob presence, or flooded roads/trails)? How heavy is that pack again?

Paratus 3 Day Operator’s Pack Military Style MOLLE Compatible Tactical Backpack Bug Out Bag

Sheriffs offices, fire departments, and other emergency management professionals do their best to warn residents of impending danger from natural disasters, and will assist in pre-planned evacuations often designed to allow ample time for you and your family to be removed from your residence safely. However the timing of natural disasters is not always so convenient and officials may not be available to help you, individually. You may have to load up your valuables and find a road out, but without the knowledge to move forward, a safe route may not be possible in your family car. Can you hike out of your neighborhood on foot? Are you a strong enough swimmer to tread water for extended periods of time, or even swim across a pond or lake to escape the danger? If you have small children with you, are you capable of carrying them to safety as well? Can you push a heavy object out of your way, lift an item off yourself or a loved one, pull yourself over an obstacle, or negotiate a series of uneven, loose, or otherwise treacherous terrain to find safety on solid ground?

What do all of these have in common?

How long do you expect to survive a SHTF event?

All of these scenarios are examples of easy ways your ability to survival the initial blow of shit hitting that proverbial fan will depend upon your physical ability and conditioning. If you have ever been in a fight, even in training, sparring, bag drills, or other controlled environments, you know how quickly you can fatigue. If you have not, just find a large pillow or something else soft to punch, and hit it as furiously as possible – as if your life depended on beating that pillow – for about 30 seconds, then assess your heart rate, breathing, and perspiration. They are probably all up quite a bit. Rest for 10 seconds then do it again for a minute. Then sprint out your door to the end of the block, and do it again for another 45 seconds. Rest for 5 seconds and go ALL OUT for a final 10 second surge. Then run a lap around your neighborhood and reassess yourself when you get back home. Go inside for a glass of water, you earned it – then defend yourself against that last attacking pillow for another 30 seconds. Get the point?

Fatigue from fighting is very real, and very quick. If you are not big on hand-to-hand combat, but have read a couple of books, or seen a movie or two, or practiced kata or other sequenced movements such as are commonly trained in karate and taekwondo, then you may not know how your body will actually stand up to the massive expenditure of energy required in a fight. Need somewhere to start? Look for a local gym and sign up for a free test class in Krav Maga. Condition yourself.

If you have ever been in a fight, even in training, sparring, bag drills, or other controlled environments, you know how quickly you can fatigue.

If your prepping relies heavily on the use of EDC, GHB, or BOB gear, you should not only be intimately familiar with every piece of gear you carry or plan on carrying, but you should be even more familiar with what it feels like to actually carry that gear. As the crow flies, I work 10 miles from home. My regular commute covers 15 miles. Pending any alterations in safe passage following an incident, I expect my trip home could range upwards of 20-30 miles. At 6’4” and about 225 lbs with a GHB weighing in around 24 lbs dry, I have a little room for 3 liters of water while keeping my ruck right around 30 lbs. With a little intimate road time, proper footwear, a series of blister/heal cycles and rubbing my shoulders raw from straps, I know what pace I can move at and how long I can move like that. Toss in variables of being loaded with an unplanned item, or extra gear I happen upon, and I also know that I can double upon that coupon and keep going. How do I know that? Walking around the neighborhood, simple day hikes on the weekend, or a good backpacking trip are all good places to start. Or jump straight up for a good sense of what added stresses could feel like on your psyche and your body, and look at completing a GoRuck event (Google it, it is worth every dime). Condition yourself.

Not sure what will be required of you before, during, after a natural disaster? Ask anyone who has lived through an earthquake, wildfire, tornado, or flooding. Look at the Cajun Navy in Baton Rouge, LA. Think they have it easy in their boats? I guarantee they end their day plum tired from the physicality required to help their neighbors. Strangers even. If you cannot push yourself off the floor, could you push a standard home office bookshelf off yourself? If you cannot perform a single pullup, could you pull yourself up and over a large item like a refrigerator blocking the doorway out to safety? Say your kid, spouse, or loved one is unconscious or otherwise unable to walk to safety themselves, can you carry them – even if for just a short distance to get out of the house? Could you drag them even? Can you hike out from danger, run away from danger, swim to safety, or simply walk down the road, for miles, until you find refuge? No, you do not need to go to the gym, eat protein bars and post-workout shakes. Try some simple body-weight exercises. Pushups, pullups, squats, planks. YouTube any one of those, find progression exercises for them if you cannot do them strictly now, and work your way towards them.

Take care of your conditioning now before life takes care of it for you

Get up and move, if even a little. Go for a walk, swim at the rec center, ride a bike, anything. You have a busy schedule. Work. Family. Life. A daily set of push ups, pull-ups, squats, and planks can be done in as little as 5 minutes. You have spent far more time than that just reading this little 1600 word article. You probably spent more time than that navigating the internet to find this article. You may even spend ten times that amount scrolling through Facebook feeds, or news articles, or simply sitting on the couch watching glimpses of your favorite programming between chunks of commercials and advertising. That’s fine. Just slip off the couch and do 10 push ups during a commercial break. Even once a day. How long does it take to walk around the block? Twenty minutes? Take the dog. Can you run a couple of miles? That doesn’t really take too long either? Be like Nike…Just Do It. Swim at the pool? It takes longer to drive there, rinse off afterwards, and drive home than it does to actually swim even just 500 meters. Condition yourself.

No, you do not need to go to the gym, eat protein bars and post-workout shakes. Try some simple body-weight exercises. Pushups, pull-ups, squats, planks.

Surviving is just the first step to survival. If you struggle with the basic physical abilities to easily get through some of the things I have discussed above, what good will the 2 years of food, hundreds of gallons of water, or thousands of rounds of ammunition do for you when the shit hits the fan? That stockpile will just be a jackpot for someone more conditioned for a survival situation than you. Someone like me who comes along later to find the money you spent, thinking you were prepared, when a few simple daily efforts could have made a far bigger difference in your life.

Are you free of addictive substances, habits, or vices? Quitting smoking is hard enough today, without other stresses, and with the assistance of any gum, patches, or other tricks to take the edge off. I know. I have done it. I cannot even imagine how weak-minded I would be a few weeks after SHTF to come across someone trading a pack of cigarettes…I probably would have sold the farm for it if I hadn’t already quit. Many prepper philosophies out there advocate for even non-users to stock up on alcohol, tobacco, and coffee to be used as trade items later on. The thought being that these little trinkets will have substantial value in bartering systems when regular supplies have long disappeared or been consumed by former smokers, drinkers, and coffee addicts. If you make it that far after the SHTF but cannot turn down a smoke, a drink, or a cup of Joe, you are just begging to be taken advantage of.

Is your body accustomed to the diet you plan on sustaining yourself with post-SHTF? Yeah, bust out the beef stew or chicken with salsa MRE, throw it in the nifty heater and lean it against a rock or something, and you’ll be a member of the “these are actually pretty good” crowd. Now eat them every day for two weeks. How has your stomach felt? How are your bowel movements? Are you paying attention to calorie intake versus expenditure? During the crucible for the Marine Corps, you are given just 2 MREs over a 54 hour period when you cover 48 miles with 45 lbs of gear, navigate 36 “warrior stations” and 29 “team building exercises” all on 6 hours of sleep. I had food left over afterwards and don’t remember going number two at all, but made it just fine. If you eat three MREs per day, breakfast, lunch, and dinner, you’ll “survive” alright, but your guts will hate you.

Can you perform the daily physical duties and manual labor required in your long-term survival plan? If you currently work on a farm or ranch, in most construction trades, oil field operations, logging, or other physically intense professions, you probably do not need much of this information at all. If you do not work in one of the above, or a closely related field, go spend a day with a family member, friend, or neighbor who does work in one of those fields and tell me how you feel the next morning. Manual labor is real. If you think the post-apocalyptic world is ripe with clerical positions, business analytics, or private consulting firms, think again. Your air-conditioned office, break rooms, water coolers, hour-long lunches, and paid vacation and sick leave are all gone. If you want to get by now, it will all be on your shoulders. Day in and day out. If you cannot weed a garden all day, you will starve. If you cannot walk the countryside gathering wild edibles all day, you will starve. If you cannot climb to the top of a ridge, check a trap line, or take down some big game and carry it home, you will starve. If you cannot gather firewood, build or reinforce a shelter, haul water, move gear – over and over – or potentially even engage in defensive postures, struggles, or all out battles, where does that land you in your new world?

Condition yourself early and often. Move. Eat right. Live right. Easiest, cheapest, most sustainable preps out there. I appreciate any and all feedback and dialogue! Know a little about anything in any of these areas, share it, talk about it, and get the thought trains rolling. Disagree with me, let me know why. Look for more to come on my conditioned prepping, from SHTFit. I am totally open to your ideas, I may even flat-out admit it and incorporate your thoughts into my own conditioning approaches. In the end, we should all make sure we are Fit for when the Shit Hits.

A violent mob a tad over 1,000 strong is blocking all outbound traffic on a major freeway leading out of downtown, your car is stuck in the snarled traffic and


Over the years I’ve heard many people describe how they would prep if they won the Lottery.

The Big Survival Truck is usually the first thing mentioned, and it’s almost always a 4-wheel drive multi-ton with brawny winches fore and aft and full stealth capability. Then there’s the all-encompassing armory of truly first-class (and extremely expensive) firearms. Plus tons of ammunition, and a Band-Aid. And a 30,000-acre BOL in Montana with a 17-bedroom underground nuke-proof house and an Olympic-size Jacuzzi—all solar-powered, of course.

Unfortunately, most of those people don’t do very much prepping while they’re waiting for their winning numbers to pop up. They just don’t have the money.

In today’s troubled economy, money goes fast, but it doesn’t go far. The average person doesn’t have enough money in the bank to carry them (and their family) through one month of lost income, much less a full-scale disaster. A person should always try to have some kind of emergency reserve. Not having emergency funds doesn’t leave much room for prepping.

So what can a poor penny-pinched Prepper possibly do?

Simple: Get four envelopes and label them Water, Food, Clothing, and Gear. Determine to use the contents of each only for its designated purpose. Then follow these three easy steps to fill them up with money:

Sell

Take a good look at everything you own. Then sell everything you don’t actually need and/or use except items of genuine sentimental value. Everybody needs two 9/16″ wrenches. But if you have three, you should sell one. Even if you can only get $0.50 for it. It may seem like a small thing—too little to be worth bothering with—but the average adult has about $2,500.00 worth of possessions they neither use nor need. Those are the things that should fund your first preps.

Sell everything that you don’t need or want to make money which could be used to purchase prepping supplies or simply build a nest-egg for harder times.

Auction the good stuff on the Internet, have a few yard sales, rent a stall at a flea market, advertise in the free Classifieds, and tell all your friends. Be persistent. Eventually, you’ll sell it all. Trust me on this: Somewhere, somebody desperately wants that three-headed elephant statue that someone must have given you because you’d never buy anything like that, especially if it cost money and you weren’t drunk. However much money this step makes, divide it equally into your four envelopes. (Water, Food, Clothing, and Gear)

Buy

Think outside the box and purchase wisely. Water, of course, should be your first concern. It’s far more critical than food. A person can last a month without eating, but after three days without water they’ve stopped lasting and started dying. The minimum water allowance should be 1 gallon per day, per person. Set 5 gallons per person as your first water goal, and pursue it with the cost of the container in mind. You can buy 3 gallons of “spring water” from the Wally Store for $5.78—but you shouldn’t.

Instead, collect freshly emptied 2-liter soda bottles, rinse them out, and fill them with food-grade water right out of the tap—at the rate of about $1.50 per 1,000 gallons. Price: $0.01, rounded up. Also collect every screw-top beer can you can get your hands on. Wash and rinse them thoroughly and then you can use them for storing water and many other needful things. Free cardboard boxes can be collected from supermarkets to store your water bottles neatly and to shift them fast if you ever have to bug out.

Don’t worry about purifying tap water that goes into clean containers. The chlorine that’s already in it will do that job for you automatically. Gradually work your way up to storing 30 gallons per family member, if you can. When you reach your water storage goal, empty the Water envelope into Buy/Sell.

Water should be the very first item you stock up on.

Food should be your next concern because in an emergency the supermarkets will be picked clean within hours. Do all your panic-buying long before it’s time to panic—then you’ll never have to. Again, shop wisely: Don’t automatically shop at the most expensive supermarkets. Go to the cheaper ones, and also check out any Bent & Dent Stores in your area. Many times the canned goods there aren’t dented: They just came out of torn cartons. Clip coupons and look for sales. Be sure to check out any local auction houses. Some have monthly food auctions where you can get almost anything except fresh meat at amazingly low prices—as low as 10% of retail for some things.

Buy long term storage foods only, plus whatever you find that you would normally buy in your ordinary shopping. After each auction, figure out how much you saved on the regular shopping items and add that much as cash to your Food envelope. What you save on regular items at the auction is the time and gas you would have expended in ordinary shopping. The cash saved can go to your preps without impacting your standard of living.

The first rule is “Store what you eat and eat what you store.” If you hate green olives, don’t buy a gallon just because they happened to be cheap at the moment. You should stock only foods that you are accustomed to and like. ALL your foods should be comfort foods. Emergencies are stressful enough. There’s no need to add diet discomfort to the situation. Store the kinds of food you are eating, eat the food you have stored before its expiration date, and replace it as you do.

Buy rice and beans because they are cheap and provide complete amino acids when eaten together—but be sure to acquire the recipes that make them into superb meals. Buy canned beef, pork, and chicken, plus soups and vegetables. Buy white pasta because it keeps longest. (Spaghetti packs very compactly.) Ramen noodles are cheap, but go rancid in about two years. Buy extra virgin olive oil and canned lard. Both have their different uses.

The Prepper’s Water Survival Guide: Harvest, Treat, and Store Your Most Vital Resource

The second rule is to buy in small containers. Refrigeration may not be available, so don’t buy canned vegetables by the gallon—unless your family is large enough to eat a gallon in one day.

The third rule is to buy variety: Don’t buy 100 lbs. of rice and 100 lbs. of beans and 10 lbs of “everything else”. Buy some of every kind of food you like, plus enough spices to put some serious zing into your cooking. When the flat-screen TV is dead, meals may become the high moments of the day.

Your first food goal should be three days (nine meals) for each person in your family. Do some careful calorie counting, and plan for three 1500-calorie meals a day. That’s more than the total 1500 calories a day many people recommend, but emergency situations are stressful, and usually require a lot of manual labor (such as walking instead of riding). The idea is to maintain your optimum body weight, not to drop to your minimum.

Gradually work up to a thirty-day food supply, and eventually try for ninety. When you’re good for food, retire the Food envelope and roll any leftover money into Buy/Sell. Then turn your attention to Clothing.

Start with durable but comfortable foot gear. Buy good new work boots, or military surplus combat boots. Buy several pairs of thick wool socks. Break the boots in, and wear them at least a few hours a week to keep them supple. Buy a surplus military poncho w/ liner. That’s good gear, and you definitely don’t want anything orange or yellow at any price. You may eventually need to be very inconspicuous.

Assemble one complete set of clothes for winter and one for summer. Include a camo hat with a brim and a black knitted watch cap, work gloves, knee pads, two bandannas, and sunglasses. Don’t be too proud to shop the thrift stores for used clothing. Incredible buys can be found there. Plus, in a disaster situation you don’t want to be seen in anything that says “Rich Person/May Have Food”.

When you’re good for clothing, empty the Clothing envelope into the Buy/Sell envelope. Then turn your attention to Gear.

Gear is an endless exercise in optimization. Start small. Buy the cheap stuff first. Haunt the thrift stores, dollar stores, yard sales, and flea markets. Roughly in order of importance: a good folding knife and a good sheath knife for each person. Also two Bic lighters, a Stainless Steel water bottle, personal cooking kit, pocket chainsaw, 30’ of 550 paracord, a tarp, a groundcloth, and a good wool blanket. A buck saw and a ¾-axe for the group, plus a four liter pot with bail & lid. Matches in a waterproof pill bottle for everyone, plus a small first aid kit.

Store your gear in a large gym bag—and with it your three day supply of food and three gallons of water. Two bags is okay, if there isn’t room in one.

All of that will be far too heavy to carry on your back, which is why you needn’t put it in a backpack. Instead of a $100+ backpack, buy an old golf dolly from a thrift store for $3.00 or so. You can tie the bags on and roll your gear instead of having to carry it. You’ll be amazed at how well that works.

The last part of Gear that bears discussion is personal defense. It’s a sad fact that in a serious emergency or disaster scenario the only animal you’ll find that will be both vicious and eager to attack you will be another person. Every person should carry a razor-sharp machete to chop brush with. Machetes do not run out of ammunition. Mace can also be a good friend in bad times. The best brand is Bear Spray.

Depending on the circumstances and the personal choice of conscience, a firearm may be desirable. The debate over which is best is endless, but having both a pistol and a long gun offers the best of both worlds. Being seen with a long gun can be disadvantageous—it can draw the attention of law enforcement (if there is any law left) and it can draw the first bullet from an unseen sniper on the trail.

For that reason, I recommend the only long gun I know of that can easily be hidden in a Bug out bag, gym bag, or book bag.

That’s a 12-ga slamfire shotgun made according to the instructions in the Kindle eBook The 15-Minute Shotgun. It breaks down into two pieces, the longest being 18-1/2”, reassembles instantly without tools, and can be used for both personal defense and subsistence hunting.

And, to the delight of the average Penny-Pinched Prepper, it only costs $10.00 to make.

When you’re reasonably well geared up, the Gear envelope can also go away, and you’ll be down to one envelope: Buy/Sell. And that brings you to Step 3:

Buy/Sell

Prepping is an ongoing process. It requires a small but continuing subsidy. Use your Buy/Sell money at auctions to buy things you can immediately sell for a profit on Craigslist. By that I mean a good washer-dryer set bought for $50.00 and sold for $200.00 the same week. Or an ugly flatbed trailer bought for $65.00, spray painted generic black, and re-sold for $250.00. Or an immaculate recliner bought for $5.00 and sold for $75.00. I have done all of those things at auctions and many more. I have funded my preps for years with an occasional Buy/Sell and made a little money on the side, too.

Spend your Buy/Sell money however you wish. By the time you’re reasonably well geared up you’ll probably know exactly what you next prepping goals should be. Whatever they are, they’ll probably be as uniquely individual as you are.

In my case, I’m saving up for that solar-powered Jacuzzi.

  Over the years I’ve heard many people describe how they would prep if they won the Lottery. The Big Survival Truck is usually the first thing mentioned, and it’s almost always


We know in a grid down situation that medical supplies will become a thing of the past. I worked as a delivery driver for two different major companies supplying hospitals and clinics with their supplies in Northern California. I can tell you for certain that there are no reserve medications in most hospital storerooms. Most hospitals operate on a just in time delivery system. They order it one day and get it in the next day. They may keep a small one day supply of some things on hand that they can use up that day and replace the next day. But they keep nothing on hand. To drive home the point: If most medical centers need a 9 volt battery to run a machine they order one 9 volt battery which is placed into a 55 gallon plastic bag, which is placed into a plastic tote which includes a packing slip with a bar code on it, and a bar code on the outside of the tote. When the hospital receives it they check the tote and pull the battery and send it directly to the machine that needs the new 9 volt battery.

Antibiotics

You can do some things now and some things later. I would advise that you get a supply of a general antibiotic such as Amoxicillin on hand now. You don’t need your doctor’s prescription to do it. Fish Amoxicillin comes from the same place as the stuff they give to humans. You can order on-line. Since most of the time I’ve been given Amoxicillin it’s a 500 MG dosage 3 times a day for 10 days. That means you need 30 pills. I have ordered on-line and purchased 100 pills for about 30 dollars. That would give me enough for 3 separate treatments and still have 10 pills left over for trade. In a true SHTF situation each tablet will be worth more than gold. I recommend you keep your bottle in the refrigerator. Keeping antibiotics cool helps extend their potency.

Food grade hydrogen peroxide

Food Grade Hydrogen Peroxide. This stuff is dirt cheap. You need the Food Grade which is a 35 percent solution and no additives or stabilizers in it which can hurt you. Food Grade is a 35 percent solution and is used in the agriculture industry to clean eggs among other things. I strongly recommend you obtain and read a book by Madison Cavanaugh called “The One Minute Cure.” It provides a lot of history for it and some ideas for its uses. Like anything else in life you must take some precautions in using it. First, at 35 percent it is considered to join the Hazmat family of flammables. 90 percent Hydrogen Peroxide is called rocket fuel. So don’t use it near open flames and remember it must be diluted a lot before you use it with the body. If you happen to spill some on your skin you need to immediately wash it off. Prolonged exposure can cause permanent nerve damage. There are several books on how to use it. Please get one and understand it fully and how to safely use and store it.

I was introduced to Food Grade Hydrogen Peroxide when joking with another truck driver who was performing a pre-trip inspection on his truck. I got so excited about what I heard I ordered a gallon of the stuff and had it at home waiting for me to try. Actually I quickly discovered that when I read the book, which I received at the same time I got my Hydrogen Peroxide, I had purchased enough for a lifetime, or two. There are numerous ways that Hydrogen Peroxide is useful. I’m going to include a way to use it that I’ve not seen anywhere in print. In several books I have seen mention that it was used to fight the Pandemic of 1918. But no one said how.

I have had severe Asthma for as long as I can remember and I’ve been on one or more asthma drugs 24/7 since I was age 3 just to breath. I wondered how to I could safely get some diluted Food Grade Hydrogen Peroxide into my lungs and see if it would help control my asthma.

A bottle like this makes a good delivery mechanism for the Hydrogen Peroxide.

I purchased a 2 ounce empty spray bottle in the travel section at Walmart for 99 cents. All of my readings told me I needed to dilute it down to something near a 3 percent solution. I’m an over-the-road truck driver and figured I needed a way to measure. Doing the improvised method, I took my thumb and held it against the bottom of the 2 ounce spray bottle and then kept applying it going up the side of the bottle. I estimated that my thumb represented about 1/11 of the bottle. I figured that was close enough. I held my thumb against the bottom of the bottle and filled the bottle up to the line of the top of my thumb. Then I filled the remainder of the bottle with purified water (I used reverse osmosis—most books recommend you use distilled.) I then took the spray bottle and squirted the watery mist into my mouth a couple of times while I inhaled through my mouth like you do with asthma inhalers.

Read More: Medicine to stock up on for when there is no doctor

I was currently using Symbicort and Ventolin. Both of these drugs, like all Asthma drugs have side effects including raising your blood pressure. My next challenge was to guess how much I would need to try to make a difference and get me off my prescription medications. I decided to start with three inhalations three times a day. I did that for a day and then I stopped taking my Symbicort. Ventolin is used for emergency breathing situations only. I had been using my Ventolin three to four times a week.

I was fine for the rest of the day without needing any Ventolin. For the next week I kept taking my hydrogen peroxide spray. I had no Asthma problems. I did not need my Ventolin once! I could actually feel my lungs changing. Up until now I have always had congestion, felt moisture, on the insides of my lungs. That all went away within a week. I had no wheezing or other noise coming from my lungs. I have since dropped the dosage to one to two puffs once a day when I remember. Yes, I can sometimes go a day or two now without any. If I’m near my trigger situations such as severe cold or smoke then I take more.

The Survival Medicine is an excellent resource every prepper should have in their library. When you can’t seek professional medical attention you will be on your own.

Since March 9th, 2012 I have only used Ventolin twice. Once when I had been near forest fires where I had been breathing the smoke for days. I finally started clogging up and needed a burst of Ventolin to give some relief. The other was in Idaho last summer when I took some time off and went camping with friends. We were near a lot of forest fires and again I used a puff of Ventolin. I needed the extra clearance with all of the physical activity I was doing at the time and wanting to keep up with friends.

I have a cousin with COPD from smoking for years. She was on Ventolin and her doctor was experimenting with other inhalers to improve the oxygen level in her blood. I told her about this and sent her one I had set up for myself to help get her started. I saw her a couple months later and she was extremely happy. The oxygen in her blood has gone up a full point since she has started using it and she has stopped all the other inhalers. Her doctor is happy with her lung capacity now.

There is another way you can use the stuff and that is by adding it to your drinking water. Think a drop to a few drops to a bottle of purified water. If it starts tasting like bleach, dilute it immediately.

I mention this because most end of the world as we know it books all believe that at some point we will also get some kind of respiratory pandemic. I believe that this stuff can help the body greatly strengthen the immune system. Most of the bacteria that makes us sick does not do well in a highly oxygenated body.

It’s also a way to increase the levels of oxygen in your body without spending a fortune. I would keep some on hand with a few spray bottles just in case. Please keep it in a low temperature stable environment. Like most other things heat breaks it down. Again, you may be able to find some in places that sell stuff for agriculture. But right now you can get it on-line pretty cheap.

Charcoal

Most of us are familiar with alternative treatments for a wound such as honey or tree sap and using super glue to help close a wound. I’ve not read anything in any of the prepping books about plain old charcoal.

It’s an old camping trick. I’ve had buddies who have been out on long hikes in the mountains and made the mistake of eating something that probably just went bad. They end up sicker than a dog. They collected the charcoal from their fire, crushed it down as much as they could and dumped it into a glass of water and drank as much as they could. Charcoal is an amazing substance. It will absorb a lot of bad things in the stomach. It’s not a cure-all, or a stomach pump. But most people who overdose and get taken to a hospital to get their stomach pumped are then often given some solution with charcoal either pumped into their stomach if they are unconscious or given to drink if they are awake (I was told this by a friend who worked in an ER in Silicon Valley many years ago). If you ever eat something and things start going south get as much charcoal into you as you can (and of course if medical treatment is available get to the ER as well).

I personally keep a bottle of charcoal capsules in my bug out bag and several other places. It’s cheap, light, and easy to carry.

  We know in a grid down situation that medical supplies will become a thing of the past. I worked as a delivery driver for two different major companies supplying hospitals

Have you ever needed to strap something down and went to look for a length of rope or bungee cord? When I do this it is usually to tie down something on the roof of my car and rope seems to be the best option in most cases, but in order to get a really perfect length of rope you need to cut your rope. This isn’t always what I have to do but if I needed to secure a tarp for example at various points over my vehicle I could end up needing 8 small pieces of rope. Assuming I tie knots that hold tight and are easy to remove I have 8 small pieces of rope that aren’t good for much else.

I could go with bungee cords too but if the distance between the tie down grommet or item and what I am securing the item to isn’t far enough I have to rig the bungee in a way that it takes up less space. Sometimes this works and others it doesn’t. Another option is a big zip tie and these work great in a lot of places but they are single use. Once you use a zip tie and you need to remove it, its life is over and we toss it into the trash. It is one of the small things in life that I find more frustrating than they need to be.

Well, you are getting worked up over nothing you say. You would be right. I could keep a wider assortment of ropes, bungees and zip ties with me in each vehicle to deal with any situation I run into, or I could work harder at my knot tying skills but I know there has to be an easier or smarter way to do stuff like this. I am not a trucker , don’t work in construction or haul things often, so my practice at tying things down is usually reserved for helping people move, big trips back from the hardware store or packing for an extremely long trip where the baggage weighs more than the people in the vehicle. When I run into a case where I am temporarily foiled by something as simple as a tarp it gets on my nerves.

TitanStraps work for strapping down small items to your Bike or 4-Wheeler

Enter TitanStraps. TitanStraps are one of those inventions that make you say, “Why didn’t I think of that”? I think the best description I have heard of it is that TitanStraps are like a re-usable zip tie and they work perfectly for so many times that you need a simple strap that is easy to tighten and best of all, remove. The TitanStrap has so many uses that it is limited only by your imagination.

TitanStraps are made from a stretchy, high performance polymer. Rather than being hard plastic, the TitanStrap is very supple and its been injected with a 10-year UV additive for extra longevity. The buckle is made from heat-treated aircraft aluminum and fits securely into the holes in the strap. Each TitanStrap is 25” long and can even be daisy chained together to secure larger items. It’s like a belt in that you can wrap it around the item you are securing, slide the other end through and stick the buckle through the holes in the strap.

I think a challenge may be thinking of a place they don’t work but this primarily comes down to size because the TitanStraps are beefy. As soon as I had these in my hands I started envisioning how they could be used to tie down equipment to my roof in a bug out scenario. I thought of how I could use these on my deer stand to quickly strap up items I had pulled up there with me that I didn’t want occupying the seat but I didn’t want to drop them either. Usually I would just snap a carabiner over the side rail, but this could make noise. Plus, the orange TitanStraps are already colored for safety. My wife would be pleased.

No more little pieces of rope.

I put a couple of these in my vehicles and some in my get home bag but I probably need at least 4 per vehicle to go along with the rope I have. I know they won’t work in every single instance that I need to tie something down but they are great anywhere a strap will work. If I needed to secure a canoe for example to the front of the car I would need a much longer rope than the titan straps but for many uses, these are perfect. Bungee cords are great in some places too, but you don’t have to worry about a TitanStrap slipping off and that big metal hook taking out an eye. The straps easily unbuckle (just like a belt) and there is no high tension to sling items back at your hands or head.

Titan Straps come in at least three colors (Orange, Blue and Grey). They did have a black option and they have a working load limit of 206lbs. As an added bonus they are made in the USA. You can find them at hardware stores like Home Depot or you can order them from Amazon or on the TitanStraps website. If you are looking for a great tie down strap option, you might want to give the TitanStrap a try. I am sure you will be happy with your choice.

Have you ever needed to strap something down and went to look for a length of rope or bungee cord? When I do this it is usually to tie down

Stacking functions is a quick term for the concept of planning things (elements) and areas (space) to perform the most services for us with the least input. It’s reusing things as many times as possible to get the most out of our time and energy, and letting the spaces themselves do some of the work for us. Elements used in stacking ideally perform multiple services and functions to not only further increase the efficiency of a space, but also add to our resiliency by creating redundancies in our systems. Analyzing homestead elements for multi-functionality and redundancy were covered in the first article. This time we’ll look at combining them into multi-function spaces.

Companion Planting & Guilds

An example of a multi-function space use is companion planting. Companion planting is basically co-locating plants so that one or all partners provide something the others need. A guild is taking that to another level to create a long-sustainable system with few or no outside resources needed for its continued health.

For example, we can put chives and daylily around the base of our trees to prevent weed growth and limit our work or need for mulching that particular area, and they’ll soldier through the dense shade seasons. Around the verges of fruit, nut and resource trees we’d put shade-tolerant and part-sun or full-sun berries, depending on sunlight, or we might have berries and-or vines on the fence beside the trees.

We might include wallflower, lavender, rosemary, and lupine around some of the trees and berries to provide health and pest benefits for those plants, and plug-in some radishes and nasturtium to act as pest traps and food sources. We’d include something that produces nitrogen if we were going with a hazelnut shrub or pear instead of a locust. We might build up rings of soil to plant sweet potatoes or yams to spread and choke out weeds, and use the biomass for livestock feed, mulch or compost. We could use weeds like henbit, plantain, wood sorrel, and dandelion for their varied human or livestock feed purposes as well as the health benefits to soil like N-fixation and nutrient mining, and their early and late pollinator feed potentials. We can fill space between the guild and other areas with somewhat decorative grass grains or high-biomass sun-loving crops like buckwheat or native oats, collecting the seed or letting it be a forage area while producing biomass we’ll use for livestock bedding or mulching.

Things like shrubs and brambles can provide shelter for small livestock that’s grazing, like rabbits, ducks and quail, should predators show up. Leaving runways of stubble and standing grasses will increase those hiding areas, either protecting our livestock or increasing our hunting territory (if neither applies, cut stubble shorter to decrease the number of critters that can hide).

All of the plants we include in the guild have at least one or two primary purposes. Most are edible or herbs, most have parts that feed livestock or worm/BSF farms, most provide something else for the system like a groundcover, nutrients, or mulching. Something like brambles might be used to deter some pests or predators, while other plants might discourage cats or ants.

We’ve jam-packed a particular area with a ton of services, yields and functions by selecting things that work well together, provide services beyond their primary role, and that fit our space and wants. By doing so, the guild doesn’t need us as often, and we can harvest a lot from a relatively small space compared to having just a couple of trees, a bramble or fence on a vine, and then mulch, monoculture pasture, or yard grass below them.

*If a companion planting list suggests chives for anything but trees and shrubs, take everything they say with a big grain of salt.

Three Sisters

One of the most well-known companion guilds is the Corn-Beans-Squash combo. Corn goes in, peas or beans follow and use the corn to climb, giving the corn extra support against wind and replacing some or all of the nitrogen the corn will use over the season. Squash follows, and is trailed around the verges to act as a shading ground-cover, decreasing evaporation and weed competition.

There are some other benefits from the system, though:

  • Increased blooming season, especially depending on type of bean and squash (good for pollinators)
  • Bug-rich hunting grounds for chicks with high-protein needs (no semi-mature chickens or geese)
  • Squash seeds for next year’s garden, eating, or livestock feed
  • Corn cobs for firestarters
  • Corn stalks to chip for bedding or mulch
  • Pea stalks for bedding or mulch (chip for bedding)
  • Squash biomass for compost
  • Dense space for ducks & guineas to hide from hawks & eagles
  • Dense, potentially long season space for beneficial insect lifecycles

Savvy birds will use elements we provide – like a hawk teepee, Three Sisters mound, or dense brush – to hide from predators while free-ranging.

Hoops & Coops – Vertical stacking

Shelters for small livestock have the potential to cram an enormous number of functions in to a stacked vertical space, just like silvopasture and aquaponics.

There’s the ability – as discussed in other articles – to stack coops or hutches over either compost or worm bins or a BSF farm (or all three). That increases the efficiency by directly feeding the bins with animal wastes, and not hauling litter and bedding more than a few feet. Another example would be storing straw or mulch under those coops, and having a bin between them. With a coop for a few chickens right beside a tier of hutches over a worm bin, we can provide young birds or layers with a handful of wigglers right there while we’re dealing with egg collection and watering and feeding.

Roofs offer two opportunities.

First, a green roof of herbs, grasses, and weeds for livestock, or human foods. Rabbit manure is “cool” and could easily be spread carefully enough to make even lettuces safe (I still wouldn’t do raw manure and root veggies, personally, but that’s me). Especially in small, compact spaces, using roofs can increase the amount of sunny area somebody has, allowing them to use the rest of the yard for larger crops. We can collect fresh feeds and let our hares and chooks clean up out out-cycling plants for us by reaching up with pruners and then taking a step to the side.

The roof can also be set up for water catchment. If it’s water that’s already filtered through shallow growing pans, it might not be great for the rabbits or chickens, but there’s no reason not to use it for the growing trays during dry periods, to keep compost and worm bins moist, or to water something like a strawberry or herb tower or some other vertical growing system that’s beside the livestock.

We can use catchment from any sized roof to create ephemeral pools, edible rain gardens, or fill catchment buckets and barrels.

We could also channel our roof runoff into a pond, and use edible lilies or cattails or damp-loving shrubs to filter and clean that water, or just make an edible rain garden.

Stacked hutches can be positioned to create shade for another set of vertical towers or planters, increasing the palatability of greens and lettuces later in the season and keeping more feed going for livestock.

Throw in a tree with human or livestock fruit, nuts, or seeds beside and across from the coops and hutches, and we’re increasing the yields of food (or feed), increasing shelter from wind and rain, providing shade (which keeps Mr. Bunny at peak performance later into the summer and earlier in the fall), creating some wind blocks and potentially terrestrial insulation for critters in winter (less heating/bedding needed), and if we arrange our buckets correctly or reuse a kiddie pool, increasing our water catchment for that area, decreasing the amount of fresh water we have to use for watering plants or animals.

Coops, Hutches & Greenhouses

Another way to stack functions in a space is something permies will love: increased integration via a combination coop-greenhouse. We’re basically going to take some of what we talked about in the efficiency article and expand it a little further.

The bare design is pretty darn good as it is: The plants benefit from the body heat and-or “deep bedding” heating method from the fowl, the insulated glass increases sun warming, and soil and water act as a heat sink in winter. Critters can clean up some of the greenhouse wastes and help reduce pests. Add in deciduous trees or vines to provide passive cooling (shade) during summer, but allow light to penetrate and warm during winter.

Some of the same thermal-mass and passive heating can be derived by siting a greenhouse and cold frames near our own homes.

Some take the combo-coop concept even further with the addition of planning trees and shrubs and annual crops nearest the greenhouse-coop to be fodder and bedding or just supplements, and all of them benefit by making it faster and easier to toss plant thinnings, prunings, and scraps to birds, and to care for both plants and animals at once.

Others stack functions by arranging chickens or geese as pest- and weed-control patrols in areas that already need to be protected, and allowing them to mow and leave manure behind for perennials to use.

The functions stacked within the building itself can be increased further as well, by increasing the diversity within the space and the use of space.

If there’s only a few animals in the types of coops and hutches shown in the first hutch examples, we can still increase the number of functions that space performs for us. We can erect a hoop house or build panels from soda bottles to arrange against and over/around the existing stacks, increasing the animals’ shelter and insulation, and using the dual body-heat and solar-heat yields to create a warmer space for starting seeds or keep “weeds” growing to feed to our livestock.

All aspects are rolling in together to create a guild of plants and animals as well as the abiotic factors like sun, wind and rain and our manmade structures, regardless of the scale.

Analyzing Elements to Stack a Space

Chickens and geese are both grazers, but ducks and guineas can be encouraged to only nibble the tenderest of shoots along with their bugs and seeds. That means ducks and guineas can be incorporated into more systems with fewer worries and less fencing. On the other hand, they require more non-vegetative feeds, they won’t till or mow for us, and they won’t cycle as much of our garden and food wastes as chooks will.

The amount of space we have, the other livestock we’re running, our feed resiliency in the form of BSF and worm farms or fish, and our own preferences lead us to deciding whether we want the increased functions and redundancy of one type of fowl over the others.

In the first stacking function article, we mostly focused on listing the services various elements can provide. When we start stacking functions within a space, especially in permaculture, we want to do basically a SWOT analysis for each element we want to include, with the element’s needs falling under its weaknesses and opportunities.

We would also list the time we need to devote on a daily, weekly, monthly and seasonal basis, and be aware of the tools we’ll be using – now and as we become older or injured – so that we can plan for proper access to each element in our system and the system’s basic infrastructure.

Then we compare it, seeking relationships where a byproduct or primary function of one serves the needs of others. We also look for similarities in needs and functions to increase efficiency.

Each kind of livestock we have or want should be taken into account as we analyze spaces for stacking functions, with structures, plants and other livestock all affecting each other in a system.

For example, if I’m choosing to have ducks or guineas and rabbits in a combined ecosystem, and I know rabbits can’t have too much fresh apple leaves and ducks don’t eat a whole lot of vegetation, I might not plant my crabapples, plums, and apples too close to them. I might instead use elms or maples – things that drop seeds my poultry will eat, but that I can also collect for hay or bedding for my livestock and to feed my worm bins. I might also use more tender forages or create a pond or ephemeral creek system for duckweed and make the guilds nearest the coop-hoop house water-based edibles.

I can use the same riparian-type edibles to create buffers and feed zones that protect waterways from livestock runoff and chilling winds.

Or I might have boggy or seasonally soaked spots and choose to create a guild or system of guilds based around willows that will help dry up those spots. The willow’s functions have increased from just shade, fodder, medicine, and possibly baskets/lashing resource limbs to also include wind break, soil stabilization or tailoring, habitat creation (fish-roots and overhanging limbs), and water purification.

It’s only by analyzing which elements we want and how each element interacts with all the others that we can best create the guilds and spaces that contain the most functions, and contain them most efficiently.

Stacking Functions – Diversity & Resiliency

Any time we can get a space to perform more services for us, it tends to increase the diversity of that space. Diversity leads to greater health. Diversity and stacked-function areas with multiple elements increase our production per square foot. Stacking also increases our efficiency by decreasing travel time (and repeated steps back and forth). The condensed, efficient use of space allows us to do even more on our property, from a rental with a balcony and some windows to a 500-acre dream ranch.

Stacking functions is worth more research. It’s another area of permaculture and functional landscape design with whole articles devoted to just one example or type, and is the subject of books and multiple chapters. Small space gardening can be another field to look into for inspiration even on large properties.

Other areas that may interest homesteaders and folks interested in doing a lot in small spaces are permaculture zone and sector analysis, redundancy in food webs and permaculture, diversity’s effects on soil, and fodder/forage trees, especially the legume family trees and shrubs that also fix nitrogen.

Stacking functions is a quick term for the concept of planning things (elements) and areas (space) to perform the most services for us with the least input. It’s reusing things

Introduction

If you happen to have worked on a military base in the past, I’m sure you’ve encountered guards standing at the guardhouse routinely waving traffic through the gate – maybe stopping the occasional vehicle to ask a question or two before waving them through. Such a relaxed approach may be adequate during peacetime, however post-disaster these procedures will be wholly inadequate. This article will describe how small communities can establish and manage effective post-disaster roadblocks.

With the recent unrest in Ferguson, MO we’ve actually had a rather ugly preview of coming attractions regarding the need to control and monitor the movement of people. The image of a large gang of criminals, intent on looting, migrating to a neighboring community and shooting their way into a locked store, is an image that should be forever branded into the consciousness of every prepper. This is precisely the reason that the movement of people will need to be controlled, and it’s going to require more than a smiling face and a wave of the hand.

In the wake of a major disaster, those living in small to mid-sized communities will be faced with the challenge of quickly reorganizing to cope with new and immediate concerns. One critical need will be to “control the perimeter”, which will involve establishing security checkpoints to control and monitor comings and goings. Without such controls the risk of disease and lawlessness could threaten the community’s very existence.

While, at first blush, it may seem trivial to set up a roadblock (“Hey, you two guys go down the road and check anybody passing through town!”), during times of disaster an effective roadblock requires more serious consideration.

Selecting Locations for Roadblocks

As with many aspects of life, when establishing a roadblock “location is everything”, and factors that should help to identify the best location for a roadblock include distance from population centers, availability of sufficient space to meet the roadblock’s missions, ability to be defended and potential for line-of-sight communications.

Ideally a roadblock should be a minimum of 0.75 miles (1.2 kilometers) from any dense population centers. This distance corresponds roughly to the range of a high-powered rifle. In other words, a defensive perimeter is much less useful to a community if an adversary can effectively shoot at members of the community from outside the defended perimeter (a roadblock should, if possible, be that distance from any location where a member of the community lives or works).

Military snipers have been known to, on rare occasions, hit targets at distances approaching 1.5 miles. Obviously a bit larger safe zone should be considered if one anticipates adversaries having military sniper training.

Roadblocks are staffed by people, and in the long term people require supporting infrastructure. Such infrastructure potentially includes provisions for the sanitary elimination of human waste, protection from the weather, storage of supplies and space to be used to detain travelers without blocking traffic. Any location considered for a permanent or long-term roadblock should address these real-world needs.

The security of those staffing a roadblock should be a primary concern when selecting its location. It is inevitable that there will eventually be security incidents at any roadblock, and the personnel there should be able to ward off any anticipated attack until reinforcements can arrive. The availability of hard and soft cover should be considered, as well as local geography (with regard to both offense and defense). In some situations it may be important to have a concealed shooting position located nearby to provide supporting fire in the event of the most serious situations.

Yet another important factor to consider when selecting the location of a roadblock is the availability of line-of-sight communication to the community. This can be important in case other more conventional means of communication become unavailable. For example, flags might be flown to request reinforcements or to visually indicate other abnormal situations. In some cases it may be necessary for a central headquarters within the community to have a line-of-sight to the roadblock, while in other cases it may be sufficient for the roadblock to be within sight of any population center (from which communication might be relayed to the central headquarters).

In addition to the factors already mentioned, a roadblock should be established at a location that is a natural traffic bottleneck. Otherwise it is possible that intruders could simply bypass the roadblock.

Sandbags are an often over-looked prepper supply that can make very effective cover for fighting positions. Just add hard work.

Facility and Equipment

Without certain basic features necessary to meet the needs of those who will be staffing it, the ability of a permanent or long-term roadblock to accomplish its mission will be significantly degraded. The roadblock station should feature:

  • A latrine or other means of eliminating human waste in a sanitary fashion
  • A source of clean water
  • A structure that provides protection from the weather
  • A flagpole (and various colored flags) for backup visual communication
  • A siren or other device for producing a loud and distinctive audible alert
  • A lockable storage bin that is protected from the weather
  • Sandbags or some other form of hard cover
  • Nearby access to places of concealment
  • A movable barrier to control the flow of traffic
  • A radio or other device for security-related communications
  • Chairs
  • A temporary parking area where one or more vehicles may be detained without blocking other traffic
  • Signs posted at appropriate locations to provide instructions and cautions to approaching travelers

Flags of various colors should be available to, at a minimum, signify abnormal security conditions (perhaps yellow and red), requests for unscheduled personnel rotation and requests for medical assistance.

In addition to the equipment listed above, those who staff the roadblock (and anyone providing them covering fire) should carry weapons that are appropriate to their role. Holstered handguns, along with spare magazines and a good supply of ammunition, are probably a best fit for those staffing the roadblock; with a rifle close at hand in the guard shack. The advantage of holstered handguns is that they leave hands free for signaling and conducting searches.

Communications

Good communications, both among the personnel staffing a roadblock and between the roadblock and other security personnel within the community, is vitally important. Efficient non-verbal communications between the personnel staffing the roadblock can be quite useful. For example, hand signals might be used to guide traffic or to quickly and silently communicate ‘caution’ or ‘danger’ to other personnel staffing the roadblock. They might also be useful in communicating with any concealed locations that are tasked with providing covering fire during times of heightened security.

Radio or other forms of electronic communication between the roadblock, a central headquarters and/or other roadblocks or other security personnel can obviously also fill a vital role. If non-secure radio communications are utilized then standard code words (similar to the ’10 codes’ used today by law enforcement personnel) should be employed to augment communications security (‘COMSEC’).

TA-312 field phones can still be purchased in surplus stores.

An alternative to radio communications is the use of military grade ‘field telephones’. Such phones provide the advantage of increased COMSEC. Military-model phones worth consideration are the TA-1, the EE-8 and the TA-312 field telephones, which have been used by the US military throughout the twentieth century. The TA-1 offers a range of up to four miles and requires no power source (it is voice-powered). The EE-8 offers a range of up to 17 miles, but requires batteries. The TA-312 has a range of up to twenty-two miles under dry conditions, and features a built-in hand generator so that batteries are not necessary for operation.

Small military switchboard devices can be installed at the central headquarters to enable point-to-point telephone communications between multiple locations. There would also be a need to obtain sufficient lengths of telephone wire to interconnect the desired stations.

As has already been mentioned, flags and sirens can fill an important role by providing a means of communicating certainly critical conditions to the entire community.

Staffing

It is typical to have a roadblock staffed by a minimum of three individuals; two members of the team typically process foot traffic and vehicles through the roadblock in accordance with standing orders, while the third oversees the operation from the guard shack and is ready to react appropriately if an incident develops. Occasionally the duties associated with manning the roadblock can be physically demanding (for example, if the station comes under attack), so it is important that all team members be physically fit.

Under normal circumstances teams should work in shifts and rotate on and off the roadblock in accordance with a pre-established schedule. As already suggested, in times of heightened alert it may also be prudent to employ a concealed sniper to provide support on an as-needed basis.

Using Roadblocks to Gather Intelligence

Roadblocks can be excellent (and cost-effective) sources of critical intelligence information about potential future security threats to the community. Question and answer sessions conducted with passers-by can provide a wealth of information which can often be corroborated by multiple independent observers. When collecting information from travelers about potential adversaries they may have observed, the following ‘SALUTE’ questions should be remembered:

  • S)ize of potential adversaries
  • A)ctivity a potential adversary was observed being engaged in
  • L)ocation of potantial adversaries
  • U)nit Types Capabilities of potential adversaries
  • T)ime the potential adversary was observed
  • E)quipment possessed by a potential adversary

Policies and Procedures Governing Roadblocks

The individuals manning a community roadblock should be governed by policies and procedures in addition to and standing orders. Policies governing a roadblock should include:

  • If possible the personnel staffing the roadblock should wear common uniforms or otherwise present themselves to travelers as members of a disciplined and professional unit.
  • To the greatest extent possible, roadblock personnel should maintain detailed notes of all incoming and outgoing traffic, including answers to the ‘SALUTE’ questions described above as appropriate.
  • The maximum number of consecutive hours that individuals should attend a roadblock without being relieved.
  • Identification of different classes of travelers (e.g. community members, vs. known locals vs. unknown personnel)
  • Standard operating procedures for handling each class of traveler.
  • Policies regarding personnel taking necessary breaks during their work shift.
  • Regularly-scheduled check-ins with the central headquarters.
  • The use of special signs or signals for identification purposes.
  • The procedure for evacuating the roadblock in the event that it is overrun (including the destruction of sensitive materials and equipment)
  • Criteria for pursuing vehicles that attempt to flee the roadblock

Conclusion

The use of roadblocks to control and monitor the flow of inbound and outbound traffic (foot traffic and otherwise) is important to the community from many perspectives. In addition to strengthening the defense of the community, it can be a valuable source of strategic intelligence. The presence of roadblocks also increases the community’s sense of security and well-being, which can itself translate into increased productivity and economic activity.

To paraphrase the great poet Robert Frost who once proclaimed that “Good Fences Make Good Neighbors” it can be said that “Good Roadblocks Make For Secure Survival Communities”.

Somehow my version just doesn’t seem as poetic!

Introduction If you happen to have worked on a military base in the past, I’m sure you’ve encountered guards standing at the guardhouse routinely waving traffic through the gate – maybe


I love the internet and social media. It lets me be exposed to a slew of information and knowledge that I would have otherwise never been able to view. In just a couple of clicks I can watch how to build a primitive spear thrower,  or purify dirty water into something ….less dirty. After enough clicks, however, I inevitably stumble upon something displaying the need for a horribly impractical “prepper tool” that I just must have. Holding this awesome, life-saving, badass and totally affordable (insert sarcasm) thing is some ex-military looking, bearded fitness model that TOTALLY MIGHT HAVE BEEN SF, Or an overly sexualized woman with chiseled abs.

Now hear me.

I don’t think there is anything wrong with looking like a Viking with an AR or a jacked and tan super woman–in fact, that’s actually super impressive. But is it indicative of someone living the prepper lifestyle?

Pros of Tacticool

Let’s not underestimate the power of looking like a tactical boss, because there are some practical advantages to be found.

1) Predators naturally seek soft targets– It’s primal, like natural selection. Whether the predator is a lion or street thug, the predatory instinct is driven to achieve its goal via the easiest, most non-confrontational path available. When looking to rob a house, break into a car, or mug an innocent bystander, the criminal has a vast amount of potential options and they will inherently choose the path of least resistance. This is one obvious advantage to looking like a former linebacker with Don’t Tread on Me tattooed across your throat.

2) You might feel more confident– Hormones are a hell-of-a drug. Seriously. And your mindset and mentality play a role in how your body produces and expresses levels of certain hormones. Confident people have higher levels of testosterone than their more sheepish counter parts. They also have lower levels of cortisol. Here is a quick talk on body language hormones, it’s worth the watch. What will that do for you?! How about greater muscle mass, clearer skin, stronger bones, lower stress levels, and decreased levels of anxiety. So if a Mo-hawk and 80-piece pocket tool are what you need to feel awesome, then I would say, go for it.

3) It’s just fun– Unless you’re too uptight to enjoy the simple pleasure of holding blacked-out combat katana or you wouldn’t enjoy setting up plans with your buddies on how you would take back and survive a potential “Outbreak” like scenario.  But for most of us, this serves as a temporary form of escapism. We take it seriously, but definitely enjoy the process along the way.

Cons of Tacticool

How could looking awesome be a bad thing?

1) The issue with abs– On average men are 18-24% and women are 25-31% body fat. This is relatively natural. For men, they typically start to show visible abdominal muscles around 10% body fat, but will have more defined musculature closer to 6%. Women tend to fluctuate around these numbers because they naturally store fat in locations other than their midsection (where the sexy abs are). So what happens to these fitness icons if there is an actual SHTF scenario and food acquisition has becomes a real problem. At 6% body fat your body is already running low on fat, which is actually very important for cellular function. Now your body is forced to burn your lean tissue and muscle for calories. This is not an excuse to be un-athletic or out-of-shape. But if you do truly identify yourself with the prepper lifestyle, then how prepared your body is must be a primary goal. You should absolutely be strong and physically capable. I believe you should consider pursuing a body that thrives in every situation and scenario, rather than one that simply looks good on Instagram.

At 6% body fat your body is already running low on fat, which is actually very important for cellular function.

2) The lines between tactical and tacticool become blurred– The more time you spend in and around any group or community the more that community becomes your status quo. I am sure you have experienced this in your life countless times. Everyone at your work drinks beers on Wednesday nights at a bar close to your office. Now you also drink booze on Wednesdays. Your significant other watches a specific TV show, now so do you, etc. If you spend enough time pouring yourself into the cool, but unrealistic, prepper activities and products then eventually you will lose sight of what makes sense and perhaps lose sight of what’s out there just to make someone else money. This is a trap that most of us have fallen prey to at some point. If this is you, then don’t be too hard on yourself. You are in great company. But take note of the things and time you have invested in, that offer little to no return on actual preparedness.

3) Cool is not going to help, when all hell breaks loose– This seems like the most obvious and important reason why we shouldn’t be pursuing phony replacements for the real thing, but it needs to be said. The reason we prep is because we have this thing in the back of our minds telling us, “event X could happen”. Whatever your X is, you’re probably right to pursue it. But somewhere along the way we tend to get caught up in gadgets and thing-a-ma-bobs that offer little to no value in prepping for our X. Do not get caught in this trap. If you wake up one morning and event X is taking place all the money and time you spent on superfluous things and skills will leave a tangible bitterness your mouth.

Pros of Tactical – You are the real deal


1) You’re an actual hard target – There is a difference between looking the part and being the part. If you are stuck in the “cool mindset” currently then this will be hard for you to distinguish. But if you ever have the opportunity to spend time with someone who is actually prepared for event X then you will quickly realize they have no flashy bumper stickers, no unnecessary tools and they do not feel the need to show anyone how prepped they are.

2) You ARE more confident – There is something to be said about the benefits of the “fake it till you make it” mindset and the power of feeling confident. But nothing will substitute the confidence that comes from being tried, tested and proven worthy. This type of mental shift permeates every fiber of your being and you see the world differently. When you understand what you’re capable of and know the limits of your training, you can take that with you wherever you go.

3) It’s deeply satisfying – Don’t get me wrong, it also fun. But there is a certain sense of satisfaction you get with a job well done. There is a specific feeling of accomplishment and deep well-being that acts like a filter through which you see the world, knowing that you are ready. Ready for whatever life throws at you, ready for the good, the bad and the many potential X events that exist.

Cons of Tactical (kind of)

1) Work, work, work, work…work – This type of lifestyle and level of preparedness takes work and a lot of it. You cannot purchase it. You cannot watch a few YouTube videos and consider yourself amongst the elite. You must be diligent, consistent and continually striving to master yourself and your situation. This is something that few people are willing to do, because work is hard and uncomfortable. But that’s why few people are really prepared for the hardships of life. But you are going to win in this is game, while others are satisfied with following the status quo of mediocrity.

2) It takes humility – Humility is something that we are culturally void of and so, being humble is typically counter intuitive for most. But if you are over-confident or the least bit arrogant then you will have a false assessment of your abilities and mistake your level of preparedness for something it isn’t. Being tactical requires self-reflection and an accurate assessment of who you are and what you’re capable of. This will typically be accompanied by a degree of emotional or mental strain as your reality will not match up with your ideal. Being a great Prepper takes the ability to assess your situation and degree of readiness with accuracy.

3) It takes patience – Like humility, patience is another very important skill that one must cultivate if they are going to be prepped for life’s contingencies. It would be great if in an afternoon or weekend we could take a class, get a certification and be off-the-grid ready. But this type of work takes time. The more time you spend in this world the more you will come to realize that you have additional skills to master and continual knowledge to obtain. So, enjoy the journey and take pride in every step along the way. Patience is not only a virtue, it’s one of your closest allies.

As you can see, the above “Cons” are not negatives, they are just challenging. As you continue down the tactical road of physical and mental preparedness, remember that the journey is meant to be enjoyed. Don’t get sidetracked or fooled by anything that claims to be the end-all of products. Put in the time and work, seek to better yourself and know that the best investment you can make in your preparations for the future will always involve personal growth and investing in yourself.


  I love the internet and social media. It lets me be exposed to a slew of information and knowledge that I would have otherwise never been able to view. In

Hiding in plain sight is a term everyone has heard at one point or another. What does it mean from a prepper’s perspective? How much can you really carry around while still looking like the average Joe/Johanna? In this article I list some of the most unusual ways that some basic survival gear, weapons, and defensive tools can be disguised in items you already wear every day.

This is not about concealing knives and firearms. It is a collection of ways hide small survival items hidden in plain sight. You will even be guided through how to create one of the most useful resources that most people never think to include in their gear!

Here are just some of the items that can easily be concealed or disguised:

Razor Blades:

Secret Compartment Money Belt

  • a simple sheath and these are easily stored in a wallet
  • Can be inserted into a slit in a leather belt
  • Under the insoles of your shoe
  • Sheathed and taped to the inside of a steel toe boot (helps with metal detectors and xray)
  • In a hollowed out sole or heel of a shoe
  • Encased in a faux gold plaque that are common for necklaces as engraved name plates
  • Behind a fancy belt buckle
  • Underside of a watch face
  • Part of a brooch or inside your name-tag


Razor Wire:

  • long “noodle beads” can be used to protect ones skin and turn this into a necklace
  • Hollowed out heel
  • Inside a hollow purse strap
  • In a special groove inside a man’s ring
  • In a belt
  • Fishing Hook
  • encased in tear drop earnings
  • In/Behind pennants
  • Backside of belt buckles
  • Made into a Broach
  • Embedded in the brim of a hat
  • Inside a hair scrunchy (caution, best if used loosely over a rubber band bun)
  • Hollowed out shoe heel

Small items like razor, wire or even maps can be hidden in special watches.

Fishing Line, Rope, Paracord:

  • Simply sew into various items of clothing as a contrast stitch.
  • Embroidery
  • Necklace
  • Bracelet
  • inside hollow watches
  • Woven into a beanie
  • Braided into a belt

Survival Hiking Boot Laces – Wilderness Survival Emergency Fire Starter – 550 Paracord Laces with Ferro Rod Tips and Serrated Steel Striker Tools – Black or Brown

Fire Starter Rods:

  • Hollow tips of shoelaces
  • Dangle earnings
  • Pendant
  • Bracelets
  • Inside a Hollowed belt
  • Belt buckle
  • Inside wallet
  • Hollowed out heels
  • Replacing sections of underwire in a bra.
  • Fastened to a barrette

Black Powder vials:

  • Worn as pendants
  • Inserted into hollow chap stick or lipstick tubes.
  • Inside the heel of a shoe
  • Attached to your key-chain
  • Inside empty travel sized hand lotion bottles
  • Inside empty travel sized toothpaste tubes
  • taped to the backside of a large belt buckle
  • Simply slipped into a pocket/purse
  • Disguised as ornaments on the outside of a purse

100 Deadly Skills: The SEAL Operative’s Guide to Eluding Pursuers, Evading Capture, and Surviving Any Dangerous Situation

Blow Gun Darts:

  • Attached to barrettes and bobby pins
  • Dangle earrings
  • Pendants
  • Broaches
  • Inside belt-loops
  • Part of the belt buckle
  • Inside a hollow belt
  • Inside the straps of a purse
  • Replacing part of the underwire of a bra
  • In your wallet
  • On a key-chain
  • Under the insoles of your shoes
  • In a hollow shoe heel
  • Decorations on a purse

TIHK Handcuff Key

Handcuff Keys:

  • inside a slit on the back of your belt
  • On a Key-chain
  • Inside a hollow watch face
  • Inside a pendant
  • In a hollow belt buckle
  • Inside the hollow heel of your shoe

This list could go on and on. As you can see there are a variety of things that can have various survival uses that can be incorporated into items that you wear every day. By creating these clothing items now and stocking your supplies, you can guarantee that if SHTF you are wearing your basic supplies. If you cannot get to your Bug Out Bag and your EDC has been compromised in some way, you want to be sure you always have something, literally, On you.

So, where do you start?

Start with the items you wear the most. For most people this is their shoes. This is also the option that can possibly be the most difficult to alter, yet carry the most supplies. This is why I have chosen to help you through this process today.

Different style shoes have different alteration options and limitations. If you primarily wear tennis shoes with thin soles, you may want to start with replacing the shoelaces with paracord and fire starter laces. Depending on how thin the soles are, you may be able to still store some supplies in the sole (such as a razor blade) or under the insole, inside the tongue, and even secured to the inside.

If you wear boots with some heels, chances are these heels are already partially hollow. You can buy boots that already have this secret compartment, or you can take on the challenge of creating it yourself. If you are creating the hollow yourself, you will need to secure the opening of the compartment so it isn’t easily damaged, removed, or otherwise tampered with. Detach the insole of the shoe near the heel to carve it out yourself. You may want to find a solid container that can provide the heel some of the support that may be lost in the hollowing process. If you want easier access to your compartment you can leave the insole dislodged. If you are hiding items you intend to keep more secure, you will want to glue down your insole. take heed to also secure or resew the insoles before gluing so that it can stand up to more scrutinizing inspection. Depending on the width of the heel, and the quality and composition of your insole, you may need to find a thin but sturdy material, or extra rubber so that it doesn’t dip down later. We do, after all, want these shoes to remain comfortable.

The other option is to put the opening of the compartment on the bottom of the shoe for easier access. This can be accomplished by carving out a perfect circle or square and preserving it, then hollowing the sole enough to fit in the supplies you desire to hide, or the container to fit them. These must fit very snugly and be lightweight enough as to not put pressure on the plug. Take the preserved piece of sole and attach it to something a little larger than it is if you need to make it more like a cork. Simply plug the hole. If it needs help staying put, and you don’t care about how it looks you can use glue or staples. Of course if you are quite handy and looking for an even more accessible and sturdy option… You can cut the end of the sole clean off, replace the inside with a box with a circle opening, and fasten threads to the removed heel and screw it back on. This would work best on heels that were already hollowed, made of wood, or women’s high heels.

Final Tip: Pack the heel in a manner that is least likely to damage the supplies and add padding as needed so they don’t make strange noises while you walk.

Disclaimer:

Some of the items in the list could possibly be illegal to conceal in the manners suggested in your locality. Please use discretion when choosing the items to include in your EDC wear.

Hiding in plain sight is a term everyone has heard at one point or another. What does it mean from a prepper’s perspective? How much can you really carry around


Even if you only have a basic knowledge of prepping, you will be familiar with the idea of necessities. Food, water and shelter, as well as weapons, are the cornerstones of discussion pages and articles about beginning your preparations. Although those provisions are definitely necessary to keep you alive, there is one aspect of prepping that is often overlooked and it can hurt even the most knowledgeable and well equipped survivalist.

Sanitation: otherwise known as the horribly unsexy, anti-adventure aspect to survival that hardly gets discussed. Without proper sanitation, a person who has food, water and a secure shelter can still perish.

There are a number of aspects for proper sanitation that any prepper needs to consider. The simplest items for something like a Bug Out Bag can include hand sanitizing liquid, bleach wipes, water purification pills and an instant use purifier like a LifeStraw.

Benzalconium wipes that aren’t expired are guaranteed to kill many severe viruses that average household disinfectants can’t touch, so having a supply of those for cuts is going to give you an edge that alcohol swabs can’t provide. A roll of toilet paper is also a must and for ladies, a supply of feminine hygiene products, in case that time coincides with the end times.

Sanitation on the Go

An outdoor latrine already built and ready to use is ideal, but not a common site in most backyards.

The next level of sanitation preparedness involves supplies as well as preparation. If you are out in the wild that would include finding a spot at least 25 yards away from camp and 50 yards away from your water supply to do your business. That spot should include a way to wash your hands before returning to camp, so having a bar of soap is a good plan to reduce your dependence on hand sanitizer and keep your camp clean.

If you are sheltering in place your toilet is most likely not going to work, unless you are dealing with a situation where water service hasn’t been disrupted. That is fairly unlikely, so having supplies and a plan for them could make the difference in getting sick or staying healthy and ready to survive.

A simple bucket can become your best friend in a survival scenario. Using a toilet without being able to flush can lead to serious health concerns, especially if multiple people are using it. As it fills, the amount of germs becoming airborne increases. This is not safe at all. Having a plan can change that.

Luggable Loo Portable 5 Gallon Toilet = Cheap and easy Grid down solution to bathroom issues.

Using a bucket gives you the opportunity to throw your waste in an area outside of your shelter. Rather than using the bucket itself, it is far better to keep a box of garbage bags available to line the bucket. It will make disposal easier and prevent accidental spills. A bucket filled with garbage bags, soap and toilet paper rolls is easy to tuck away in a closet and it will make a drastic difference in your ability to maintain sanitary conditions.

There is always the option of buying a specialty bucket lid that is designed as a toilet seat to increase comfort, but it isn’t necessary. It’s a personal preference to include one in your supplies. Other ways to increase the safe handling of waste would be to include disposable gloves and bleach in your bucket to eliminate skin contact while moving or disinfecting with a bleach/water solution.

The most ardent prepper who has their eye on a homestead situation can take this planning even further. If you are intent on staying at your camp for an extended period of time, one of the best things you can have is a container of quick lime powder, which can be poured over your waste to help it break down faster. The same is true for packaged enzymes that are used to break down waste in septic tanks. It’s a good habit to get into, especially if you plan to build a permanent out house.

Simple plans for sanitation can go a long way in keeping your food and water, your camp or shelter and all those depending on you clean and healthy. It will help control the spread of diseases like cholera or diphtheria when medicine and doctors are hard to locate and general experience with those illnesses is lacking.

It has been said that an ounce of prevention is worth a pound of cure. With these tips and a bit of extra planning any prepper can ensure they are practicing good sanitation. Just because the SHTF, it doesn’t mean you have to get messy or sick.

  Even if you only have a basic knowledge of prepping, you will be familiar with the idea of necessities. Food, water and shelter, as well as weapons, are the cornerstones

You don’t have to buy into any woo-woo-ology or being “green” to reap the benefits of some of the concepts to come out of environmentally friendly growing methods and lifestyles. In fact, some once would have just been considered common sense. Stacking functions is one of those. Stacking functions is a quick term for the concept of planning things (elements) and areas (space) to perform the most services for us. It’s reusing things as many times as possible to get the most out of our inputs. In permaculture, we really like multi-purpose items (stacked functions) because they increase our efficient use of a space, decrease our labor, and make it easier to gain resiliency by having multiple items that perform each function. I’ll take this in two parts so I can be wordy. We’ll start with what stacking functions is and multi-function elements. Next time we’ll look at multi-function spaces.

Types of Stacking

When we talk about stacking functions we generally mean two things: a multi-function element or a multi-function space.

Within spacial stacking, we have things like silvopasture (livestock grazing on pasture beneath and in the alleys of trees, which can be for timber, firewood, fodder/forage leaves and branches, or a fruit or nut yield for humans or livestock). We also have things like companion planting, combined coop-greenhouse or greenhouse-home designs, total-system hutch-coop systems – anything with a great deal going on in one space.

Two types of stacking function include spacial stacking or multi-function spaces, like silvopasture to increase yield or a chicken moat to protect gardens and increase efficiency, and multi-function elements – each individual inside a system, like a particular plant or animal.


Multi-function elements are the individual things inside our systems that are capable of performing more than one job – an apple or locust tree, the fire from our thermal-mass heater and rocket stove, our coop with its roof and the way we arrange our bird fencing.

How we combine and site our various elements adds or detracts from their ability to maximize the efficiency of their multi-functionality. Creating redundant spaces and incorporating redundant-functioning elements increases diversity, which adds to the resilience and thus the stability of our systems and homestead.

Multi-Function Element – Pigs

Pigs have the ability to do more than turn my creek into a muddy wallow and turn broccoli into bacon. Joel Salatin reinvented the market for pigs.

I can also tweak his methods and make it just one stage. I can let them clear land (and run off predators) ahead of chickens. Chickens further till land, spread the pig manure, consume things they missed, and make my scrub woods a field ready for replanting a little bit faster. If I have relatively savvy chickens, I can arrange my pigs as a buffer between the poultry run or rabbit hutches and nearby woods or fields. Throw 3-5 pigs in a space, and even stupid domestic dogs will rethink crossing that lot to play with the fun feathered things. I’ve seen a coyote destroyed by a handful of five-month porkers, and it’s just not pretty.

I can also use them to create a no-rodent/canine/cat zone on the non-dog side of garden beds. Foraging pigs are pretty smart. Run a loose line at the top of a fence or between trees where the pigs’ hot line is, hang some bells or cans from the line, and slap it periodically as you toss in a squirrel tail and barely-keeper fish, entrails, bug-eaten produce, gophers, scraps – anything extra, they don’t care. Pavlov’s got nothing on pigs that discover goodies at the sound of a bell.

Happily, wild critters are pretty smart, too. I’ve seen raccoons change their mind when they hit the top line with a bell on it and hear those “feed me” squeals. On the other hand, I’ve also accidentally bumped an alarm line while already flailing for balance on loose leaves, which led to one of the scariest moments of my life. Pigs: double-edged swords.

Pigs would be one element in a system – any system. They’re

  • one of several food elements (garden, poultry x1-6, goats/sheep, rabbits),
  • one of potentially three brush removers (sheep, goats),
  • one of potentially two tillers (chickens),
  • one of potentially four garden/crop clean-up critters (chickens, goats, sheep)
  • one of potentially six alarm systems (guineas, dogs, chickens, geese, donkeys), and
  • one of potentially five guardian or protection systems for smaller livestock and gardens (dogs, large aggressive geese, donkeys, Winnie the Winchester or Kimmie the K98)
  • one of several manure contributors (any non-dog, non-cat)
  • one of several manure/compost spreaders for fields and garden areas (chickens, geese & ducks to lesser degree)

They potentially serve seven functions for me. Their characteristics mean that I need to haul them water and spend enough time dealing with them that I can safely enter the pen for the keepers and handle the raise-out(s), or I can spend more time and stick them in harnesses on leashes to forage other areas or just be more amenable to humans.

If we ran the same analysis of ducks, we could see the same type of multi-function creature that provides:

  • Bug removal/pest reduction (direct garden patrol when nothing is overly small; there’s less waddle-waddle, smack-smack compaction with mulch)
  • Parasite reduction (ticks)
  • Eggs
  • Meat
  • Manure

Different animals provide fewer and more services. They all come with pro’s and con’s like size, noise, feed needs, water needs, human care, weather resistance, protection, and their ability to interact with other elements. Our needs, capabilities, and desires affect what might fit on our space and in our lives.

Ideally we also seek out the animals that let us cover each of our systems’ needs in multiple ways – redundancy to build resiliency, using stacked-function elements that each perform multiple services. It creates a complex web, but when we have complex webs, we’re nearly immune to losing a strand or two. It just doesn’t hurt us the way losing a link in a single chain would cripple our production and self-sufficiency.

Multi-Function Element – Tree

Another individual element would be a tree – super simple. We can take a produce tree like an apple or a “resource” tree like locust. Locust wouldn’t be my pick for being right next to a house, but if I had rabbits in a small lot, I might go for it.

Apples provide:

  • Fruit for fresh eating, preservation, cider (and regularly, easy-storing fruit)
  • Fruit for pectin (potentially)
  • Fruit for livestock feed (potentially – too rich for some)
  • Limbs & leaves for green feed (rabbits limited, goats, sheep, chickens)
  • Limb tips & leaves for tree hay (rabbits, goats, sheep, limited chickens & cattle)
  • Limb tips, fruit cores, & leaves for silage
  • Pruned branches for garden supports, chipping into mulch (don’t mulch berries with Rosaceae leaves), smoker chips, kindling & rocket stove fuel
  • Mid- to late-spring pollinator fodder

Two goats under tree, one on hind legs nibbling leaves

The locust provides:

  • Nitrogen for nearby plants (leaves, roots)
  • Limbs & leaves for green feed (rabbits limited, goats, sheep, chickens)
  • Limb tips & leaves for tree hay (rabbits, goats, sheep, limited chickens & cattle)
  • Limb tips, fruit cores, & leaves for silage
  • Limb tips & leaves for leaf mold (fertilizer & mulch) or shredded leaves for worm bins & compost
  • Pods for fodder (honey locust)
  • Branches for fencing & tool handles
  • Firewood & kindling
  • Pruned branches for garden supports, chipping into mulch, kindling & rocket stove fuel
  • Early- to late-spring pollinator fodder (neck-and-neck with sage for the best honey)

Both trees also have the potential to be shading a greenhouse, workshop, or home against summer’s blasts, or shading livestock coops or hutches, sheds, tractors, tie-outs, or pasture. They could also very easily shade a hammock or patio set, creating an outdoor living area, or make up part of the wall and “roof” of an outdoor cooking area.

Everything that goes for the apple also goes for most fruit trees and some nut trees. There are other livestock fodder/forage trees and things like aspen and maple that provide some to many of the same functions and services as the locust.

When worked into a guild with other plants (basically: companion planting on steroids), the apple and locust become part of a multi-function space, with some of the functions overlapping to create the same redundancy and resilience discussed with the livestock. It’s possible even in a small space by coppicing that locust (or replacing it with another, smaller N-fixing tree, or using N-fixing shrubs instead) and selecting dwarf and semi-dwarf trees.

Single-Element Replacements

Although we can get even more out of a space by combining multiple multi-function elements that work together or have similar needs, there are times when a simple solution still does wonders for us.

Thorny and dense shrubs can harden fences against livestock and intruders, create chokepoints, and serve as windbreaks while also providing a food or resource.

For example, fences and windows. It’s pretty common to have a foundation plant around homes, and living fences or using fences as trellises isn’t uncommon. It’s a pretty well-known trick to use a particularly uncomfortable shrub or bramble to create choke-points around property, make fences a little “harder”, and make it a little less likely that somebody just hops up and through our widow without us knowing. Defensive properties are one function. I totally accept aesthetic landscaping as a function.

We can boost those functions by selecting roses that produce copious hips, thorny shrubs like goji and some of the nostalgia berries, and bramble fruit like raspberry. In the case of raspberry, I not only get either a medicinal or a fruit, I get both. With a lot of them, I can also select harvest tips to use as fodder supplements for rabbits and goats. Raspberry and blackberry canes add a lot of flavor as a smoker wood.

Rubus – Blackberry ‘Loch Ness’

The Bio-Integrated Farm: A Revolutionary Permaculture-Based System Using Greenhouses, Ponds, Compost Piles, Aquaponics, Chickens, and More

Seaberry is a pain for humans, but chickens are happy to work for the berries. As a dense, spiky plant it makes a great living fence and it has the benefit of being a nitrogen fixer, so heavy-bearing plants placed alongside it can reap all kinds of benefits, from fertilizer to protection from deer and humans, to less wind.

We can replace our just-showy shrubs with vitamin-packed blueberries, honeyberries and aronia and still get explosions of color twice a year, but also get human and livestock food and increased pollinator presence by tailoring our plantings so there’s always something for them.

If we already have a patio bed or sidewalk we past nearly daily, that’s a great place to put our berries and greens that so quickly go from perfect to squishy or tough and bitter. We can easily intermingle them with our annual and perennial herbs and flowers to maintain a pretty space.

Using a bed near a house or building also allows us to quickly and easily attach porous lines to our downspouts or water barrel overflows, directing even short, light rains to water-needy plants like greens and tomatoes.

Plants, plants & more plants … always with the plants

In my defense, plants are the fastest, easiest way for absolutely everybody at every skill and scale to increase their resilience, and they tend to offer almost as many functions as a chicken – without the noise. However, we can stack functions with abiotic things as well.

If the bane of my existence is mowing and I have downhill spots in my yard that turn into swamps every time it rains, I can solve two of my problems by deep mulching uphill – using landscape fabric. The mulch not only limits how much I have to mow, it also slows, spreads, and absorbs some of the rain, increasing infiltration and requiring a little more rain to fall before I have to jump the Niagara on the way to my car or mail in the morning.

I can also deeply mulch a play area so I can still kick the kids out when it’s been raining. And if it’s deep enough, children and animals are less likely to break a bone when falling off a slide, swing or tree branch.

Either mulched area is also a non-muddy staging ground for repairs and projects, harvest sorting, training, and all kinds of gatherings.

My quad isn’t just for recreation. It’s not even just deer- or harvest-season transportation and hauling. My quad also has a hitch that turns it into a furrowing plow, disker, seed spreader, and winnowing rake.

A rocket stove and thermal-mass heater can heat my pot of water now, have a cavity and lid that acts like an earthbox/slow-cooker and a cabinet to serve as an old-school warming box, be shaped into a lounger, slowly dissipates and keeps my house nice and toasty, and with embedded plumbing can have additional water right there still hot or warm for a hand wash or a faster mug of tea. A coil of hose in a greenhouse ceiling can provide some of the same benefits.

Stacking Functions – Elements to Areas

We can tailor non-living things to provide more and less shade, take advantage of sun, wind and rain or protect from wind and rain, and we can make purchases with an eye to multi-functionality (like a kiddie pool that will double as water catchment, a chick brooder, or a tarp). However, usually when we talk about stacking functions, we’re talking about productive spaces as a primary goal. If you want to eat it, it’s usually a plant or animal.

Those plants and animals can do a lot of jobs for us even if we look at them as just individuals and spread them out across a conventional homesteading site plan. When we start combining them into groups and when we start cramming them into small spaces, we can gain a lot of benefits. We’ll look at some of the ways various plants and animals can benefit each other or us by sharing space in an article that deals specifically with multi-function areas and guilds.

You don’t have to buy into any woo-woo-ology or being “green” to reap the benefits of some of the concepts to come out of environmentally friendly growing methods and lifestyles.

When it comes to things that are super useful in daily life, bed sheets rank right up there. In a world where we’d like to conserve energy, go as unnoticed as possible, or avoid stores, or when fresh resources just aren’t all that available, sheets go up even further on the usefulness scale. To be clear from the start, I’m not saying everybody should run out and buy multiple sets of brand-new bed sheets. For some uses, threadbare and worn are actually better. Used is always acceptable.

Tarps are best for some things, but tarps are also more expensive than old, used sheets we’d throw away or that we find for free or 10-50 cents each, and they tend to be larger to store. A cheap $5-10 tarp is usually about as vulnerable as a well-made used motel sheet, so if the moisture protection isn’t as much an issue and it’s a temp use, we may be able to save some money and space with sheets.

When the Sheet Hits the Fan: The advantage of bed sheets

One of the major repetitive advantages to sheets is that they’re lightweight. That means they’ll both wash and dry easily and pretty quickly, even in total off-grid situations. They’re also fairly compact, so it’s pretty easy to store them. They’re not heavy to carry. And of course, there’s the myriad uses an old bed sheet can offer us.

Uses for Bed sheets

Like any “must have” item, an internet search is going to return dozens of hits, some of them really, really good. This is the kind of area where Pinterest is worth its weight, too. I’ll stick to the less-artsy and more-practical uses here, but there’s still no way I’ll cover them all. It’s just to show some of the range so we can justify a trashcan filled with bags of sheets. I totally welcome other ideas and uses – it’ll only benefit everybody to share ideas.

Lining bedrolls – Lining a sleeping bag or bedroll with a sheet or two gives us hot-night options as well as keeps dust and sweat from hitting the thicker blankets and bag. The same applies to a “regular” bed – both under and atop the main covers, especially if there are pets. Sheets are much faster to wash and dry, especially on the move.

This also works for dogs beds, unless there’s a “nester” involved who likes to dig or root around in their spot before they lie down.

Lining furniture – I have pets, and a guy who thinks pets on furniture is normal, regardless of size or shedding seasons. I can switch out a couple of sheets on chairs and sofas, wash them, and hang them to dry in about the same time it takes me to vacuum and lint roll them. That’s especially nice if somebody drops by, because I can just flick sheets off and they have a clean place to sit besides an office chair and the kitchen table.

It also works for me. There are times I’m too sweaty to even consider padded furniture, but sometimes I’m just dusty or flecked with stuff when I’m hungry and want a break or to watch a show while I cool down or warm up. With sheets on my two rocking chairs and my squishier furniture, I don’t have to sit in the floor like a 1930s child.

Color coordinating by mood and season is just a bonus, as is catching all kinds of remotes and pocket detritus.

Plant covers – Keeping in some extra sheets can help extend our garden season, especially if we have unexpected cool weather. Thin, white or pale green sheets are best for extended use, but any color works for just overnight or for a day or two of cold weather. It’s best if they’re propped up above plants with some air space between the plants and sheets, but just covering them is enough to save tender seedlings and flowers in a lot of cases.

Heat sinks – We can use sheets to make dark curtains that absorb and hold onto more heat in winter without needing nails the way ad libbed tapestries from comforters do.

We can also fold them into 1-2’ rectangles several layers thick to lay right against our plant rows in early spring and autumn. They’ll help block some of the weeds and help protect against splash-up dirt, as well as help warm the soil, hold a little more moisture than bare earth, and protect the roots from frost a little more. Sheets aren’t going to last season after season, but not much does. If we’re only using them for a few days or weeks early and late, we can wash them and fold them back up, and protect them from the most damaging weather and extended bug attacks.

Image: An old bedsheet can be used to shade a baby or tractored livestock, or hung over a porch, used as window awnings and curtains, or spread like a tarp for even a few days or weeks to help beat blistering hot days.

Shade – Sheets aren’t going to last in the long run, but to break the heat for an afternoon, weekend, or even a particularly brutal heat wave, sheets are pretty nice for rigging as a shade cloth since they’re light enough to hang from clothesline, 550 cord, a lot of garden twines, duct tape, and household-level screws and nails. Without rivets, sheets are going to rip in high winds and after hanging soaked from rains and exposed to sun repeatedly, but I’ve had some last out most or all of the summer over rental porches in Arizona and Alabama. Folding the edges to double or triple before poking line, nails or hooks through them can help prevent some of the tearing.

Defensive Training Space – String line and weigh curtains with spare sticks and rocks, and create red-gun and airsoft reaction training courses. They’re inexpensive, faster to erect than OSB/plywood, they cost a fraction of stick construction, and they can be updated and renovated to keep experiences fresh. They can also be cut into truly man-sized targets for airsoft and paintball training. (Do not conduct live-fire drills with restricted visibility unless you have experience running live-fire drills with restricted visibility – that’s how idiots shoot each other.)


Sheets – especially thick, absorbent ones – can be turned into reusable paper towels, cleaning wipes, baby wipes, cloth pads, or hankies.

Health & Hygiene – We’ve all heard of boiling sheets for bandages. We can also cut them up to make hankies. We can go as sew-happy or KISS as we like to turn them into reusable bleach and Lysol cleaning wipes or baby wipes. They can make decent enough dusting cloths. Thicker and softer versions that are fairly absorbent can be turned into top and middle layers for cloth menstrual pads or diapers. We can use any of them to make “family” cloths (reusable adult baby wipes).

If we find multiple colors and patterns, we can color-coordinate by person for a lot of the hygiene uses, which might at least help with the knee jerk “eww” and “eek” factor.

Line floors – When there’s a sick or still-house training pet indoors, sometimes you just can’t get there fast enough. With carpets or old hardwood, this is a recipe for a lot of time on knees. My pets tend to avoid plastic (including training pads) or the cat plays with them, so folding sheets into quarters to stick in their usual areas and the runways leading to doors works far better for us.

Pine Sol and bleach are my friends, and they tend to make it all better. Instead of scrubbing on my knees, it’s a matter of wiping up the worst of it, then washing the sheets the same way I would a changing table cover, leaky diaper bedding, “accident” pants, and puked-on shirts and towels. One baby is very much like another when you love them, especially when the four-legged baby would kill, maim and die for the two-legged baby.

If it’s ugly or I’m rushed, since it’s a sheet that outlasted its mate or cost me $0.25-$1, I am more than willing to just throw that puppy away.

Lining the floors also has a great deal of use when it’s muddy and there’s a lot of foot traffic and no pre-built mudroom for dusty, sandy environments, snow and wet, and freshly tilled garden areas, especially when you’re dealing with poorly trained humans.

Sources for Bed sheets

There are lots of places we can get our hands on used bed sheets without necessarily outing ourselves as nut jobs. We can limit our “crazy” reaction by citing the camping, pet, and garden uses as our primary interest.

Image/Images: Used sheets picked up for free or at low cost can be re-manufactured and reused in all kinds of ways, to include clothing, which can be especially handy for families with growing children during a crisis.

In all cases, like free and low-cost buckets and windows and screens, the burden is on us. Other people have regular jobs and priorities. We cannot make contact once and expect them to both remember our request and keep our phone number, then declare it a dead and stupid idea. We have to check back. Weekly or twice monthly, not enough to be an annoyance, but enough to be that smiling sweetheart. Showing up in person works best in many cases, because a face, a respectful and pleasant tone, and a hand shake can still go far.

We can find used sheets from:

  • Salvation Army/Goodwill, etc. (they sometimes don’t accept linens, or don’t accept stained/ripped linens of any kind)
  • Lower-rent and independent motels (they eventually rotate worn and stained linens, and are less likely to brush you off or already have contracts like larger, mid-high level hotels)
  • Message boards for “want” ads – church and community halls, agricultural co-ops and Tractor Supply, and flea markets (ask first if it’s a member-driven location)

Usually you’ll need at least a manager. Most commonly an owner has to give their nod. Still, there’s nothing wrong with hitting up housekeeping ahead of time to find out how they handle worn linens or calling ahead to find out when owners will be available to talk to with the least disturbance. Second shift is always the busiest for hotels, so try to avoid harassing them between 1-11 p.m. In the case of donation centers, sometimes the sorters are happy to let you poke through the trash or to pile stuff beside the dumpster instead of in it.

Another use for old sheets: Divide living areas and sleeping quarters into separate spaces with easy-hanging privacy curtains. It can save some much-needed sanity during even a temporary crisis.

Preparedness via Bed sheets

Some of the other uses for bed sheets in various condition include stocking them for clothing fabric, having plenty of extras on hand to limit rainy-day laundry, and hanging windows and doors with 3-4 overlapping layers to help with light discipline. They can also be used for animal and human towels, outdoor shower privacy curtains, and to hang for a DIY iPod or cell phone movie projector screen.

On the “daily” side, we can also turn them into tablecloths to cover our buckets and cases of stockpiled goodies or use them to make hook rugs and animal bedding. When we start accruing friends and relatives at our prepper palace, we can hang sheets as curtains to at least visually divide space (don’t knock it – high stress is a bad time to have fights break out because one person’s fidget is another person’s pet peeve; there’s a reason some of us take our glasses off in church and waiting rooms when somebody’s twitchy or acting up).

Bed sheets have lots of uses, with tons of crafty DIY out there for those interested. When it comes to preparedness, they offer so much potential for such a low cost and relatively tight storage space, they’re almost a shoe-in for a must-have list.

When it comes to things that are super useful in daily life, bed sheets rank right up there. In a world where we’d like to conserve energy, go as unnoticed