HomePosts Tagged "SHTF" (Page 11)

When I say “hands-free light” I mean a miner/caver style headlamp or a clip-on cap light. I don’t mean a lantern or any equivalent. Lamps and lanterns have their place, just like the good ol’ portable spotlights and flashlights that also live in my house. However, when it comes to a portable light, it’s hard to beat something that leaves your hands free and moves around with your eyes. Their cost, usefulness, and weight make them an absolute must-have for preppers.

Different Types of Headlamps

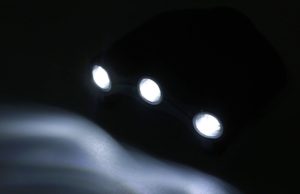
There are two general types of headlamps. There’s the “miner” or “caving” style with a strap or two like this one:

8149gcml4rl-_sl1500

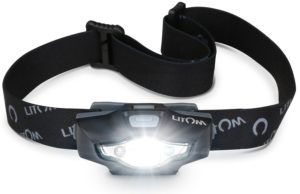
LITOM Headlamp Flashlight with White/Red LED, IPX6 Waterproof Helmet Light

Then there are the clip-on “cap light” types that rides on a hat brim like this one …

000-combo-clip-on-pan-light

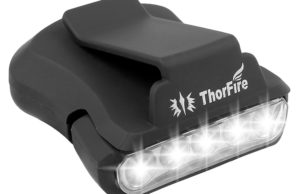
ThorFire Cap Hat Light 5-LED Headlamp Rotatable Ball Cap Visor light Clip-on Hat Light

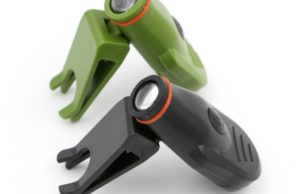
Both have some pro’s and con’s. Then there’s this guy, too, nearly a hybrid of the two:

clip-on-cap-light-ii

ThorFire Cree LED Cap Light Headlamp 3 Modes Ball Hat Lamp Flashlight Adjustable Zoomable Headlamp 155 lumen

With any headlamp, quality matters. That is sometimes to regularly reflected in price. Cheap stuff is … well, routinely cheap.

I can find good Rayovac and Browning models at HAM fests and flea markets for $5-10. Not only is the price spot-on or lower than online, there are regularly examples out, so you can get a feel for how sturdy clips are, how scratchy/smooth the band is, how heavy they are to wear, and how easy the controls are to handle before you buy.

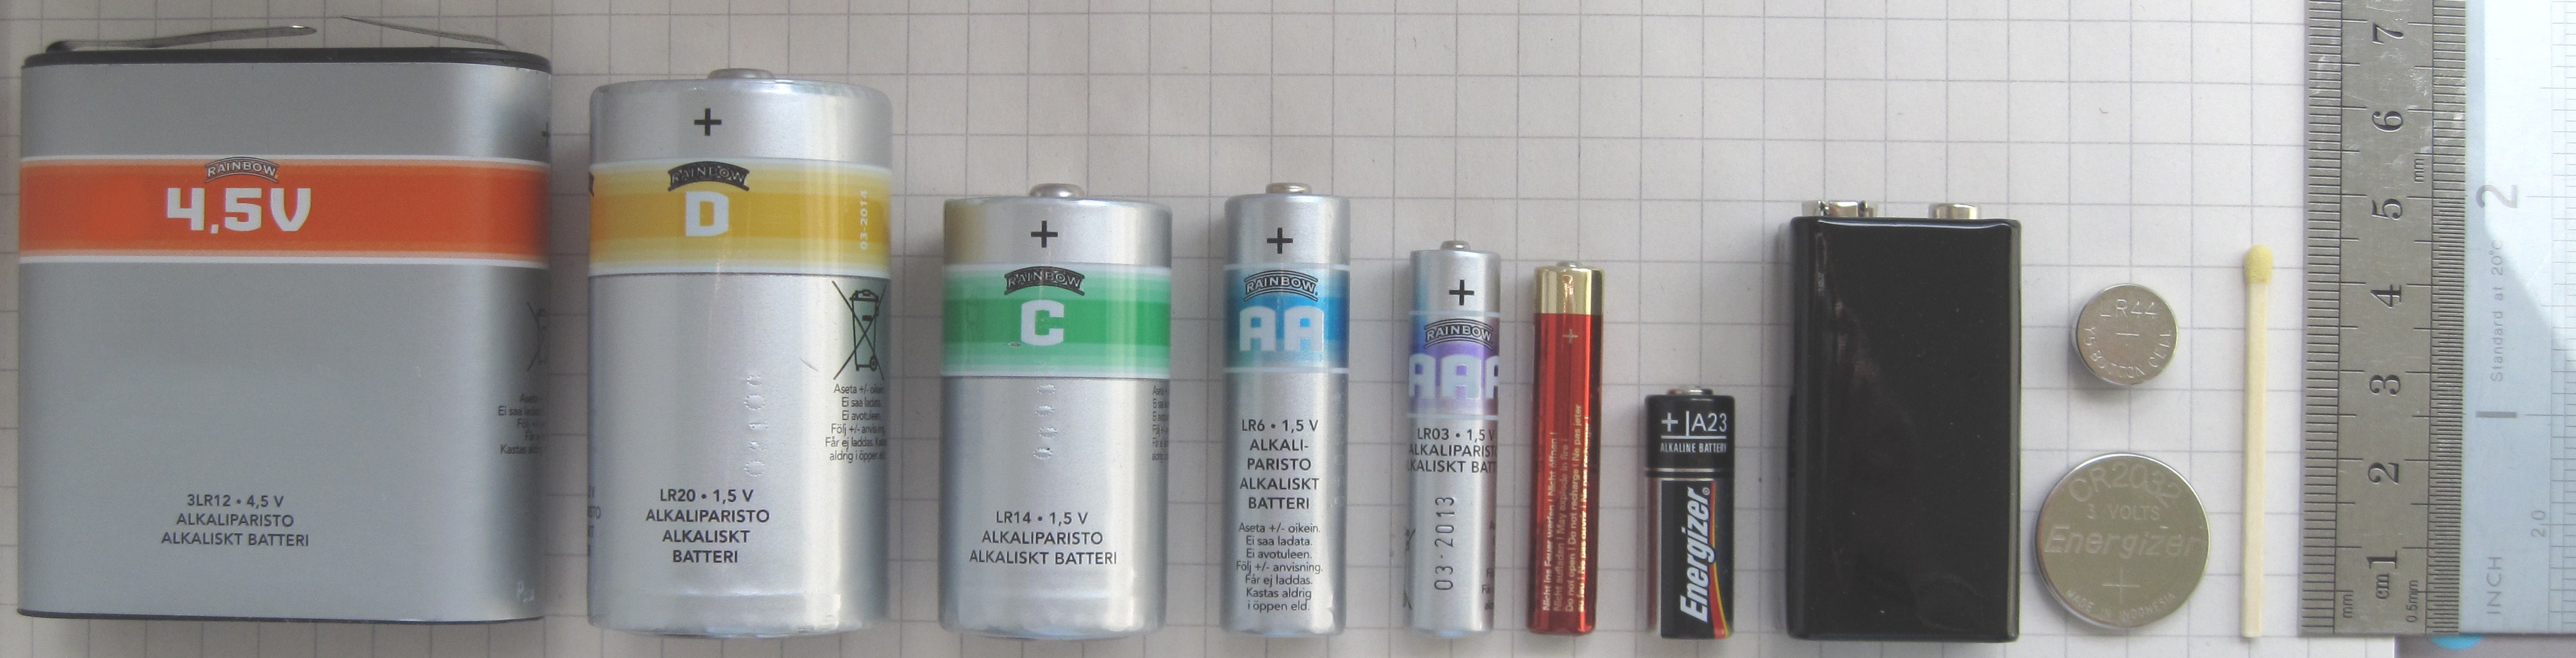
Headlamp Shopping Consideration: Battery Type

Different models run off different types of batteries. Most take standard AA or AAA batteries or specialty coin/button cell batteries of various diameters and power, with some caving/miner’s style running off of a 9 volt.

There are a few that run off of A23’s and periodically a “matchstick” 4A/AAAA pops in one of our pockets. Those and the button cells are not exactly sitting on every shelf.

Even if they’re not going to be the victims of any crazy pre-disaster or mid-disaster runs, I’m not going to be able to grab any if I don’t already have them should a natural or manmade disaster bears down on us. They’re also not particularly inexpensive, although some of them have pretty incredible lifespans, especially in an LED light that gets used for a few hours during dark seasons, and I haven’t found chargers for them sitting on many shelves in my neck of the woods (or at all, ever).

The more powerful the headlamp – miner/caver headlamp or clip-on cap light – the faster it will burn up those batteries. In some cases, that’s mitigated by a light running off of 3-4 batteries instead of two, and that starts getting pretty heavy on heads that aren’t used to hardhats or helmets.

batteries_comparison_45_d_c_aa_aaa_aaaa_a23_9v_cr2032_lr44_matchstick-1

Headlamps that run off common batteries are easier to keep powered. Headlamps with battery packs opposite the light source distribute the weight and are a little more balanced, but aren’t particularly great if you have long hair.

For a lot of my everyday purposes, I really like the slim, curving clip-on cap lights that use a button cell battery, even though it does use uncommon batteries. They’re lighter to wear and slimmer to stick in a pocket when I’m not wearing a hat.

However, for preparedness purposes and away-from-home headlamps, I stock up on the ones that run off one or two AAA batteries.

They’re still relatively lightweight, and AAA is a common size for us. I have plenty of chargers, and rechargeable and disposable batteries for them, to include some that stay in my truck with a mini solar window charger. That means I can afford more batteries and I have more options for battery sources, so I can keep them fed longer than if I relied on a less-common or specialty battery.

There’s also less aggravation involved when a battery gets replaced, and then a light immediately dies a hero’s death (or an inglorious one; we’re a family of klutzes).

For people who prepare for the worst, how much money and what percentage of a supply is invested in any given risk is something to consider. After all, our plans should always include a visit by Uncle Murphy.

Shopping Consideration: Light & Switch Array

I prefer the kind where the light options are one-click selectable instead of progressive click types, but I’m learning to look down and shade them with a palm before I touch them.

combine_images-cap-light

Some clip-on cap lights have progressive-click single-button controls that require running through various light intensities, colors and-or flashing sequences to turn them off. Some are available with one-click select-able settings.

Why is this a factor?

Because it’s rude to blind people, horses, and dogs whose vision has adjusted, especially if you love them. Sometimes it’s only as annoying as living with somebody who doesn’t close cabinets or drawers, but sometimes it’s really a bad time to have your rods and cones flip-flop and your pupils tighten to a pinpoint.

Being able to just automatically go from a low light to “off” also has advantages at bedtime.

Some of us are sensitive to sudden light increases, even when we’re aware it’s coming. Closed eyes are not always barrier enough. When we’re done reading and ready for bed, but have to progress through three colors or 3-5 intensities of light to turn a lamp off, we have a real potential to wake ourselves back up or disturb loved ones or partners. That’s bad enough on a camping trip or for a short-term outage. It’s the kind of thing that can become a constant bur under the saddle and lead to tempers and serious discontent in high-stress situations.

Hands-free flashlights are supposed to be making our lives easier, not harder. It’s not an insurmountable problem (hence, learning to hold a hand over the LEDs); it’s just something to be aware of when we buy. If we’re forgetful or only have one good paw, maybe we make sure to buy the selective-setting versions with a separate on-off switch, or that we buy ours with just one light setting. Lots of options.

Headlamp Pro-Cons by Style

As I said, I really like the flatter clip-on styles over the caving/miner style of headlamp.

They fit in back pockets of jeans and coat pockets very easily and without snagging everything else in there in winter. They’re light enough to clip to my stove hood and to lampshades during outages, to a branch or fence wire while grilling, or to a pack strap sitting at a campsite, and to clip to my shirt or coat collar if I’m wearing a ski cap or bandana instead of a hat.

brand-new-water-resistant-headlamp-light-120-lumens-clip-on-cap-hat-light-headlight-hike-camping

There are clip-on cap lights with single optics and that prop up or rotate for convenience. They lose some of the drawbacks of a miner style headlamp, but they can weigh just as much and drag a hat down – which is a real pain if you wear glasses.

I’m also a chick, and the miner’s strap types snag my hair. That then gets in my way until I stop and re-band it. This is annoying when my hands are wrist-deep in raw meat, starchy potatoes, or garden soil.

When I’m wearing them without a hat, they rub my forehead uncomfortably. They’re a little bit heavier and a little bit bulkier, and you have to adjust multiple straps. They also give me one more length of strap to be snagging on things. Those annoyances add up when you’re already uncomfortable.

However, they, too, have their advantages.

cap-light-some-powerful-but-headlamps-usually-stronger

There are some powerful cap lights available, but for the same price, there is usually a caver/miner style headlamp that penetrates further or illuminates a wider area.

I can find more powerful lights that penetrate deeper into space without extreme costs in the miner’s/caving style of headlamp. It’s kind of their wheelhouse, after all. I can think of a lot of situations where that added distance has a real advantage.

As with the clip-ons, I can find versions with variable light distance and area coverage, and with the miner’s style, I can sometimes find them Maglite style, where twisting a ring lets me condense to a narrow point or open up to a wider area. That’s pretty convenient sometimes, and the rings tend to hold up well to years of use.

I tend to find the caver’s and miner’s style sturdier and more resistant to boots and bouncing down stairs than the clip on’s, even when they’re a lower-grade camping model.

We call them “nighttime collars” for the pups because we sling them on before we turn the pack loose in low-light situations.

With a handy clothespin or a wire clothes hanger, they can be used in just as many places around the house as the cap lights. The strap has periodically gotten looped around my neck or arm, I can hook them around pack straps to keep track of those while setting up camp (and of the nephews and BSA kiddos in front of me when we’re running late into a site), and I can hang them on my rear-view mirror easily instead of clipping a light to the sun visor.

Which is better? It’s really just a matter of preference, and sometimes preference changes just by use. I have both, just like I own both firearms and airguns.

headlamp-hands-free-moves-with-your-eyes

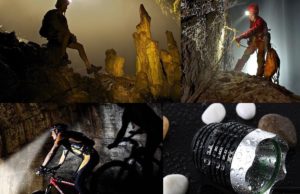
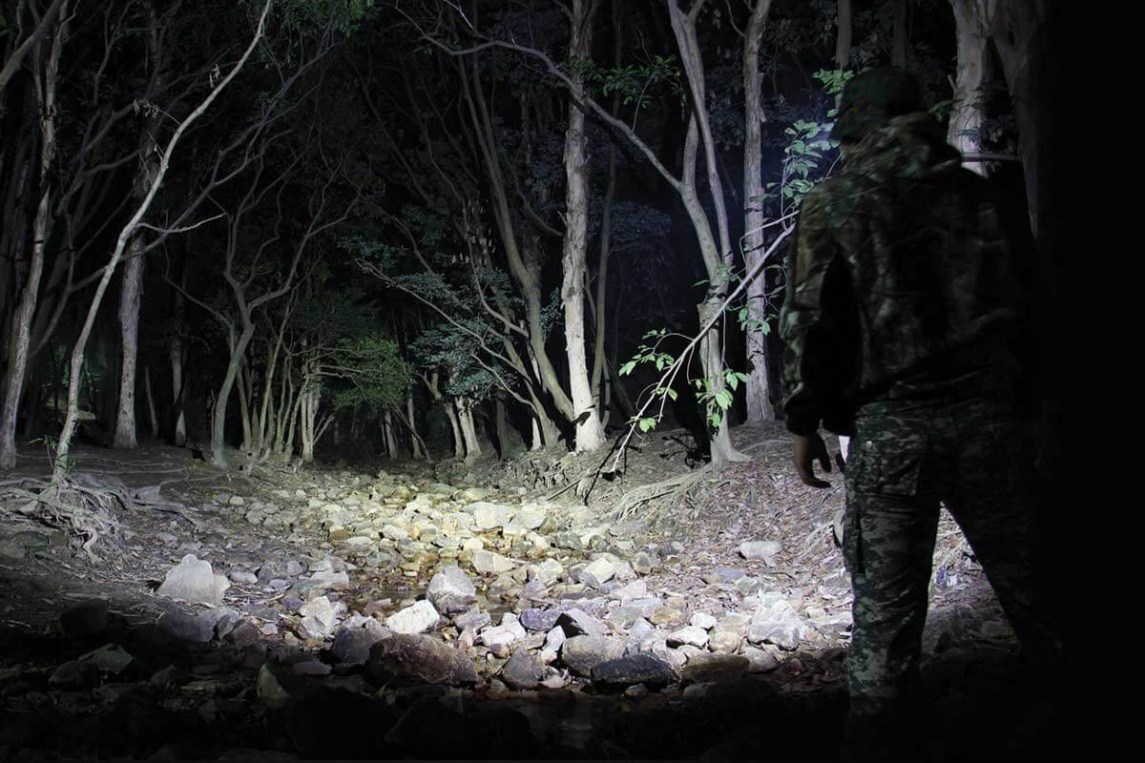
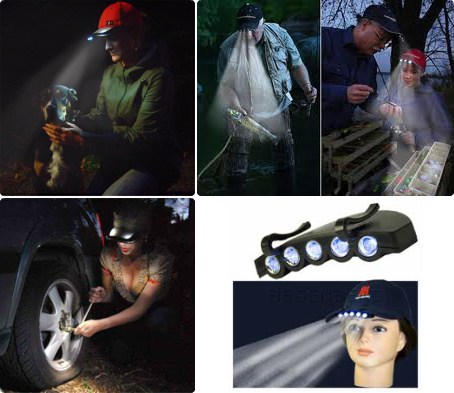
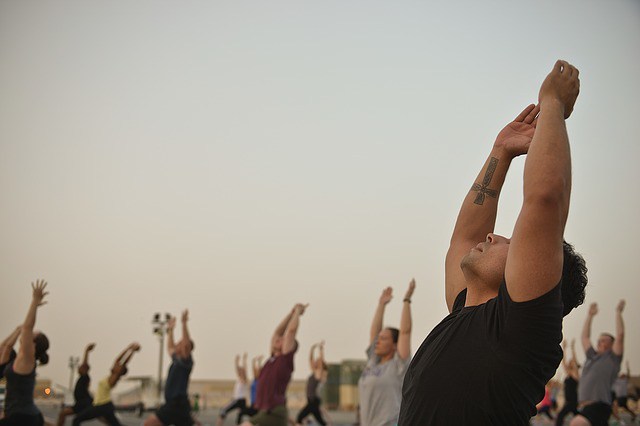
Image/Images: There are a lot of times when it’s not just nice to have a light follow our eyes without holding it in our hands – it greatly effects our efficiency and speed.

Hands-Free Lights – A Must-Have? Really?

Yeah. Because it’s dark out there. Most of us never truly know how dark it can be, even when we’re rural dwellers and backpackers, because there’s so much ambient light in most of North America. One of the big adjustments for non-camping suburban and city folks is just how dark a rural area can be – even with its household lights from electronics and appliances.

Long-term outages and a grid-down situation will change that, and potentially remove most or all of those constant glows from our lives. So light sources belong on any must-have list.

Especially in the dark, it’s really nice to have a light while working with my hands. Yes, there are all kinds of lanterns. I have quite the variety. Lamps and lanterns have to be carried around. That takes a hand, or requires fetching them. Other light sources are fixed and I have to move to them with tasks. That’s limiting my efficiency one way or another.

cooking-hands-free

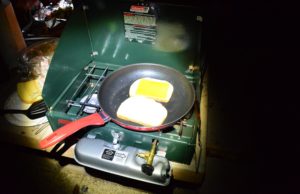
Cooking is one of those times when a lamp doesn’t always cut it and it’s nice to have the light turn with our heads.

When I’m sitting somewhere reading, playing cards, or cleaning a tool, a lantern works great.

When I’m moving around cleaning, cooking, filing animal nails and feet, going from the back to the front of my truck and somebody else’s vehicle miracling one of them to life, or doing chores in darkness, it’s really nice to have a light that moves with me and leaves me with both hands free.

When I’m walking the dogs, hauling game to a vehicle or home, or chipping/brushing/shoveling our vehicles free from winter’s grasp, a light that follows me around without adding much bulk, weight, or effort on my part is definitely worth the price of somebody’s fancy coffee or Big Mac meal.

Since headlamps are so affordable, and since they have the potential to increase my efficiency so much over having to cart a lamp or lantern around with me, since they take up so little room in storage for their backups and backup power sources, and since those power sources and chargers cross with so many other devices … for me, hands-free flashlights are absolutely a must-have item.

In bulk, if I’m a bartering type, because they’re just that useful in an outage and off-grid environments of all kinds.


Other self-sufficiency and preparedness solutions recommended for you:

Healthy Soil + Healthy Plants = Healthy You

The vital self-sufficiency lessons our great grand-fathers left us

Knowledge to survive any medical crisis situation

Liberal’s hidden agenda: more than just your guns

Build yourself the only unlimited water source you’ll ever need

4 Important Forgotten Skills used by our Ancestors that can help you in any crisis

Secure your privacy in just 10 simple steps

When I say “hands-free light” I mean a miner/caver style headlamp or a clip-on cap light. I don’t mean a lantern or any equivalent. Lamps and lanterns have their place,

There are many great reasons to start down the road of being prepared to take care of yourself in an emergency or crisis. When you feel that is something you need to do personally, it usually begins a search on what you need to be prepared. This searching can lead to checklists of prepping supplies which can provide guidance or a place to start but in reality; the process is different for each person. The answer to the question of what you need to do in order to get prepared isn’t something that anyone else can answer for you and in the end, is almost wholly dependent on what happens and where you are when “it” happens to you.

I have often sat down and compiled lists of things I need to accomplish in the main areas I focus on with prepping. My very first list had dozens of items and now, since I have been prepping for a little over 8 years, my lists aren’t quite as expansive. I have been acquiring the needed supplies and making preparations so that I don’t need as much as I thought I needed in the beginning. One thing I have learned though is my list overall still contains the exact items I thought I would need back in 2007, just the quantities of what is left to do have gone down.


The concept of making lists again made me think of the question I have asked before of myself. Are you prepared enough for what you think is coming down the road? Have I made the best plans you could have made knowing what I know? Have I made the right fiscal decisions to put me in the most advantageous position should the economy collapse? Have I shared enough information with my family and in my own small way, the rest of the world? Have I done enough? Am I prepared?

Are you prepared enough?

How much preparation can anyone do that we could consider the level of those same preparations to be sufficient? I have stated before that prepping is a journey, not a destination and I still subscribe to that theory, but depending on the situation; I could have more than I needed. What if there was a regional storm that caused minor flooding in my town and the utilities were out as well as roads for a month. Would I have enough supplies to last? Yes, I certainly would.

What if there was a crisis that lasted two years? Would I have enough?

Getting back to how much you need, it all comes down to what the emergency is, what your situation is at the time and how other influences impact you after the crisis begins. You could have enough food to last you for a year, but add in 6 family members who you take in and that amount of time could go down to 2 months. You might not have enough in your eyes, but the hungry family might think you are prepared enough. What if you have 2 years’ worth of food stored safely in your basement but you are away on vacation and a tornado rips right through your town and sucks everything you have been working on up into the air?

We can make as many plans as we want but if something happens outside of our plans we will have to adjust. Thinking that you have the answers to all of the different scenarios posed in your head is well and good, but you should account for contingencies. More importantly, you have to face the reality that you might walk into TEOTWAWKI with nothing but the shirt on your back.

You are asking yourself the wrong question

You can inventory all of your prepping supplies and make lists; I do it too. I use these lists to gauge what I have left to accomplish in my mind. I check items off so that my imaginary supply room of everything I need, will be filled with precisely what I think will be the minimum necessary but I try not to ever think I have enough. Does this mean I am stocking supplies up as much as possible? Does this mean I keep buying ammo or food or weapons until I have no money left? No and I think if you are looking to reach some level where you can say, “I think I have enough to last…” you might be looking at this the wrong way.

There is a danger in thinking that there is ultimate security in your supplies. Why do I say that? For one thing, your supplies can be taken away from you. Your supplies will eventually go bad if left unused or in the right conditions. Your supplies, if you have to rely on them will eventually dissipate down to nothing. Having a 6-month supply of food or a few thousand rounds of ammo and some gasoline stored doesn’t mean I am any better prepared than the neighbor down the street when the time comes. It does certainly mean I have put some thought into this that the average bear might not have considered, but does that make me better prepared?

When my family asks me questions like, how much food do I have or basically, how long could we live on what we have stored, I have to guess. Sure, I know roughly how much food is stored and I have calculated how long we could eat on that food but I don’t consider myself prepared really. I am looking at this as a stop-gap measure. Could my preparations buy me and my family some time? Yes, very possibly we could be sitting pretty while others go hungry, at least for some time. Does that mean I am prepared enough? Not hardly.

Prepping isn’t about storing up supplies and quietly riding out Armageddon from the comfort of your easy chair, happily eating your MRE’s and enjoying reruns of the office on your Solar Powered DVD player. The steps you are taking today might not be enough for the disaster you face. Are they better than nothing? Absolutely, but don’t become complacent and cross the last item off your list and sit back and wait. Prepping should be constant movement, preparation, consideration of your environment and the world around us and you have to reevaluate what is happening all of the time. We shouldn’t think we know what is coming, even though we can prepare for certain scenarios.

When you start asking yourself the question of are you prepared enough, the answer is it really depends on what you are forced to go through. Looking back after you have made it through alive is the only way to answer that question. Making it through alive should be what we are striving for.


Other self-sufficiency and preparedness solutions recommended for you:

Healthy Soil + Healthy Plants = Healthy You

The vital self-sufficiency lessons our great grand-fathers left us

Knowledge to survive any medical crisis situation

Liberal’s hidden agenda: more than just your guns

Build yourself the only unlimited water source you’ll ever need

4 Important Forgotten Skills used by our Ancestors that can help you in any crisis

Secure your privacy in just 10 simple steps

There are many great reasons to start down the road of being prepared to take care of yourself in an emergency or crisis. When you feel that is something you

When SHTF, you better be in shape and your fitness level now is probably not as great as you will wish it was in a survival situation. In emergencies, our bodies are going to be called into action that a lot of us aren’t used to, there will be more stress, less rest and more muscle strength required. Even if you are physically active now, the routine chores that you could find yourself doing will tax your muscles and stamina in a way that in the best case scenario will take some getting used to.

When finding food isn’t achieved by walking to the fridge or pulling around to the drive-thru and cleaning up involves a lot more than jumping in the shower, your body will need to adjust. That doesn’t even get into the possibilities of running for your life or defending yourself from violence. Now is the time to make sure that your survival fitness levels are as good as they can be.

Here is what every single survivalist should know about getting fit and staying strong before the apocalypse strikes.

Strength

You don’t need a fancy weight room or home gym to get stronger. You can improve your strength with nothing more than the items that you already have at home. Filling socks with grains or rice can make for weights. Cans of soup work just as well, too. Chopping wood also builds up your strength.


Even your bug out bag, which should have supplies like clothing, food, water and other necessary items like sunglasses and replaceable lenses, weapons and electronics, can come in handy for a home workout to improve your strength. Strap it on — don’t take anything out — and do your workout. This way you’re even more prepared for TEOTWAWKI since you’re training with your full pack.

Home workouts are just fine. But if you’re searching for something more intense, other workouts, like CrossFit, can challenge all of your muscle groups. In addition to challenging you physically, the group fitness program also challenges you mentally. Find a CrossFit box to join in your community and get fit with a like-minded community of fitness fanatics.

Stamina

You’re going to be counting on your endurance in any survival situation, and that goes for surviving the end of the world, too. Stamina gives you the necessary power to boost you through any physical activity at your peak. Stamina depends on a healthy, lean diet, regular fitness and an overall healthy lifestyle.

Aerobic activities that work all of your muscles and get your heart pumping, like running or riding a bike, can help boost your endurance and should be done regularly. The American College of Sports Medicine reports that weight training also benefits stamina. Sleep is also crucial to building up your endurance.

Flexibility

Yoga isn’t just for green-juice-drinking hippies. It can make you stronger and more flexible. And believe it or not, these things can help you survive the world’s end. Yoga can help you develop a strong core, which gives you more power and control over your body, and it also improves your balance. If your body is flexible, you are going to be less likely to suffer from a pulled muscle when you’re out in the field. Yoga can even make you more agile.

men-1179452_640

You don’t even have to leave your house to learn yoga, you just need an Internet connection. Man Flow Yoga has online classes that are structured just for men.

Speed

You’ve got to be able to outrun the enemy. And newsflash, you’re not going to be able to do that if you’re sitting idle on the couch. You need to start running. Do something that works for you. If you’re comfortable running for 30 minutes at a consistent pace, it’s time to do something that makes you faster. Add more mileage to your runs, but remember that you still need to take days off from your training.


Other self-sufficiency and preparedness solutions recommended for you:

Healthy Soil + Healthy Plants = Healthy You

The vital self-sufficiency lessons our great grand-fathers left us

Knowledge to survive any medical crisis situation

Liberal’s hidden agenda: more than just your guns

Build yourself the only unlimited water source you’ll ever need

4 Important Forgotten Skills used by our Ancestors that can help you in any crisis

Secure your privacy in just 10 simple steps

When SHTF, you better be in shape and your fitness level now is probably not as great as you will wish it was in a survival situation. In emergencies, our

I was inspired to write this post while watching my favorite TV show, the Walking Dead. My wife and I only watch one TV show and this one, while I know it doesn’t appeal to everyone, is great in my opinion. It isn’t that I believe that flesh eating zombies are in our future, but the writing is creative and the scenarios the characters face are exactly the same (minus the walking dead) as any apocalyptic vision you can imagine. Take out the zombies and imagine a world after an economic collapse or pandemic and you would have similar problems as the characters in this show I think.

I got the idea to write about makeshift grills from a recent episode. All cooking that happens in the Walking Dead is usually done over an open flame. If we have TEOTWAWKI we will all need to be more resourceful. Even if the whole world isn’t thrown for a SHTF loop, natural disasters like the 2011 Fukushima Tsunami victims pictured above demonstrate the need to improvise from time to time. Below are a series of photographs that I found illustrating several creative methods for cooking without the benefit of a stove top range or what we all might be faced with at some point and find ourselves cooking when the grid goes down.

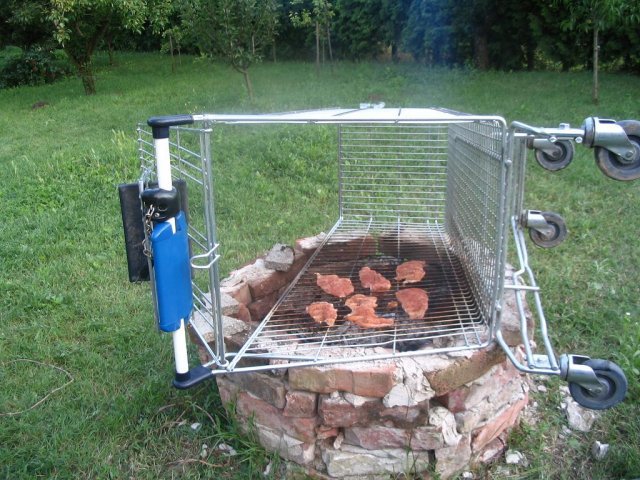
One of my favorite ways to see a shopping cart used.

A lot of these images share common traits and those are a source of heat which is usually wood or charcoal, a fire containment device to hold the combustibles and a grilling surface. You can see the resourceful use of the shopping cart in this case.

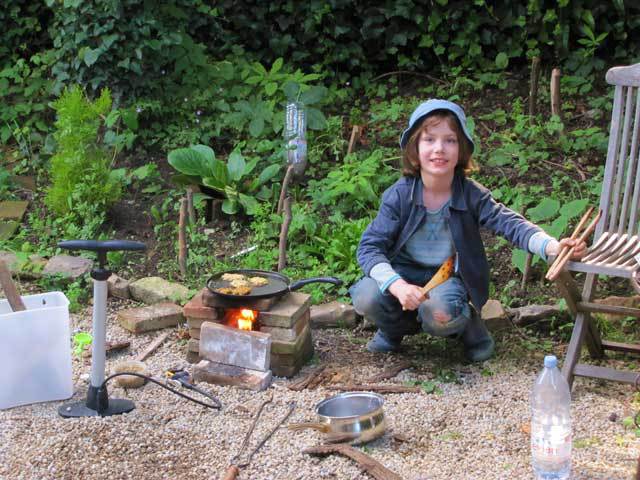
Simple bricks perform double duty as fire containment and rest for the pan.

If you have a cooking pan like a cast iron grill, you can forgo the shopping cart and simply use bricks to rest your pan on.

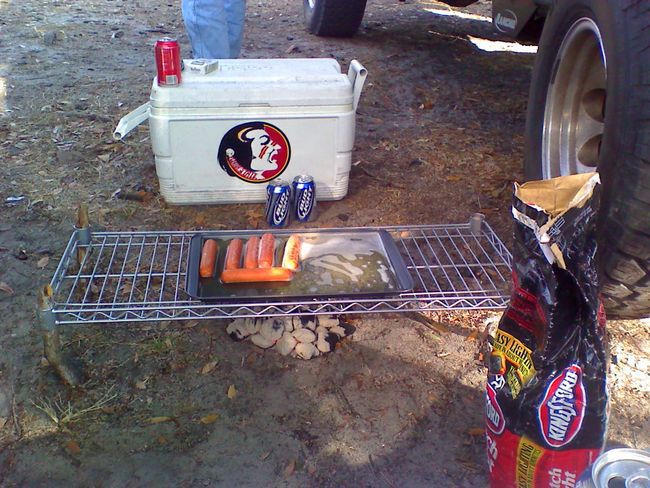
Surplus shelving also works in a pinch.

There are lots of options for a grilling surface and you can see what looks like a simple cookie sheet in this photo that is suspended over stainless steel shelving. Another resourceful use of materials and you can see the grill has been placed on sticks. Yet another great use for that survival knife. The cooler of beer is a welcome plus too if you have it and makes those beer brats taste even better.

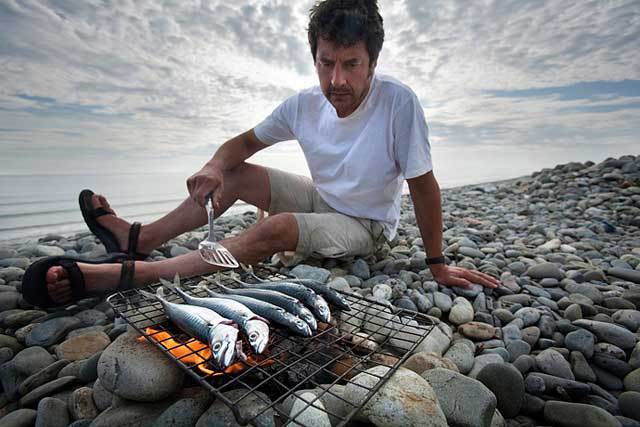
Who needs bricks when you have rocks?

Need to grill that fresh fish you caught but you don’t have a frying pan or bricks? No worries! This man has grabbed what looks like a grill screen and placed it over some rocks that are surrounding his fire. The spatula is a plus but a knife or even a good stick works in a pinch.

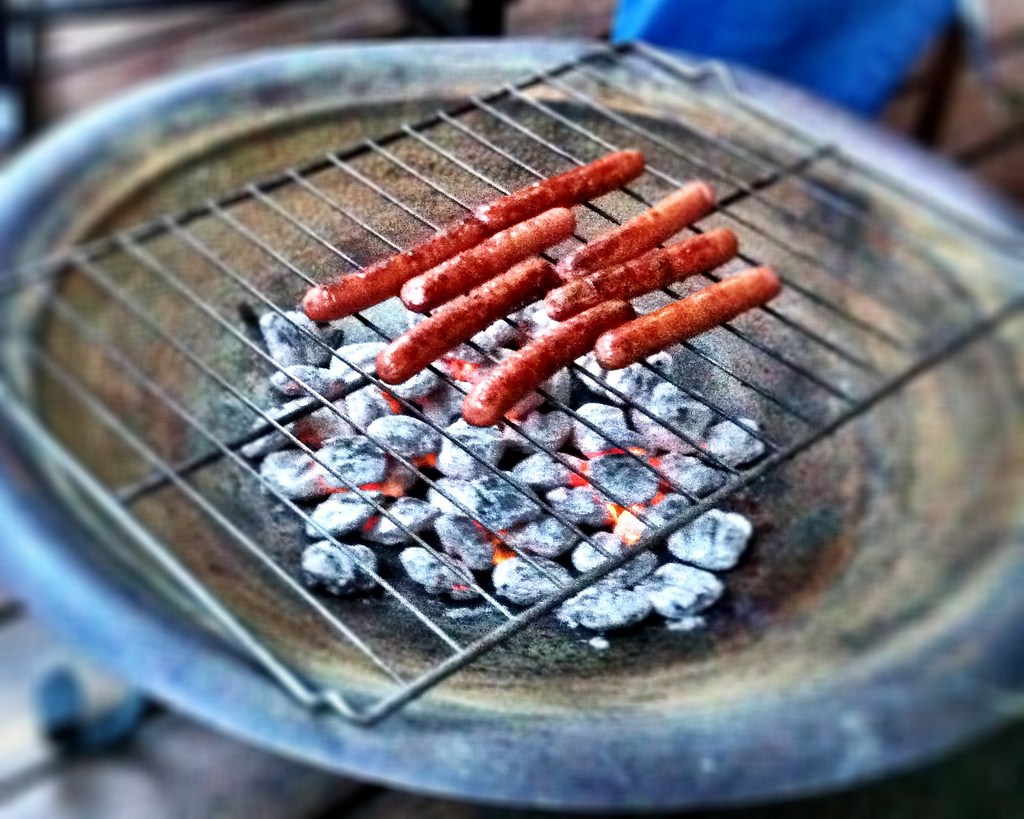
Convert that seldom used fire-pit to Grill master.

Many of us have one of those fire pits that we purchase with the idea of sitting on the back porch with a fire blazing away as we all gather around with marshmallows or our favorite adult beverage. Yes, I have one but I can probably count on one hand the number of times we have actually used this in the last two years. At any rate, if I needed to, this makes a great grilling surface as well. You can use charcoal or I would probably use wood, throw that oven grate over the top and start cooking your hot dogs. Adult beverages optional.

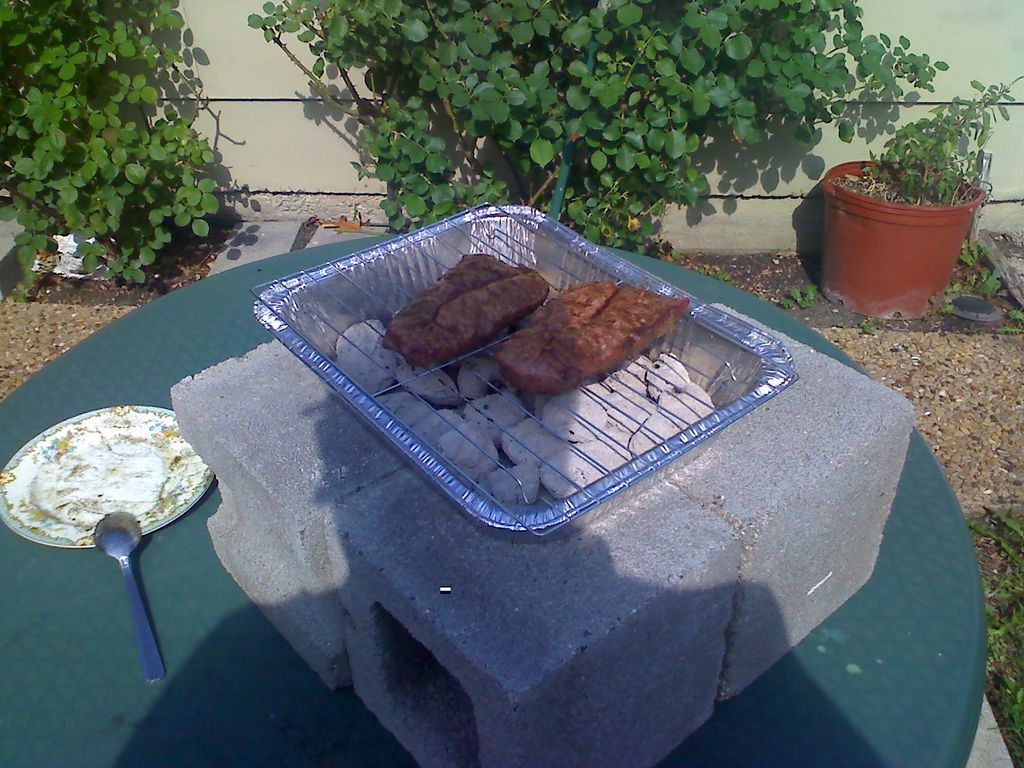
Don’t have a grill? Use aluminum baking pans instead.

You can also use those disposable aluminum baking pans to keep your charcoals in. I don’t know how many uses you could get out of this method and you would want to ensure the bottom is well insulated (nice use of cinder blocks here) but the concept is the same.

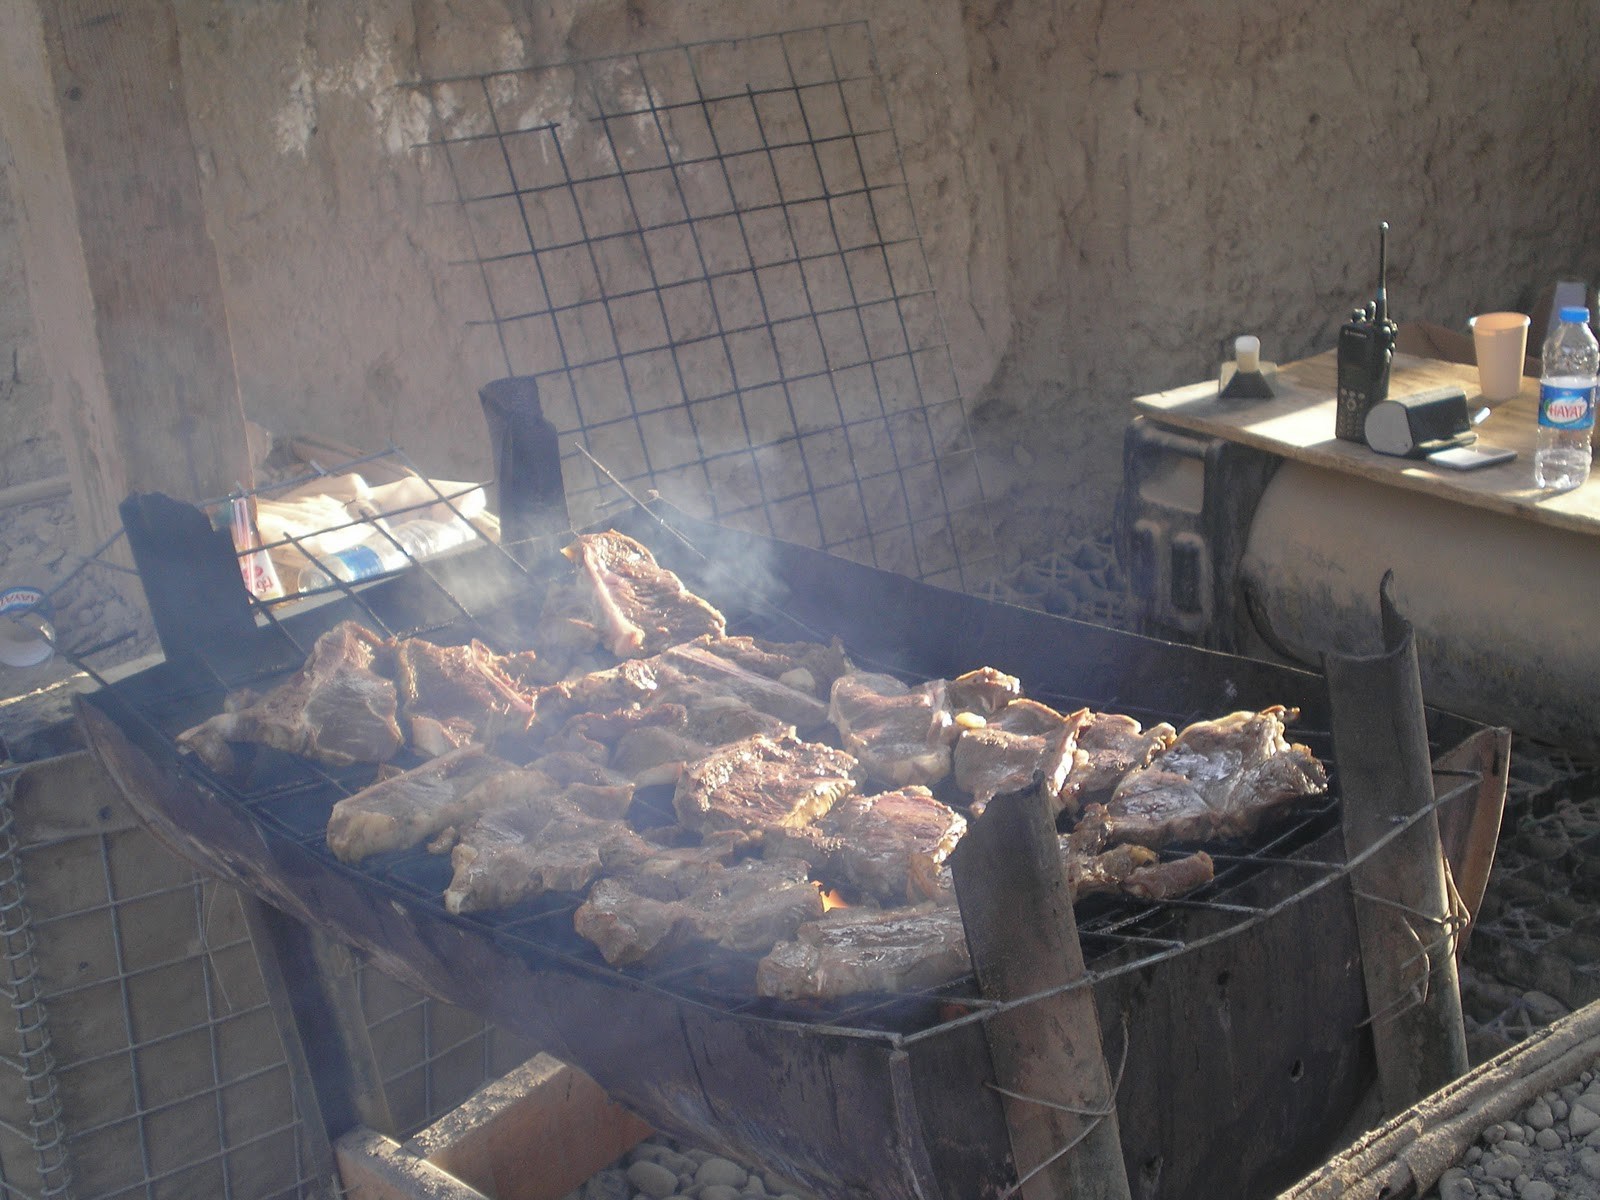
50 gallon drum slow cooker.

This person probably had a little more time to set up their grill, but with the right equipment (cutting torch or a lot of time with a hacksaw) you could convert those old 50 gallon barrels you have lying around your yard into a perfect grill. Grab some of that unused fencing from the garden and you are all set to cook up those steaks that will go bad now that the power is out.

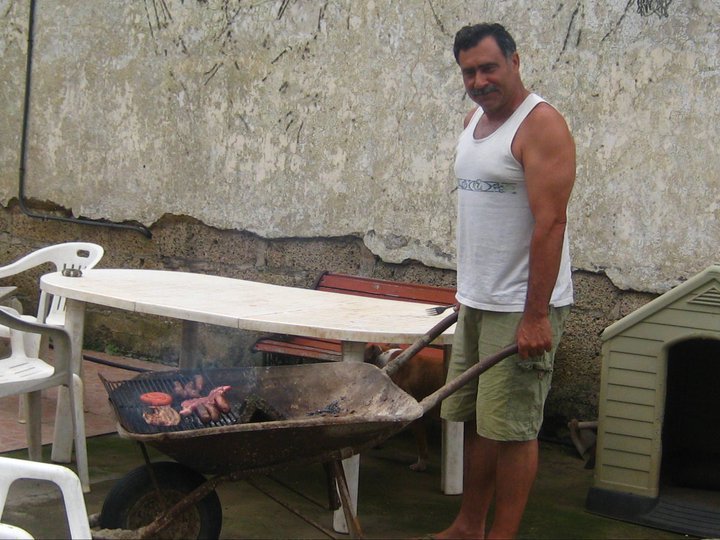
Forget a grill, we have a wheel-barrel.

This guy looks like he knows how to party! And he is creative too. Now if you don’t like where your grill is positioned (like maybe too close to the dog house), you can simply move it. What a great use of his wheel-barrel to contain the fire and hold the grill surface too. Bonus is that he can roll the ashes over to the garden when he is finished!

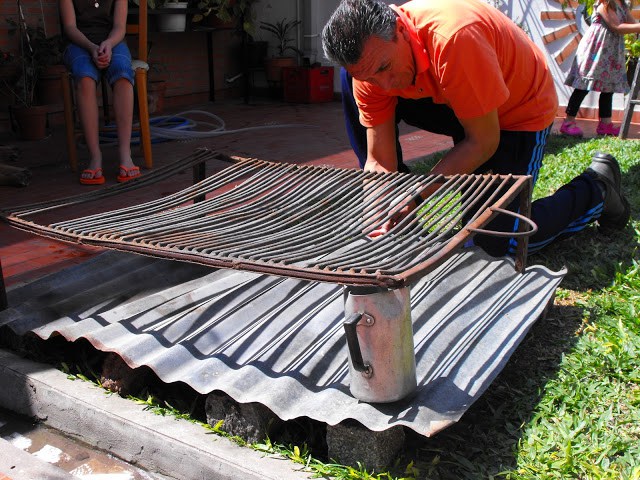
Creative support options.

This guy isn’t going to let one missing leg get in the way of his having some good eating and when he is done, the coffee water will be ready for a nice hot cup! Notice the metal sheeting used to place the coals or wood on as opposed to having them directly on the ground. I believe he is soaking the ground with water first.

So, do you have any creative makeshift grill ideas that you have used before?


Other self-sufficiency and preparedness solutions recommended for you:

Healthy Soil + Healthy Plants = Healthy You

The vital self-sufficiency lessons our great grand-fathers left us

Knowledge to survive any medical crisis situation

Liberal’s hidden agenda: more than just your guns

Build yourself the only unlimited water source you’ll ever need

4 Important Forgotten Skills used by our Ancestors that can help you in any crisis

Secure your privacy in just 10 simple steps

I was inspired to write this post while watching my favorite TV show, the Walking Dead. My wife and I only watch one TV show and this one, while I

For many preppers, a firearm is a must-have item for dealing with the aftermath of a potential SHTF or grid-down event. Firearms in the hands of properly trained individuals can prevent as well as cause death, so their use and acquisition isn’t something to be taken lightly. We routinely talk about firearms under the security category when I am mentioning the 4 things you should focus on when you are prepping, but simply having a weapon isn’t the end. You can check the box on having a firearm in your SHTF arsenal, but to be better prepared, you should look at what else needs to be planned for with that firearm to ensure that tool doesn’t become an expensive paperweight shortly after you need it.

Don’t get me wrong; just the fact that you have a firearm and a box of ammo is an advantage should you be called on to protect or defend your life, but history has shown us in order to be more fully prepared, there are other considerations that you need to account for and these topics are what I wanted to bring up today on the Prepper Journal. What are all of the other things you need to consider for your safety and protection that you may need to maintain that firearm and conversely your ability to protect yourself if the grid goes down?

Why do you need weapons if the grid goes down?

Before we get into the SHTF weapons checklist, I wanted to briefly paint a picture for you. Some disaster has happened and society is in chaos. Let’s take the example of an economic collapse which as I discussed the other day is a real and tangible threat our country faces. When millions (more) are out of work, services are cut and there are shortages on food, gasoline, power and protective services of police, people will get angry. Once they are angry, people will get desperate and once people get desperate, you better watch out.

A firearm is only a tool, but it is a tool designed to inflict mortal damage on your opponent. In the case of a desperate individual breaking into your home, would you rather have a firearm or harsh language? For me personally, I want firearms to be a tool my family has at our disposal in a case just like this. Above all things, I hope I never am forced to use a firearm in defense of my life or the lives of anyone in my care, but the pragmatist in me doesn’t believe for a second that people are always good deep down. I know people can be evil and act in ways that are dangerous. To believe anything else is foolish I believe so I prepare for evil and dangerous people while hoping I will never see that.

What are the best weapons for SHTF?

So if you are still hanging with me by now and don’t already have a firearm, you might be asking what are the best weapons to have on you in a STFT scenario. This question can be answered many different ways and I have actually written on this subject before. If I am looking holistically at an array of weapons you need for many different STHF scenarios, I would make similar recommendations as in our Top 5 Firearms You Need To Get Your Hands On Now, but this is an ideal scenario, not just what is necessary.

I have also recommended a shotgun as the best weapon for home defense under the assumption that if you only had time/money to purchase one weapon, what would that be. For a SHTF scenario, I think I have changed my mind somewhat on the best single weapon to a pistol. I read a post from FerFal who has his own blog. Ferfal lived through the Argentinian economic crisis and he makes a compelling case for the pistol as the best weapon for SHTF and I tend to agree with him. The main reason is that a pistol over any rifle or shotgun is highly concealable. Even if there is an economic collapse, life won’t immediately turn into Mad Max so as FerFal rightly proposes, you will still have to function in society for some time before you can whip out your camo outfit and go running down the streets geared up for battle.

The right pistol can be used for home defense easily and as I mentioned above, you can take it outside with you concealed so you can also have protection away from your home. I do still think that ideally you would have more weapon options, but a pistol would seem to be a priority for living in the immediate aftermath of any SHTF fallout.

What else do you need for SHTF?

OK, so for the rest of this article we are going to assume you have procured a SHTF weapon of some form, likely a pistol but what else would you need? A firearm is just a tool like I said and that tool needs several things to function ideally in bad situations for a long time. When we are talking about SHTF, you aren’t getting much worse than that and we will also assume a trip to Walmart or your local Sporting Goods store is out of the question.

Do you have supplies to keep your firearms clean after SHTF?

Ammo – Any weapon you have is going to need ammo and many people have asked me how much ammo do you need. Each person has to answer this question for themselves. I know some preppers who will say you can never have too much ammo. These people plan to not only never worry about running out, but logically state that ammo will be more valuable than precious metals after a collapse. Selco, who runs SHTFSchool.com and who lived through the Bosnian War where his city was under siege for years wrote that he personally gave all his gold for ammunition. Now, he says he keeps 2000 rounds per weapon. Your mileage may vary but consider how much ammo you need if you can never go to the store again. How much do you think you would need for one week? For one month? For one year? Purchase Hollow-points for damage and ball for practice.

Cleaning supplies – Sometimes we overlook how many weapon cleaning supplies you might need. Imagine the worst scenario. Do you have enough cleaning supplies for your weapons to last? Do you have a portable weapon cleaning kit? Do you have all of the right brushes for your various bore sizes? Do you have spare oil and cleaning solvent?

Magazines – Most new pistols will come with one or two magazines, but what if you lose one? What if during the chaos of a firefight, home invasion or attempted car-jacking you have to change magazines and in the panic, leave one on the ground that you aren’t able to find? Do you have spares to replace what could be lost? What about your AR-15? Do you have enough magazines for a load out and spares to replace those if you have to ditch your gear for some reason?

Holsters – This is one thing I think most people overlook and that is a good holster for your pistol. Sticking this down your pants isn’t the ideal way to carry concealed so a good holster is really important to have if you plan on carrying that firearm around with you. I would opt for a good concealed holster first and then get your go to war holster if you need one after that. Most people will only ever need a good concealable holster.

Spare parts – Things break all the time and you won’t be able to log on to Amazon.com to get 2-day free shipping in order to be resupplied after SHTF. You can now purchase spare parts for your weapons online easily so it may make sense to have spare parts on common items that may need replacing(if any) on your model of firearm . One of the reasons I like sticking to one weapons platform is that parts are interchangeable in many cases. I am partial to Glock so some of my magazines, all component parts and some barrels are interchangeable with different Glock weapons I own.

Training – Training is crucial because even if you have the best firearm in the world, pallets of ammunition and enough spare parts to last a lifetime, you still need to know how to use that weapon. Training at a minimum should enable you to safely use the weapon to hit what you are aiming at. You should be comfortable reloading ammunition, changing magazines, clearing jams or malfunctions and taking the weapon apart and putting it back together for cleanings. There are all forms of advanced tactical training courses out there too, but know the basics first.

I think that if you have a plan to keep a firearm for self-defense and you foresee a situation where you could be putting this weapon to use in a bad scenario, you should consider the checklist above. Do you have these bases covered? Did I miss anything?


Other self-sufficiency and preparedness solutions recommended for you:

Healthy Soil + Healthy Plants = Healthy You

The vital self-sufficiency lessons our great grand-fathers left us

Knowledge to survive any medical crisis situation

Liberal’s hidden agenda: more than just your guns

Build yourself the only unlimited water source you’ll ever need

4 Important Forgotten Skills used by our Ancestors that can help you in any crisis

Secure your privacy in just 10 simple steps

For many preppers, a firearm is a must-have item for dealing with the aftermath of a potential SHTF or grid-down event. Firearms in the hands of properly trained individuals can

In the case of a SHTF event, we could live without internet, cars and gadgets. We could survive without electricity, air conditioning, heating systems and hot water. But we couldn’t make it without enough food supplies. Canned tuna, frozen beans and boiled potatoes can only last so far. All these supplies are bound to end sooner or later, leaving us exposed to starvation. So how can preppers improve on this aspect and ensure their food supply doesn’t run out after three days? The answer is raising livestock. Our ancestors didn’t have supermarkets, had never heard about take-away, fast-food, processed food or preservatives. In this respect, we have a great deal of things to learn from them.

Related: Healthy Soil + Healthy Plants = Healthy You

Their survival depended on livestock, fruits, vegetables, plants and seeds. Nowadays you can learn about all of these by getting an agriculture degree. But back then, knowledge was passed down from generation to generation and people had to learn from trial and error rather than from a YouTube tutorial. If you want to make sure you are truly ready for anything read all about the livestock you should raise and why. It’s never too late to start researching livestock and becoming an expert in the field. Who knows, if you start right now, you might be taking the first step in keeping your family alive when disaster strikes.

Chickens

If we would have to advise you what livestock you should raise and why, based on rate of growth criteria, chicken would win by far. They manage to double their number with every year and they don’t require a complicated set up or high maintenance. They are great because they yield plentiful supplies of meat and eggs in relation to how much food they require. For example, a hen could supply you with 10 to 12 eggs for each five pounds of food.

Related: The Many Benefits of Raising Chickens

Another great benefit of raising chicken is that the birds are not picky about what they eat. They will happily peck on anything that they can find, from insects and weeds to leftovers from your dinner. The only drawback with this is that they can easily damage your garden, so you might want to fence them in to keep that from happening.

raisingchickens

Another pro for raising chicken is that they don’t need a lot of space or sturdy fences. However, you should keep in mind that these fowls will learn how to fly, so you might want to build a six-foot fence or add a top to their pen. You should also watch out for predators: foxes, owls, rats and opossums will all try to take a swing at your chicken if they’re not protected enough.

Pigs

Also dubbed the best garbage disposers, pigs will munch anything you put in front of them: kitchen leftovers, greens, roots and grains, just to name a few. In exchange for these, in return, they will give you bacon, ham and plenty of meat. Not only unpretentious eaters, pigs don’t need too much room either, despite their great size. The best time to buy a piglet is in the spring in order to give it time to grow and develop to more than 220 pounds over the summer.

pigs

All the maintenance pigs require is feeding and watering two times a day as well as cleaning their pens every few days. Butchering a hog that weighs over 200 pounds is no easy task. But you’ll only be reaping the benefits. Almost every part of the pig is edible and ready to be turned into steaks, broths, aspic, bacon, ribs, sausages, pork loins and trotters. Even the skin is edible, although most people are reticent to eat it because pigs are not among the cleanest animals. Bear in mind that they might test your olfactory tolerance before you manage to fatten them up and transform them into pork chops.

Rabbits

Not only pretty faces, rabbits are clean, quiet and prolific. Ideal for small spaces, rabbits will thrive in modest sized cages and as long as their manure is cleaned out regularly, they will remain odor-free. These furry animals are extremely rewarding for the amount of care and food they require. Rabbits feed on hay, which should be cut in three-inch lengths and stacked into the hay-racks that must be kept full at all times. They will also eat dried bread or crusts and, as it may be expected, they enjoy nibbling on carrots and roots.

rabbits

A buck and two does will yield as much as 50 rabbits per year, which translates into roughly 170 pounds of meat. Not too shabby for the effort you have to put in every day. Rabbits can be consumed as soon as they are seven or eight months old, but you can wait and make a more consistent stew from a three-year old buck. While they can withstand harsh cold weather, they are not big fans of wet or hot conditions. Keep in mind that they will need a cool place in the summer that has plenty of ventilation and fresh water supplies.

Sheep

Docile and quiet, sheep thrive on grassland, which is a huge selling point. They don’t require high maintenance and offer excellent products in return: meat, milk (which can be made into cheese), skin, wool and manure. Because they are amazing grazers, they are very economical. An acre of pasture can feed as much as four animals, without including the lambs. An adult ewe will be able to yield as much as 100 pounds of meat and 7 to 9 pounds of wool.

raisingsheetp

Care-taking is kept to a minimum, but you might want to prepare yourself for yearly shearing. Ewes might also need assistance in delivering their lambs and in making sure they are looked after. You should also keep an eye on the lambs which are extremely vulnerable in the first weeks and stand for an easy prey for natural predators. Easy to feed and look after, odourless and calm, sheep are definitely a top choice when it comes to livestock you should raise.


Other self-sufficiency and preparedness solutions recommended for you:

Healthy Soil + Healthy Plants = Healthy You

The vital self-sufficiency lessons our great grand-fathers left us

Knowledge to survive any medical crisis situation

Liberal’s hidden agenda: more than just your guns

Build yourself the only unlimited water source you’ll ever need

4 Important Forgotten Skills used by our Ancestors that can help you in any crisis

Secure your privacy in just 10 simple steps

In the case of a SHTF event, we could live without internet, cars and gadgets. We could survive without electricity, air conditioning, heating systems and hot water. But we couldn’t

A perennial problem faced by suburban and rural dwellers is obtaining water in the absence of utility provided electric power. Standby generators require fuel of some type, which will eventually run out, and deep drilled wells are poorly suited for use with hand pumps of most types.

As a prepper, this has always been a concern for me as I live in a rural setting, but in a house constructed with the modern “central-everything” design concepts. I do have a gasoline-powered generator, and maintain supplies enough for a few weeks of continuous running. After that, it’s carrying buckets to the stream.

This has led to my experimenting with some alternatives for my survival homestead, and based upon my current deployment I may just go off-grid for water completely. Most of the components I had lying around with the exception of the pump, and the batteries: those items set me back around $450.

Read more: The vital self-sufficiency lessons our great grand-fathers left us

The basics of my survival homestead:

  • Frame house with a huge, unfinished second story, currently just storage.
  • Drilled well: 270 finished depth, water table at approximately 50 feet down
  • Standard 220 VAC submerged pump at 100 feet depth
  • The usual captive air pressure tank with associated plumbing and pump pressure relay

So the conundrum is: how to extract perfectly clean water from this well at minimum cost, and without completely changing the plumbing. (I may want to sell and move further out, so any new owner will probably want things as standard as possible)

What I have come up with to date, experimental at this point is a solar/battery-powered pump that stores water in an elevated container, allowing gravity to supply the pressure. Keep in mind though: water is heavy! Be sure to reinforce your structure as needed! I’d consider this a relatively high level overview as opposed to a design doc, so tailor as needed for your own situation.

Stuff.

  • A 12/24 VDC submersible pump with 230 foot lift:
  • 100 feet of 1/2 “ pex tubing
  • Renogy 100 Watts 12 Volts Monocrystalline Solar Starter Kit (Amazon. Harbor Freight, etc)
  • 2 – 12VDC marine deep cycle batteries, connected in parallel
  • A second pitless adapter installed on the well casing
  • 2 – ½” Pex to brass adapter sized for the pitless adapter being used, (1/2 <> 1” in my case)
  • Pitless adapter top plug
  • A second strain relief for the well cap wiring pass through.
  • SharkBite check valve ½”
  • SharkBite Tee for ½” PEX
  • A used but good queen water-bed mattress (for experimenting only! Gets brittle when cold)
  • I will probably use plastic 55 gal drums for anything permanent.
  • 100 feet #8, 2 conductor, jacketed, direct burial stranded wire
  • 2 – reducing adapters – ½” pex > 1” brass
  • Zurn pressure reducer (had on hand – Zurn 1-NR3DU Wilkins 1-Inch Pressure Reducer Valve 15-75-75PSI)
  • 2 – SharkBite ½” gate valve
  • Limit switches (Amazon Model: a14061600ux0543)
  • Assorted connectors, plumbing bits, and crimpers

Read more: Build yourself the only unlimited water source you’ll ever need

Installing the new pump

welldetails

Drawing 1 – Well details:

The first thing is to install the new pitless adapter in the well casing, just follow the instruction that came with it, In my case, I needed a 1-3/4” hole saw.

Using a string with a weight on it find the depth of the torque arrestor above the standard pump.

Using the same string with a float find the water level in the well casing.

Cut a piece of PEX approximately three feet shorter than the depth of the torque arrestor but be sure it’s still well below the water height. If it very close you may have to re-examine the well suitability.

Connect the two-conductor wire to the new pump following the instructions meticulously: you do NOT want the fitting to leak.

Connect the piece of pex to the new pump. Use stainless clamps or crimp collers.

Connect the PEX to the pitless adapter using suitable adapter hardware.

Run a piece of paracord through the lifting eye on the pump, either use twice the needed length so you can pull it free later or a bowline if you want to keep it in place.

Secure the line to something sturdy, it’s there in case the pump slips out of your hands.

Drop the pump and attached wire down the well. Be very sure it doesn’t come to rest on the torque arrestor! If it does, pull it and adjust the length of the PEX.

Install the solar array where ever you want: mine are on a south-facing roof with a 45 degree pitch.

Install the solar panel charge converter somewhere out of the weather; connect the wiring as described in the instructions.

Run #8 stranded wires from the charge converter to the battery bank.

Turn the charge converter on and make sure the batteries are charging. A voltmeter is sufficient. Mine reads 13.8VDC across the battery terminals in bright sun.

Connect the new well wires to the batteries to ensure the pump works correctly.

If yes, disconnect the pump for now.

water-flow-detail

Drawing 4 – Water Flow Detail:

Connect the remaining PEX to the pitless adapter outlet, tape the pump wire to the PEX, and bury the entire run below the frost line for the area.

Run it into your basement or crawlspace using whatever critter-proof method you wish.

Install a large water container in a location above your typical faucet height. The higher the location the greater the water pressure.

I’ve been experimenting with a water-bed mattress because, 1 – I had it already, 2 – it distributes weight well.

storagedetails

Drawing 2 – Storage Details:

Run the PEX and wiring up to whatever storage container you are using, install the check valve, (flow toward the storage tank!), then the PEX Tee after the check valve, and then from the check valve outlet side into the tank, using suitable fittings to provide for a secure, leak free connection. Inside the container, if it’s not flexible like the mattress, install an addition piece of tubing that just barely reaches the bottom of the container.

Install the limit switch with a float or similar to open the pump circuit when the water level reaches the maximum desired height in the container. Typically you would use the normally closed contacts that will open when the float is lifted. There is a multitude of ways to do this, I happened to have the switches already.

chargedetails

Drawing 3 – Charge Details:

Now run the wiring to the batteries, and connect, observing the correct polarity as during the initial test.

On the original house water supply plumbing cut and insert a tee in the line from the pressure tank going to the house plumbing. Install one of the gate valves in the Tee side going to the new storage. The object is to connect the new storage container outlet Tee to the standard supply plumbing after the pressure tank check valve, see drawing 4.


Other self-sufficiency and preparedness solutions recommended for you:

Healthy Soil + Healthy Plants = Healthy You

The vital self-sufficiency lessons our great grand-fathers left us

Knowledge to survive any medical crisis situation

Liberal’s hidden agenda: more than just your guns

Build yourself the only unlimited water source you’ll ever need

4 Important Forgotten Skills used by our Ancestors that can help you in any crisis

Secure your privacy in just 10 simple steps

A perennial problem faced by suburban and rural dwellers is obtaining water in the absence of utility provided electric power. Standby generators require fuel of some type, which will eventually

Most preppers recognize the rule of threes, as they pertain to preparedness, to include being able to survive three hours without shelter, three days without water, and three weeks without food. Included in being able to survive three hours without shelter but often neglected, is the clothing. Warm clothing will help keep you from burning calories up at a time when calories may have to be carefully controlled.

When you aren’t getting enough calories, your body has a harder time generating heat and you really need warmer layers of clothing and blankets. Light clothing will help keep you from overheating in heavy labor in summer. Choosing the right clothing may be critical to your survival.

We choose our clothing based on the climate, but we should also remember to prepare for some changes to climate if there is any possibility at all of moving to an area that differs in temperature, humidity, or rainfall. While I have lived most of my life in the high deserts of the West, I did spend five years in Missouri. Northern Nevada and Central Missouri are at about the same latitude and the temperatures are the same. The difference is humidity, and wow, what a difference! I never want to experience the bitter cold of a Missouri blizzard again. Nor do I want even a few hours’ repeat of laboring in the garden at 90 degrees Fahrenheit and 90% humidity. So it may be wise to prepare for extremes. It’s something that many of us don’t consider, probably because we have grown up in a time when the solution to being too warm or too cool hasn’t been to add or remove layers, but to adjust the thermostat. I’m grateful for each morning I wake up to find that the thermostat still works. But I prepare my family for the day that it won’t.

This book could have been called The Replacement for The US Healthcare System. Learn here why

Making the right choices in clothing could be crucial to our survival, so let’s start from the top and see if you are a well-dressed prepper.

Hats

A wide-brimmed straw hat is essential for working outside in the heat of the day. Heat exhaustion and heat stroke are real threats, and they are even more real for the elderly. But heat stroke can also affect those who think they aren’t quite senior citizens yet and still able to put in a good day’s work, or at least a few hours in the garden. Baseball caps and visors are good for shading faces. Beanies are good for all cold weather, but also for sleeping when nights are cool, for those who chill easily. Ski masks/balaclavas are crucial for bitter temperatures and biting winds and blizzards to protect the facial skin from frostbite.

Bandanas

Bandanas are the multi-tool of clothing. But make sure what you get is 100% cotton. Not only can your bandana—which when TEOTWAWKI hits you should be wearing at all times—blot sweat or function as sunblock for your neck, but it can also work as a tourniquet, sling, bandage, signal, preliminary water filter, the list goes on. An entire article could be written just on bandana uses.

Scarves

Choose your scarves carefully. You may want one that can do more than wrap around your neck once or twice. And if you live in colder areas, you will definitely want to upgrade beyond a wool scarf to alpaca or angora fiber instead for something that is much warmer, much softer, and at the same time much lighter.

This book teaches you What To Do When Your Doctor Is Not Around. Follow this link for details

Underwear

ShirtsThese items I just do not want to have to DIY, ever, so these get stockpiled. Fortunately, they are very light and take very little space. Thermals get stockpiled as well. Under Armour is a popular choice. Wool is highly desirable if there is any chance of getting wet. Yeah, we all fear the itch, but there are really high quality merino thermals available. They’re a little pricey, but they will be worth every penny when the need arises.

Of course, everyone has plenty of t-shirts, for everything we have to do. And most have Pendleton-type heavier wool shirts for keeping warm in winter, but make sure you have some long-sleeve lightweight shirts in natural fibers. I really love the very light-weight 100% wool shirts I have. Unlike 100% cotton which I will eventually be able to wring the sweat out of, the light-weight wool shirts are great at wicking perspiration and shielding from the sun.

Pants

While most everyone has plenty of jeans, most of what is sold today is very lightweight and poorly made. What we need are heavy-duty denim jeans, like what farmers wear. Buddy’s Jeans are incredibly durable, and made in the USA. Duluth Trading Company sells “firehose” pants, which are also very durable.

Socks

People sometimes don’t give much thought to the socks. They’re cheap and easily replaced. Unfortunately, they ARE cheap! As with almost everything in the USA, quality has been decreasing over the past few years. Cotton socks in brands that I have bought for years now seem to start falling apart after just a few washings. Because commercially produced high quality wool socks for a family of seven are a bit out of our price range, I am now knitting socks. Regardless of whether you buy commercial or make your own, you must have natural fibers, though you may have some nylon content for durability. Avoid acrylic like the plague. Wear wool socks year round to help control athlete’s foot fungus. Choose angora blends in the winter to have the warmest feet.

Shoes

Everybody in the family should have work boots as well as several pairs of athletic shoes for every day wear. Most shoes are manufactured overseas, and most are rather poorly made and will not last long. When our society collapses footwear will become extremely hard to find. Be sure to have plenty of Shoe-Goo for repairs and an abundant supply of spare shoelaces. Flip-flops are not shoes and should be reserved for showers. Shoes should really be worn at all times, even indoors, to protect from injury.

Hard work is usually best done with heavy duty work boots.

Sweaters

Each family member should have a few sweaters for layering. However, not all sweaters are created equal. For maximum comfort and warmth, you really only want sweaters made from natural animal fibers—wool and alpaca primarily. Cotton and synthetics just don’t keep a body very warm, and if they get wet, they stay wet, whereas if wool and alpaca get wet you will still be able to keep warm.

Coats and jackets

Make sure that your outerwear will keep you warm enough to be outside for extended periods in the coldest of temperatures and in a range of conditions. And make sure you test it in those conditions! I have one jacket my dad bought me that is warm enough for me most of the time, but if the wind is blowing it’s almost worthless. Better to find that out now, before it can’t be replaced.

Coveralls

The family mechanics have lightweight coveralls for dirty jobs. However, everyone in the family has Carhartt insulated coveralls. My husband and son reported that these coveralls kept them very comfortable—almost too warm—as they worked to help a family whose car had gone off the road one Thanksgiving in a miserable Missouri snowstorm.

Gloves and mittens

Of course, a wide variety of gloves is needed. Leather gloves for heavy labor, garden gloves for digging in the soil, rubber gloves for doing dishes and protecting hands from harsh chemicals, latex gloves for caring for the ill and handling bio-hazards, and very warm gloves or mittens for cold weather. Children will need the latter in a variety of sizes to accommodate growth. Also consider having some very warm finger-less gloves for those occasions when having to work with tools outside in cold temperatures.

Aprons

Aprons were indispensable in times past when people had just two or three changes of clothes and when it was all washed by hand. They served two important functions—protecting clothing and reducing the amount of laundry. While we currently have aprons only for cooking and working in the shop, this summer I am also making aprons for eating dinner and working in the garden.

Many preppers frequent thrift stores and garage sales looking for discounted quality items that will help them. Most also seek good quality clothing. However, they often limit themselves to looking for clothing in sizes currently needed. This is a great time to buy for the eventual needs of growing children. A pair or two of shoes in every size for a few years into the future is not unreasonable, and in fact will save you a great deal of money even if society never collapses. Also consider acquiring knit sweaters in sizes you don’t wear and scarves that can be re-knit or felted into other clothing.

Clothing was so expensive in colonial times that suits and dresses were written into our ancestors’ wills. “My black suit to John, my brown suit to James….” “The blue dress to Sarah, my red dress to Elizabeth….” As I prep for economic and societal collapse, I consider the daily life of colonial and pioneer women, living as they did without electricity or indoor plumbing. For them, there was a reason why as soon as the dinner dishes were done, the work day wasn’t over yet, and women sat down to mend clothing and knit socks. Women spent all day cooking, cleaning, and doing laundry, all evening working on clothing. Clothing isn’t glamorous. It’s not exciting. But it is essential to our survival. Choosing your clothing well now will make you and your family much more comfortable when times get difficult.


Other self-sufficiency and preparedness solutions recommended for you:

Healthy Soil + Healthy Plants = Healthy You

The vital self-sufficiency lessons our great grand-fathers left us

Knowledge to survive any medical crisis situation

Liberal’s hidden agenda: more than just your guns

Build yourself the only unlimited water source you’ll ever need

4 Important Forgotten Skills used by our Ancestors that can help you in any crisis

Secure your privacy in just 10 simple steps

Most preppers recognize the rule of threes, as they pertain to preparedness, to include being able to survive three hours without shelter, three days without water, and three weeks without

Probably every Hollywoodian adventure flick out there has at least one scene where the protagonist or, better yet, the bad guy, finds himself trapped in quicksand. Film producers gave their very best to depict as gruesomely as possible what it means to become entangled in that sandy pit of death.

I have to admit that, for a very long time, I was convinced that there was no difference between stepping in quicksand and doing the mamba in a minefield. Although most of the things you see in movies are BS, not all are fictitious.

For instance, I remember seeing a screen adaption of The Hound of Baskerville, my favorite story from the Sherlock Holmes universe, in which one the main characters explain to doctor Watson how people may ‘unstuck’ themselves from quicksand by getting on their backs and swim. True to some degree, as you will find out later in this chapter, but not nearly enough to get out of quicksand.

A billboard advertising a book? DETAILS HERE

When it comes to movie depictions of shifting sands, the thing that irks me the most is this feeling of utter doom given off by those scenes. It’s something like “Crap! I stepped in quicksand. Well, nothing more to do than letting the sands swallow. Oh, to make things even more dramatic, I will roar like a raging lunatic and flutter my arms. That’s it! Lights out! Buh-bye! End of the line for me.”

It’s not exactly like that in real life. Sure, if you move around like crazy, that thing will eventually choke on sand or mud. That’s another thing – quicksand pits are not always made of sand, and it’s not just desert you’ve got to look out for.

Technically, any hole containing a fair amount of sand, dirt, silt or clay can become a quicksand pit it’s drenched by water and agitated by movement. I won’t bore you to death with the science behind quicksand, but I will say this – these treacherous pits can be found anywhere around the world, especially in areas that have been hit by natural disasters such as earthquakes, landslides, and flooding.

So, my advice to you is to watch your step and stay away from puddles or suspicious pits. Carrying a walking stick always helps, especially when you have to traverse unknown terrain. As you’re walking, the ground in front of you with your stick a couple of times. If it appears to be solid, it means it’s safe to walk.

Still, if the end gets caught and you have trouble getting it out, you should definitely avoid the area. That’s basically it for the prepping and prevention part. Let’s now see what we should do in case we end up in a quicksand pit.

Step 1. Stop and discard.

Once you step in a quicksand pit, you’ll immediately notice that your body will slowly begin to plunge in the pit. Stop! Take a deep breath! You’re not going to die here. Now, the first thing you’ll need to concern yourself with is your weights – the heavier you are, the faster you’ll sink.

So, grab your backpack and throw it as far away from the quicksand pit as possible. If you have a toolbelt or anything similar, you should throw that away as well. Your boots make one Hell of a difference when it comes to getting out fast of quicksand. For instance, rubber boots, like those used by people fishing in shallow waters, are very useful for this kind of situation since they can be removed easier compared to their laced peers.

Step 2. Watch your movements


The whole idea of dealing with quicksand is knowing exactly when to move and when to stand still. What most people don’t know is that there’s a 5 to the 10-second interval which allows a quick escape. So, if you step in one of these quicksand pits, go through step one, which is discarding your backpack and any other stuff that might weigh you down, and try to take a couple of steps forward and backward.

Small, baby steps – don’t try to rush things. If you move slowly, you’ll soon feel that less grip. Continue doing this until you manage to break free of the quicksand pit.

Step 3. Drop and swim to safety

If you miss this interval, again, stop what you are doing, stand still, and take a deep breath. Remember that every twitch or sudden movement can stir the stuff inside the pit. This will tighten the grip and make you sink even further.

Once you’ve calmed down, slowly lay on your back, just as you would do at a hospital when a nice lady doctor offers you a consultation. Keep your arms parallel to your body. You should ensure that your head and torso remain above the ground. Take a short breather, and roll on one side. Now, arch your back and swim forward. Remember the backstrokes you’ve learned in swimming class? That’s exactly what you must need to do.

The only difference between swimming in water and quicksand is the amount of friction. Obviously, it’s more challenging to swim in mud or sand compared to water, but if you put your back into it, you’ll eventually reach solid ground.

Again, everything must be done in slow motion. Don’t rush it! If you feel that the effort’s too much, rest for a couple of minutes. Yes, I know it’s frustrating to have the same speed as a garden snail, but rushing it would only make you sink even further into the quicksand.

Once you feel that the ground below you is solid, flop back, firmly plant your hands on the ground, and push as hard as you can to yank yourself loose.

Don’t worry about losing your boots or smartphone in the quicksand pit. Those can be replaced; your life cannot. Above all, don’t try sticking your hand inside the hole in a desperate attempt to recover your position. Your priority right now would be to recover your B.O.B and\or toolbelt.

Do a quick inventory to see if anything went missing. If you have an emergency phone in your backpack, use it to call the authorities. You can also switch on your personal emergency beacon if you have one.

The next step would be to check all body areas that have been in contact with the quicksand pit. Remember that the extra friction may cause some nasty bruises and even wounds.  If this is the case, get the first-kit out of your bug out bag and treat all resulting wounds before infection sets in.

Additional considerations on surviving quicksand pits

In 99.9 percent of cases, you can survive a quicksand encounter. Still, there are a couple of more things you should know about these things.

Quicksand pits are not specific to only one part of the world.

In fact, research has pointed out that these formations can appear anywhere in the world, especially in proximity to bodies of water such as lakes, underground springs, riverbanks, beaches, and marshes.

Quicksand pits are featureless.

There’s no possible way of telling if the thing in front of you is a quicksand pit or just another mud puddle or hole in the sand. Well, there actually is – by getting stuck in it!

Swimming is the best way to get out of quicksand.

Buoyancy is the only thing that keeps you from meeting an untimely demise. However, there are times when you may not be able to backstroke your way out of a quicksand pit. More specifically, the friction will be too higher for your body. If this happens, arch your back and hips more. This will allow you to equally distribute your body weight, ensuring buoyancy.

Not all quicksand pits are dangerous.

Although movies show that each encounter with a quicksand pit means certain death, in reality, you won’t sink lower than your ankles. Still, you shouldn’t take this for granted, since everything depends on how deep the pit’s in the first place.

Panicking is the leading cause of death in case of deep quicksand pits encounters.


Researchers have determined that most people who have choked to death in shifting sands, panicked and tried to latch onto anything they could find.

Remember that sudden and violent movement will only stir the bottom of the pit even more which, as you’ve guessed it, results in sinking. Stay calm, lay flat on your back, flop over, and use the backstroke to get out of the quicksand pit.

Walking sticks makes escapes a lot easier.

Escaping a quicksand pit is a lengthy and strenuous process (sometimes, it takes more than half a day to cover one or two meters). You can reduce the time it takes you to get out by using your walking stick as a flotation device.

Provided that you haven’t lost the stick or threw away with your bug out bag and\or toolbelt, lay flat on your back and place the walking stick underneath your body (it should be right below the lumbar area). In a couple of seconds, you will notice that there’s no more sinking.

Using your legs only, push slowly. After advancing a couple of inches, move the stick to a new position. It will take a while, but by combining the leg-pushing drill with the stick, you’ll soon be able to reach firm ground.

That’s basically it for my take on how to escape a quicksand pit. Again, not all encounters with this sand and water formations area deadly. The odds are you’ll probably never sink below the ankle level.

For smaller quicksand pits, it’s enough to move your legs back and forth to get out. Of course, the best method of escaping quicksand pits is to avoid them in the first place. Granted that shifting sands are featureless, but you can test the terrain in front of you with your walking stick. Avoid marshy and sandy area also helps, but you never know where life takes you.

Other self-sufficiency and preparedness solutions recommended for you:

Healthy Soil + Healthy Plants = Healthy You

The vital self-sufficiency lessons our great grand-fathers left us

Knowledge to survive any medical crisis situation

Liberal’s hidden agenda: more than just your guns

Build yourself the only unlimited water source you’ll ever need

4 Important Forgotten Skills used by our Ancestors that can help you in any crisis

Secure your privacy in just 10 simple steps

Probably every Hollywoodian adventure flick out there has at least one scene where the protagonist or, better yet, the bad guy, finds himself trapped in quicksand. Film producers gave their

For some newbies, the topic may elicit some bravado – “wow, an open wound. Neat! I was looking forward to testing out my new suturing kit.” It’s never like that; the worst thing that could happen to you in an SHTF situation is being forced to deal with an injury of this caliber. Of course, it’s even shittier if you’re the one who has been wounded and no one around to provide medical assistance.

Learn how to both diagnose and treat any medical problems you are going to encounter. Learn more about it here.

I want to share with you some tricks and tips that will be of great use to you in open wound management. Pray to God that it will never come to that, but you never know where life takes you.

Open Wound Management for NMPs (Non-medical personnel) and preppers


You know what’s the real golden rule of prepping? Shit can happen anywhere. And, unfortunately, it does. Scrapes, bruises, and nicks are very common around a household, especially when you have kids or if you’re that kind of person that has butter fingers. There’s nothing special about treating small cuts – apply pressure, wash, clean, and disinfect.

That’s all there is to it! Still, considering the crazy world we live in, even a trip to the corner store can turn into a deadly, Indiana Jones-like expedition. This is the very reason why you should always be ready to tackle any kind of emergency, no matter its nature.

As far as today’s subject is concerned, a good friend of mine, who also happens to be a thoracic surgeon in his spare time, one told me that the best thing you could do about an open wound would be to leave it alone.

Related Knowledge to survive any medical crisis situation

Yes, I know it sounds crazy and rather dangerous considering that germs are always looking for ways to get inside our bodies, but there’s a good reason why doctors approach open wounds in this manner. Let’s backtrack a bit.

Regardless of the medical emergency, the first thing you need to do is to assess the patient. Check breathing, pulse, and state of consciousness. Many first-aid manuals state that the patient should not be moved unless he’s in immediate danger.

For instance, if a person is involved in a car accident, you should attempt to yank him out of the vehicle before the gas ignites it. So, if your patient is in danger, carry him to safety as fast as possible before assessing his condition.

In dealing with open wounds, hypovolemic shock and loss of consciousness are your opponents. When a person loses 20 to 40 percent of blood, his organs will begin to shut down one by one. Passing out is a distinct possibility.

However, if the blood volume cannot be restored, that person will die. Hypovolemic shock is a very common occurrence in case of open wounds. This is why the next step you will need to take would be to stop the bleeder.

Ask the patient to lie flat on his back and elevate the wound (if it’s on the leg, raise the his\her leg above body level). You may need to improvise some sort of stand; a rock, an old crate, a trashcan or anything that will help you raise the wounded limb.

Next order of business would be to figure out where’s the bleeding coming for – if an artery was severed or lacerated, then the blood will come out spurting. On the other hand, if it’s a vein, the blood coming out will flow.

Related 4 Important Forgotten Skills used by our Ancestors that can help you in any crisis

Why do you need to know this? Because each scenario comes with a different approach. For instance, in case of a venous hemorrhage, it’s enough to pack it with sterile gauze in order to stop the bleeding.

On the other hand, if you’re dealing with an arterial hemorrhage, apart from packing it with sterile gauze, you will also need to compress the upper part of the artery to control the bleeding, giving your body enough time to perform what docs call hemostasis (stopping the bleeding).

Treating Open Wounds

Once you have assessed the patient, elevated the wound, and identified the bleeder, it’s time to act. At this point, it’s important to stop the bleeding. It doesn’t matter if the wound’s filled with dirt or anything. You can concern yourself with those things after your patient no longer loses blood.

To do that, apply a sterile gauze right on the wound and apply pressure. If the wound continues to bleed, use another gauze. Stack as may gauzes or clean cloth as you see fit. Keep the pressure constant, even if you feel like your hands are about to give up on you.

In the meantime, if the patient’s conscious, ask him or her to drink water. Plenty of it! Remember that your goal is to replenish the liquids lost through the wound.

This is the only place where you can get DR. RALPH LA GUARDIA’S THE DOOMSDAY BOOK OF MEDICINE

Keep pressure on the bleeder and add more gauze or cloth, if necessary. Once the bleeding has subsided, it’s time to tend to the wound. One of the most common mistakes I’ve encountered is yanking the bandages. Don’t do that – the barrier formed by clotted blood and those little cells that repair leaks is keeping the patient from bleeding.

Still, you will need to clean that wound to prevent infection. To do that, grab a bottle of sterilized water and pour over the bandage. Once the gauze has enough moisture, you will be able to remove it without too much difficulty. Stay calm! You’re almost to the finish line.

After removing the bandage, take a closer look at the wound site. Do you any dirt? Piece of wood or metal sticking out? If it’s just dirt, use plenty of clean water to wash the area. However, if there’s anything sticking out of the wound like a metal spike or, even worse, a protruding bone, leave them be.

Between washing, using a saline solution to flush the wound. In case your first-aid kit doesn’t include a syringe with saline solution, you can make some using a clean plastic bottle, water, and a tablespoon of fine rock salt. Mix, shake the bottle and use your survival knife to cut a small hole in the plastic cap. Use this liquid to flush the wound.

Remember when I told you about my doc friend who said that in most cases it’s better to leave the wound open? Well, that’s exactly what you must do. When you’re done cleaning and flushing the wound, apply a sterile gauze over the site to keep the area clean. You may also want to waterproof the site – wrap a sterile glove or an unfolded condom.

Now, in case the wound is smaller (one or one and a half inches between the skin flaps), you can attempt to suture it. Bear in mind that suturing is a last resort solution – you should only do this if you know that help will not reach you in time. In one of my articles, I’ve talked about how to do simple interrupted sutures.

Be sure your first-aid kit includes a suturing pack. Keep monitoring the wound for signs of infection – skin discoloration, oozing or acidic smell. If you’re lost in the wild, a quick way to keep infection at bay and stop tissue necrosis would be to use maggots. Yes, it sounds utterly disgusting, but those little suckers are great at eating dead tissue.

Wrap-up

Keep your priorities straight – assess, elevate, identify bleeder, hemostasis, wash, flush, and continue monitoring. Sounds like a no-brainer, but I can bet that you won’t feel that way once you’re facing a wound that won’t stop bleeding. You should also tell the patient to drink plenty of liquids.

Bleeders can go out of hand if the patient goes into a panic. That’s why it’s important to talk to him or her. Tell your patient that everything’s going to be okay and that help is on its way. Above all, don’t let him close his eyes. If you see that the victim is about to faint, pour some water over his face, and ask him to keep talking to you.

That’s basically all that you can learn as a non-medical person about open wound management. If you’re interested in learning more, check with your local Red Cross chapter. They’re bound to have a free advanced first-aid course. Any thoughts? Hit the comments section and let me know.

Other self-sufficiency and preparedness solutions recommended for you:

Healthy Soil + Healthy Plants = Healthy You

The vital self-sufficiency lessons our great grand-fathers left us

Knowledge to survive any medical crisis situation

Liberal’s hidden agenda: more than just your guns

Build yourself the only unlimited water source you’ll ever need

4 Important Forgotten Skills used by our Ancestors that can help you in any crisis

Secure your privacy in just 10 simple steps

For some newbies, the topic may elicit some bravado – “wow, an open wound. Neat! I was looking forward to testing out my new suturing kit.” It’s never like that;

A Medical Chest: Is it important?

OF COURSE.

Whether your bugging out with a group or bugging out alone it is extremely important to have someone with some degree of medical knowledge and/or skill. If you’re bugging out with a group and you’ve got a plan in place, but no designated “medic”, you have a problem. If you’re bugging out alone and you don’t have any basic medical knowledge, again, you have a problem.

It’s easy enough to say “I never get sick” or “Ill tough it out” when it comes to an illness or injury in everyday life, but if you’re bugging out, everyday living will cease to exist. Whether you’re hunkering down in a bunker or climbing up foothills or mountains, sh*t is bound to happen. Maybe someone in your family brought in a simple cold. It doesn’t take long for that simple cold to turn into a sinus infection, which once your immune system is beat down enough, can turn into pneumonia. Consider you’re climbing in the foothills or hunkering down in a forest and you drink some bad water…maybe your Lifestraw has already filtered its limits, or maybe your water wasn’t heated for long enough. Bacteria can take hold of your body’s systems within days, sometimes hours, and cause unfortunate and inconvenient effects such as vomiting, diarrhea, dehydration and eventually, death. You get my point.

So what can you do to prevent this? Well, stay healthy, take your vitamins, and boil your water. Stating the obvious, right? Prevention is great, but like I said, and I’ll say it again, sh*t happens. A contingency plan for those SHTF moments is the key to efficiency and more importantly, survival. You can create a top-notch medical kit addition to any bugout bag or kit easily and cheaply. All it takes is basic medical knowledge and a small pack to potentially save you, your family or your friends in a SHTF situation.

The Doomsday Book Of Medicine: A Guide for When Help is Not on the Way

I wish that there was a six star option

“I’m a dentist, and I have just enough medical knowledge to be dangerous. This marvellous book has so far exceeded my expectations that I am amazed that so much useful knowledge can be packed into one book! Hats off to Dr. La Guardia! The information in this book can be used immediately to improve your health, and expand your treatment options in many areas even if there is never a crisis event for you and your loved ones. The panorama of medical, herbal, and traditional treatments in one easy reference makes this one a MUST HAVE! for everyone interested in healthy options and preppers/survivalists in particular. Cannot recommend it more highly. If you can only buy one medical reference book, this is IT!

 
Absolutely THE BEST prepper medicine book!”
DR. DALE W HUDSON

The Basics of a Medical Chest:

Ibuprofen: So Underrated. It’ll help with mild pain, but more importantly, it can help take down and break a fever. How fun is it trying to function at your day job with a fever that turns into a massive headache that turns into hot flashes and cold sweats? Now imagine dealing with that while you’re lumbering through the wilderness. Not fun.

Pepto Bismol: Once again, underrated. Not only will this reduce your burning desire to throw up those repulsive MRES, but it has the potential to get diarrhea under control. Having to stop every 5 minutes to see a bush about a horse? Inconvenient AND unpleasant.

Benadryl: Works for both people and dogs, making it a vital part of my personal bag. Hiking through the woods and your dog steps on or eats a wasp? I know I don’t want to carry my almost 50 pound dog for very long, how about you? 1 MG per pound of body-weight will take care of that problem. It can also be used to ease a dog’s anxiety, just lower the dose a bit. If you’re traveling or hunkering down with someone who has an allergy whether it be to a food or animal, a quick response with a dose of Benadryl can make a bigger difference then you would expect. I carry a bottle of Benadryl and a tube of Benadryl Cream for topical use.

Medi-Lyte: Uncommon, but not unimportant. I used to work in the oil fields during the big boom, and this was something I always kept stocked for my guys. It is used to replace electrolytes from excessive loss of liquids. I’m talking sweat, vomit, whatever. You can purchase 500 tablets on Amazon for twenty bucks. 100% WORTH IT. Oh, and try two tabs for a hangover, it’ll do wonders ????

Hydrocortisone Cream: Once again, suitable for both you and your dog. Hiking out in the woods comes with a price. While an occasional bug bite is not something that will really bother you, being covered in them probably will. The same goes for your dog. Mosquito bites, tick bites, flea bites, poison ivy, weird rashes; it covers it all. Literally.

Triple Antibiotic: This one is basically the jack of all trades. Use it on burns, cuts, scrapes, and anything else you’re worried about getting infected. I would suggest only using it the first 1-2 days after the injury is sustained. After scabs are formed it won’t do much and there is no point in wasting precious supplies.

Everyday Allergy Meds: Sudafed, Zyrtec, Claritin, because there is nothing worse than trying to walk long distance or climb bluffs or mountains with a runny nose.

CPR Rescue Mask, Adult/Child Pocket Resuscitator

CPR Mask and Sterile or Nitrile Gloves: I don’t care how well you know someone; do you really want to take a bath in their bodily fluids? I didn’t think so. Carry a CPR mask with you in your medic bag and remember the basics from CPR Class, compressions and breaths, 30:2. Compressions should be done by finding the middle spot between the nipples and pumping your overlapped hands down onto their body. They won’t tell you in your average CPR class, but I will; you will hear ribs cracking, if they survive they will be in pain from it, and it is not easy on the body to lean over and perform compressions on someone. You will be sore. Saving someone’s life though- 100% worth it. If you haven’t taken a basic CPR class yet, don’t be a dummy. It’s 50$ on average and takes only a few hours of your time.

Hot Hands: There is nothing worse than being sweaty, cold, and out in the wilderness. Once you’re cold it is very hard to get warm, but a hot hands pad can make the world of difference. Toss one onto the top of your head and cover it up with a hat. My dad has told me since I was little; heat rises. Keep your head warm and your body will be warm.

Various sized Band-Aids, bandages, ace wraps and anti-bacterial wipes: Obvious, but easily overlooked. I was on a mountain climbing trip in Montana this fall, and I got stuck coming down at night. Not smart, and not fun. I tripped on a tiny rock and my ankle bent and twisted. The next morning I had a 7 mile hike to a primitive forest service cabin across two mountain ranges and I could barely walk without my ankle giving in. An ace wrap and some duct tape made the world of difference.

The Not-So-Basics:

I don’t expect you guys to have giant stockpiles of these things lying around, but I can guarantee you if you dig through your cabinets and junk drawers you’re bound to find one or two of these things lying around. Please also remember I am not a doctor, and I’m not god, so take everything I say with a grain of salt. Having these things does not guarantee a life saved.

Elite First Aid Fully Stocked GI Issue Medic Kit Bag, Large

Epi-Pens: Unfortunately, these have gotten harder to come by recently, on account of obnoxiously high prices, but if you or your family member has an allergy that requires you to carry one of these, don’t leave it behind when you bug out. Not only could it save your life for what it was intended, but it could save someone in your groups life should they encounter an unexpected allergy source.

Muscle Relaxers: If you’ve done any hiking, walking or running long distances you know how exhausting it can be on your body. Imagine doing it for days at a time while trying to find the perfect camp location. These come in handy to both relax your body and your mind, making it much easier to carry on hiking or even sleep. Personally I can take one of these and continue on with my day, but I’ve heard stories of people taking them and falling asleep within the hour, so remember that everyone responds differently.

Antibiotics: I know I can’t be the only one that’s been prescribed antibiotics and not taken all of them. Do you have a stockpile of half taken antibiotics? In everyday life it’s not a good idea to take half of a dose and leave the rest behind, as it puts you at risk for antibiotic resistance, but if you’re in the wilderness or an emergency situation and you need antibiotics, I think you can afford to take that risk. The same goes for your basic antifungals.

Higher Dose Pain Relievers: If you have left over pain killers from a surgery or injury, pack them up and take them along. I will let you imagine all the possible injuries that may require their use.

Israeli Pressure Bandages: These bandages have been carried by the Israeli Army for ages for a good reason. They compress, clot, and cover a wound. The instructions are on the packaging, and they are fairly simple, lightweight, and about 10$ a piece on Amazon. Worth it.

Suture Kits: Also available on Amazon, although they are usually labeled “for veterinary use only.” They will work in time of need. It’s basically a needle and thread. Buy a few and practice stitching up an orange, or if you’re looking for a little more “real world” (and gross) experience, a pigs foot. It’s pretty much what you see on TV. Unless you went to medical school, you will not be an expert, but if it’s absolutely and undeniably necessary, you’re better than nothing.

I have all of these things in my bugout bag, and it only takes up a very small portion of it. Scrounge up what you can from what you already have, and buy the rest when it’s convenient or on sale to keep costs low. If you’re low on space, take the pills out of the bottles and package them in plastic instead, but remember that the bottles can have other uses in your bag.

I have no doubts that with even 1/2 of these items in your bag you will be better off than your average prepper. Never underestimate the power of basic medical knowledge and preparation. Good luck out there!


Other self-sufficiency and preparedness solutions recommended for you:

The Lost Ways (The vital self-sufficiency lessons our great grand-fathers left us)

Survival MD (Knowledge to survive any medical crisis situation)

Backyard Liberty (Liberal’s hidden agenda: more than just your guns…)

Alive After the Fall (Build yourself the only unlimited water source you’ll ever need)

The Lost ways II (4 Important Forgotten Skills used by our Ancestors that can help you in any crisis)

The Patriot Privacy Kit (Secure your privacy in just 10 simple steps)

A Medical Chest: Is it important? OF COURSE. Whether your bugging out with a group or bugging out alone it is extremely important to have someone with some degree of medical knowledge

I can’t even begin to describe the way I feel about ponchos – yes, those things you carry around in your B.O.B like all the time without actually having a chance to use it. I know that my “opening” statement could’ve come out sounding a bit off, but it’s the truth. One the one hand, they’re very useful for a lot of stuff besides rain.

However, I am sometimes annoyed by the fact that a good poncho is heavy as shit and that you never get around to use it. This is the very reason why I’ve made the journey to the all-knowing, and all-seeing Oracle called the Internet, in hopes of finding other uses for that over-sized raincoat.

Have to admit that I was a little bit surprised by the fact that most people who wrote about ponchos tend to emphasize the non-rain-use part, which I think it’s great. Anyway, because most of you are probably thinking about the same thing right now, here are X ingenious ways to use a poncho during an SHTF situation. Enjoy!

  1. Water collector

When SHTF, water becomes top priority (remember, remember, the rules of threes). Obtaining it might be a bit problematic, but don’t lose hope. While scouting for a water source, lay your poncho in a clearing. You may want to check the weather beforehand to see if there are any chances of rain. If you have Mom Nature on your side, that poncho of yours will soon become a veritable water tower.

  1. Taking shelter

Besides food and water, you will also need to find shelter. The simplest way to take cover from the elements is to take out your poncho and to turn it into a makeshift tent – just stick a long pole under the hood and get yourself some sack time. You’re going to need it.

  1. Crafting a mattress

Nothing’s worse than having to sleep on the bare ground. Sure, it’s no delight waiting for the Sandman to come when you’re lying on a thin sheet with rocks prodding you in the back, but it doesn’t have to be that way. You can make your own mattress by stuffing your heavy poncho with leaves, grass, fresh moss or pine needles. Snap it shut, place in on the ground, and sleep like a boss.

  1. Creating a hammock

Since we’re still talking about sleeping, nothing beats the comfort of a hammock. Ever! Well, a hammock’s kind of heavy to carry around, not to mention the fact that it’s a nightmare to make that thing fit inside a backpack. If you’re looking to relax after a long day of hiking, take out your heavy poncho, and use whatever cordage you have on hand to tie it between two trees.

  1. Shower curtain

Even a seasoned survivalist needs a good shower every now and then. Well, the idea of getting naked even there’s no around for miles can be a bit unnerving, but you can wish that anxiety away by making a shower curtain from your heavy rain poncho. Hang from the nearest tree, get inside, scrub until you drop, and come out a new man or woman.

  1. No more dripping

As a person who spent most of the summer looking for holes in the roof, I can wholeheartedly say that my heavy poncho spared me a lot of trouble. Sure, the roof still needed patching, but at least I managed to get myself a breather by plugging some of the larger holes with the poncho. Looks like a nasty piece of work, but who’s complaining?

  1. Red Riding Hood Cosplay

Yes, I know it sounds kinky, but I was, more or less, referring to how you can use your poncho as a basket. There are a lot of goodies lying around the forest and simply not enough hands to collect all of them. So, get into your apple-picking gear and enjoy your foraging.

  1. Controlling hemorrhages

Although it’s not advisable to use a tourniquet to control the bleeding, sometimes it may be the only way to prevent a person from going into hypovolemic shock (that’s what happens when someone loses more than 20 percent of his blood supply).

If you don’t have anything on had to use as a tourniquet, cut a long strip of poncho material, apply it above the wound, and start twisting with a stick.

  1. Carrying sick or injured party members

If someone from your hiking groups becomes injured or experiencing life-threatening symptoms, use the heavy poncho as a stretcher to carry him down to base. Don’t forget to get in touch with the local emergency serves and to stay on the line until the operator says that you can hang up.

  1. Protection against toxic fumes

If you’re about to cross an area which is filled with toxic fumes (a thing that happens very often during a wildfire), get the heavy poncho out of your bug out bag, put it on, cover your face and nose, and pull strings to keep it shut.

  1. Improv pillow

Being lost in the wild without any hopes of seeing your loved ones doesn’t mean that should give up the comfort of your home. What most non-preppers don’t realize is that we really don’t drink our own piss or eat half-digested berries from bear’s dung in order to survive. Nope, we use our noggins to increase our comfort and increase our chances of getting out alive.

You already know how to fashion yourself a mattress using a heavy one. If you also remembered to pack a light rain poncho, then you have everything you need to create a bedroom fit for a king.

Go around the woods and scavenge soft stuff like pine needles, leaves, moss, grass, soft earth. Put everything inside you light poncho, pull on the strings, put on the mattress and sleep as if you have not a care in the world.

Hope you enjoyed my article on ways to repurpose a poncho. Any thoughts? Hit the comment section and let me know.


Other self-sufficiency and preparedness solutions recommended for you:

The Lost Ways (The vital self-sufficiency lessons our great grand-fathers left us)

Survival MD (Knowledge to survive any medical crisis situation)

Backyard Liberty (Liberal’s hidden agenda: more than just your guns…)

Alive After the Fall (Build yourself the only unlimited water source you’ll ever need)

The Lost ways II (4 Important Forgotten Skills used by our Ancestors that can help you in any crisis)

The Patriot Privacy Kit (Secure your privacy in just 10 simple steps)

I can’t even begin to describe the way I feel about ponchos – yes, those things you carry around in your B.O.B like all the time without actually having a