HomePosts Tagged "SHTF" (Page 9)

As you consider the following and plan your food storage, bear in mind that your survival in any scenario will have a great deal to do with the decisions you make now about your food. Good food—and a good variety of that food—boosts morale tremendously in difficult situations. Less palatable food causes stress and much worse. Whether you and your family survive and thrive in the coming difficulties will ultimately depend on acknowledging the essential role of a healthy, varied diet and planning for it. This article will give you some real food storage ideas to use for your family.

There is a lot of advice out there to store food for uncertain times, but how much? How much food to store depends on how long the difficult times last, and only you can decide how long you want to prepare for. First off, consider your situation. How many people are you responsible for? What are their ages? When you are calculating how much food to store, everything is calculated based on an adult and teen males consuming 2500 calories per day. Pregnant and nursing women get the same number of calories. Teen girls and other women are allocated ¾ of this amount. Children under 12 years count as ½.

Consider your food storage needs

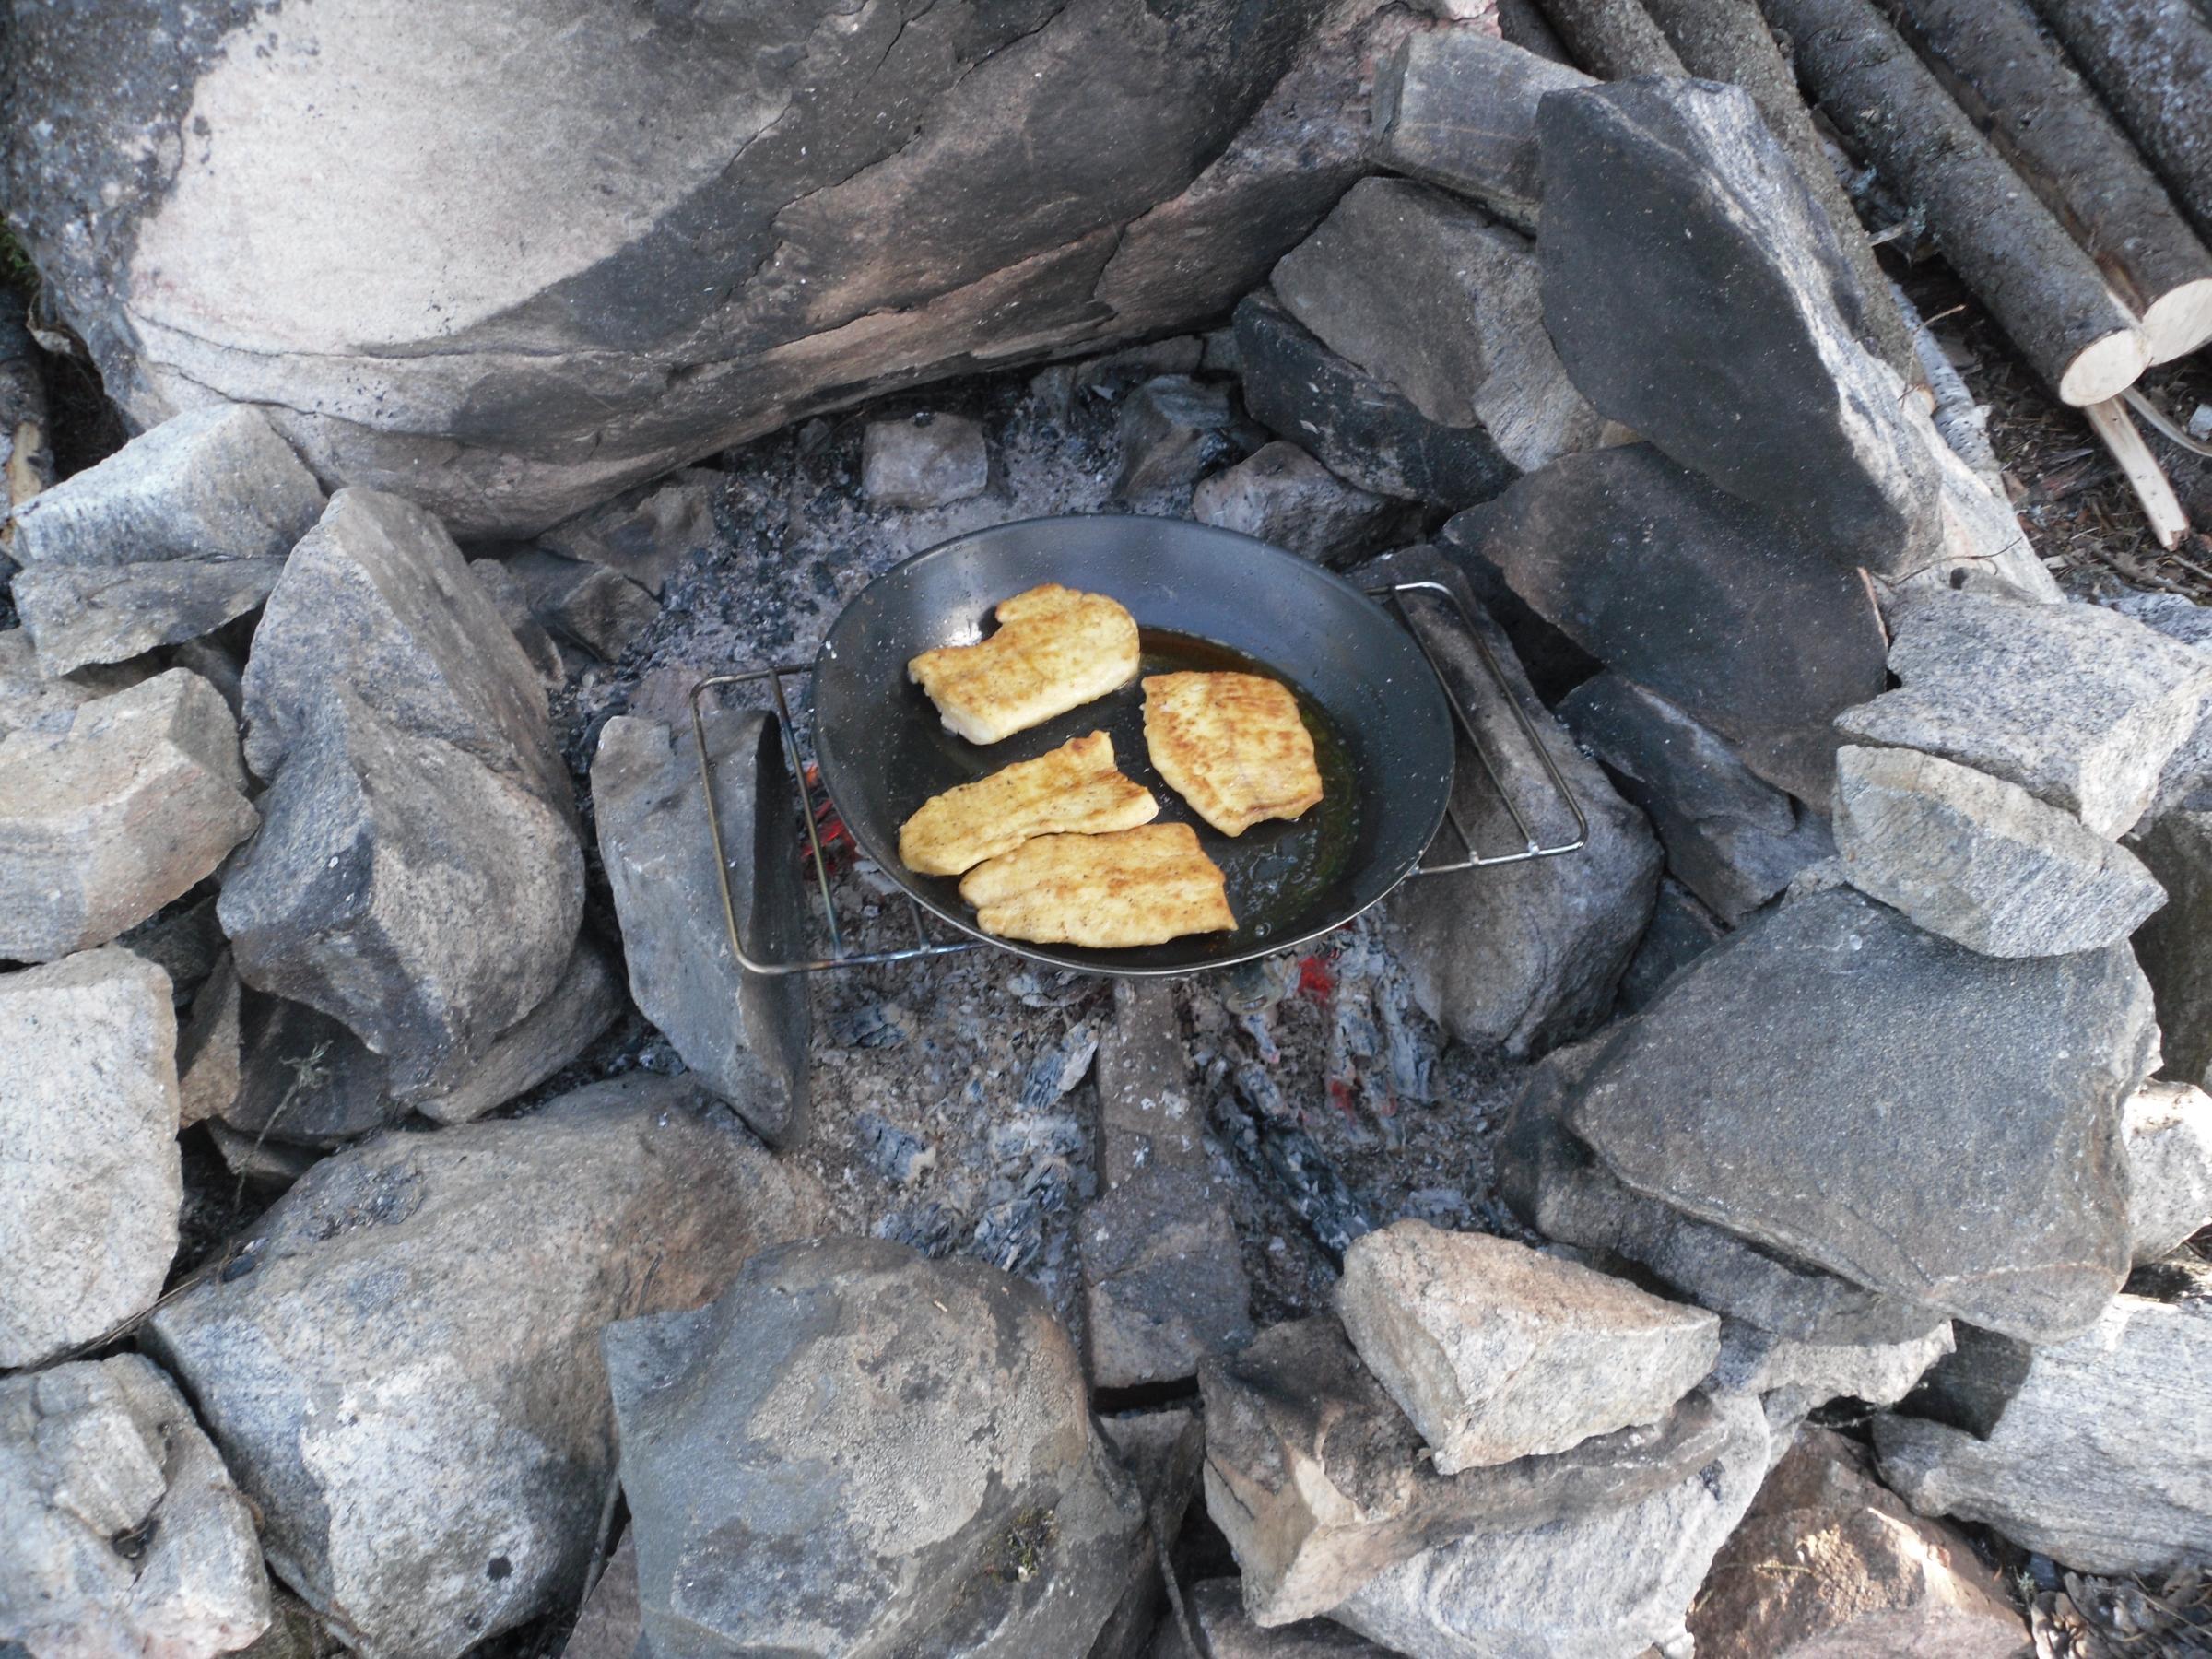
Decide what event(s) you are prepping for. Is it a civil war, world war, EMP, financial collapse, personal financial misfortune, pandemic, etc., or maybe all of the above? There is no shortage of people telling you what exactly is going to happen when. So far, they haven’t been right, but someday somebody will be. Collapse of some sort is in our future; history says so. If I’m prepping for a pandemic, I’m going to want a fair number of heat and eat or freeze-dried meals for when people are too sick to prepare food. With a financial collapse, I’ll supposedly have the time to prepare normal meals at home. With an EMP, I better be able to make meals without electricity.

Consider what you want to eat. Do you really want to live on MREs, canned soups, freeze-dried meals, and the like, all of which are really high in sodium and artificial preservatives? Is that how you normally eat, or will suddenly changing to such a diet be a shock to your body? Do you want to just buy a package deal—and trust that someone else knows what and how much you want to eat? If so, pay attention to the number of calories per day. Some of those packages contain as little as 1200 calories per day. Who is going to be happy with that? TEOTWAWKI is not the time to lose that extra weight. Mental stress alone will contribute to weight loss. In addition, are you planning on doing much more physical labor when TEOTWAWKI hits? (You should be.) How happy are those doing the heavy labor going to be on 2,000 or even 2,500 calories per day? Hint: They won’t be happy. You need to plan on double the number of calories for those doing heavy physical labor.

Defining your food storage budget

Decide what your budget is. Most people can probably manage to buy a few weeks’ worth of freeze-dried meals or MREs, but if you’re prepping for the long-term and/or for a family, and your funds are limited, you are going to have to be more careful. The biggest bang for your buck is going to come from long-term storage foods such as grains and legumes.

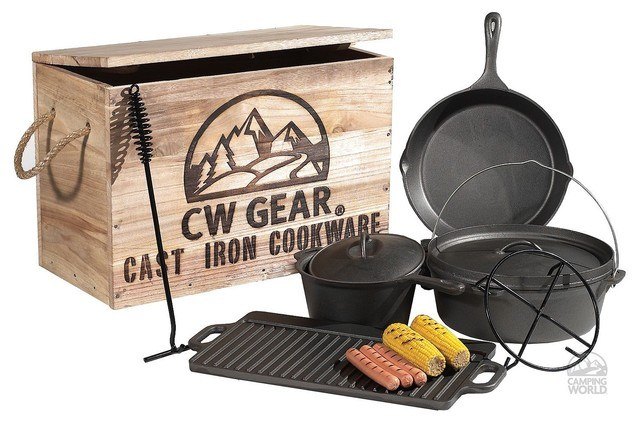
What new skills you are willing to learn? Are you willing to learn to bake? Are you willing to learn to bake bread—without an automatic bread machine? Are you willing to grind your own grains? Are you willing to learn to garden? What about learning to can fruits, vegetables, and/or meats? Raise livestock? It doesn’t have to be cows and pigs—chickens and rabbits are much more manageable for beginners. The answers to all of these questions should govern the decisions about what you store. If you are not willing to learn to bake bread, storing a whole lot of wheat may not make much sense. You can store white flour instead—its shelf life is much shorter and it is far less nutritious, but it will keep you alive. Pick one new skill to learn each month. The most important one is probably learning to make bread, followed by gardening.

jam-428094_640

The first items to store should be a three-month supply of foods you normally eat. Whatever it is that causes us to eat our stored food is going to be a stressful time. The last thing your digestive system needs when it is already stressed is more stress from eating unfamiliar foods. Children and the elderly are much more vulnerable in this situation and you don’t want to increase their stress (and yours!) by forcing a radical new diet on them.

So come up with your list of foods you already enjoy preparing at home and you are already accustomed to eating, preferably foods that require no refrigeration. You should really have a three-month supply of these foods. Make up a menu for one week, list every item you need for each meal, and buy thirteen of each item to have a three-month supply.

What are some real food storage ideas you can use?

Once you have done this (because how many of us really think the chaos will be over in three months and life will immediately return to normal?), consider adding longer-term storage foods. For each adult male per month, store the following:

  • Grains: 33 lbs per month. If you are grinding your own grains for bread, store 20 lbs hard white wheat (white wheat is generally preferred for its lighter, sweeter taste, and is also easier on the digestive system), 5 lbs white flour, 2 lbs rice, 3 lbs pasta, 2 lbs oatmeal, 1 lb popcorn.
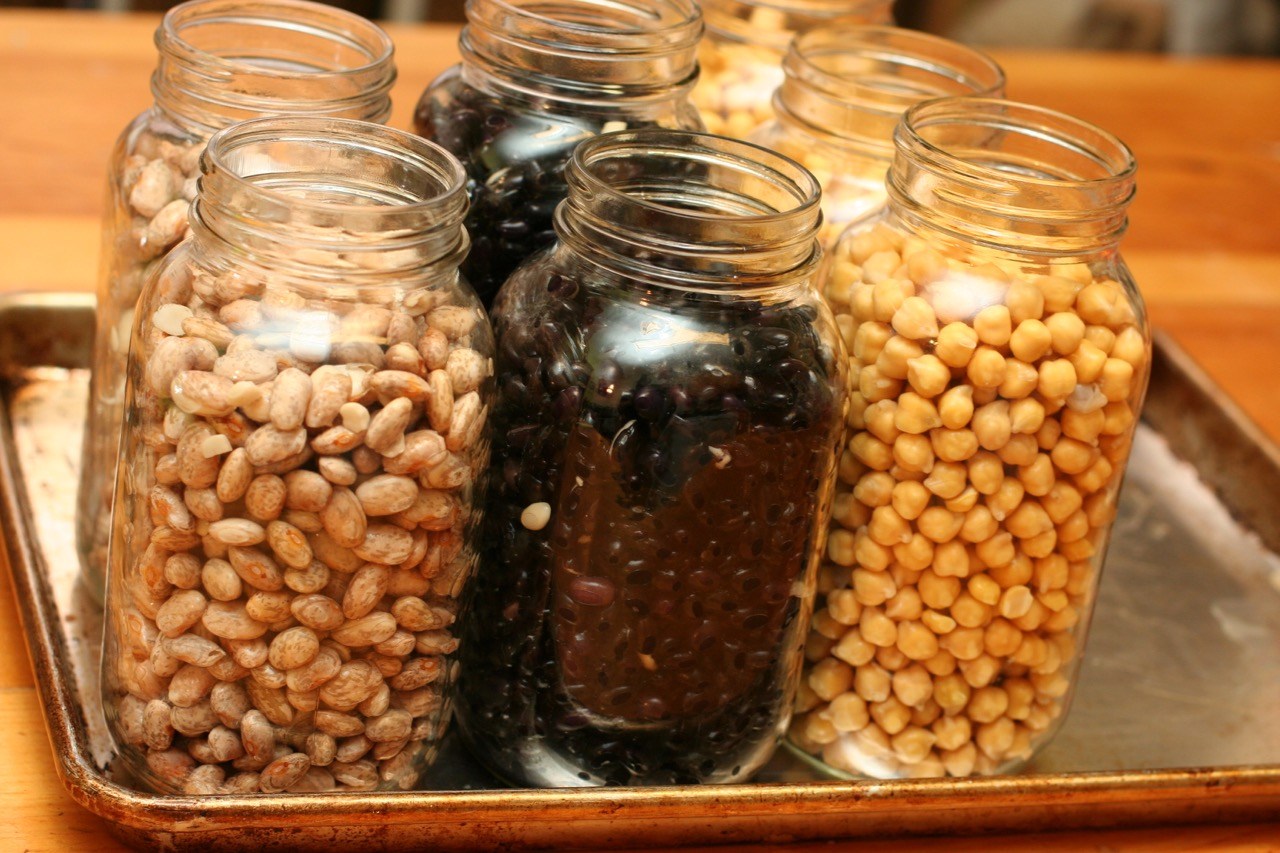
  • Dry beans: 5 lbs per month. Pinto beans, white beans, black beans, legumes, lentils. Beans are among the most sensitive of long-term storage foods and must be stored in a cool, dry place. Otherwise, they will become tough and require much longer cooking times to soften.
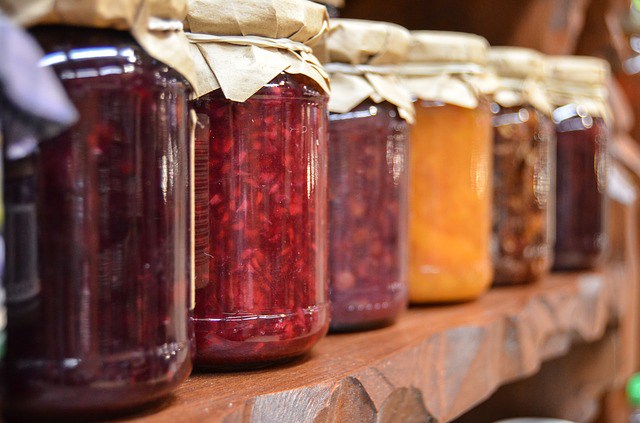
  • Sugars: 5 lbs per month. This is only for baking and cooking meals, no desserts. It is about 3 tablespoons per day. It does not include amounts needed for canning, making jam or syrup. White sugar and honey store indefinitely. They don’t even need to be kept particularly cool, though they should be kept in a dark place if possible. You can also store brown sugar, molasses, corn syrup, pancake syrups, jams, and jellies. Often I hear people say they don’t need that much sugar. And it is true that we should all probably eat less sugar. However, bear in mind that sugar has become an important ingredient in many of our comfort foods. In addition, if you choose to store less sugar, you need to increase the amounts of other items you store to compensate for the calories.
  • Salt: ¾ lb per month. You need both plain and iodized. Most people in my food storage classes thought far less salt would be enough because they would never go through that much salt in one month. And that is true for most of us who still buy most of our food at the store. But when you are making everything from scratch, especially bread and beans, you use a lot more salt. Children need iodine for proper brain development. The rest of us need iodine for continued brain function. We generally get adequate iodine in our diets. However, when many of the commercially prepared and vitamin and mineral-fortified foods that we depend upon are no longer available, we will need to ensure we have sufficient iodine in our diets. For those who are planning to make their own bread (and we should all be planning to do that—bread is the staff of life), it bears mentioning that iodine actually retards the fermentation of yeast and thus hinders the rising of bread dough. So you really want about half of your salt to be plain and half of it to be iodized.
  • Oils: 28 oz of oil per month really is the minimum. Not only is oil an essential ingredient in many recipes, but it can also render normally unpalatable foods rather tasty. Store a variety of oils—olive oil and peanut oil for frying and baking, coconut oil for some frying but more for a long-term storage butter substitute. Avoid vegetable oil (it’s all soy, and almost all soy is GMO). Some food storage experts place peanut butter in the oil category due to its calorie content, but really, do you want to use peanut butter in your baking and frying recipes? Not generally. Peanut butter is indeed high in calories and high in protein and as such makes an excellent addition to the pantry. It just shouldn’t be classed with the other oils. Call it comfort food and store a goodly amount of it, at least 1 lb per person per month. Store all oils in a cool, dry place. And for longest-term storage, store all oils in glass—they will last much longer than in plastic.
  • Dry milk: Store 1.75 lbs of dry milk per month. This amount includes not one drop for drinking—this is only for baking and cooking. If you want to be able to drink some milk, you will need to store more. If you want to improve the flavor of your powdered milk, stir in 1 teaspoon of sugar and ½ teaspoon of vanilla extract per quart of milk. And of course, make sure your milk is well-chilled. Dry milk is the most sensitive of all long-term storage foods. It must be kept dark—light will degrade the vitamins and cause deterioration in flavor. It must be kept cool, and of course, it must be dry.

Once you have stored the basics, start adding in other items.

  • Baking essentials–baking soda, baking powder, yeast, powdered eggs, cocoa.
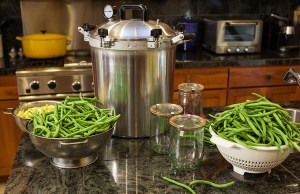
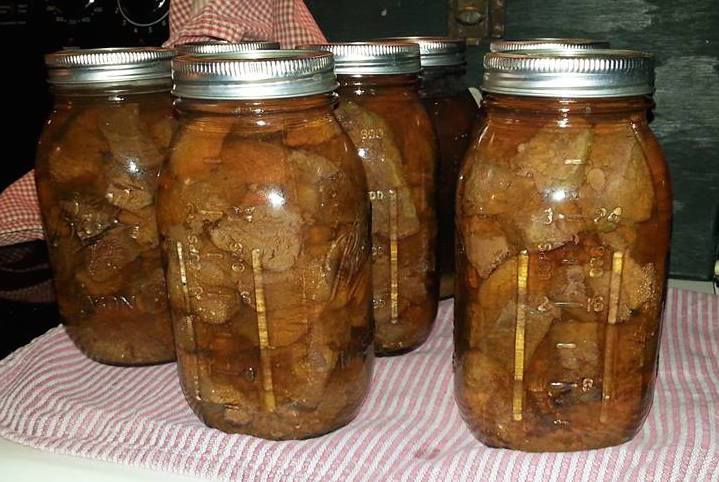
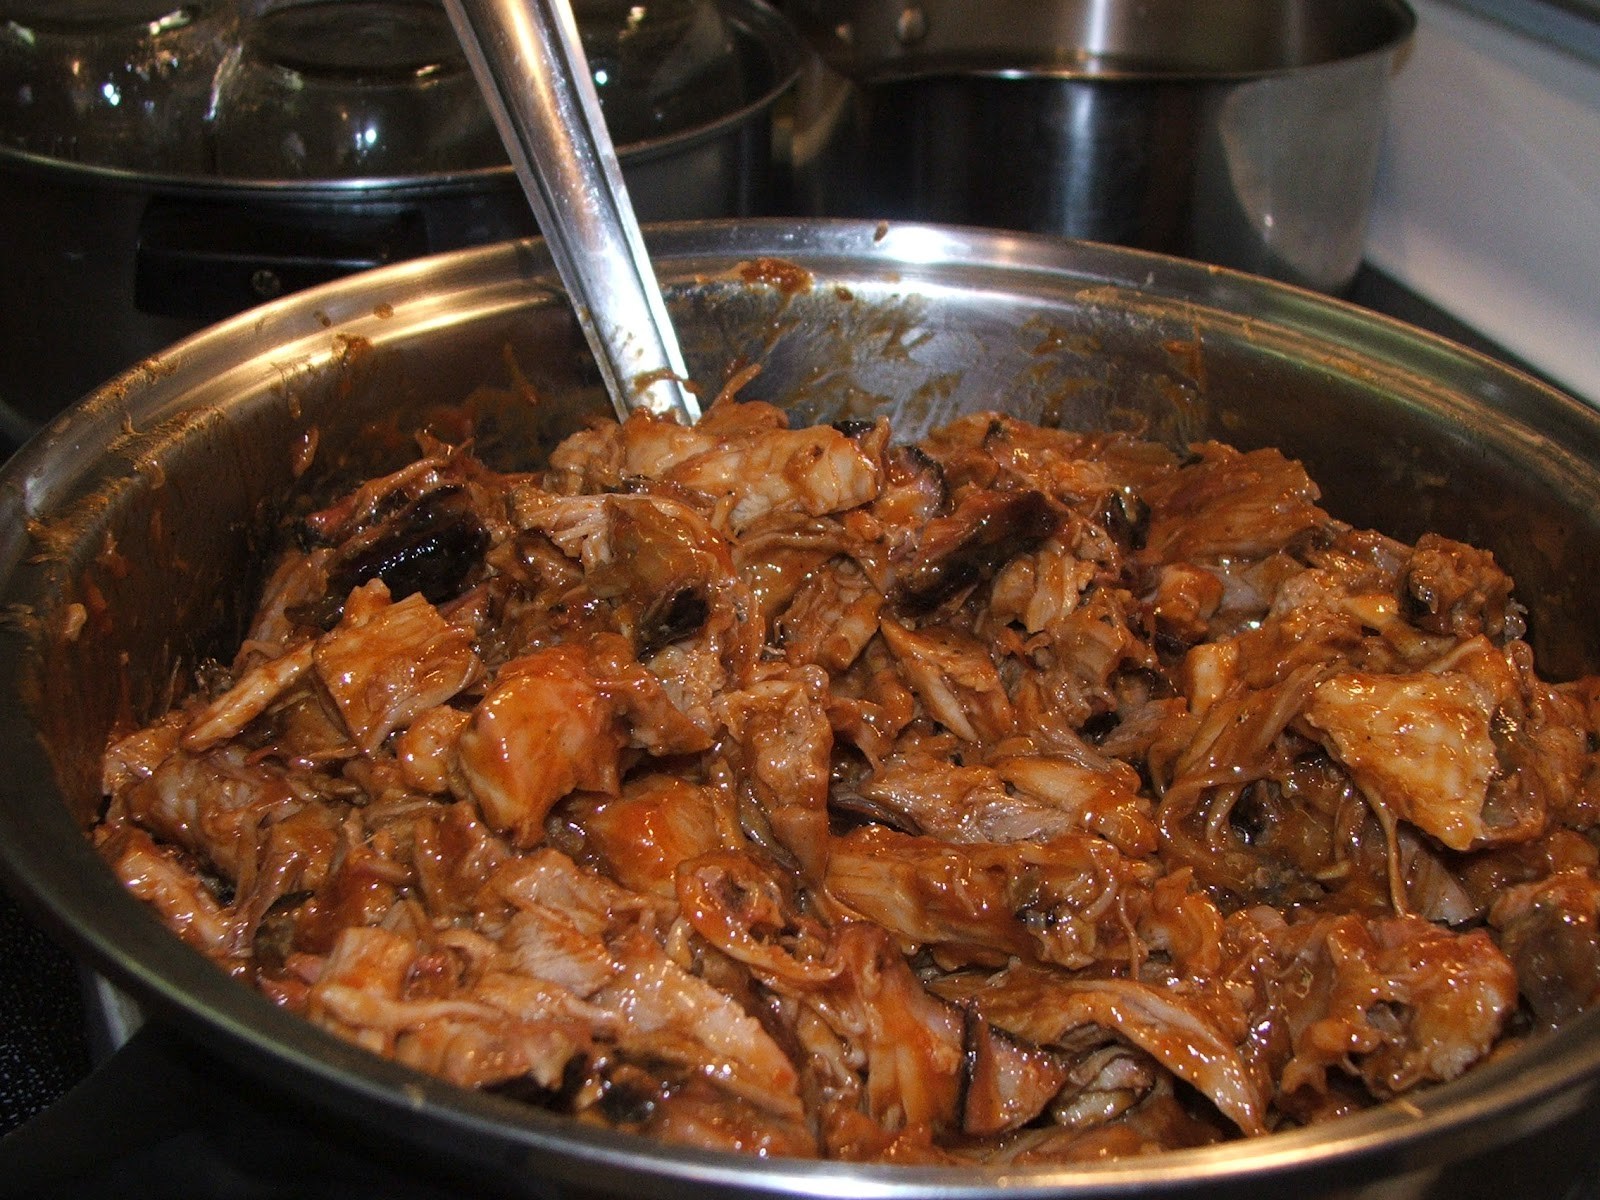
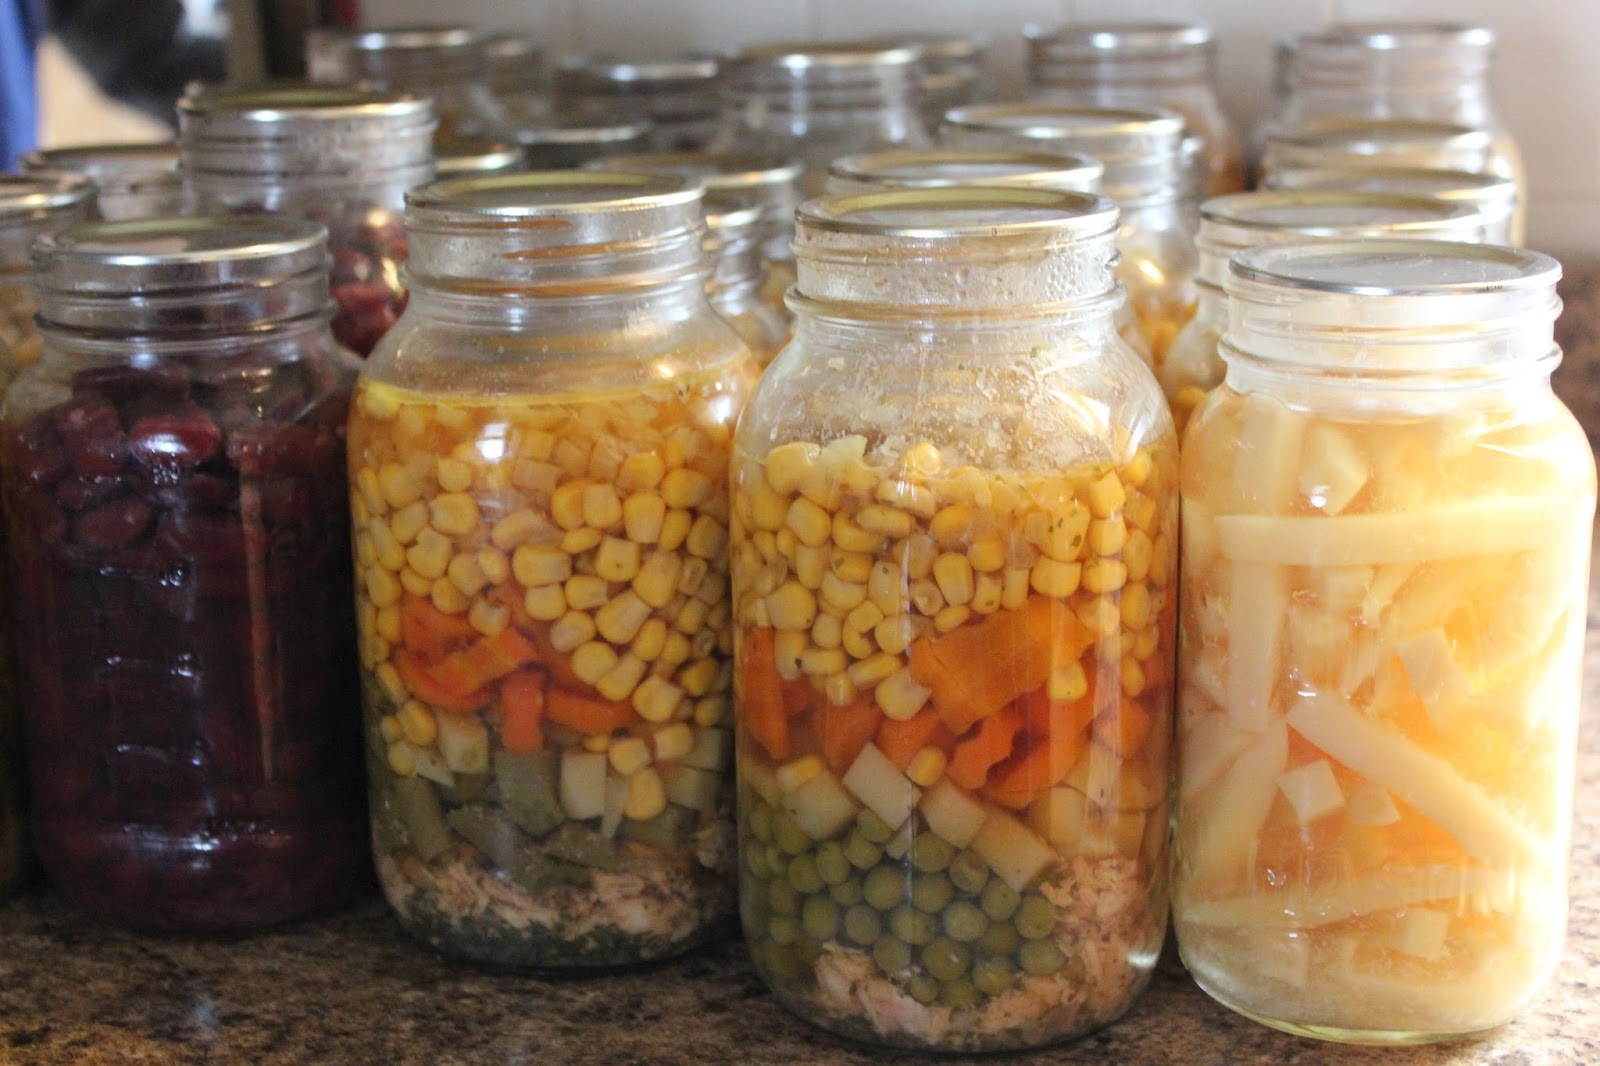
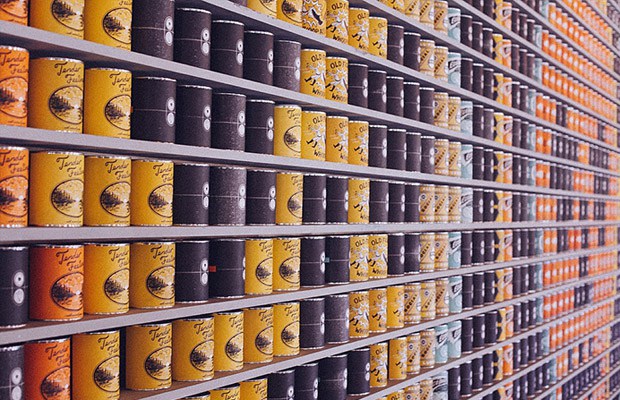
  • Canned items—fruits, vegetables, and meats.
  • Spices—pepper, cinnamon, chili powder, cumin, mustard, ginger, herbs (oregano, basil, thyme, sage).
  • Condiments—Ketchup, mustard, relish, soy sauce, salsa.
  • Comfort foods—chocolate chips, candy, gum, Jell-O gelatin, and pudding mixes.

As you build your food storage, you also need to be learning to use it so that you will be accustomed to eating these foods—and enjoying them. It takes practice to learn how to make good bread. And your body needs time to get used to eating whole grains. Make the switch from white flour to 100% wheat in your diet, and you might find yourself with a serious case of the trots.

While doing all of the above, consider your garden. Spring is just around the corner and the time has never been better for learning how to grown your own. Fresh salad greens, home-grown tomatoes, carrots, potatoes, and who can’t grow zucchini and green beans? Eating from your garden will add variety to your diet while making your long-term storage go a whole lot further.

Storing food for future uncertainties isn’t exciting. Nobody gets worked up over a bucket of beans or a bag of wheat. And that is probably because the vast majority of preppers and those reading this site have never been without food and have never seen starvation. I know I haven’t. But I am a student of history. Bad things happen when people don’t have any food, when they don’t have enough food, and when they don’t have nutritious food. Don’t let bad things happen to your family. Be proactive. Store a wide variety of long-term storage foods and learn to use and like them now. Recognize that your future and that of your family depends greatly upon the decisions you make now about your food. Start today.

As you consider the following and plan your food storage, bear in mind that your survival in any scenario will have a great deal to do with the decisions you

In a disaster our first instinct is to move as quickly as possible to safety or to the closest approximation we have to our ideal of safe. For me, if anything happens my goal is to get back to my home as quickly as possible. I have supplies at home specifically designed to help me and my family handle the aftermath of almost any emergency and logically this is our first/main rally point in any crisis. No matter where I am if something happens I will be working immediately to make it back to reunite with the rest of my family. My get home plan is my first priority if I am away unless there is something that prevents me from reaching home. This is less of an issue if I am with my family and we are together, but I like most of you spend a good part of my day away from home.

We like to speak of the ideal of heavily stocked survival retreats located on hundreds of acres of land in the boonies only accessible via a dirt road and after crossing several water hazards. That is the ideal maybe, but almost none of us, when you start looking at the numbers live anything near that type of lifestyle. Are there people who live in remote areas? Of course, but for most of us, our survival retreat is our home in the suburbs or semi-rural areas still easily accessible by plenty of roads with a Walmart within a short drive. Even more live in the cities where our neighbors are practically on top of us. Most of us who call ourselves preppers do not live year round at a retreat taking care of livestock, building barns and furniture from trees we felled and wood shaped with hand tools. Most of us work a job for someone else in an area that is anything but remote and that is almost always away from home. I personally want the retreat, but unless my life changes drastically that isn’t going to happen anytime soon. For me right now, I am where I am so I plan to make the best of it. If something happens I will be heading to my home.

There are multiple strategies for travel needed with the unexpected emergency but the variables start adding up when you consider all the permutations of what the emergency could be and where you are at the time. Today I want to talk about how you can begin to prepare for a situation where you are at work and your goal is to get back home to your family, your supplies and your castle. In a lot of cases you have to plan for situations that are out of the norm. The first plan of course would be to simply hop in our cars and drive home, but what if the roads were blocked? What if you couldn’t even reach your car? You should make a plan now for getting back home in alternate ways and plan for travel that isn’t ideal.

My Get Home Bag of choice right now.

How will you get home?

Before we can really start discussing how to get home, you have to take into consideration how far away home is. For the purposes of this article, I will use the example of a typical work day. For most of us that means we leave home in the morning, go to work and return home the same day. I have written articles on getting home from much further distances, but for this article we’ll assume you aren’t on the other end of the country, you are at your regular day job.

One of the first things I recommend thinking about is a Get Home Bag for anyone who works more than a few miles from home. I personally use the Maxpedition Jumbo Versipack right now pictured on the right. A get home bag has been called by a lot of other names, but it is simply a bag with basic supplies that you might need in order to walk back to your home. This is not the same as a bug out bag, but the concepts are related. All of these bags are simply containers for some essentials you might need in an emergency situation. My Get Home Bag is stored in the trunk of my car and has very basic items because on an average day I am not more than 15 miles away from home. I have spare water, some food in the form of a Mainstay bar, work gloves, lighter, paracord, ammo, multi-tool, headlamp and dust mask along with some blood stopper bandages. Could I pack more in there? Of course but I try to lean toward the minimal side on these bags and focus more on what I really could need versus what would be nice to have. For example, I don’t have a compass because I know my town and where my home is. I don’t have hand sanitizer because that is the last thing I am going to worry about. I don’t have a radio because I should be home in a few hours tops but I do have a ham radio in my car that is mobile. Your get home bag should have what you would expect to need on your trek home.

But what if my car is blocked or I can’t get to my car? What if the parking deck that my car sits in all day is shaken to the ground by an earthquake or an explosion? That is when the absolutely prepared person would grab their back up bag from their desk. I don’t have a bag in my desk and really I don’t live far enough from work that I don’t think I could make it back even without a bag. Couldn’t I leave my Get Home Bag in my desk at work and eliminate that problem? Sure but what if my office is closed or blown up or for some other reason I can’t get back to my desk? For me, the trunk of my car is the safest bet that will be with more more often than my desk drawer and if that doesn’t work out I will adapt. One thing you don’t want to have to adapt to are the elements though. I carry rain gear on days when there is a chance of rain even if I don’t plan on going outside. Cold weather is the same thing. Its easy to leave home and think that you will just be in the car, but what if you are forced to walk? Dress for the weather outside, not the weather inside.

Another aspect of making it back home is to have footwear up to the challenge. I have written before about how so many people wear flip-flops everywhere they go now and I shudder to think about what it would be like in a real disaster to have virtually no protection on my feet. As well as my Get Home Bag I have a pair of sturdy work boots in my car. I never wear flip-flops but if for some bizarre reason I have a John McClain moment and am caught with my shoes off I will have a backup.

Carry your Every Day Carry – EDC

Another aspect of my preps is my EDC or Every Day Carry items that I have on my person at all times when I am away from home. For me, my EDC consists of a concealed handgun, handkerchief, multi-tool, flashlight, knife and water. My water bottle is in my backpack with my computer, but I always have that with me. These items augment what I have in my Get Home Bag and I try to religiously make sure they are on me. If I am walking out the door to work I have an almost perfect track record of taking all of my EDC gear, but it is the odd times where my outfit choices are different when this falls down. Going to the pool for example, I have been known to change things up due to necessity and some of my gear stays in the car as opposed to poolside.

With my EDC gear it is always in my pockets or my bag, but how many of you have gone to the bathroom without your cell phone? How many have run down to the corner store without your car keys? What if something prevented you from getting back to your desk or work location and the only way you had to get into your car was several floors up, or under rubble? I try to take my keys and cell phone with me anytime I leave my desk so that I will have this option if needed.

Plan more than one route back home

Where I live, there isn’t a tremendous amount of traffic so I routinely take the same route to and from work. This is the quickest way for me to travel, but in an emergency, roads could be blocked and impassable. If needed, I can take alternate roads, but in some cases that might make my trip longer by taking me further away from home to route back to a good road. Alternately you could cut through the woods or neighborhoods but this isn’t always faster. In some situations, it might be a bad idea to cut through someone’s yard and you could find yourself in an altercation you didn’t need to get in. What if your travel takes you through a rough part of town? You would necessarily want to avoid those areas at this time so that you don’t become the victim of a predator. It helps to know the area you live in well enough and in some cases to perform what I call Neighborhood Recon to scope out alternate routes and identify obstacles ahead of time. Could you make it through the swamp that is in the woods? Maybe, but would you want to?

Have a communication plan with your family

In a disaster, cellular communications might be down and who has land lines anymore? You used to find a phone booth on every corner but now they are nonexistent where I live. My communication plan is really meant to address a lack of communication I can foresee in a disaster. My family knows what my plans are and that is to come home. I might be delayed but I will stick to the plan. In the event that some crisis hits and my family is not in immediate danger from staying put at our home, they are supposed to wait for me to arrive. Depending on the crisis this could be several hours to a day, possibly overnight. Does your family know what your plans are? More importantly, do they know what to do if you never show up?

What are your plans for making it back home in an emergency if your trusty vehicle isn’t available?

In a disaster our first instinct is to move as quickly as possible to safety or to the closest approximation we have to our ideal of safe. For me, if

Emergencies can take place in a moment’s notice — at home, work or in public places — and knowing what to do next can very well safeguard you from injury or even death. There’s no point in waiting until an actual emergency happens. With that in mind, here are a few ways you can be prepared for whatever comes your way with these emergency survival tips.

Prepare for the Worst

If you live in California, you know the state has been expecting a massive earthquake for several years now. And if you live someplace where snow days are the norm, it’s important to be prepared for toughing it out if you find yourself snowed in for several days. Whatever situation comes your way, it’s important to be mentally and physically prepared for the possible events that can occur. Do your research on what can go wrong and you’ll be better prepared for anything that comes your way.

Pack a Generous ‘Bug-Out’ Bag

This may be the most crucial component of preparing for a disaster. Emergency preparedness bags, or “bug-out” bags, contain a number of items to sustain and protect you for long periods of time when you’ll likely have no other available resources. Some potential items include flashlights, a first-aid kit, water and food, emergency contact information, clean clothes, and an emergency fund. Plan accordingly for any situation and pack all necessary items ahead of time, while regularly updating your bag so any perishable items stay fresh.

training-828764_640

You can be prepared in every aspect, but if your health is poor, it’ll make every other task more difficult than it has to be

Optimize Your Physical Fitness

In order to successfully evade danger in an emergency, it’s important to be in the best physical condition possible. You can be prepared in every aspect, but if your health is poor, it’ll make every other task more difficult than it has to be. If you haven’t already done so, begin an exercise regimen that will build your muscles and endurance. Try going on long hikes and lifting weights to build muscle mass. In addition, eat healthy meals to keep your body in tip-top condition.

Develop Safe Driving Skills

In the case of a disaster, it’s not unlikely you’ll have to relocate to a safer location. Wherever that is, it’s important to drive safely to your destination in the midst of chaos. Begin refining your defensive, offensive and evasive driving skills by refreshing your knowledge on the rules of the road.

Plan for Recreation, Comfort Foods

It’s likely you’ll end up with a lot of “downtime” during a crisis. You may be stuck at one location for long periods, so it’s important not to let panic get the best of you. One way to avoid succumbing to fear or just a bad attitude is to prepare recreational activities and comfort foods. Pack a deck of cards or your favorite board games in your emergency preparedness bag. Include your child’s favorite toys, as well as some snacks your family enjoys. These items will become a source of comfort in an emergency situation.

joining-a-survival-group-007

Form a survival group as soon as possible to gain advantages with numbers of like-minded people

Prep as a Community

One important aspect of prepping is to become a part of a community that shares your preparedness. This way, in a crisis, you can all support and help one another to survive. Having a community with the same mindset will make you stronger in adversity. If no one around you shares your gusto for prepping, talk to your family and close friends about the importance of being prepared for a disaster or emergency crisis. Upon finalizing your plan, share your preparation tips and tricks, as well as some resources and knowledge with one another.

Emergencies can take place in a moment’s notice — at home, work or in public places — and knowing what to do next can very well safeguard you from injury

‘When the SHTF I am bugging out man’! ‘If the SHTF you will be glad you have one of these’. ‘You won’t be able to do that if the SHTF’. ‘When the SHTF you better be prepared’! If you have been anywhere near prepping, survival, self-sufficiency or emergency preparedness content, movies, TV shows, books or blogs, you have heard someone say a sentence that went roughly like one of those above.

Do you know what everyone means by SHTF?

Just in case there are some of you out there who do not know what this handy little acronym stands for, it is S**t Hits The Fan. When the SHTF basically all hell breaks loose. The exact meaning of SHTF varies by person and sometimes SHTF is used interchangeably with TEOTWAWKI. As in ‘If there is an EMP device exploded over the US it would be TEOTWAWKI’. TEOTWAWKI is another acronym for The End of The World As We Know It which is also used to describe a million different things to different people. One thing we do know though is that when it comes to SHTF or TEOTWAWKI they both mean that bad things happen and most likely our lives will be changed dramatically in some way for some period of time.

I think one of the aspects of prepping has to be with an eye toward a SHTF type of event. We prepare for minor inconveniences like being stranded on the side of the road, or living without power for a couple of days, but with relatively simple steps these two examples are by themselves minor in the grand scheme of things. If you have prepared, there is really nothing to worry about if the power is out. Will you have to adjust and make do? Probably but if you have prepared for a power outage the adjustment could be very minor. Would you be inconvenienced? Most likely, but you will survive.

Most preppers I have talked to are at some point along an arc of preparedness. (I am copyrighting that phrase right now) One end of the arc is no preparedness at all. The other end of the arc is our individual version of being totally prepared or at least extremely prepared. I say extremely prepared because like I have written before; I don’t believe you can ever finish prepping. There should be a point when you are pretty darn set though when you compare yourself to the rest of the world.

The prepared end of the arc is our supplies, skills and gear for really bad things. This is the SHTF that people are preparing for and it is this concept that many are striving for all along. To be actually prepared as well as possible to handle or maybe more accurately, live through a SHTF event. Our preps would ideally help make that possible. The prepared end of the arc deals with Long-term and abundant food storage, plentiful and renewable sources of water, shelter from the elements while at home or in a bug out scenario and survival firearms for each member of your group. Personally, I don’t want to ever need to use my supplies on the ‘Prepared’ end of the Arc but they are there if the time comes.

What does SHTF look like?

And so we get to the big question that I have heard asked a million times. Well, not a million but a lot and that is ‘How will I know when the SHTF’? How will I know when it’s time to bug out and move our family out of harm’s way? How will I know when I need to hunker down, board up the windows and keep watch overnight? The reason so many people want to know this is that they don’t want to be caught unaware. You don’t want to be the last person trying to get out of your town before the roads are too clogged with traffic, or the one who shows up at the grocery store after they have taken everything except the mops back in housewares. Anyone who is prepping for SHTF is doing so because we want to avoid it as much as possible so knowing how to identify the actual moment that the S**T Hits the Fan is pretty important.

The problem is that unless we are talking about huge, cataclysmic national events, defining the moment that it happens is too late is difficult across the scale of everyone in the country. If a huge terrorist attack happens in Los Angeles California but nowhere else, would you as someone living in Las Vegas do anything besides watch the news? If a nuclear bomb went off in New York, would you as someone living in Tennessee go anywhere? I think the answer to almost any situation where we are asking if the SHTF moment has arrived is unfortunately, ‘It depends’.

What does this event mean to me?

There is a famous Supreme Court case, Jacobellis V. Ohio in which the subject was a movie that had been deemed obscene. The movie theater owner who showed the movie had been convicted and his case made it to the Supreme Court where Justice Potter Stewart, in his concurrence with the other judges ruling for overthrowing the case, said with respect to hard core pornography, “I know it when I see it”. There are other details which you can read here, but the point I am trying to make is that there is no universal SHTF moment or series of actions. You can’t point to a terrorist attack and say that for everyone it is a SHTF moment. Now, it most certainly will be for people involved in the event and surrounding areas of course but it may not impact you at all. If it does however, you will most likely know it when you see it.

Well, thanks that wasn’t helpful at all! Maybe you were hoping I would give you a checklist of items to look for to determine when the S had actually HTF? OK, I can do that but each of these would be examples that have to be taken in context. All of that would also need to be considered with your own personal situation. Some items to look for:

  • Loss of Electricity on a regional scale for more than one week
  • Media blackout
  • Martial law declared
  • Door to door gun confiscations – yes they have happened before.
  • Stock Market takes a dive of 10% and they halt trading the next day.
  • Bank holidays are declared and you are not allowed to remove money from your bank. If you are you are limited to a small amount.
  • Attack on US soil – This would be most likely blamed on terrorists of one shape or another
  • Virus outbreak rates that continue to go higher and occurrences start to increase in your city.
  • EMP device that causes massive power outages (multi-state)
  • Nuclear reactor meltdown
  • Natural disasters that impact you locally (fires, tsunami, hurricane, flood, etc.)

These are all examples that in the right context could be signs that we are in a SHTF moment. On the other hand, some of these could be single events that for a large part do not impact you or your family. I have said before that everything depends on the disaster and if something like this is happening to you, in your town things may be totally different from others across the country not affected. Naturally a stock market collapse or EMP doesn’t fall into that category but regional issues would. I always advocate watching the news media – not to hear about the latest starlet who is acting trashy but to get a feel for what is going on in the world. Maintain an active awareness of the news and be prepared to act fast if you get wind of events that you are considering as being a real SHTF event for you.

Will there be a national SHTF event? Who knows? It could be that we have minor SHTF events that happen to us and that doesn’t make them any less real or dire. You could have your own personal TEOTWAWKI moment that doesn’t impact anyone else and you will still need to react.

I believe we have an intuition but we have to tune ourselves to hear it. I think one aspect of that intuition is what prompted me to begin prepping and I believe that for many others out there you have that same feeling. That small voice telling you to prepare; that gut instinct that something is rotten in the state of Denmark. When it comes to your town, I think you will know it when you see it if you are prepared to look for it. Don’t expect the news, FEMA, your governor or me or any so-called expert in the world to tell you when it’s time to go. You will be able to make that decision for yourself.

‘When the SHTF I am bugging out man’! ‘If the SHTF you will be glad you have one of these’. ‘You won’t be able to do that if the SHTF’.

This is my stab at a Get Home Bag after reading endless posts and recommendations, as well as experimenting with my camping gear. The total weight of my personal get-home bag, minus water and handguns is 13.7 Lb.

There are a number of criteria I considered during this exercise:

  • Distance – how far will I likely need to travel?
  • Why – why am I’m being forced to walk home anyway?
  • Terrain – lakes, streams, rivers, roadways, built-up areas, residential areas, and sub-divisions.
  • ClimatePiedmont area of the Carolina’s, although I travel through the Appalachians and further south on occasion.
  • Flora/fauna – what sort of natural resources are available?
  • Most importantly – My own aching back.

Distance – Daily commute is 32 miles each way, although the straight line is significantly less.

Why – The only reason to be hiking home would be due to some regional or larger disaster. This area takes hurricanes in stride, although an inch of snow will bring the place to a standstill. So WHY implies the roads are down for the duration, IE: I can’t just camp out and wait for the government to unscrew whatever has been screwed up. We don’t get earthquakes, and snow does eventually melt. And those are pretty much the only thing that can shut down the road systems here. So it has to be something very bad, probably due to external forces, and most likely dangerous, with curfews, checkpoints, and the like.

Terrain – Since my assumption for the reason to walk home is that there’s been an SHTF event of some sort, (See WHY), the terrain aspect becomes one of how to avoid contact with anyone else as much as possible. This in turn means avoiding as much as possible all roadways. This in itself has a problem: we have lots of waterways of various sorts, and waterways imply bridges to get across, and that’s where the roads are. Which I want to avoid.

So I acquired the best maps I can lay my hands on. In this case, they’re aerial photos, aka, Google maps, with topology superimposed.

These allow me to chart a number of routes out of the semi-suburban area I drive to every day using non-road paths. The power line and pipeline right of ways show up clearly on photo maps and typically avoid high-density population or dwelling areas as much as possible. The companies that build these things know that getting a grant for a right of way costs money, and the right of ways through built-up areas are especially costly. They use legions of surveyors to plot the most cost-efficient routes, which just happen to match up with my goal: the minimal possibility of contact with others.

Climate – Seasonal variance of ~ 20F to 100F+, sometimes colder, but rarely. So my clothing load-out changes somewhat on a seasonal basis, but that’s primarily changing the outerwear I carry in the car anyway. In summer I always have a relatively light, IE; down to 40F jacket, in the winter it’s much more substantial with heavier backup garment.

Flora/fauna– there is a ton of usable and edible stuff wild here. Just need to know what it looks like, and if it needs special preparation to be edible. Think burdock root, or Jerusalem artichoke, and small game.

My aching back – I assume, based upon my current hiking/camping trips that I’m good for roughly 8 – 10 miles in broken country per day without killing myself. So I judge seven miles per day given my security concerns.

So a minimum of four days of cross-country hiking, while avoiding everyone, at the same time everyone else is either trying to get out of the city, or into the city, along with an unknown, but probably poor security situation.

Breaking out my standard camping gear gives me an immediate starting point, but I want to:

  • A – Lighten it up
  • B – Make it fit inside my car spare tire, IE; out of sight.
  • C – Add some security items.

What I’ve come up with is described below, with the various items grouped roughly by purpose. This set of equipment goes far beyond the basic needs of a four-day walk in the woods: I explicitly decided to expand the resources under the working assumption that Murphy never takes a vacation, and if worse came to worse, I wanted the ability to live off the land for a while if need be, due to injury, or possible adverse government or militia control. Thus the radio and binoculars for comms and surveillance, and the specific planning for travel off maintained paths. Am I a TEOTWAWKI paranoid nut case? No, but having been in NOLA during Katrina, I have somewhat less than inspired faith in the government, and am a firm believer in the Boy Scouts motto.

Also note that I have a static car kit that includes a woolen watch cap, gloves, flashlight, headlamp, fixed blade knife, my best-hiking boots, wool blend hunting socks, MOLLE first aid kit, and a couple of liters of water.

From my camping kit, I’ll subtract the sleeping bag, ground pad, tent, stoves, propane canisters, cooking gear, and sub my rucksack for the full-size pack. I’ve also made heavy use of a Food Saver to vacuum pack as much stuff as I can.

Categories in no particular order:

Fire stuff: a bit on the overkill side, but it weighs virtually nothing:

firestuff

Food and refreshment cache:

  • Three MREs – packaging removed, sealed in vacuum bags. A bit on the heavy side, BUT: They heat themselves without fire and are calorie heavy.
  • Four dehydrated chicken soup packets.
  • 1 dozen packets of good dehydrated coffee.
  • Two plastic sporks. No biggie if lost or broken: a spoon or chopsticks can be whittled from wood.
  • I’m thinking I should add a few packets of Gatorade powder too.

food

Protection:

My daily summer concealed carry Kimber in .380. This weapon lives with me no matter what else I may have with me. Small enough to fit in my front jeans pocket in a soft pocket holster.

gethomebagprotection

My routine camping/hiking weapon: Ruger long barrel MK III in .22. It’s far more accurate than I am out to 50 yards or so. Lives in the rucksack now with 50 rds and an oiled leather holster.

gethomebagprotection

Health & Comfort – 1

Didn’t know what else to call this group…..

health

Health & Comfort – 2

  • Sanitizing wipes
  • TP
  • Lotrimin: if you use your feet a lot and stay in your boots for days on end, you want this stuff. Just believe me.
  • Toothpaste and mini brush
  • Three specific meds:
    • Ibuprofen- 30
    • Benadryl – 20
    • Immodium – 6

health2

Water is critical, right up there with warmth.

water

Knives & Tools – 1

I carry a folder at all times: not shown here, it was in my pocket. Browning survival knife with self-sharpening sheath and a ferriconium stick on the sheath. This knife is well made, full tang, four-inch blade. I wouldn’t be really keen on banging on it to split wood, but for every day, campuses it’s fine. The handle is a bit small for my paws, or if wearing gloves.

My longtime friend the M-7 bayonet. It’s much heavier than the smaller knife and doesn’t have the fire stick attached, but after years & years of being abused, it’s my favorite over a bunch of traditional hunting/camping/survival blades I own. I could probably kill a bear with the thing too.

The bayonet lives in the get-home bag and the Browning in the center console of my daily driver.

  • Fifty feet 550 para-cord – no explanation required.
  • A few 10-hour glow sticks.
  • A mini pry bar. Lowes calls it a trim bar; at seven inches long it’s quite capable of opening ordinary windows or doors.
  • The folding camp saw. Works far better than the wire or chain “survival” saws. Weighs in at 4 ounces so I don’t mind.

survival

Knives & Tools – 2

  • Sharpie – leave messages, or mark an area for surgery.
  • Mini razor
  • Pencil with 25 feet of duct tape
  • Fishing kit – Plastic container with: 50 ft. 50 lb. line, 6 small hooks, 3 swivels
  • Can use the line for snares as well.
  • Twist ties – light repairs, etc.
  • Tie wraps – repairs
  • Orange surveyors tape – mark trails, etc.
  • Mini tool
  • Four feet plastic tubing – use w hydration kit, siphon fuel, etc.
  • P-38 can opener
  • Bunch of safety pins

survival2

Electrical stuff

  • Baofeng hand-held. Programmed with the local HAM, EMS, sheriff, state police frequencies for use as a scanner, I also programmed in the FRS, CB, GMRS channels for two-way comms.
  • Headlamp
  • Extra batteries.
  • Micro LED light
  • Solar battery with an adapter cable. 5000 mAh output. Will recharge the radio or my cell.

electronics

Navigation

Tools to get from here to there, and to see where you’re going and who’s around.

  • Mini binoculars 7X
  • Tradition lensatic compass
  • Wrist compass
  • Maps not shown, but a set of satellite maps with topo overlay for the entire area I tend to travel through.
  • I’ve also pre-planned a few off-road routes to get from work to home or other “safe houses”. If one looks closely there are pipeline and power line right of ways that cut through everywhere, and mostly avoiding residential areas.

navigation

Shelter and such like

  • Two 35 Gal contractor bags. Cover your pack, flotation, rain poncho, ground cover, etc, etc.
  • Rain poncho
  • Single person bivi sack.

shelter

The ruck

Amazon grade, 15 liter, MOLLE compatible ruck sack.

The most important features are: having a bazillion compartments, pass through holes for the camel-back hydration tube, and both sternum and waist straps. I like the MOLLe feature as well. I’ve a surplus combat aid kit, that’s been expanded to accommodate lesser problems than combat injuries. Also a water bottle carrier. Both use the MOLLE attachments.

rucksack

This is my stab at a Get Home Bag after reading endless posts and recommendations, as well as experimenting with my camping gear. The total weight of my personal get-home

In a protracted crisis, we’ll be missing a lot of our usual conveniences. While some may already make their own sandwich bread for slicing and render their beef and hog tallow, a lot of folks don’t. Early on, a lot of folks may not yet have the time or energy to do so, and some may be torn between cookware and grinders, dehydrators, saving for a move, and stocking up on food and water supplies, along with all the rest that goes along with preparing for disasters big and small, personal to global.

Having options for cooking that are typically inexpensive and-or easily acquired can open up options for what we store, whether we’re new or experienced. Thinking through what we prepare food in can save us labor in various ways. Both can help us prioritize for purchases moving forward.

Ovens & Stove-tops

The advantages of the clay ovens come from not heating the house, but also from being able to use a single “burn” to cook a number of dishes. James Townsend & Sons have several videos using and making clay ovens, and he’s nice enough to go through the progression of dishes used in the latter half of the video in this one.


Another type of cooker that limits the amount of heat we have to produce and fuel we have to burn is a purchased or homemade WonderBag or a wonder box cooker. They basically take any ceramic, cast iron or steel pot and turn it into a crock pot/slow cooker. All we have to do is burn enough to bring it to a boil.

They don’t work that well on kidney beans that really do have to simmer for a while, even after a pre-soak and a pre-boil, but they work on most other beans, lentils and grains, even the ones like wheat and barley that resist softening sometimes. (If doing beans, simmer them in a “fast soak” method first.)

It can take a little while to figure out timing and liquids with both WonderBags/Boxes and solar ovens, but the same is true of a regular crock-pot, too.


You can get complicated with mirrors, black paint and larger clear containers to go over them or you can go simple and just stick glass pickle and pasta sauce jars that aren’t really appropriate for home canning and have some nice size to them in a black bag in the sun.

Image: A pickle or spaghetti jar of water and grains or pre-simmered beans can be hung in any black bag, to absorb heat like a solar camp shower and decrease the need to burn fuel for cooking.

The times of year the glass-jar option are good for are somewhat limited to mid-spring through autumn, but even when food’s not getting piping hot, soaking in jars in the sun can help limit the amount of time it takes prepare food.

Sticking water in black jars or jars in black bags, pots inside bags, or systems as simplistic as a pot inside a tire and under a window pane are also great ways to just heat water. That water can then be used for tea, coffee, instant foods, to get a head start on the time it takes to boil or simmer water over fires, or for washing up.

The last cooking method are all the many varied types of candle cookers and space heaters, from the clay pots to the trays of tea lights, and even using standard emergency candles or Crisco candles inside a home oven (where the cracked oven retains some of the heat and makes them more efficient).

*Please use bricks or a bread pan plus bricks, or an overturned brownie pan as a base for candle-clay pot heaters and cookers, not skinny little tubes that will shimmy and fall.

I just don’t see them in off-grid cooking methods all that often, so they bore repeating. They do use a consumable, either Crisco or candles, but they create options, especially for those in urban and some suburban areas, rental homes, or very small homes. They also provide us with an additional backup, especially for times we don’t want to go outside, produce much smoke, or create a great deal of heat in summertime.

Non-Fire Cooking Methods

There are a couple of shared advantages to the non-fire cooking methods listed here and in other articles.

One, they’re infinitely and easily renewable, which lets us save non-renewable (or very slowly renewable) and labor-intensive fuels for the seasons where the sun isn’t going to be much help.


Two, they lessen the labor. If we’re only hauling enough wood for a rocket stove or to bring food to a boil, we’re spending less time and energy than if we needed more fuels to cook over directly. That can let us concentrate on producing food to cook and can, and on replacing and stockpiling fuels for when we want them for heat.

Three, while food scent carries – more than you might imagine if you’ve never done long-range packing or been in isolated areas, or just hungry as you pass Fast Food Row – charcoal and wood smoke carries even further. And with a few exceptions, wood smoke can leave a visual trail as well.

Thermal Mass & Reflectors

If you’re a woods-survivalist or a through-packer, you’ve probably heard of the concept of a reflector for fires in an emergency, or of creating a mound or even a loose screen as a wind break in front of your shelter entrance even if you aren’t going to have a fire.

The goal there is to help us stay warm. It either blocks and diffuses wind, which will eddy through and carry our heat away even in a small shelter, or it helps bounce warmth back.

There’s also the thermal mass and insulation theory from survival and backpacking folds. If you build a thicker debris hut or lean-to, you tend to stay warmer, just like you can find a sun-warmed stone bank to put your back against if you’re in the right territory, and it helps by holding onto the heat longer in the day.

Those two are the same theories as are applied to the idea of using a Dakota pit to cook in, as well as the WonderBag and similar slow-cooker methods, and Thermal Mass Heaters that have a cook-pot basin built-in.

The benefits from a screen, reflector and thermal mass can be achieved in any outdoor cooking setup, though, permanent structure or temporary.

Even just a couple extra logs set up on the windiest side can help reduce the amount of time it takes to prepare a meal over a fire or coals. It can also help make sure food is still hot and warm when it’s served, like turning off the ceiling fan over a dinner table while it’s being set.

Stone, thick timbers, brick, and things like a steel barrel or defunct metal washer or filing cabinet on one side of our fire, forming a right angle, or forming a three-sided semi-circle – ideally on the windy side – can help us with thermal mass or the equivalent of a debris hut of loose leaves.


The air space or mass warms, and forms a more oven-like environment on top of preventing the heat from being whipped away. As with a survival campsite reflector, they also help bounce heat on the foods we’re consuming.

It doesn’t even have to be a campfire. The methods can be applied with grills and rocket stoves as well. A rearward reflector or a heat sink like a tire can make our solar ovens more efficient and effective, too, and extend their useful seasons.

Even if a bug-out is the last thing on our minds, the decrease in time and increase in efficiency for when we want to cook outdoors instead of heating up the house can make a big difference.

Cookware

Sometimes cookware gets its due, and sometimes not. When I do see cookware in various lists and articles, it seems to mostly be dedicated packing sets or cast iron.

I have family that will make pterodactyl noises if you touch their woks or cast iron with a steel scrubby. Maybe that’s less of an issue in other houses.

To avoid the scrubby, though, the non-ceramic-coated cast iron requires a fat to help foods not stick. Fats are one of the expensive, short-lived storage items for preppers. While they’re necessary (and another one that seems to not get their due as much as I’d like to see), using them as non-stick assistants seems painful to me.

Sunflair Portable Solar Oven Deluxe with Complete Cookware, Dehydrating Racks and Thermometer

Steel and copper cookware have big advantages, especially the ones that have nice, thick bottoms (helps heat efficiently and prevents hotspots in pans). They can be hit with steel wool, and with a metal handle can go from fire to stovetop to solar oven. They don’t need the oiling and oober-drying and maintenance care the cast iron gets in my family, even the small camping Dutch ovens.

But they do still need an oil if you’re going to be doing something like eggs or potatoes.

Because of that, I have started using a stone-lined pan set that came home as a nothing present (he lived). Mine’s Crofton (if it’s inexpensive, tell me; if it’s expensive, hold your tongue so he continues to live).

They’re sturdy and oven safe, they have nice metal handles that are well attached, and those images of just sliding an egg out … yeah, that’s legit, at least with my set. Even oopsed rice just oozes off with a two-minute soak and a regular sponge.

*Tip from the candy makers: Fill an “oopsed” pot or casserole dish with water and boil it while scraping if it’s going to need more than just a little time and a little elbow grease. Smarter, not harder. At least, while water is cheap and copious.


The only thing I’d change is that the pans lack the quarter-inch of solid metal base that creates an even cooking surface. The flip side to that, though, is that it’s far lighter.

Metal baking pans have also become obsolete in my kitchen. Oh, they’re stocked back in case of breakage, but I largely do my roasting and baking in Corning and Pyrex, and a fair bit of it in $3 glass bread pans.

That’s about me being lazy.

I can use that steel wool on them without removing coatings and then fighting rust. Most of the time, I don’t even need steel wool.

Most of the time, things I’d have once soaked or boiled on the stove because even Bissel the Labrador couldn’t get the baked-on goo off, I don’t even pre-wash at all. They go straight in the dish washer.

That means that in a crisis, I’m spending less energy/labor on cleaning up, I can conserve more fats and oils for consumption instead of lubrication, and I use less water and cleaning soap.

They also cross-purpose between various cooking methods, and since they’re not metal, they’re non-reactive when I have recipes for cheese that don’t like steel or aluminum or copper.

Cooking in Disasters

Big or small, some disposables are good. And I’ve been poor. I understand that for some, a good casserole dish and a single good pan require the same budgeting as Aimpoints and gennies. Prioritize these, as with anything else, although the daily-life ease the cookware offers may make them worth asking for as a holiday or birthday present.

With any luck, some of the inexpensive food-heating and water-heating options listed above can help with the budget, opening up the ability to build or source other things, or just with creating redundancy in our systems.


Other self-sufficiency and preparedness solutions recommended for you:

The vital self-sufficiency lessons our great grand-fathers left us

Knowledge to survive any medical crisis situation

Liberal’s hidden agenda: more than just your guns

Build yourself the only unlimited water source you’ll ever need

4 Important Forgotten Skills used by our Ancestors that can help you in any crisis

Secure your privacy in just 10 simple steps


In a protracted crisis, we’ll be missing a lot of our usual conveniences. While some may already make their own sandwich bread for slicing and render their beef and hog

When you read the various Prepper and Survival blogs and comments on Prepping, it’s hard to avoid the constant chatter about guns and defensive warfare… Hollywood has done an excellent job of glamorizing the use of guns and warfare to the point where some people actually believe that by simply owning lots of guns their problems will be mitigated. And nothing could be farther from the truth!

What’s even more interesting is that some of these same people own scoped rifles that aren’t even sighted-in! And if you were at a shooting range and handed them a rifle that was all dialed-in, they couldn’t put a single round on the paper (target) down-range under ideal circumstances, let alone if they were in crisis-mode.

Please don’t misunderstand me; I am 100% for the Second Amendment and the right to own and bear arms. I own guns myself and I grew up shooting and hunting for food in the mountains of Southern Oregon.

It seems however that there are a few people who think that survival (Prepping) is all about owning lots of guns and paramilitary training and tactics. And it’s my opinion that these beliefs are based upon defective logic when it comes to the primary objective of Prepping, which is survival, as in ‘staying alive‘ long-term.

If any given Prepper truly believes that there are bonafide risks to their families and friends, which might stem from any one of a host of credible natural and made-caused disasters, then taking a purely logical approach to minimizing those perceived risks requires that Preppers must do what is necessary at the moment such action becomes necessary. This, of course, requires a plan of action that is in place, as well as the equipment, supplies, and tactics that support such an action.

Any tactics supporting any plan that increases potential risks for casualties are defective because it violates the core objective; ‘don’t get dead’.

The superior plan of action is the one that removes as much risk as humanly possible. When you compromise this logic, you also compromise your odds of ‘staying alive’.

Almost anyone with a minimum of training using even marginal equipment can survive off the grid and in the wilderness for a week or even two. How well you fare in such matters will depend greatly upon your fitness, training, experience and the type, amount and quality of the equipment you employ.

However, when you are forced to survive for months and possibly years totally ‘off the grid‘, that’s a whole different subject and few people have the know-how based upon the actual experience that is required to help others prepare for such a challenge.

Few of the so-called ‘experts’ who are providing information into the Prepper community have themselves actually survived off-the-grid in remote locations for many months at a time. And having never been in that kind of a situation, they have no first-hand knowledge or appreciation of what the long-term challenges actually are, let alone the solutions. Surely some of these experts are making many assumptions and educated guesses.

Other experts focus on short-term survival; I recall an episode of Bear Grylls where he is shown squeezing the liquid out of Elephant dung into his mouth as a means of obtaining water in survival mode. Of course, he has the ability to check into a hospital after the show to deal with all the micro-organisms that would readily sicken him, and if left unchecked, potentially kill him in the long-term. These are not the kind of methods that will serve most Preppers very well but are taught in some military survival courses.

Most if not all expert advisers naturally teach what they know best; hopefully based upon their own actual experience. There are a few so-called experts who are writing books and posting information on Blogs who have very little if any actual meaningful or relevant experience.

Should other Preppers be making critical plans and adopting tactics based upon the guesswork of someone else, who may have only read some books?

Living ‘off the grid’ at a farm or ranch is really not ‘survival experience‘. I am not saying that the experience gained from such a lifestyle is not relevant or beneficial, in fact, it is. However, in the case of remote rural living, when a problem or need is encountered, you have the option of driving into town or reaching-out for what you need using the telephone (on our ranch, we would even occasionally ride our horses into town for supplies).

However, as in an actual disaster, where logistical support and travel are cut-off, an Expedition Sailor has no such options. That’s because when an Expedition Sailor has a problem, it is serious since he/she may be hundreds of miles (by sea) away from any outside help (medical, parts, tools, expertise, equipment, etc.). This mandates that Expedition Sailors must be self-reliant in real-life on a daily basis, long-term. It’s not some theoretical or academic exercise, it’s for all the marbles. When you are at sea or anchored at some remote location, separated from the nearest land by water, you can only look to yourself for solutions. This also means having planned ahead in provisioning all the ‘right stuff’ on-board the boat, before leaving port. This is what prepping on land is about; having all the ‘right stuff’ before a disaster hits.

There are some survival experts who have gained their ‘survival’ experience from duty in the military. To make my position crystal-clear; I have the utmost respect and appreciation for our military men and women (my son-in-law is a serving U.S. Marine and we are very proud of him). Some former military personnel who are now advising Preppers tend to teach/preach what they know best….guns, ammo, and military tactics. And a few of these ’experts’ seem to universally fail to acknowledge or even recognize that their success in the field was the result of the guy on the right and on the left, and the extensive training that they all had received in combination with the team of people in the rear, who were providing and fulfilling all kinds of support missions. Preppers will not have access to that training or the specialized training environment, nor the logistics support that is provided by the military.

A few former military operators who have become ‘experts’ on Prepping fail to continue to appreciate that every bullet, MRE, stitch of clothing, intel, transportation and mechanical support that supported their operations in the field were provided by many other trained people in the rear. And without these mission support personnel, the operators on the front line and downrange wouldn’t fare nearly as well as they do in achieving their military objectives. There are exceptions of course in that there are Special Forces who through highly advanced training programs can and do improvise and adapt in the field down-range (damn few!). Here again, Preppers will not have access to anything close that level of training and experience, as it was provided by the military and designed to train that personnel, who were already pre-qualified, screened and selected for that specialized training. In the world of civilian survival and prepping, it’s the Prepper who has to understand and incorporate many mission skills and parameters into their own survival paradigm. If you don’t, you will likely fail.

Nobody has all the answers and no one particular survival paradigm is perfect for everyone. Each Prepper needs to identify his own potential problems and goals and then using the best information from many reliable sources, form a custom survival paradigm to suit.

It’s extremely important to maintain a clear understanding of the vast differences between ‘military objectives’ and the tactics and training to achieve those objectives, and ‘Prepper objectives‘, which are purely related to ‘staying alive’ and long-term disaster survival. Any form of combat, at any level, will lead to casualties on ‘both’ sides of the conflict.

Aside from being fully prepped (supplies, equip, etc.), the most logical approach to survival is to plan to avoid risk when the SHTF.

Should a major large-scale disaster occur, one that may for instance take the entire U.S. electrical grid down, or some other catalyst that would cause a collapse of the supply-chain infrastructure (food, fuel and supplies into cities), there will be masses (in some areas millions) of Un-Prepped people that will be dislocated from the cities and towns and who will relocate themselves to the rural areas in search of resources (food, water, etc.).

Many of these un-prepped survivors (keep in mind, we are talking about millions of people) will be armed and desperate. If Preppers attempt to shelter in place within range of these survivors, regardless of the preps and tactics used, they will likely be ultimately overcome by their sheer numbers. Any argument to the contrary is simply illogical (none of us are John. J. Rambo). If you truly want to survive (as in ’staying alive’), then a realistic relocation plan is of paramount importance.

The thousands (and more) of un-prepared and desperate survivors who will be migrating outward from towns/cities during post-disaster conditions are what some Preppers refer to as ‘Zombies’; I call them the ‘Un-Prepped’. These are the people who are post-disaster survivors and through their desperation pose a real danger to others, akin to a drowning man who will quickly push another person under the water in his desperate attempt to survive.

So what are the legitimate options?

First of all, 24/7 situational awareness is absolutely key for people living in the cities, given that relocation may only be possible just before any disaster/event and/or immediately after (within minutes). If you are already living off-grid in a remote area, you are in the best situation and have much more time to consider the situation as it unfolds.

Second, you’ll need a relocation plan in place that will get you to a prepped facility that is at a secure distance from migrating masses, as in ‘out of reach‘ and remote. Distance is your ally, since many Un-Prepped survivors will be on-foot (vehicles will be grid-locked, fuel will be unavailable), and they can only walk about 10-20 miles in a day. Doing the math, and giving them the benefit of the doubt, the average ‘Un-Prepped’ may be able to travel as far as 2-3 days away from any towns/cities. This gives an effective maximum ‘Un-Prepped Radius’ of about 60 miles (maybe more) from any towns/cities. Therefore, I would expect that if your relocation facility was 75-150 miles away from the nearest major town/city, you would minimize possible contact with the Un-Prepped, and thereby minimize your risks of dealing with these desperate people.

Clearly, there is still some vulnerability being on land. This stems from the fact that some Un-Prepped may nonetheless reach your position on foot, and possibly using vehicles. The ones who reach your location will likely be the most resourceful of the Un-Prepped, since they will have obviously survived the initial chaos and made it out of the towns/cities, and likely have already engaged in lethal combat.

Being under-siege in a fixed location can be a real problem and due to the duration of such sieges, some fixed position facilities ultimately fall. It’s a function of how well prepared you are as compared to the threat that is presented by any hostile force.

There is also another option that is best suited for those people who are living in, or close to a city on the coast, which precludes the need for potential defensive combat and the risks posed by the Un-Prepped.

Bugging-Out in comfort on a boat is a very realistic solution for some people. In fact, Expedition Sailors such as myself do it for fun and have done it for many years with our families, friends, and pets!

Once you leave port and are over the horizon heading to a preselected safe destination, you are out of sight and out of mind, leaving 99.99% of everyone else in the city behind competing for the dwindling resources. The risks at sea and at a preselected remote location (an island with zero or limited population) are far less than those that must be endured long-term on the continent in and around cities. Of course, this paradigm may not be suitable for many people, for a host of reasons.

Over the course of several decades, among other commercial marine operations, I have personally handled all of the logistics, planning, engineering, and operations, including the customization of the vessels that were required for two separate multi-year sailing expeditions that each covered thousands of miles at sea. Each of these expeditions ultimately required that I provide all of the know-how that allowed my family (wife, two children, and two dogs) and I to successfully reach distant remote locations and then live off the grid at uninhabited desert islands in the Sea of Cortez.

The success of these long-range multi-year expeditions was not by chance. The technical know-how that I have accumulated over decades involves detailed knowledge of many disciplines, including but not limited to:

Power collection, generation and storage systems, communications and navigation systems, meteorology, water production-collection and storage systems, provisioning, food storage and long-term field supplementation, life support and safety systems, security, defense systems and tactics, surveillance and counter-surveillance, sanitation systems, equipment and clothing for personnel, advanced first-aid and medical supplies. And all the tools, parts and supplies to maintain and repair all mission-critical equipment, which must function long-term as they must in any ‘Prepper’ survival mission.

The bottom line is this:

When you have actually lived and survived off the grid long-term in challenging conditions you learn what works and what doesn’t work, and I have certainly earned some of that knowledge, by ‘living the preps‘. It would be a huge mistake for Preppers to learn the hard lessons under actual survival-disaster conditions.

For example; equipment fails over time; some much sooner than others and you have to know in advance which equipment is best and why…that knowledge only comes from actual use over time in the field. Morale is another critical matter in both short-term and long-term survival and through actual experience, many lessons are learned and genuine solutions have been developed.

When you read the various Prepper and Survival blogs and comments on Prepping, it’s hard to avoid the constant chatter about guns and defensive warfare… Hollywood has done an excellent

Your EDC gear that you carry daily can be used in millions of ways. It could be something as trivial as having a light to shine into a dark room for greater visibility or as serious as a weapon to defend your life or the lives of others. We carry and advocate EDC (Every Day Carry) to place tools on your body or within ready access that can make whatever situation you are faced with easier, safer or more survivable.

Some of the items I carry on my person (practically) everywhere I go are my concealed carry weapon, a folding knife, multi-tool, flashlight and bandana. Naturally, I have the more common items like a cell phone and a watch, usually some paracord and a Nalgene bottle of water in my bag but I don’t carry much more than that. This allows me what I consider are the basics that can be used in situations to provide me with an advantage.

For additional capacity I have my Get Home Bag or Bug Out Bag in my vehicle that has pretty much anything I would need in all but the most dire circumstances to live for 72 hours or more. I don’t have that on my person, but it is in my vehicle so when I am venturing away from home, those additional supplies are with me as well.

But there are supplies and gear I can expect to use that fall outside of the ideal mission for a Bug Out Bag. I don’t really want to raid that bag anytime I need something because I will then have to remember to put it back. Additionally, I don’t want to overload my bug out bag with gear I might not be able to use effectively in a bug out scenario. I don’t want unnecessary weight that could slow me down. Enter the vehicle EDC gear concept.

What is vehicle EDC gear?

Your vehicle EDC gear are supplies that can easily be stored in your vehicle that can give you advantages in situations where survival or simple convenience require them. Just like with my personal EDC gear that I have on my person, I might not use any of my vehicle EDC gear on a day-to-day basis. I might not use it for months or years, but it is there if I need it.

Your vehicle EDC gear extends your regular EDC gear but it doesn’t take the place of your Bug Out Bag.

Some of your vehicle EDC items can be stored in smaller pouches like this one.

Important factors to consider when choosing your vehicle EDC gear list?

Every person is different. We have different vehicles, different resources, and different commutes, live in different climates and have different priorities and concerns. The items I am listing for my vehicle EDC are ones that I have chosen based upon what I can see myself possibly needing on any day where I live and commute daily. My list isn’t set in stone and has and will evolve over time. Your list might look different and that is perfectly fine. This exercise is simply looking at what items could augment your daily carry EDC and make life a little better if you encounter an emergency.

The amount of time you spend in your vehicle, the work you do, the vehicle’s mechanical condition and what you may be able to fix, if needed all play into consideration for this list.

What vehicle EDC gear should you consider?

So with all of that out-of-the-way and without needing a tractor-trailer to haul everything, what are some ideas for vehicle EDC gear that could help you?

Water

We never used to carry water in any of our vehicles until I got into Prepping. It wasn’t long after that my wife decided that she didn’t like the thought of being stranded in the car with small children in the heat of the summer. Water is possibly the easiest thing you can do to affect your survival situation no matter what you are faced with. You can either buy a case of water and keep it in the trunk or fill up some stainless steel water bottles and store them. The stainless steel will prevent the plastic leaching into the water when it gets really hot, but don’t forget about them when the temperatures drop down to freezing. I lost a perfectly good SIGG water bottle this past winter due to that and some of my gear had mildew damage for sitting in water for I don’t know how long.

Food

Not everyone carries a set of jumper cables anymore. Would you have some in an emergency?

This one might be up for debate. I know some people will say you should always have some spare food in your vehicle, but choosing the type of food is a little trickier because again you have to worry about it spoiling in the heat. Even if that isn’t an issue, you have to prepare it unless you buy something that requires no cooking. I have two mainstay emergency rations in my bug out bag, but I don’t have any spare food in my car. Would this be completely different if I was on a cross-country trip or commuted more than 10 miles to work? Yes, but as it stands right now I don’t.

Vehicle Maintenance/Misc.

Some of the items don’t apply to all vehicles and to all people. If you have zero mechanical skills for instance, there really isn’t any value in putting tools in your car is there? One could argue that maybe you should learn how to fix vehicles and I can see some value in that, but for me if my car broke down and I couldn’t see something very simple I could fix, I would start walking if there weren’t any other options. I wouldn’t be pulling the engine apart trying to see if I could fix some broken part with duct tape.

  • Jumper Cables – This should be a no-brainer. My kids have run the battery down in our car while my wife was inside shopping. She wasn’t in there long, but it doesn’t take long running the fan in the summer, lights on and radio blaring to kill a battery. She had to call me because she didn’t have any jumper cables. It would have taken all of two minutes to get her back on the road, but because nobody around her had any, or was offering to help she was temporarily stranded. Needless to say, she had jumper cables that night.
  • Duct Tape – Getting back to my point above, I don’t expect anyone is going to be fixing a flat tire or mending a broken axle with strong duct tape, but that stuff sure does come in handy. You probably don’t need an entire roll either, just wrap some around your water bottle for emergencies.
  • Fluids (as necessary) – Again, this is vehicle dependent. I don’t carry any fluids because my vehicle doesn’t go through fluids that I should worry about it. Some people have older vehicles that needed the occasional topping off of oil or coolant. If that is you, plan accordingly.
  • Flat Tire Tools – The simplest option is a good old can of fix a flat although sometimes that can cause more havoc when you take your tire into the shop and they refuse to fix the Tire Pressure sensor. The jack and wrench that come with your car are the bare essentials. They will get the job done, but not as easily as a beefier jack and lug wrench. Make sure the spare is full when you top off the other tires too. You don’t want to get a flat tire only to find out your spare is empty.
  • Spare Gloves – A good pair of mechanix gloves or even simple leather work gloves will come in handy if you have to get your hands dirty. It is much easier to put on a set of gloves than to get grease off your hands.
  • Tarp – Another multi-use item. A tarp can provide protection from rain. You can lay on it instead of muddy or frozen ground if you have to get under the car or it can protect the inside of your car from getting dirty.
  • Gas Can (empty) – Again, this is one that I don’t personally have only because I am pretty much always filling up when my tank gets to half-full. I could regret this one day, but for me it isn’t needed at this time. If you do get one of the newer style (which are practically worthless, thank you California) be sure to get a Gas spout and modify the can so it actually pours.
  • Basic Tools – Back to the initial point. Tools are great if you know what you are doing. If you can’t find the hood release, or recognize the big parts under the hood, this probably won’t do you any good.
  • Demolition Hammer – This might be a luxury item but if you ever need to beat the ever-loving crap out of something or just hammer some tent pegs in, a big hammer will come in handy. Doesn’t take up too much space either.

A good multi tool has hundreds of uses.

Survival/Safety

  • Multi-tool – The multi-tool goes in the duct tape category. Actually, for most people, this might be the only tool that you need. No, it won’t allow you to remove the water pump, but it can take on a myriad of smaller tasks.
  • Spare Magazines – No, I don’t mean People Magazine or the latest Oprah. In addition to my concealed carry weapon, I have a weapon in my car. It is my EDC backup. Usually, there are a few more on long trips, but I always have spare magazines for each weapon ready to go.
  • Seat Belt Cutter/Glass punch – The likelihood that you are going to be involved in an accident that requires you to cut your seat belt or shatter your window to escape is remote, but having something like the resqme car escape tool is cheap and provides some extra peace of mind.
  • Rope – I have some general use Polly rope if I ever need to tie something down to the roof rack. Paracord is a suitable alternative too and takes up a lot less room.

First Aid

Most of the time you will need a first aid kit in your car it is going to be for either headaches or minor boo-boos. You likely won’t need the Elite First Aid fully stocked medic bag unless you drive up to a war zone or horrific accident and have the skills and training to know what to do. However, a good first aid kit gives me peace of mind. I don’t plan on surgery, but I do have some celox quick clot, some blood stoppers along with my own IFAK. If nothing else, I can help stop bleeding if I need to until help arrives. Then I’ll pop some aspirin and go back to my car.

A good handheld ham radio will work in disaster scenarios to communicate when traditional methods are out.

Communication/Navigation

Getting lost is half the journey, right? Well, if you have all the time in the world to kill and plenty of gas, maybe that sounds nice but I usually don’t go for joy rides. Have you ever been given the wrong directions on your GPS? We have. I have had Google Maps tell me to get off the highway at one exit, drive back to the previous exit and turn around again. Yes, like an idiot I followed it. GPS might cease to work, or due to some other reason, you can’t use it. I like to have backups.

  • Road Atlas – Rand McNally has simple and low-cost maps that you should have in your car. Throw it in the trunk for emergencies.
  • State Atlas – I also have a state atlas for my state that will help me get out of my neighborhood (figuratively speaking here) if the roads are blocked and I need alternate routes.
  • Cell Phone Charge cord – You should have a spare cell phone charger in your car at all times. These are usually less than $20, plug into a USB to cigarette lighter adapter and can keep your phone going.
  • Ham Radio w/Battery Charger – I have one of my Baofeng handheld radios in my car in case all else fails. This also has FM frequencies on it if I need to listen to local news/radio.

General Purpose

  • Pen/Pad
  • LED Flashlight
  • Headlamp – Superior to a flashlight in a lot of cases due to the hands free nature.
  • Light Stick
  • Spare Batteries
  • Lighter
  • Toilet Paper
  • Shop Towels
  • Trash bags

Weather Dependent

The weather where you live greatly affects this list so I am not going to get too specific. I think people who live in colder climates already know the importance of keeping some supplies just in case.

  • Cold Weather
    • Tire Chains – or all-weather tires
    • Wool Blanket –I like a wool blanket better than the space blankets although it is more expensive and takes up more space.
    • Tow Strap – I now have a 4X4 so I have a tow strap just in case I can pull someone out who has fallen into a ditch. Again, this doesn’t make sense for all vehicles.
    • Proper footwear
  • Hot Weather
    • More water, electrolyte solution
    • Hats to block sun

What to store your vehicle EDC gear in?

Now, what do you store all of this EDC gear in? If you are building your kit out I would suggest you compile everything first and then choose a suitable container or containers for holding this gear. Some gear makes sense to be kept with similar associated gear and the potential for use might dictate where you place it. For instance, you might have food and any cooking supplies in one container. The vehicle you have will obviously dictate where some of this goes. The general purpose items could go in a glove-box, center console or a molle visor attachment.

I have different gear spread over the vehicle, but the majority sits nicely in a plastic tote from Rubbermaid. It’s there if I ever need it and I am not surprised at how often my vehicle EDC gear has come in handy. Maybe some of these items could help you out.

Your turn! What do you keep in your car that I missed?

Your EDC gear that you carry daily can be used in millions of ways. It could be something as trivial as having a light to shine into a dark room

Pressure canning is, by its nature, done by those who wish to preserve an overabundance of fresh food for consumption at a later date, and as such is an activity routinely engaged in by many preppers. Of course, there are many other reasons people do their own pressure canning: environmental (only a thin metal lid to dispose of as the jar is reusable); nutritional (you know what’s in that jar); financial (saving energy by cooking several meals at once and by having convenience foods on hand).

However, those who are preparing for the dark days ahead don’t use their pressure canning to its fullest potential. They just don’t realize how important it is going to be to have variety in the diet, especially in a world where fresh and frozen foods will be lacking. 

Most people look at pressure canning as a means of preserving garden produce and maybe some meat or a few stews here and there. And for those reasons alone a pressure canner is a worthwhile investment. But there is so much more that can be done. So let’s take it to the next level. The Ball Blue Book of Canning (hereafter the “BBB”) should be found in every prepper’s library and will provide all the guidelines for canning the basics. It should be consulted for all matters related to food preparation and processing times. This article is focused more on preserving some of the foods you really want to have on hand, those that will make meals a little more delicious and boost morale in difficult times.

Vegetables

Most of what is in the BBB regarding vegetables is pretty straightforward and beyond jazzing them up with spices or peppers, there isn’t a whole lot to discuss, with two exceptions. The first is canning shredded zucchini. Most people prefer to simply freeze their shredded zucchini to use later in zucchini breads and cupcakes (a favorite around here) and soups. But we’re preparing for when we won’t have freezers. So every year we can a few jars of shredded zucchini so that we can make our treats. The zucchini simply gets shredded in the food processor, packed in jars, and processed per the BBB.

Ball Blue Book Guide To Preserving should be found in every prepper’s library

The other exception is potatoes. Yes, potatoes are routinely canned so as to be able to make soups and mashed potatoes long after the fresh potatoes in the root cellar have run out. But in this case we’re talking about that other main food group in the American diet: the French fry. Even if the pressure canner was not used for anything else, it would be worthwhile (in this family, at least) to acquire one just to be able to have French fries when the grid goes down. These fries are so incredibly divine. Unfortunately, I can’t give you a taste. You’ll just have to trust me.

You’ll want a French fry cutter to make preparation a whole lot faster. Amazon sells them for about $15. (Use the larger blade—1/2”. The smaller blade is just too fine and the fries will kind of disintegrate. ) Buy a bag of large potatoes—not the super huge ones. The potatoes need to be scrubbed well, but as long as they are being used for fries, they don’t need to be peeled (soil can harbor the botulism spores, but deep-frying will kill the botulism, so no need to worry about peeling). Cut the potatoes into fries and follow instructions in the BBB, except instead of boiling potatoes for 10 minutes, only boil for three. Place the fries in wide mouth canning jars. Continue canning per instructions from your BBB.

When you wish to eat some fries (which will be often!), open the jar and put the fries into a strainer. Thoroughly rinse and drain to remove excess starch. Deep fry in peanut oil until they reach a golden brown.

Dry Beans

Dry beans aren’t a particularly exciting item to can, unless you get excited about saving money, time, and energy. Dry beans normally take hours to prepare for each meal. By utilizing a pressure canner, you prepare beans for several meals at once, saving money now and time down the road. So how is it done?

By utilizing a pressure canner, you prepare beans for several meals at once

Soak beans for several hours or overnight. Rinse and drain beans several times, then fill jars about halfway. This is the part that is a little tricky, and I can’t be more precise than “about halfway.” You see, the exact amount to put in the jar will vary due to several factors—the type of bean, for example black beans usually expand more than pinto beans; the age of the bean; and how dry the bean is.
After filling jars about halfway with beans, add salt (1/2 teaspoon per pint, 1 teaspoon per quart) and boiling water. Process per instructions in your BBB.

Meats

For those who haven’t ever ventured into the world of canning meats, but do have experience with canning fruits and vegetables, don’t be scared. Yes, you need to follow directions and be careful, just like for produce, but canning meats is so much faster and easier! All meats are canned exactly as outlined in the BBB; what I present here, however, are some ideas for preparing and packaging meats for other uses generally not discussed elsewhere. Having a variety of dishes in our menus will be critical to good morale in the coming crisis.

Beef

I can a good quantity of stew meat to be used as is in stews, but also to be shredded for use as taco filling, French dips, etc. Ground beef also gets browned and canned so that I can make soups and casseroles very quickly. Most people who are preppers and canners are already familiar with this. However, I know it will be very nice in the future to also be able to have a hamburger now and then. Obviously stew meat won’t work for this purpose, and neither will ground beef that hasn’t had a little extra preparation.

So this is what I do to have some hamburger patties. Form about one pound of ground beef into a log and roll it up in parchment paper that has been cut so that it is about an inch wider than the wide mouth jar being used for canning. Fold the parchment paper over the ends to help hold the hamburger log together. Put the hamburger log into the jar, making sure that you have one inch of head space. Process as per ground beef instructions in your BBB.

When you’re ready for some slider-sized burgers, run the jar under hot water for a minute or so to loosen the hamburger from the sides of the jar. Carefully slide the hamburger log out and remove the parchment paper. Slice the patties about ½” thick and fry them in a little butter or bacon grease for extra flavor. Serve with buns and all your favorite condiments.

Pork

Some pork is canned in chunks for later use in chili or to be shredded for taquito filling or super quick pulled pork sandwiches. Leftover ham from Christmas and Easter (we always get a large one for just this purpose) gets canned for adding to soups or fried rice.
I think bacon will be one of the most important morale boosters in the food department, so I can quite a bit. To can bacon strips, cut a piece of parchment paper about two inches longer than the height of a wide mouth pint jar. Lay the bacon strips (which you have cut into halves or thirds) side by side down the middle of the parchment, fold the parchment over the bacon ends, and tightly roll the bacon up as you go. You’ll need a few pieces of parchment, and you’ll want to overlap each additional parchment strip with the previous one to hold everything in place. Stop when the roll is large enough to fill the jar and place the roll in the jar. Process per BBB instructions for canning pork. When you wish to cook your bacon, you’ll need to run the jar under hot water to soften the fat and be able to remove the roll from the jar. Lightly brown the bacon and enjoy.

Can there be such a thing as too much BBQ after the grid goes down?

I also can bacon ends and pieces. These are typically sold in three-pound packages. There is usually quite a bit of fat, but there is also quite a lot of solid meat, and there are some pieces that look more like regular bacon. They all get canned separately. I use the bacon fat in some of my cooking, and the meat will become bacon bits for salads and baked potatoes. Some will say that in a TEOTWAWKI situation, bacon bits will be a bit of a ridiculous luxury. And I might have agreed a few years back, but for this one experience. A few years back we had a phenomenal crop of potatoes, and as such baked potatoes were a frequent dinner in our home. The kids were getting a little tired of them, so I decided to fry up a can of bacon bits to add to the spuds that night. I could not believe what a difference it made in the kids. They were so excited! Another lesson learned in avoiding flavor fatigue.

Chicken

This is probably what we can the most of in the meat department, mostly because I have one son who cannot have beef or pork. Home-canned chicken is perfect for making quick casseroles or adding to a summer salad for a main dish meal. And with a can of chicken on hand, it takes no time to get homemade chicken noodle soup ready when someone comes down with a cold.

Chicken bones. No, this isn’t being recommended as food for people, but chicken bones can be pressure canned (using directions for canning chicken meat) for feeding cats. Because the bones are hollow, after being pressure canned they can be easily mashed with a fork and fed to cats. Unfortunately, the chicken bones are too high in protein to be fed to dogs. (Too much protein can cause kidney damage in dogs.)

Convenience foods

Pressure canning is mostly about preserving the harvest, but it’s also just as much about making life easier. It’s what people have been doing for decades when purchasing processed foods at the grocery store. However, as more of us realize what kind of garbage is being added to commercially produced convenience foods, we’re opting to do more of our own. While we all enjoy freshly prepared meals, sometimes that just isn’t an option—the chief cook is sick, there’s been an emergency, or labors that day were needed elsewhere.

Keeping a ready supply of stew, chili, soup, and spaghetti sauce on hand for just such situations is a great way to reduce stress and be prepared at the same time.

Having some home canned convenience foods can really save the day. Keeping a ready supply of stew, chili, soup, and spaghetti sauce on hand for just such situations is a great way to reduce stress and be prepared at the same time. Because every family will have their own favorite recipes, I’m not providing any here. Most any recipe can be adapted for canning; one just needs to always remember to process for the time stated for the ingredient that needs the most time and highest pressure.

Traditional favorites for convenience foods to can at home are stews, soups and chili. Bear in mind, however, that some items just don’t do as well in a pressure canner at home. I’m not sure what the difference is between commercial canning and home canning, but unlike their commercially canned counterparts, noodles and rice just seem to go to mush when canned at home. So in this house we always add those ingredients just before mealtime.

With dark days ahead, and days that could quite conceivably turn into years, why not invest in a pressure canner and start preserving your own (at significantly greater savings over purchasing commercial products)? With more and more food being sourced from who knows where and with increasing reports of unsavory individuals employed at food processing plants, why not take control for more of our own food needs? A pressure canner is going to cost $100-$300. But the peace of mind that comes from preparing your own food? Priceless.

Pressure canning is, by its nature, done by those who wish to preserve an overabundance of fresh food for consumption at a later date, and as such is an activity

As the proud owner of two small cats, I can admit that sometimes I just can’t keep up with their potty habits. Sometimes they’re worse than kids; spreading those silica pebbles all over the bathroom or bringing them to bed when it’s nap time. Anyway, in buying so many sacks of cat litter, a thought occurred to me – what if I can use this stuff for other purposes than, well, kitty litter?

Of course, this sort of thing called for some extra time spent online searching for non-cat uses of kitty litter. Well, after a very though peer review (cats were pleased with the results of my searches), I pieced together this small list of ways to repurpose kitty litter.

Yes, I know that most of you have heard that cat litter can be used to defog car windows or to gain extra traction during the winter, but there are other ways to use this stuff.

Now, without further ado, here are some ingenious ways to use kitty potty pebbles during an SHTF situation.

  1. Dump some of that stuff in a portable emergency potty

Since kitty litter is made to draw out moisture, it makes for an excellent smell and liquid buster for your portable toilet. The idea of having to go number two in a bucket or whatever may be unnerving, but you won’t have much choice during an emergency.

Want to hear one more reason why you should add kitty litter to your portable toilet? Because you won’t have the time or disposition to empty it after each use. So, do yourself a favor and put some of this stuff inside your mobile potty before nature takes its course.

  1. Making your driveway slip-free

You know how people end up in the ER when the frost sets in? Slipping on the driveways after getting out of the car. You can either use regular rock salt to deal with the ice, but that stuff eats through concrete like acid, or you can opt for an environmental- and driveway-friendly solution which is kitty litter.

Sure, it won’t do much about the ice, but at least you’ll have enough traction to stay upright until you get inside the house. You should also sprinkle some kitty litter under your doormat – yup, that thing can also become very slippery during the winter.

  1. Putting the kibosh on them moles

Prepper loves veggies, mole loves veggies, but prepper does not like a mole – that’s how it is; a true Shakespearian forbidden love affair which ends in the above-mentioned person finding all kinds of non-soil-friendly ways to get rid of the blind Romeo.


Anyway, if you don’t want to end up poisoning the ground, sprinkle a little bit of cat litter around your plants. For some reason, moles abhor cat litter and will stay away from your garden. From where I stand, it’s a win-win situation: no one gets hurt, the soil remains healthy, and plants will grow unhindered.

  1. Nips grease fires in the bud

Whether you’re cooking outside or inside, grease fires are a very real and very scary possibility. Even worse is that you can’t do shit with water. Now, if you forget to check your fire extinguisher, leave it where it is. Grab a handful of kitty litter and toss it over the fire.

Since the silica pebbles are designed to draw out moisture from, well, anything, they’ll blanch that grease spot faster than you can say “preparedness.”  You should also consider keeping a small bag of kitty litter in your BBQ’s firebox if you’re planning on cooking grease-laden foods.

  1. No more rancid smells around the house

Kitty litter is great at reducing foul smells around the house. If there’s a stink in the fridge, put some of this stuff on a small plate and place it inside the fridge.

Now, if the kitty litter doesn’t help with the bad smell, try this trick – in a small bowl, combine one tablespoon of diatomaceous earth, one tablespoon of fine rock salt, and one tablespoon of baking soda. You can also add a splash of apple cider vinegar if you like. Stick the bowl in the fridge, and I guarantee you that by morning, the inside will smell as if the fridge just came out the production line.

  1. No more rodents lurking around your food pantry

Before I got around to redoing the pantry where I keep my emergency food and water stockpile, rats and mice were a big issue. Sometimes I had to throw entire packs of trail mix or whatever because they were literally covered in rat bites and feces. Plugging every hole that you can find is indeed a good fix, but a costly one.

After doing a little bit of research, I’ve discovered that moles aren’t the only pests that detest the sight and smell of cat litter. Apparently, even rats and mice flee in terror at the sight of these pebbles (probably because they know that a cat may be hanging around).

Anyway, doesn’t matter if you own a cat or not, should you find yourself up to the neck in rodents, scatter some kitty litter around the area where you saw bites or feces. They won’t trouble you any longer after this.

  1. Plant care

Since I’ve always like fooling around the garden, knowing how much moisture plants need was kind of an issue for me. There was this one time I ended drowning my wife’s cabbage patch because I used the power hose to water them. If you’re just like me when it comes to gardening, you can use kitty litter to balance the water levels.

Since this stuff absorbs extra moisture, you need not worry about giving too much water to plant – it will draw out the exact amount it needs. The rest will be absorbed by the kitty litter (would be best to use silica pebbles, because they have a higher absorption rate).

That’s it for my 7 funky and fun ways to use kitty litter in an SHTF situation. What are your thoughts? Hit the comment section and let me know.

As the proud owner of two small cats, I can admit that sometimes I just can’t keep up with their potty habits. Sometimes they’re worse than kids; spreading those silica

What are you prepping for? Is it a natural disaster like a wildfire, tornado or hurricane? Those are perfect examples of common events that occur every day. Nature has a way of dealing us unexpected circumstances from time to time and we, as humans try to roll with the situation as best we can. That is one of the benefits of prepping in that you are proactively planning for events, and the fallout of events now before you find yourself possibly affected by disaster. There are large and small examples of emergencies but prepping gives you a method of working through examples and making potentially lifesaving decisions all from the comfort of your computer or as in Sideliner’s case; the easy chair.

From a big-picture perspective we can look at regions where certain types of natural disasters are more common. If you live in areas where you have identified many potential risks as part of your prepping plan, some people advocate designing your own threat matrix. A threat matrix is really just a decision-making system where you assign a level of risk and probability to each disaster. This is supposed to help you decide which disaster is more likely or impactful to your life and thus should be worked on first. For example, California has routinely seen floods, earthquakes, mudslides, wildfires and you have to throw in the risk of blackouts, riots, nuclear fallout, and most recently drought. You could line all of these threats up on a page, assign them a number and a risk and start making plans accordingly. Now that I think of it, why would anyone want to live in California anyway?

As a resident of California, this might make sense because you have seen the first-hand effects of these disasters, but what if there was a different type of emergency that we haven’t really seen in this country before? What preparations would you make if you knew now that the FEMA tents weren’t going to be popping up, truckloads of relief supplies weren’t headed your way and that sooner or later scores of news media and Red Cross volunteers weren’t going to be descending on your town to document the devastation?

What would a WROL world look like?

WROL is a term that means Without Rule of Law. I don’t know who coined it first but it seems to accurately describe the worst type of scenario preppers imagine. A WROL world could spring up spontaneously or it could grow out of some relatively common natural disaster. To imagine a WROL world you would simply have to imagine no police, fire or ambulances coming to your aid. In a WROL world, you would be on your own or left with your band of friends and neighbors to provide for yourself all of the services that are now gone.

wrol2

We have seen brief glimpses of WROL already. What if it is not ever controlled?

If you look around you might have seen glimpses of a WROL world even if they are quickly controlled. Looting is an example of WROL behavior and so are riots. The two go hand in hand but the police rely on controlling the crowd to a large extent to keep these events from growing much larger than they are. If the police are not available or are overwhelmed, what happens then? When the rioters and looters don’t have any reason to stop the spread of rage and violence, what do they move on to next?

Imagine something as benign as the power grid failing for some arbitrary period. Let’s say a fluke takes out the power for the entire eastern seaboard for one month. This could be a terrorist caused outage, solar flare or some random chain of events that causes a domino effect of failures to equipment and systems. Imagine also that this happens in August and the east coast is also experiencing warmer than usual weather.

Without power, what could possibly happen in the US? Do you think riots would break out? Could you see looting of stores? Without power there would be no way to refrigerate food. You wouldn’t be able to pump gas, run credit card machines or ATM’s, air conditioners or ice makers. Cell towers would be ineffective. Would you be able to go to work? Not likely unless your job involved something manual that was completely not reliant on electricity or fuel. My job is 100% dependent on the internet and electricity. Public transportation would be down and even government services would be unable to help. So what would millions of hot, hungry and panicked people do?

What would you have to worry about in a WROL world?

Is this all a fairytale? Maybe. There are a lot of people who believe nothing bad like this will ever happen and that our way of life will keep on chugging along in more or less the same fashion it always has. I have said many times that I hope that is our shared reality, but I am planning for the chance that it doesn’t. My own threat matrix is my gut. You will find no shortage of people who say worrying about things like this is a waste of effort.

By very definition, WROL means there is law and order so normalcy is pretty much out the window. With a failure like this, there wouldn’t be enough police, National Guard or military combined to help everyone out. All of these soldiers, police, and firemen would have their own families to watch over most likely and I could see many of them if forced to choose between going to work stopping a riot or staying at home to defend their wife and kids would choose the latter. Again, there will be those who disagree and say that the professional soldier, police officer or fireman would never abandon their post and communities will rally together to take care of one another in times of crisis. Maybe when the crisis is over, but not while everyone is going through it.

st-louis-ink-tattoo

In the Ferguson riots, two shops were ignored by the looters. Can you guess why?

What can you do now to prepare for WROL?

My WROL scenario above is relatively short-lived. There have certainly been natural disasters where the destruction caused power outages for a long time. In my example, presumably, we would have half a country that could rally to help us but assume for a second help isn’t on the way. You are on your own for a month of potential lawlessness. Imagine a month of the Purge lived out in real life?

Limit your exposure

Who makes the best target? They guy right in front of you. If there is widespread violence being carried out in the name of rage or of need, stay far away from it. You don’t want to be anywhere near the chaos that is going on and it would be better to let it burn out as much as possible before it gets to you. In this case, bugging out may be your best option so have a plan for that contingency in your back pocket. In my scenario, you would have plenty of time to make that decision, but you should have prepping supplies together before the ability to acquire them has passed. This includes everything you need for food, water, shelter, security, and hygiene for a minimum of 6 months. Start small if you have to.

Use the buddy system

If you do have to travel or bug out, you don’t want to go it alone. Someone needs to be there to watch your six and potentially pull you out of trouble. In a without rule of law world, I foresee deadly force as being much more prevalent and warranted if your life is in danger. I am not saying to go out and shoot people walking down your street, but if they are threatening your life then you have a choice to make. It is better to consider this now as opposed to in the moment even though I realize and admit that thinking about killing someone is a lot different from actually pulling the trigger.

  • Neighborhood watch on Steroids
  • Thinking of your neighborhood from a tactical perspective
  • Coordinating a neighborhood response plan

Keep an eye out

If there is a real threat of violence in your neighborhood, you won’t be able to simply lock the door and hope they will go away. If you haven’t already, post-event you should form up with your neighbors immediately to draw up plans for security and address any needs of anyone in your local group. Whatever you did or didn’t do before the event will need to go out the window if you want to survive. It takes more than one person to stand guard all night.

Arm yourself responsibly

And legally. I am a big advocate of responsible firearm ownership. This assumes you have the training and knowledge of how and when you should discharge that firearm in the course of defending your life. It has been said that the only thing that stops a bad guy with a gun is a good guy with a gun and I believe that. Just make sure you are the good guy in this situation.

A WROL world is what I envision as a mixture of a war zone and a mad-max movie rolled all into your favorite disaster flick. Essentially, I never want to go through anything like this but if something this catastrophic comes your way, you better make sure you have a plan and you are ready to go.

What are you prepping for? Is it a natural disaster like a wildfire, tornado or hurricane? Those are perfect examples of common events that occur every day. Nature has a

Recall how almost all material on prepping says something about having at least one cornbread around the house? It’s, indeed, delicious, nutritious, and, all thing’s considered, very easy to make.

As I’m always on the lookout for great survival recipes, a couple of days ago, I stumbled upon this nifty cornbread recipe. The thing that stroke me is that I still can’t figure out if this thing should be served with something on the side, like some butter or cheese, or is more of a dessert. Well, it’s up to you to figure it out.

Anyway, the cornbread recipe I’m about to show you is not only very easy to prepare, but it also has a peculiar name. In Mormon tongue, this type of cornbread is called a Johnnycake. No comments there. I will do some more digging to figure out why it’s called that way (if you know, don’t be stranger and share with the rest of the community. So, without further ado, here’s how to make some Mormon Johnnycake.

Gathering the ingredients

For this recipe, you’ll need the following:

  • Two eggs. This recipe calls for both egg white and yolk.
  • One cup of buttermilk.
  • Two or three tablespoons of molasses.
  • Half a cup of all-purpose flour.
  • One teaspoon of salt.
  • One teaspoon of baking soda.
  • Two cups of Yellow cornmeal (you can find that at your local food market).
  • Two or three tablespoons of melted butter.
  • (Optional) Agave nectar.

All done gathering the ingredients? Neat! Put your chef’s bonnet on because it’s time to do some major cooking.

How to prepare Mormon Johnnycake

Step 1. Start by grabbing a baking dish or cast-iron skillet. To ensure that your Johnnycake won’t stick to the bottom, grease it with some butter, tallow or a little bit of sunflower oil.

Step 2.  Preheat your oven to 425 degrees Fahrenheit.

Step 3. Grab a large bowl and add your eggs, buttermilk, and molasses. Give them a good stir with a whisk.

Step 4. Get another mixing bowl for your dry ingredients.

Step 5. Grab a flour sifter and get to work on that flour. You can skip this step if you like your bread with air bubbles.

Step 6. Add your salt and the baking soda.

Step 7. It’s now time to put everything together. Using a mug, add the dry ingredients to the bowl with the buttermilk, honey, eggs, and molasses. Don’t add it all at once. Empty the contents of a cup and slowly whisk the mixture. Do this until you’ve incorporated all the flower.

Step 8. The batter should be smooth. If it’s too watery, add some flour and whisk.

Step 9. It’s now time to add your cornmeal. Just like before, pour half a cup, and gently whisk it. Yes, I know it’s frustrating, but do you have anything better to do?

Step 10. When you’re done incorporating the ingredients, transfer the batter to the cast-iron skillet or baking dish.

Step 11. Stick the baking dish\skillet into the oven and bake for 15 to 20 minutes until it’s golden brown. To see if your Johnnycake is ready, use a toothpick to test the batter. If it comes out clean, it means that it’s ready.

Step 12. Johnnycake is what chefs like to call comfort food. Serve it on rainy or cold days with plenty of butter. If you like to turn it into a desert, pour some agave nectar or maple syrup on top. Enjoy!


An alternative way to prepare Mormon Johnnycake

This recipe’s extremely versatile. Although the classic recipe calls for oven or stove baking, there’s another approach. Called Hoe Cakes, it’s the Southern take on the original Mormon Johnnycake recipe. The major difference between the two is that the first gets you a classic bread loaf, while the latter is more, well, pancakes. Anyway, here’s how to make some delish Southern Johnnycake pancakes for breakfast.

Ingredients

  • One cup of flour.
  • One cup of cornmeal.
  • Two and a half teaspoons of baking powder.
  • One teaspoon of salt.
  • Three-quarters of a cup of milk.
  • Half a cup of water.
  • Half a cup of melted butter.
  • One teaspoon of vanilla.
  • Half a tablespoon of nutmeg.

How to prepare Southern-style Johnnycakes

Step 1. Take a large bowl and mix your flour, sugar, baking powder, salt, nutmeg, sugar, and cornmeal.

Step 2. Using your fingers, make a little hole in the center of your dry mix.

Step 3. Put the milk, egg, vanilla, melted butter, and water in the hole.

Step 4. Mix the batter using a whisk or a fork. Since Southern Johnnycakes are closer to pancakes than to bread, your batter should be silky smooth.

Step 5. Take a cast-iron skillet or a frying pan and place it over the oven. Set to medium-high heat. You can use butter to fry the Johnnycakes or some cooking oil. I personally prefer to use tallow.

Step 6. Using a ladle or a small cup, pour some batter in the skillet and fry. Once the bottom is golden-brown, flip it and fry the other side. Continue until there’s no more batter left in the bowl.

Step 7. Like in the first case, serve hot, with some agave nectar or maple syrup. If you want to turn this into a really fancy dish, you can also add some frozen berries.

Wrap-up

As far as the traditional Mormon Johnnycake is concerned, I believe you can turn it into a full-fledged bread if you skip the sweet ingredients. Yes, I know that it’s hardly a substitute for oven-baked peasant’s bread, but it’s super easy to make and requires no cooking skills at all. If you’re careful enough to store it in a zip-lock bag or airtight container, that loaf can last for at least a couple of weeks, if not months.

The traditional recipe calls for the bread to be served hot out of the oven. Well, it is possible to eat it stone-cold but doesn’t have the same taste. What do you think about the Mormon Johnnycake? Hit the comments section and let me know.


Recall how almost all material on prepping says something about having at least one cornbread around the house? It’s, indeed, delicious, nutritious, and, all thing’s considered, very easy to make.