HomePosts Tagged "SHTF" (Page 12)

You can wipe that smile off your face because I ain’t going to teach you how to make a real grenade. Apart from the fact that they’re illegal, which means that I will be up to my eyeballs in SWAT the minute I hit the “publish” button, it’s not the topic of today’s article. Remember that scene from Rambo, when John unscrewed the cap of his knife to take out a piece of cloths? Well, that’s exactly what a paracord grenade is – a very small container that comes will all the items you will need to get out of shit hits the fan situation.

So, why is called a paracord grenade if it doesn’t explode? Well, maybe because it’s shaped like a grenade and because having one tied to your belt makes you a bad MF.

Anywho, in my opinion, every prepper should have at least one of these neat accessories. Yes, I am well aware of the fact that your bug out bag has everything you will never need, but you never know what could happen – maybe you’ll lose it, forget to take it or perhaps you may be compelled to abandon it in order to run faster. So, without further ado, here’s how to make your first paracord grenade.

Materials required

For this project, you will need the following items:

  • Survival items of choice. I packed an emergency blanket, a signal mirror, a magnesium rod, two pieces of paper, a small pencil, six Band-Aids, some fishing line, and a small fishing hook.
  • 550 paracords. For this project, I used black and red 550 paracords.
  • Rubber bands.
  • Scissors
  • Paracord fid (they look like regular knitting needles, but they’re used for paracords).
  • Mini carabiner.
  • Aluminum foil.

All done gathering your supplies? Good! Here’s how to make your paracord grenade.

Step-by-step paracord grenade

Step 1. Place some aluminum foil on your work table. Use a knife or a pair of scissors to cut the excess foil.

Step 2. Place your survival items in the center of the tin foil.

Step 3. Fold edges as to create a grenade-shaped package.

Step 4. Tie the black and red paracords to the small carabiner. To ensure that both paracords will be wrapped tightly around the package, use a Larks Head Knot for both of them. If you don’t know how to make this type of knot, check out the video below.

Step 5. Place the carabiner on top of your package. Right now, the red paracord should go on the left of your package, while the black one should run along the right edge of your package.

Step 6. Secure paracords to package by applying two rubber bands right below the mini carabiner.

Step 7. Tie the red and black paracords ends at the bottom of your package. For this, you will need to use a square knot. If you don’t have any clue on how to do that, check out the video below.

Step 8. It’s now time to make the first knot. Now, take the paracord piece on the left side and make an S shape right below the package.

Step 9. Grab the end of the left paracord and get it through the loop that’s on the left side.

Step 10. Now pull until there’s no more slack. Leave the loop on your right side for the time being.

Step 11. To close the loop on your left side, you will need to grab and pull the upper part of the loop that on your right side.

Step 12. Now you can pull the upper part of your right loop to close the left one.

Step 13. To cover the rest of the package’s surface with black paracord, make several Solomon knots. If you don’t know how to do them, watch the video below.

Step 14. Once the entire surface is covered, start the second pass using your red paracord. Follow the steps above to add another layer of paracord. When you’re done, use a square knot to secure the red paracord to the mini carabiner.

Step 15. Attach the paracord grenade to your belt or bug out bag, and you’re done.

Additional considerations on the paracord grenade

Keep in mind that the paracord grenade can be used only once – just like a regular grenade. If you run into trouble, undo the knots, take out the items inside, and save the paracords for later use. I wouldn’t recommend attempting to make a paracord grenade in the field because it’s a time-consuming process.

Now, if the above-mentioned steps seem too difficult, you can use one type of paracord instead of two. The process is the same: start with a square knot at the base of the mini carabiner, Solomon knots all around, and finish up with another square one.

As far as the contents of the paracord grenade are concerned, you’re free to add or remove items. When I first did this project, I used the same items as John Rambo. One thing I forgot to add was a firestarter. Of course, the magnesium rod is important, but you can also try to add things like a bit of char cloth wrapped around in plastic or even a wad of steel wool. Think of it this way: the paracord grenade mirrors the prepper’s personality. Your bug out bag contains all items needed in the field, but this small container should pack only those items you can do without.

Another thing to keep in mind is to add some sort of protection for sharp or pointy items. For instance, if you want to pack a pocket knife or fishing hooks, wrap them in some tissue paper or cloth before putting them inside the package. If you want to weatherproof your package, place your items inside some plastic wrap first before packing them in aluminum foil. You may also want to add some dental floss in case the paracord is too big.

That’s basically it on how to create a paracord grenade. What’s your take on my little DIY? Hit the comments section and let me know.

You can wipe that smile off your face because I ain’t going to teach you how to make a real grenade. Apart from the fact that they’re illegal, which means

For some minutes after this fancy possessed me, I remained without motion. And why? I could not summon the courage to move. I dared not make the effort which was to satisfy me of my fate — and yet there was something at my heart which whispered me it was sure. Despair — such as no other species of wretchedness ever calls into being — despair alone urged me, after long irresolution, to uplift the heavy lids of my eyes. I uplifted them. It was dark — all dark. I knew that the fit was over. I knew that the crisis of my disorder had long passed. I knew that I had now fully recovered the use of my visual faculties — and yet it was dark — all dark — the intense and utter raylessness of the Night that endureth for evermore.    The Premature Burial, Edgar Allan Poe

Welcome, weary traveler! The journey’s been a long one and you rest. Sleep! Sleep! And awaken to find yourself trapped in a pine box. Deep silence apart from the thumping sound made by your heart – like a Mad Hatter racing past everyone to get front-row tickets to see the Rapture. Charming perspective, isn’t it?

Well, for us, it’s just a tall tale, a decrepit fable meant only to scare children or to make chicks jump into your arms when campfire ghost stories become too ghosty. However, for people living in the Victorian Age, it was a very distinct and frightening glimpse into the afterlife. Rumors of medical conditions that so perfectly mimicked the symptoms of death fueled the common folk’s fear, leading to all kinds of peculiar funeral practices.

Have you seen the Autopsy of Jane Doe? Great horror movie, by the way. You should definitely watch it if you like old-school horror flicks with lots of jumpscares. Anyway, there was this scene in the movie where a mortician explains to his apprentice the significance of attaching a small bell to the cadaver’s toe.

Won’t spoil the movie for you by quoting the doc, but I’m going to say this – that’s a very old and very common 19th-century medical practice to ensure that the deceased wasn’t interred while being alive. As I’ve mentioned, some conditions such as catalepsy mimic the symptoms of death.

With Medicine lacking the needs to detect faint life signs, some patients were declared dead even though they were very much alive. The bell attached to the toe was to make everyone aware that the soon-to-be-buried person still had life in him.  Historical records that toe bell was not the only peculiarity when it came to the mortal dread of being buried alive.

Affluent families commissioned intricate coffin which featured let’s say, emergency release switches. These levers or buttons were installed inside the coffin, probably in proximity to the deceased’s limbs.

As death spares neither the rich nor the poor, even the working class sought to outfit their loved ones’ final resting places with similar signaling devices. The most common was the bell mounted on the tombstone, which could be triggered by the deceased via a thin metal wire running through the ground.

Anyway, welcome again to the first part of my extreme survival series; a project which I have postponed for far too long. As you’ve probably guessed by now, the first article will be about how to escape being buried alive.

I know that with nowadays medical gadgets it’s next to impossible to second-guess the symptomatology associated with death, but it can happen (check out the story about the Spanish man who woke up during the autopsy). Now, without further ado, here’s what needs to be done in order to escape a coffin if you’ve been buried by mistake (or intentionally!).

Step 1. Assess the situation

Fear is only natural and waking up in utter darkness, surrounded by four wooden boards can make even a man with nerve made of steel to go nuts. Don’t do that! I know it’s hard to think about anything else in those moments, but screaming, kicking, crying, and obsessively scratching the inside of the lid will only force your lungs to consume more oxygen, not to mention the fact that you will more than likely end up hurting yourself.

Take a minute or two to compose yourself and assess the situation. Knock on the lid and listen – if you hear a hollow sound, it means that the coffin has yet to be placed underground; in which case, all you’ll need to do would be to kick open the lid. Doesn’t matter if haven’t had the chance of break open a door – with that much adrenaline coursing through your veins, you can probably kill a bull.

Now, in the event that you don’t hear a hollow sound, you should assume that the casket has been buried. There’s no reason to panic. Calmly, reach into your pockets and try to figure out what you have in them. I know that this sounds really sad, but people nowadays tend to bury their loved ones with some of their possessions – this could mean, well, anything: a small switchblade, a lighter, a smartphone, a tablet, heck, even a laptop.

Don’t even bother trying to call someone if you find a phone in your pockets – the signal won’t get through that far underground. However, you can use flash to check out the inside of the casket. Don’t forget about your breathing – even if all the odds are against you, panicking will only make you act irrationally.

Most caskets are made from flimsy materials, meaning that breaking open the lid would not be much of an issue. It’s the earth on top that must concern you at this point.

Step 2. Provide some sort of head protection

It’s obvious that you won’t have access to the tools you keep inside your B.O.B, but that doesn’t mean you can’t improvise. Bear in mind that breaking the coffin’s lid is the easy part. Having to deal with the earth will be quite challenging, but not impossible.

To spare yourself a chocking death once the earth starts pouring into the coffin, pull your T-shirt, shirt or park over your head (hands should not be in the sleeves). After doing that, use the sleeves to make a knot just above the head. Yes, I know it sounds awful and rather ineffective, but this simple trick will protect your head while preventing you from chugging dirt.

Step 3. Look for weak spots in the coffin.

If the unfortunate event happened very quickly and away from your family, you’re very likely to have been buried in a rectangular box. Those require little force to break since the lid’s held in place by a couple of nails. Still, if some funeral arrangements were observed, you could end up in one of those double-doored caskets. It doesn’t really matter, because all of them have weak spots – in the latter case it’s the gap where the two doors meet. That’s where you will need to strike.

However, before making any attempts, take a few moments to compose yourself; you’re alive, you’re still breathing, and you will get out of this no matter what. Free your mind of any menacing thoughts and focus only on the task at hand.

Step 4. Break the lid and start shovelling

When you’re ready, ensure that the shirt’s sleeves are secured, and, using all the force you can muster, kick the coffin’s lid. Hit it until earth begins to fall inside the coffin. Don’t panic when that happens. Push the falling earth on the sides.

Always keep your head and torso above the earth. Keep pushing and piling the dirt to the sides. You can guess how far you will need to pile by using your nose – if the air’s still stale and, well, earthy; it means you’ve still got a few feet to go. Again, keep breathing at a steady pace and don’t attempt to remove the ‘bag’ over your head no matter how uncomfortable you feel. As the earth piles inside the coffin, you’ll notice or rather feel less of the stuff falling on you.

Step 5. Get up on your feet, soldier!

Once the inside of the coffin starts feeling up, arch one of your feet, and plant the foot firmly on the coffin’s bottom. You’re nearly out! One more push and you’re free! Using that foot as support, muster all the strength you have left and stand up.

You’re one step away from freedom. It may be very hard at first, but once you’ve managed to raise your head and torso above lid level, standing up will be very easy. At this point, all you’ll need to do would be to push away the remaining earth and to crawl out of your grave. Congratulations! You’ve just survived one of the worst fates anyone can imagine.

Final Thoughts

I should emphasize the fact that even with our astounding progress in life signs detection, errors can sometimes occur. Nobody’s to blame for this. It’s just the fact that your body has decided to slow all body functions to the point where detection becomes impossible. Still, one cannot ignore the fact that someone could have done that to you on purpose. Yes, I know that it’s a rather disconcerting thought, but, then again, the world is a crazy place.

Once you’ve got out of the grave, head immediately to the nearest hospital for a full checkup. You should also find a way to notify the authorities. The chances of you being the target of an assault may be slim, but at this point anything is possible. One more thing before I go – emotional support. This kind of things stirs some serious shit inside your noggins.

Don’t even dare to assume that it’s over. Ever heard about PTSD? Yes, that awful conditions which afflict so many battle-hardened soldiers. Post-traumatic stress disorder doesn’t occur solely during an intense battle. Nope! According to the docs, you have more chances of experiencing PTSD-like symptoms after a car accident or going through a breakup, than on the battlefield.

So, after the good doc gives you a clean bill of health, do yourself a favor and go talk to the therapist about this experience.

What are your thoughts of being buried alive? Hit the comments section and let me know.


Other self-sufficiency and preparedness solutions recommended for you:

The Lost Ways (The vital self-sufficiency lessons our great grand-fathers left us)

Survival MD (Knowledge to survive any medical crisis situation)

Backyard Liberty (Liberal’s hidden agenda: more than just your guns…)

Alive After the Fall (Build yourself the only unlimited water source you’ll ever need)

The Lost ways II (4 Important Forgotten Skills used by our Ancestors that can help you in any crisis)

The Patriot Privacy Kit (Secure your privacy in just 10 simple steps)

For some minutes after this fancy possessed me, I remained without motion. And why? I could not summon the courage to move. I dared not make the effort which was

In a previous article, I might have mentioned something about cowboys and bandanas. Apart from the fact that they looked awfully cool and would help them conceal their faces during a bank robbery, those wild rags, as they were called, had more uses beyond fashion or crime. And since bandanas will never go out of fashion, I’ve decided to do this little follow-up to show you how this painted rag can save your can in a shit hits the fan situation. So, without further ado, here are 17 survival uses of a bandana.

Water collection

Water’s essential in field survival. Still, if you get lost or anything, you won’t be able to rely on your emergency water supply. If there are no streams or rivers nearby, it’s possible to use your bandana to soak up water. Tie to your ankles and walk through tall grass during the wee hours of the morning to collect dew. Tree holes usually harbor a small amount of water. Get that bandana in there and soak as much water as possible. It may sound disgusting, but you can also squeeze some water from that rag after a long day’s walk (yup, drinking your own perspiration).

Crafting a simple pouch

Don’t have any pockets left to carry out your gear? No problem! You can whip up a simple pouch which can be attached to your belt or backpack. Just place your items in the center of the pouch, bring all folds into the middle, and tie it with a piece of dental floss or whatever cordage you have available.

Head protection

It’s obvious that a bandana cannot replace a safety help, but you can also use these thingies to keep your head dry when it’s raining, or the sun’s up in the sky.

Makeshift bandage

In case you’ve lost your med kit or had to use that gauze as tinder, you can use your bandana to bandage a wound.  If you have to deal with a large arterial bleeder, you may also use that wild rag as a tourniquet.

Setting up the table

Sorry if there are no roses nor lit candles – all I can offer you is a bandana used as a tablecloth.

Getting your keister clean

Well, you know that they say – when shit hits the fan, there’s nothing more to do than wipe your behind and move on. In case you run out of TP or paper tissue, take out your bandana and improvise. Just be sure to wash it before using it as a headcover or tablecloth.

Marking a trail

If you feel like you’re walking in circles, get the bandana out of your bug out bag and place on the ground right where the trail starts. Keep going. If you still see the bandana, it means you have to change your approach.

Repair broken backpacks

One of the most frustrating things that can happen in the field is a broken backpack strap. If you don’t have a sewing kit in your B.O.B, just use your bandana to replace that strap.

Starting a fire

No need to tear your clothes for tinder if you have nothing left in your box. Just place the bandana on the ground and set it on fire using your method of choice.

Using it as a mask

If you need to cross an area filled with dust or debris of any kind, you can always wrap the bandana around your head. Don’t forget to soak it in water to increase its filtration efficiency.

More grip on tools

Knees are weak? Hands are sweaty and cannot get a decent grip on the tools you’re using? Wrap the bandana around your hand and give it another go.

Instant sleeping bag warmer

What’s the purpose of including an electric blanket in your bug out bag if there’s no electricity around for miles? Still, you’ve got to do something about getting some warmth inside your sleeping bag. Making an indoor fire is the obvious approach, but not the only one. Before making a fire, wall your pit with whatever rock you find. When it’s sack time, take a couple of hot rocks, place them inside the bandana, tie the pouch with some rope or string, and place under the sleeping bag.

Making ice packs

Bruises? Fever? Headaches? Use an icepack. Get your bandana out of your B.O.B, put a couple of ice shards inside, wrap, and profit.

Gas Cap

In case something happens to your gas cap, don’t run around the city with that intake exposed. Until you reach the next auto shop, you can stuff a bandana inside to protect the gas pipes. You can do the same for gas canisters if you’ve lost the metal cap.

Diapers

As a father of two, I’ve always had to make supply runs to the store for diapers. You know you’re in deep shit when two boxes per day are not enough. In case the local store runs out of diapers, or there’s no one else around the house to take care of your kid while you’re away, use your bandana as a diaper.

Naptime cover

Do you know what I hate most about having to nap during the day? The sunlight is getting in my eyes. Ever since my kids came along, I was forced to rethink my napping habit. Well, long story short, if you’re in the situation, you can sleep like a boss even during the day by using that bandana as an eye cover. Try it yourself! It works like a charm.

Picnic protection

Too many insects around the campsite? Well, if you don’t have any repellant on hand, cover the food basket with your bandana to prevent those pesky termites from making away with your food.

This about covers it for my funky ways of using a bandana in a shit hits the fan situation. What’s your take on this? Hit the comments section and let me know.


Other self-sufficiency and preparedness solutions recommended for you:

The Lost Ways (The vital self-sufficiency lessons our great grand-fathers left us)

Survival MD (Knowledge to survive any medical crisis situation)

Backyard Liberty (Liberal’s hidden agenda: more than just your guns…)

Alive After the Fall (Build yourself the only unlimited water source you’ll ever need)

The Lost ways II (4 Important Forgotten Skills used by our Ancestors that can help you in any crisis)

The Patriot Privacy Kit (Secure your privacy in just 10 simple steps)

In a previous article, I might have mentioned something about cowboys and bandanas. Apart from the fact that they looked awfully cool and would help them conceal their faces during

Welcome to the jungle! We ain’t got any fun, games, plants or even swinging vines. What we do have is concrete, iffy back alleys, and lots of ways for you to lose your wallet and, perhaps, even your very life. Charming perspective, ain’t it?

Well, that’s more or less what it feels like living in the big city; nature may be wrathful, but not even her can hope to emulate our fellow man when devotes his entire energy to darker things. Urban survival has gained a lot of traction over the past couple of year and, I, for one, agree that you don’t need to become in the middle of nowhere in order to exercise those survival skills.

Anything can happen when you’re on the street – and that’s not fear-mongering, that’s a reality. If you don’t believe me, just hop on the Internet and do a quick search on crime in your area. You’ll be surprised to find out that your seemingly-quiet neighborhood becomes a minefield at night.

Anyway, after these cheerful little thoughts, let’s get acquainted with today’s topic – urban survival. Prepping means being ready for anything and at any time.

This also covers things like taking a stroll around the park or visiting another part of the city. Can’t say I got into too much trouble around the city, but then again, I’ve always tried my best to avoid some areas, especially at night.

No, it doesn’t have anything to do with mystical mumbo-jumbo, but anyone can get a little jumpy when having to traverse a poorly-lit area with tons of dark corner and who knows what else.

Ever since I got bit by the prepping love bug, I’ve always done my business to carry around a downscale version of my B.O.B. Well, on the outside it looks like a regular backpack (nothing too fancy about it), but in the inside, I have all the tools I need to get out of just about urban SHTF situation. So, without further ado, here are my choice of X items that shouldn’t be missing from your urban survival kit.

  1. Tactical flashlight

I truly believe that entire books can be written on the topic of tactical flashlights, and for a darn good reason – they have many other uses, some of them going well beyond their original purpose. Now, this is the kind of item you really wouldn’t want to buy from a thrift or yard sale.

A high-quality tac light can cost anywhere from $100 to $1,000, depending on things like construction and add-ons. I found it best to carry around one of the tac lights that come with a built-in taser (the electrodes are built into the flashlight’s butt, so be careful not to fool around with it).

Apart from the fact that most tac lights are LED-powered, meaning that they offer thrice as much battery life and light compared to those using incandescent bulbs, it can also serve other purposes. For instance, if someone wants to mug you, use the back end to zap him.

Or, if you prefer something more hardcore, you can always use that tac light as a club. A high-quality tactical comes with various gadgets which you can use to attach them anywhere – suction cup for walls or glass surfaces, strap, and socket for headwear, and even a lanyard hole. They are very robust but, at the same time, very light (mine weighs a little over 200 grams). So, get yourself a tac light and toss it in your urban survival kit.

  1. First-aid kit

No matter where the winding road takes me, I always carry around a downscaled version of my B.O.B’s medical kit. If you’re going to stroll around the city, you won’t need stuff like straight scissors, suturing kits, syringes, saline solution or whatnots.

For a basic urban first-aid, toss in a couple of Band-Aids, sterile pad, a small bottle of disinfectant, hand gel, and a couple of safety pins or some tape. That’s it! Still, if you live in a rough neighborhood, you should remember to pack extra supplies in case you have to deal with a more severe injury.

Moreover, if you have any allergies, you should always carry an EpiPen and a box of antihistamines in case you experience an allergic reaction. Before I met my wife, I used to hang around another part of the city where – how should I say this? – was not for those faints of heart. Since the opioid crisis’ on the rise, I made sure to carry a Narcan pen with me at all times.

No, it wasn’t for me, if that’s the question on your mind, but on several occasions, I found myself standing in front of various individuals who ODed on God knows what. Why not spend a couple of bucks each month to save a life? Chance are that you will never need to use a Narcan pen or someone, but wouldn’t it be neat to have one close when someone’s life hangs in the balance?

  1. Small pry bar

No, I really don’t fancy myself a burglar, but I always remember to carry a small prybar in my urban survival backpack in case I need to get off the street really fast and need to break down a door or something.

That thing’s really very useful in you to live in old condos where the elevator tends to break down on a daily basis. So, no matter the circumstance, a pry bar is always a valuable asset. Just don’t go waving it around like crazy, unless you want to wind up in the cooler on purpose.

  1. Face mask

Living in a big city means sucking in all kinds of toxic fumes and gases. I am very grateful to all those wonderful people for getting hybrids because I can still feel the smoke coming from the exhaust pipes during a traffic jam. Anyway, you really don’t need to face a chemical attack in order to make use of a face mask – there are some areas of the city where the fumes are thick enough that you can probably cut them with a blunt butter knife.

  1. Emergency potty

There’s nothing worse than having to go number two, only to realize that the toilet’s clogged or the water pump has stopped working. Well, I have to admit that this is a little strange, even for a prepper, but I always carry one of those foldable potties in my backpack.

Yes, yes, I know that most of you are picturing me know to get out my portable potty to “spend a penny” on a crowded subway, but it’s not like that. You may never know when the shit hits the fan, and you wind up having to cross half of the city for a working toilet. No, I will not expose myself on a bus full of people, but I will find a secluded place for when Nature calls in those moments when there’s nothing available nearby.

  1. Multi-tool

I always like to carry around Ol’ Vicky (that’s how I named by Victorinox Swiss Multi-tool). Why? I don’t know for certain, but I usually find a way or two to use my multi-tool before the day’s over. I found very handy for those Saturday afternoon bike trips of mine – I should seriously consider buying a new bike since I tend to spend more time making repairs than actually riding it.

Anyway, the multi-tool’s a very useful asset, no matter where you go and do. Broken zipper? No problem! Key broke in the lock? Just use the multi-tool to get it out. Locks are cheap; doors aren’t!

  1. Work or hiking boots

Wearing heavy-duty work or hiking may not much of a fashion statement, but they can help a bunch during an SHTF situation. Of course, being in the city means that you won’t have to do too much mountain climbing. Still, in certain situations, you’re going to need that extra traction offered by a pair of hiking boots.

For instance, there’s no guarantee that during one of the walks you won’t wind up stuck in an elevator or inside a subway tunnel. Both situations call for hiking, climbing, and maybe running. Sure, you can always wait for the repair team to arrive and fix the thing or you can get out and lend them a hand. Remember that in some cases, like a tunnel collapse or whatever, it may take the emergency response team hours to get to you.

That wouldn’t be much of a problem if you didn’t have a limited oxygen supply or surrounded by injured or scared to death people.  Anyway, weather permitting, you should do yourself a favor and tour the city in hiking boots. Of course, not every social call allows for this type of footwear, but I’ll let you figure that one out yourself.

  1. Solar charger

I find nowadays smartphones very irritating. Yes, I know you can take lots of pretty pictures with them, shoot 4K videos, surf the Internet, buy stuff online or play games, but that battery life though. Had this Samsung Galaxy Whatever-Model smartphone – great gadget.

The only thing wrong with it was the blasted battery – 6 hours on a full charge. That’s how long my battery lasted, no matter the circumstance. Tried changing the battery, tinkering around the apps; nothing worked. So, I’ve decided to carry around one of those portable solar chargers.

They work great, and if there’s enough sun, you can probably get a full charge in 4 hours or less. However, the best thing about these solar chargers is that you don’t have to stop in order to charge your phone or whatever. The solar cell can be taped to your backpack and the cable’s long enough to reach your pocket. Try it out! You won’t regret it.

And so, we come to the end of yet another article in which I glorify the well-made bug out bag. Well, it’s not exactly your run-of-the-mill backpack, but you get the idea. I know that most of you don’t feel comfortable carrying zero hour items while going shopping, strolling in the park or going to propose to your SO, but do bear in mind that shit happens everywhere, regardless if you’re a big city dweller or the king of your own mountain.


Other self-sufficiency and preparedness solutions recommended for you:

The Lost Ways (The vital self-sufficiency lessons our great grand-fathers left us)

Survival MD (Knowledge to survive any medical crisis situation)

Backyard Liberty (Liberal’s hidden agenda: more than just your guns…)

Alive After the Fall (Build yourself the only unlimited water source you’ll ever need)

The Lost ways II (4 Important Forgotten Skills used by our Ancestors that can help you in any crisis)

The Patriot Privacy Kit (Secure your privacy in just 10 simple steps)

Welcome to the jungle! We ain’t got any fun, games, plants or even swinging vines. What we do have is concrete, iffy back alleys, and lots of ways for you

In preparing for what may come, big and small, we tend to focus on two things first: food and defense. Some of us do plan out our resupply and restocking – which means growing – but maybe we’re stuck in a rut because of the things we read about seeds, and maybe aren’t really and truly understanding seed types and some of the terms we see. I’d like to dig into some of those terms so we know what we do and don’t want to buy, and why.

Seed Terms

We see a few plant terms pretty commonly in our day-to-day life, especially if we’re of a certain mindset. The biggies we see when we’re researching and buying seeds are: hybrid, heirloom, OP (Open Pollinated), GMO (Genetically Modified Organism), and organic. So let’s look at them a little closer, because they’re pretty significant and tend to be rife with crazy advertising and misconceptions.

Organic

This isn’t actually a seed term. It speaks to the culture of plants, the way we treat a plant, how we grow it. States have differing requirements for what it takes to be labeled organic, but the upshot is that it limits the amount of chemicals used. GMO seeds are not considered organic, even when the modification is something that is considered an organic compound, like some of the cold-resistance genes from fish, Bt that is a naturally-occurring microbe, or genes that allow resistance to Roundup (AKA, RR-Roundup Ready). However, seeds do not have to be grown organically to be either heirloom or OP crops. Likewise, hybrid seeds can be grown organically.

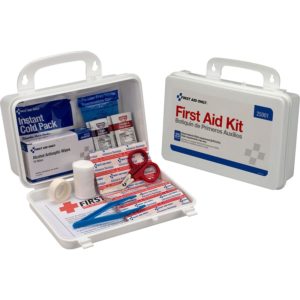
The most comprehensive look at preventative medicine out there. Click on it for details.

Genetically Modified Organisms

Contain genes from something that did not start off in a particular genetic line. Genes that are implanted could be from another class of plant or algae, from a frog, or from a fish. Sometimes the modification is removing a gene that would normally suppress or create a reaction. It’s a wide field.

GMO plants are mostly capable of successfully breeding, just to clear up that myth. Plants are more resilient in the face of uneven chromosome matching than animals. That uneven number of chromosomes in offspring (seeds) are what make fertile mule mares newsworthy, but the ability to cope with genetic inequality is actually responsible for some varieties and eventually speciation within plants, totally naturally. However, since most GMO plants are hybrids, it’s like rolling a 10-sided die in hopes of a 6, just like breeding two mutt dogs to each other. Because of that – and because of contracts – farmers don’t collect seed from their GMO crops.

Another pervading myth is that you have to work hard to avoid GMO plants. Yes, in U.S. supermarkets. Unless otherwise marked, almost everything in the center aisles, dairy section, and meat department has likely been fed or contains GMO corn or soy.

You want to survive tomorrow? Start today.

However, GMO variants don’t exist for every type of crop, and few are readily available. Wheat, corn, squash, canola, beets, alfalfa, soybeans, and oil cotton are the most common GMO seeds sold by Monsanto, with sweet potatoes and papaya available in Asia. Tomatoes, rice and potatoes have been approved but are not yet available commercially. GMO seeds are actually pretty expensive, too, especially in small scale. It’s unlikely – unless we’re buying big bulk farm-cropping seeds from a supply store – that we will even see GMO products available to us.

So why do we see so many “GMO-free” and “organic” banners on seed packets? Because we’re more inclined to buy them – or pay more for them.

It’s a case of the tail wagging the dog – when we’re interested in something, companies strive to meet that interest. Even good sellers and producers need to eat and thus develop marketing strategies, but it’s something we can be aware of to save our own hard-earned cash. If we’re buying OP or heritage seeds, paying extra for a “GMO-free” label is like paying more for “cow-free” labeling on soy milk. How the seed parents were raised (organic or inorganic) is really only of political or moral interest. We’ll inhale more toxins in a day than that single seed will convey to the adult plant and its fruit. Therefore paying more for “organic” labels is more personal preference.

That’s not to say a certain pack of seeds is not worth more than another. I may be motivated to support independent farm-to-sale seed production, small companies, organic growing methods, landrace projects, or heirlooms. I might be paying for packaging, uniqueness, or to support some organization in conjunction with the supplier or retailer. Just be aware of what you’re really paying for.

Everything from the soil up. Seeds included. Click the book for details. 

Heirloom seeds

Also sold as heritage crops, have been around for a while, somewhat unchanged. I say “somewhat” because things change. Look up the evolution in AKC standards, especially for things like Airedales and German shepherds.

You can also look at vehicle tag standards. The 1991 F150 and the 1930 Model A are both older Ford pickups that qualify for the same classic or antique plate, but they’re very different vehicles with very different capabilities. Heirloom seeds are kind of like that. Some are fifty years old, some are centuries old. They may follow a basic form, but the 1850’s cultivar will likely demonstrate more changes from the original than the fifty-year-old seeds.

That’s okay. All our crops have changed significantly, usually for the milder and sweeter, sometimes getting bigger and sometimes yielding more fruit per plant. In other cases, plants have gotten smaller, like an heirloom wheat bred by human selection over about 300 years to produce seed at 2-3’ instead of taking half the season just to grow to 5-6’.

All heirloom is going to be open-pollinated, but not all OP seeds are heirloom, and that’s okay, too.

OP/Open-pollinated

This means that seeds will breed true, beagle + beagle = beagle, pepper to pepper.

Some plants (corn, wheat) use wind to pollinate them from another plant of the same species (two or more plants are necessary for pollination or for fertile seeds). Some plants (squash) need a thin paintbrush or a bug to get coated in pollen from a male flower and then coat the important parts of a female flower, but the flowers can be from a single plant. Peas could use wind or a bug, but will usually bear fruit just fine from the pollen and eggs within a single flower. Tomatoes could bear fruit from just one flower without any assistance, but will be more successful if the flower gets shaken by us or by insects, dropping more pollen onto the petioles.

Spacing-concepts-congestion-planting-marigolds-and-cabbage-www_welldonelandscaping

So long as our spaghetti squash does not begat-begat with acorn squash and our bantam sweet corn does not make time with our strawberry popcorn, all will be well. That’s how OP and breeding true impacts us: We can collect our seeds, plant them again, and make future generations of the same squashes and corns into infinity.

It does not require a particularly long genetic line to produce those results. OP seeds have regularly been refined over years, but they may only be a few years old, relatively, especially fast-growing plants that can produce multiple generations in a year.

OP’s are commonly tailored the same way hybrids are, breeding more and more for cold and heat and drought tolerance, expanding the range that a plant can be successfully grown in, or making it resistant to the introduced and stagnant-soil diseases we fight. We also breed for more produce per plant, either same-size plants or larger plants. Sometimes OP’s go the opposite way and are bred to be smaller and more compact, so they fit in more places, or so they spend less time on foliage and can be harvested earlier and easier.

OP’s can be had both determinate (most production in a narrow window) to aid in efficient harvest and succession or rotation cropping, or indeterminate (production spread out across a longer range) so that we can stagger harvest and processing.

OP is how all heirlooms start. They’re no less reliable than an heirloom or heritage crop seed. They’re just younger, 1991 F150 instead of 1948 F150.

Hybrids

Are what result from promiscuous plants or deliberate cross-pollination. The problem is that they don’t necessarily breed true to a parent hybrid.

Look at Labradoodles (Labrador + Poodle). If I breed Labradors for fifty years, I might get some slight variations but I’m getting Labs. However, if I breed two Labradoodles, I start gambling. I may get some pups that throw back to Labs, some pups that throw back to poodles, and some pups that do present as Labradoodles. There may also be some pups that look like maybe there was a milkman involved, because neither parents nor grandparents have upright, pointy ears or spots.

Genetics are funny that way. “Hybrid vigor” is awesome, I love my mutt livestock and pets, but it’s also a gambling game. When we want to eat, we don’t like to gamble on what’s going to show up with more than a year invested in the seeds.

Hybrids have their purposes, especially since a lot of heirlooms and some OP’s are indeterminate. A lot of hybrids are also faster than their heirloom fore-bearers. Although there are heirlooms and newer OP’s that are resistant to diseases, hybrids can usually be found already tailored for our exact growing conditions. They shouldn’t represent the whole stock for somebody worried about losing their supply line, but there are arguments that can be made for including them in planting and storage.

gardening-1117866_640

Bonus: Landrace

We sometimes see the term “landrace” in homesteading circles. That’s its own separate cookie, too. Landrace lines – plant or animal – represent the idea that regionally produced specimens are better than “generic” heirlooms and heritage crops.

They are being developed much the way our crops and livestock started and why we have so many breeds of chickens, pigs, goats and so many cultivars of plants: they stay in pockets. It’s not necessarily bottle-necking and inbreeding, although there is some – purposefully done and carefully controlled. It’s about a belief small, slow solutions, and in local products. It’s making a pig and a dent corn for Arizona that fits Arizona better than it does Alabama or Alaska. Some landrace programs are also working on livestock with native pasture and forage, to decrease the amount of reseeding and grain feeding we have to do.

We already apply some landrace principles when we give advice. I may suggest certain apple trees and chicken breeds for a pasture orchard, but I will also tell you to try to find a local nursery with a local or regional grower, and a local or regional breeder. The chances of you having success with something that’s intended for your area, that has come from healthy parents that are already thriving in your area, are much higher than if you order in a plant or livestock from two USDA growing zones away, even if it’s the same breed or cultivar.

Landrace initiatives are working to make those kinds of local-to-local sources more available, increasing local success.

Selecting Seeds

“One Size Fits All” is largely a myth. There are always exceptions. Needs and goals differ, so one specific seed type isn’t necessarily better or worse across the board.

Somebody might stock some 45-50 day hybrid squashes so that they can see returns if a tornado, rogue truck, fire, animal or torrential downpour takes out their garden 60 days before the average first frost. Somebody may want a hybrid cover that more effectively chokes out weeds for the first couple of years. Alternatively, some may be dedicated to saving towering heritage wheat, or may see good reason to cultivate tepary beans even though they don’t match their current climate.

That’s as it should be. We’re all different with different motivations, so we seek out our best fit.

Additionally, sometimes we can save a little money or increase our options by understanding how important a specific seed term is to us, and how important it is to us to have our heirloom or OP seeds also marked with the words “organic” or “GMO-free”.

The goal is to be aware of what those terms in seed descriptions really mean so that we can make the best purchasing decisions for our situations and expectations.


Other self-sufficiency and preparedness solutions recommended for you:

The Lost Ways (The vital self-sufficiency lessons our great grand-fathers left us)

Survival MD (Knowledge to survive any medical crisis situation)

Backyard Liberty (Liberal’s hidden agenda: more than just your guns…)

Alive After the Fall (Build yourself the only unlimited water source you’ll ever need)

The Lost ways II (4 Important Forgotten Skills used by our Ancestors that can help you in any crisis)

The Patriot Privacy Kit (Secure your privacy in just 10 simple steps)

In preparing for what may come, big and small, we tend to focus on two things first: food and defense. Some of us do plan out our resupply and restocking

A crisis of any scale is a tough time to either have to learn to do without, or create a lot of work for ourselves. With a little practice and planning, we can still have things that make our next dish of soup or pinto beans or squirrel a little happier, and give us some versatility in how we use flour and mixes for baked goods. We can do it without adding a ton of steps, mess, and in most cases a lot of ingredients to our daily tasks. Whether we’re at home or on the trail, that can save some sanity as well as time and labor.

This is me, so you’re mostly going to see 5 ingredients or less through here, and a focus on cleanup. I’m just not Martha Stewart. But I do like my breads and I do like something sweet now and again, so here’s half a dozen ways we can still get them, even without a working oven or supermarket.

Ash Cakes & Bannock 

What would a soup be without some sort of bread? Not as happy, that’s what. Any flour will work for either an ash cake or bannock bread, even purchased mixes like the dinner rolls Augason Farms apparently figures I’ll be making – ever, but especially in a disaster. Even when it’s got extra stuff in there, I go ahead and follow the cup-tablespoon-teaspoon ratio for bannock, or just drizzle in water or milk for an ash cake.

Those ash cakes and bannock can also be augmented by rolled oats, rolled wheat, or instant rolled barley, although you need to let those sit for 10-20 minutes to make sure they have a chance to soak up some liquid, and you’ll probably need to add more liquid than usual. It’s a way to both add some texture and variety to diets, as well as use up some of the cheaper ingredients like oatmeal that are in our storage even when we haven’t planned for no-bake cookies.

Any cornbread or cornmeal can also be turned into ash cakes or pseudo-Johnny cakes, to go beside a soup or under a stew, or to add variety to our breakfast meals.

Drop biscuits & dumplings

Most pancake and dinner roll mixes have the potential to turn into nice, easy biscuits; and anything that’s a biscuit (or bannock bread) can be dropped by mounded tablespoons into a simmering pot of broth, gravy or soup, simmered for 10 minutes, flipped, simmered another 10-12 minutes, and whala – we have a fluffy(ish) bread right there in our soups.

Head’s up: Biscuit dumplings will regularly turn your clear, light broth into something thicker and more gravy like. That is not a bad thing, just a point.

Something that can be a bad thing, is that if you completely cover the top of your soup with dumplings, it gets really hard to stir the bottom.

Both of those factors go away if you opt to make your meal in a solar oven or similar. You can do it one of two ways, just like a regular biscuit bake – stick the biscuits/dumplings on the bottom to slowly rise and fluff, or space them out on top from the get-go or after part of the bake time has elapsed.

An advantage to dumplings over other ways of getting a breading into our soup meal is that it’s still only one cooking pot.

Drop biscuits have advantages in clean-up, too, and in time and waste. When we mix a batter and then spoon biscuits out onto a sheet pan, we don’t even have to dip our fingers in flour for molding them. We sure don’t have to flour a counter and a rolling-pin or drinking glass (which is also what I usually use for a cutter).

When I make drop biscuits, they’re ingredients to oven in 5 minutes or less, and my cleanup involves a bowl and two spoons. When Mr. P makes *real* biscuits, I consider just torching the kitchen and starting over.

In a life with limited water, limited resources, and a lot of labor involved with every aspect of survival, the differences can matter. The same holds true for the drop biscuit dumplings instead of rolling out and cutting even more to make flat drop dumplings.

Hardtack

Hardtack is definitely an option to go with our soups, just like it was in colonial and pioneer days. There are lots of recipes online for baking it.

There are not as many as I’d have expected where people actually eat this stuff, and discover that it’s best soaked for a few hours first, then simmered right along with broth, tea, or soup, anywhere from 10 minutes to an hour depending on the alignment of the stars*.

*Snicker; but not entirely kidding on the predictability front.

That veers it away from a convenience food, but if you’re using a crock pot or equivalent, or are simmering soup for a few hours anyway, heating the house anyway, it’s pretty handy to be able to pop open a bucket of these things 2-5 years after you made them and have a nice, portable, calorie-dense portion to pick up and eat or saw with a fork and knife. We can even sub in some of our crazy flours like ground dry beans, acorn, and barley if we’re so inclined.

Just be aware that real hardtack is not Mountain House pilot bread or a cracker, and that 5-20 minutes under gravy or in a fry pan goes nowhere without a pre-soak once it’s hard and dry.

Beer bread

I am lazy, if it was not obvious from the articles about bed sheets, laundry, and gardening. I’m also not big into babysitting food at timed intervals.

Beer bread fits me to a T.

Price out some inexpensive light beer, and don’t neglect the option of a local store ordering a couple flats of forties for you. They’re actually the cheapest option for me, both bottles and cans, because I’m not willing to buy Natty Ice even for a disaster, even though there’s boxed wine in case I decide a wine IV or camelback is necessary for my sanity.

There are many recipes online. I like this one, although I sometimes just omit the butter entirely or use oil instead. This one skips the salt and goes straight to self-rising flour. We can sub in a dinner roll mix or Bisquick for either.

And the sifting … I call it optional.

We can use a beer bread recipe in any kind of cooker, from a crock pot or facsimile to a solar oven. We can make it in little cans around a campfire or rocket stove, too, or atop a clay pot candle heater.

Spread out in a pie plate or frying pan instead of a loaf pan, or separated into muffin pans, it’ll cook faster and be easy to portion out.

That can save arguments over who does or doesn’t get the heels (there are freaks out there who consider that a lesser slice). It can also just make it faster and less messy to serve, while also saving cooking fuel and time.

If you want more flavor to your bread, you can go with heavier and darker ales as you like. While I’m happy sipping a well-built Guinness or Killian’s Red, I don’t actually like them in my bread and that bread is no good for PBJ.

Griddle Cakes 

Another cheat I learned for backpacking is that you can make any baked good into a griddle cake. For those of us who want fast and easy in a disaster, or who aren’t *ready* yet and are dying for a quick and easy treat, bag and box mixes I have successfully made into little rounds of goodness with a pan or on the greased top of a canteen mug and any heat source include:

  • Oatmeal cookies
  • Brownies
  • Muffin mixes
  • Cake mixes
  • Scone mixes
  • Cornbread & corn muffin mixes
  • Hushpuppy batter

You can follow the directions (or portion them, depending on how easy fresh or powdered eggs and oil are to divide) or cut some of the liquids, and they come out about like puffy pancakes.

Thin them down a fair bit, and, boy oh boy, we’re starting to look into the gourmet side with crepes.

They can be eaten as-is like a soft cookie or roll-up, or topped with powdered sugar, cinnamon sugar, ice cream and milk flavoring syrups, nuts in syrup, honey, tree syrup, Karo, and jelly.

Frosting in a Ziploc bag offers the ability to make cute spirals and grids or fluffy artistic mounds. Pudding can be reserved and mixed thick to do the same, or used as a filling for crepes.

They can also be topped or filled with canned or rehydrated fruits, cannoli filling, pie filling, cream cheese, or peanut butter. You can also play with adding shredded coconut and nuts (and chocolate) to German chocolate frosting, or use sweetened condensed milk and shredded coconut as a super-sweet filler.

Fun note: They can also be baked in a skillet to cut like wedges of cornbread. I regularly bake muffin mixes in a pie pan to create thin little slices that are usually drizzled with something. Tuna cans and soup cans can also be used for any batter, as can small Pyrex bowls or ramekins. Those containers are also all options for baked pancakes, such as this one .

Off-Grid Cooking

Even when we’re not as prepared as we’d like to be, or when we like convenience and we want to continue to have convenient options in a disaster, we can still get the feel-good foods that bread and even “baked” sweet treats can be.

Whether it opens up options for us, just provides some extra backups, or becomes part of our daily habits, keeping an open mind about what we can accomplish – and how much effort it has to take – can only benefit us in the future.

This focused on my weakness: Breads. (And laziness, okay.) I totally endorse knowing how to do and make things from scratch. There are preservatives and cost issues with some of my cheats. However, from things like ash cakes and bannock that truly need few ingredients, to new ways to make and use mixes we might already have around, we don’t want to pigeonhole ourselves, especially if our disaster plans involve holing up in summertime or a lot more physical labor year-round.

Other things to consider when we look at these lists are the amount of fuel some of the treatments take, the amount of pan scrubbing and kitchen cleanup involved, and even the cookware we have at our disposal.

We also might want to look at some of our guilty pleasures when it comes to eating. Even if we don’t stock our cupboards to make it a daily or even weekly staple, we might consider stashing some premade mixes, hiding away some beer, and holding onto some tin cans so we can pop them out now and then for special occasions.

A crisis of any scale is a tough time to either have to learn to do without, or create a lot of work for ourselves. With a little practice and

When I started my own prepping journey, a bug out bag was high on my list of priorities. I read a lot of articles and watched a ton of YouTube videos about this subject and as you can imagine, there are as many bug out bag ideas as there are grains of sand at the beach. The bags all share a common goal in that they are supposed to keep you alive if you have to leave your house for some period of time.  I think where the line gets blurred however is what your own idea of the duties of your bag are for. What do you really “need” in order to “live”? If your Bug Out Bag contents look more like what you would pack in a suitcase for a vacation, you may want to reconsider your options.

smp

What is the purpose of a Bug Out Bag?

OK, let’s start with what a Bug Out bag is most typically used for and go from there. A 72-hour bag or kit is usually listed as the standard we as preppers should aspire to and is actually what FEMA recommends on their website. Again, this means that your bug out bag should have enough supplies to get you through 72 hours. What you put in here though should vary by person and need. If you have considered whether you will bug out or hunker down, preparing a bug out bag could be the next step in the process.

Your bag is meant to be something that you can quickly grab and run out the door. Your bug out bag should be pre-packed with the appropriate supplies and ready at a moment’s notice. Ideally, you would have practice with your bug out bag and lugging it around through various terrain and experience actually living off the supplies that you have stored in there. A bug out bag is different in scope from a Get Home Bag, but you may have some of the same types of contents in both.

A good bug out bag doesn’t have to weigh a ton, or cost a fortune to do the job.

At a minimum, your bug out bag should cover the 3 basic necessities you need to live; food, clothing, and shelter. After that, we look at supplies to make your life more comfortable or more secure.

Do I need a Bug Out Bag?

Great question! The answer depends on what you are going to use it for I think to a large extent. Bug Out Bags come in two main flavors or types. The first type is the bag that you plan to strap on and head out into the woods or use to hike to a remote location. This might be your retreat hidden away in the woods in a small town somewhere away from your home. This could also be for those who figure they are just going to hike deep into a national forest and live off the land until whatever crisis they are avoiding has passed.

For most people, I think a Bug Out Bag is more along the lines of a pre-packed suitcase so they can get out of dodge quickly without having to stop and pack. These types of bug out bags are very useful for people who may live in a wildfire, flooding or hurricane areas although I would hazard to guess that not many people in today’s society would be able to have a wildfire, flood or hurricane sneak upon them. If you are completely unaware of what is going on around you then you most likely won’t have any bag packed and ready to go in the first place. For the rest of us, fires, hurricanes, and floods are generally forecast and announced with more than ample time to prepare, pack and get out of the way. Are there circumstances where this is not the case? Of course, but we are talking in general terms here for the most average prepper scenario.

How can my bag get me killed?

There are two main ways I can see how not thinking logically about your Bug Out Bag can end up hurting you. The first is weight. Let’s assume that your bug out bag’s purpose of use is that you plan to walk out of town with it strapped to your back before the zombie hordes can breach the city. This will be your bedroom dresser, kitchen pantry, shelter, entertainment center and medicine cabinet all rolled into one tidy package. The average weight guidelines for a fully loaded backpack are no more than 25% of your overall body weight. For a 200 pound person (in good health) that is 50 pounds.

How many of you are used to walking with 50 pounds of weight on your back for 20 miles? How many of you think your bag would actually weigh more than 50 pounds? Do you know how much 3 gallons of water, the recommended amount you need for each person – for 3 days, weighs?

Having a bug out bag that is too heavy can cause injury very easily. Not only that, but it can wear you out much faster and make running, something you may have to do when the zombies are hungry, very difficult to do. Unless your bag is packed the right way, your center of balance will be off and you can just about forget doing any type of tactical movement with a heavy pack like this.

Am I talking about trained Navy Seals? No, I am talking about Mr. and Mrs. Joe Public who are probably just like most of us. We have jobs where we sit at a desk most days and aren’t training daily with 50-pound packs like the 10thMountain division. What about your children? Will they be able to carry all of the supplies needed on their backs as well? Probably not in all cases.

The second way I can see having a large pack could be dangerous is from the standpoint of a total collapse scenario where massive amounts of society are displaced, scared, hurting and desperate. With a large pack, you are a greater target. If there are truly desperate people and they see you with a big pack full of supplies and goodies they may be more inclined to relieve you of that extra weight. If their children are freezing or starving and you are walking around with the WalMart camping section attached in a big bright orange pack, they may decide that you need that less than they do.

How can we avoid this problem?

Pack Smarter – A bug out bag should be viewed as a life preserver in most situations, not a convenience store. When I see lists out there that have as their contents miscellaneous hardware and tools, saws and fishing gear I have to wonder what these people are going to do. Most of us, if there is really some type of disaster won’t have any place to fish at all. You aren’t going to likely be fixing a radiator hose on your car either. If you were, that is a different pack for a different purpose. Think smart about your bag and what needs to go in there.  If all hell breaks loose in your town, what will you really need to survive? Will a change of clothes, something to shelter you from the elements and a means to make a fire be most of what you need? Add in some food and a little water with a backup to get filtered water elsewhere, simple first aid and you have the basics covered. Will all of this weigh significantly less than 50 pounds? It should.

There are ultra-light hiking fanatics that try to scrounge every single ounce of weight out of their packs in order to have a much lower weight pack and thus a happier hiking experience.  Think about what your bag is for, how you will be using it and pack accordingly. Remember, this is just to save your life. If you have a bug out bag and you are leaving your world behind, you won’t be staying at the Ritz. Some discomfort should be anticipated so I would plan on leaving the Kindle behind.

Blend In – Packing lighter can certainly help with weight and with less weight should come less bulk. With less bulk, you should have a smaller footprint for your supplies and may be able to pack everything you need to stay alive in a smaller backpack. This will help you look like everyone else out there and not like you are hiking the Appalachian Trail. Just for the record, I am not recommending that all you need is one seriously packed survival Altoids can, but we can think about the bag that we are using to save our lives in a logical way.

Hopefully, this gives you some ideas on packing your Bug Out Bag. I would love to hear your ideas and perspectives in the comments below.

On a different note, here are some other self-sufficiency and preparedness solutions recommended for you:

The Lost Ways (The vital self-sufficiency lessons our great grand-fathers left us)
Survival MD (Knowledge to survive any medical crisis situation)
Backyard Liberty (Liberal’s hidden agenda: more than just your guns…)
Alive After the Fall (Build yourself the only unlimited water source you’ll ever need)
The Lost ways II (4 Important Forgotten Skills used by our Ancestors that can help you in any crisis)
The Patriot Privacy Kit (Secure your privacy in just 10 simple steps)

A bug out bag is designed in theory to give you everything you may need to live for at least 72 hours outside of your home and should be considered

Remember!

  1. Moving targets are harder to shoot than stationary targets!
  2. Smaller targets are harder to shoot than the large target!

When I ask my students what is the most important thing they must do in a hostile incident, most reply that they should simply shoot the bad guys, get access to their weapons, shoot for the head, carry a big gun and so on.  The answer I am looking for is not to get shot by the terrorists!

You should first of all work out a plan of action that you will take in the case of an active shooter or terrorist attack.  Do this for your home, business and for when you are out and about in public. Things that need to be considered are means communication, safe areas, when to fight and when to flee and so forth. Planning is what sorts the professionals from the amateurs, if you plan how to deal with a hostile situation if it happens, you’ll know what to and how to react to it and not be confused and panic!

GET THIS BOOK NOW AND BEGIN TO LEARN SUCH SECRETS AS: The Antioxidant 550 times stronger than vitamin E and 6,000 x More Powerful Than vitamin C

Plan your reaction to being shot at!

As I just mentioned, you NEED to put together a plan of action on how you will react to a shooting or a hostile incident. Over the years I have spoken to many security contractors, police and former non-British military personnel and find it amazing that when talking about their reaction fire drills most just say they would draw their weapon, if they have one and return fire…  That’s OK if you have a gun or are on a gun range but you need to take a few other things into consideration if someone is shooting at you!

This is an adaptation of the British Army individual reaction to fire drill. Some of this may apply to you and some might not- use this as a basic format. If you are serious about your security, you must put together a plan that is specifically designed for your personal situation and then practice it until it is second nature.

  • Preparation: If you have a gun it must be clean, serviceable and well-oiled. Ammunition must be of good quality, clean and your magazines full. You must be properly trained and ready to deal with the incident.
  • Reacting to fire: The immediate reaction at close quarters is to identify the threat, move to cover as you are deploying your weapon, if you have one and returning fire. If you are being shot at from a distance or do not know where the shots are coming from, you should:
    • Dash– a moving target is harder to hit than a stationary target.
    • Down– keep low and present a smaller target.
    • Cover– Get into cover from fire.
    • Locate – Observe where the threat is.
    • Return fire– if you have a firearm.
    • Winning the fire-fight, if you have a firearm: As soon as the threat has been firmly located, you must bring down sufficient accurate fire on the terrorist to incapacitate them or force them into cover so you can extract yourself from the situation.
    • Re-organizing: As soon as you have incapacitated the terrorist or are in a safe area, you must reorganize yourself as quickly as possible in order to be ready for other possible threats. You need to re-load your firearm if you have one, make sure that you or anyone with you is not injured and inform law enforcement and emergency services immediately.

406378856_640_bigger

There are two types of cover: 1.) Cover from view 2.) Cover from fire (bullets and shrapnel), you always want to locate the latter.

Moving targets are harder to shoot than stationary targets. It’s a fact, it’s harder to shoot a target that is moving than one that is stationary. So, if someone is shooting at you, do not stand still, run. Smaller targets are harder to shoot than large targets! If there is no cover for you, make yourself a smaller target and drop to a kneeling position. I do not recommend prone position, as it takes too much time for most people to stand up. From a kneeling position, you can quickly run and get to cover.

If You Are Diabetic THIS Book Is Essential For Your Survival Medicine Chest.

Use of cover

This is a very important and basic subject! In your home, business or when you are walking around, you should always be looking out for positions that you could use for cover in the event of a shooting incident. There are two types of cover: 1.) Cover from view 2.) Cover from fire (bullets and shrapnel), you always want to locate the latter. You also may want to consider which type of rounds the cover will stop. A table might be able to stop a .32 fired from a handgun, but a 7.62X39mm fired from an AK-47 would go through both the table and you. Also consider will you want to be able to shoot through the cover, such as at a criminal in your house through dry wall etc.

619gmsnjhvl-_sl1000

Guard Dog Security ProShield 2 Bulletproof Backpack

Cover from view includes:

  • Cardboard boxes and empty rubbish bins
  • Bushes
  • Thin walls and fences
  • Thin tabletops
  • Doors
  • Shadows

Cover from fire (depending on the firearm used):

  • Thick tabletops
  • Heavy furniture
  • Stone and concrete walls
  • Dead ground
  • Thick trees
  • Various areas of a car
  • Curb stones

One of the best-publicized examples of good use of cover happened in St. Petersburg, Russia on February 26, 1996. At 4:25 pm, two mafia gunmen in long coats entered a fashionable café. Under their coats, each man had a AKS-74. They were there to kill an opposing mafia boss, who was in the cafe with his two off duty police bodyguards. The mafia gunmen fired 60 rounds at close quarters from the AKS-74s and killed both the police bodyguards. The criminal boss tipped over a thick marble table he was sitting at and hid behind it; although wounded he was well enough to walk out the cafe making phone calls, after the gunmen had escaped. A Scottish lawyer was killed; he was just sitting drinking coffee in the café when he was hit by three stray bullets. The attack took about 40 seconds from the gunmen entering to leaving the café. The Scottish lawyer was in the wrong place at the wrong time.

When you get into cover, you should always try to have an escape route and try not to get pinned down. When using cover as a shield, always keep low and fire or look around cover- not over it. When you are in cover and need to move, first select the next piece of cover that you will move to and move fast and keep low. Keep the distances between cover positions short. When you get behind the cover, assess your situation, where the threat is, etc. Keep moving this way until you are out of danger.

active_shooter

Remember!

  • Always looking for and make maximum use of available cover and concealment.
  • Avoid firing or looking over cover; when possible, fire or look around it.
  • Avoid silhouetting yourself against light-colored buildings, backgrounds and lights.
  • Always carefully select a new piece of cover before leaving the cover your in.
  • Make sure you always have an escape route planned.
  • Avoid setting patterns in your movement, for example, shooting or looking from the same position at the same level.
  • Keep exposure time to a minimum; don’t look over or around cover for an extended period of time.
  • Always look up and behind you remember that positions which provide cover at ground level may not provide cover on higher floors.

Camouflage yourself

It makes me laugh when I see a lot of SWAT Teams and PSD guys wearing Tactical Black and other colors that look cool but do nothing bit make them stand out. In reality black is one of the worse colors to wear, what is black in nature, look around you now and what in your surroundings are black? I expect very little… In urban areas most walls are white, gray or cream… Light colors! The colors you wear should blend in with your background whether its day or night. Even at night dark clothes stand out when moving past light backgrounds. In the country or bush when moving through low bushes or fields the silhouettes of people in dark colors are easy to see at a distance…

Learn How to treat each problem without prescription pharmaceuticals, often with everyday items already in your pantry or medicine cabinet.

Moving Through a Building

If you have to evacuate your home or business, for whatever reason, it should be done quickly, quietly and with the minimum of fuss. You should also have already worked out your escape routes and exits. If there is an incident, get as much information as possible to what the threat is, where and what the threat is. I recommend you never use obvious evacuation routes and exits, the criminals or terrorists could have blocked, booby trapped, ambushed or manned them.

If you have to walk down corridors keep low and move fast, do not walk down the center and do not walk next to the walls. Stay a couple of feet off the walls to avoid being hit by any ricochets and wall fragments if you come under fire. Doorways and frames can make good cover, even in an apparently empty corridor look for things that could be used as cover. Remember to continuously check behind you, and if you must stop, do not stand up, stay in a kneeling position. Always be aware of where you are casting shadows, you do not want this to give away your position, such as before you go around a corner. You should always keep staggered spacing from anyone who is with you; you do not want to bunch up. Remember; one bullet can go through two people; large group of people make an easier target than a lone individual. Also if you are dealing with criminals or terrorists who are using improvised pipe bombs or hand grenades, one of these devices could take out your whole group if you are close together.

With the rise of active shooter incidents in the United States, students and faculty members are highly encouraged to be aware of the policies to follow in order to promote safety precautions in case of an active shooter incident were to take place. (Photo Illustration by Cassandra Nguyen | The Collegian)

With the rise of active shooter incidents in the United States, students and faculty members are highly encouraged to be aware of the policies to follow in order to promote safety precautions in case of an active shooter incident were to take place. (Photo Illustration by Cassandra Nguyen | The Collegian)

Going through doorways is very dangerous, especially if the room or area on the other side could contain a criminal or terrorist. If you must go through a doorway, try to determine if there are any threats on the other side before you enter. Use your senses of smell and hearing, in addition to sight; take a quick look into to room at a low level before entering. If you have to open a door, do so quickly, quietly and then back away from the door and listen. You want to back away from the door because if there is a terrorist in the room they will be shooting at the now opened door or moving if startled. Also consider if the wall around the door could stop a bullet; the criminal or terrorist could shoot through the wall and hit you, especially if they are armed with hunting or assault rifles. When you go through a doorway, again keep low and move fast, check the corners, when though the door move away from it and get behind cover.

You must keep a cool head as you might not be the only person evacuating the building. When you are clear of the building, get out of the area and summon support and law enforcement, ASAP.

Remember!

  • Never use obvious escape routes.
  • Use your senses of smell and hearing not just sight!
  • Move quietly, cautiously and quickly.
  • Corridors are areas of extreme danger- avoid whenever possible.
  • If you need to use a corridor, NEVER walk down the center stay a couple of feet off the wall.
  • If you must walk past an open door keep low and move fast.
  • Always check around corners before you go around them and expose yourself.
  • Continuously check behind you.
  • If you must stop do not stand up, stay in a kneeling position.
  • Avoid offering a silhouette for your opposition to shoot at.
  • Lights behind you should be extinguished.
  • Always keep a space between you and others; one bullet can go through several people.

After a Shooting Incident

You should do all that you can to avoid getting involved in any hostile situations, even indirectly. If you are somewhere where a hostile situation is developing, leave the area quickly and not by an obvious route. You do not want to be in the wrong place at the wrong time and to catch a stray bullet. So, if you see a hostile incident developing and it has nothing to with you, mind your own business and leave the area, ASAP! If you are unfortunate enough to get involved in a shooting incident, when you believe the incident is over, you should reload your weapon if you have one, prepare to deal with any other threats, give first aid to anyone with you who is injured and evacuate to a safe location. You should also call for support and police etc. as soon as is safely possible.

Learn How to both diagnose and treat any medical problem you are going to encounter.

In developed countries, even if you believe others have already called the police, do so yourself and identify yourself to the dispatcher as the victim and you should do as the dispatcher tells you, as long as it does not compromise your safety. You must ensure that the police officers responding to the incident know that you are the victim and not the attacker. For their own safety, the police officers will assume that anyone at the scene of the incident is a threat. You should never point your gun at the police and should comply with their every request. Remember the responding police will be scared and most are not that well trained and will shoot with minimum excuse. Try to remain calm and do not argue with them- do as you are told. Make no fast movements and keep your hands where they can be seen. It would be unfortunate to survive a lethal encounter with a criminal, only to end up being shot by the police.

If you get into a hostile shooting in a country where the police cannot be trusted and going to prison would most probably mean you would catch an incurable decease to say the least, you should have pre-planned on how to deal with the situation. My advice; leave the country as quickly as possible if you are a non-resident of that country!

The Tactical Use of Lights

In my opinion, many people are over-enthusiastic in the use of flashlights. There is a big market in tactical flashlights and the companies making them wants everyone to buy one, thus making them a must have item. Flashlights have an application in hostile situations but you should remember that any light will give away your position and draw fire. Light should be used sparingly and tactically. I tell my students to get used to training in the dark and using their senses of hearing and smell in addition to sight. At night there is more chance you will hear someone before you see them! When moving in a dark environment, do so slowly and cautiously and try to make minimum noise. Try finding your way around your house or business in the dark, before you start moving around give your eyes a few minutes to adjust to the dark.

If you must use a flashlight, keep it at arm’s length and keep it on for no longer than necessary, then move quickly or get behind cover. If you want to check a room or a corridor, one option is to roll the flashlight across the doorway, corridor or into the room. Light can be used as a distraction and help to cover your movement, shine it in their general direction of your opponent and move. This will mess up their night vision and if you leave the light pointing in their direction, it will be difficult for them to see what is happening behind the light.

If possible, use remote lights, as this is more of an application for your home or business. For example, place powerful spotlights that illuminate corridors to safe rooms, stairways or doorways. If your home is broken into at night, you could move your family to your safe room and take up a position in cover behind the lights. If you hear or identify movement to your front, you turn on the spotlights; this will surprise, blind and illuminate anyone in the corridor. This will also help you to confirm that the people in your house are criminals or terrorists and give you good targets to shoot at if you have a firearm.

Remember! Moving targets are harder to shoot than stationary targets! Smaller targets are harder to shoot than the large target! When I ask my students what is the most important thing

If disaster strikes, you may find yourself on your own, without recourse to the infrastructure we use to stay safe and healthy.

So you prepare for the worst. Food, water and clothes can be easy to stockpile, but what about medicine? First aid kits are available, but what if you need more? What if you or a loved one have specific, unavoidable medical needs? Medical planning should be part of your overall preparedness plans for disasters.

How to Get Started:

“Meeting medical needs during a longer term disaster can be a challenge, but having a plan is an important first step,” Mary Casey-Lockyer, senior associate of Disaster Health Services with the American Red Cross, told Healthline.

She suggests starting by talking to your doctor.

“Discussion about emergencies with the individual’s provider of medical supplies, such as an oxygen provider is also a very important proactive step,” Casey-Lockyer added. “If an individual is on a dialysis regimen, finding out what is the emergency plan for their dialysis provider is lifesaving.”

Learn Your Area’s Plan and Plan Accordingly:

Learning about community-wide disaster plans in your area can also be good idea, Casey-Lockyer and Dr. Amesh Adalja, senior associate of the University of Pittsburgh Medical Center for Health Security, said.

“One should become familiar with the local hospitals and health departments response plans, stockpiles, and recovery planning as well as their own personal needs in the context of the likely disasters that could occur in the specific geographic area they are located in,” Adalja said.

Casey-Lockyer said visiting your community’s website and speaking with your local government can tell you more about regional disaster planning.

It’s also a good idea– many agencies recommend it — to have your own comprehensive disaster plan. Having necessary medicine is only part of that planning. The U.S. Centers for Disease Control and Prevention (CDC) and Department of Homeland Security (DHS) provide advice about communication, food and water, and meeting other needs for your family during a major emergency.

For the medical component of your plan –based on what the experts told Healthline, and suggestions from federal agencies– ask yourself a few questions:

  • Who might you have to care for in a disaster?
  • What are their medical needs?
  • How often do they need it and in what quantity?
  • How do you normally obtain it and store it?

How Much Medicine Should You Have On Hand?

For specific prescriptions, having a month in reserve is a good rule of thumb, Casey-Lockyer and Adalja said. Getting it, however, can be a challenge.

Prescription limitations depend on insurance coverage, they said. An insurance company might cap at 30-, 60- or 90-day amounts, Casey-Lockyer said. Your pharmacist should know the number of doses you’re allowed.

“(Gathering a 30-day reserve) can be difficult if your insurance coverage only allows for a 30-day supply,” Casey-Lockyer said. “If that is the case, renewing your medication at the 28-day mark of the prescription might allow an individual to stockpile a couple of doses a month to build up a reserve. Even a week’s worth of reserve would be helpful.”

She said you could also request a paper prescription for emergencies, but some regions only allow doctors to write electronic prescriptions.

Keeping a written health history, current list of medications and copy of your insurance coverage with your reserve supplies is also good, Casey-Lockyer said.

Other Additions to Your Reserve:

When building your reserve, also consider more general medical needs that can be treated with nonprescription medications: pain, swelling, colds and other day-to-day discomforts.

Again ask yourself questions: what you/your family use, how much and how often, how you get it and how you store it.

If you get a first aid kit, it should have items that address these needs. They might cover fewer days or people than you want, though. Planning for long-term emergencies might require a shopping trip for some additions.

Casey-Lockyer had some suggestions for over-the-counter medicines to add to your reserve:

  • acetaminophen
  • ibuprofen
  • aspirin for heart attack
  • cold meds
  • allergy relief
  • antacid
  • Pepto-Bismol- type medication
  • anti-diarrheal med
  • daily multivitamin

Keeping it Ready/Keeping it Safe:

Rubbermaid ActionPacker Storage Box – Store your emergency preps and they are ready for travel.

The DHS recommends storing your whole disaster kit in a few easily transportable containers — even unused garbage cans! — with individual items in airtight plastic bags.

But Adalja and Casey-Lockyer warned that the medicine’s needs must be remembered while storing a reserve.

“Medications should ideally be stored in accordance with the manufacturer’s recommendation which will vary with each medication,” Adalja said.

Since you’re planning for possibilities, not certainties, your supplies may sit for a lengthy period before use or, hopefully, never be used in an emergency at all.

This means you’ll have to periodically replace supplies with a finite shelf life.

For the medications, Casey-Lockyer and Adalja said the expiration dates will be your guide.

Special Cases:

So what if you are faced with disaster, and you need medicines like insulin, which can require refrigeration?

Casey-Lockyer again said your healthcare providers can help.

“Many newer types of insulin coverage do not need refrigeration and the local pharmacist will have that information,” she said. “Individuals taking biologic medication should discuss with their pharmacist how (they) might store the medication during a loss of power.”

If the medication does need to be kept cold, there are products available that can do the job, she said.

The site diabetesselfmanagement.com  suggests as an option the FRIO insulin cooling wallet or other device that use evaporation to keep drugs cool and has other helpful suggestions.

Having an emergency source of power to keep medications like insulin cold is vital in some homes. The Honda EU2000I 2000 Watt Super Quiet Inverter Generator is a good choice.

Adalja also suggested emergency generators or battery-powered cooling containers as way to protect medicines that must be kept cool.

The U.S. Food and Drug Administration (FDA) has specific tips for using insulin during a disaster:

  • U.S. insulin manufacturers recommend refrigerating insulin between about 36 degrees Fahrenheit to 46 degrees Fahrenheit.  If unopened, this insulin will remain effective until the listed expiration date.
  • Insulin should be as cool as possible, but do not freeze it. If it does freeze, do not use it.
  • Insulin in the original vials or cartridges can be unrefrigerated between 59 F and 86 F as many as 28 days and remain usable. This is regardless of whether the container is opened or still sealed.
  • If the Insulin has been “altered for the purpose of dilution or by removal from the manufacturer’s original vial,” the FDA recommends disposal inside of two weeks.
  • Extreme temperatures will cause loss of potency. The longer the exposure to temperature extremes, the greater the loss. Do not expose insulin to direct heat or direct sunlight.
  • “(Exposure to extreme temperatures) can result in loss of blood glucose control over time,” the FDA states.  “Under emergency conditions, you might still need to use insulin that has been stored above 86 F.”
  • When a fresh supply of appropriately-stored insulin becomes available, the supply subjected to extremes should be thrown out as quickly as can be safely done.

Some Last Thoughts:

You’ll have a lot of questions when disaster planning and that’s to be expected. Fortunately, reliable resources exist to help you.

Use them, and remember basic needs like access to vital medicines. Those are a good place to start looking for the right answers. Doing so will help you develop a solid, common-sense plan on which you can depend should the worst occur.


Other Self-Sufficient Solutions And Sources Recommended For You

The Lost Ways (The vital self-sufficiency lessons our great grand-fathers left us)

Survival MD (Knowledge to survive any medical crisis situation)

Backyard Liberty (Liberal’s hidden agenda: more than just your guns…)

Alive After the Fall (Build yourself the only unlimited water source you’ll ever need)

The Lost ways II (4 Important Forgotten Skills used by our Ancestors that can help you in any crisis)

The Patriot Privacy Kit (Secure your privacy in just 10 simple steps)

If disaster strikes, you may find yourself on your own, without recourse to the infrastructure we use to stay safe and healthy. So you prepare for the worst. Food, water and

Editor’s Note: This post has been generously contributed by Andrew H.


Sometimes, having such a wide array of gun choices can be more of a curse than a blessing. Of course, it’s great that gun technology and manufacturing have evolved to such a point, but if you’re a beginner you simply don’t know which way to go with your first handgun purchase. But it might not be the best choice to turn to just anyone who carries, because all of their responses will be personal ones; just like your choice of a handgun should be. You will need to decide for yourself what is best for your needs. So here are some major tips for buying your first handgun you should consider and answer for yourself before heading out to make a purchase.

#1. Consider the purpose of the gun

This is a simple question – why are you buying this handgun? Do you simply want to have some fun shooting at the range? Will you use it for personal defense at home or personal defense in general, and will need to carry it around with you all the time? Answering these questions now and establishing a clear purpose for your gun will help you determine later which type it will be, because its size, caliber and barrel will be a factor.

#2. Revolver or semi-automatic

Learn the difference between a revolver and a semi-automatic pistol because it will help you choose. They differ greatly when it comes to the firearm’s size, its cartridge capacity, its reliability, how capable you are of reloading a gun under stress, its grip strength, and the list could go on.

#3. Don’t think of your first gun as your last one

Many first time shooters and/or buyers make the mistake of getting way too attached to their first gun. However, most experienced gun owners will tell you that you quickly outgrow it, for various reasons. There’s no way anybody can convince you of that, of course, so you just need to take their word for it. Don’t look at it like it’s going to be under your belt forever.

#4. Start with a low-caliber

A low caliber means a .22. And this is a piece of advice you will receive from both experienced shooters and professional shooting instructors. The main reason is that it will help you learn better, but it’s also because it has less recoil. So it will be a lot more fun to start with that, not to mention it’s going to be cheaper as well. Cheap is important when it comes to your first gun. Why? See point #3 again.

Read More: What is the best gun for home defense?

#5. Find a gun with a good grip

This is not an easy task to accomplish at all, because no two people or two shooters for that matter have the same hands, obviously. You’ll need to test as many guns as you can, until your find the one that feels most comfortable in your hand. You need to be able to move your hands and fingers across and around it with as much ease as possible, and not awkwardly and clumsily.

#6. Research is key

If you’re reading this article, you’re on the right path, but it won’t be enough. Read as many as you can. Then after you’ve decided on a few guns, read all you can about those as well. Find out their technical properties, what they can do and what purpose they serve. Do the same not just for your gun per se, but also for all the accessories you’re planning on buying for it. For instance, if you’re looking to purchase a rifle scope you’ll need to read reviews on what the best one is to suit your needs.

Reading reviews is a great way to find out which way to go.

#7. Practice, practice, practice

This particular piece of advice goes hand in hand with not hurrying into buying. So, after you’ve gone through all the previous steps and finally decided on a small list of guns you would like to own, it’s time to go down to the shop. You don’t have to buy right away, but you can examine the guns and ask all the questions you want. Another good thing about this is the fact that, while you inspect your selected guns, the salesperson might suggest some other guns they have, similar to your choices. That’s a good thing, and you should certainly take advantage of the help.

Read More: How to Select the Best Handgun for Home Defense

#8. Ethics

Think about the ethics involved in owning a gun, especially if you’re buying it for personal or home defense. Owning a gun is a big step in anyone’s life and most shooters say it has changed them. Apart from that, reflect on what it will actually mean to shoot someone. Granted, it will be in self-defense and you will be protecting yourself or your family, but it is not for the faint of heart and it will have serious repercussions on you and your life. Consider these things well before proceeding down this path.

#9. Go to the range

You may not find all the guns on your list to try out before the purchase, but you’ll find some of them. It’s important to visit your closest firing range and shoot your guns a few times to get a feel for it. Ideally, we should be able to test the merchandise we buy, especially something as important as your first handgun, and you actually have the chance to do it. One thing you need to know though, is that when going shooting at a range you will have to buy your own ammunition. This can be quite expensive. But remember, it’s better to spend some money on testing than on buying impulsively and then regretting your purchase. 

#10. Price

Never buy a gun just because it’s cheap. Guns are not an area where you want to skimp. A cheap gun might mean it’s poorly manufactured or that it has some problems the seller won’t tell you about. You should know from the start that guns aren’t cheap. So if you’re in this for the long haul, you should be prepared to spend on them, their ammunition and their accessories. The best solution is to buy from trusted and famous brands.

#11. Buying the gun

It’s always advisable to buy your guns at professional and reputable shops. They are more trustworthy and you will feel better and safer when it comes to your purchase. This will also show that you are serious shooter. And that, though you are a beginner, you’ve already invested time, money, energy and research into starting this new sport. Congratulations!

After you become a well-trained and experienced shooter and another beginner asks for advice about buying his or her first gun, remember all the pointers above. Or, better yet, reference them back to this guide.


Before you go, here’s other survival solutions recommended for you.

The Lost Ways (The vital self-sufficiency lessons our great grand-fathers left us)

Survival MD (Knowledge to survive any medical crisis situation)

Backyard Liberty (Liberal’s hidden agenda: more than just your guns…)

Alive After the Fall (Build yourself the only unlimited water source you’ll ever need)

The Lost ways II (4 Important Forgotten Skills used by our Ancestors that can help you in any crisis)

The Patriot Privacy Kit (Secure your privacy in just 10 simple steps)

Editor’s Note: This post has been generously contributed by Andrew H. Sometimes, having such a wide array of gun choices can be more of a curse than a blessing. Of course,

As Preppers we normally consider medical injuries in our plans. The “Band-Aid” piece of the whole puzzle is a little easier to follow than other subjects because we have more experience with treating wounds like this. If you have a cut, you know you have to stop the bleeding and keep the wound clean so it can heal. In some cases, stitches or a tourniquet or a sling may be required but a lot of us have played doctor before and these concepts aren’t so foreign.

Dental emergencies on the other hand require very specialized treatment in a lot of cases and it seems that Dental Emergencies like to pop up at the most inopportune times. The article below has a lot of good information on both minor and major injuries, some tips for treatment and considerations for if the SHTF. Warning, some of the images are a little intense so if you get squeamish… Don’t say I didn’t warn you.

TOM and Sylvia Moore and their two boys, Tom Jr., age twelve and Jed, age ten, hiked all day and near dusk made camp on a lovely grassy knoll overlooking a high mountain stream loaded with trout, apparently begging to be tossed in their frying pan.

At daybreak, Tom and Sylvia were awakened by Tom Jr. and Jed jumping up and down outside their tent yelling for them to get up and take them down to the stream. The boys had their four rods rigged by the time their parents had dressed. Tom understood their excitement knowing how much the whole family had been looking forward to this vacation.

As they started out, the two grownups found the kids’ feelings contagious. Halfway down the trail, Jed, who had been running ahead, suddenly let out a cry of pain. When the family rushed up, they found the boy lying on the ground holding his jaw. Tom picked him up and sat him on a flat rock. Blood gushed out of his mouth. Pulling the boy’s hand away, Tom saw a gaping hole where Jed’s front tooth should have been. The boy held up a bloody tooth. Tom saw where the boy fell and the bloody rock where he must have hit his jaw and realized he had knocked the front tooth cleanly out of its socket.

Luckily Sylvia had once worked in a dental office. She gently took the tooth from the boy being careful to hold it by the crown. Leading the boy back to camp, she sat him in a camp chair while she got out her emergency first aid kit. Laying the tooth on a clean piece of gauze, she washed the blood from the boy’s mouth and inspected the tooth’s socket. A small amount of blood was still oozing out. She had the boy rinse with plain water cautioning him not to suck or use any force. She then rinsed what dirt she could from the surface of the root, being careful not to touch the root with her fingers. Still holding the tooth by the crown, she tenderly inserted it in the tooth socket, holding it firmly in place while her husband, using a piece of heavy mono-filament fishing line splinted the tooth to the two adjoining teeth. She made a cold pack with water from the icy stream which she had the boy hold against his face next to the injured area to minimize swelling.

Leaving Tom Jr. and Sylvia at camp, Tom took the boy down the mountain to a hospital emergency room where they got in touch with a dentist who gave the boy more permanent treatment. He told Tom due to their quick action in replacing the tooth and bringing him in for professional help, they had an excellent chance the tooth would be permanently attached though he would have to check the tooth’s pulp from time to time to make sure it was alive. If it died, he would fill the canal and the boy could still retain his tooth for many years.

Often when taking a vacation away from home, we are prepared for general health problems but do not know what to do when faced with a dental emergency. Whether the trouble faced is a simple toothache, pain from tooth eruption or something more serious like a broken jaw or an abscessed tooth, it may threaten to spoil a vacation.

Before leaving on a trip, it is good insurance to see a dentist in order to make sure there will be no dental problems which may give trouble in the near term. It is smart to add a dental first aid emergency kit to your luggage.

This should include:

  1. Medications such as, salt, hydrogen peroxide (3%), aspirin or acetaminophen (Tylenol), oil of cloves and orabase with benzocaine, (like Orabase Oral Protective Paste with Benzocaine on sale at your local pharmacy).
  2. Supplies should include: cotton balls, cotton swabs, gauze pads, tea bags, a toothbrush, dental floss, toothpicks, tweezers, some paraffin or candle wax and an ice pack or a wet frozen wash cloth.

Toothache

The most common dental emergency. This generally means a badly decayed tooth. As the pain affects the tooth’s nerve, treatment involves gently removing any debris lodged in the cavity being careful not to poke deep as this will cause severe pain if the nerve is touched. Next rinse vigorously with warm water. Then soak a small piece of cotton in oil of cloves and insert it in the cavity. This will give temporary relief until a dentist can be reached.

At times the pain may have a more obscure location such as decay under an old filling. As this can be only corrected by a dentist there are two things you can do to help the pain. Administer a pain pill (aspirin or some other analgesic) internally or dissolve a tablet in a half glass (4 oz) of warm water holding it in the mouth for several minutes before spitting it out.

DO NOT PLACE A WHOLE TABLET OR ANY PART OF IT IN THE TOOTH OR AGAINST THE SOFT GUM TISSUE AS IT WILL RESULT IN A NASTY BURN.

Swollen Jaw

This may be caused by several conditions the most probable being an abscessed tooth. In any case the treatment should be to reduce pain and swelling. An ice pack held on the outside of the jaw, (ten minutes on and ten minutes off) will take care of both. If this does not control the pain, an analgesic tablet can be given every four hours.

Other Oral Injuries

Broken teeth, cut lips, bitten tongue or lips if severe means a trip to a dentist as soon as possible. In the mean time rinse the mouth with warm water and place cold compresses on the face opposite the injury. If there is a lot of bleeding, apply direct pressure to the bleeding area. If bleeding does not stop get patient to the emergency room of a hospital as stitches may be necessary.

PROLONGED BLEEDING FOLLOWING AN EXTRACTION

Place a gauze pad or better still a moistened tea bag over the socket and have the patient bite down gently on it for 30 to 45 minutes. The tannic acid in the tea seeps into the tissues and often helps stop the bleeding. If bleeding continues after two hours, call the dentist or take patient to the emergency room of the nearest hospital.

BROKEN JAW
If you suspect the patient’s jaw is broken, bring the upper and lower teeth together. Put a necktie, handkerchief or towel under the chin, tying it over the head to immobilize the jaw until you can get the patient to a dentist or the emergency room of a hospital.

PAINFUL ERUPTING TOOTH

In young children teething pain can come from a loose baby tooth or from an erupting permanent tooth. Some relief can be given by crushing a little ice and wrapping it in gauze or a clean piece of cloth and putting it directly on the tooth or gum tissue where it hurts. The numbing effect of the cold,along with an appropriate dose of aspirin, usually provides temporary relief.

In young adults, an erupting 3rd molar (Wisdom tooth), especially if it is impacted, can cause the jaw to swell and be quite painful. Often the gum around the tooth will show signs of infection. Temporary relief can be had by giving aspirin or some other painkiller and by dissolving an aspirin in half a glass of warm water and holding this solution in the mouth over the sore gum. AGAIN DO NOT PLACE A TABLET DIRECTLY OVER THE GUM OR CHEEK OR USE THE ASPIRIN SOLUTION ANY STRONGER THAN RECOMMENDED TO PREVENT BURNING THE TISSUE. The swelling of the jaw can be reduced by using an ice pack on the outside of the face (At intervals of ten minutes on and ten minutes off.

COLD SORES, CANKER SORES AND FEVER BLISTERS

Sores in the mouth, lips or tongue can be caused by many reasons, irritation, injuries which bruise or cut the lip or just a run-down condition. The germs which cause most of these sores are always laying just below the surface waiting for a chance to flare up. Usually these lesions last five days no matter what you put on them. Such preparations as Blistex, Carmex, Butyn Dental Ointment or Spirits of Camphor will relieve pain but it is doubtful whether they cause them to heal any sooner. New studies suggest that high levels of another amino acid, arginine can give the body increased resistance to these painful mouth and lip sores.

Generally, when confronted by a dental emergency, you can only relieve the pain and give temporary treatment until the patient can see their dentist. Sometimes, as was the case in Tom and Sylvia’s family, fast prompt emergency treatment can spell the difference between permanently losing a tooth and saving it.


On a different note, here’s some other self-sufficiency and preparedness solutions recommended for you:

The Lost Ways (The vital self-sufficiency lessons our great grand-fathers left us)
Survival MD (Knowledge to survive any medical crisis situation)
Backyard Liberty (Liberal’s hidden agenda: more than just your guns…)
Alive After the Fall (Build yourself the only unlimited water source you’ll ever need)
The Lost ways II (4 Important Forgotten Skills used by our Ancestors that can help you in any crisis)
The Patriot Privacy Kit (Secure your privacy in just 10 simple steps)

As Preppers we normally consider medical injuries in our plans. The “Band-Aid” piece of the whole puzzle is a little easier to follow than other subjects because we have more

The Great Depression is almost universally thought of as the darkest time in recent U.S. history from at least a financial standpoint. Like many of you, I know close family members who lived through the depression and their stories of the hardships, but more precisely how they made do regardless of the times, always seem to fascinate me. People were much hardier back then I believe. This period of time is how we imagine life at its hardest; and the realities that so many people faced during that roughly 10 year span seem to loom larger in our collective consciousness to this day. All we need are the right present day events for us all to see how we fare in a similar situation and the worst predictions seem to point to a time where the Great Depression will look like a picnic by comparison.

There are some that say we are already living through another great depression but we don’t know it because of the social safety nets, which over 100 million people rely on daily to get by. Rather than waiting in line for soup and bread, you are given a credit card so you can buy junk food at the store like everyone else. Remove the stigma of public poverty and one could argue the actual harsh effects, and you might struggle less to get out of it. At a minimum, if nobody sees the outward face of poverty, why worry? Not that people on welfare have it good, but the poor in this country live like Kings and Queens compared to the poor in India or China.

Regardless of where you live, it can’t be argued that the prices of food are rising. When the price of groceries increases too far or your ability to pay is decreased, that is when creativity comes into the kitchen and you will need to adjust your menu. During the depression, meat was a luxury that was often only eaten once a week. When I say meat, I am talking about Hot Dogs. Forget having your steaks if we enter another depression. Meals were frequently based on a few simple ingredients like potatoes, flour, onions and vegetables that were grown in the family garden.

ClarasKitchen

Clara’s Kitchen: Depression Recipes

Our society faces a few problems, not the least of which is the ability to grow our own food. In the 1930’s we didn’t have frozen dinners, fast food restaurants and microwaves. Most rural families had their own gardens. If we were to suffer an event now, like the great depression that saw 25% of all workers out of a job, there would be a lot of people unable to eat. That is one of the reasons preppers talk about starting to garden now so that you will not be behind the curve when it’s too late.

If it does come to that and you find it is time to tighten your belt and start making do with less, I thought it would be a good idea to look back in time to see some of the depression recipes that people used to make. I know that we stock up on food that we eat now in the hopes that we will have enough to last us, but I doubt anyone here has stocked up 10 years’ worth of food. If another great depression happens, we will be required to be more frugal and these depression recipes allow you to feed your family with much less.

I have included a few recipes below, but there are also some great books like Clara’s Kitchen: Wisdom, Memories, and Recipes from the Great Depression. Clara also had her own YouTube Channel and you can see her prepare her Poor man’s Meal and talk about living through the great depression below.

In addition to Clara’s Poormans’ Meal, here are a few other options.

Great Depression Pork Stew – Serves 4-6

Ingredients

  • 2 -3 large pork chops
  • 4 large white potatoes
  • 2 large yellow onions
  • 6 stalks celery, include leaves
  • 1/2 gallon water
  • 1/4 cup flour
  • salt and pepper
  • 2 chicken bouillon cubes

Directions

  1. Boil pork until it falls from the bone. Cut into small bite sized pieces (fat as well) and return to pot with some salt and pepper and keep on slow simmer.
  2. Peel and cut potatoes into bite size chunks.
  3. Roughly dice the onion and celery. Add all vegetables and bouillon cubes to the pot and bring to a boil. Simmer low until vegetables are done. Thicken with a mix of flour and cold water. Taste for salt or pepper.
  4. The stew is white with some green so you might want to add a chopped carrot for color.
  5. Serve in deep soup bowls with biscuits on the side. Some may want to add ketchup to their bowl of stew. This is OK – I do it.
  6. You may substitute and inexpensive cut of pork for this recipe.

DepressionEraRecipes

Depression Era Recipes

Old Fashioned Corn and Potato Salad– Serves 4-6

Ingredients:

  • 2 1/2 cups cooked corn (canned is fine)
  • 2 cups diced potatoes
  • 1 tablespoon butter
  • 1/4 cup onion, diced
  • 1/2 teaspoon salt
  • 1/8 teaspoon pepper
  • 1 1/2 cups boiling water
  • 2 cups hot milk
  • 1 tablespoon flour, mixed with
  • 1 tablespoon water

Directions

  1. Combine, in a large pot, all ingredients except milk and flour/water.
  2. Cook until potatoes are fork tender.
  3. Add milk and flour/water, stirring well.
  4. Bring to a boil and cook for 10 minutes.
  5. Serve with chopped green onion and shredded cheese as a garnish.

Creamed Tuna on Toast – Serves 4

CreamedTunaOnToast

Creamed Tuna on Toast

Ingredients

  • 1/4 cup margarine
  • 1/4 cup flour
  • 2 cups milk
  • 1 can drained tuna fish
  • 1 cup frozen peas (or to taste)
  • salt and pepper
  • bread (for toasting)

Directions

  • Thaw frozen peas in a colander.
  • Melt the margarine in a saucepan.
  • Add the flour and blend.
  • Add the milk, stirring constantly to prevent clumping and stir until creamy.
  • Add the tuna, peas, salt and pepper and warm through.
  • As the tuna is warming, toast bread.
  • After toasted, cut in triangles and spoon tuna mixture over the toast.

Cornmeal Griddle Cakes – Serves 10-15

CornmealCakes

Cornmeal Griddle Cakes

Ingredients

  • 1 cup cornmeal
  • 1 cup flour
  • 4 teaspoons baking powder
  • 1 1/2 teaspoons salt
  • 1 egg, well beaten
  • 2 1/2 cups milk
  • 2 tablespoons fat, melted

Directions

  • Mix and sift dry ingredients.
  • Combine beaten egg and milk.
  • Add to dry ingredients.
  • Stir in shortening.
  • Pour on a hot griddle.

Wacky Cake – 1 Cake

This gained fame during the depression because unlike traditional cake recipes, the wacky cake didn’t need milk or eggs. It is still delicious!

WackyCake

Wacky Cake

Ingredients

  • 1 1/2 cups all-purpose flour
  • 1 cup white sugar
  • 4 tablespoons unsweetened cocoa powder
  • 1 teaspoon baking soda
  • 1/2 teaspoon salt
  • 1 teaspoon vanilla extract
  • 1 tablespoon cider vinegar
  • 6 tablespoons vegetable oil
  • 1 cup water

Directions

  1. Preheat oven to 350 degrees F (175 degrees C).
  2. Sift flour, sugar, salt, soda, and cocoa together into an 8×8 inch ungreased cake pan. Make three depressions. Pour oil into one well, vinegar into second, and vanilla into third well. Pour water over all, and stir well with fork.
  3. Bake at 350 degrees F (175 degrees C) for 30 to 40 minutes, or until tooth pick inserted comes out clean. Frost with your favorite icing.

Do you have any depression recipes your family loves?


Before you go, here’s some other self-sufficiency and preparedness solutions recommended for you:

The Lost Ways (The vital self-sufficiency lessons our great grand-fathers left us)

Survival MD (Knowledge to survive any medical crisis situation)

Backyard Liberty (Liberal’s hidden agenda: more than just your guns…)

Alive After the Fall (Build yourself the only unlimited water source you’ll ever need)

The Lost ways II (4 Important Forgotten Skills used by our Ancestors that can help you in any crisis)

The Patriot Privacy Kit (Secure your privacy in just 10 simple steps)

The Great Depression is almost universally thought of as the darkest time in recent U.S. history from at least a financial standpoint. Like many of you, I know close family