HomePosts Tagged "SHTF" (Page 14)

You know that the flame’s gone in your love light when your wife gives you a lighter for your birthday. Just pulling your leg. Anyway, the real reason why I got a lighter for B-day is rather much more banal than that. Last year, during our Amazon holiday, I lost mine while touring the jungle. Couldn’t recover the damned thing, despite retracing my every step.

It didn’t feel like losing a lighter; it was like witnessing the end of a great friendship. Hell, I have so much of those things that I can probably open up my own tobacco shop; but that lighter was the first thing I bought after getting my very first paycheck. The Tin Man, as I liked to call my Zippo, never left my pocket for 20 odd years – it was there for my first kiss, first breakup, and even on that day when I said “Yes” to my ‘lovely’ wife.

Oh, well, que sera, sera, as the song goes. Now, the reason why I’ve decided to write this article is that this new gadget my wife got me for my B-Day is very neat. And because I’m such a grateful S.O.B, I just had to find out just how much money would my wife be willing to spend on my happiness and well-being.

While messing around on Amazon looking for my gift, I stumbled upon several neat survival lighters. So I figured to share with you people a couple of tips on how to choose the best lighter for your bug out bag or car’s emergency kit.

Why should I look for in a survival lighter?

At the end of the day, there’s not much difference between a survival lighter and a regular one – you can use both of them to light up your morning or after-sex cigarette and to whip out a campfire. However, the major difference between them is the amount of damage one can take before keeling over.

For instance, most Bic or corner store light will fall apart if you step on them or drop in a body of water. Moreover, all survival lighters have some sort of weatherproofing – some have water-resistant cases which can take the same pressure as a capsulated watch, while others have grates that prevent wind from putting out the flame.

Anyway, choosing a reliable survival lighter is much harder than you realize. Keep in mind that your fire-starter is part of that inner-circle of survival items called stuff to stake your like on. Would you spend $20 on a survival knife knowing that the blade might shatter during the first use? Of course, you wouldn’t. The same thing goes for survival lighters. Now, to make things easier for you, I have prepared a small list of, let’s say, purchasing criteria.

Reliability

There’s no point in spending $200 or $300 on a lighter if you know that you’re going to use it only once. On the other hand, if you really want to purchase something you can stake your life on any day of the week, money shouldn’t be an issue. Yes, there are fancy lighters which can go as high as $500.

However, those are more what I want to call a bourgeois gratification, rather than an item that can save your ass in a shit hits the fan situation. You should also know that design and construction materials also dictate a survival lighter’s reliability. Of course, the ones made from steel can take more punishment compared to one made from plastic, aluminum or alloy, but they tend to heavier.

Bottom line: if you want a lighter to stake your life on, don’t be a cheapskate or send for smelling salts after seeing the price tag. Remember that items will be with you for at least 10 years, if not for life.

Type

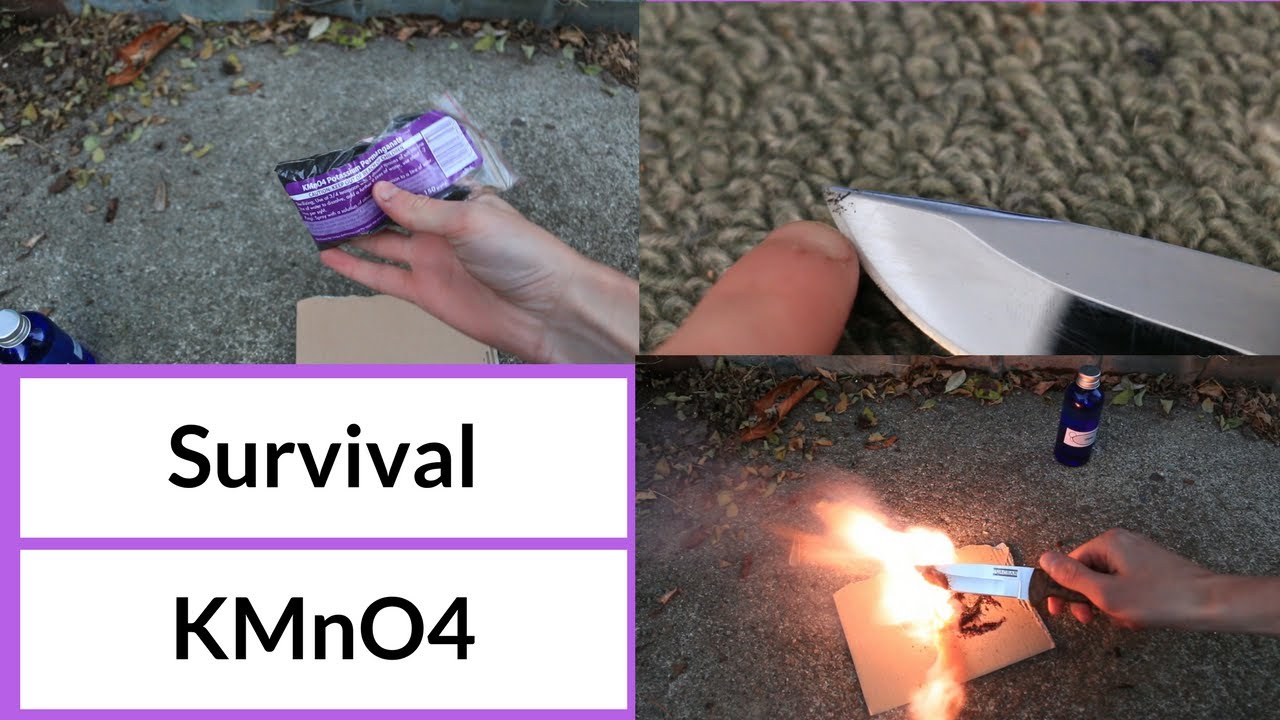
You know the saying: there’s more than one way to skin a cat and to start a fire. Survival lighters come in many shapes and sizes – the most common ones use an electric arc, butane, and flit to produce a flame. Zippo lighters, for instance, have no need for an electric spark since they rely on flint and highly-flammable fuel. If you want a more interesting gadget, you can always try out a plasm survival lighter, which use electricity to produce well, a plasma bolt capable of melting anything in mere seconds.

There are also the so-called windproof lighters that use electricity to produce a flame. The latter variety has been designed to operate in various conditions: heavy rain, snow blizzards, strong winds. Moreover, even a low-cost windproof lighter can light up at a max elevation of 80,000 feet.

Bottom line: there are four kinds of survival lighters – butane, Zippo-types, plasma, and windproof lighters. Some use fuel, while others rely on electricity. Each have their pros and cons; for instance, Zippos have a very long lifespan but require a bit of maintenance.

Plasma survival lighters are extremely useful in setting ablaze even soaked wood, but require a USB or outlet for recharging. As for butane lighters, they’re cheap, can be found literally anywhere, but they do tend to jam a lot.

Portability

Not all lighters are the same – some are flat, others are odd-shaped. The lighter’s design will ultimately dictate the gadget’s portability; of course, it’s easier to pocket a Zippo or similar model since the shape allows for it. You should also keep in mind that the lighter’s additions will also affect portability – remove weatherproofing, the lighter’s more, well light. On the other hand, you can end up with a survival lighter that’s heavier than a brick.

Bottom line: survival lighters should feel comfortable in your pocket, where they belong.

Direct flame

It refers, more or less, to the height of the flame. Some survival lighters, like Zippos, can produce a two or even three-inch flame, depending on how much of the wick sticks out. This can come in handy in situations where you will need more light or a source of heat for cooking purposes. Bear in mind that lighters producing this kind of flame are not weatherproofed.

Bottom line: figure out what works best for you – a lighter that doubles up as a torch\heater during an emergency or something else.

Water resistance

For me, this is a very important factor in choosing a survival lighter. Though most lighters, ever butane ones, can take a little bit of water, they really can withstand being completely submerged. When I was 20 something, I remember going on a hiking trip with this chick from work. Later that day, I tripped and fell, obviously because I was paying more attention to her than to the road.

Long story short, my Zippo fell into a stream and had to chase it around for a mile or so. Even though it remained below the water for at least 10 minutes, it came back to life after I left it out to dry. Plasma-based survival lighters are also water-resistant, and so are the electricity-based weatherproof lighters.

My choices in awesome survival lighters

Of course, no article on survival lighters should be without a couple of nifty gadgets. So, here are my choices in awesome lighters.

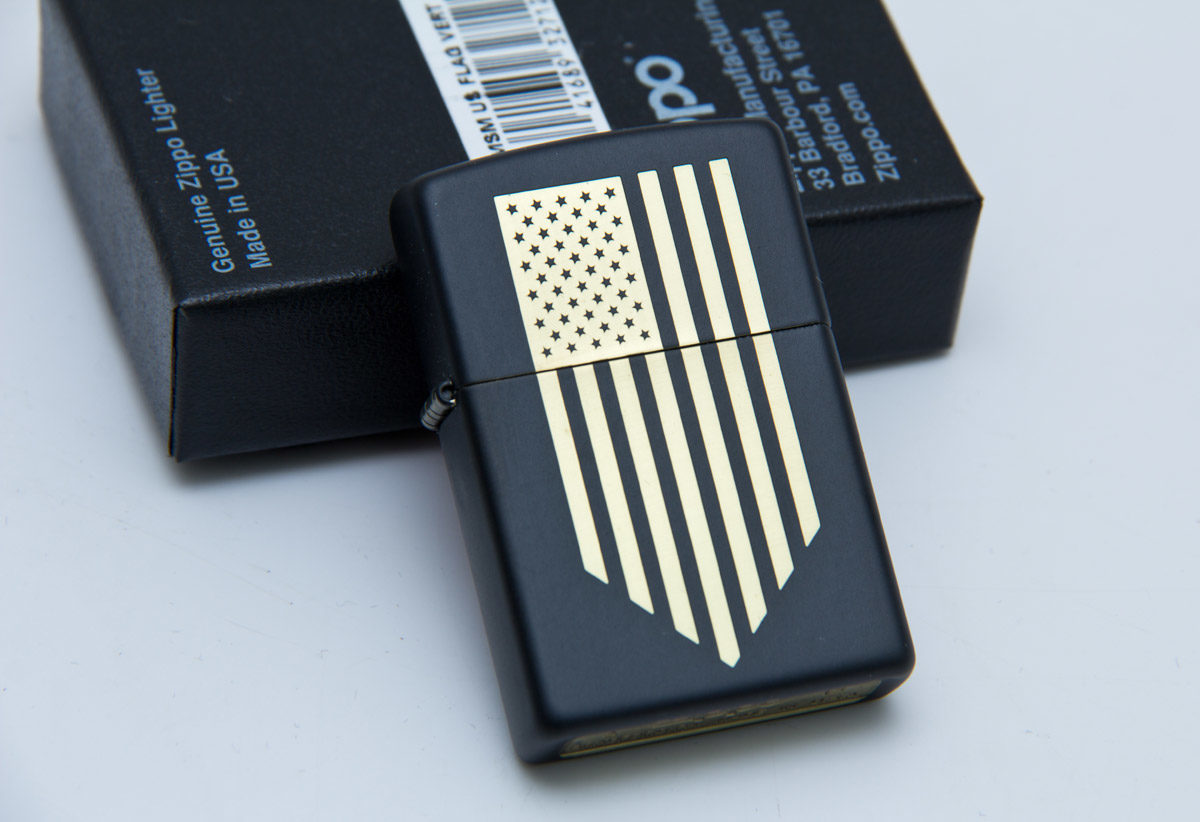
  1. Zippo Emergency Fire Starter

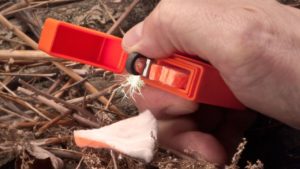
This is the mother of all Zippos out there. Apart from the fact that the body is weatherproofed, the Emergency Fire Starter also comes with four or five tinder sticks which can be used to start a fire just about anywhere. As for shape and weight, I would have to say that it’s bulkier than a regular Zippo on account of the extra protection layer; weight is about the same.

Don’t worry too much about extra supplies like flints, wicks, cotton or fuel – you can buy everything you need from Amazon or whatever tobacco e-shop you have in the area. The tinder sticks, on the other hand, are kind of harder to come by. If you run out, you’ll need to search for a military surplus store that has Zippo products. Other than that, I can’t really say anything bad about Zippo’s take on SHTF.

  1. UCO Stormproof Torch and Utility Tape

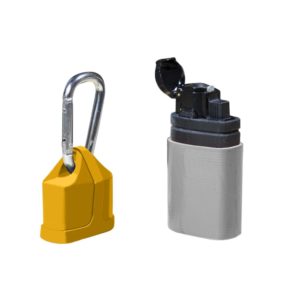
Though I’m not really a big fan of butane lighters, I have to say that I was really impressed by UCO’s torch. This electric, butane-powered lighter has three outlets, all of them covered by weatherproofing grates. It’s very small – basically fits in that tiny penny pocket. On a single charge, it can be ignited up to 700 times. Moreover, given the fact that this is more of a torch than a lighter, it has a ludicrously long lifespan: 30,000+ uses.

It also comes with a small safety cap that packs a mini carabiner, which you can use to attach this little sucker to your belt or B.O.B. The body of UCO’s torch is wrapped in heavy-duty utility tape; if you need to patch up something really fast, you have at least 3 feet of tape at your disposal.

  1. Xikar 9660BK Stratosphere II Lighter

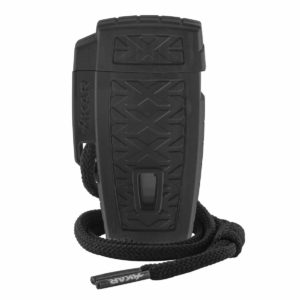
The Stratosphere II Lighter is as close you’re ever going to get to a plasma gun just like in the movies. There’s nothing this bad boy can’t do- the flame’s at least two inches in height, which means that it can compete with Zippo’s survival lighter without breaking a sweat. This model, in particular, is very interesting because it has an armor – yup a stainless-steel cover that protects the mechanism from mechanical shock or water.

If that wasn’t enough to convince you, get him: The Stratosphere II Lighter has a built-in blade, which can be used for chopping or self-defense. As for fuel, this survival lighter goes along splendidly with Zippo fuel or any kind of lighter fluid. When the electrical ignitor no longer works, you can always charge it up from a USB port.

  1. Electric Lighter Dual Arc Flameless Windproof Eco-Friendly Lighter

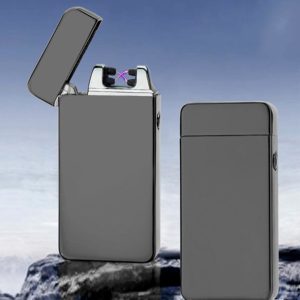
Now that’s a mouthful if I ever saw one. The Dual Arc Flameless is an all-out electrical lighter capable of producing a powerful flame via its two electrodes. On a single charge, the Dual Arc can produce 300 sparks which means that you can probably use it to light up even soaking-wet wood. This is one of those lighters for tech addicts since it doesn’t have a spark wheel, but an infrared switch. The only caveat is that you will need to bring along a power bank or seek out an outlet for recharging.

  1. Blazer CG-001 Refillable Torch

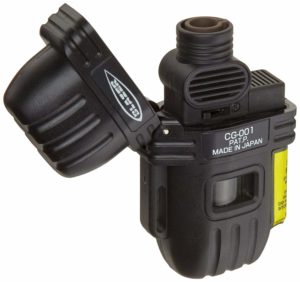
This piezoelectric beauty is more than enough to start a fire, burn paper or illuminate a small room. The flame is tall enough to burn just though anything. This particular model comes with a stainless-steel cover, which means that it can take any amount of punishment.

You can recharge it using any kind of lighter fluid. Don’t worry about running out of fuel because it comes with a small window on the side which shows just how much fuel you have left. It may not be as famous as the Zippo, but, apparently, Japan’s take on survival lighters doesn’t disappoint.

That’s about it on how to choose the best survival lighter. Don’t be a stranger and hit the comment to let me know what kind of lighter you purchased.

While messing around on Amazon looking for my gift, I stumbled upon several neat survival lighters.

Yup, you read the headline right – today we’re going to have a nice and cozy chat about how lady supplies can very well save your ass one day. As someone who has bought more tampons than he could ever care to remember, I always wondered if those things can be used for other purposes then, well… you know.

Anyway, after digging around for a while, a stumbled upon this nice prepping forum where the topic was tampons. Although everything could have gone to shit, the people there were surprisingly very open about sharing their opinions on how to use feminine supplies in a shit hits the fan situation.

So, without further ado, here are 15 ways to use tampons for survival.

Bandage Replacement

Since most tampons are made from pure cotton, obviously they can be used as bandages in case of a medical emergency. I would venture to say that they’re more efficient in stopping bleeding compared to regular gauze since they’re manufactured to, well, suck out every drop of blood.

Don’t forget to keep the pressure on that wound and to stack as many tampons as necessary to stop the bleeding.

Tinder

If you run out of char cloth, you could make some more using a tampon. Unwrap the thing and pour some lighter fluid on it before setting it on fire. Alternatively, you apply a thin layer of petroleum jelly.

Ear mufflers

Neighbors too loud? Mosquitos won’t stop buzzing around? No problem. Take a tampon out of its wrapper, rip it in half, and stuff the pieces in your ears. Now you’re all set for nap time.

Dry-clean yourself

If you forgot to pack a towel, use a couple of tampons to dry yourself. As most of them pack some kind of perfume, you could very well end up smelling like the proverbial rose. They’re also very useful for wiping your forehead of sweat.

Patch up tent holes

A hole in the tent’s tarp is no laughing matter, especially if you plan on camping during mosquito season. If you don’t have anything else, you could use to repair the hole, take a tampon out of its wrapper, strip some cotton, cover the hole, and apply some duct tape.

Craft an emergency candle

If your tac light’s out of juice, it’s possible to make an emergency candle out of a tampon. Get a bell or mason jar, fill with oil, fat, wax or petroleum jelly and stick a tampon in it. Allow it to soak the fuel and set it ablaze. Haven’t tested this out yet, but, apparently, the flame from burning a tampon is powerful enough for cooking. Let me know if it works.

Bait

As gory as this may sound, a blood-soaked tampon can be used to bait fish. And no, it doesn’t have to be human blood – you can use some from a freshly-gutted game or a smaller fish.

Self-defense\offensive weapon

Well, when shit really hits the fan, you’ll want to do everything to get your ass to safety, even if that includes torching someone or something with a tampon Molotov cocktail.

To craft one, get yourself an empty glass bottle and fill it with lamp or gas. Take a tampon out of its wrapper and dip it in some petroleum jelly (you can also soak it in lighter fluid). Place the tampon inside the bottle but leave a bit dangling outside. Flip the bottle a couple of times to soak the tampon in oil or gas. Set fire to the part sticking out and let it rip.

A waterproof carrier for tinder and matches

Lost your tinder box? No problem. To avoid getting those matches and tinder soaking-wet, place them in a tampon wrapper and store them in your bug out bag. As many tampons come with a small, metallic case, you may be able to use that in order to craft a new Tinder box.

Extra cordage

Don’t panic if you run out of cordage. If there are tampons left in your backpack, take them out of their wrapper and cut them into smaller stripes using your multi-tool or survival knife. Tie the heads together, and voila, you have an extra piece of rope.

Figuring out the wind direction

If ever in doubt as to the wind direction, use a tampon. Take a small pole, attach a tampon to one of the ends and stick it in the ground. You’re welcome!

Corking a bottle

Should you lose your bottle’s cork or have to use it for any purpose, use a tampon to cork your wine bottle or whatever.

Making an emergency potty

You can make your own portable toilet by using a couple of tampons and a large zip-lock bag. Here’s what to do. First of all, ensure that there are no holes in the bag. Next, unwrap a couple of tampons, and get them inside the zip-lock bag.

That’s it! You now have a pocket-size emergency toilet- great for number one, though I’m too sure about the other one (would be stupid to carry your own crap in a plastic bag, but survival makes us do ‘amazing’ things).

Water filtration

If you run out of water purification tablets or have no other means of sterilizing water, use a tampon and a plastic bottle. Put as many tampons as possible inside the bottle and pour water. The process will take a while, but the water collected at the bottom is safe to drink.

Treat blisters

I don’t think there’s any universe where blisters are embraced. Doesn’t matter if you’re hiking or running for your life, those blisters will slow you down.

Now, if you have one on your foot, it may be possible to reduce the friction between the skin and boot and, at the same time, protect the area by duct taping a tampon over the blister. Yes, it looks awful, but it works.

Well, that’s about it on how to use tampons in a shit hit the fan situation. What’s your take on this? Hit the comments section and let me know.

Yup, you read the headline right – today we’re going to have a nice and cozy chat about how lady supplies can very well save your ass one day.

In my opinion, every prepper needs to know how to cook. More than that, he or she must become acquainted with the intricacies of preparing the game. Since it’s nearly impossible for me to cover every kind of game out there, I’m going to stick with something smaller and found in almost every corner of the globe – the rabbit.

Yup, you’ve guessed; in today’s article, I’m gonna show you how to deep-fry Bugs Bunny. Yes, I am well aware of the fact that they are cute and friendly and make great house pets, but do keep in mind that in SHTF situation, there’s no room for bias or, in this case, for mercy.

Anyway, you should know that in many countries, the rabbit is considered a delicacy, especially the wild one. Not that there’s anything wrong with domesticated bunnies, but those with ‘freedom to roam’ have an entirely different taste – it’s exactly the same thing between eating domesticated and wild hogs.

Now, the recipe I’m about to show you is very easy to prepare and, as the headline suggests, it involves plenty of oil. Consider this dish a prepper’s take on Colonel Sanders’ iconic fried chicken. So, without further ado, here’s how to prepare a Kentucky-style fried rabbit.

Gathering the ingredients

For this dish, you will need to following ingredients:

  • One young rabbit. Regarding the meat, you can use almost any part. I prefer the cottontails because they’re easier to prepare and far juicier compared to the other cuts.
  • Two cups of buttermilk.
  • Two tablespoons of Italian seasoning or your favorite spice mix. Just make sure it contains oregano, thyme, and dried parsley.
  • One tablespoon or paprika.
  • One tablespoon of powdered garlic.
  • Two or three tablespoons of black or cayenne pepper.
  • One and a half cups of all-purpose flour.
  • One teaspoon of salt.
  • Two cups of vegetable oil or tallow.

You done gathering the ingredients? Great. Let’s get to the fun part.

How to prepare Kentucky-style fried rabbit

Before seasoning your rabbit, you may want to brine it. The thing about using wild rabbit for this recipe is that it comes out all dry. Brining the rabbit beforehand ensures that the, well, nuggets will be moist and crispy at the same time.

To do that, grab a zip-lock back an add a ¼ tablespoon of rock salt and four cups of water. Put the cottontails inside and leave in the fridge for four to 8 hours. After that, take the rabbit out of the bag and start cooking.

Step 1. In a large bowl, put your buttermilk, paprika garlic powder, pepper, and Italian seasoning. Whisk the ingredients.

Step 2. Coat the cottontails with this mixture, stick in a zip-lock bag, and place in the fridge for a couple of hours or overnight.

Step 3. When you’re ready, take a skillet or frying pan and fill it with oil or tallow. Ensure that the oil completely covers the cottontails. Otherwise, you will need to flip it more times than necessary.

Step 4. Take the rabbit out of the zip-lock bag and place it into a strainer. Allow your cuts to drain for 15 or 20 minutes.

Step 5. While the rabbit’s sitting in the strainer, prepare the crust. Normally, you would have to put flour in a deep plate or something and sort of roll over your cottontails in it. However, there’s a faster way, one that does not involve getting your hands too dirty. Take a large zip-lock bag, add all-purpose flour and the salt.

Place your rabbit cuts inside, seal the bag, and shake. That’s it! All you have to do now is to use some thongs to take out the flour-coated rabbit and to place on a plate while waiting for your cooking oil to reach the desired temperature.

(Optional) If want a crunchier crust, follow the Viennese schnitzel recipe. Put some all-flour in a plate, some breadcrumbs in another one, followed by a third plate which contains one whisked egg, two tablespoons of milk, a dash of salt and pepper. First, roll the cottontail through the flour, dip in the eggs and milk mixture, and finally roll through breadcrumbs.

Step 6. Set the heat to medium-high. You’ll need a temperature of at least 325 degrees Fahrenheit to deep-fry those rabbit cuts.

Step 7. When the oil gets hot, add the cottontails. Deep-fry them for 8 to 12 minutes. Keep in mind that rabbit tends to suck a lot of oil, so be ready to pour some more if the oil level drops.

Step 8. When they’re done, place on a piece of paper towel. It will absorb the excess oil. That’s it! Serve while it’s still hot. Rabbit cottontails is a very versatile food since it can be paired with almost any kind of side-dish. I personally like to serve them with mashed or blanched potatoes and some green lettuce. Since it’s a deep-fried dish, you can always serve it with garlic sauce and a cold beer.

Wrap up

Preparing the rabbit is not that difficult. Of course, there are other ways to prepare this sort of game, but those recipes call for a lot more steps and ingredients. The best thing about this dish is that you can prepare it in any kind of setting. I personally like to prepare this recipe during a family camping trick. All you need are the right spices, a survival knife, a medium-sized cast-iron pot, and a source of the fire.

If you can’t afford to carry a pot, you can always use your canteen. As for frying the cuts, you can replace oil with tallow if you’ve got some of you. Always remember that domestic rabbits don’t need brining. Moreover, while keeping the wild rabbit cuts in the salt and water solution, you would do well to set a timer. If it stays longer than 8 hours, it will get all mushy during the deep-frying process.

That about covers it for my mouthwatering Kentucky-style fried rabbit. What do you think about this recipe? Hit the comments section and let me know.

Every prepper needs to know how to cook. More than that, he or she must become acquainted with the intricacies of preparing the game.

Do you wanna know the secret behind a great camping trip? Well, apart from flying solo or going with you SO, there’s also that sprinkle of magic called food. Yes, I know that most of you prefer a quick snack (MREs, poached eggs, may a couple of veggies), but what if I told you that you could actually enjoy a meal fit for a king’s table while backpacking?

Granted, it sounds like a contradiction in terms since camping has always been about leaving behind the hustle and bustle of the big city, which, incidentally includes fancy eateries and heavy cooking gear.

Well, the recipe I’m about to show you will not only blow your mind but will surely make the question the ways you chose to cook your Sunday roast. Anyway, as the title suggests, the only cooking tools you’ll need are the ones that should be included in your backpack or bug out bag.

Now, for those of you who are wondering about the cooking machine, I would recommend a simple and, if possible, firebox. Of course, you can always try your luck with a gas-powered stove.

For my part, I went with option A, since nothing beats that smoky flavor that only charcoal can provide. Moreover, since this is a 7-hour roast, I don’t think it would be a good idea to pack extra gas tanks just to cook one hunk of meat.

So, without further ado, here’s how to prepare your first 7-hour roast beef.

Gathering the ingredients

A simple dish calls for basic ingredients: salt, pepper, a bit of vegetable oil, and a dash of thyme (pairs divinely with beef). As for the cut, T-bone’s good, but a chuck steak’s better. As I said – simple stuff.

Now, for the rest of the stuff: one firebox filled with charcoal, one firestarter, and your camping pan (make sure that it’s one of those models that come with clamps). If you don’t have such a pan, you can always take a regular one from home and use a metallic bowl as a lid – clamp it in place using regular paper clips.

So, did you gather your stuff? Great! Now find a good spot and let’s work some magic.

How to prepare a 7-hour beef roast

Step 1. Find a good spot to set up your firebox.

Remember your grills safety training. We don’t wildfires now, do we? Best would be to pick a barren spot, away from trees or any vegetation. When you’re done, place a piece of paper on the bottom of the firebox and stack some tinder.

Fire it up and start shoveling coals once the fire picks up in speed. I wouldn’t recommend using lighter fluid or whatever, because your roast is going to end up tasting like gasoline.

Step 2.  Prepare the roast beef.

If you’re not in a hurry, you can marinate the roast beef for a couple of hours before the cooking part. I would venture to say that two-and-a-half hours are more than enough for the marinade to get into the beef. Regarding the latter, don’t overcomplicate things; in a zip-lock bag, add water, sugar, salt, pepper, some chili flakes for a kick, a couple of crushed garlic cloves, and two tablespoons of veggie oil.

Bag the meat, give it a couple of shakes, and store in the shade, away from insects. Now, if you want to skip this extra step, you can go ahead and start preparing the meat for pan-frying.  To do that, unpack your meat, season on all sides with salt and pepper. Don’t forget to rub the chunk with a little bit of veggie oil.

Step 3. Pan-frying the meat.

Once the fire has started to gain momentum, drizzle some oil in your frying pan and place on top. When the oil reaches the cooking temp, take the beef chuck, and place in the pan (fat part down). You only need to sear the meat – two minutes on each side is more than enough. When it’s done, take it out of the frying pan.

Step 4. Oven-roasting

In the same frying pan, add some more oil, and a splash of water. Make sure that there are still coals in your firebox. Next, you will need to place the meat in the pan, pop the lid, secure it with paper clips, if you have any, and to place it over your firebox.

Leave for 30 minutes to cook. After that, grab some hot coals from the firebox and place them on top of the frying pan’s lid – this will ensure that your beef will be cooked on both sides.

Now, there’s not much left to do but to sit and wait. Keep an eye on the coals and add some more if you feel like the fire’s ‘losing its touch.’ The first time I made this dish, I was with the whole gang: wife, kids, best friend, his SO, dogs, and, yes, even the cat (taught it how to walk on a leash). Our pastime of choice was obviously cracking open a few cold ones and reminiscing.

Well, if you really want to make more out of your camping trip, you can spend this time looking for side-dishes that pairs well with the beef like wild mushrooms or even fish.

Anyway, do keep in mind that this is going to take a while, so, there’s no point to guarding the firebox.

Step 5. Twist and turn.

After about four-and-a-half hours, remove the coals from the lid. Pop it open and flip your roast. Careful not to drop it or it’s bye-bye dinner. When you’re done, put the lid back again and continue cooking it for about two-and-a-half hours. Don’t forget about the coals.

Advice: if you want to add a crunchy crust to your meat, you can ditch the lid after six-and-a-half hours. Flip the meat every now and then. If you run out of the liquid, add a little bit of water. Otherwise, the meat will dry up and, eventually, turn into ashes (true story!).

Step 6. Gravy all around!

When the beef’s done the cooking, don’t throw away the liquid in the frying pan. Use it instead to prepare a mouthwatering gravy that will everyone a run for their money. Yeah, I know that this qualifies as an extra step, far from the simple dish – simple tools ideal, but trust me when I say that the gravy made from beef feet is the best thing that ever happened to your mouth.

So, here’s what you’ll need to do in order to prepare a simple gravy:

  1. Pour your beef stock in a separate container.
  2. Add a little bit of butter to the same pan.
  3. Wait for the butter to melt then add the stock.
  4. Let it simmer for a couple of minutes.
  5. Add half a cup of all-purpose flour and whisk the mixture.
  6. When the composition becomes silky-smooth, add another half a cup of all-purpose flour.
  7. Give a few more whisks and allow it to cook for another minute or so.
  8. Add salt and pepper.

Advice: if you prefer smoother gravy, you can strain it a couple of times through a sieve or a piece of gauze.

That’s it! You now have a nice cup of gravy which pairs wonderfully with the 7-hour beef.

Additional considerations on the 7-hour beef roast

As you see, preparing this dish is easy, and you only need a handful of tools to get the job done. Now, you’re probably wondering about how to serve this ginormous beef roast. It’s all up to you, of course, but it would be a shame not to make some pulled meat sandwiches. Yes, I know that you usually prepare those with pork, but, hey, beef’s good too. So, here’s what to do in order to prepare some juicy pulled beef sandwiches from your roast.

Step 1. Get yourself a couple of bread slices.

Step 2. Put a metal plate over your firebox and drizzle it with some cold water. You can also add some veggie oil.

Step 3. Grill the slices on both sides. Don’t burn them, though.

Step 4. Put some of that gravy on each slice.

Step 5. Place your roast in a small tray and use two forks to pull the meat apart. Better you do this while the meat’s still hot.

Step 6.  Take some meat shreds and place on each bread slice. Add more gravy if you like. Now, if you fancy carrying around more veggies and ingredients, you can garnish the sandwich with onion rings and a piece of cedar cheese.

Well, campers, that’s about it for my 7-hour roast beef recipe. Hope you’ve enjoyed it as much as I did cooking it. Sorry for not posting any clips or anything, but there was hardly anything left to be shot after everyone dug in (beer will do that for you). Anyway, if you have any questions or think that the recipe can be improved in any way, don’t be a stranger and hit the comments section.

I know that most of you prefer a quick snack, but what if I told you that you could actually enjoy a meal fit for a king’s table while backpacking?

Ever wondered what it’s like to pull a Houdini in real life? I have; not because of some flight of fancy or whatever, but because it’s something that it may happen to you. I like overseas holiday trips just like the next persons, yet I’m not very comfortable with the idea of visiting a country labeled as ‘dangerous.’

Last year, my wife booked us a vacation to Caracas, Venezuela (said it was a dream of hers to visit Caracas). Anyway, for those of you who don’t know, this year, Venezuela’s capital got first place in the ‘most dangerous cities in the world’ top (120 homicides per 100,000 citizens). Yeah, you can very well imagine that I was on edge the whole time.

Now, from what I gathered, guerillas have this method of getting rid of ‘evidence’ by binding the victim’s hands and tossing the unfortunate soul in a deep body of water. Charming, isn’t it? Well, after doing a little bit of research, I stumbled across a former SEAL Navy instructor’s interview in which he explained how special forces prepare for capture and execution.

I won’t bother you with the details, but he did indeed broach a subject which, to my opinion, may prove to be invaluable in an SHTF situation: not drowning when your hands and feet are tied. Sounds very far-fetched; I know. Still, this is the extreme survival series, which means one thing: very low prob, but good to know.

So, without further ado, here’s how to survive a tied and drowning scenario.

Step 1. Consider the bigger picture

Say you were captured by some guys that want to use you as fish bait. Forget about what you’ve seen in the movies about cement shoes or Chicago overcoats – ain’t nobody got time for that! More than likely, your hands and feet will be tied with some sort of cordage (rope or zip ties).

According to the former SEAL instructor, the first thing you will need to do is to feign death by drowning -yes, acting is probably not your forte, but do keep in mind that your captors are packing a lot of firepower; emerge too soon, and you will probably wind up with a piece of hot lead between your eyes. So, the best thing to do would be to hold your breath for as long as you can.

There’s no guarantee that they will leave immediately after tossing in the water – it’s a gamble and, like it or not, your life is on the line. You should also consider the fact that your body can hit bottom in an awkward position.

Now, you should keep in mind that the biggest challenge, in this case, is panic. I know that it’s easier said than done, but be aware of the fact that is panicking leads to hyperventilation which, in turn, leads to getting more water in those lungs. So, keep calm, wait for the danger to pass, and then act!

Step 2. Getting a breath of fresh air

You may be able to hold your breath for a long time but, eventually, you’ll still need to grab some fresh O two. Here’s what you will need to do. First of all, make ensure that you’re in the right position (water surface on top and bottom on, well, the bottom, guess). You may need to do a couple of spins in order to reposition yourself. When you’re done, follow this sequence:

  1. Get all of the remaining air out of your lungs.
  2. Thrust to the bottom.
  3. When you reach the bottom, assume a crouch position.
  4. Push as hard as you can to get topside.
  5. Take a breath of fresh air before getting back underwater.

Bear in mind that you may need to repeat these steps at least a couple of times; the goal is to swim back to safety, not to stay underwater – talk about a no brainer!

Step 3. Keeping your head above water

Swimming is very easy – I mean, your body knows what needs to be done in order to stay above water. However, it may be trickier this time, considering that your hands and feet are tied. Indeed, it’s harder, but not impossible. Here’s what you will need to do in order to float:

  1. Use the above-mentioned steps to reach the water’s surface.
  2. Just before hitting the edge, bend your knees, while keeping your head in the water.
  3. Kick back and arch your back.
  4. Repeat the process to obtain buoyancy.

Step 4. Getting to shore

Now that you’ve mastered the flotation technique, it’s time to ‘swim’ back to safety. First of all, pop your head out of the water a couple of times to scout a safe patch of land. You should also make sure that there’s no one there. Otherwise, all your efforts would have been in vain. Once you’ve identified a safe spot, repeat the step 2 sequence to replenish your air supply. To travel back to shore, follow these steps:

  1. Assume the floating position (head below water, bend knees, and exhale).
  2. Kick backward and propel forward by straightening your back
  3. Repeat these steps to travel to safety.

Note: during your trip to the shore, you will need to stop a couple of times from getting more air. To do that without losing speed, when you’re at the top, flip over and inhale. After that, flip back to the initial position (head down). Repeat this a couple of times. This trick allows you to maintain travel speed while replenishing lost oxygen.

That’s about it on how to survive being tied and tossed to the bottom of the water. A little tidbit before I go: this method is part of a SEAL’s examination. As these units operate far behind enemy lines, the chances of capture are quite high. So, as part of their training, they are literally tied, gagged, and tossed in the water (talk about a rough school day!). What’re your thoughts on this? Hit the comments section and let me know.


Ever wondered what it’s like to pull a Houdini in real life? I have; not because of some flight of fancy or whatever, but because it’s something that it may

I know for a fact that no man has ever seen coconut oil being used for other stuff than scrubs, facial masks, and the occasional fancy dinner with an Asian twist. If I had been called to write an article a couple of years ago, I would have dismissed the task, arguing that I and beauty just don’t mix (keep thinking why my wife picked me in the first place; lost wager, I gather).

Anyway, since I turned to prep, I discovered that coconut oil could be used for tons of other stuff. And no, it’s no unmanly to go and stock up on this stuff.

Need more convincing? No problem there. Here are 13 ways to use coconut oil in those situations when your ass is on the line.

First-aid

Because coconut oil’s packed with nutrients and more good stuff, it can successfully be used to treat all sorts of medical emergencies. For instance, when applied to a limb with edema, it will reduce inflammation and enhance tissue regenerations. In its watered-down form, coconut oil can be used to deal with yeast infections and common viruses.

Moreover, since study has shown that oil extracted from coconut shell has a strong anti-protozoa effect, it can be employed to treat giardia, a parasite known to lurk in untreated waters. Fever? No problem. Just use a coconut oil extract, and you’re good to go. The same substance’s good against viral infections and various skin conditions produced by bacteria.

Get rid of that beard

Sure, there’s nothing manlier than a beard, but, man, that thing itches like Hell. Well, if you decide on getting rid of that beard and have no shaving cream on hand, you can always use a bit of coconut oil. Yes, yes, I know that it sounds like I’m giving you beauty advice or something, but the truth of the matter is that this stuff’s way better than regular cream.

Apart from the fact that it moisturizes your face, it makes the blade slide across your face like it was an Olympic skater. Best of all, you won’t cut yourself.

No more stuffy nose from allergies

Feel like your nose just doubled in size on account of your allergy? No problem. Take a big bowl, pour hot water, and add some coconut oil. Put a towel over your head and inhale. After a couple of minutes, you’ll feel like a newborn.

Foot care

Sore feet? Blisters? Wash the area thoroughly and apply a thin layer of coconut oil.

Repel nasty smells

If you ever run out of deodorant, you can always use a little bit of coco oil. Rub a little bit under your armpits, and you’re good to go. Since it has a great anti-microbial effect, it will effectively kill all bacteria that produce that foul smell. Just don’t coconut oil instead of showers.

Give those gums a good massage

Commercial toothpaste can easily be replaced with a homemade concoction made of equal parts coconut oil and baking soda. Might not taste that good, but at least it gets the job done.

For when the tummy starts growling

I really don’t care that much about carrying veggie oil or butter during hiking. Still, as the beast has to be fed, a stove-cooked meal would be just the thing to put the twinkle back in those peepers. So, if you don’t want to burden yourself with oil or a loaf of butter, grab a small can of coconut oil. Yes, I know exactly how it sounds, but coco oil is an excellent substitute for the regular variety.

Get the juices going

Ever felt like you’re about to fall off your feet but you can’t because you still have tons of shit to do? Well, you can now rest easily because I have just the thing you need to replenish that lost energy: coconut oil. Take a teaspoon of this stuff on an empty stomach, and you’ll have enough juju to move mountains (don’t know about splitting the sea in half, though).

For when Nature doesn’t come calling

Constipation’s perhaps the nastiest thing that could happen to you. Sure, there is other bad stuff out there, but believe me, there’s nothing worse than feeling that you’re more stuffed than a pinata. So, in order to get rid of constipation, just take two teaspoons of coconut oil. Since it’s packed with fibers, it will help your tummy eliminate that nasty stuff in no time.

Use as lubricant

No, not that kind of lubricant, but hey I’m not judging. If you have to deal with bolts that won’t budge or with stuck machine parts, just use a little bit of coconut oil. Of course, this is pricier compared to WD40 or Vaseline but helps if you don’t have anything else.

Waterproofing hiking gear

Thinking about wasting some more money on expensive waterproofing solutions? You may not need to. If you have a box of coconut oil lying around the house, use a little bit to waterproof your boots and coats. Works wonders on hiking boots, by the way.

Clean your eating utensils

Water’s a precious resource, no matter if you’re in the woods or the big city. So, if you’re in a situation where you have to use clean water for other purposes, know that you can use coconut oil to clean your eating utensils. And yes, it’s way better than water and dish detergent.

No more rust!

Think that vinegar’s the only thing that knows how to deal with rust? Then you haven’t seen coconut oil in action. Now, if you have stuff covered in rust, rub a little bit of coconut oil and let it sit for an hour or so. After that, rinse with plenty of water, dry with a paper towel, and you’re good to go.

Well, that about covers my favorite bushcraft uses of coconut oil. What’s your take on this? Don’t be a stranger and hit the comments section.

I know for a fact that no man has ever seen coconut oil being used for other stuff than scrubs, facial masks, and the occasional fancy dinner with an Asian

I don’t need to remind just how darn important it is to know what to cook when the power goes out. There are so many recipes on the grand world-wide-web that you need only type in “gimme food” in Google to figure out your next step.

The trouble with these “whip-up” dishes, as I like to call them, is that they have a very limited shelf life, despite being bagged and refrigerated. In my searches for the next cannable superstar (be sure to check out my article on canning and pickling pork meat), I’ve stumbled upon a most interesting recipe – the so-called Poor Man’s Hamburger. According to its description, it should be an Amish dish, although I find it very hard to make a connection.

Anyway, the recipe’s pretty straightforward and if you have a good pressure canner, you can keep this stuff in your pantry for at least three months if not more. The weird part about preparing this recipe is who or rather what gets the spotlight – though it’s a meat-based dish, the gravy’s actually the one who steps into the limelight.

Crazy, right? Not in the very least! As you’re about to see, the gravy you get is what you might consider a great SHTF asset – it can very easily be combined with the meat of all sorts (chicken, beef jerky, spam) but it can also be eaten, well, plain, as a sort of early-morning broth.

Before we get to the cooking part, I should warn you that this recipe takes time. If you have something big planned that day, I will leave it for another day, preferably a lazy Sunday. So, without further ado, here’s what you’ll need to do in order to prepare Cannish, aka the canned version of the Amish Poor Man’s burger.

Gathering your utensils and ingredients

For this recipe, you’ll need the following tools:

  • Canning jar (the bigger, the better).
  • Plastic container (I would go for a 35 quart because you’ll have a lot of stuff to mix)
  • Food processor.
  • Oven grill (if you don’t have one, you can always use the top part of an old BBQ which you can place it over a tray).
  • Mouth rim (you’ll need this to shape your burger patties).
  • Skillet (for cooking the gravy).
  • Aluminum foil.
  • Lots and lots of patients.

As for the ingredients, go raid the pantry or the local farmer’s market of the following supplies:

  • Celery (around five cups).
  • Onions (five cups will do).
  • Saltines (I used one and a half pounds of saltine or six packs).
  • Eggs (two dozen).
  • Milk (five cups).
  • Lots of salt and pepper.
  • Ground beef (this recipe calls for at least 30 pounds. That’s around two or three big-ass rolls).
  • Canned mushrooms (five cans).
  • All-purpose flour.

Yes, I know it’s a very long list, but as I’ve told you, this is the kind of recipe that kind of makes you spend the entire day in the kitchen. Still, do bear in mind that will also be some waiting time, which would be right after you stick those burger patties into the over. All done with the tools and ingredients? Great! Let’s get right down to business.

How to prepare Cannish

Step 1. Grab a cutting board, a sharp knife, and get to chopping. Have your food processor ready, because everything you’ll chop or crush from this point forward will require a little bit of mixing.

Step 2. Leave the chopped onions and celery aside for the moment. As for the saltines, you can either use a mortar and pestle to crush them or place everything inside a zip-lock bag and use a rolling pin to beat the living daylights out of it. When you’re done, add them to the food processor, and give them a good mix (I scrambled them for 10 or 15 seconds to make sure that there are no chunks left).

Step 3. Grab yourself a large bowl and crack open two dozen eggs. Whisk the shit out of them.

Step 4. Measure five cups of milk.

Step 5. It’s now time to put everything together. Place the plastic container on your work table and add your chopped celery & onions, saltines, whisked eggs, and milk.

Step 6. Get dirty! You have two choices for the mixing part – wooden spoon or hands. I personally prefer the latter (make sure you’ve washed your hands before dipping them in the mix).

Step 7. Add some salt and pepper to the container (I used two tablespoons of rock salt and one and a half tablespoon of grounded black pepper) and continue mixing.

Step 8. Stick the container in the mix in the fridge for 30 minutes. It will be easier to handle once you get to the patty-making part.

Step 9. Get your ground beef out of the freezer and use a knife to remove the membranes. Add the meat to your plastic container and use your hands or a wooden spoon to bind the mixture. FYI, it’s easier to do this if you dip your hands in ice-cold water. Fill a small bowl with cold tap water and keep it next to your container.

Step 10. Start making patties. Take a handful of meat and stick in the metal rim. If you’re skilled patty—maker, you can ditch the ring, and form them by hand. Don’t make them too big or thick. Remember that your goal will be to place each cooked patty inside the canning jars. You shouldn’t also take into account that this type of meat is packed with fat, which will kind of end up in the oven tray.

Step 11. Stick the formed patties in the fridge for 15 or 20 minutes. To prevent them from sticking to each other, create patty layers separated by baking parchment.

Step 12. Get the patties out of the fridge and arrange them on your grill. If you use the exact amount of ingredients, you’ll end up with 28 or 29 burger patties.

Step 13. Preheat your over to 375 degrees Fahrenheit.

Step 14. Place the BBQ grill with a tray in the oven and bake for 35 minutes. Don’t forget to flip the patties after 15 minutes. Depending on your rig, this step can take anything from 2 to 6 hours. In my case, it took about three and a half hours to bake all the burger patties. When they’re done, place them in a large roasting pan. Cover it with two layers of aluminum foil. Allow the burgers to cool down.

Step 15. In the meantime, get a skillet and prepare the gravy. Here’s how to do it. Get one and a half cup of fat from the patties and add it to the skillet. Set your heat to medium-low. After the fat begins to warm up, and half a cup of all-purpose flour.

Use a spoon to stir. Don’t rush it! Gravy’s something that takes a lot of patience. If you see that the mix is about to go up in flames, lift the pan off the stove, and put it back again. You’ll know that the gravy base is done when it turns light brown.

Step 16. It’s time to prepare the mushroom soup. In a big pot, pour the contents of five mushroom soups cans. Using an empty can as a measuring cup, add five cups to the shroom soup and bring it to a boil.

Step 17. While the shroom soup’s still hot, grab a ladle and carefully add it to the browned flour mixture. The secret to not ending up with burned gravy is to stir while pouring shroom soup with the ladle. It may take a while longer, but it’s worth it. If you feel that the mix is too thick for the spoon, use a whisk instead.

Step 18. When you’re done adding every last drop of shroom soup, give the mix a good whisk, and let it bubble for five more minutes before killing the flame.

Step 19. Take a breather. Smoke if you have them. After the gravy cools down a bit, it’s time to put everything together.

Step 20. Give those canning jars a good wash. You can either submerge them in a tub filled with water and dish detergent or boil the Hell out of them before using. Your call.

Step 21. Place five burger patties in each canning jar and cover with gravy. Put the lid on, tighten it, and allow the jars to cool down overnight before placing them in the fridge or pantry.

Congratulations! You’ve just made your first batch of canned Amish Poor Man’s burgers. Your kitchen probably looks like a scene from WW2 or something, but who cares when you have delish marinated burgers. If stored probably, you won’t have to worry about running of food, at least for a couple of months. Although the canning part allows you to store this stuff in any place outside of the fridge, I would strongly advise you to keep your jars refrigerated and to consume it in two months’ time.

Another thing about this recipe is that it will take a while to figure out how to make the gravy base. For my part, I had to discard the contents of two skillets and ended up using more than three cups of fat before I was able to make a ‘stable’ base. As I’ve mentioned, the trick is to gently stir the mix and to lift the skillet every now and then. If the weather’s nice, you can always skip the oven part and cook your patties over a charcoal barbeque.

As for the mix, if you can’t find any saltines, you can always replace them with other types of crackers. Just make sure that they’re salty. The dish can be eaten hot off the oven but, if you want to get more kicks out of it, stick in the fridge and leave it overnight. By morning, the patties would have sucked in all that delicious gravy. You can heat them up in your microwave or in a pan with boiling water.

That’s it for my Cannish recipe! What do you guys think about this SHTF dish? Hit the comments section and let me know your thoughts.

Before you go, you may also like:

This is more than just about your guns…
How to survive any medical crisis situation with ease
10 Easy Steps to Secure your privacy
Secret Military Solution For Power Independence

DIY Unlimited water source
Why a food reserve is way better than the Federal Reserve
Lost Skills of our Ancestors that still work today

Anyway, the recipe’s pretty straightforward and if you have a good pressure canner, you can keep this stuff in your pantry for at least three months if not more.

Diatomaceous Earth – the best thing to have around the house for some, and a thing loosely associated with alchemy, black magic or natural healing to others. As for yours truly, D.E. is probably the best eye-opener I had since discovered that bread could be made from anything, including wild herb-like dandelions. In today’s article, I’m gonna talk about how my life has changed after discovering this off-white powder.

Now, for those of you who don’t know or simply don’t care D.E is a powdery substance made from fossilized diatoms, which are microscopical algae-like organisms. This stuff’s been around since the dawn of the 19th century when it was discovered by mistake by a German peasant who was trying to sink a well near his home.

Ever since then, D.E. has been studied and used for various purposes. In fact, Alfred Nobel aka the Dynamite Dad had been experimenting with diatoms for the purpose of stabilizing nitroglycerin. D.E.’s also used in the beauty industry for manufacturing toothpaste. Farmers also used a refined form of D.E to prevent caulking and to keep pests bay.

Anyway, my interest in D.E. began when I was doing a bit of research on ways to purify water in the field. A couple of clicks later, I ended up reading tons of material about D.E. being used to clean pools and that most water purification tablets are made from this stuff.

From that day forward, I have tried using diatomaceous earth for more than just water filtration. It’s true that baking soda’s the most versatile household ingredient, but that’s before I discovered D.E. Here are a couple of ways I managed to use this powdery delight around the house.

  1. Saving a shit-load of money on kitty litter

I’ve already told you that I’m the proud owner\slave of two wonderful cats, which means that I usually have to stock up on kitty litter as often as I can. The trouble is that you can’t just make two cats share a litter and you really can’t leave them uncleaned for more than two days.

Anyway, after spending literally hundreds of bucks on jumbo kitty litter bags, I stumbled upon this great way of using D.E. as a substitute for silica shards. What I do is make my own cat litter using wood shaving and sawdust, which I sprinkle with D.E. Since the stuff’s great at sucking out every bit of moisture, it entirely eliminates the smell as well as clutter.

  1. Making deodorizers

Yes, I know you can probably get rid of all the foul smells around the house using vinegar, but D.E. is much cheaper. More than that, it doesn’t leave behind that stingy odor, especially when you use it on stuff like carpets, drapes or upholstery. To make your own D.E. deodorizer, grab a canning jar, fill it with water, and dissolve one tablespoon of diatomaceous earth. Place inside the fridge and use it when necessary. It really works wonders on those garbage pails and the back of the refrigerator.

  1. Helping my chicken lay better eggs

It may sound far-fetched, but this stuff’s actually very beneficial to chickens and poultry, in general. If you want to up the nutritional value of your eggs, mix D.E. with chicken feed. They’ll taste better, look great, and have a harder shell. You can also spray some D.E. around the chicken coop to get rid of the smells and to keep away pests.

  1. Being able to make my own cosmetic products

I have to admit that being able to make my own cosmetic stuff was something I’ve been dreaming since my college days. Still, have to say that the perspective of getting caught up in that New Age BS was not my kind of gig, neither was setting up a lab in the basement. Well, after learning a bit about D.E. I’ve managed to get my hands on a couple of great recipes for stuff like toothpaste, deodorant, and facial mask (yes, I use those because my pores refuse to close).

Anyway, with a handful of D.E., a drop or two a peppermint oil, and some vegetable glycerin, you can make one Hell of a toothpaste. Apart from being a great antibacterial agent, D.E also has a scrubbing effect. If you want to add some extra kick to your toothpaste, consider putting some baking soda into the mixture. As for deodorant, you can whip up a good batch by mixing D.E with cornstarch, arrowroot powder, and coconut oil. For facial masks, just add a couple of tablespoons to a glass of water and stir until you get a thick paste. Have fun!

  1.  Removing just about any stain

In a previous article, I’ve told you a bit of how great salt is when it comes to removing stains and smudges. Well, that stuff got nothing on D.E. – this thing can get rid of any stain or dirt, no matter how stubborn it is. From experience, I’ve learned to rely on D.E., especially in dealing with oily stains. So, if the washing machine is of no help, just use a mixture of water and D.E. on the stain. Rub it in, allow it to work its magic and wash.

  1. Great for removing scale and grime from the bathroom

If my wife’s really mad at me, she doesn’t have to yell or anything. She just tells me that the bathroom could use a bit of cleaning. And nothing’s more frustrating for me than having to deal with scale and grime, especially around the bathtub. Tried every cleaning product there is. Didn’t solve anything apart from the fact of sparring me a trip to the gym that day.

Well, since D.E. is very abrasive, I figured that maybe it would help me get rid of the scale. And it did! So, if you want an efficient abrasive cleaning solution, mix two tablespoons of D.E. with some water and use a sponge to spread it around. Give it a good rubdown, and you’re good to go.

That’s if for how D.E. changed my homesteading life. What do you think about this off-white magical powder? Let me know your thoughts in the comments section.

Before you go, you may also like:

This is more than just about your guns…
How to survive any medical crisis situation with ease
10 Easy Steps to Secure your privacy
Secret Military Solution For Power Independence

DIY Unlimited water source
Why a food reserve is way better than the Federal Reserve
Lost Skills of our Ancestors that still work today

Diatomaceous Earth – the best thing to have around the house for some, and a thing loosely associated with alchemy, black magic or natural healing to others.

Probably most of you have included some kind of wound cleaning substance in your first-aid kits. Sure, hydrogen peroxide’s the way to go for getting dirt and other stuff out of the wound, but it’s hardly the only antiseptic out there.

Anticipating that some of you can get a little freaky like me when it comes to having a complete medical kit, I’ve decided to use this opportunity to write about potassium permanganate – prince and pauper, at the same time, among antiseptics. What’s even more interesting is the fact that knowing what this stuff is will allow you to use for stuff other than cleaning wounds.

Before I start talking about the many uses of potassium permanganate, here’s a historical tidbit. During the latter years of the Korean War, the North was so desperate to gain a foothold that it began deploying unconventional weaponry. White phosphorus rounds were one of the weapons used against the South Korean soldiers and friendly American GIs. I won’t go into many details as to what kinds of wounds these devilish contraptions inflicted; suffice to say that it wasn’t a welcoming sight.

Anyway, the trouble with phosphorus rounds was they continued to burn inside the would long after leaving the gun’s barrel. Almost invisible to the naked eye, the Army surgeons had to improvise. And here’s where potassium permanganate comes into play – phosphorus reacts to potassium permanganate; quite violently I might add.

However, if used in small amounts the compound makes phosphorus light up like a Christmas tree. So, in order to operate, surgeons would dunk wounded patients in tubs filled with water, pour in some potassium permanganate, switch off the lights, and operate.

Outside of surgery, this compound can be used for tons of other stuff, most of them having to do with our favorite topic – getting out of SHTF situation. So, after probably boring you half to death with my little historical detour, here’s how potassium permanganate can serve you in a survival-type situation.

  1. Wound managed and various life-threatening scenarios

Let’s start by stating the obvious – potassium permanganate is a very effective antibacterial agent and just the thing you’ll need to keep infection at bay. However, the thing with this compound is knowing what forms works best depending on the nature of your emergency. For instance, in the case of wound management, the liquid solution would be the best approach. However, the powdered form can be successfully employed when having to deal with stuff like snake bites or poisoning.

By the way, if you or someone close to you has ingested poison, you can induce vomiting by using a 0.2 percent permanganate solution. Doctors would often order stomach washes using this compound. Conditions of the skins like irritations, sores or eczema may also be treated using potassium permanganate. Still, if you consider including this compound into your B.O.B or household emergency kit, I wouldn’t use it for more than wound washing.

  1. Getting rid of the dreaded morning breath

Although it’s far trickier to use than baking soda\salt with others, it may be possible to use potassium permanganate to 86 the dreaded morning breath. To prepare a mouthwash, dissolve one gram of powdery potassium permanganate in two gallons of water. This stuff will burn your esophagus and stomach, so be sure you spit it out. By the way, since potassium permanganate is known for its astringent effect (making the skin cells contract), you can use the mouthwash mix to get rid of stinky feet. Use this in conjunction with purified water and soap, and you won’t need another foot spray ever.

  1. Water filtration

If you’re all out of water filtration tablets or can’t lay your hands on charcoal, it may be possible to use powdered potassium permanganate to remove bacteria from the water. According to the FDA’s safety guidelines, the concentration should be around one unit of potassium permanganate to 10,000 units of water.

To figure out what this means, imagine you have a well with very dirty water. By applying the dilution ratio, it means that you will need to use around 7 grams of powdered potassium permanganate to purify one gallon of water. Do the math if you plan to sterilize smaller amounts of liquid.

  1. Fire-starter and probably self-defense weapon

Here’s my favorite way of using this stuff outside medical emergencies – to start a quick fire. For this, you will need around 10 grams of potassium permanganate and one-quarter of a teaspoon of glycerin (if you can’t find glycerin, use a water and sugar mixture). Place the permanganate on a small plate. For extra safety, you should do this experiment outside, as far away from flammable sources as possible. It would also be wise to put the plate on a hard surface like concrete slab or brick.

Now grab a pipette, draw a bit of glycerin and put a few drops in the middle of your permanganate mound. Stand back because the fumes are highly toxic. In a matter of seconds, you’ll see smoke rising from the mound, followed closely by purplish flame. When it’s safe to approach, grab yourself a handful of kindling and longs, move the place to your firepit (don’t forget those safety gloves) and, voila! You now have a cozy fire.

As for the weapon part, I guess you can create makeshift pipe bombs using potassium permanganate and phosphorus. I don’t know for sure if phosphorus is an over-the-counter compound or not, but in SHTF situation, you may be able to combine these two in order to make defensive weapons.

Be extremely careful when mixing potassium permanganate with other compounds. As you’ve seen from the above-mentioned experiment, permanganate doesn’t behave like an English gentleman when combined with stuff like glycerin. Always wear protective gear when working with volatile compounds.

Well, that above covers my take on using potassium permanganate outside the medical field. I hope you’ve enjoyed my article. As always, if you feel that I’ve missed anything, don’t be a stranger and leave a comment.

Outside of surgery, this compound can be used for tons of other stuff, most of them having to do with our favorite topic – getting out of SHTF situation.

Everyone simply adores it and, truth be told, a meal would never be the same without it. I was, of course, referring to salt or, as I like to call it the uncrowned king of spices (that’s because salt is not actually a spice nor a condiment, but a mineral). Anyway, no matter how bad the food tastes, a pinch of salt can make all the difference in the world.

Of course, without this wonder mineral, we wouldn’t have yummy stuff like beef jerky, jerk-style chicken or the wondrous pickled meat. Come to think of it; our own body would have a hard time coping with, well, like it didn’t have enough sodium chloride. Lest not forget about the marvelous sayings this mineral inspired such as “take everything with a pinch of salt” or “being the salt of the Earth.”

Entire books and stories could be written on the topic of salt and for a darn good reason. As for the subject at hand, yes, it is true that sodium chloride can be of help in many SHTF situations, and not just for curing meat or making pickled veggies. Because I’m such a big fan of salt and salty stuff (though my doc told me I should use less) I’ve decided to write this wonderful piece on survival uses of salt.

Little Black book 2

Call it my tribute to the spice that crowns every dish, regardless if it’s a stove-cooked meal or a fancy plateau whipped up by a chef with two Michelin-stars. Now, if you thought that salt’s only useful for brining, pickling or putting taste back into food, you’re dead wrong. After doing a bit of research, I can wholeheartedly say that I’ve stepped into a whole new salt-using dimension. Don’t believe me? Check it out for yourself. Here are 12 ways salt can save your sorry can a shit hits the fan situation.

  1. Gum-massaging early in the A.M.

Fact check – no matter how hard you try or what toothpaste use, you can never get that great shade of dentist white- that’s mostly because they use stuff like hydrogen peroxide and light-accelerated bleach. Great if you want to get rid of tobacco stains or plaque, but wouldn’t be recommended it in the long-run since all teeth whitening agents are notorious for weakening the enamel.

Anyway, a very quick, easy, and all-out natural way of getting in a couple of shades of white is by using salt in combination with baking soda and your favorite toothpaste. There are many to do this, the most straightforward one being garbling a mixture of water and equal parts baking soda and salt. If you want to make your own teeth-whitening substance, take a bell-glass and add one tablespoon of salt (aim for the fine grain variety) and one tablespoon of baking soda. Put a bit of water on your toothbrush and sprinkle some of this one top. Wash, rinse, and finish off with regular toothpaste. You’re welcome!

  1. Removing clingy stains

There’s nothing more frustrating than having to toss a T-shirt back into the washing machine just because that pesky stain didn’t come off. Leave the washing machine alone! Here’s the prepper’s way of removing any kind of smudge – while the stain’s still fresh, sprinkle some salt over it. Take a paper towel, dip it in water, and start rubbing. After a couple of seconds, you’ll see that the stain is gone. Works for all kind of smudges – ketchup, blood, dirt, mayo, blueberries. If you have chunky salt, you can try throwing one inside the washing machine for extra cleaning power.

  1. Putting out a fire

Sodium chlorine is held in very high regards not just for its food-rejuvenation properties, but also for being a great fire retardant. If you get yourself lost in some neck of the woods and need to put out a fire fast, forget about sand, dirt or water. Just toss a handful of salt, and everything will be over faster than you realize (I was talking about the camping fire, of course).

  1. Making the itch go away

Stung by poison ivy? Can’t resist scratching that mosquito bite? No problem. Just rub a bit of salt on the sore spot, rinse with a bit of water, and it all goes away. By the way, salt and water can also be used for throat soreness – just garble a bit of salted water two or three times a day and you’ll be on your feet before you know it.

  1. Removing fish scales

In an SHTF situation, fishing can become your only food source. Sure, mostly anyone can reel in a fish with the right tools, but removing the scales – now that’s an art. I managed to cut myself more than a few times while attempting to scale a fish. That’s until I’ve learned this nifty trick – fill a bowl with ice-cold water and add two tablespoons of regular salt. Put the fish inside and allow it to soak overnight. When it’s cooking time, take the fish out, give it a good rinse, and peel off the scales (yes, the scales peel off like snakeskin or something).

  1. Preventing candles from dripping

At some point, probably each of you had to wait out a blackout by the light of a candle. Have no problem with using them, especially in cases that call for this sort of approach (wink-wink), but no matter what I do, I can’t seem to stop that irritating hot wax from reaching my pants. So, if you’re a candle-yes, wax-no kind of a person, you may try soaking the candles in salted water. Leave them overnight, take out, rinse, allow to dry, and that’s basically it. You will have noticed that there’s no more dripping. Awesome!

  1. Patching up plaster or sheet-rock walls

Though it’s safer to call in a pro for this kind of job, you can patch them up yourself in the meantime using water, salt, and corn starch. Do keep in mind that this neat trick works only on plaster or sheet-rock walls (wouldn’t try it on carpentry or heavy masonry). Get yourself a bucket, add some water, and equal parts salt and corn starch. Mix until it becomes pasty. Use a trowel to spread the mix over the wax and cover with a thin layer of paint. Easy-peasy!

  1. Dealing with mosquitos and other pests

And because I’ve mentioned something about mosquito stings and itches, here’s a great way to keep them at bay. Get yourself one of those spray cans and pour inside a water and salt mix. Spray yourself with this mix and around your campsite. Works for ants too. On that note, if you want to keep ants outside your tent, draw a thin salt line around the sleeping area. Will keep out ants, bugs, and even mischievous ghosts.

  1. Open wound management

Yes, I know that the last thing you’ll want to do is to put salt on a wound, especially a nasty one, but this is exactly what you will need to do order to keep infection at bay. Put that salt shaker aside, because that’s not how this thing works. Let’s backtrack a bit. Your blood serum contains sodium chloride, which is used to maintain vital organs like the liver, heart, and kidney in working order.

Docs use so-called isotonic salt solutions (sodium chloride concentration equal to that of your blood serum) to flush out wounds and, if necessary, replace lost levels. And because bacteria abhor salt, a water and salt mix is very useful in the treatment of severe wounds. Here’s what you will need to do in order to flush out an open wound in the field: grab a plastic bottle and fill it with clean water. Add a teaspoon of rock salt and shake the bottle until the salt dissolves. Put on the cap and use your survival knife to make a small hole in the middle of the cap. When you’re done removing any debris from the wound, flush it with this saline mixture before applying sterile gauze, clean cloth or anything you have on hand.

Little Black Book

  1. Removing nasty smells from shoes

If you’re just like me (thanks mom for the awesome glands!) then you know just how difficult it is to remove nasty smells from your shoes. Tried every footcare products out there – all of them are worth zilch! Do you know what removes pungent smells from your favorite blue suede shoes, apart from not wearing them in the first place? Yup, you’ve guessed it – water and salt. Here’s what you need to do. Dissolve one tablespoon of salt in half a liter of water.

Fill up a spray can with this mix. Spray the inside of your shoes and allow the water to evaporate. You can do the same with new shoes. One other advantage of using salt in footcare – it severely cuts back on blistering. Just use the same solution to spray your soles before wearing those shoes. Might be a good idea to do is if you’re planning on breaking new shoes any time soon.

  1. Whacking driveway weeds

I really lost track of all the times I had to get down on my knees to pick up those f-ing weeds that seem to sprout out of every crack in the driveway. What’s even worse is that, if you wait too long before rooting them out, those things can make a hole in the driveway. So, to prevent those weed from growing, grab a little salt from the kitchen and put some in every crack you see. You should also consider mixing up some mortar to patch up those cracks.

  1. Extend milk’s shelf life

I know that the fridge is milk’s BFF, but even this cookie refrigeration contraption can’t keep milk fresh forever. Nothing can, by the way, but there’s a clever trick that can help you extend the milk’s life by at least a couple of days – putting some salt inside the container. Yes, I know it sounds strange, but salt does have this kick-ass property of preventing milk from getting sour. Just be sure you don’t use too much. Otherwise, you’ll probably end up with something that can hardly be called palatable.

So, that’s about it about using salt in a shit hits the fan situations. I’m aware of the fact that some of tips and tricks I’ve shown can hardly be associated with disasters, natural or otherwise, but hey you don’t need a nuke or EMP to be up your neck in crap. Anyway, hope you’ve enjoyed my article on how great salt is (I can never seem to stop praising it). As always, if you feel that something’s missing from the list, be sure to hit the comments section and let me know.

Before you go, you should check out these 7 most wanted goods this month:

Book of Income (Get an extra $6,840 per year out of your Social Security benefits) [Complementary Book Inside]
Cash for Patriots (Trump’s shocking new plan to help distribute cash to American Patriots)
Cancer Curing Vaccine (U.S. Government Document Admits We’ve Had It Since 1962)
Secret “$50 Marijuana Stock Blueprint” (Turn a single $50 bill into a massive fortune)

Little Black Book (46 Ways to Collect Consistent, Work-Free Income) 
Klebsi Plague (If you were born before 1961 you are at immediate risk)
Marijuana Millionaire Playbook (Now is the time to bet big on Marijuana) [Complementary Book Inside]

Call it my tribute to the spice that crowns every dish, regardless if it’s a stove-cooked meal or a fancy plateau whipped up by a chef with two Michelin-stars.

I have so much coffee in my system that each time I go to the doctor for tests, the nurse asks me if I have any blood left to give. Indeed, I could write novels about my lifelong relationship with coffee, but today I’m going stick to a topic which is more on the lines of prepping and SHTF – how to use coffee filters in a survival-type situation. Let me just grab a quick cup of Joe before I tell you about the most ingenious ways to repurpose those lovely paper filters. Yes, I know I shouldn’t drink that much coffee, but I can’t help myself. So, what were we talking about? Oh, yes – coffee filters.

Without further ado, here are 15 creative ways to make use of plain filters during a shit hits the fan situation.

To wipe your bum

You need to go number two but have no TP left in that fancy bug out bag of yours? No problem! Grab a handful of coffee filters and let nature take its course.

To dine like a hopeless ‘romantic.’

Each time I go hiking, I always forget to bring my portable eating set. Well, there’s nothing wrong in eating with your hands, but what about plates? Grab a coffee filter, cut it along the edge with a pair of scissors or survival knife, and voila, you have a disposable plate.

Keeping your glasses clean

There’s nothing worse than fogged or dirty glasses. Yes, I know that you know where all the things are and that you don’t need to clean those specs, but, hey, we live in a world of conventions. If you lost your cleaning rag or have nothing else on hand, just use a coffee filter to give them glasses a good wipe.

Making an ice-pack

If you need to apply ice to something, grab some from the freezer, place in a couple of coffee filters and tie around the neck using your cordage of choice.

Improv Band-Aid

No more Band-Aids in your first-aid kit? Grab a coffee filter from the kitchen or backpack and place it on the wound. Keep that pressure steady to stop the bleeding.

Improv funnel

If you have to transfer liquids from one bottle to another, take a coffee filter, and snip the tip. Place over the opening and pour the liquid.

Water filtration

Water filtration tables may be cheap, but those things are worth their weight in gold during a shit hits the fan situation. If you ever run out of purification tablets, stack a couple of coffee filters, and use them to sort of strain the water.

Remove persistent stain from clothes

A quick and headache-free way of removing nasty stain from clothes would be to apply some baking soda or hydrogen peroxide and to scrub clean with a small piece of the coffee filter.

Use them as food wrappers

In the wilderness, there is no corner store to buy food wrappers such as plastic or aluminum foil. If you haven’t got any of those in your bug out bag, put your food inside coffee filters and tie them using a piece of dental floss.

Improv feeding bowl for pet

The trouble with food bowls is that you have to search far and wide to find high-quality items. In my experience, ceramic bowls are the best – resilient, cheap, and the pet’s food won’t have a metallic taste to it as in the case of aluminum. In the meantime, you can use coffee filters to feed your pets. Just stack a couple of them, fill them with wet or dry food and keep hitting those pet shop for better feeding bowls.

No more poison ivy itching

If you tiptoe through the wrong vegetation, you may end up with some nasty poison ivy rashes. There’s no need to hit the drug store for this one. Run a hot bath. Meanwhile, get some coffee filters and stack them. Fill them with dry oatmeal and tie with string or dental floss. Toss this satchel in the bathtub and get in. After a couple of minutes, you won’t feel any kind of itches. You’re welcome!

Freshen up your linen closet

If there’s too much stink in the linen closet or wardrobe, you can make an air freshener using a couple of stacked coffee filters and some dried-up lavender flowers. Place the flowers inside, make a knot, and toss inside the closet\wardrobe. You can also make a similar satchel for your car or living room. If you cannot stand the smell of lavender, grab one of those potpourri mixes from the supermarket and replace.

Keep your toolbox neat and tidy

It usually takes me at least a couple of hours to fix stuff around the house. Well, most of this time is spent searching for the right screws or nails, which end up at the bottom of my toolbox. To keep that bag of tools organized, place smaller items like nails, screws, pins or bolts inside coffee filters. You can either use a small piece of dental floss to tie each satchel or some duct tape.

Keeping those nasty insects away from your food

Yes, I know this is the third time I’m complaining about insects on my food, but I just can’t help myself. If you’re having trouble keeping those nasty buggers away from your yum-yums, take a coffee filter, cut it along the edge, and use it to cover your food. By the way, in case you lose the wine cork, you can stick a couple of coffee filters inside the bottle.

Drying your hair and body

Towels are a must-have for every B.O.B, but sometimes they’re more useful for other stuff than drying your body. If you want to take a quick shower but have nothing to dry yourself with, use a couple of coffee filters.

That’s it for my article on ways to use coffee filters in an SHTF situation. What’s your take on this? Hit the comments section and let me know.

Before you go, you may also like:

This is more than just about your guns…
How to survive any medical crisis situation with ease
10 Easy Steps to Secure your privacy
Secret Military Solution For Power Independence

DIY Unlimited water source
Why a food reserve is way better than the Federal Reserve
Lost Skills of our Ancestors that still work today

So, what were we talking about? Oh, yes – coffee filters.Without further ado, here are 15 creative ways to make use of plain filters during a shit hits the fan

I would lie if I said that I don’t envy all those wonderful homesteaders who managed to put a couple of bucks outside for the root cellar. Yeah, those things are really great (if you have them, of course) and not to mention very useful during any kind of shit hits the fan situation – a hole in the ground, some stones, a couple of shelves, and you’ve got yourself a gigantic fridge capable of storing veggies, legumes, pickles, and whatnots.

Ingenious, that’s what it is! However, if your home doesn’t come with a root cellar, building one from scratch takes a lot of time, energy, and, yes, a shit-load of money.

Fortunately, there is a way to tap into Mom Nature’s icy powers without the need to fork over too much cash. Being a very determined guy, I have searched high and low for ways to recreate a root cellar without actually having to build one. Sounds crazy, right? Not in the least, as you’re about to see.

The idea to write this short and sweet piece came to me after watching a documentary on National Geographic about ancient food storage methods. Can’t remember the name of the show, but there were these two guys traveling around the world and interviewing homesteaders about how they make food last longer.

In the last part of the show, there was this man from China who was quite a bit of a local celebrity, thanks to his top-notch Kimchi. For those of you who don’t know, Kimchi is Asia’s version of pickled cabbage. However, instead of using canning jars, homesteaders would place the thinly-sliced cabbage inside a ceramic jar, which would later seal with wax before burying it in the Earth.

So, with this in mind, I snooped around the Internet and found a simple and cheap way of making a mini version of the root cellar using only an old metal barrel. Here’s how to whip up a backyard cellar in order to store your veggies.

Gathering the necessary materials

For this project, you’ll need the following:

  • A shovel.
  • A barrel (I would go with a galvanized metal barrel because they’re easier to clean and fare much better underground compared to the plastic ones).
  • Rocks (shape and size don’t matter).
  • Straw.
  • Several pieces of plywood to cover the lid.

Ready with the gear? Neat! Let’s get to work, then.

How to build a mini root cellar in the backyard

Step 1. Find a suitable place to dig a hole. I would advise you to place your barrel\future root cellar in a sunny spot. You should also make sure that there are no water pipes or electrical lines running nearby.

Step 2. Once you found a suitable location, grab your shovel and start digging. The hole will need to take the shape of the barrel. As for depth, it all depends on the size of the barrel. Just be sure that the rim stays on top, with the remaining underground.

Step 3. After you’ve finished digging the hole, remove any deep roots or pebbles from the bottom. Moreover, ensure that the end of your pit is dry.

Test the ground – if it feels moist to the touch, it means that there’s water underneath which is a big no-no. I know it’s annoying, but if this happens, you will need to find another location for your root cellar. Mark the spot in case you’re thinking about adding a well to your property.

Step 4. Fill the bottom with the rocks you’ve brought.

Step 5. Place the barrel on top of the rocks. Ensure that the body of your barrel remains below the freezing line while keeping the rim up top.

Step 6. Place some earth around the barrel to seal it in. Don’t put on the lid yet.

Step 7. Prepare the veggies or fruits for storage. If you’re not sure about the thingamajig’s cooling action, you can try it out on a couple of potatoes.

Step 8. Place a handful of straw on the bottom of the barrel.

Step 9. Place your veggies on the straw. You can add more vegetables if you like. Just remember to put some straw between your veggie layers.

Step 10. Put the lid on the barrel, put the plywood boards on top, and cover with dirt. Congrats! You’ve just made your first backyard root cellar.

Additional Consideration on Mini Root Cellars

Building’s the easy part, but knowing what and how to store – that’s a bit challenging. The first rule of the game is never to mix your veggies with fruits. If you plan on storing fruits, you should consider placing a second root cellar.

The reason why fruits and veggies should never be placed in the same barrel is because of ethylene, a plant hormone which induces ripening in fruits. The same substance that makes fruits yummy-yum-yum will cause your veggies to ripen and rot a lot faster.

A root cellar built in this fashion will allow you to store food at a decent temp (somewhere between 32- and 40-degrees Fahrenheit), with humidity at around 95 percent.

For this reason, you’ll be able to store even short-lived veggies such as cauliflower, brussels sprouts, celery, kale, endive or leaks. If the seal holds, you can look forward to a scrumptious carrot-based dish even after six months. As far as fruits are concerned, you should ensure that your root cellar has a bit of moister compared to the one used to store veggies.

After consuming every veggie or fruit from the barrel, I would recommend giving it a good wash with the power hose and use plenty of detergent. I can’s put my finger on it, but I believe that this kind of contraption can also be used the summer to keep your fruits and veggies cool.

In most cases, the mini root cellar can extend the shelf life of fruits and veggies by at least a couple of months, with one exception – kale. If you’re planning on storing some kale, keep in mind that you can’t keep it in for more than two weeks.

Think I’ve missed something? Have another way of building a root cellar in your backyard? Hit the comments section and let me know.

If you didn’t start digging, you may also want to check out this offer coming from our partners at Easy Cellar. As well as the many benefits of having one in your backyard.

A hole in the ground, some stones, a couple of shelves, and you’ve got yourself a gigantic fridge capable of storing veggies, legumes, pickles, and whatnots.