HomePosts Tagged "SHTF" (Page 31)

This article will try to answer many questions around self-defense for preppers. I have written a fair amount on the subject in other articles, so this will have links to other information for more detailed analysis and opinion. As always, I welcome your comments below.

Why do you need to plan for self-defense?

Many years ago when I started prepping the world wasn’t radically different. We didn’t live in any Nirvana of goodwill and peace, but the idea of preparing to defend your life from bad guys was met with much more resistance than it does now. We would talk about fortifying our homes, purchasing firearms and enrolling in training to hone our skills but frequently you would have someone comment to the effect that we were all paranoid, crazy and disillusioned idiots who saw fear lurking around every corner.

Flash forward to today and there is much less push back when we talk about self-defense. People have seen far too many incidents in the news of violence happening. All over the world we witness mobs going out of control, of riots after natural disasters, incidents with police or even sporting events where innocent people are hurt. The world can be a dangerous place now and I don’t believe a majority of people anymore think it is foolish to consider being prepared to defend your family.

Read More: Top 5 Firearms you need to get your hands on NOW!

What we do have is a lot of argument about the best means, equipment, practices and policies. I won’t be able to debate all of those here, but I will lay out my plans and suggestions below.

What are your self-defense options?

The dictionary defines self-defense as “the act of defending one’s person when physically attacked, as by countering blows or overcoming an assailant”. I believe that each of us has a right to defend ourselves when attacked. No one has a right to take my life that trumps my right to stop them from doing so. The threats faced run the gambit though when we enter the world of prepping. My suggestions will almost exclusively focus on situations where your life is on the line and the imminent threat of deadly violence is what we are talking about.

Psychological Self Defense – Can you talk or bribe someone out of violence against you? Potentially, yes but that requires skill and luck and the right set of circumstances. Assume you are out one evening and a man tries to rob you. Could you talk him out of it by appealing to his humanity or shaming him? Maybe, but I don’t want to risk failing. When it comes to self-defense I want to escalate appropriately to deal with the threat immediately. Some may feel that this is the first level you should try.

stop-1131143_6401

Physical Self-Defense – If talking the bad guy out of hurting you doesn’t work you may still have options. Can you run? Do you want to fight this person? Could you win? Are you sure? Do they have a weapon? Can you overpower them and what if you do? I strongly believe that each of us should as part of a well-balanced approach would be physically fit, mentally sharp and experienced in hand-to-hand combat, but that simply isn’t a reality for many people. Could a strong, fit man take out another strong fit man of approximately the same weight? Sure. Could a small diminutive woman take down a much larger attacker with martial arts? Of course. Is that you?

Read More: How to select the best handgun for home defense.

Physical self-defense in a life threatening situation for me would not be my first option either because I don’t want the bad guy anywhere near me. If I have no other means to defend myself it will come to this, but I wouldn’t use this by default.

Weapons based self-defense – To me, this approach is far superior for more people in more situations than the other two options. For starters, weapons are the great equalizer. A 110 pound female can defend herself with a weapon effectively against a 300 pound man or even two. Could she also go ninja and bring him to his knees? Sure, some could but could you? Firearms with proper instruction, used to defend your life give you great advantages. It goes without saying there are drawbacks too, but as the saying goes. I would rather be judged by 12 than carried by 6.

What is a balanced approach to self-defense?

Obviously I advocate the responsible use of firearms for self-defense but there are times when I can’t carry a firearm or I simply don’t have one on me. When those scenarios appear, the other two options have to be looked at. Can I talk this person out of violence? Can I run and escape the situation? Can I overpower them with some other inanimate object like a fire extinguisher or baseball bat across the back of their head?

When I started prepping, it was with the vision of a world gone bad. My nightmare scenario was some form of economic collapse that brought horrible times and violence right to my front door. In thinking of that, I purchased several weapons that I thought would help me defend my family and assuming anything along the lines of a full-scale violent uprising happens, I still have those at my disposal.

gun-252784_6401

Practice, Practice, Practice.

But most of us go through our daily lives without anarchy. We don’t have economic collapse happening now, at least to the scale that we might have imagined it with panic and looting in the streets of our neighborhoods. We go to work, go out to eat and come home, every day. Does that mean we don’t have to worry about self-defense until some cataclysmic event happens?

Will you be prepared to defend your family mentally?

I advocate being prepared for emergencies. For this to happen, you have to be ready now. It isn’t good enough to wait until something bad happens and then start worrying about how you will defend your family. You have to be prepared to defend them now and hope that you never face that situation.

If firearms are your choice of survival weapon, you should purchase them now and get some good training in now in the proper use and function of whatever weapon you choose. Concealed carry permit applications set records every year for the simple reason that people are getting prepared. What for? Who knows but if something happens you don’t want to be that guy headed to Walmart because you are hoping to buy a shotgun only to find they have been completely cleaned out. Take steps now.

I should also mention that none of the above advice means anything unless you are mentally prepared. Violence usually occurs very fast and hesitation can kill you just as quickly as doing nothing. If you aren’t prepared to take a life, you don’t need to purchase a tool designed to do just that. Whatever you decide you will be left with the responsibility of your actions. It is worth thinking about now while you have the luxury of time.

This article will try to answer many questions around self-defense for preppers. I have written a fair amount on the subject in other articles, so this will have links to

This article is the fifth and final article in an incredibly detailed discussion on the important considerations you may have to make if you are bugging out and on the run.

Additional Thoughts

In this final segment we will examine three topics that merit special consideration. If you have (or plan to have) a group that you would hit the trail with, these subjects will be worthy of serious discussion.

The Fallacy of Setting Arbitrary Schedules

If you are traveling on foot, I can virtually guarantee you will not reach any camp site that you preselected for that day. Such goals are difficult enough to achieve if you are bugging out with vehicles, but motorized transportation at least gives you the advantage of bursts of speed if you have to detour. You may be able to make up lost time by driving faster or a bit longer.

Realistically, such options are not likely to exist when your group is on foot. What might have been a plausible schedule for reaching successive camp sites based on a motorized time line becomes unattainable when on foot. Going ‘faster’ means the entire group either has to pick up the pace for extended periods or continue traveling beyond sundown.

There will be innumerable reasons why you cannot maintain a pace needed to reach a predetermined camp site. For example, rainstorms may delay your progress, or scouting activity may force you to lay up for extended periods.

Apart from placing a group that is ill-equipped to travel on foot in the dark, pressing ahead to an arbitrarily selected camp site will add the risk of physical injury. Importantly, you will have lost the ability to mask your tracks while traveling in darkness. They will be there for anyone to see at the next dawn. And, they will lead right to your camp.

This is why, for a group with diverse (and possibly limited) experience and stamina, I maintain a strong bias toward traveling only in daylight; allowing sufficient time to locate and set a concealed and secure camp.

What does this mean? You should constantly be assessing possible campsites along the way. The best location may be at a site that you passed a half-hour earlier.

No one can predict the conditions they will encounter when SHTF. You may have a reasonable understanding of the geography, an idealized route and a passing knowledge of the terrain you will be crossing; but all of it will have been based on perceptions that you gained when things like water fountains actually worked and people weren’t holding rifles when you got near their property.

The goal for each day is to have a group that is still intact and uninjured. It will not matter that you covered only 12 miles rather than twenty.

Trail Discipline

TrailDiscipline

The tracks left by this group greatly exceed what is required for a single file formation.

This topic can be difficult for some people to wrap their brain around, but it is vital, nevertheless. The time to learn and discuss these disciplines is before a member puts the entire group at risk of detection.

  • Limit movement on and off the trail. If your point man has you moving in single file formation, it is for a reason. Don’t walk abreast or clump up.
  • Keep verbal communication to a minimum and keep it low. If you are having a noisy conversation you are (1) broadcasting your location and (2) are unable to hear an approaching threat.
  • Use 2-way radios with headsets to communicate between people who are detached from the group (such as the scout or tail-end Charlie) when necessary.
  • Use unambiguous hand signals as often as possible. There is an amazing amount of information that can be conveyed using this technique, but it has to be learned and practiced. (See http://www.lefande.com/hands.html as an example, or search “Military Hand Signals” on the Internet.

Signals

Signals for File Formation, Stop and Line Abreast

  • Keep your eye on the guy on point. If he/she signals for everyone to stop, that’s what it means. It doesn’t mean to step away from the trail or that you should rush forward to see what’s going on. Stop! The person behind you may not have a line of sight to the point man. You should repeat the signal for the benefit of those behind you.

Trail discipline applies to everyone. Lack of cooperation will raise everyone’s stress level and could endanger the group.

Planning for Success – Essential Tools

Any individual or group contemplating a cross-country bug-out should incorporate extensive and detailed route planning as part of their Prepper regimen. You may have driven the route a hundred times under normal conditions, but your knowledge will likely be limited to your visual recognition of highways that you may no longer be able to use, or towns that are no longer safe to pass through. There are several tools that can help you plan and execute a route that will minimize your profile and avoid areas that are susceptible to tracks.

GPS

GPS in combination with satellite imagery is the best solution.

One of the tools that I keep handy is a GPS unit. When not otherwise in use, it sits inside a Faraday Box and can be retrieved within a matter of minutes. Loaded in my GPS are pertinent topo maps and key GPS waypoints that would lead me (or anyone in my group) to a variety of locations. As an optimist, I believe that the network of GPS satellites (there are 32 in orbit at present) would survive just about any SHTF situation that can reasonably be imagined. The use of GPS can be of great value if you are navigating across unfamiliar terrain.

Mapping Software

Mapping tools, such as DeLorme, can be similarly used for capturing topographic details (including 3-D) of an extensive route. These images can be downloaded from a computer and stored on a smart phone.

Satellite imagery

Satellite imagery, such as Google Earth, can provide details of terrain and trails that do not appear on maps, and allows you to capture in 3-D mode. These images can also be transferred to a smart phone.

Hard copy topo maps

Communication options are a huge force multiplier.

USGS topographical maps covering the route from your origin to destination can serve as a hard copy backup if you lose power in your GPS unit or smart phone. Frankly, a topo map isn’t going to tell you anything about soil composition (unless it happens to be a swamp) or if the terrain is rocky.

Of the four options listed above, I prefer using GPS in combination with satellite imagery. The value of having GPS is that you will always know where you are relative to your target location, especially if you have had to detour away from your chosen route. Satellite imagery gives you a realistic ‘photo’ of the terrain at just about any level of apparent eye altitude you desire (that is, height above the deck), and allows you to color code trails, locations where there is water, etc. Over the course of the last five years I have located and marked several thousand trails that do not appear on any topo map.

Conclusion

In the final analysis, the level of tracking expertise of a group on your tail may not matter much. If you are leaving a “bright” trail, one that is loaded with sharp tread impressions, trail trash, reckless high sign and other indicators of your route, it will not take much observational or reasoning skill to locate you. Practically speaking, it is impossible to pass over a significant span of terrain – involving multiple days of travel – without leaving any sign. Your goal should be to practice disciplines that will make your passage along that route as “dark” as possible.

This article is the fifth and final article in an incredibly detailed discussion on the important considerations you may have to make if you are bugging out and on the

This article continues where Part 3 left off in discussing how you can dress for concealment when you are avoiding detection, potentially in a SHTF scenario. For anyone who has considered the sobering thoughts of running from hostile forces as I know many of us have, this series by Bolo is a deep wealth of knowledge that we can all benefit from immensely.

Dress for the occasion

There have been some great discussions on TPJ about the benefit of blending in with the crowd (the ‘gray man’ concept) after a SHTF incident. The general scenario is that you are moving through an urban/suburban environment with nothing more than your wits, determination and a Get Home Bag, and that your objective is to simply get home to your family as quickly and safely as possible. You may be surrounded by many people with the same objective. If you are dressed out in full camouflage, carrying 40 pounds of gear and a pump-action 12 gauge shot-gun, you will undoubtedly draw unwanted attention to yourself.

In contrast, the premise throughout this article is that you have been forced to abandon your home; that you are now beyond the urban setting. In this scenario, your manner of dress needs to support your survival rather than endanger it. You will want to be wearing colors and patterns that work for you day and night, while on the move, in shadows and while stationary. Colors that sharply contrast with a natural setting can be easily detected, even when the person wearing them is stationary. When naturally blending colors are combined with a disruptive pattern, you have camouflage.

To my way of reasoning, if you have abandoned your home and are now on foot, it means you should be wearing this type of clothing at the outset of your journey. You may not have the luxury of changing from nondescript street attire to tactical clothing at a point of your choosing. In any case, you will have wasted valuable space in your packs that could have been used for food or water.

Boonie hat provides protection from the elements and breaks the silhouette of your head.


Beyond your basic clothing I would add five important items:

The first four items obviously contribute to comfort and concealment, while the tactical vest provides you with many additional compartments for things that you may need to reach quickly.

I am obliged to say that camo clothing does not make a group invisible when they are on the move. Camouflage works best when it becomes part of and blends in with the natural surrounding. In other words, it will be most effective when you are stationary and surrounded by natural objects such as trees, brush or boulders, etc.

Watching the Back Door

Every member of a group, whether on the move or not, should have a role, but three functions are particularly important. These are the person on point, the scout and (for lack of a better term) the “Tail-end Charlie.”

Being on point has nothing to do with the size of one’s ego. The guy up front bears the responsibility of leading you on a course that puts you at the least risk (exposure and safety) and that gets you to your destination by having selected routes that economize the expenditure of energy and time. These can be daunting and stressful tasks.

The most physically demanding activities will likely fall to the scout. The scout is one who can move competently to check out an alternate route, a potential hazard or obstacle, or opportunities such as water or shelter. Your scout must be able to provide an objective assessment and return to the group without having given your location away. The scout function may also entail the location of possible scavenging sites. It is a challenging assignment that could occur many times over the course of your journey.

Don’t think of the third role as one that relegates or demotes a team member to the rear of the column. Rather, the person at the rear has three key functions.

The first is to make sure that those ahead are not leaving high sign, trash or distinct tracks on the trail. As the video clips in Part 1 amply demonstrated, smugglers take precautions to obfuscate their tracks using various tactics, and they take effort to wipe out footprints when needed. The role of your “Charlie” requires constant attention to what is on the ground or hanging on limbs and branches in front of you. Smearing out footprints is a tedious and potentially tiring task; it can take a lot of effort if the team members ahead of you are incautious.

A good set of variable power binoculars is essential.

Second, being observant also permits “Charlie” to assure that the exertions of the group are not causing someone to become overly tired. Relative to the person on point, this position is perhaps best able to determine when it’s time to call for a rest break.

The third task is to maintain frequent watch of the trail and terrain that you have already crossed, and it involves more than a simple glance over your shoulder from time to time. There are some simple strategies for detecting a trailing group. For example, let’s say your group has just passed over the crest of a low-rise between two hills. Charlie can linger at that point for a few minutes to glass the area behind. Remember, while you have been moving through an exposed area, a group in trail of you may have been observing your movement from a point of concealment at some distance. Elevation always improves observation. Obviously, you want to know if there are people on your tail. You will be looking for color, motion, glints of light and smoke in the distance. A good set of variable power binoculars will be essential.

The functions of the scout and tail-end Charlie will occasionally require that they break visual contact with your group; therefore, radio communication is necessary. Scouting activities in particular may force the group to lay up for long periods. Charlie should be using this time to keep an eye on the back door.

Taking a Break

The number and type of circumstances that could delay your progress while on the move are beyond imagination. Terrain, route uncertainty, weather, temperature, the necessary assessment of risk to exposure or threat ahead of you, as well as the make up of your group, will decide when it is necessary to halt forward progress. Whatever distance objective you may set for the day is actually irrelevant. Accept as a ‘given’ that your group will be required to frequently pause.

Whenever it becomes necessary to suspend movement, you should ensure that the group will become stationary and concealed at a point that is some distance from your trail. Depending on the features of terrain and ground cover, the necessary distance may be as little as 50 -100 feet, but far enough away from the trail that they would not be visible. Trash and tracks that are left alongside a trail are incredibly easy to locate. Always police the break area before the group returns to the trail. Return to the trail at a different point if possible.

Elevation is your friend

If you are standing at ground level on flat terrain you can see a distance of about three miles; but, you will have obstacles (like trees) that block your line of sight. If you can raise your elevation by 100 feet, your range of vision increases to greater than 12 miles and those obstacles are now below your position. At 200 feet above the deck, your range of vision becomes slightly greater than 17 miles. These elevation gains provide the ability to spot moving groups, dust columns, smoke, and (at night) moving or distant lights that you would not be able to see at ground level.

Whenever possible, use elevation to observe the terrain, identify areas where you may be able to use natural cover as part of the day’s route. Importantly, elevation will help you identify areas that provide poor concealment while your group is on the move. When put to effective use, elevation will help you maintain a low profile throughout the day.

When elevation in not your friend

Extended periods of exposure on the top of a hill or ridge (especially a bare ridge line) invites detection from great distance.

MilitaryCrest

Military crest: An area on the forward or reverse slope of a hill or ridge just below the topographical crest from which maximum observation … can be obtained.

U.S. Army Field Manual FM 101-5-1

Observation of terrain by your scout or tail-end Charlie can be conducted from the military crest of a hill or ridge; but if your group is moving on the long axis of the ridge, they should maintain a course that is above the military crest, but below the actual (topographical) crest. This will reduce the chance for detection from below. It should be noted that the area between the two crests can be good locations to set camp if good cover is provided by trees or scrub, etc.

Shadow and terrain

Wherever possible, use shadow to your advantage. Bright sunlight can produce sharply contrasting dark shadows to an observer at distance. In other words, if I am on a hilltop in full sunlight and scanning terrain at a distance, it will be much more difficult for me to detect movement in shadowy areas. If you are in shadow and wearing camouflage clothing, the difficulty in spotting you will be compounded.

Terrain features that are most capable of producing starkly contrasting shadow include: draws, ravines, gullies, bluffs, the shaded side of washes, cuts and passes through mountains, etc. Using these features will lower the profile of your group whether stationary or on the move.

Foot trails through open country

It can be a great temptation to cut a straight line path across a large open area when your objective is to reach the other side. Taking such a course would save time and energy. Even so, I would advise that you skirt the open area, using the margins where you can take advantage of tree cover and shadow to obscure movement.

Closing thoughts for Part 4

By now, you hopefully have reached an understanding that the study of terrain is an essential survival tool if SHTF forces you into a cross-country journey. The topics that I’ve used to illustrate the issues, risks and opportunities are by no means comprehensive, but they can set you on a course of thoughtful preparation. In the next, and final, segment we will address three remaining topics:

  • The fallacy of setting arbitrary schedules
  • Trail discipline
  • Planning for success – essential tools

In the meantime, your questions and comments are welcome.

This article continues where Part 3 left off in discussing how you can dress for concealment when you are avoiding detection, potentially in a SHTF scenario. For anyone who has

This article continues where Part 2 left off in discussing how you can move through environments without leaving signs that you were there. This could come in handy if you are fleeing from people who are trying to track you.

Minimizing Your Trail

We have, thus far, introduced five different types of sign that can be used to track and locate a group on the move. Without trying to throw you a curve, there is a sixth type that just is as damaging, or more so. That is, the ability to visually locate you. If I see you standing on a ridge line or moving through open country, it matters little that I haven’t picked up your trail (yet). Because I saw you, I can now move in your direction and cut for sign. This means that your route movements and manner of dress are just as important as the physical sign you are depositing along your route.

There are many things you can do to lower your profile (visibility to others) and to reduce your tracks while on the move. Part 3 will address the physical sign and Part 4 will deal with your group’s visibility profile while on the move.

The Obvious

Be alert to soft soils – whether saturated with water, damp, dry or powdery (such as moon dust). Any soil type that permits the sole of your shoe to leave a clear imprint of the tread may require some type of obfuscation or outright avoidance.

Whenever possible, use hard packed soils, rocky ground, or terrain that has pebbles or gravel. In areas where rocks or pebbles rise above the soil level, you can walk long distances without leaving any trace at all.

Dry Washes and Creeks

Normally dry washes and creeks tend to reinvent themselves after a heavy downpour; sometimes violently so. Sandy areas will be wiped clean of any tracks, but damp silt deposits may remain along the margins. These can leave sharp impressions of tracks.

Hiking through a wash can be a convenient way of concealing your movement because it places you below the surrounding terrain, and there are times when it may become necessary to use them. There are, however, two important caveats: First, it is far easier to travel downhill in a sandy wash than uphill. The expenditure of energy while you are gaining elevation could be two or three times greater than what is required on a hard pack surface of equal distance and elevation gain. Second, any tracks that you leave in a dry wash could remain there for days or weeks. It will be more difficult for an inexperienced tracker to determine the age of the tracks, but they will, nevertheless, reveal your route. If the planned route takes you near a wash, my general advice is to travel above and parallel to it.

Using Booties or Carpet

CarpetShoes

In this image, the wet sole of a carpet shoe shows the outline of the shoe it was covering. The only reason this group was located was because they created a visible trail through an area of wet grass. Prior to entering the grassy area, there was no sign.

In Part One I introduced the concept of using burlap, booties and carpet shoes to mask tracks on soil types where shoe tread can be easily seen.

Burlap can be effective for relatively short distances (perhaps 10 to 20 miles), but will break down on rough terrain that is dominated by sharp-edged rock or gravel, course granite or pumice. Once burlap begins to unravel you will be leaving a trail of threads behind you. In addition, wrapping or removing burlap from your trail shoes simply takes too long.

In the case of booties made from felt type material, a worn out bootie sole will allow the tread of your shoe to make direct contact with the soil. This is not to say that booties cannot be effective, but their application should be limited to terrain where there is little likelihood of encountering sharp, jagged or coarse rocks. Bear in mind also, booties are relatively thin and will not be effective if worn over aggressive boot treads such as lug soles.

The ideal solution is a carpet shoe made with medium to high density pile that has a height of ½ inch or greater. The upper portion should be a sturdy material, such as denim or a rip-stop weave. Ideally, the carpet sole will be about ½ inch wider and longer (at the toe and heel) than the shoe it will cover. The key to securing a carpet shoe to your foot is the use of good quality Velcro strips sewn onto the upper fabric. Depending on the type of hiking shoe it will be worn over, you may choose to have either an open heel or opening at the top. Although you won’t find them listed in the yellow pages, there is a veritable cottage industry along the U.S./Mexico border dedicated to manufacturing carpet shoes and booties, so producing them for yourself will be a DIY project. Experiment with carpet remnants and scrap material to see what works and fits best for your foot.

Why you should avoid bunching up

SmugglerTracks

This photo shows where a very large smuggling group gathered in a wash before crossing a 2-track road.

Photos like the one above illustrate what happens when there is no trail discipline. All of the tracks you see are the result of a single group (estimated to be in excess of two dozen people) that was allowed to bunch up before crossing a road. This is what you call a “bright trail.” In addition to the many tracks, the group also carelessly left bits of trash. In a SHTF scenario, any group that leaves trail sign like this certainly risking detection and could be gambling with their safety.

When to Walk Single File

The vast majority of your movement on a trail should be in single file formation. This is often necessitated by terrain features and dense ground cover, such as brush and trees. There are, however, three circumstances that justify a deviation from this mode, but the decision to abandon single file should be determined by your point or scout and based upon their judgment. The three circumstances are: Jumping trail, moving through tall grass, and crossing roads. The most obvious reason for maintaining a single file is that it is minimizes the spread of your tracks, making it far easier to police them up. From a practical standpoint, it is far easier to keep track of everyone in a file formation than when spread out, and a narrow column keeps foot sign confined to a single trail, making it easier to police careless tracks. Spreading the trail with ten people walking abreast means that you are producing ten sets of tracks. It becomes an impossible task to police these tracks if the group is moving abreast of each other.

Determining When to Abandon a Trail

Your primary objective is to keep your group safe and to survive the journey to your destination. Abandoning a trail does not mean you are abandoning that objective. It may mean that circumstances in front or behind you have made the continued use of a trail untenable.

Jumping trail

This describes a calculated maneuver that may be required when you believe your present route is untenable. For example, your “tail-end Charlie” has spotted a group in trail of you at some distance. You may determine that their rate of closure is such that maintaining your present speed and course will result in unacceptable risk. The need to conceal your tracks has now become a matter of some urgency. There is no cause for panic, but you need to locate a point where you can break off (or ‘jump’) the trail. Whether you choose to jump trail going uphill or downhill will depend on terrain features where you are.

You will want your group to be able to individually depart from the trail in a lateral movement (left or right, up or downhill), but in such a way that you are not creating visible sign. The last person to jump trail should be the scout or “Charlie.” Their role will be to ensure that no visible signs of trail departure can be detected. Once again, the use of booties or carpet may be needed until the group is able to reassemble at a point of concealment.

If you are under pressure from a group in trail of you, you may not have a wide range of jump locations that you would consider ‘ideal.’ One thing is certain, however; that is to put a natural obstacle, such as a hill, between yourself and the trailing group so that when you do abandon your route the maneuver will not be visible.

I dislike making recommendations based upon hypothetical terrain conditions, but I will risk this one suggestion:

Given the opportunity, break from your trail on an uphill course. The primary reason is that high ground is tactically superior.

  • You will be better able to observe the group that is closing on your position.
  • It will be more difficult for someone standing at the base of a hill to spot you. Brush, trees, rocks and the natural curvature of the hill work in your favor.
  • Their behavior (which you can now observe) will reveal whether they have been tracking you.
  • You will be able to assess their threat level and make appropriate decisions.

Crossing roads

At some point on your journey, perhaps often, you will encounter roads that require crossing. Roads with frequent curves and bends, especially in hilly country, can sharply limit your ability to detect other groups that may be using it. Do you cross the road in single file, time the crossing so that each person makes it to concealment on the other side before the next one crosses, or do you make a mad dash to cover on the other side?

Let’s say that you must cross the road from a point of concealment on one side, to a tree line or similar concealment point on the other side. The total distance, including the roadway and shoulders or banks, is 70 feet. At a normal, unhurried pace, you can cover that distance in 20 seconds. Our hypothetical group of ten people would, therefore, require 200 seconds (03:20) from start to end to complete the crossing in single file mode. That is a very long time.

A faster and safer method is to spread the group laterally and cross the road simultaneously. Total crossing time: 20 seconds. Crossing points such as these are a good time to use booties or carpet. This will obfuscate the tracks on both sides the road.

Tall grasses and weeds

TracksThroughGrass

Moving single file through tall stands of grass or weeds risks the creation of a very distinct path.


As I pointed out earlier, moving through large stands of grass and weeds in single file can create a very visible trail that may not recover very quickly, if at all. If the field cannot be avoided, it will be better if each person enters and emerges from the field at a different point; that is, you will be spreading the trail in a “line abreast” maneuver that permits each member to be separated by several feet. Provided that each member of the group is not ‘barging’ through the field, this tactic will make it much more difficult for a group in trail of you to locate your path.

There is one caveat. Because weeds and grasses are easily crushed, you must move slowly through the field and watch where you place your feet. Step over or around clumps.

How to prevent skids

Although the shortest distance between to points is always a straight line, it does not mean that you should attack a steep hill or decline in a straight line path. Apart from the increased exertion and risk of injury while climbing or descending a steep angle, you risk the creation of skid marks that will be very difficult, of not impossible, to conceal.

It will be much easier if you use a “switchback” method that allows you to keep your angle of ascent/descent relatively shallow. This will greatly reduce the risk of skids and conserve energy. It is important to note that scuffing of soil is harder to prevent when you are going downhill – even if you are using a switchback course of descent. The simple reason is that gravity is a force multiplier and increases the impact of each step on the soil or rubble that you are crossing. Repeated impact on the same spot by several people will loosen the soil and may dislodge rocks.

Proper brushing out of tracks

TracksInDesert

This photo shows the tracks of three individuals moving through silt. Note the heavy toe impressions – they were moving hurriedly toward nearby cover.

As noted in several places, tracks laid down on soft, damp soil or mud will be difficult or impossible to remove. The best method I have found for removing or obscuring tracks on loose and hard packed soil is to use a soft hand towel. I’m referring to the type that matches a bath towel, except that it would be 26 to 28 inches in length. A gentle flip of the wrist will propel the towel onto the track with enough force to obscure or remove it without causing a major displacement of other soil (or rock) on the trail. At minimum, this type of motion will fill in the track with loose soil, giving it the appearance of an old track. Ideally, it will completely obscure the track. In the photo above, there is no practical way to remove these tracks without it being obvious. The shoe impressions are simply too deep for this type of soil.

It is a certainty that you cannot avoid leaving some type of sign along your trail. Whether it is a dislodged rock, a muddy print or an accidental piece of trail trash, you will at some point leave evidence. The techniques described in Part 3 will help you cover your tracks to the best possible extent. If practiced and adhered to, they may well give you the edge you need to complete your journey safely.

In Part 4 we will take a look at lowering your group’s profile while on the move. In the meantime, I welcome your comments and questions.

This article continues where Part 2 left off in discussing how you can move through environments without leaving signs that you were there. This could come in handy if you

This article continues where Part 1 left off in discussing how you can move through environments without leaving signs that you were there. This could come in handy if you are fleeing from people who are trying to track you.

In Part One of this series I introduced some of the issues that can place your group at risk of detection when on foot and on the move. In Part Two, we will cover the remaining four types of ‘sign’ that can be left on or near a trail you are using.

High Sign

This topic focuses on evidence that is above ground level. In other words, this is evidence that may be found on brush and tree branches that line the path of your trail.

Cut and broken branches

If you are moving through areas of dense cover, such as thickets or bramble, it may become necessary to use machetes to clear a path. Removing (disposing) the evidence of cut limbs and branches is problematic by itself. An even greater issue is the stub that remains on the tree. Cutting a path means that you will have created a visual sign of your passage and course. Freshly cut branches that are left near the source will remain green for a time, indicating that you have recently used this location, or that you have cut a path in a new direction.

CoveringTracks1

Tree branches were hacked off to provide a place of concealment and shade.

Hanging or suspended debris

Good trackers always look for various types of sign that are lying on, or suspended from, brush and tree branches along a trail. The most common sign will include fabric from ripped or torn clothing, sleeping bags, blankets or back packs.

The most effective method of mitigation is to maintain constant awareness. Everyone in the group should be alert to the risk, but the person occupying the “tail-end Charlie” position will be your last line of defense for the detection and removal of high sign.

  1. Night Sign

This term refers primarily to critters that commonly emerge and search for food in the safety of darkness, including innumerable bugs, mice, rabbits, raccoons, skunks, coyotes and deer, etc. Their foraging activities will leave tracks on just about any trail that has loosely compacted soil. Importantly, the combination of night sign and your tracks will provide a useful timeline. For example, if a night critter crosses tracks that you deposited the previous afternoon, it could mean that you are several hours, but less than one day, ahead of the tracker. If your tracks overlay distinctive night sign, it may mean that you are only one or two hours in front of the tracker.

In the photo below, a very crisp heel mark with an “X” pattern has been laid on top of several critter signs.

CoveringTracks2

Footprints that overlay night sign indicate recent passage.


Birds that forage for seeds or insects (quail and dove, etc.) will only leave tracks during daylight hours, but footprints that lay on top of these tracks can be used to establish a timeline, as well.

Night fog and dew can also be forms of night sign when moisture is deposited in the imprint of a track, particularly if the soil inside the print shows signs of swelling. Fog and dew operate differently on tracks than rain. An astute tracker can use this knowledge to establish an approximation of when your tracks were created.

There is nothing you can do to prevent night sign on your trail, but you can limit the ability of a tracker to use these clues as time stamps. The key, of course, is to leave no tracks of your own.

  1. Poor Obfuscation Techniques

There are many ways to attempt covering your tracks. With few exceptions, most efforts that I’ve seen merely substitute the original footprint with a different clue – one that shows you are trying to hide your trail. Effective masking of footprints depends on the type of soil, surface covering, the depth and detail of the impression, and soil moisture. Obfuscation is not a “one size fits all” solution. You are better served by avoiding the creation of tracks in the first place, than your efforts at removing or obscuring them. Here are a few examples of techniques that are not effective:

  • Avoid sweeping techniques that make use of rough brush. Any attempt that leaves lateral impressions of stems or branches will be obvious.
  • Coarse bristle materials will wipe the track, but it will leave a brushed out area that may be larger and smoother than the original print.
  • Rough techniques that cause the displacement of small rocks and gravel will be obvious to a trained observer.
  • Walking single file in sandy washes may increase the difficulty in determining a group’s size, but it is impractical to eliminate the tracks.
  • In sandy or other loosely compacted soils, repeated impressions in the same foot print will only serve to enlarge the size and depth of each print.
  • The same holds true on soft or damp soil, but increases the risk of revealing overlaying tread marks from multiple shoes.

The bottom line is that obfuscation efforts that do not match the original texture and appearance of the surrounding area may result in detection. Useful mitigation techniques are addressed in Part Three.

CoveringTracks3

Discarding trash and clothing along a trail is a sure way to be detected. What else is wrong in this photo?


Trash and Waste

Do not discard trash along the trail. Careless disposal of trash, such as package wrappers, water bottles or metal food containers also indicate use of the trail. The condition of the trash may tell a tracker how recently it was deposited. Importantly, it is an advertisement that, not only do you have food, it may reveal the type. For example, a carelessly discarded MRE package may reveal (or at least suggest) that you are well equipped for a long journey. Some types of trash, such as a brand of imported sardines, may uniquely identify your group; particularly if the same objects can be found at successive break points. Light colored objects, such as tissue, plastic spoons and discarded shopping bags are additional indicators that you are moving along a route.

Clothing items of any type reveal much about the person that discarded them, including size, age and sex.

Small folding shovels can pull double duty as a weapon or for digging holes to hide your trash or waste.

The best practice is to bag all trash and return it to your back pack while on the move. You can collect everyone’s discards from the day’s journey when you set camp, then bury it in a secluded spot. It is essential that you bury human waste and tissue.

Make sure that you have more than one trenching tool in your group. I would also suggest that someone have an army style folding shovel.

In this and the previous segment of the article we have identified the primary types of ’sign’ that your group is at risk of leaving along a trail. Realistically, you cannot move along any route in an invisible state, but you can use tools and practices that will greatly reduce your trail profile.

In Part Three of this series we will begin to address techniques that will help you conceal, or at least mitigate, any sign your group may leave. In the meantime, your questions and comments are welcome.

This article continues where Part 1 left off in discussing how you can move through environments without leaving signs that you were there. This could come in handy if you

The Lowly Goat

I have been a prepper since just before Y2K. It has been an interesting journey that encompassed ‘peak oil prepping’, natural disaster prepping, EMP prepping and TEOTWASKI prepping. I’ve purchased all sorts of prepper gadgets and supplies, drooled over the Lehman’s catalog, ordered from a variety of dehydrated food company catalogs, improved my gardening and food preserving skills and changed a room in the house to a storage room instead of a dining room. But after all those years, all the prepper novels, the YouTube channels and lengthy discussions with like-minded friends, I have come to the conclusion that we just have to learn how to survive as our pre supermarket ancestors did. We need to have the skills necessary to survive long-term that were needed before electricity. Because once all our purchased stuff is used, we will have to know how to raise our food and fix things by hand.

There are thousands of articles on all things related to prepping written by people way smarter than I am. But I seldom find much on how to select and manage livestock after a collapse. My gardening skills are improving, I don’t know much about guns and my cooking and food preservation skills are a work in progress, but I have been around animals all my life. I’ve cared for livestock on my hobby farm for at least forty years so it only seems natural that I would decide to focus this article on animals from a prepper point of view.

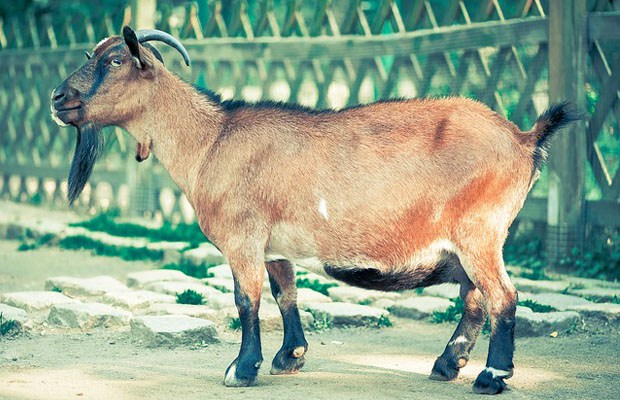
One of the animals that I think will be a major player in sustainable living after the SHTF is the lowly goat. Goats can supply milk, meat, hides for clothing and be work or pack animals if needed. It’s time to look at what the goat has to offer and why I think it is better than a cow.

Both the cow and the goat provide the same products and many think the cow is going to be the perfect prepper milk and meat source. It is generally assumed that once the power goes off, dairy farmers will be giving, or bartering, their herds away because they won’t be able to milk them. I suspect this is true. So many preppers are planning on just grabbing one of those free, or bartered, cows and their milk and meat problems are solved. Short term, that will work for some and, worst-case scenarios, get others severely injured or killed. Let’s look at the cow and goat and explore why I think the cow is a bad idea and the goat is the perfect solution in most prepping situations.

BackyardGoat

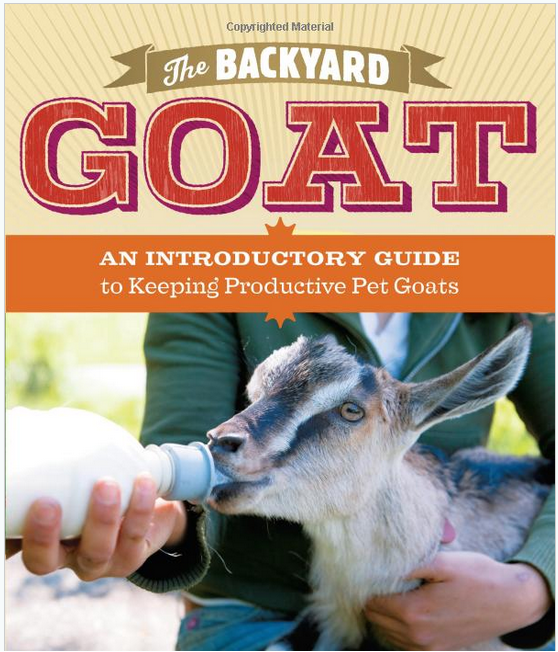
The Backyard Goat: An Introductory Guide to Keeping and Enjoying Pet Goats, from Feeding and Housing to Making Your Own Cheese

Raising Goats: Goat Safety

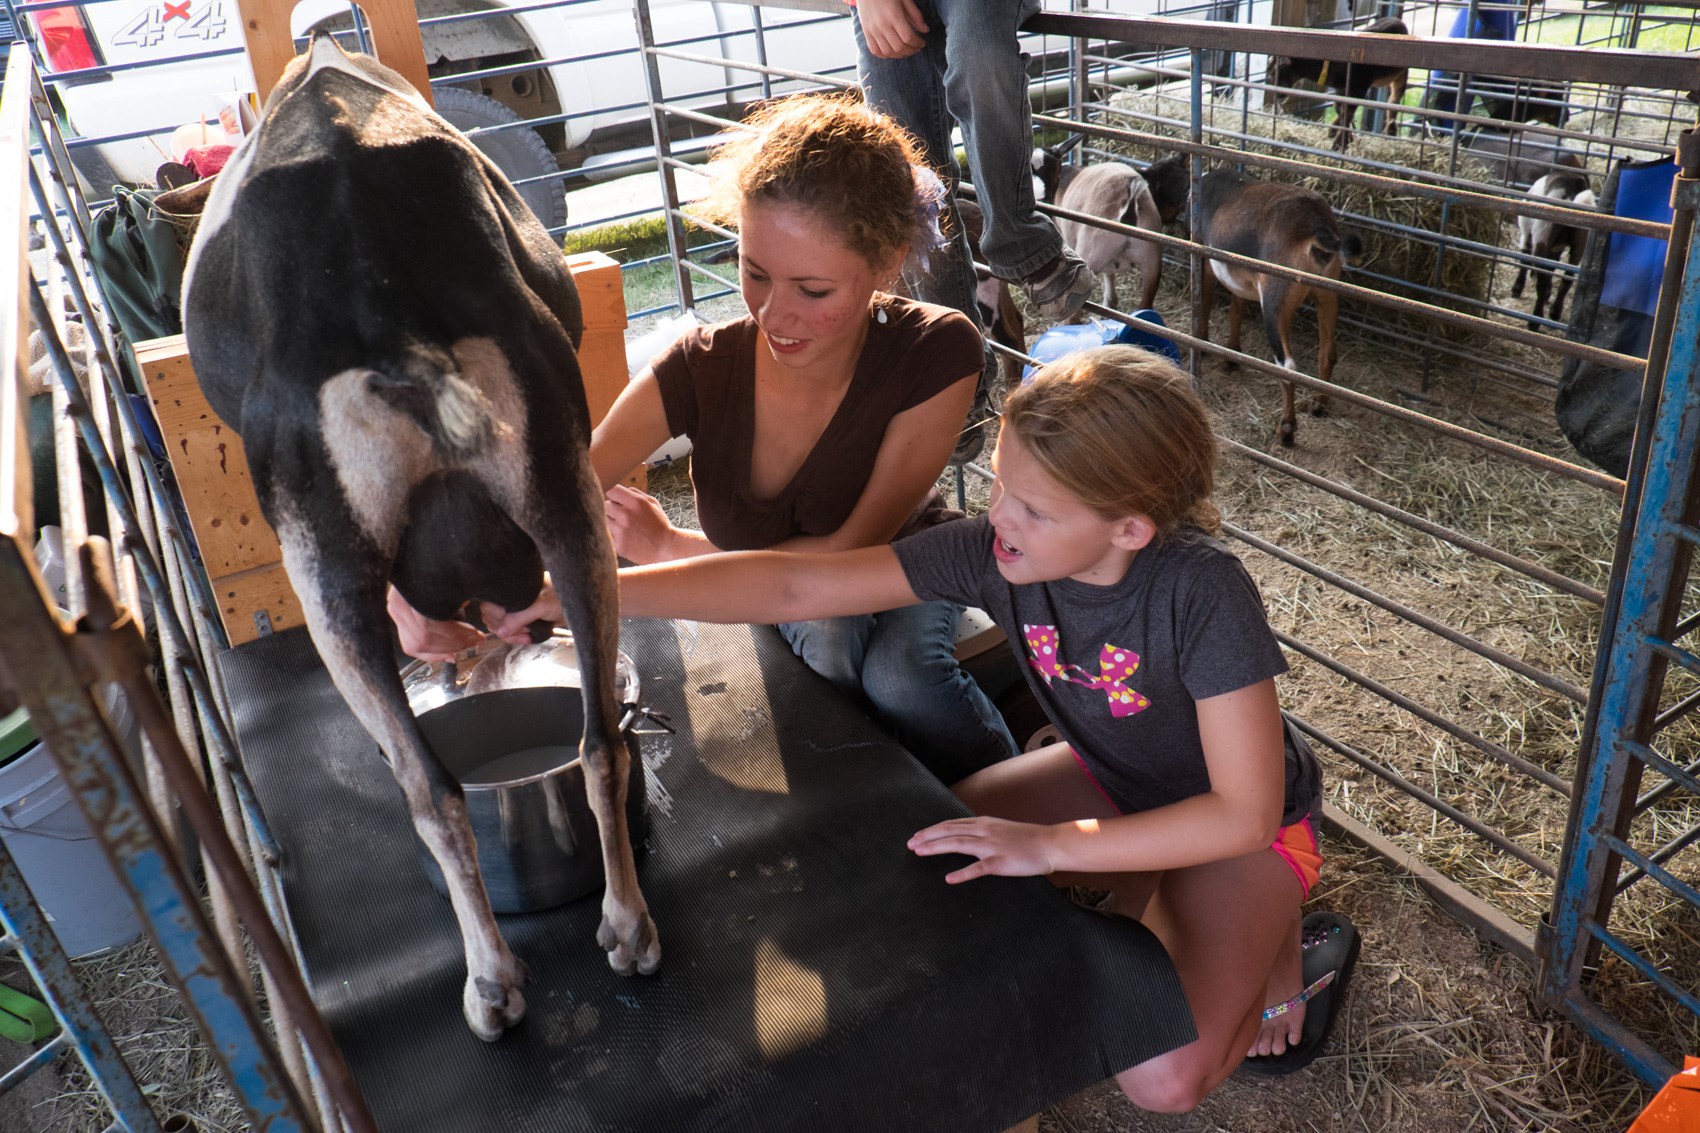
The first thing to look at is handling. The average prepper doesn’t have a lot of experience handling animals…let alone milking a dairy animal. While we tend to see photos of contented cows in clean barns looking happy, cows are animals that weigh over a thousand pounds and very definitely have a mind of their own. If you don’t know what you are doing, the risk of injury when a cow swings her head around and accidentally drills you into a wall is very real. Don’t forget that she may not like your amateur milking efforts and show you her displeasure with a well-placed kick. Have you ever been run over by a cow that doesn’t want to go in the direction you want her to go in? Remember, doctors will be in short supply at best, so a broken arm that means a trip to the emergency ward today may mean something much worse in an STHF situation.

The milk goat, on the other hand, is usually under two hundred pounds. A cranky goat is much easier to handle than a moody cow and the likelihood of injury due to a kick is dramatically reduced. A doe (female goat) isn’t likely, although it is possible, to be able to swing her head around and send you sailing either. So from a safety point of view, especially for someone with little or no experience handling livestock, the goat wins hands down. Of course, if you have the handling experience, then a family cow might be something to consider. But keep in mind, if the collapse has happened, you will probably have inexperienced people staying with you. While the experienced people will do fine with a grumpy cow, how will the new displaced urban residents living at your bug out location do if they are assigned barn duties? Something to consider.

Since we are talking about safety, lets mention bulls and bucks….the boys! Breeding animals are not pets and in this case, both of these animals can be dangerous. Many an experienced farmer has been crushed by a bull after making one handling mistake. While a buck goat can be nasty, the chance of serious injury from a handling error is dramatically reduced just because of the difference in size.

Raising Goats: Goat Reproduction

Most people never give the breeding aspect of milk production a thought. Cows and goats have to be bred, and produce a baby, in order to produce milk (Some contradictory info on this later) . Farmers now days solve the problem of keeping a dangerous bull by, instead, using artificial insemination (AI). The AI guy comes to the farm with tanks of semen and breeds the cows. There is very little risk of injury. But after an EMP there will be no AI guy and the only way to get the goat or cow bred so she can keep producing milk, and offspring to raise for meat, will be to have a breeding bull or buck around. Life after a collapse of society is going to be jam-packed full of new and terrible dangers so it makes sense to choose the reduced risk of keeping goats that must be bred instead of cows.

goat-692274_640

Some of you will say “I can take my cow to the bull at the neighbor’s house” and that could be true in isolated cases. But two things should be considered. The average prepper isn’t going to keep a bull for breeding so finding that bull in your region will be difficult. Then you have to get your cow to the bull. You will be able to lead a goat through the woods. Depending on the woods themselves, leading a cow through the woods in order to avoid detection on a road is going to be a big challenge. Especially if Bossy isn’t interested in walking through the underbrush and jumping over fallen trees.

The reproductive cycle of the cow is continuous all year-long so you can breed her and have calves at any time. This means you can plan when you will have the biggest supply of milk. Goats have a breeding season, usually from mid-fall to about January. You have to plan carefully if you want a decent supply of milk for the entire year. This could be a disadvantage if you choose to have goats as your safe haven dairy animal but it isn’t an insurmountable problem.

Raising Goats: Housing your goats

The bigger the animal the more extensive the housing required to keep it healthy and happy. You can keep about six goats comfortably in the same space that you can keep one cow…. And the goats are not nearly as strong as a cow so your shed or barn doesn’t need to be as rugged for goats as it needs to be for a cow. The average prepper doesn’t have a barn but is likely to have a shed or garage that can be converted to shelter a dairy goat or two. Keeping goats in a small shed or garage is much more doable than housing a cow in one. Let’s not forget that a fifteen hundred pound bull is going to need a very stout barn and paddock area, as a bull on the loose is extremely dangerous. A two hundred fifty pound buck goat does not present the housing challenges of the bull for the prepper.

Obviously, if you have the space and shelter, then a cow isn’t going to present a housing problem…however, as a prepper who understands that security is important, you will probably appreciate an animal that you can easily hide. While not ideal, a goat can easily be housed in a cellar, on a porch or even in the home itself. I’m sure keeping a goat in the house is not something anyone would look forward to, but in some SHTF situations your animals are a critical part of your long-term survival and the ability to hide them from thieves, and wandering gangs, is an important consideration when deciding which dairy animal you will decide on. Cows will be MUCH more difficult to hide or even impossible. Keep in mind that livestock of all kinds will be far more valuable when food is scarce. In our modern world, livestock thieves are not common. But in a post-collapse world your livestock may be one of your most valuable resources. Your ability to protect and hide the livestock could be the difference between surviving and starving to death.

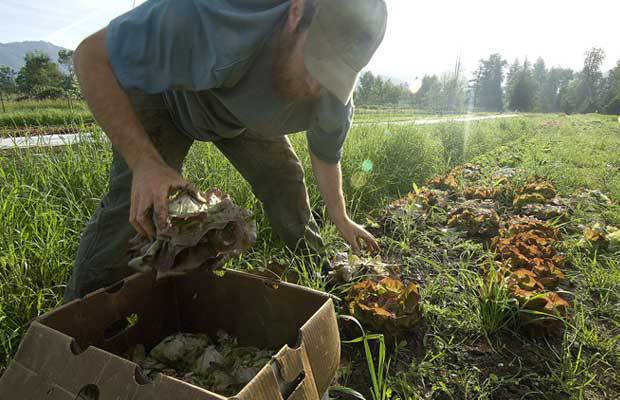
When discussing housing we can’t overlook pasture space. Cows are grazers and goats are browsers. That means that cows need good quality pasture to produce milk. Goats, on the other hand, browse (similar to deer)and are great at converting weeds to delicious milk. They don’t need large open areas of pasture. The downside is they love to eat trees and will kill any trees they have long-term access to as they strip off the bark of fully mature trees and eat the small branches of all trees. Eating an apple tree that is part of your long term survival plan isn’t a good thing but good fences and management will prevent that. Cows, because of their size, tend to destroy the ground in small pastures so it is important to have large grazing areas for cows. If you aren’t currently farming, and your dairy choice is the cow, you will need to have all the fencing on hand so you can put it up if TSHTF. You can tie a goat out and then move it as it trims everything within reach so a failure to have fencing prepositioned isn’t the disaster it could be if you plan on keeping a cow or two.

Another aspect of housing is feed storage. Keep in mind that in a complete collapse or an EMP, it is highly unlikely that you will not have access to baled hay. You will have to store loose hay, which takes up more space than baled. Do you have the space to put enough loose hay in a building to feed a cow for the winter, or is feeding a goat a more reasonable option when it comes to hay storage space available?

goat-516932_640

Bugging out with livestock

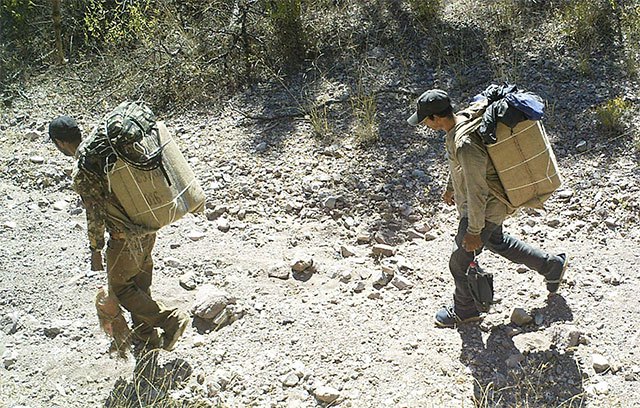
I’m sure this topic sounds out-of-place since we are talking about dairy animals….but it is very important to discuss in a worst-case scenario. The bottom line here is you can move a goat much easier and faster than you can move a cow. Without a stock trailer, you don’t have many options other than walking. The goat, on the other hand, can ride in the back seat of a car. If you are walking, they are usually easy to walk with and much easier to hide if you are on the road and need to jump into the woods to hide from other people you come across while traveling. You can even use a goat as a pack animal and there are pack harnesses available for purchase specifically for this purpose. The cow will slow you down and make it far more difficult to hide while the goat isn’t going to slow you down, is much easier to hide and can even carry some of the supplies you have decided to take with you when you bug out.

Raising Goats: Goat Milk

Before I get into choosing the goat I should probably address the issue of goat milk. Most people I talk to think that goat milk tastes terrible. Sometimes they are right, however, sometimes they are wrong and often there are good reasons for ‘goaty’ tasting milk.

When judging the taste of goat milk some things need to be considered. Remember that the whole milk you purchase at the store is bottled after some of the cream has been skimmed off. If you have access to raw cows milk try some and you will discover it tastes much different from the product you purchase at the store. Goat’s milk is naturally homogenized which means the cream doesn’t separate. So if you are used to drinking milk with reduced cream content, drinking goat’s milk that is rich in cream will either be a tasty treat or make you want to say “ugh!”

But the big complaint about goat milk is a goaty taste. The taste of goat milk is influenced by genetics so always try to sample the milk of a goat’s mother if you are buying a young goat. The food you feed your goat will also influence taste and that includes the types of plants growing in pastures. Undiagnosed illness or parasite infestation can influence taste so correct health management is important. Handling the milk after milking is critical in providing a quality product and chilling it quickly is the key to making sure you are properly handling the milk. Cow’s milk needs to be handled in the same way. And last, the condition and location of the milking area will contribute to the taste in the milk. Milk tends to absorb the odors in the air. Because of the unique characteristics of goat milk, it seems more prone to absorbing these odors. If there is a buck near the milk stand or you are milking in a garage with chemicals, the milk may absorb the odors produced by the buck or the chemicals. With all these factors influencing the quality of the milk to think about how you will store milk at your safe haven. Will you have refrigeration? If not, will you be able to use 3 to 4 quarts of goat milk a day or will you be able to find uses for 4 to 6 gallons of cow milk per day? It makes no sense to feed an animal to produce milk and then throw the milk away. For that reason alone, the goat may be the best option for a prepper.

MilkingGoats

The average goat is going to produce about three quarts of milk a day over the course of a ten-month lactation, with some producing less and others producing over a gallon a day. (Cows will produce three to six gallons a day). The amount of milk, for both the goat and the cow, is going to depend on the quality of feed, how long the animal has been milking, barn management and genetics. Remember, in an SHTF situation you probably won’t have access to good quality baled hay and grain purchased from the feed store. It is safe to assume that feed quality will go down and have a negative impact on production so choosing a goat that is an exceptional producer is important as that production will drop with the drop in feed quality.

Since one cow will produce a lot more milk in one day than one goat, you should look at your situation and decide how much milk you need at your hideaway. Do you have a small or large group of people? Are there children that will need milk daily? Do you have other animals to feed that could benefit from extra milk? Remember, you will have a much more difficult time preserving milk without electricity so planning ahead, as far as milk needs are concerned, is important. Will you be able to use four to six gallons of milk a day from a cow? Do you have children or adults who are lactose intolerant because many of these people can tolerate goat’s milk when they cannot tolerate cow’s milk?

Choosing the best goat for you

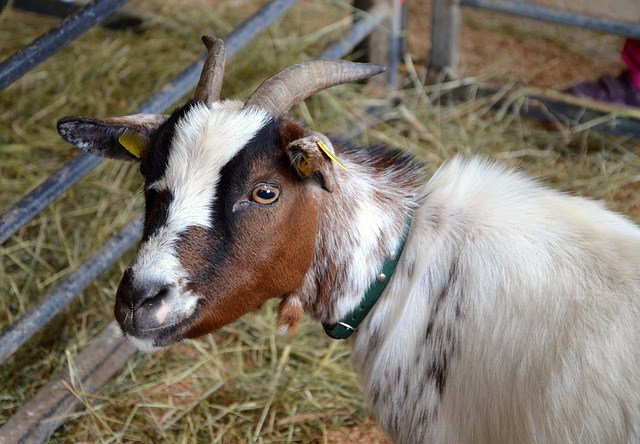
There are many different goat breeds but not all goats are the same. I am going to discuss the differences that are important from a prepper point of view. Some are dairy breeds (Alpine, Saanen, Toggenburg, Oberhosli, LaMancha, Golden Guernsey), some are meat producing breeds (Boer, Kiko, Kinder), some are dual-purpose (Nubian) and some are miniatures (Pygmy, Nigerian Dwarf). The Fainting Goat is a novelty that is listed as a meat breed but it claims to fame is a genetic disorder called myotonia congenital which causes the muscles to freeze for about ten seconds, rendering the goat prone and helpless when frightened. Then there are experiments which are crosses of two breeds and they include crosses of the normal size goats crossed with (usually) the Nigerian Dwarfs to produce a miniature dairy breed. The minis are cute and from a prepper standpoint much easier to feed, house and hide. But milk production is, on average, reduced to a minimum so it may only be an opinion for the small family or lone prepper.

Check out this article from “Mother Earth News” for an in-depth discussion of the breeds and their differences.  Based on my experience with goats I do think that some of the milk production is exaggerated however you can see which breeds milk the best and which breeds have the most butterfat.

What about a mixed breed goat? Experimentals, the crossing of two purebreds, are often just as expensive as purebreds. Crosses are usually done to achieve a certain characteristic or because the goat breeder doesn’t have access to a purebred buck to match the doe. Experiments are great if they are a good cross that was designed to improve characteristics you are looking for, like increased milk production or better udder support. If the cross goes against what you want, such as reduced size of the goat or to produce more fainting goats that are helpless to predator attacks, you should stay away from the experimental. Mixes of unknown origin may be good if the seller can show you mom, dad, sisters, and cousins of the goat you want to purchase but in general, a mix of unknown origin is a big risk as you have a good chance of not getting what you hoped for.

The cost of a mix is usually the big reason for purchasing one but the old saying holds true here. “It costs the same amount of money to feed a good one as is does to feed a bad one.” In other words, if you feed a pound of grain to two milking does there is a good chance one of those goats will produce more from that pound of grain than the other. Genetics plays a big role in milk production and the only way to have a reasonably good chance of getting what you want is to get a goat with a known history.

Genetics also plays a role in the length of time a goat (or cow) will produce milk after giving birth. The dairy industry generally determines that an acceptable length of time for one lactation is ten months and then you dry off the cow or goat and wait for the next baby to be born to start the process again. But what happens if you don’t have a bull or a buck to breed the girls? While I cannot speak intelligently about how long a cow can milk if you keep milking her past that magic ten-month deadline, I can say that there are many factual accounts of goats being milked for years without stopping and without rebreeding. Milk production is not at the peak if you choose to just keep milking a doe but you at least are able to provide some milk if you can’t find a buck to breed her. If your bug out location or safe haven isn’t located in a place where you will easily have access to a buck, or if you can’t find a buck to purchase, you need to purchase your does wisely so you have the best chance possible of getting a doe that can keep milking long after you go past the ten-month cut off date. You need to find a doe or does with a proven history or genetic background of exceptional milk production and then hope that production will help her to continue producing for a year or more.

I am currently milking a ten-year-old LaMancha doe that has been milking for almost two years. She is giving me about a quart and a half daily. While that doesn’t seem like a lot, it is still more than my husband and I need and I am told her production will increase again in the spring.

A word about udders. In the world of dairy animals, the udder is the working part of the animal. It must have certain characteristics that will contribute to the cow or goat being able to produce milk over many years. Udders should be nice and tight against the body. An udder that isn’t supported correctly and hangs below the hock join in the leg is much more likely to be damaged if the animal runs. Well attached udders on a prepper dairy goat are critical to the health of the animal and its ability to bug out with you.

The purchase price is also a consideration if you are going to get started before disaster strikes. You have put a lot of money into your preps and purchasing livestock probably isn’t something you want to do. Unless your plan is the bartered farmer cow after the collapse, you will need to plan on spending $200-$500 for a good goat with a proven pedigree. You will be able to find goats MUCH cheaper but the chances of getting a good on at the cheaper prices is basically very low. If your survival depends in part on a dairy goat, you shouldn’t skimp on the quality of that goat.

Obviously, as I have mentioned above, you want to check out any known milk production records. However, there are other things to take into consideration as a prepper. Color may be important to you. Will a white goat such as the Saanen be more difficult to blend into the environment than a brown Toggenburg, LaMancha or Nubian? If you can’t effectively hide them inside a building or shed, then you will want goats that blend into the countryside.

The Nubian is known for their constant talking. Will that talking let neighbors know you have a nice milk and meat source just waiting to steal? Or doesn’t that matter? Speaking of talking, have you ever heard the bellowing of a cow half a mile away? There will be no hiding a talkative cow.

The Saanen is probably the biggest dairy goat and that can be either good or bad. Do you want to use them for pack animals too? In that case, you want big and rugged. Of course the bigger the goat the more food it will eat. Do you have the manpower to cut and haul food from the fields in large quantities? Keep in mind that goats eat about 4 pounds of hay a day vs a cow eating about 30 pounds per day. That is a lot of hay to harvest, haul to the barn and put in the barn.

Perhaps you want the kids to do the milking and be able to handle the goats? The LaMancha is often more ‘docile’ than the other breeds and might be a better choice for those who can’t handle the bigger framed goats.

Meat Too

Just a quick note about meat production. The goat often has more than one kid…sometimes as many as four. These kids, if not being added to the dairy herd, can either be used for barter or meat production. Cows usually have one calf and, when butchered, produce a lot more meat. While that sounds great, you have to remember that you have to preserve that meat and you may not have refrigeration. Butchering one goat means less problem processing than a steer. It also means that the other goats for meat can be kept alive till you need more meat instead of having to process and store your entire meat supply at the same time.

As I am sure you noticed, I think the goat is the perfect prepper milk supply. She will be safer to handle, easier to milk, easier to house, easier to hide and easier to feed than a cow. Unless your safe haven or compound will have a dozen or so people living there, the cow will produce so much milk in a day you will end up throwing it away. If you have to bug out, dragging two or three goats with you is relatively easy but transporting a cow or two if there are no automobiles or trucks running will be almost impossible and very dangerous as the cow will make you a big target for gangs. You won’t be able to move fast enough to hide her quickly.

After reading this article I suspect some of you will still say “A cow is the best prepper choice for me” and I’m sure that in some cases, a cow is a better option than a goat. But for the vast majority of preppers, who have never milked a dairy animal, and never cared for livestock before, the goat offers a solution that will fit nicely into the average prepper’s long-term food production needs.

The Lowly Goat I have been a prepper since just before Y2K. It has been an interesting journey that encompassed ‘peak oil prepping’, natural disaster prepping, EMP prepping and TEOTWASKI prepping.

Introduction

There may be a time in your future when it becomes necessary to evade detection while on foot and on the move. If SHTF forces you to strike out cross-country, or to abandon your vehicles at some point, you will be leaving a trail of your route with every step that you take. The more people there are in your group, the ‘brighter’ that trail will be.

I’m not referring to concealment while in camp or at a lay up site. Instead, this series will focus on two things:

  • Developing an awareness of the sort of activities that reveal your presence on a trail, and
  • Techniques that will hamper the ability of someone to track you while moving through various types of terrain.

Effective application will, at minimum, slow down tracking efforts of a group behind you. The less aware they are of your presence, the safer you will be. If a group is aware of you, but cannot pin down your route, they may abandon efforts to locate and overtake you.

The Risks

There are numerous reasons for being concerned about tracks that you or your group may leave:

  • Other groups may very well be taking the same route, even if only temporarily, to reach their destination.
  • Your rate of travel will be determined by the capabilities of your group. That is, you will be moving at the speed of the slowest individual.
  • Health and stamina issues may force more frequent rest breaks than you anticipated.
  • Security risks that are in front of you may force frequent breaks in travel.
  • Any group in trail of you may be traveling at a higher rate of speed.
  • You will not know the size, capabilities or intentions of a trailing group.
  • Bandits may be working in your area. At some point, this may become inevitable. They will be on the hunt for vulnerable groups. If they pick up your trail you may become their next target.
  • You can be tracked at night.
  • You may be in trail of group whose size, condition and capabilities are unknown. Information contained in this article can provide tools to help you assess some of that group’s composition and potential threat level. That knowledge will help you determine whether you can risk overtaking a group, or if you need to find a different route.

Before we launch into the techniques for covering your tracks, I suggest that you take a few minutes to watch the following collection of videos. They are linked so that one will play after the other. Pay particular attention to the one titled “Raw Footage Arivaca April May 2014.”

Apart from gaining an exposure to what goes on in the borderlands (that you may not have been aware of), this collection of video clips from hidden cameras is extraordinarily instructive in the ways smuggling groups move in terrain they effectively control, as well as areas where they are at heightened risk detection. If the route bears significant risk, or if it is being repeatedly used over a period of time, efforts will be taken to obscure tracks.

Five Types of ‘Sign’

Tracking skills require more than the ability to recognize a footprint. It involves the detection and interpretation of visual evidence on the ground, as well as above it. Basically, there are five types of sign (evidence) that a tracker will be looking for. Someone else might categorize them a little differently, but I have organized them in a way that allows you to think about evidence that you deposit on a trail and what you can do to avoid or mitigate it. Think of these categories as ‘calling cards’ that you may unwittingly leave behind as you move along your route.

1. Footprints

A comprehensive discussion of soil types and terrain conditions that allow the detection of tracks is far beyond the scope of this article. Suffice it to say that most surfaces will reveal the passing of foot traffic to a greater or lesser degree.   Even a boulder will show signs of your passage if you deposit a muddy boot print on it. The durability and clarity of the impression are affected by many issues, including soil composition, material that is on top of the soil, moisture and wind.

The SAS guide to tracking is another great resource for learning tracking skills.

The imprint of a shoe sole reveals many important things about you and the group you are traveling with, including whether you are carrying heavy packs and whether there are women and children in the group. Tracks will also reveal whether you are walking casually, hurriedly, or if you are running. They will tell an experienced tracker that you are attempting to keep each step inside the footprint ahead of you or even that you are walking backward in an effort to mislead your direction of travel. Finally, your tracks may reveal that your group is not equipped to go the distance: highly worn tread, holes in the shoe, or the divot from a walking stick are good examples.

The sole of your shoe is a signature

Experienced trackers use tread recognition to single out one or two patterns when they are ‘cutting sign.’ They will alert others along a known or suspected route to the details of the tread, such as a ‘running W,’ concentric circle, cross trainer or lug pattern, to see if they appear farther up the trail. This helps confirm the course and direction of a group and enables trackers to leap-frog, or ‘cut ahead,’ so that they can close in on the group.

If a group is behind you and tracking, they may not be experts, but the continued sighting of any particular tread pattern will confirm that they are on your trail.

The number of tracks indicates group size

In a group of any size, the length of each person’s stride will vary. For example, the stride of a nine-year old child will not be the same as that of a six-foot tall adult male. A reasonably experienced tracker in trail of you will be able to develop a pretty accurate “soft count” your group size after only one or two hundred yards; often less. Determination will be based upon the variations in stride, range of tread types and foot size. The effort will be greatly simplified if your group does not maintain a narrow, single file column.

The size of the tracks indicate the group’s composition

Even if everyone in your group is wearing an identical brand of shoe, variations in foot size will reveal the number of children, juveniles and adults that comprise your group. In combination, the foot size and tread pattern can reveal that there are females.

Tread detail is an indicator of freshness

Full and partial tracks that are laid in a variety of soil types can retain a very sharp impression. Without an excessive amount of moisture or wind, those tracks can survive for weeks. Accurately interpreting the relative freshness (hours versus days) is a learned skill that you can practice at home and on weekend outings. Nevertheless, good observation can help pin down the age of a track. For example, let’s say that you started out with a dry day, but it rained for about a half-hour at noon. A tracker behind you will have waited out the same rain shower. If he sees your still moist tracks at 3:00 that afternoon he will know that you are no more than two and a half hours ahead. Your ‘gift’ has just lowered the skill requirements of a tracker from expert level to that of simple observation and rudimentary reasoning.

Freshly turned rubble and scuffs on the trail

Trackers will also look for freshly turned rubble and displaced pebbles. Simply stated, an overturned or displaced rock or pebble will leave a surface scuff or small hole in the soil that matches the size and shape of the rock. The rock will likely have a different color on the bottom than the side that was facing upward. The color of the soil in the hole may be different from the color on the surface.

ConcealFootprints

This photo shows two scuff locations and a displaced rock. The group that left these sign moved on the trail at night. Apart from the obvious tracks, what else does the photo tell you?

General characterizations can be made of groups that leave these types of sign. For example, one or more of the following may apply:

  • Moving at night
  • Hurried – Being pushed from behind by trackers
  • Experiencing fatigue, or
  • The group has poor trail discipline

Bent grass

ConcealFootprints2

Bent grass can reveal a distinct trail of a group when moving in single file. This photo shows two distinct trails and a spot where people were standing while in the cover of trees and brush.


Tracks that are laid through wild grasses and other ground covers will be bent over by the pressure of passing foot traffic. Repeated, (single file) traffic will bruise the grasses, breaking the stalks near the ground. Although green grasses that have not been excessively bruised will return to an upright stance over time, recovery is not immediate. Dead, (especially desiccated), plants are easily crushed and fragmented. They will indicate a course of travel, even in the absence of a distinct foot print.

Methods to mitigate bent grass will be discussed in Part Three of the article. Other than natural forces (wind or rain), there is no practical remediation for crushed, desiccated plants that I know of.

Skids

Did you ever slide down a hill after stepping on loose pine needles, or had the soil on a steep bank break loose under your foot while you were climbing up an embankment? These are the type of skid marks I’m referring to. They can easily mark the location where you break from a trail for rest, or when changing course. Remediation is difficult, especially if you are in a hurry. Methods to avoid or limit skid marks will be discussed in Part Three.

Moon dust

This type of soil can be figuratively compared to dry talcum powder. Tracks laid in moon dust will leave a particularly sharp impression, although windy conditions will quickly erase the details. The arid Western region of the U.S. and areas that are experiencing drought will produce these conditions. Be alert to and avoid trails that take you through powdery soil.

Desert pavement

Many lower elevations in the Southwest (particularly if they are alluvial) may have a thin, fragile covering that is referred to as “desert pavement.” It is usually comprised of very small pebbles overlaying a thin, equally fragile surface crust. The pebbles are frequently coated with a thin patina (varnish) of minerals, making it reddish to dark brown in appearance. Walking across desert pavement will dislocate the small surface pebbles, and your weight will break through the thin crust.

ConcealFootprints3

Tracks on Desert Pavement

In the photo above a smuggling group crossed a large area of desert pavement at night; leaving the very visible trail that you see. If you create a trail across this type of soil there will be nothing you can do to mask it. Attempts to do so will only make the trail more obvious. The solution is to detour around desert pavement.

I am not familiar with soil surface conditions in other regions of the country. I mention desert pavement only because it may alert you to soil types or surface conditions that warrant similar precautions where you live.

Windblown tracks

The movement of air, (breezes and wind), can dry out surface soil very quickly. Depending on the soil type, rapid drying may preserve a sharp image of tread. Trackers will look for tread imprints that may have bits of sand or plant debris on the trailing edge of the imprint (relative to the prevailing direction of the wind). On other soil types, windy conditions may obscure or erase tracks entirely on exposed terrain over a period of time. These clues can help determine the age of the tracks.

Burlap, booties and carpet


ConcealFootprints4

These drug packers are wearing carpet shoes in a rocky dry wash.

If you have watched the videos referenced at the beginning of the article you will have seen many smuggling groups that were wearing various types of covering over the soles of their shoes. The videos show individuals with layers of burlap wrapped and tied around their shoes, as well as “carpet walkers” and foot coverings, known as “booties,” made of thinner material, such as felt. To varying degrees, these obfuscation efforts work. It can take an experienced tracker to recognize a trail where these methods have been employed, and it will likely take an expert to successfully locate a group on carpet in rough, rocky terrain.

At its most fundamental level, the purpose of these obfuscation methods is to make it more difficult to spot tracks and to deny a tracker the ability to identify a specific footprint. This does not mean, however, that the methods are equally effective across all terrain, or that they have equal durability. All three types merit some discussion.

Burlap is frequently used on dry hard packed soil and in dry sandy washes. On damp soil the rough burlap material can leave an impression of the fabric weave. Several layers of burlap will be wrapped around the shoe and then tightly tied with cordage. Once the burlap begins to break down from wear, strands of thread can be found lying on the surface. If the cordage unravels, a portion of the shoe tread may become exposed, leaving a direct imprint in the soil. Trackers will look for evidence of shredding.

ConcealFootprints5

Felt booties are effective on many types of soil, but are not the most durable method for concealing tracks.

Booties are designed to slip over a shoe and are usually constructed using a relatively thin synthetic material. The bottom may be constructed of one or two layers of material. They are primarily intended for covering lightweight walking or jogging shoes that do not have aggressive treads. Durability of the fabric is only marginally greater than the same thickness of burlap. Booties do not break down in the same way that burlap does. They don’t shred per se, but large holes can develop, allowing a major portion of the tread to make contact with the ground. The best application for booties is smooth, hard packed surfaces.

ConcealFootprints6

Carpet shoes have a bottom made from pile carpet sewn to a durable upper material. This pair has Velcro straps that secure around the heel.

Carpet shoes are constructed using a cut to size piece of carpet that is usually sewn to an upper portion made from durable cloth. The carpet portion is typically a pile type of synthetic material. Higher quality shoes will have a denser and thicker material. Some carpet shoes fully enclose the heel, while others may be open at the heel or use Velcro straps. In some cases, the carpet may be strapped over the top of the foot to make it more secure. Open heeled carpet shoes can be put on very quickly when circumstances require their use, but can slip off if the person is running. Well constructed carpet shoes are the most durable of the three types. Carpet can be used on virtually any soil type and, in general, is the most effective method of obfuscating tracks. In addition to preventing an impression of the shoe tread, it can reduce the overall print impact on softer soils.

It is important to note that these obfuscation methods are generally not used on steep, bare rock surfaces (especially when wet) where traction is needed for safety. Booties and carpet are usually removed when a group moves from soil conditions to terrain that is mostly rock.

We will continue the discussion of the remaining four types of trail sign in Part Two. If you have questions in the mean time, drop me a note to ensure that I address it directly, or in a subsequent article segment.

Introduction There may be a time in your future when it becomes necessary to evade detection while on foot and on the move. If SHTF forces you to strike out cross-country,


I recently read an article about what a woman learned from a weekend of surviving on stored water. Basically she learned to have her kids share their bath water and to store more so she could take longer showers and more baths.

In a disaster we all know water is going to be very precious. Water is also one of the hardest things to store. Now is the time to think about ways to get the most out of every drop. I want to stay clean but if it comes down to it and in a disaster we all know it will I’d rather have more for drinking and less for washing.

I have had many instances of not having access to running water. I live in a mobile home and my piping is PVC pipe. One day my brother accidentally ran over it with the lawnmower. Fortunately I am friends with a plumber and he would fix it for free. Unfortunately I had to wait 3 days. I’m 5 feet 6 inches tall and I can wash and rinse everything using only 2 liters of water. I wasn’t even being careful just too lazy to get an extra 2 two liter bottle.

Squeezing the last drop out of your water during a disaster

Here is what I did. Stand inside a plastic tote. Use a red solo cup etc. Pour water on head slowly and massage into hair, trying not to let any water run-off. If you have long hair, pile it loosely in a bun on top of your head and hold in place with one hand. Pour water slowly to allow your hair time to absorb it. Lather. Rinse. Repeat.

If washing a second time to get your hair clean you only need to rinse about half of the soap out. Be careful not to use too much soap because the more soap you use the more water it will take to rinse. Use cup to scoop water from tote to get body wet and wash. You can also just use a wet wash rag. Using this method you don’t have to get your skin wet first. Use water from tote to start rinse. Finish with cup to rinse with clean water. Using this method you can use 2 liters or less of water. Practice now and learn how little water you can get clean with.

You can brush your teeth with very little water. Put toothpaste on toothbrush. Take a small sip to wet mouth. I have also used mouthwash for this step. Spit out on toothbrush to wet paste. Brush like normal and rinse with a sip of two of water.

Grey water can be used by the next person and followed with clean for a rinse. It can be used to start to clean clothes and finally if possible to flush a toilet.

person-845365_640

A local pond might become your new bathing spot.

When washing your hands or dishes be careful to catch water for reuse. Better yet plan on having at least some disposable dishes and baby wipes for cleaning your hands.

After a disaster everything is going to change. Most people are used to showering every day but in the past most people bathed once a week. They did this when there was no air conditioning and many had labor intensive jobs. These next suggestions may seem gross to you but they are worth considering. Even if you think you have plenty of water and a perfect bug out plan. It is highly likely that during a disaster at least once you will have to go a few days without a shower or clean clothes.

Bring out the funk!

Texsport Jumbo Camp Shower, 5 Gal – For those who want to freshen up without access to running water. Good insurance policy.

You might want to get an ideal of how it I going to feel and start getting used to it. Try going a few days without a shower to get used to it. I’m not suggesting no hygiene at all. Go ahead use deodorant. Use a baby wipe to clean up. Just forgo an actual shower. I have managed to get to 10 days before I was told I smelled. It helps that I work from home. For those of you that work with people outside of your family try skipping your Thursday night or Friday morning shower and waiting till Sunday night or Monday morning to shower. If you are used to wearing clean clothes every day try wearing the same outfit for several days.

For personal food storage I generally see the advice to store what you eat and to eat what you store. In theory that sounds good. However, during a disaster everything is going to become harder. I want life to be as easy as possible during this time so I store several things I don’t normally eat.

Some examples are canned tuna, canned ham and canned chicken. I have eaten these in the past and tried all of the brands I store. I don’t eat them regularly because it is cost prohibitive to do so. I store them because in a disaster it is likely to be the only meat available to me and my family

I store instant potatoes even though I don’t like them. I’ll eat them if I have to and I don’t expect to have access to regular potatoes. I have instant gravy to make cooking and eating faster and easier. I have canned beans because it takes so much water to cook beans. Precooked rice pouches will reduce cook time and water usage. For as long as it lasts bagged cereal requires no cooking, no additional water to cook and no water to wash dishes. It also doesn’t weigh much. My local Walmart frequently has Malt o Meal 11 ounce bags for a dollar. Picky eaters should practice expanding the foods they eat.

I also have food I would only eat if I had to. I didn’t buy most of this food and what I did buy was on sale. My local HEB always has meal deals where you get free items if you purchase something. I get even the foods I don’t like and save them. These are the foods that will be out in my visible food storage. That way when people come to loot my house or steal from me they can see and steal those. Hopefully this will satisfy them and they won’t look or look as hard for my hidden food. Some things are best kept private but I will say I have put considerable thought into places and ways I can hide my preps. I am under no illusions that no one will come and take things from me. I actually expect to have things stolen.

My plan is to not cook anything for at least 30 days. I may heat up a can of soup or fix instant potatoes but that’s about it. I don’t want people smelling my food. This will also reduce water usage. Little to no water will be needed to cook. Little to no water will be needed to clean up after eating.

  I recently read an article about what a woman learned from a weekend of surviving on stored water. Basically she learned to have her kids share their bath water and

Who are the real terrorists and what is terrorism? According to the Online Etymology Dictionary, the word terrorist (n) in the modern times, since 1944, especially references Jewish tactics against the British in Palestine. Earlier use of the word dates to the extremist revolutionaries of Russia in 1866 as well as the Jacobins during the French Revolution in 1795. The English word terrorist is a derivative of the French word terroriste which ultimately means the tendency of one party’s terrorist to be another party’s guerilla or freedom fighter. The interplay between guerillas or freedom fighters was noted in reference to the British action in Cyprus in 1956 as well as the war in Rhodesia in 1973. The word terrorist was retroactively applied to the Maquis resistance in occupied France in World War II, found in the “Spectator,” Oct. 20, 1979.

Based on the very definition of terrorism, we see that the writers of history interpret that history retrospectively to show the agenda of the leaders of the time. Clearly, the leaders, or the winners of just or unjust wars, are responsible for the recording of mainstream history. The losers, the slaves or those conquered do not generally write or teach history books. Those in power write a history to show their great deeds and propagate their agenda. A quick review of historical events demonstrates how history is interpreted, reinvented and twisted to push agendas, many of them evil. An example is that history books in the USA used to teach that slavery was a gift from God, based on race evolution, Biblically supported and morally correct. Clearly this interpretation of slavery is wrong, historically inaccurate and meant to push the agenda of a certain slave society.

In the Post Modern Age, in the media of the USA, the word terrorism has been twisted to conjure fear which is a tool to steal liberties. Leaders can lead through two major means, love or fear. If they are not beloved, the only choice is to push their agenda and gain power through fear. Movies, the mainstream media news and television shows program viewers to associate terrorism and fear with their false flag event or whatever group they wish to vilify in order to push the agenda which surfaces in-laws designed to steal liberties and usher in tyranny. An example of this script is the well-known false flag 911 which kicked off a series of unjust actions including war and the Patriot Act, signed in October of 2001 which supposedly provides the USA the proper strength and tools to intercept and obstruct terrorism. In the Patriot Act the use of the word Patriot implies that the founding fathers of the USA and the Constitution are upheld and protected by this act. Evil throughout time twists, imitates, devalues and perverts the good in order to achieve evil ends. The Patriot act actually does the opposite of anything Patriotic. The Patriot act should be called the Tyranny Act because it allows, in the name of the feared terrorism, anything the Federal Government plans to do, like spying, disappearing, imprisoning, executing, silencing and denying of every human right.

Of course, the catch is to make sure that the audience, the students, the so-called sheeple, believe the lies. The words have to be accepted in their twisted form to take on the new meaning and push the agenda. For example, consider the following six secret usurping of words and meaning, the purposeful twisting of good things into bad:

1. It’s a secret that the Patriot Act is really the Tyranny Act. The government officials ALWAYS defend the Constitution and are NEVER corrupt.

2. It’s a secret that the abusive spouse is abusive. Instead let us all believe that really his domestic violence is loving. Just interview any abusive man or any victim of domestic abuse and its very clear that the abuser is justified and loving while the victim is insane and delusional. Never mind that domestic violence effects at least 1 in 3 households in the USA. The loving answer no matter what is to ignore domestic abuse and focus on taking children away from those horrid people who smoked pot. The government loves the children.

3. It’s a secret that many victims of war are innocent. Let us believe that the wars are just because wars are NEVER about money or power they always about justice. The government only cares about human rights and will sacrifice anything to ensure constitutional liberties for all people everywhere.

4. It’s a secret that the government is poisoning the food, water, air supply and pushing toxic vaccines. The government always loves you and protects you. Democide, Agenda 21, eugenics, genocide and infanticide do not exist in the civilized world. Conspiracy theories! Don’t become a tin hat wearing laughable, insane person.

5. It’s a secret that people kill their babies. After all, the baby isn’t a real person because the definition of person is most likely some full-grown adult. All that matters are the rights of the mother because those rights are loving. The government would never support killing people, just the young ones who are not people. Maybe even up until age three this practice is acceptable; after all China does it.

6. It’s a secret that the public education system is purposefully retarding intellects. The government loves the children. These secrets could never be exposed by the dumbed down sheeple, RIGHT? Our only option is to accept the lies, RIGHT?

The sad part is that those six examples are only a small slice of the history being taught, redefined and twisted by the true terrorists. Terrorism is not loving. We should judge people according to their deeds, not their words. When people who act in evil ways their words are meaningless. We stand at a dangerous precipice in our history as a terrorist script is flipping to innocents to usher in a final stage of tyranny that is worse than ever before. The new terrorists in the history books are: Christians of all variety, veterans, patriots, truthers, lovers of justice, whistle-blowers, Oath Keepers, preppers, pro-life advocates, those who are awake to the lies, people with high IQs, people who understand history, mainstream Muslims, Tea Party people, listeners of Ron Paul or Alex Jones, mainstream Jews, Caucasian people, Hispanic people whom they say are white, families, babies, children and any other group that is innocent, well-meaning and awake. In order to be labeled a terrorist all someone has to do is own a phone, send an email, have more than 7 days worth of food in their homes, take a photo or pose a question. Technology is enabling a new era of terrorism by the true terrorists who exploit the innocents.

Compare those six secrets listed above to Proverbs 6:16-19, “6 There are six things that the lord hates, seven that he abhors:17 a haughty look, a lying tongue, hands that shed innocent blood,18 a heart that weaves wicked plots, feet that hurry to do evil,19 a false witness who lies with every breath, and one who sows dissension among brothers.”

I suggest that this quote from Proverbs is the true eternal wisdom that exposes terrorism and tyranny. Who are the real terrorists? The terrorist is the one who does those six things listed in Proverbs 6:16-19. Do not let the history writers, the mainstream media pushers define terrorism to provoke fear and control. Do not get hooked into the lies. The greatest trick of the Devil is to hook people with lies which parade as fake beauty and fake good. The only way the Devil has power is when people believe his lies.

Who are the real terrorists and what is terrorism? According to the Online Etymology Dictionary, the word terrorist (n) in the modern times, since 1944, especially references Jewish tactics against

Imagine that the S has HTF, and you’re one of the lucky survivors. While many didn’t make it, your “preps” provided the sustenance that made it possible to ride out whatever apocalyptic event occurred. Over time, you’ve acquired many skills for self-sufficiency, and you have no interest in banding together with other survivors. In fact, almost all of the survivors prefer to live as nomadic individuals or isolated families in a post-apocalyptic world. Eventually though, that will change.

The most important rediscovery in a post-apocalyptic world will be fried-chicken. Fried chicken will not only be a catalyst for a post-apocalyptic civilization, it will divide humanity into two distinct subgroups:

1.Liberals
2.Conservatives

Frying chicken requires vegetable oil and flour, which will lead to the reemergence of agriculture. Since there will be no home delivery, those wanting fried chicken will stay close to the source, and that’s how villages will be formed. Some men will spend their days building pens and raising chickens. These men will be known as Conservatives.

Other men will have no agricultural, or chicken raising skills. They will learn to live off of the Conservatives by doing their sewing, hair dressing, and fetching. This will be the beginning of the Liberal movement.

farmer-1367104_640

Growing food and surviving off the sweat of your brow is not easy.

As time passes, Conservatives will once again become big-game hunters, rodeo cowboys, lumberjacks, construction workers, firemen, medical doctors, police officers, corporate executives, athletes, and generally anyone who works productively.

Liberals will not be involved in society until Conservatives have once again tamed the land. In a post-apocalyptic world, Liberals will domesticate cats, and facilitate group therapy. Although they’ll produce little or nothing, Liberals will consider themselves “enlightened”. They’ll prefer to govern the producers, and decide how to divide the fried chicken that the Conservatives provide.

Not all villages will be productive in a post-apocalyptic world. Some people will be content to sit around a campfire, moaning about their bad fortune. “It’s so unfair”, they’ll say, “that some villages have so much, while we have so little.” As luck will have it, Liberals will come to the rescue by redistributing fried chicken, taking from the productive villages and giving to the non-productive ones. To further enhance their image, Liberals will offer free cooking oil and flour to everyone. This will not sit well with members of the productive villages who will be forced to supply those things, but Liberals will counter Conservative arguments by calling them names and correcting their grammar. Liberals will become so popular with those receiving the handouts that little can be done to stop them.

Some people will not be willing to work too hard no matter the situation.

Some people will not be willing to work too hard no matter the situation.

This ends today’s lesson in post-apocalyptic history. It should be noted that a Liberal may have a momentary urge to angrily respond to the above. A Conservative will simply laugh and be so convinced of the absolute truth of this that it will be forwarded immediately to other true believers and to more Liberals, just to piss them off.

– – – –

The inspiration for this came from a humorous story I read recently concerning the invention of beer, and from my favorite place to go to for fried chicken. I take prepping seriously. I believe that the things I’m doing now may one day save my life, or that of a loved one. I also believe that humor is often the best medicine, and I find that it keeps me going at times when I’m feeling overwhelmed.

I’m grateful for the many contributions from my fellow preppers, and I’ve learned a lot from them, even when I disagree. Hopefully I’ll never have to use my preps as the result of societal collapse, but if it comes to that, I’m not going to have time for the political correctness that has permeated our society today. I’m not going to deal with non-productive people who’ll drag me down. I won’t support those who are able, but choose not to support themselves. I have friends who are skilled at hunting, fishing, building, and fixing things, but I also have friends who can’t do any of those things. I’ve often wondered what kind of childhood they had that so poorly prepared them for life. Were they more concerned with keeping up with the Kardashians?

I’ll support capitalism. I’ll help those who are less fortunate than me, but not to the extent that it puts my own survival at risk. I’ll contribute to charity based on what I think is fair, and not according to what someone else thinks is my fair share. In a post-apocalyptic world, I won’t respect “gun-free” zones, and I certainly won’t listen to those who tell me I should give up my weapons. Call me a bigot if you want, but if I’m suspicious of anyone, for any reason, that person will not be part of my inner-circle. I would rather be wrong, and alive, than right, and dead.

Knowing that my contribution will not reflect to views of everyone, I encourage alternative opinions in the form of respectful comments, or humorous stories.

Imagine that the S has HTF, and you’re one of the lucky survivors. While many didn’t make it, your “preps” provided the sustenance that made it possible to ride out


Great gardens that grow heaps of high-calorie food don’t just happen – you have to build them. I learned that this year when I tried growing a guerrilla garden in a nearby field, described here on FinalPrepper. To summarize, I sprayed Round-up on a 10’x10’ plot in an abandoned farm field, chopped holes in the ground every square foot, and then dropped in a couple of corn kernels. No watering, no fertilizing, no amendments of any kind to the soil. Just to see what would grow, if I needed extra growing room in a SHTF situation, and couldn’t spend lots of time tending my guerrilla garden. These lessons learned can also be helpful if you are converting a part of your entire lawn to a survival garden after SHTF.

Lesson #1 – Unimproved field gardens are not as productive as established gardens, so expect less food.

My home garden produced 16 pounds of field corn in 100 square feet because the soil was improved with composted kitchen scraps, and I could water it during dry spells. My guerrilla gardening only produced about 4 pounds in 100 square feet. Therefore, we have to improve the soil and/or plant more land for a needed quantity of food when starting a garden from scratch.

Plan of Action #1 – The soil in the field is piss-poor: compact, full of clay, and lacking in humus – probably why it was no longer used as a farm. To improve the soil for next spring’s planting, I turned over the 10’x10’plot with my trusty spade. Next, I hauled a couple of 30 gallon bags of grass clippings and fallen leaves from my car, down the path about ¼ mile, and spread the contents over the plot. Finally, to break up the clay and improve fertility, I spread about four pounds each of lime and pelletized gypsum. I will turn and add the same amendments in the spring a few weeks before planting. Once the crop has sprouted, I will mulch the plants with grass clippings to reduce evaporation and the need for watering.


Lesson #2 – Deer and other wild animals will eat whatever they can find, unless they can be scared away or blocked.

Plan of Action #2 – Because the plot is far from human activity, the deer see my guerrilla garden as safe for them. My job is to make it seem inhabited by humans to the deer, without giving its location away to human passersby.   I have read that clothing that has been worn keeps a human smell for weeks, and can be used to repel deer, or funnel them to a kill zone. I can try that with the orphan and “holey” socks my wife is determined to throw away. I have also read that human hair and urine have a repellent effect when sprinkled around a garden perimeter. Rather than courting danger by transporting sloshing bottles of urine in my car, I think I’ll stick to saving floor sweepings when I cut my children’s hair. In a SHTF situation, I could dump our semi-composted humanure on the garden to keep everybody away!


Lesson #3 – Crop selection is important.

Corn seemed to be a good choice for field planting, as it has a high calorie density/pound, but it turned out to be a terrible choice for guerrilla gardening. Because the corn that did develop was so tall, it was exposed and the opposite of stealthy. Any hungry deer or person within 100 yards could spot it, but because we are in an “all-normal” situation, only deer attacked it.  Also, corn is needy, requiring lots of fertilizer or rich soil and plenty of water.


Plant of Action #3 – Next spring, I will plant sweet potato sections with eyes in this plot.

Advantages –

  • Sweet potatoes can be planted earlier (late April) compared to corn (mid-late May) in our region, as the growth is underground for a few weeks, protecting it from frost.
  • Because the crop is underground, it is less vulnerable to attack by animals or people.
  • The vines are above ground and low, less visible, and could easily be mistaken by people for vines of some non-edible plant.
  • Sweet potatoes provide more calories per square foot than corn, at least in my garden. My 10’x10’ garden plot of field corn produced 1600 cal/lb x 16 lb = 25,600 calories. My 10’ x 10’ sweet potato bed produced 390 cal/lb x 108 lb = 42,120 calories.

Learn more about Guerrilla Gardening and how you might be able to use this in austere situations.


Disadvantages –

* Sweet potatoes are more vulnerable to underground pests like moles. While last year I got a harvest of about 108 lb, this year moles ate all but about 2 pounds of my crop, and I didn’t even know it until digging time! Next year I will definitely defend my garden with some of these mole-proofing ideas, but I will put away needed supplies this year.

* Corn can last for several years when stored in a cool dry place, sweet potatoes generally last about a year in a root cellar. I had good luck with my sweet potatoes in the basement this year, as we just finished eating the 2014 crop early this October.

* Sweet potatoes require loose soil, so they are more work-intensive and only suitable for small gardens, not acre-sized fields.

* Corn is more versatile than sweet potatoes – You can cook cracked corn, grits, hominy, and grind cornmeal for bread. Sweet potatoes you can just bake whole, or put into stews.

Lesson #4 – The one plot I had was found and attacked by deer.

Plan of Action – Next year I won’t “put all my eggs in one basket”. I started a second garden next year, out of sight of the first plot, by turning and amended another 10’ x 10’ plot. That way, if someone hungry discovers the first plot, all is not lost, and if both plots are safe, I have doubled production. This lesson applies to other storage decisions, like splitting your emergency food storage into two areas of your house, or burying some in a cache in your backyard.

******

It is important to know how to quickly build a survival garden. Even if you are not lucky enough to have an abandoned farm near your house, you may still have an urban lot, remote public park, or other area where you can try your hand at guerrilla gardening. Just be discrete, and don’t get caught. If you want to play it safe, just pick a sunny part of your lawn, and start converting it into a garden this fall – the experience gained may save your life!


  Great gardens that grow heaps of high-calorie food don’t just happen – you have to build them. I learned that this year when I tried growing a guerrilla garden in


Around six years ago I stopped running (got suddenly sick of it) but for the 15 years before that it was basically a part-time job for me. Over that time I did around 100 marathons (42.2km 26.2 miles) and 100 ultramarathons (anything over 26.2 miles). Since getting into the concepts of prepping for SHTF I have been thinking that my previous experience as an ultra-marathon runner has left me with many great tips and ideas for everyone to travel more than 26 miles unsupported. No I am not telling you to run to get back to your home or bug out location but if you can then great! I certainly could not do it anymore! My best race was 6 hours and 24 minutes in a 50 miler to give my experience here some context and I could pop out sub three-hour marathons easily. That said all these ultramarathoning tips I learned the very hard way and perhaps some might help you even if you are planning only to walk home or to your bug out location?

PREPPING:

Ultramarathoners prep and we never know if we will finish the race when we line up. We prep our minds and our bodies and I will talk about the body first.

Vaseline is more than a fire starter:

Slap it on or skin becomes badly excoriated from the continual friction or running for hours. Between the thighs and buttocks and do not skimp on it at all. Between the underarms as well as you will be surprised at how painful friction burns are the next day. Runners’ nipples are the partial removal of your nipples from friction and hurt like crazy the next day. All these friction points need Vaseline as you will not notice them until too late. Put a small dab directly on the nipple and cover with a bandage. As you walk or even run for hours check these friction points at rest stops and reapply as required.

Sun lotion is an everyday thing:

Run or walk for 9 hours with the sun mainly hitting you from one direction and you will burn even on a cloudy day. Winter is worse as you do not think about it or notice it. SP 30 or higher and yes use expensive “sport” ones and I recommend the waterproof versions for swimming. The cheaper ones fail quickly. In Summer always have some with you on your journey and reapply it often. The main areas to get burned are top of the head even through hair, tips of the nose and ears, and lips. The backs of your knees if in shorts or thin trousers and exposed elbows get burned fast and need more frequent sun lotion applications. Your neck and head should be covered so use a bandanna!

Clothing is optional:

Yes there are naked races but I’d avoid long distance over trails in the buff. However your choice of clothing is optional. Layers of course and remember you will feel a lot warmer once you start moving so set off a bit cold not comfortable. Remove the hat and clothes early not late as sweat will end your race early (see Just Doing It section). For races or bugging out you should visit specialty stores and online sites that have great quality gear designed for you to move in for hours. Compression socks are a good idea. Wicking inner layers are essential and they better not rub! Test all clothing out before the real event. Trash bags are good for rain and wind protection and every prepper should have some but they make you sweat badly. No doubt you have seen runners wearing them before the race starts but did you know the trash bags can be slit along the sides and holes made to keep you mainly dry and let the sweat out? Three holes (head and arms) is never going to help you avoid dehydration and rain is actually real nice to be in when you are moving hard.Marathonbook

Clothing for running (triathlon, long distance hiking, etc. as well but they are not areas I can speak about) is much lighter and better designed for hard forward movement than traditional camo/military gear. It is a bit non-functional for our purpose but many new developments come along all the time including jackets with multiple pockets for long distance events. Think outside the military choices here. At the very least look at hiker clothing if you cannot bring yourself to try running gear.

These boot were made for walking:

I expect many people will get upset by this but in all honesty for fast return to home or fast bug outs please do not wear military or hiking boots. Their weight will cause severe leg and lower back fatigue in only a few hours unless you use them daily before the event. A decent pair of trail running shoes works almost as well and should be totally fine in most scenarios. They work very well on asphalt but road shoes do not usually work well on rough trails. Sure the ankle is not encased but the flexibility of the shoe and its lower weight mean it is much more suitable for hard moving over miles and miles.

They work fine on ice and snow and wet rock provided you have a quality trail shoe and have tested it out. If you are running stop using the heavy trail shoe after 25 miles and put on a lighter pair for the rest of the trip. Many people in road races do this in reverse which is a shame as they cannot lift the legs as high after 25 miles and dropping foot weight helps with this to some extent.

For trail shoes visit a store and try a bunch on wearing the socks you would use in the event (race or the end of the world). Find one or two that work and then ask if last year’s model is available. Do not pay more than $120 and not less than $60. Higher priced ones are not doing anything for your abilities no matter what mumbo jumbo the clerk says and cheap shoes are not helpful. Tell the clerk you want a “decent pair of trail shoes to do an ultra-marathon”. Then say you are starting running, have no idea about how to do it, have no running experience, and have not decided the race yet but it will be a trail race. Expect them to be puzzled but distance on trail is the shoe you need and it has to fit your foot type. This is why you must have an experienced person fit the shoe to you rather than buy something from a chain store or online.

The Mind is the major muscle here:

The very first ultra-marathon I did was on a bet and was 100 miles of trail. I did 70 miles and had to quit. I had not read and reread the maps, I had not thought about what and where I would eat and drink, and I had no real conviction that I could do it. When the wall hit me I had no experience and no belief I could walk through it and get on with the race. Practice is ideal and as close to the event conditions as possible. So for bugging out or getting home on foot from work do all or at least some of the route for real and carry and dress in what you would be doing in SHTF.

running-573762_640

Volunteer at a local 100 Miler race or equivalent triathlon/bike race. Help out at an aid station for the entire event and realize just how tired the participants must be. Who makes it and who fails and why? Jot down notes on tips and gear. Ultramarathons are ideal for this as many runners get very chatty late in the race!

Sweetness is Critical:

Being relaxed and happy is vital before the start. Do not start all anxious and stressed. Likely you will be but then take 2 minutes silence to think about your life and why finishing this event is important. Being sweet means you likely have people with you in this event (race or SHTF) so check them out for issues before the start. Have they got Vaseline or sun lotion on? Do they have water and food?

Carbo-loading is an immense topic but it works. If you know you will bug out in 24 hours or have to go on a 20+ milers then hit the rice and pasta. Pig out as you will burn all this and more. It is a bit more complex than I am saying here but just upping the carbohydrates prior to the start for 24 to 48 hours will help.

JUST DOING IT:

Set rest intervals and enjoy them:

I use rest intervals every hour and a 5 minute walk or a full sit down if I am in trouble. Vary these as you do not want to ever stop on an uphill as restarting is hard. Momentum is vital but so is adequate rest and hydration and nutrition from the very, very start of the event. Sure you are hyped up and can keep going but it has been estimated that every minute of sensible rest in the first half of a race equals two to four minutes of less time taken to do the last half. Simply put going to hard and/or for too long at the beginning will make the journey much longer, much harder, and often causes failure to finish. You are doing something very hard so be nice to yourself.

Later on keep the rest intervals at 5 minutes and walk or sit but increase their frequency. You might find yourself doing one minute rest and one minute walking after many hours. Is it worth it? I have revived and gone on to finish well but mostly the smart move is to stop the event and recover. With a bug in or a get home scenario camping out might be dangerous so again your mind has prepared for this and you have sites preselected in case you cannot make it without sleeping.

Water, water, everywhere:

Drink 500ml (one pint) an hour every hour. If it is hot increase this. At 40C I found I needed about one litre (two pints) every ten to fifteen minutes but I was running hard and in great shape. Dehydration will end your journey and can easily end you in very hot or very cold conditions. Drink a lot of water and do not ration it. Have the resupply sources (shops are not a good idea for us but gas stations are great in normal events) fixed in your mind in advance. Rivers, industrial pipes, pools, and best of all are buried caches of snacks and water along the line of march. Think no effort water treatment and fast. A life straw is not a smart move here as you need effort to get clean water. You are going to be very, very tired. There are multiple sports bottle filters that work great. Scoop them full and put in a tablet as well (better safe than having diarrhea). Bladder type bags are excellent and I recommend one that you have trained on. They can be a bit fiddly until you get used to them. Even with this I would have a minimum of two liters in four bottles as well.

runner-405773_640

Water alone will kill you:

Not going to be technical but hard efforts lasting hours need you to drink a lot of water but you need to add in salts or your brain will swell and burst (literally in the worst case scenario). Drinking any sports drink you like that comes as a power (you can easily make your own). Mix it half or a third strength but never full strength. Keep one bottle sizes in separate small plastic bags and dump one in and add water are you are all set without thinking. This is not your only source of salts and you want to avoid slow egress from your stomach which happens with full strength. Get trained to drink hot water and hot sports drinks in case you need to move mid-Summer. Sure cold drinks work better in being absorbed and cooling you but will you have an ice bucket with you in SHTF? Salt tablets and capsules are meant to work great but for me they did nothing and they sure cost a ton. Again, get out of the house and train for the event using what you would use in the event. Have multiple varieties of flavors here not just one or two. Variety gives you a focus and helps you focus on planning what flavor you want at the next rest stop. Sounds silly but really helps to get you through events after being mobile for eight-hour or more.

I have used very light beer in races and it works very well after 4 hours in getting your mind back into the thing. Basically the liver has little resistance to the alcohol after prolonged exercise so you get smashed in a more controlled way but it is not a great idea. I use it as a last-ditch method to finish and it worked all 5 times.

Hunger:

Please use and carry sports gels and bars. Eat every hour at the beginning at least 500 Cal. Up this later on. This sounds a lot but works out to one gel packet every 15 minutes. Again resupply is going to be useful. Have different flavors and different makes. Use hard and soft bars. Variety is vital here. Crush up chips into small bags and pour into your mouth before a water break. You are burning massive calories here even if just walking hard. Running out of energy to fuel yourself is painful and a horrible thing so avoid it.

Trail mix is dreadful on the trail. Choking hazard and very dry. Same with nuts. Big chewy bites is the way to go. You are likely different from me so train and use what works for yourself. I am fine with that!

Mentally it will not be long before you are focused on what you will eat at the next rest stop. It gets to be a main motivator or a main failing as the cravings hit. You have done this before and know what you want, when you want it, and are actually carrying it. Dates work great for me but if I use them every snack I get very fed up of them very fast.

Go Girl Female Urination Device

Go Girl Female Urination Device.

Ultramarathoing tips for Sanitation:

Pee in the middle of the trail. Do not waste effort going off trail to pee behind a tree. Look at your pee and up the fluids if too yellow and decrease them if too clear. However after multiple hours clear may mean you are also in a critical salt shortage but you have been taking salts in from the beginning right?

Carry a small pack of Kleenex. Hop slightly off or next to the trail. Scoop a small holes and vacate your bowels. Do it quickly as on trails the flies come real fast. Wipe, wipe, cover reapply Vaseline to your nether regions. If weight allows a good baby wipe is a thing of sublime beauty in these situations.

My first outdoor bowel movement was a classic in how not to do it. I tried for 10 miles to hang on to it to get to an aid station. It was very painful. Your bowels are partially shut down and go as soon as you need to.

Getting there without effort:

Use a car. Otherwise use these tips to make the crushing pain a bit less.

Roads have camber as do trails. This means hard top roads generally are higher in the middle than at the sides while trails generally are lower in the middle than the sides. If you are walking the side of the road or trail move over every 15 to 30 minutes to the other side and do this from the start and keep on doing it. It sounds insane but the extra half-inch your outside leg has to move compared to the inside leg will cause all sorts of problems if you keep doing it for hours. Ideally walk down the flat middle or the flat outside of all trails and roads. Security issues might make this a bad move so plan it out in advance.

Most trails and roads curve a lot except in Florida! Seriously cut all corners from the beginning if safe to do so. Cut them very gently and about 50-100 yards out from the turn. Over miles this is cutting down the distance you have to walk or run by a decent amount.

Jog/Walk on the flats and the down hills. Walk gently uphill taking extra rests. Focus on the next visible objective not how many miles you need to go. The event is over if you do not make the next tree and if you keep thinking “I’ve got 40 miles of this to go!” you are literally talking yourself into failure.

Pace is a key issue. As I said go slower than you can right from the beginning. Every 5 to 10 minutes alter your pace a bit. Either walk a bit slower or a bit faster. Swing your arms more or less. Do this for a minute and then relax back into your natural pace and rhythm. This pushes back the time your muscles fail due to repetitive strain. If you are in good shape jog a little of safe down hills but not too much as that will cause muscle strain. Put your main faster intervals in on flat terrain (if you have any. If not then whatever passes for “flat”).

Night Owls are a hoot:

If you plan at doing this at night practice it. The world looks very differently at night especially if the grid is down. A decent head lamp is what most people use but I always used a hand flash light. I found I could sweep the trail much easier with the light source in my hand while going forward. Have at least two flashlights with spare easily obtainable if the one in use just switches off.

Most people pushing for 24 hours or more crash at 0300 and revive after sun up. Plan on that. If the terrain is very hard sleep through the hardest hours. But we are all unique and I find that time I am relaxed, awake, and very functional. When the sun comes up I crash badly. I have worked night shifts for decades but the dawn hitting me and myself falling asleep as I walked was unexpected.

Herd Mentality:

Women tend to be better at long distance than men and lighter men better than heavier men. Take this into account if you are in a group. The slower member is at the front or next to the front and never 200 yards behind. They go faster at the front. If the group splits up for any reason the explorers move while the rest stay put spread out along the probable route of return for the explorers but in visual range of each other. If both groups continue to move but at differing paces expect finding each other again to be impossible. I would never recommend splitting up. I have done it in races when our lead pack gets lost (this happens a lot in ultra-marathons!) but it burns time and is risky.

Look after each other. If you are the leader and no one is checking on your mental and physical state you are doing a bad job. Everyone has a buddy and everyone looks after everyone else. People will crash mentally so those who are okay need to be able and willing to take the lead and push the nearly dead.

Geographically brain-dead:

Honestly trails are tough and some people are much netter at reading terrain and maps than others are. Use the good navigators and trust them. One rule is use a paper map and check it at each and every fork in your road no matter how obvious the route seems to be. At night this is a practiced skill so do not move at night unless you have been on the terrain before and have great navigational skills. I have seen runners take the wrong route and literally end up twenty miles off course before they realized it.

Post event issues:

Every muscle will ache for days unless you are fit. The harder you push yourself in terms of early pace the worse this will be. This will get better but to get it gone faster try these tips

  • Keep the pace slow until the hall way mark
  • Do not run all out ever even for short distances
  • Avoid smashing down hills at speed. It sure feels great and I can do it but most people cannot
  • The next day go for a two-hour walk. Seriously this helps

Often after arrival lying in bed or on the floor of a shower is all you can do. Get up, get dry, change those clothes, and get fatty high calorie hot foods into yourself. You will actually not feel hungry at all but once you start eating you won’t stop. Beer is also very helpful afterwards especially heavy stouts.

Conclusion:

I hope this helps with your bug out or return home plans. I would love to see tips from serious cyclists, trail bikers, and triathletes illustrating those secret parts of their sports that preppers could use when hauling ourselves long distances. The main rule I would say is each of us is unique and what worked for me may very well mot work at all for you. Practice makes perfect J

  Around six years ago I stopped running (got suddenly sick of it) but for the 15 years before that it was basically a part-time job for me. Over that time