HomePosts Tagged "SHTF" (Page 16)

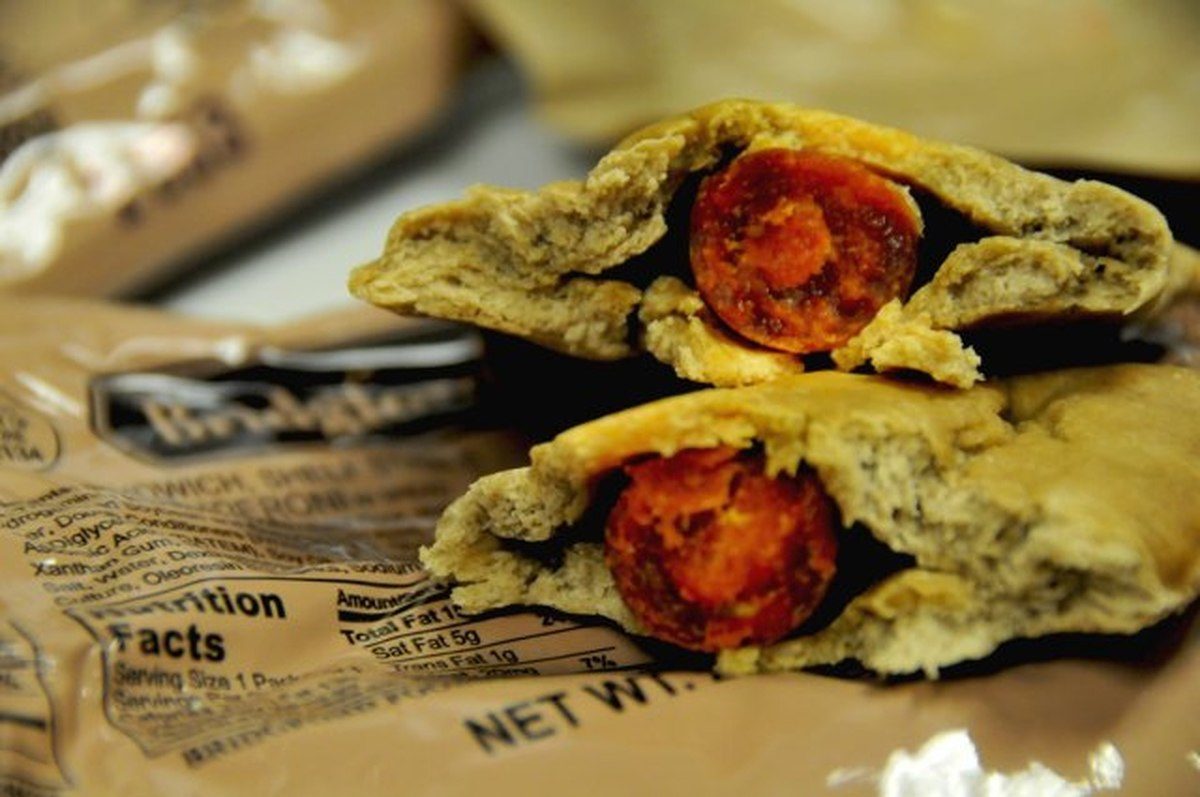
You know ‘em, love ‘em, and, most of the time, you buy them by the pallet. No wonder MREs are so popular since they make excellent snacks while providing your body with all the proteins and fats it needs to keep on rolling. But let me ask you a question here – is it really necessary to go to the military supplies store to buy MREs every time you run out? The answer’s “no” because these delish treats can be baked in the comfort of your kitchen. What’s even great is that you already have all the ingredients this recipe requires.

When I was doing my research for the first piece on pickling meat (be sure to check it if you haven’t done so already), I discovered, much to my bemusement, that there are lots of preppers out there who wanna know the best places from where one can buy Meals Ready to Eat. Can’t say that I wasn’t tempted in pulling a fast one by doing a piece on top 10 places that offer great bargains on MREs, but, then again, I really wouldn’t want you guys to spend more of that hard-earned cash.

I came to realize that my folks were baking MREs, long before the stuff hit the market. So, is this a family recipe? Yes, it is! An old one, at that. Mom told me she picked it up from my great-grandmother’s recipe book, who was a sister of mercy back in WW1. Apparently, this stuff would sell like hot cakes during the Great Depression, mostly because they go along so well with a glass of beer or moonshine or whatever (that raised a couple of eyebrows, back in the time).

After baking the first batch, my wife and I did the math: we spend somewhere around 20 on the ingredients for 8 jumbo-size MREs (although we could have made more if yours truly wouldn’t have sampled the mix too many times). That kind of money will probably get you around 4 or 5, and we still got enough left for another batch.

Still not convinced? Keep on reading for our killer survival ration baton recipe.

Why should I bother baking when I can always hop on the Internet to buy some more?

Because, contrary to popular belief, knowing your way around the kitchen is as important as learning how to swim or perform CPR. And we’re not talking here about whipping a quick breakfast or curing meat for long-term storage.

Nope, far from it! Cooking’s a no-brainer if you know how to follow a couple of simple steps.  And by that, I mean that you’ll be able to whip up a delicious and nutritious dish in no time, even if you’re that kind of person who sees the kitchen as just a room. Since I know most of you guys enjoy a good survival ration baton every now and then, I’m going to show you that it’s easy-peasy.

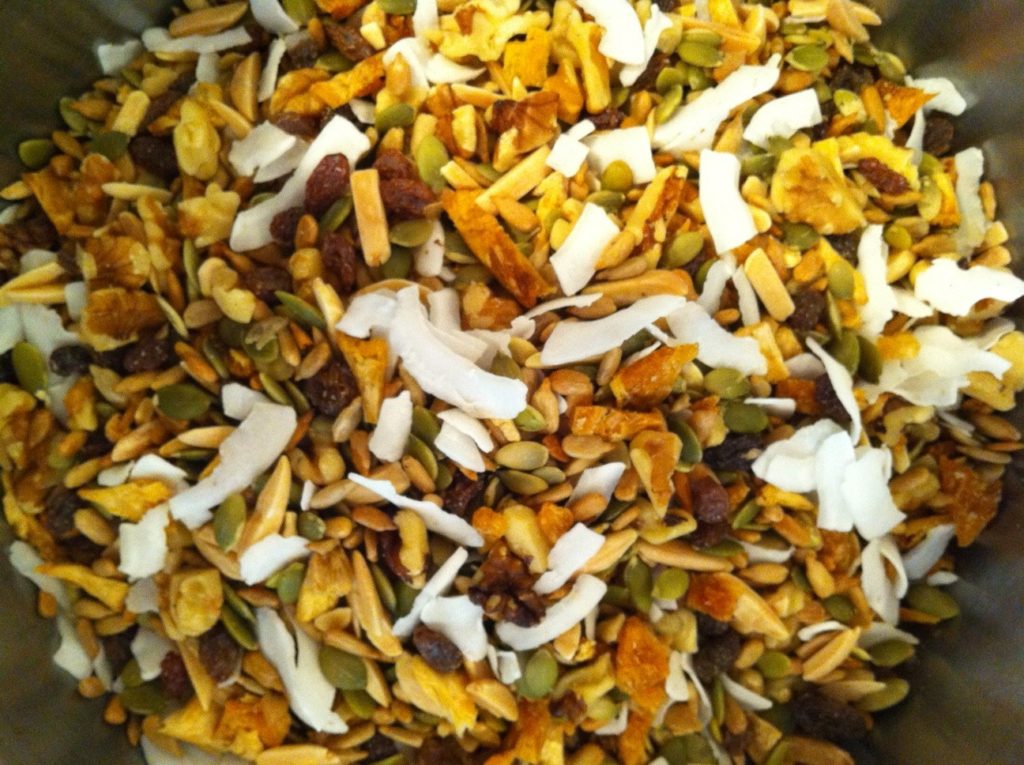
As I’ve said, the recipe involves ingredients found around the house – honey, assorted nuts, sugar, oats; stuff like that. There’s nothing fancy about this recipe, and it will only take you a quarter of an hour, tops. The result – 8 crunchy and sweet energy bars, each of them packing at least 3,000 calories. Check out it for yourself.

Get ready to ruuuuuumble!

As I’ve told you, all the ingredients for this recipe will cost you around 20 bucks, at most.  If you’re not too keen about going shopping, you can always order them online. Now, for 8 survival ration bars you’re going to need:

  • 5 cups of dry milk powder.
  • 3 tablespoons of honey.
  • 3 tablespoons of water.
  • 1 cup of granulated or white sugar.
  • 1 pack of gelatin (at least 3 oz)
  • 1 cup of peanuts or assorted nuts.
  • 2 cups of dry oats (you can also use normal oats).
  • 1 cup of dried cranberries (if you’re not too fond of cranberries, you can replace them with trail mix or assorted dried fruits of your choice).

Managed to grab all the ingredients? Neat! Let’s start making some survival bars.

Step 1. Preheat you over. Aim for 350 degrees.

Step 2. Grab a large bowl from your pantry and mix the following ingredients in order: milk, oats, nuts, and sugar.

Advice: use a wooden spoon or spatula to mix the ingredients (avoid using metal because the resulting mixt will have a bitter taste to it). Don’t stir too fast. You’ll want your mix to be a little chunky. What I like to do is to sort of dip the spatula and bring everything from the ground up top. Do this for a couple of minutes to make sure that there are no air bubbles left.

Step 3. Time to prepare the gelatin for the bars.

  • Grab a small pan and empty the gelatin pack’s contents inside.
  •  Add three tablespoons of water (don’t add more otherwise you would end up with mush).
  • Add three tablespoons of honey to the pan.
  • Crank up the heat and bring the mixture to a boil.

If you want to add a dash of color to your energy bars, try using some edible paint. Go crazy with them.

Step 4. It’s now time to put together everything – the dry and the moist ingredients. One thing you shouldn’t do would be to let the gelatin and honey mixture cool down completely. If you do that, you won’t be able to mix them with the dry ingredients.

So, toss the spatula aside, and ready your hands. Yes, you’re going to use the hands for this part. It’s much easier and, why not, fun. Don’t forget to wash them hands before messing with the mix.

Just like before, stick your hands inside the mix and bring the stuff on the bottom right to the top. Do this for a couple of time to make sure your dry ingredients are thoroughly mixed.

When you’re done, grab the gelatin pan. Pour a little over the mixture and use your hands to knead the stuff. Continue pouring and kneading until there’s no more gelatin.

Advice: the first time I tried doing this one on my own, the dough turned out to be way too dry even after pouring the entire contents of the pan. To make is moister (wipe that smirk off your face), add a little bit of lukewarm water or even a tablespoon of milk.

Knead, knead, and knead again, until everything’s hunky-dory. If you want your batons to be extra puffy, cover with a clean cloth and it aside to rest for around half an hour. Plastic wrap also works if you don’t have a cloth.

Step 5. Place some baking paper on an oven tray and pour the mix right in the middle. Then, using a spatula or your hands, spread it around as to cover the entire surface of the tray. Over should have reached the desired temperature by now.

Step 6. Use a pizza knife or the other end of a wooden spoon to separate your energy bars. I like to make them rectangular, but you’re free to try out any shape you like (next time, I think I’ll make them in the shape of hearts or Christmas trees just because I can).

Step 7. Stick the tray into the pre-heated oven and bake for 20 to 25 minutes (might takes less if you have one of those convection ovens). Here’s what I like to do in order to see if the bars are ready to be taken out of the oven.

FYI, this trick works for all your baking needs (cake, cookies, pastry). So, what I do is take a toothpick or small piece of wood (grandma used a clean straw from the broom), and sort of poke a small hole in the middle of the dough. Take out the toothpick and look at it – if the dough’s still clinging to the toothpick, it means that it’s not yet ready. On the other hand, if the toothpick’s clean, take it out of the oven before it hardens.

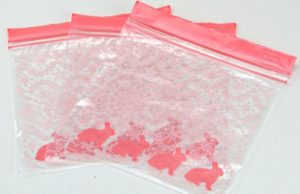
Step 8. Take the tray out of the oven and allow the power bars to cool down before bagging them. You can store them in zip-lock bags or airtight plastic container.

More on home-made MREs

That’s about it for the baking part. It’s exactly what I’ve been telling you – simplicity itself. Now, some of you are probably wondering about shelf life.

Well, since this recipe calls only for ingredients with very long shelf life, in theory, they should last for quite a while if you’re careful enough to store them in a proper environment. Still, if I were you, I would bake a fresh batch every couple of months or so just to be that the B.O. Bs are up to speed.

For those of you with peanut allergy, I would advise you to replace them with dehydrated fruits. You can also use more oats if you like that stuff.

Also, if the good, old doc told you to cut back on the sugar, you can always 86 the sugar from the recipe and stick to honey, pun intended. I wouldn’t use artificial sweeteners like stevia because that would give the bars and unpleasant, metallic-like taste.

The best thing about this recipe is that no matter how clumsy you are in the kitchen, you’ll still be able to make it to the finish line. First time I tried baking MREs, I poured the mixture from the side, instead of putting it in the middle of the tray. Yeah, I ended up doing more cleaning than actual baking.

If the power goes out, which tends to happen of a weekly basis where I live, you can still bake these thingies if you have a gas oven, a thing I highly recommend.

Another thing you can try out is to try an all-nut version (without fruits). Of course, that would definitely make the calorie count go through the roof..

So, have fun with your baking and don’t forget to hit the comment section to show me how your MREs turned out. Ta-da, guys!

Is it really necessary to go to the military supplies store to buy MREs every time you run out? The answer’s “no” because these delish treats can be baked in

“She lit wildfires inside my soul and fanned them with hurricanes.”
― Morris R. Gates

“The whole world was on fire.” These are the exact words of Brian R., a Magalia resident, who only minutes before his statement has experienced first-hand the horrors of Camp Fire, one of the deadliest and most extensive wildfires in Californian history. I can’t say for certain if it was Brian’s statement or the news reports that prompted me to write this article. Don’t even care, come to think of it.

Every prepper out there should know just how wild wildfire can get. And believe me, you haven’t seen anything yet. If you’re faint of heart, then you should quit while you still can. I have to warn you though that the article you see here before your very eyes will be pretty graphic and explicit. Be warned and welcome on board!

I can literally stay here an entire day and talk about the reasons behind wildfires. Some say that they are undeniable proof of climate change (nope, I ain’t going to touch that, not even with a ten-foot pole), while some cling to a more sordid theory – that each and every one of them is the work of guy or girl with too much time on his\her hands and too many matches. Can’t say for sure which one of them is more far-fetched. I’m going to go along with saying that wildfires are real and very deadly, at that. FIY, according to the guys over at the Insurance Information Institute, a staggering 90 percent of all wildfire are made by humans.

Pretty neat, isn’t it? What’s that got to say about forest fire prevention – in your face, Smokey! BTW, your hat is stupid. Anyway, wildfires tend to envelop entire acres of vegetation, which means that putting out the flames is a very difficult and time-consuming task. More than that, those toxic fumes are usually carried by strong winds, turning the entire area into a lung-killing trap. Wildfires closer to major cities like the 2018 Camp Fire can be far more dangerous compared to those limited to unsettled areas since most of injuries and deaths are not fire-related! Yes, you read that right.

Wildfires and natural disasters, in general, can make everyone lose their noggins. Think that this is something out of an Orwellian novel? Nope, it’s a fact. If the fire or smoke don’t kill you then maybe a crowd of scared-to-shit people will. And that’s another thing I want to address in this article. But more on that later. Remember – all good things come to those who wait!

It’s a wild world out there!

Back in ’16, Fort MacMurray in Canada had experienced the most devastating wildfires of the last two decades. I was back home that day, watching TV with my wife. There was this special bulletin on CNN saying that thousands of people were trying to get out of the city – some on foot, others by car, and there was even this young lady who got out of Dodge on horseback.

Anyway, the anchorman said that there was so much confusion going around that day, that entire family got separated just because they didn’t have any actionable means of staying in touch. As I later understood, the officials planned two separate evacuation routes – one was in the north of the city and the other one in the south.

The only thing was that the northern evac route was not designed to sustain that much outgoing traffic and people simply abandoned their cars and proceeded on foot. There was this one family who ended up in separate parts of the city because one member went to fetch the kids and took the northern route, while the other one returned home, and had taken the southern route, convinced that the other one made the same choice. Crazy, am I right?

The truth of the matter is that crazy doesn’t even begin to cover it when it comes to panic induced by natural disasters, not to mention the sheer stupidity which caused some of them in the first place. Ever heard about the catch-phrase “Like my fire”? If your first thoughts were “attention-seeker” and “social media”, then you’re right. Back in 2013, a teen by the name of Sadie Renee Johnson set a whole forest on fire just because she wanted to put to work two of her friends who happened to be firefighters.

Long story short, Sadie drove to one of the largest forest surrounding Portland and set fire to a firecracker. After the entire forest was on fire, the teen took a picture, posted it on social media with the message “Do you like my fire?” Her stunt led one hell of a wildfire, which burned down 51,000 acres and caused damages amounting to $8 million. You go, girl! The saddest part is that Johnson is not the only person to have caused a wildfire.

Getting back to the matter at hand, wildfires can be prevented. How you ask? By using a thing called common sense. Put out those fire pits before leaving the forest. Better yet, use a portable fire device like a Bunsen burner or something to cook your food or to get smoochy with that chick you picked up from Tinder. Also, if you’re a smoker, my advice for you would be to quit. Still, if you’re hiking in a heavily forested area, it would be a good idea to extinguish that butt with water, sand, gravel, dirt or anything. A portable ashtray would also be a major improvement.

Now, after getting these out of the way, let’s have a little chat about some of the things you could do in order to prevent a wildfire. While at it, I will share with you my kick-ass wildfire prevention evil scheme (insert Doctor Evil laughing with pinky in his mouth meme here).

Wildfire prepping and prevention

I’ll just say this once: if you’re in the city, you’re royally screwed. If you’re in the countryside, guess what? You’re also in danger! No matter where you go if the wildfire will eventually catch up to you.

Let’s talk a bit about a little thing called wildfire prevention. I’ve already given you one example. Putting out a fire pit is not only your way of saying “thanks” to the forest but the most efficient way of preventing a wildfire.

On that note, you should always keep a close watch on that fire, especially if you plan on spending the night in the forest or something. It’s always a good idea to keep a bucket of water or dirt or sand near the fire pit in case something goes wrong. You should also wall your fire (placing rocks around the fire pit) to prevent it from expanding. Simple and common-sense stuff.

Of course, I guess it would also help not to set fire to firecrackers by the side of the road so that your friends may have work cut out for them. Anyway, this just about covers the stuff you can do to prevent wildfires while you’re outdoors. Still, if you’re living off-grid, say a small hunting cabin, like yours truly right there, things get a little more complicated. See, when you’re smack in the middle of something that can at any time turn into a searing oven, your prepping must take on a more active role.

The idea of dropping off the grid is neat, and nothing beats that fresh mountain air in the morning. However, as I later came to find out, having such a place puts you a bit in harm’s way, wildfire-wise.

In respect to all you wonderful crazy guys and girls out there, I’ve whipped out a small to-do wildfire prevention and prepping checklist. I haven’t got around to solving all of them since I still have a 9-to-5 and this here editorial gig, but I’ll eventually come around to it. So, here’s what I was thinking about fireproofing an off-grid home.

  • Keep cordwood and fuel as far away from home as possible. One spark and everything goes to shift (damned autocorrect). What I did was to bundle all my firewood and wheelbarrow them to a small outcrop, some hundred feet away from the house.

Would be neat if the place is upwind. If you’re Gung-Ho about fuel storage, you can always build a small shack for them. You can find everything you need for the job at your local hardware store (bought everything I need from Costco). If you have a gas-powered generator, store the canisters inside this shack, and always under lock and key.


  • Trimming. Since I’m smack in the middle of the forest, obviously I need to do a little more pruning than usual. Great for the heart, but not that okay when you have other stuff to tend to. Anyway, take all the time to trim bushes, tall trees with low-lying branches, shrubs, and any kind of vegetation close to your house. See, when the wildfire hits, all of those things turn into fuel.

Spare yourself the trouble of racking and buy a leaf blower. They’re not that expensive. Start with the roof – see if there are branches hanging over it and use a hacksaw or gas chainsaw to cut them off. You may either dispose of this stuff or do I did – dry them up and turn them into fuel for your stoves, fire pits or whatever floats your boat. Having so much vegetation around spared me a lot of firewood money.


  • Sprinkler system. Gotta make sure that sprinkler system is up and running. My advice to you would be to buy the non-automatic version and to outfit it with a mechanical timer – they’re far more reliant and endearing compared to their electronic peers.

Here’s what I did to make sure that my house doesn’t get scorched from a wildfire. I went ahead and installed two separated sprinkling systems – one for the lawn and one for the roof and the front side of the house. That way, if a wildfire sprouts nearby, I can use the system closer to my home to water down the roof and walls.


  • Trash the trash. Get rid of another wildfire danger by burning your trash and burring the ash pile far from your house. I know it’s a thankless and smelly job, but, hey, it certainly beat the alternative. Sure, that doesn’t mean you can’t have some fun while doing it.

See, when I moved in with my wife and kids, I discovered I had this charming guy who claimed that the cabin is his and wants us off his property. After a couple of lovely chats with the local sheriff and idle threats, I managed to prove to him that the cabin was mine and mine alone. Still, he would hang around, waiting for a chance to call the cops on me for whatever reason.

So, this one night, me and a couple of buds, after drinking one too many suds, decided to pull a fast one of the peeping Tom. We grabbed all the garbage we could find around the house, placed inside one of those black, heavy-duty bags, and arrange everything so that it would look like a body bag with a corpse inside. And, while he was watching, we took out the faux body to the yard, lit up this big fire pit, and threw it over the flaming pile. From that day on, I haven’t seen him around.

So, this is the end of part one of my take on wildfires. Stay tuned for more misadventures from the prepping world. Stay frosty guys, and see you in part two of my wildfire series.

Every prepper out there should know just how wild wildfire can get. I have to warn you though that the article you see here before your very eyes will be

You’ve probably heard plenty of horror stories about people being caught under tons of debris from a falling building, the golden triangle, and other pleasant stuff about quakes. Let me tell you something – it ain’t pretty. Far from it! A quake can level entire cities in just a matter of seconds.

Remember that little Japanese garden you always enjoyed on the other side of town? Gone! Your favorite pub? Kaput! I kid you not when I say the earthquakes are, by far, the nastiest thing you can experience in terms of natural disasters. During one of my stays in Europe, I’ve heard this one particular tale told by a guy whom I imagined to be a paramedic or something.

Anyway, this guy said that during the 70s, a massive earthquake took an entire East European country by surprise. I’m talking here about entire neighborhoods razed to the ground, landlines disrupted, the works.

So, this guy tells me that it was not the collapsed buildings, nor the deafening sirens that got to him – it was the smell. Everywhere he went, he was followed by the same pungent aroma that turned his insides into mush: rotting flesh. It was so bad that the smell was still there weeks after firefighters and police officers managed to remove all the corpses. What do you do when you’re staring true horror in the face? Prepare and survive!

So with that in mind, I wanted to pull together this earthquake safety checklist which hopefully will point out any areas in your preps that you might need to work on. You can also find more information from FEMA’s Earthquake Safety Checklist downloadable as a PDF file and all the Earthquake information you can shake a stick at (no pun intended) on the USGS Earthquake hazard site.

How to prepare for an earthquake?

  • Know where you are at all times and how to get out of the building. This is more important if you are in a strange place like a hotel in another city.
  • Select a safe place in your home for everyone to wait out the earthquake if needed
  • Practice earthquake drills with your family
  • Keep flashlights and sturdy shoes available.
  • Bolt gas appliances to walls (water heater, oven, dryers)
  • Know how to shut off the gas in your house and have the proper tools on hand if you need to do this.
  • Keep emergency supplies/bug out bags in a safe location.
  • Have a plan for power outages before you are faced with one.

What should I do during an earthquake?

If you are indoors

  • Move to your safe place as quickly as possible; make sure your head is protected from falling debris.
  • Stay away from windows and glass.
  • Stay indoors until the shaking stops.
  • Use stairs instead of an elevator in case of structural damage or power outage.

If you are outside

  • Find a clear spot away from any buildings, power lines, trees or streetlights.
  • If you are in a vehicle (and notice the shaking in the first place) pull over to a clear spot and stop. Don’t pull under an overpass or anything that could fall and trap you.
  • If any power lines are down stay away even if the power appears off. Especially if there are power lines on vehicles, do not touch the vehicle.
  • If you are in the mountains or near cliffs watch out for rock-slides or unstable features. Landslides and avalanches can be triggered by earthquakes.

What do I do after an earthquake?

  • The initial shock-waves may only be the first of many that could still cause injuries. Expect aftershocks and use the time between instances to get to a safer place. If you are anywhere near the coast Tsunamis could occur so immediately seek higher ground.
  • Check your family or group for injuries and move injured people to a safe location.
  • Make sure you are wearing appropriate clothing, footwear, and protection for your hands if there is a lot of debris.
  • Make sure any fires are extinguished as quickly as possible.
  • Check radios for the extent of the damage and any emergency notifications.
  • You should already have stored water, but if not and the water is still working, it may make sense to fill your bathtubs (providing your house is safe) to use the water for hygiene if the water is cut off.
  • Stay away from power lines and out of damaged buildings as much as possible.
  • Contact your loved ones if possible and let them know you are OK.
  • Go to your prearranged rally point if you are able to do this.

There you have it. Let me know what you think. Or if you any stories to share that we can all learn from.

You’ve probably heard plenty of horror stories about people being caught under tons of debris from a falling building, the golden triangle, and other pleasant stuff about quakes. It ain’t

A couple of days ago, I took my wife and kids for a ride to our hunting cabin. The weather was holding and, I said, why not? Four hours later, we arrived only to find out that someone nicked the power transformer from one of the nearby electricity poles.

Long story short, our weekend was doomed because the electricity company representative said that a replacement should arrive in a couple of weeks. Back when we furnished the place, we didn’t consider that something like this could happen, and so we went ahead and bought all the electrical appliances we could find at a discount.

Here’s where things get interesting. My grandma gave me this old and battered chest. Told me that inside it I’d find anything a chef needs to whip up a quick dinner, power or not. Because that thing was heavy and smelly, I figured that the best place to store it would be the hunting cabin.

Seeing that the power won’t come any time soon, I took a peek inside the chest to see if there’s anything of use there. I am not exaggerating when I’m saying that I struck gold. Inside, were indeed all the kitchen tools one could need to live a totally electricity-free life. And I would be lying if I didn’t admit that we had some trouble figuring out what goes where or how to use those thingies.

Anyway, seeing that more and more of you guys are asking about powerless appliances, I figured showing you my list of 8 most useful kitchen stuff. Dunno if you have chest inherited from your grandparents or not, but, surprisingly enough, most of this stuff can be bought from just any kitchen appliances store, and, yes, they don’t cost a fortune. So, without further ado, here are my choices in powerless kitchen gadgets.

  1. Hand-operated coffee grinder

Because I’m a coffee junkie I’m going to start by saying just how awesome and handy a cordless coffee grinder is. I mean, nothing compares to that subtle, yet flamboyant, freshly-ground coffee aroma – way better than sex (hope my wife doesn’t read this article).

Anyway, if you get ahold of one of these gadgets, be sure to hit your local gourmet coffee store for some great beans. While you’re at it, learn how to make Turkish-style coffee – beats espresso any time of the week. Be sure to clean your grinder every now and then and oil those parts to prevent blockages.

2. Meat grinder

If we’re talking of couldn’t-do-without kitchen items, the meat grinder’s is out there with the big shots. Nearly every recipe that calls for minced meat, whether it’s lasagna, moussaka or meatballs, will taste even better with freshly-minced meat. For a while, I used to buy minced pork from my local supermarket.

Gave it up for Lent after I discovered that I could make it at home, with the cuts of choice. More that than, I simply abhor the fact that even the most expensive minced meat is filled with so much water that you mostly end up boiling your meat instead of searing it. Great little gadget, very low maintenance, but now so great when it comes to cleaning it. Pros and cons, man. Pros and cons.

3. Hand-cranked food processor

I like preparing salad dressing as much as the next person, but doing so without an electrical blender is quite difficult. Wrong! The hand-cranked food processor will chop down your veggies or meats in a matter of seconds just like any over glorified electric blender. Just make sure to give those blades a quick sharpening from time to time and to apply some oil or WD 40 on the moving parts.

4. Kitchen scale

My wife’s madly in love with making all sorts of cakes and cookies and pastry. However, most of the time, she needs a scale to measure the ingredients – sometimes I feel like I’m stepping into a meth lab or something.

My take on the electronic scale is the old and moderately precise mechanical scale – a cup, a platform, and several weights. Might not work that well if you need to measure with Swiss precision, but other than that it’s a very dependable kitchen item.

5. Tea kettle

Not much of a tea drinker myself (usually do that when I’m nursing a cold). But I have to admit that a tea kettle is pretty useful around the house, especially when the power goes out.  More than that, if properly maintained, a kettle can last for decades if not more (mom said granny got her tea kettle from her mom). It’s also a very fast and low-gas consuming way of warming up water for other necessities.

6. Eggbeater

Forget the mixer! If you really want to step up your kitchen game, learn how to tame the egg beater. IT’s a really simple item, but one that helps you prepare far more stuff than omelets (I like to use it to prepare the bather for my MRE survival bars).

7. Can opener

Those electrical gadgets are shinny and new but much too unreliable to be kept around the house. If the power doesn’t go out on you, that thing will break down faster than you can say “preparedness.” I had to fix two of those blasted things and buy three others. So, my solution was simple – out with the bad and in with the good, the good being the mechanical can opener. Solid piece of work, capable of breaking into just about any can out there.

8. Water filter

Water comes, and water goes. No matter where you’re from, you must always ensure that the water you drink is, well, drinkable. That’s why a water filter is a must around any house, hunting cabin or duplex. It may be a little expensive compared to the other items on this list, especially the spare carbon filters, but it’s an investment worth making.

That’s my list. Do you have some other mechanical gadgets on your mind or in your off grid house? Share it here.

Dunno if you have chest inherited from your grandparents or not, but, surprisingly enough, most of this stuff can be bought from just any kitchen appliances store, and, yes, they

Any SHTF story begins like this: “so, there I was, once upon a time (in December), in the wild, no water, no food, and with wolves on my ass.” Well, not exactly like that, but you get the picture. What I meant to say was that in every survival-type situation, water becomes denominator. And for good reasons – you need water for digestion, heat regulation, breathing, living, stuff like that.

Today, I’m going to hit you with my very best FUBAR story – how I converted my heater and toilet into open bars. See, when you’re at home, in the city, you fail to realize just how important water is. Sure, tune on the tap, and, voila, you have water. The nasty part comes soon after there’s no more water coming from the taps and you have no idea what to do next. Keep calm, my friend! Water can be siphoned from any area of the house, and I’m going to show you how I did it. Let’s start with the heater first.

Sucking Water out of the Heater, Dracula Style

“Listen to them (water heaters). They’re the children of the night”, and what music they make when you plug a hose in them to suck out that water. Backtracking a bit, a couple of months ago, there was a power outage in Fresno. A big one at that – must have at least 2 days, if not more. Anyway, I was at home, thinking about going out to buy a couple of stuff for my household emergency kit.

Ironically, we’ve just the last drop of bottled water to prepare formula for the tyke (bundle of joy that little monster is). I need to say that some time ago, at father-in-law’s bequest, I swapped the old electrical water pump for a brand-new, computer-controlled one. Yes, I know it’s the stupidest thing a prepper can do, but, hey, it’s hard to talk your way out of the wishes of a retired Marine.

So, the power goes out. Naturally, I went for the breakers. Nothing! Tried everything I could think of but to no avail. Soon enough, I came to realize that I didn’t have a drop of water left in the house. Okay, so what do I do? And then it hit me – I recalled reading in a book or something about using the water heater’s contents to augment my non-existing water sources.

So, after some careful deliberation, I grabbed my toolbox, a hose, and a bucket and got to work. Here’s what I did. One short disclaimer though: my heater is electric. This means that the things I’m about to show may not apply to you if it’s running on gas or an older model.

  1. Turn off the heater

You can’t just siphon water from the thing while it’s still running. For once, the thing has a lot of fail safeties in place to prevent leakages. And two – the water inside has around 104 degrees Fahrenheit, which means that you’ll wind up with a nasty second-degree burn if you try anything. What I did was to unplug the thing completely (could still have had some juice in the system, so I took no chances) and let it be for the next 12 hours.

Naturally, I had to make do without the water from the heater. I’ll tell you in a sec, what I did in the meantime. While searching online for my water heater model, I’ve discovered, much to my amusement, that the damned thing had a sort of blanket around it to help keep the water hot. If you want the water inside to cool off faster, I would advise removing the heater’s “coat.” This will cut back on the cooking time by at least a couple of hours, if not more.

Now, in case you have a propane water heater, don’t forget to close the gas intake valve before cutting the electrical power. It should be somewhere at the bottom of the heater. Best thing to do would be to read the heater’s manual for more info. Same thing as before – allow the heater to cool down before attempting to siphon the water inside.

2. Figuring out where the drain valve is

Okay, after allowing the heater to cool down, next on the list is to identify the drain valve. In my case, it was way in the back (had to move the water heater to gain access to it; hard to since the support was nailed to the floor). Most heater models have plastic drain valves. However, some of them have metallic taps. Whatever the case may be, rotate the heater, until the valve’s facing you. If your heater is on a rack just like mine is, don’t take it down. The slope will allow the water to drain faster.

3. The old hose-and-bucket switcheroo

Take a hose (I’ve used an old sprinkler hose which I was keeping in the shed) and attach it to the drain valve. Place the other end in an empty and clean bucket. Don’t forget that some of this water will be used for stuff like cooking, washing, and drinking.

So, storing it in a clean container is a must. One thinks to keep in mind – water heaters are not that great at water filtration as other appliances. You may have to sterilize the water before drinking it. There are plenty of ways to do that: boiling, distillation, chlorination, tossing in a couple of water purification tablets. The choice is up to you. I, for one, boiled the living hell out of that water before I poured it into clean bottles.

4. Open the valve and let it rain!

Before attempting anything, open a sink faucet anywhere in the house but the place where your heater is. Once you’ve placed the hose inside the bucket, open the drain valve halfway. When the water’s starting to come out of the hose, you can fully open the valve. Keep an eye out on that bucket because it’s going to fill up pretty fast.

Be sure to change buckets once the hose starts to resurface. You can store the water from the heater in the bathtub, collapsible water carrier or inflatable kiddie pool. On average, there should be at least 50 gallons of water inside the heater at all times. Just don’t let that water go to waste. Once you’ve siphoned every last drop of water from the thingamajig, don’t forget to close the tap.

Finding even more water around the house

Do keep in mind that the heater is not the only emergency water source around the house. Even though the pump may be out of commission, there’s still water in the pipes. The quickest way to get some extra water would be to find a low-lying outlet like the one connecting the toilet tank to the pipes and to remove the part that goes into the tank.

Get a bucket or a plastic bowl and put the disconnected pipe inside. Gravity will do its magic, and the remaining pipe water will slowly appear in you basic. Of course, there are always at least 2 gallons of water inside the water tanks which can be used for stuff like washing dishes or cleaning.

Just remember that neither the water inside the heater nor that drained from the toilet tank or pipes is entirely safe to drink. As always, if it’s intended for long-term use, although I do not recommend it, use one or more water purification methods to remove harmful bacteria.

This concludes my mission with this article. If you have anything to share about it, please feel free to comment or send us an email. Have a good one.

So, the power goes out. No water! Tried everything I could think of but to no avail. Soon enough, I came to realize that I didn’t have a drop of

You know ‘em, you buy them by the dozen, and they usually end up in the washing machine along with the rest of the clothes. Yup, you’ve guessed it – the chapstick, the only thing that shouldn’t be missing from your pocket, especially during the cold weather, regardless of sex. Sure, it’s funny to see a 7-foot-something mountain of a man using a chapstick because of cracked lips, but still, the thing has its uses.

A couple of days ago, I was at home watching this guy on TV who kept on repeating that all everyday items can be used in an SHTF situation. This guy did say that ALL EVERYDAY ITEMS, including the ones found in pockets and purses, can be used for survival. He managed to cover everything from lipstick, hand sanitizer, credit cards, and pens, but he missed out on one item that can do that all of that stuff put together.

And, after doing a bit of snooping around on the Internet, I’ve discovered some of the most ingenious uses for these objects which, as I earlier said, ends up on the clothesline after a good wash. So, without further ado, here are 9 awesome ways to use chapsticks in and SHTF situation.

  1. Blister buster

If you’re the kind of person who gets blister each time he wears a new pair of shoes, then chapstick is the answer you were seeking. Since the stick contains a small amount of antibacterial substance, applying a little bit on the area predisposed to chaffing and blistering will go a very long way. Give it a go and see how it works.

  1. Fixing small cuts

In case you find yourself without disinfectant or bandage, you can apply a thin layer of chapstick on the cut. Bear in mind though that this only works for small cuts (wouldn’t try using it on larger wounds). If you really want to speed up healing, you can use a combo of chapstick and clean cloth on the cut.

  1. Cleaning glasses

As the very proud owner of prescription glasses since the age of 12, I can tell you that nothing cleans lens better than chapstick. First, wipe both lenses with a clean cloth and then apply a very thin layer of chapstick. You can use the same cloth to wipe off the chapstick, or you can rinse the glasses with plain tap water (don’t do this too often, as water can erode the lens). Sure, this may not qualify as a run-of-the-mill SHTF situation, but do bear in mind that many car accidents have occurred because the drivers simply forgot to wipe off their glasses before getting behind the wheel.

  1. Hiding money

If you live in a rough neighborhood, then your kind of forced to improvise when it comes to money. Sure, keeping them on credit cards or a virtual account like PayPal usually works, but with cash being king you simply cannot step out of the house with a couple of greens on you.

A very clever way to conceal money is by using an empty chapstick tube. Pocket the thing and in case trouble find you the only thing your wannabee robber will see is a regular chapstick tube. You can also use the same method to save some cash for stuff – that’s how my wife bought me an amazing B.O.B for my birthday.

  1. Crafting emergency candles

For when the lights go out, that’s when all the hidden treasures of the world reveal themselves. The nigh may be dark and filled with dangers, but nothing a little light can’t solve. If you’re all out of 24-hour candles or flashlight died out on you, it’s possible to make an emergency candle out of a chapstick. Get a Q-tip and pop the top of your chapstick. Fluff the cotton on one end and dip it into the chapstick. After that, simply stick the other end in the stick, use your favorite fire-starting method on the fluffed end, and, voila, let there be light!

  1. Blocking sun glare

Summer’s great – except for that f-ing glare which makes you feel like somebody used your eyes for Voodoo practice. Of course, nothing beats sunglasses, but in case you lose or break them you can block some of the glare by using a combination of soot and chapstick. On a clean surface, put the contents of a chapstick. Grab a handful of soot and use a stick or something to mix them. Smear this under your eyelids, and you’re good to go.

  1. Setting up snares

If you’re trapped in the wild with no food, you can use chapsticks to bait small animals. Rabbits, for instance, are suckers for anything that’s sweet (no, you can’t use your engagement photo to lure the critter into your trap). Set up a trap and instead of food, place an opened chapstick (would be great if you have one with fruit-flavored one).

  1. Leather care

There is plenty of stuff on the market for leather care. However, I found out that nothing makes a leathery surface shine better than a chapstick. It’s very similar to using the cream for your shoes or boots: wipe off the dirt and dust with a clean cloth and then apply a thin layer of chapstick. For a great shine, use a fine brush after the chapstick has dried.

  1. Lubricant

First of all, wipe that smirk off your face. I was talking about things that need a little extra something to get moving like screws or a machinery’s moving part. If something’s stuck and won’t budge, you can always replace the famous WD40 squirt with chapstick. It works wonder on rusty things as well.

Hope you’ve enjoyed my piece. As always, if you have any questions, wanna say ‘hi’ or add something to the list, hit the comment section.

After doing a bit of snooping around on the Internet, I’ve discovered some of the most ingenious uses for these objects which, as I earlier said, ends up on the

As a seasoned driver, I have to admit that there were times when someone would search the dictionary for the word “stupid,” he would have found my picture right underneath. This one time, I was driving through a blizzard and, all of a sudden, the engine stalled. Instead of using a flashlight to check under the hood as right-in-the-mind prepper would do, I got out my lighter because, hey, why would I need a flashlight in my car in the first place? In our cozy prepping world, if you don’t step up your game, you’ll probably end up dead or worse.

Anyway, after realizing just how stupid can stupid get, I told myself that if I ever got out this alive, I would make it my point to tell other fellow drivers and preppers about how far-reaching is a fully stocked and killer vehicle emergency kit.

I would like to start by pointing out that one should never hit the road without the essentials. Of course, it all depends on your state’s regulation, but mostly it all boils down to:

  • Jumper cables.
  • Toolkit for small patch-up jobs and repairs.
  • Spare tire (make sure the pressure is between 30 and 35 PSI).
  • First-aid kit.
  • Fire extinguisher (for those moments when everything goes up in flames, including your hopes and dreams).
  • Reflective or battery-powered emergency beacon.
  • Reflective Vest.
  • Jack.
  • Lug wrench.

So, these would be your basics. Ready to head into the advanced class? Best to warn you that a complete car emergency kit can and will make a dent in your budget. Here’s what I had in mind in terms of the ultimate vehicle emergency kit.

Mr. Fix-it-Al’ Has the Answer to All Your Issues

The first thing you should consider long before hitting the store for more supplies is where the road might take you. Snowy mountain peaks? Heavy rain? Muddy country roads? War zones? This is, without a doubt, the easiest way to figure out what supplies you’re missing. I, for one, ended up spending 400 bucks at Costco since the flashlight story painfully reminded me that I am in dire need for other stuff. Remember that your car’s emergency kit is intended for more scenarios, some of them going far beyond a flat or burnt bulb.

For instance, if you get caught in a blizzard, your emergency kit should have enough supplies for sheltering-in-place. Remember the news bulleting about the Swedish man who survived two months in extreme cold because he SO kicked him out of the house? How do you think he survived? Not wishful thinking, to be certain. He made it out alive because he had a shit-load of supplies inside the car.

So, to build a survival kit capable of catering your every need, take a quick look at my awesomely-drawn list.

  • Cat litter

No, you’re not going to adopt a cat, just yet. Kitty litter is very useful for a lot of stuff. Some drivers use it for defogging. I personally use it for traction – if your car gets snowbound, put some kitty litter underneath them wheels, and you’ll be out there in no time.

  • CB Radio

Obsolete technology, for sure, but still comes in handy when your phone loses signal. Tried it once on a country road. The phone had no signal, but I could still pick up chatter from police and passing truck drivers.

  • Foldable shovel

Great for a lot of stuff like de-snowing tires or burying the bodies of your slain enemies. The choice is yours.

  • Toilet paper

No comment!

  • Flashlight

Yes, genius, at least you got this one right. Don’t forget extra batteries. You should consider buying a tactical flashlight instead of a regular one – more battery, more fun!

  • Extra food and water
  • Mylar blanket

If you have a family car, you should buy one for each family member.

  • Tow Strap

Not that kind of strap, but I like the way you think. Was referring to that cord used to pull another car. While you’re at it, you should consider buying a hand winch – great for getting out if you get stuck in the mud.

  • Tire patch and repair kit.
  • Coolant hose repair kit.

Fantastic for getting out of Dodge when the radiator’s coolant hose has snapped. Saved me a lot of money and another trip to the auto shop.

  • Weather-dependent gear

Stock up on warm, winter clothes if you intend to brave the elements during cold weather. During the summer, you should have one extra cap, T-shirt, pants, some insect repellant, and sunscreen.

  • Insurance-claiming tools

This includes a disposable camera, which you can use to take pics of the damages or at least some awesome selfies, pen, paper, and a copy of your car’s insurance card.

  • Battery Rejuvenator

This baby can start up a car in no time even if the battery’s more dead that Burton’s corpse bride. Seen one a while back – it’s as light as a tablet but powerful enough to juice up a car. In addition, these gadgets can also recharge devices such as smartphones, laptops, and GPSs.

  • Extra phone

Get one of those older models with a button. You may want to buy one with extra battery life. I would recommend CAT’s unbreakable series. Make sure that the extra phone is fully charged at all times.

  • Rescue tool

This little thingamajig has so much spunk in it. Normally, it can be used to break the car’s windshield if you take a dive in the river or any other body of water. However, it can also double up as a weapon, in case there are bad guys nearby.

  • Multi-tool.
  • Spare parts and supplies.

Be sure to have at least one extra box of fuses, bulbs, some braking, and windshield wiper fluids.

Bottom Line

Ours not to question why, but to prep and not die – that’s my motto in life. So, fellow prepper, if you want that comfy and fuzzy safety feeling while on the road, considering revamping your car’s emergency supply kit. Got more stuff I can add to the list? Hit the comment section and let me know.

Remember the news bulleting about the Swedish man who survived two months in extreme cold because he SO kicked him out of the house? How do you think he survived?

If one thing’s for sure is that bug out bags are, at times, even more, important that one would care to realize. And I’m not just saying this because I have a bunker tucked away in my basement where I prepare for the coming of the Apocalypse (or do I?) – it’s one thing you don’t wanna lose, regardless how shitty things get.

Remember the first time you went up the mountain, and someone told you that you should have a rucksack with some basic things like food, water, and clothes? Well, since I learned all about B.O. Bs, I sort of grew out of regular hiking packs.

Who can blame me for that? My wife, for one, who says I look kind of silly going to work with a rucksack filled with prepper goodies like windproof matches, magnesium rod, and tactical flashlight.

Anyhow, B.O.Bs are fiendishly cool and, if you know what to pack, you can survive anything from an EMP to coming home empty-handed on your wedding anniversary (seriously, that’s way worse than trying to outrun a tornado).

Since most of you are taken aback by this whole powerless living thingy, I’ve decided to share with you my list of 4 most useful objects to have in your B.O.B during an EMP.

Vital EMP Items for Your B.O.B

  1. Fire starting gear

Whether it’s for a night out in the woods or for BBQing some juicy ribs, fire starting gear is a must for every self-respecting prepper. You have a lot of choices here: weather-proof matches, Zippo or any army-grade lighter, or magnesium rod. The best thing about this stuff is that they require an electrical jolt like regular lighters do, meaning that you will be able to use them even if half the world’s out of electricity due to an EMP.

Now, if you’re as ‘dedicated’ (rather obsessed) as I am with keeping a fully-stocked B.O.B, you may want to get all of them. And another thing – if you’re that kind of person who would rather do anything else with money rather than investing it in survival gear, you should definitely check out any local thrift stores and yard sales.

2. Maps

No matter where you go or what you plan on doing, maps are vital. Yes, I know that most of you tend to rely way too much on GPS or smartphones, but to keep in mind that those things eventually run off battery or, worse, can be knocked out by an EMP. Leaving the Doomsday scenario aside, I personally find them unreliable even with Google’s vans mapping every square inch of the globe.

True story: last year, I went on a sort of honeymoon trip with my wife to Vienna. Enchanting city and full of history. The thing is that there are tons of sites and building to visit, but you really need to pick up the pace and have a map or a guide to see all of them (we stayed for a whole week). Anyway, there we were in Freud’s city and wanted to visit the Natural History Museum.

Fired up Google Maps and entered our destination. After half an hour of walking, we realized that we were going the wrong way. Of course, we ended up ordering an Uber, but that’s not the point – even though we were going in the right direction, the blasted thing keeps telling us that the route was completely wrong.

Never again will I rely on Google when I’m abroad. If you like these kinds of trips, I would recommend getting a map of the city or area – in some countries, like Sweden for example, they’re free of charge, and you can pick them out from any train, bus or tram station.

3. Portable Stove

Cooking is to survival as air is to the lungs. There’s no denying to that. Sure, there are plenty of ways to cook without relying on microwaves or any electrical cooking machine. Still, my first choice in SHTF food-prepping gear is the portable stove.

Sure, most of you would argue that the thing will only add to the B.O. B’s overall weight. Not quite true in fact. A while back, I bought this nice little trinket from an army surplus store – it has a propane canister and metallic support for pans or pots. Nothing too fancy.

To my surprise, the whole thing’s incredibly light. Made me so happy, that I decided to buy one for each bug out bag in my house. If you want a high-quality portable stove, get one that comes with a lever to control the gas flow.

4. Survival knife

There’s nothing short of brain surgery this bad boy can do. Probably only the most important piece of survival gears you’ll be glad to have in an SHTF situation. It’s something about simple tools like a knife, for instance, that really brings out the SURVIVOR in you.

Now, I would advise you to do your homework well when shopping for this type of instruments. Why? Because of rip-offs, that’s why. If you see a company advertising military-grade survival knife for under 50 bucks, do yourself a favor and steer clear. A buddy of mine bought it this one time. Since he was a big fan of the Rambo franchise, he searched high and low for a survival knife just as Stallone’s character.

He eventually found something similar on a discount website for 30 bucks. Told him it was a bad idea, but do they listen? Anyway, he ordered the thing which came home in a week or so. In wanting to try it out, he wanted to chop up some stakes for his veggie garden. Two stakes late, the thing broke down. Of course, you would say something like “maybe your buddy doesn’t know his strength.” Far from it – the blade was glued to the pommel.

So, if there’s a lesson to be learned here it’s this one: always aim for quality and buy full-tang knives.

Missed anything in my list? Do let me know in the comments.

Before you go, you may also like:

This is more than just about your guns…
How to survive any medical crisis situation with ease
10 Easy Steps to Secure your privacy
Secret Military Solution For Power Independence

DIY Unlimited water source
Why a food reserve is way better than the Federal Reserve
Lost Skills of our Ancestors that still work today

Remember the first time you went up the mountain, and someone told you that you should have a rucksack with some basic things like food, water, and clothes? That was

In my experience, any SHTF situation begins like: “shit I forgot to pack <insert cheap and common item here>! What am I supposed to do now?” Rings any bells? We’ve all been there – buying all sort of cool, survival gadgets, but at the same time, losing sight of what’s really important during SHTF. For those of you who’re in love in hiking, you probably know what it’s like to hear that growling in your stomach only to realize that you forgot to bring along a roll of TP.

The bottom line is that during an emergency situation, priorities and values tend to change. I wouldn’t be surprised if people would pay lots of money for a TP roll or a box of matches if either of those things should become hard to find.

About that, the other day I heard a cute little story about Canadians using trading cards for barter during the late 19th century, because, guess what, nobody gave a flying BS about paper money. No surprise there considering that even the Ancient Romans had no love for currency and would often use salt as bargaining chips. As you can see, some items are even more valuable during trying times. That’s why it’s essential to know what to stockpile and, of course, when to do that (reading the signs).

In writing this article, I’ve discovered, much to my own sadistic amusement, that nearly all of the items that become almost invaluable during an SHTF situation are ridiculously cheap. If you’re lucky like I was, you can probably find most of them in thrift stores or even yard sales; got me a nice BB gun from one of my neighbors. He only wanted five bucks for the thing, and he even threw in jumbo pellet boxes.

Now, about today’s topic. In thinking about my little incident with the missing TP roll, I’ve done my homework and figured that most people, even seasoned preppers, tend to stockpile the wrong items. So, if you’re still wondering about what’s missing from your household emergency kit or B.O.B, here’s my killer low-priced SHTF items that will become invaluable during a crisis.

My Top-Notch SHTF Shopping List

  1. Skivvies

Yup, you read that right! Underwear is at the top of any list. Why? Because if soiling your pants after seeing a tsunami won’t convince that buying extra skivvies isn’t the right thing, I don’t know what. Apart from that, underwear’s great for keeping you nice and clean and smelling like a daisy.

More than that, it prevents sweat-loss during long hikes, meaning that your body will have less trouble keeping itself cool. Always aim for 100% cotton, if you don’t have a cotton allergy that is. It would be a great idea to get boxers instead of briefs, thongs or whatever because those don’t limit your movement.

2. Zippo lighter

Song and poems should be written about this little gizmo, which saved my life more times than I care to remember. It’s the kind of thing that sticks around for a lifetime and even more (I got mine from gramps, who was a Ranger in WWII).

If lighters were cars, then Zippo would be a Volkswagen Beetle – as old as time itself, cheap, reliant, and can be tuned at will. A Zippo lighter does require a bit of maintenance compared to other lighters, but other than that, you can light up that MOFO even after dropping it in a river. As always, go for thrift stores, discount shops, yard sales or online auctions to get a Zippo.

3. Zip-lock bags

Bag and tag ‘em, boys! These transparent wonders are useful for almost every SHTF situation – storing food, keeping your electronics dry, organizing your toolbox, cooking, making ice, and the list goes merrily on. Go stockpile as much as you can ‘cause these things have of the habit of disappearing faster than TP after eating Chipotle.

4. Char cloth

Char cloth is a great firestarter and comes in handy when you’re too beat to whip up a fire using traditional means. It’s often recommended to use char cloth when the wind picks up in speed. Funny enough, char cloth’s very easy to make at home. Still, many preppers prefer to buy their online or from military shops.

A buddy of mine sells them by the truck and, sometimes, he can’t deal with the number of incoming orders. The choice is up to you – buy your char cloth online or learn how to do it yourself. FIY: it involves linen, a tin box with holes, and a fire. I’m sure you’ll figure out the rest on your own.

5. Emergency blanket

Whether it’s for pitching up a makeshift tent or snuggling with your SO by the fire, an emergency blanket should not be missing from any of your emergency kits or B.O.Bs. For taking shelter, a mylar blankie aka the one lined with aluminum is very efficient at deflecting heat. It also comes in handy when you don’t have anything to collect rainwater in. Stock up on them while you can.

6. Water purification tablets

Water may be the source of life but can also make your insides turn to mush if the source’s contaminated. One of my buds bought it that way – we were our hiking in Montana when he had this genius idea of emptying his bottle to refill it from one of the springs we encountered. “Bad idea, dude,” I told him since natural water sources are teeming with bacteria and all sorts of nasties.

Fast-forward, he ended up in the hospital with a bad case of dysentery (guess they took him there to outfit his bum with a tap or something). Anyhow, water purification tablets are must-have in any SHTF scenarios – even the water coming from your tap can sometimes become contaminated. Why take any chances when you can use these bad boys to get instant mostly-purified water?

7. Fishing tackle

Smeagol caught juicy fish! Yup, there’s nothing grilling a freshly-caught trout, that’s for sure. But for that, you need a couple of tools. No, not a fishing rod because those are too heavy to carry – I was thinking more about some line, a couple of hooks, and a good reel.

Those things can even fit in the pockets of your cargo pants if you try hard enough. Why buy it? Because in any SHTF situation, ponds and rivers become treasure troves for all those hungry, hungry preppers. So, be sure to have one in your bug out bag in case things really begin to smell rotten in Denmark.

8. Candles

Got around to saying “goodbye” to Norma Jean? Well, in any case, emergency candles, although little gauche for today’s world, come in very handy during a blackout or finding your way in the dark when your flashlight dies out on you.

Yes, you can even set up a romantic ambient if your SO is a prepper like yourself. I personally used those 24-hour candles on many occasions to keep my meals warm or just to scare the crap out of my friends. Your call. Anyway, their great for just about anything that involves warming up or shedding light.

9. Batteries

Hey, tin man! Ran out of juice yet? Now, an extra pack or two of long-life, triple-A batteries is a must especially if you have more than one gadget running on bats. They’re quite cheap, and you can probably get a very good bargain if you hit a thrift store or something. Just be sure to store them in a dry and dark environment – you wouldn’t want those to spring leaks before you have a chance to use them, do you now?

10. Hand-cranked radio

I have to admit that I’m more partial to hearing stuff over the radio than watching TV or streaming movies online. Call me old-fashioned if you like, but a hand-cranked radio will be of much more useful to you during a blackout or even an EMP attack.

Another reason why you should buy a hand-cranked radio has very much to do with all the cool attachments each model has (mine has a built-in flashlight, a USB slot, and a card reader). And no, you don’t really need to step in the swanky electronic shop to buy one. I bought mine from $2 store, and it works just fine.

11. Duct tape

The tales I could tell you about duct tape! Unfortunately, most of them are not really PG, so I’m just gonna say that duct tape and WD 40 solves most of your problems, mechanical or otherwise. Duct tape can be used to seal outlets, put together shelters, insulate Faraday cages, seal food, and more. If you want good quality duct tape, I would advise going to the hardware store and buying at least a dozen.

12. Baby wipes

As stupid as it would seem, baby wipes are quite useful when there’s no water around for washing your unmentionables. Back in college, I had this friend called Sean, who would use baby wipes instead of taking a shower. You don’t want to know what happened during those hot summer days when all of us were in the same room with.

We even coined the habit – a Sean Shower, which literally stood for I’m too lazy to take a bath, so I’ll just use these baby wipes because they do the same thing. Anyway, Sean Showers are okay if you have to ration the water. They’re also great for cleaning out wounds and even getting some of that dirt off the car’s hood.

13. Books

Let me just say this: books f-ing rule! There’s no denial in that, and even though much of today’s lit is online, I still prefer that new book smell instead of Kindle or a computer screen. More than that, in case you run out of battery, or there’s an EMP strike, there’s no more reading stuff. So that’s one to nothing for books.

You should definitely consider throwing in a book or two in your B.O.B and your household emergency kit. They’re very comforting when you’re all alone out there, with darkness all around. You can also use them as fuel in case you run out of tinder. Anyway, my book philosophy is simple – always buy used. Search for them in flea markets, thrift shops or antique shops. Your call.

14. Floss

Mouth health’s very important and flossing is still considered the most effective way of dealing with food remains. However, in an SHTF situation, dental floss can also be used for other stuff as well. I recall ripping my shoelaces while camping and used some floss to repair tie my boots until I could find replacements at a nearby store. You can also use floss to pitch a shelter, make weapons, seal food bags or creating snares. Search for offers online. You’re bound to find a dozen under $10.

15. Heavy-duty garbage bags

Whether it’s for disposing of hazardous material or burying dead bodies, heavy-duty garbage bags should not miss from your B.O.B. They’re quite cheap, and the things you can do with them are only limited by your own imagination. I like to use heavy-duty bags to protect my wife’s flower beds from insects, snow blizzards, heavy rain, and stuff like that.

If you’re in an SHTF situation, you can always use a garbage bag, a knife, and some floss to make a temporary shelter. It’s even more crucial to have these around if you need to collect rainwater or to hunt (yup, you can create a simple net for bunnies and birds using a stick, some duct tape, and a little bit of floss).

I managed to get quite a bargain on garbage bags – 5 for $4 at Costco. Try them out before buying them. They’re supposed to withstand quite a lot of punishment. If they tend to tear in your hands, then you should seek another brand.

We’ve all been there – buying all sort of cool, survival gadgets, but at the same time, losing sight of what’s really important during SHTF. Some items are even more

A couple of days ago, my nephew, who’s 8 years old, asked me what do I do for a living. Of course, my answer to him was that I’m a prepper and that I write about it. Cute, I know, but try explaining to a toddler what the Hell is that supposed to mean. Tried to give him the prepping talk with Smokey the Bear and Ivan the gas mask-wearing city denizen.

Dunno if I managed to get through to him – barely convinced my teen daughter and son to help me move some stuff to the family’s mountain cabin, but here’s the thing – in talking to the tyke I got around to realizing how much BS’s floating around our prepping world.

Hell, even the word itself sounds like a cheap millennial knockoff when in fact it’s something as old as time itself. Our grandparents used to call it “common-sense” or just survival. I sometimes wonder – could it be that in prepping for disaster, we actually welcome it in our lives?

Today’s topic will somewhat different. Perhaps you have friends or close acquaintances who wish to become preppers themselves. That’s great, but we really mustn’t lose track of the fact that, in most cases, prepping is far more than buying a nifty gadget or stockpiling food and water in case shit hits the proverbial fan.

The truth of the matter is, not all of us are NBPs (natural-born preppers). Sure, there is such a thing as survival instinct or, as my dad likes to call it, knowing how to guard your royal keister, but that is, more or less, case-dependent. Prepping is not. You do it around the clock, and, most importantly, you never stop.

Sure, for some, it’s a way of life, but for most of us, it’s one of those nagging thoughts nesting at the backs of our heads, keeping us awake at night: “But what if Katrina strikes again? What will happen to me or my family if North Korea declares war on the United States?” Okay, I’m going to stop right here with my end of the world train of thought.

Now, in wanting to show my fellow preppers that this lifestyle choice is no bed of roses, I’ve thought long and hard and finally managed to jot down a small list of reasons why prepping’s more challenging in reality than it is on paper. Call it my way of letting the skeletons out of the cupboard.

Yard Sales or Thrift Shops Are Not the Answer to Everything

I can give you a ton of reasons why you should check out garage sales and thrift shops more often (be sure to check out my article on SHTF items you can find at yard sales for 20 bucks or less). Most items can be repaired and reused. For instance, a while back I found this great garden solar lamp at a Montana flea market.

The owner wanted only 10 cents for it because it was broken and he couldn’t be bothered with the repairs. One new bulb later, the thing was up and running in my garden, giving off the most enchanting glow you’ll ever see. That’s my tiny slice of Heaven or hygge, as the Danish like to call it.

So, if you ever find yourself at a garage sale, spare a couple of moments and look around. You’ll never know what you’re going to find.

Unfortunately, this is where the fun part ends. With a couple of minor exceptions, prepping for every contingency is very expensive. Even if you’re not yet fully ready to drop off the grid, making your house safe, even a small one at that, can run into hundreds of bucks if not more.

Of course, smoke alarms are not that expensive but consider the rest – surveillance system, safety room, sprinkler system, which is a must for any respectable yard owner, garage, keeping your bug out vehicle up to speed, tools, keeping those food and water stocks up to speed, medical checkups, and the list goes on and on.

Prepping’s not the kind of thing you want to rush into or to do it, as the Brits like to say, half-heartedly. You either do it, or you don’t.

Many years ago, before settling down, I lived in a cramped apartment on the 12th floor of this new and shiny glass building. Rent was awfully expensive, but hey, at least I have my own place now.

So, instead of doing what’s right – setting some money aside, making an emergency food and water supply, I went ahead and bought every pack of instant noodle soup I could find. Long story short, city power grid failed one day, and I had to go without electricity for two weeks. Guess what I had to eat all this time? Noodle soup! All day, every day for two whole weeks because I was stupid enough to burn all my money on stupid things like beer and movies and computer games and another crud.

Of course, it’s way cheaper to have a pantry stocked with ready-to-eat noodle soup, but it’s not exactly healthy nor nutritious.

Another harsh reality of prepping is the need vs. afford dilemma. Any like-minded prepper will tell you that in an SHTF situation, dropping off the grid and starting anew is the best option. Regrettably with today’s real-estate market, you can’t even afford to buy a parking spot, let alone a parcel of land.

You may get lucky and find someone willing to part with such a property, but I wouldn’t bet my bottom dollar on that if I were you. Moreover, buying a piece of land means nothing if you can’t build a shack or something on it. I don’t want to sound like the lovechild of Richie-Rich or something, but I could’ve bought two new hybrid vans and refurbish my city house two times over with the money I’ve spent on my off-grid location.

More than Money

As William Ernest Henley so eloquently put it: “beyond this place of wrath and tears, looms but the Horror of the shade.” You know what Henley’s shade is? Loneliness. Sheer, mind-wrecking, solitude. A prepper’s life can be a lonely one, especially if he’s surrounded by ‘pals’ who gift him tinfoil hats for his birthday.

I had a rough time convincing my wife to join me on my prepping merry-go-round. Although she’s as much into prepping as most of you are, I still can’t shake the feeling that she sometimes gives me the stink eye. Can’t say I blame her considering that I spend most of my off days working on our hunting cabin garden.

Anyway, the loneliness part becomes even more apparent when you decide to drop off the grid. And it’s not just about being in a relationship or hanging out with your buds on a Saturday night. I’m talking here about the absolute lack of human contact.

Sure, every wide-eyed lad toiling for a big-shot corporation dreams of living everything behind and going to live in seclusion. It’s not like in the movies – you don’t get to discover the true meaning or purpose of life, and you don’t get to be a sultry, ax-wielding Paul Bunyan ersatz. It’s wild, hauntingly quiet, and, most importantly, not the kind of gig you would want to get yourself into unless the shit really hits the fan.

Solitude aside, piecing together such a project takes a lot of work, dedication, and energy. Of course, I’m talking about good, old manual labor. Yup, off-grid living mostly means that you will need to get off your couch and put that shoulder to the wheel if you want to build something that’s abiding.

Most of the challenges you’ll face will be mostly due to your mindset. Growing veggies may be a quaint and probably soothing endeavor for someone who never held a hoe in his hands, but it’s really not that amusing. I threw my back a couple of times before I was able to plant all of my wife’s herbs and veggies.

Sure, it’s nice to snuggle next to a cozy little fireplace, but it becomes a nightmare when you have to clean out the damn thing. One of the most nerve-wracking parts of setting up an off-grid place is how you choose to deal with things like electricity, water, heat, and, of course, the Internet.

Certainly, you need to have electricity for a couple of appliances, but you also need to think about a backup – a gas-powered generator or something (thinking on doing a piece of how I managed to whip up a water-powered generator for my hunting cabin). Everything has to be thought thoroughly. Otherwise you wind up with another house that’s just as vulnerable during an SHTF situation like any city location.

And probably, the most daunting aspect of prepping is knowing that everything you do is a gamble. There’s no guarantee for anything – nobody can tell you for certain if your crops will yield something or if the home you’ve to build won’t fall on your head in case of a disaster.

Yes, I consider myself to be a gambler of the sort, but the only difference, in this case, is that I know when to cash out. That’s probably the most important aspect – trying to do a lot of stuff at the same time can end in disaster.

A couple of years after I bought the hunting cabin, I was faced with a big dilemma. The mortgage on our city house went up big time. I was the only one who was bringing enough money into the house.

So, there I was, all alone with my thoughts, and forced into making a choice: either keep the hunting cabin and live pay-check to pay-check until I can find a better-paying job or sell the blasted thing. Naturally, I went with option A.

It’s not hard to imagine how this kind of thing ends – arguments after arguments, she threatening to give everything out for Lent and move away. Fortunately, this story had a happy end.

See, when you’re a prepper, natural disasters are only a small part of the equation. You still need to find a way to deal with your fellow man. And let me tell you, convincing someone about dropping off the grid is just as difficult as starting a fire with an ice lens.

Bottom Line

I can’t help to think that, in some regards, preppers are superheroes. Sure, we don’t have capes or X-Ray vision, but we do have this knack to counter every possible problem long before it comes into being.

In rereading T.S. Eliot’s Wasteland, I realized that A Game of Chess, the title of the poem’s second canto, is the best prepping description anyone could come up it. Most of the times, it’s exactly like that – you make a move Mother Nature, and I’ll play my gambit. Crown me not for getting to the edge of the board, but for finding the resolution to survive.

A couple of days ago, my nephew, who’s 8 years old, asked me what do I do for a living. Of course, my answer to him was that I’m a

There’s a reason why each shopping cart contains at least a bottle of bleach – this stuff’s good for a lot of odd jobs around the house, and some of them don’t have anything to do with cleaning. I being a computer geek have always kept an ample supply of bleach because it works wonders on yellow computer cases.

Anyway, ever since it became commercially available, bleach has been held in high regards, especially by those who had a rough time cleaning nearly-impossible to remove stains and for keeping germs away. In it’s watered down form, bleach can also be used as a room freshener and for giving shine to grandmamma’s white porcelain collection.

Beyond the mere household, bleach can also be successfully employed in survival-type situations. Hence today’s piece which will deal in the many uses and faces of survival bleach, this Jack-of-all-trades of the pantry.

Because I had time to look up more stuff while doing research on my pleasure rubber in SHTF article, I’ve somehow managed to stumble upon a treasure trove of info about the over glorified Clorox bleach. So, fellow preppers, prepare yourselves and feast your eye on the wonders of bleach in just about any SHTF situation.

  1. General sterilization

Of course, one would be very inconsiderate if not stating, well, the obvious – bleach is the ultimate germ buster, being successfully employed in virtually every cleaning job. Grime? No problem! Scale? Who cares? Smears? I have 99 problems, but Clorox makes all of them go away. The stuff is very handy for disinfecting tools used in minor surgery (a pair of pickup scissors or needle with surgical thread) when you don’t have other means of removing the germs. If you water it down a little, you can also remove stain and bacteria from small objects.

For instance, a solution containing one-part Clorox and three parts water may be used to clean and sterilize LED displays (always water down the bleach before using it). My grandma had the habit of spraying all the rugs and upholstery with a diluted bleach solution.

Apparently, this is the best way to remove bacteria, revive colors, and prevent warping. If you’re a fan of second-hand shopping, the above-mentioned bleach mix will help you get rid of lingering germs, while removing that old, musty smell that tends to follow every object bought from these sorts of establishments.

If you have a kid on the way, you may use spraying bleach to disinfect every item the kid may come in contact with – cradle, toys, clothes.

In the field, it may be possible to use trace amounts of chlorine bleach to purify water. Sure, it won’t have the same taste, but at least you won’t come down with dysentery, enterocolitis or any other tummy diseases.

Pet owners can use spray-based chlorine to remove animal smells from the furniture. I being the proud owner of two cats (a boy and a girl), I found relief in the fact that bleach’s able to remove that nasty odor tomcats tend to leave behind when establishing boundaries.

  1. Crafting an anchor

Though the idea of becoming adrift is akin to pure dread, there’s no reason why you can’t anchor down your raft if you have a bottle of bleach nearby. If the situation calls for immediate action, use the remaining bleach to sterilize your gear and water supplies, and salvage the bottle.

Wrap paracords or any dental floss around the bottle’s neck and fill it with anything heavy (concrete, sand, tiny rocks). Congrats! You’ve just made yourself an anchor worthy of any ship on its maiden voyage.

  1. Cleaning your veggies and fruits

Water’s the best way to clean fruits and veggies, isn’t that right? In most cases, yes, but there are some cases when using just purified water just won’t cut. Enters bleach, a marvelous disinfectant that can be used in case of an emergency to clean your veggies and fruits. Just be sure to use a watered-down mix. Otherwise, you will end up with bleach-soaked food, a thing which does not agree with your esophagus and stomach.

By the way – be very careful around the stuff, because the thing can burn through your skin like acid. In case you accidentally spilled some on your hands, or other parts of the body (I don’t judge) go and wash the area with plenty of soap and lukewarm water. As for the drinking part, don’t try to induce vomiting. Instead, dial CDC’s accidental poisoning hotline and await further instructions. In the meantime, drink water or a glass of milk. You should stop in case you’re experiencing convulsions or other changes.

  1. Weed-whacking

Without a doubt, every prepper’s turned gardener waking nightmare is seeing his crops wilting or, worse, eaten away by pests or overtaken by weed. Sure, you can try out all kind of artificial weed-whackers and whatnots, but you’ll probably end up poisoning the soil and making bad veggies.

A great and safe way of getting rid of pests and weeds is to spray your plants with a mixture of water and chlorine bleach. Like always, the recipe calls for one-part chlorine bleach and three parts water. Cover your garden using a hose with a fine mist. For the best results, you should do this at least once a week. Be careful about weed-whacking the wrong kind of weeds (see my article on healing herbs and weeds that grow around the house).

  1. Anti-rad countermeasure

Although it’s highly unlikely that we would have to deal with a nuclear detonation any time soon, it’s good to know that household bleach can be used for decontamination. Hypothetically speaking, if you find yourself stranded in an area with high radiation, take off your clothes and soak them in a tub filled with water and chlorine bleach.

As for body decon, wash all body parts with water and soap first, then used a watered-down bleach solution to rinse your body. Be careful when preparing the mix – for body decon, it should be one unit of bleach to 100 units of purified water.

  1. Self-defense

Pray it won’t come it, but when the spam hits the ham, a bottle of chlorine makes a great weapon of self-defense and distractionary device. If your opponent gains ground, uncork a Clorox bottle and toss it in his face. The results won’t be pretty, I guarantee that, but saving your can is sometimes more important than thinking about the interaction between skin and bleach.

  1. Outliving a contagion

Hold on to your britches there, because I wasn’t referring to the next Black Plague or Ebola. Even the flu season is considered an outbreak, and it should not be taken lightly. One way to purify the air is by bleach and water.

Hygiene is very important but becomes crucial when dealing with a contagion. To minimize exposure to the virus, make a 50-50 bleach and water mix. Pour it inside an empty and clean spray. Use a fine mist on things like clothes, upholstery, pet beds, bathroom tiles or any place that may hoard bacteria and deadly viruses.

  1. Getting rid of mold and mildew

Probably the most annoying part of being a homeowner is finding ways of removing mold and mildew from various objects. Since my son has a slight allergy to mold, I and my wife always try our best to removing as much as the stuff as possible.

One of its nesting places are the gaps between bathroom tiles (yeah, I real back-buster when it comes to spring cleaning). It is possible to hack away any mold and mildew from your home by mixing bleach and water in a bucket. Take a clean rag, soak it in the mix, and wipe. Not only will the mold come off on its own but it takes less scrubbing compared to using special cleaning supplies.

  1. Removing grime and dirt from trashcans

As you know, in case of an emergency, trashcans, especially the big ones, can be converted into portable water carriers. Still, that they are somewhat challenging considering the amount of grime, dirt, and sludge festering at the bottom. A quick way of removing that filth in a sinch is by using bleach in addition to detergent. Prepare a 50-50 bleach mixture and add some detergent. Don’t forget to wear protective gloves while cleaning the trashcan. Word of warning – while preparing the mix, fumes might emerge from inside the container.

Don’t breathe in those fumes as they are highly toxic. If you do, immediately stop what you’re doing, wash your face with plenty of water, and wipe with a clean cloth. You can try to flush out any lingering bleach from your nostrils with blood serum (you can find those bottles in any drug store or pharmacy, and they’re perfectly over-the-counter).

Fill up a small syringe with blood serum, tilt your head a bit, and slowly inject the stuff into your nostrils. Don’t breathe in the stuff!  Blow your nose in the sink and rinse with plenty of water.

  1. Field-sanitization of food plates and eating utensils

Just because one finds himself in the middle of shit hits the fan situation, it doesn’t mean that one should disregard basic hygiene rules and eat from whatever plate, no matter how dirty it is. If you were planning on adding one or more items to your B.O.B, my advice to you is to toss in a small bottle of Clorox. Combined with purified water, bleach can be used to clean and sterilize everything from plastic plates to cutlery.

I myself like to use the stuff in order to clean and remove any grime from my portable stove. The mix also works wonders on other objects used for cooking like cast-iron pots, stoves, ovens, and knives. Careful about using too much bleach on your chopping implements as the substance is known to reduce the life of stainless steel blades.

That about wraps it on ingenious ways to use bleach in an SHTF situation. Instead of a conclusion, I will leave you with a question: to bleach or not to bleach? As always, if you figure out another great way of using this stuff in a survival-type situation, don’t be shy and hit the comment section.

There’s a reason why each shopping cart contains at least a bottle of bleach – this stuff’s good for a lot of odd jobs around the house, and some of


I have three decades experience in trauma ICU care at a level three trauma center (used to be level one was the worst category. That was flipped a few years ago) and recently saw yet another YouTube video where the Israeli bandage was being waved around like it is the savior for all SHTF issues. Quick clot and compression bandages will certainly save lives if applied and monitored correctly. As ever get training for health care needs before you need them and try to get real life training not just videos and books.

However I got to thinking about what I would do with 32 years nursing experience and most of that in trauma if I had a person laid up in bed and was faced with providing hospital care in SHTF and why. It seemed to me the knowledge is not that widely available or known but please, as ever, correct me in the comments below. As ever Doctors are really smart and any advice I give here is intended only for my own use and you should not use any of the advice given unless you have had a smart Doctor agree with it.

Bed Rest

Back in the dawn of time a lot of my surgical and medical patients used to experience sudden cardiac arrest. I was around for as medical science figured out why and how to treat this reasonably common (in the 1970s) complication of bed rest. Deep Vein Thrombosis leading to Pulmonary Embolism (same thing that kills discount airline passengers. Always fly business class!).

Bed rest is an easy prescription especially if the injury is severe. Bed rest is what I love to do when sick and getting me out of bed is hard. However with eight hours of lying around the venous blood flow through the large veins of the legs and calf slows. Pain, fear and lower levels of consciousness will make this worse. Dehydration also encourages the venous blood to slow and thicken deep within the person’s legs and calves.

However many injuries in SHTF might well need bed rest so what can you do?

Low Molecular Heparin injections are really good but you likely will not have any. T.E.D. ™ anti-embolism stockings are a good thing to have in your trauma kit. Reasonably cheap and come in a variety of sizes. You can also use tight bandages wrapped around the legs but honestly they are more likely to cause venous congestion than minimize it. Here is what you should do if you have appropriate stockings or not. Move the legs and the joints carefully trough a range of motion (depends on the injury of course) every one to two hours throughout the stay in bed. Get them up into a chair and make them walk as soon as practical. In the 1960s you got to lie in bed for a week being hand fed if you had a heart attack to minimize cardiac stress. This caused a lot of deaths from embolism! This is also why new mothers get booted out of hospital in hours as well. Beds are very dangerous places if you lie in them for ages. Give a bit of daily Aspirin but read the next section carefully first.

Start gentle laxatives as early as possible and encourage high protein foods and drinks. Monitor their temperature twice a day at the same time of day and consider gram negative antibiotics if they develop even a slight temperature.

Aspirin

Most people are familiar with aspirin. If the person is a child or a baby do not give ever. Rarely it can kill the child. However if you are taking a non-steroidal anti-inflammatory (NSAID) you should also never take aspirin. Advil, Motrin, Aleve are common pain killers but never, ever take them and aspirin. Take one or the other, never both. If you have asthma try to avoid taking aspirin. The reason is that a severe asthma attack can be triggered by aspirin especially if you have asthma and/or are also taking an NSAID (this is arguable). The aspirin also makes the NSAID ineffective (this is true). Now I know some people are going to be saying “but I have asthma or I took Advil and aspirin and I am fine”. You were lucky and most times you will be lucky but you might not always be lucky. These are rare but fatal complications.

If you are bleeding actively (gushing or oozing blood or bruising under the back- check frequently when you turn the person on bed rest who has had a trauma) never give aspirin. It is an excellent blood thinner which is why small doses if safe should be consider if your person on bed rest can safely swallow. I also have aspirin that absorbs via the mouth for those too ill to swallow liquids safely. Pulmonary embolism is a proven killer of people on bed rest who do not have access to regular injections of low molecular heparin. If you have ulcers, gout, kidney, or liver diseases do not take aspirin. It is to be avoided in hypertension but frankly I consider it too valuable to avoid if primary hypertension unrelated to kidney disease.

Read More: Medicine to Stock up on for When There Is No Doctor

Broken bones should also avoid aspirin for at least three days. A bad femur fracture can cause several liters of blood loss into the tissues. A bad pelvic fracture can easily bleed so much internally they die. If you can use transfusion but battle field transfusion without cross and typing has many risks and is unlikely to be available in SHTF. Even if you have the same blood type there can easily be dramatic and deadly effects from a blood transfusion as incompatibility is not just the blood type. For me if you need a blood transfusion to survive in SHTF you are a gonna anyhow so why bother?

In the third trimester of pregnancy do not take aspirin as both the mom and the baby may well bleed to death during the delivery. Do not use it is you are breast feeding (breast is best and possibly the only option in shtf) as the baby will get dosed and it really is not a good thing. If the aspirin bottle smells strongly of vinegar it may no longer be effective but if it is all you have then take it anyway. Consider researching Willow Tree Bark (and the leaves to some degree). Natural analogue for aspirin and an okay pain killer (beats nothing).

Many people use “baby aspirin” to avoid strokes and heart attacks. This low dose aspirin is expensive, Buy normal aspirin and take half a tablet.

Real Trauma Kits

Elite First Aid Fully Stocked GI Issue Medic Kit Bag, Large

You can buy good trauma kits and Israeli bandages and I would encourage everyone who is trained to use one to have one and plenty of extra supplies but then what? Your friend stopped a bullet in her right leg and it seems the bone is broke judging by the screams when she moves and the bits of hard white stuff sticking out. Step one is to control the bleeding and step two to avoid infection. You slap on the Israeli bandage (likely your will need more than one), use the splint to immobilize the leg, and start her on fish antibiotics.

Then what? She’s going to be laid up for weeks and will take a lot to get her back on her feet. Do you have a bedpan (urinal for the males too slow to dodge bullets) to make washroom times less messy? Do you know how to remake a bed with a person lying in it and to wash them? Back in the 1980s as a student nurse we did these things on each other. These days they do not and their skills show it. Have a night where you try this on a loved one after reading up on how to do it. It is honestly a lot of fun. Can you make and use skin traction to get the bones in a better alignment? Again it is not hard and is easy to do but you need to know how to do it right to avoid crippling them. Do you have electrolyte drinks in large quantities and understand that urine needs to be clear or they are dehydrated? Real trauma kits will let you start intravenous infusions, pick out the bone bits, and suture internally and externally. The focus is on the first hour in prepping but rarely do people think about care the next day, the next week, the next month. Pool shock used to make strong bleach is a great thing to wash the bed sheets and to swab the area around the person who is stuck in bed. Can you make a frame and a hand hoist to let them sit upright frequently and relieve pressure on their bum and back? Pressure ulceration is not fun. Again look up basic nursing and at least have a text book available if you have avoided actual practice.

The one of the best things to get is an Emergency RN and keep him or her in your ‘kit’. An medical Doctor is helpful but they rarely have to do the thinking and creating that the RN has to do and RN who has worked in ED for a couple of decades knows much more than more a ED Fellow.

Fish Antibiotic

These are achieving a fair degree of popularity amongst preppers and for good reason but are you treating a Gram negative or gram positive infection? Generally speaking gram negative infections are more harmful than gram positive ones and tend to be more resistant to antibiotic use. Use penicillin and sulfonamide for gram positive and use streptomycin, chloramphenicol, and tetracycline for gram negatives. Use ONE for one week or two weeks (look up treatment regimens). Use another if the person is getting worse or is unimproved at the end of the full course of the initial drug.

Other than using gram staining (yes you can but I’d not bother) you need to assume it is a gram negative bacterial infection. These tend to kill more than the positive ones and are more common. If there is zero improvement then consider using a gram positive antibiotic. Gram negative is your go to antibiotic first off except if the bowels and/or stomach has been opened but frankly the person will likely die of sepsis in this case no matter what you do in SHTF. Try gram positive but give nothing by mouth if the bowels and or the stomach have been hit. Can you use a stethoscope and assess bowel sounds? A basic and a useful skill but can you give intravenous fluids and use a nasogastric tube? It gets complex very fast in trauma and stopping the bleeding is vital but there is more than this to ongoing treatment.

If you are thinking of using antibiotics at least take a look at this and realize many fish antibiotics are really not used much in humans anymore as they can cause issues. Still if nothing else then I’d use them. Prepper Princess mentioned she is worried about cholera in SHTF. This is a reasonable worry in SHTF and is likely if you fail to treat all water and food sources as possibly infectious. A quick search uncovered this so fish antibiotics used wisely would be useful. However I would go with doxycycline as a first use in cholera and the other advice on treatment here is highly appropriate to most infections in SHTF. You can and should do this for all infections you think are likely in SHTF and that you wish to treat. A standard drug book is too detailed and confusing for most people.

Within one month of a specific antibiotic not being used the rates of its efficiency start to rise. Store lots of antibiotics especially the gram negative ones as they will work very well after a year or two. Penicillin will again be great for sexually transmitted diseases which will also dramatically return in SHTF. Of course abstinence is the best practice but what else are you going to have to do in the bunker?

Babies

They will come along in SHTF as they have since humans first appeared on the Earth. Do you have contraception and/or methods to avoid unwanted pregnancies? Returning to the 1800s and each fertile woman popping out 10-16 children would happen fast. This Wikipedia article, (I know but it is reasonable) shows that death three to five days after birthing for women will be very common in SHTF. What the article fails to say is death rates were 40-60% for women having their delivery from a Doctor and 5-10% (or lower) from the Midwife in the same maternity ward. The lesson here then and now is wash your hands and forearms in bleach before and after every examination, do not use long sleeves (of note this applies now in health care), have lots of soap and clean water. Scrub clean beds between uses. Basic stuff but easily overlooked.

Babies get sick and die. Always have and always will but most infectious diseases had very little mortality (death rates) prior to antibiotics and vaccines (maternal deaths are the exception here). Chlorinated water, sleeping one person to a bed, quarantine of infectious people, hand washing, and good old fashioned nursing are absolutely critical in SHTF and now to avoid dying for infections. Sure antibiotics have saved millions but we are in the billions.

Hope all of this gives you some food for thought.

  I have three decades experience in trauma ICU care at a level three trauma center (used to be level one was the worst category. That was flipped a few years